Related Tags
DIY Workshop: How to convert an Epiphone Flying V to 1950s spec (Part One)
Far rarer than Les Paul Standards of the same year, few people have even seen a 1958 Gibson Flying V in the flesh, let alone played one. We take an Epiphone Joe Bonamassa signature ‘Amos’ model and see how close we can get to the Holy Grail.
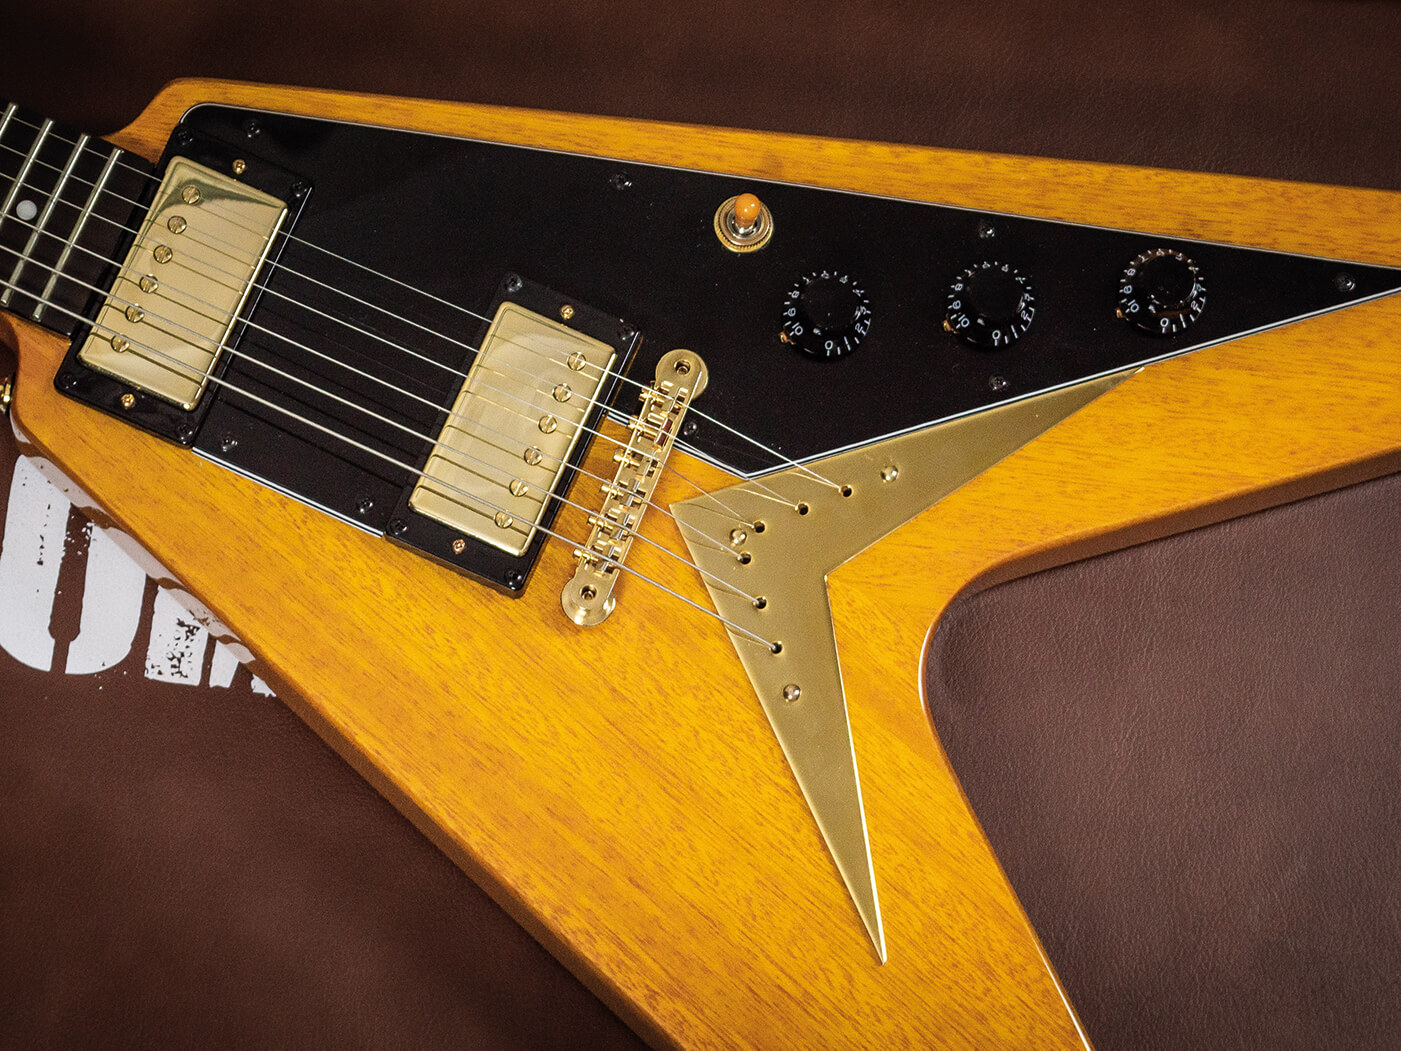
If you’re a Gibson player and you want a Les Paul or an SG, there’s a model for every style and budget. But when it comes to Flying Vs, Gibson doesn’t currently manufacture a 1950s-spec Korina reissue. If you can get hold of one, Epiphone’s recent limited-edition Joe Bonamassa 1958 ‘Amos’ Korina Flying V model features impressive specs for a model that originally retailed around £750.
The guitar is made from period-correct Korina and features 50s-style through-body stringing. There’s a fairly chunky neck profile too, apparently modelled on Joe’s own Flying V, along with vintage-style tuners and a fine-quality hard case.
Yet over time, the nagging feeling crept in that this Flying V could be even better – the thick, dark gloss poly finish and jumbo fretwire being the chief areas for improvement. Delving deeper, the owner wasn’t keen on either the dot markers or the milky finish covering the fingerboard. And with a spare set of late-60s Patent Number humbuckers sitting unused in his parts box along with some CTS control pots, upgrading the electronics is a no-brainer.
Epiphone has mounted the bridge using metal bushings rather than screwing the posts into the wood itself, so the plan is to change this to as-close-as-possible to vintage specifications. The owner has also sourced some high-end replica parts, including a plastic truss-rod cover and a more vintage-correct metal ‘V’ plate to cover the string holes. The brief is straightforward – let the vintage makeover begin.
Tear down
Removing the parts from this Epiphone Flying V is no different to any other guitar. I had expected the bridge-post bushings to be tough to remove, but they are so loose in their holes that they lift straight out.
The V-shaped metal plate that the strings pass through is actually nailed onto the body. To remove it, I use my end nippers. The finely ground jaws get under the nail heads to lift them up a few millimetres and from there, I use a regular claw hammer to pull them free.
It’s important to lift the nails out gently, because they’re serrated for grip. Also use some masking tape to protect the surface if you’re trying something similar and plan to reuse the metal plate. The string ferrules present a bit more of a challenge, because I discover – the hard way – that they’re glued in.
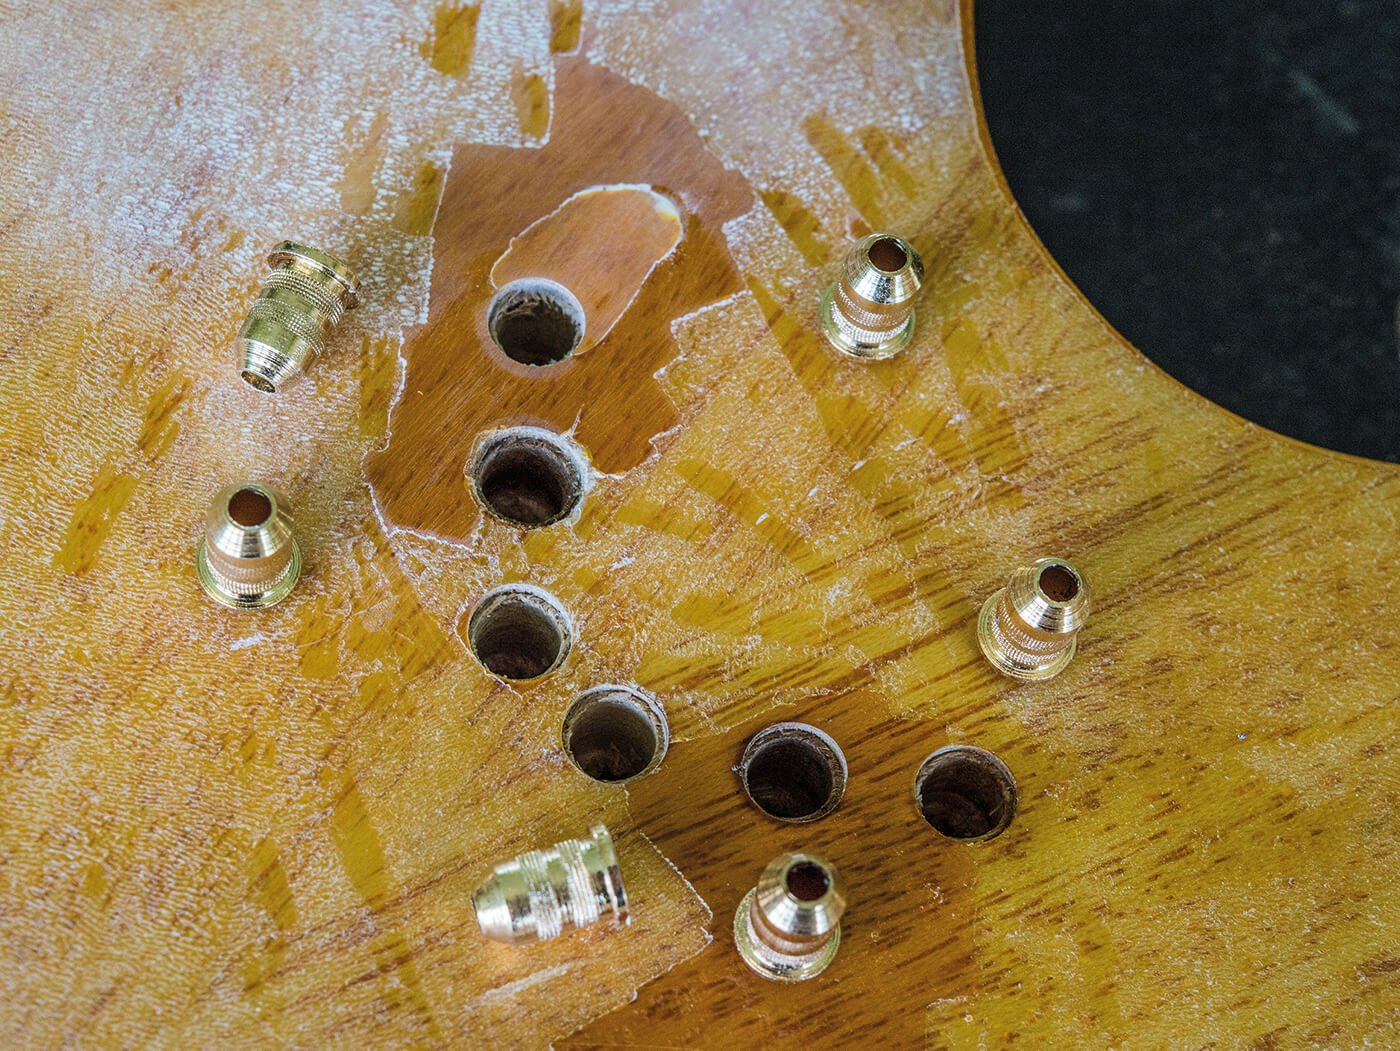
With Telecaster ferrules, I’m accustomed to passing an appropriately sized drill bit through the string holes and gently easing them out by tapping the drill bit from the front side of the body. Attempting the same here, the first ferrule comes flying out, taking a chunk of wood and a large patch of finish with it.
It transpires that the ferrules and the wood are firmly bonded to the finish. In fact, the bond between the Korina wood and the finish is stronger than the bonds between the wood fibres themselves. I fix the detached chunk of finish and wood back onto the body using Cascamite glue.
Rather than risk further damage to the guitar, I decide to heat the remaining ferrules before attempting to remove them. With my soldering iron set to 450ºC, I insert the tip into one of the ferrules and after a minute or so, I try tapping. It comes out cleanly and I work my way through the remaining four using the same method.
At last I’m left with just the body – it’s astonishingly light. It weighs a fraction over 2kg, which is one whole kilogram lighter than the Greco Les Paul replica body that I used for the Goldtop conversion project. To put this into context, the Goldtop ended up weighing 3.8kg fully loaded – or 8.4lb if you prefer – which is on the lighter end of the vintage Les Paul spectrum.
Strip down
In the official promotional video for this model, Joe Bonamassa says that they could have done an aged model, but “part of the fun with guitars is putting your own marks on them”. I agree with Joe’s sentiment, but the poly finish is so tough on this guitar that it’s unlikely to exhibit any significant playwear for the remainder of this century, at least.
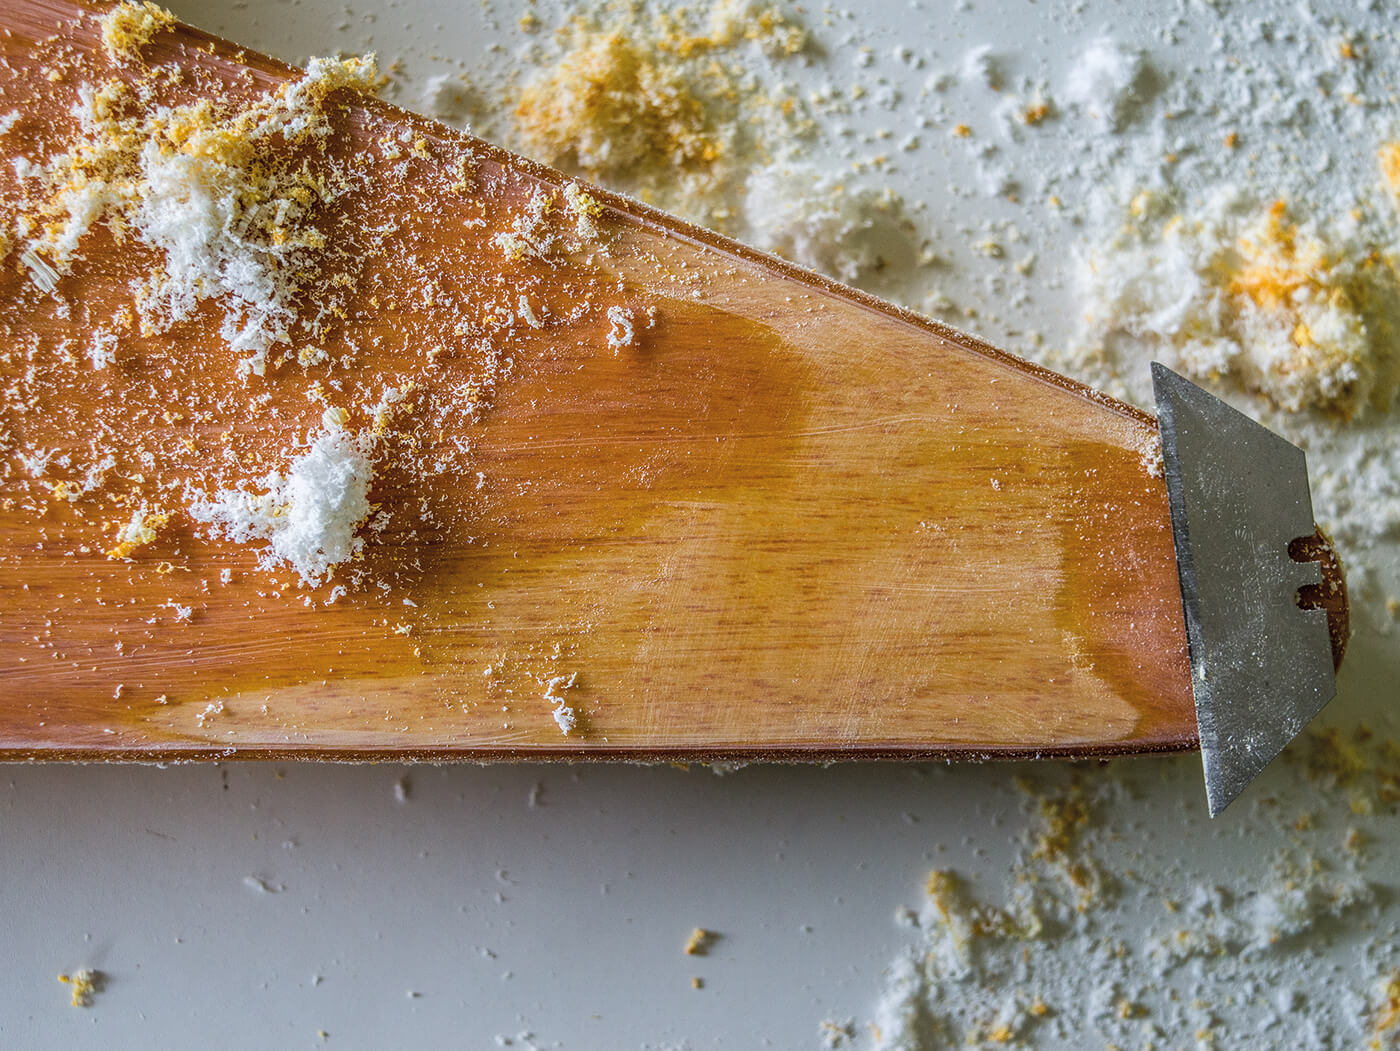
I experiment with Nitromors, but after that fails, I try scraping the finish with a fresh craft-knife blade and eventually get through the outer layer in a small area at the end of the body. In the process, I dull two blades and I have to accept that it will take too much time and effort to strip the body this way. So, it’s back to ‘Plan A’ and with a feeling of weary resignation, I dig out my paint-stripping heat gun, which can easily be found in any DIY store.
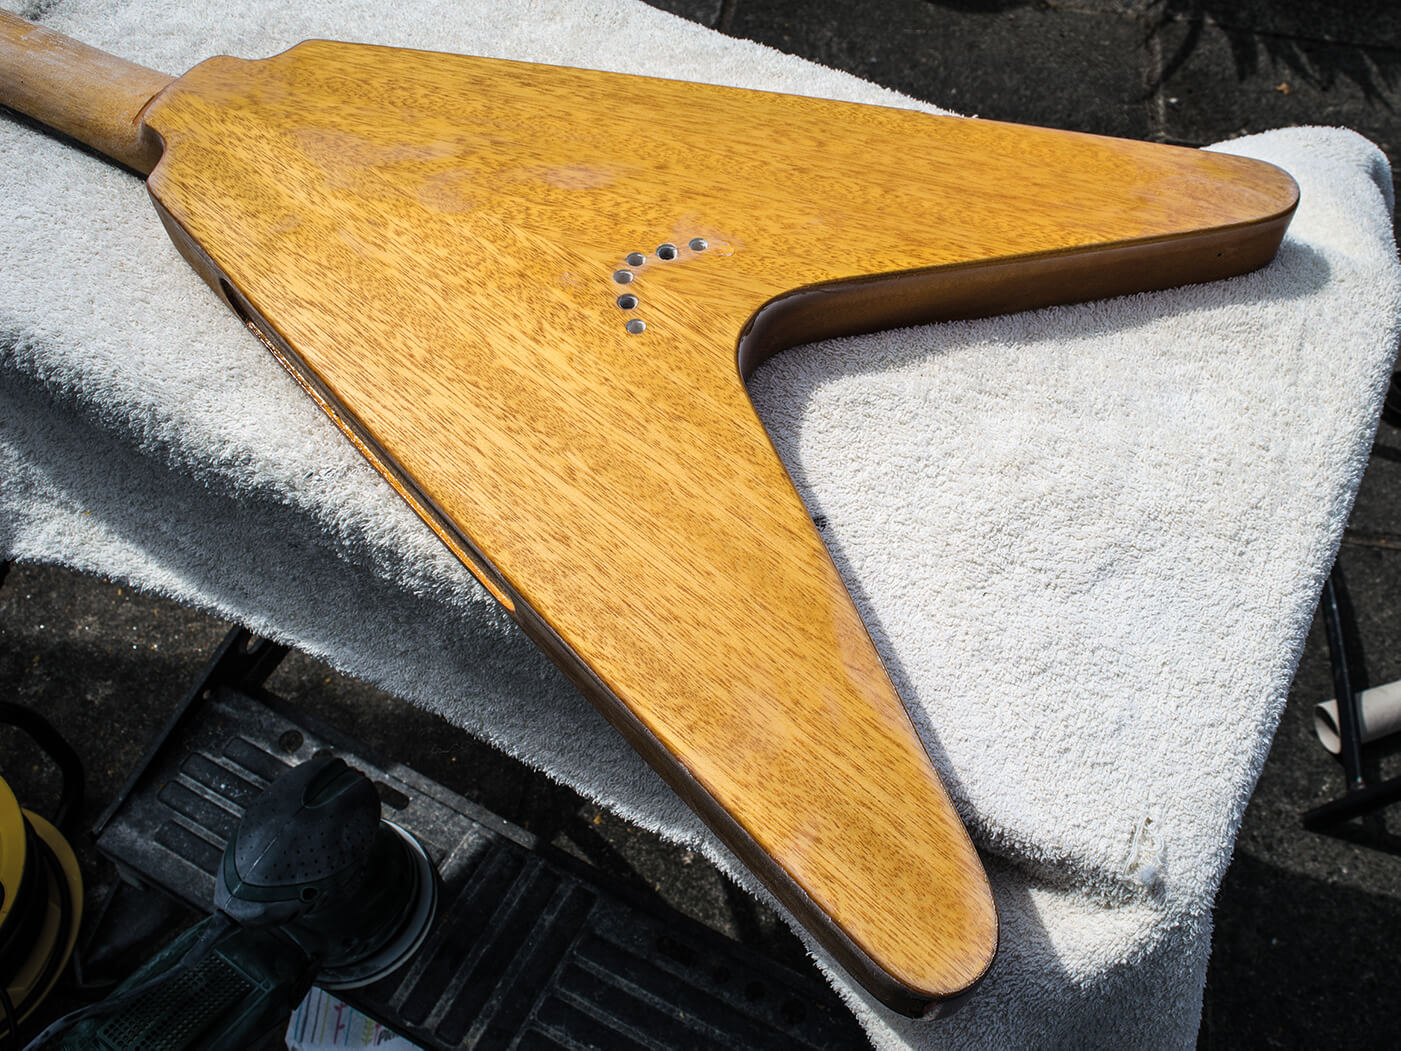
The difficult part is getting your technique right, so the finish comes off without damaging the guitar. Two things concern me here. It’s very easy to scorch the wood when you’re doing this and since Korina is so pale, and the finish is going to be clear, it won’t be possible to hide any burn marks. In addition, close examination has revealed that the front and back of the body are veneered.
Epiphone did a great job, because the two-piece body is centre joined and the joins in the veneers line up perfectly. But the added danger is that too much heat will cause the glue to let go and the veneer might bubble up. Having stripped a few other poly-finished guitars using a heat gun, I know that the secret to a successful outcome is to accept that it can take a very long time and that the finish will only peel off when it’s ready to.
If you try to persuade it with your scraper knife, you’ll end up damaging the wood. When you get bored or frustrated, you’re more likely to try and speed things up. Instead, accept that it’s time to take a break and come back to it when you’re in a better mood.
With the V firmly clamped in my trusty workbench out in the backyard, the poly bore-fest begins. I would strongly advise that you work outdoors and wear a breathing mask, because the fumes smell horrible. Although I don’t know for sure that they’re toxic, it’s safest to assume they are.
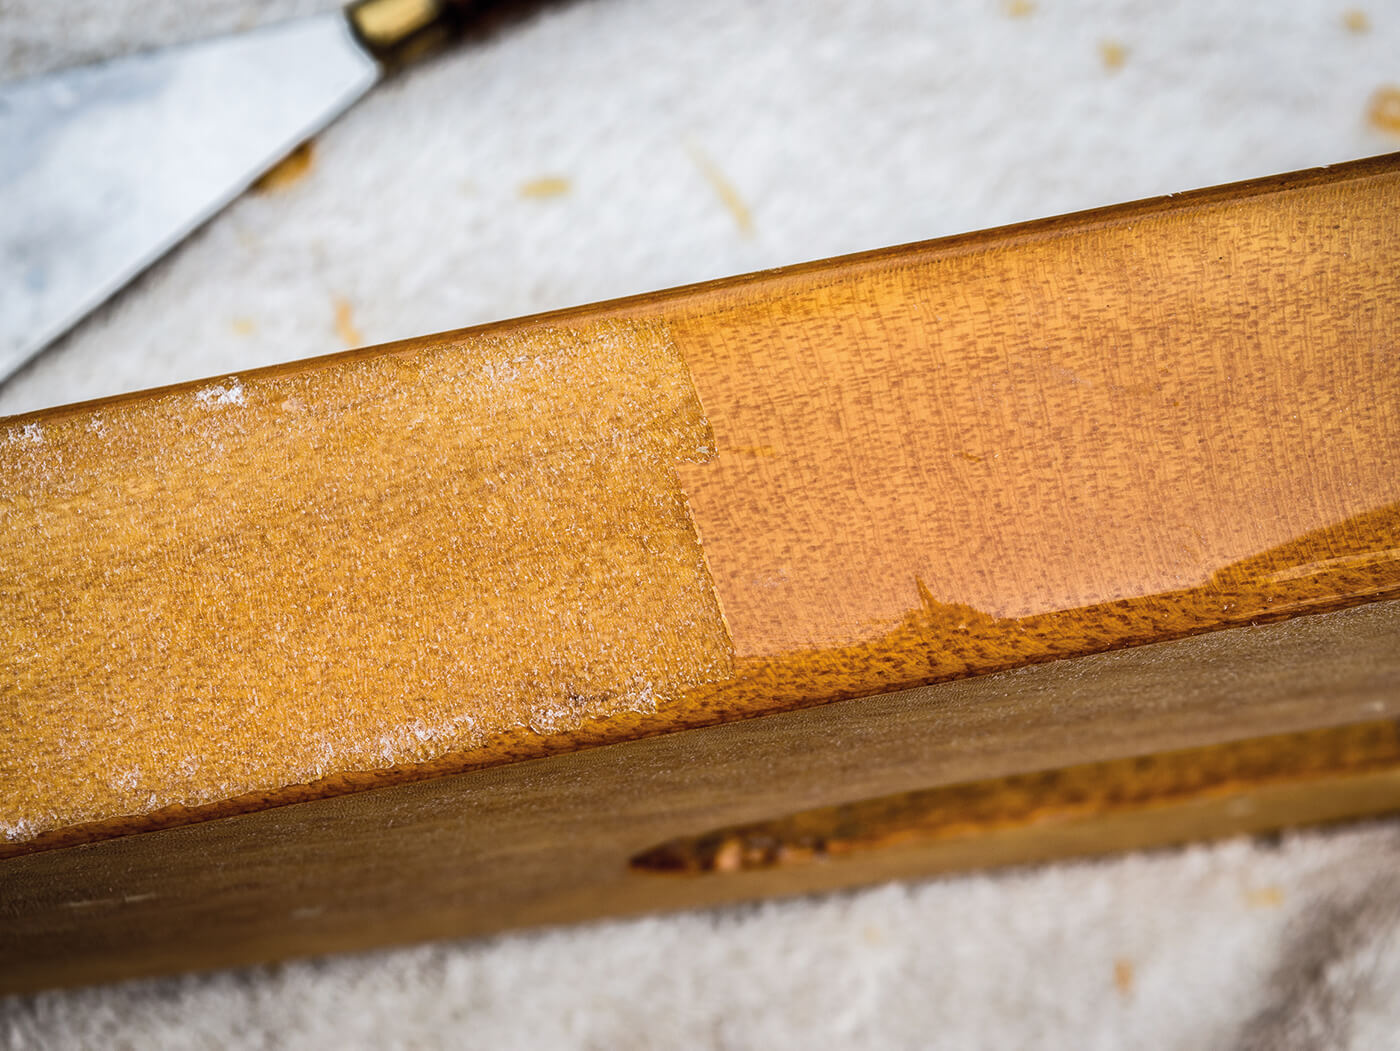
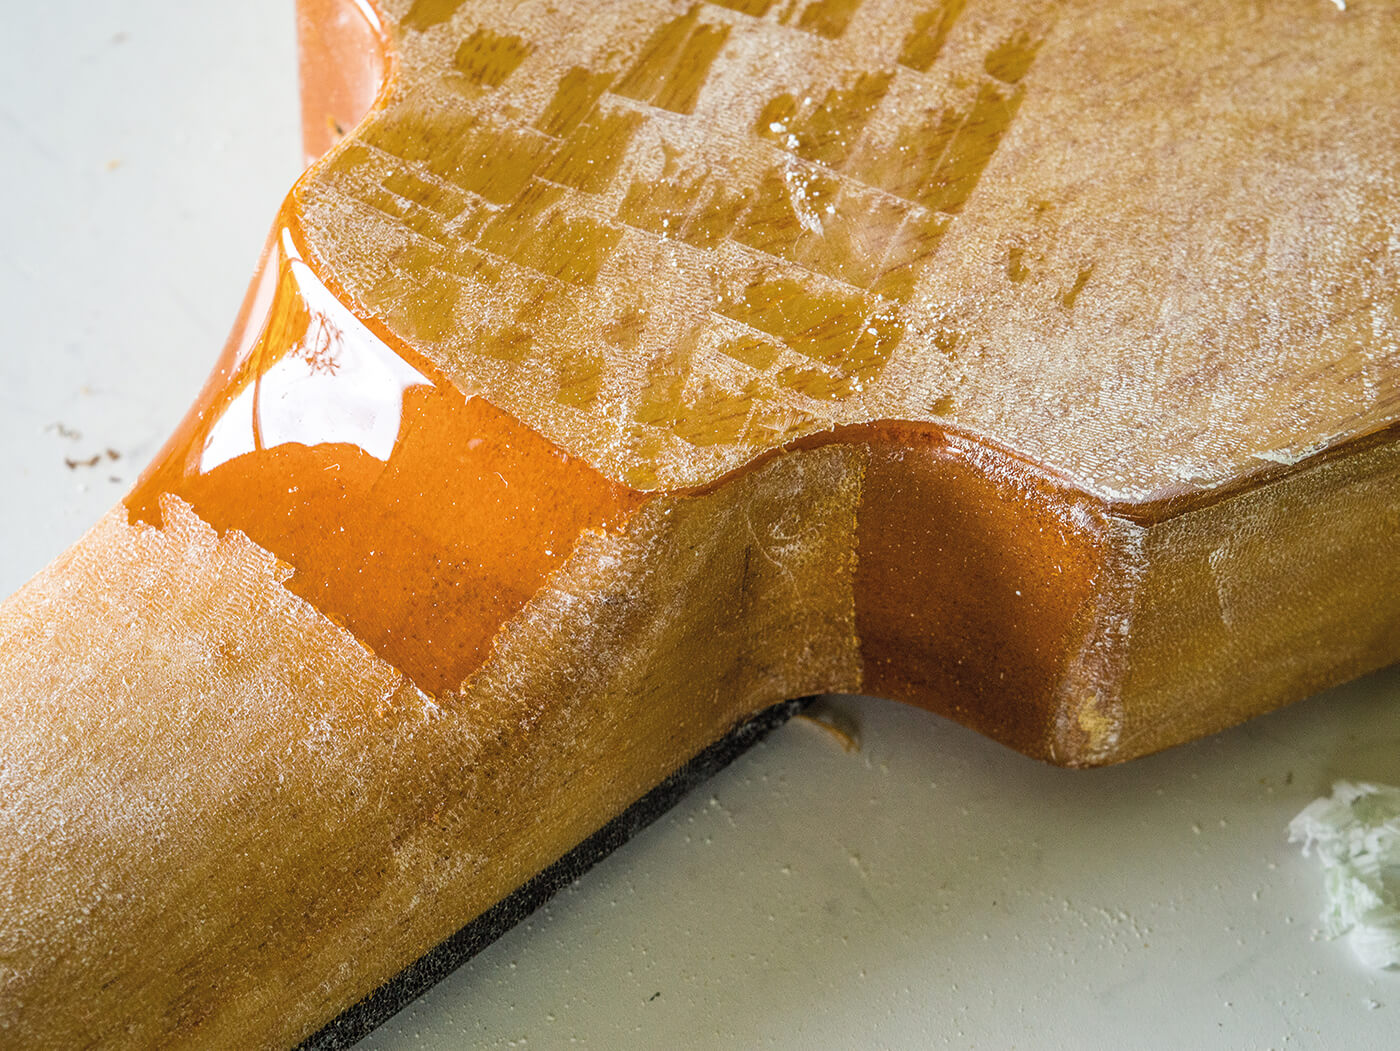
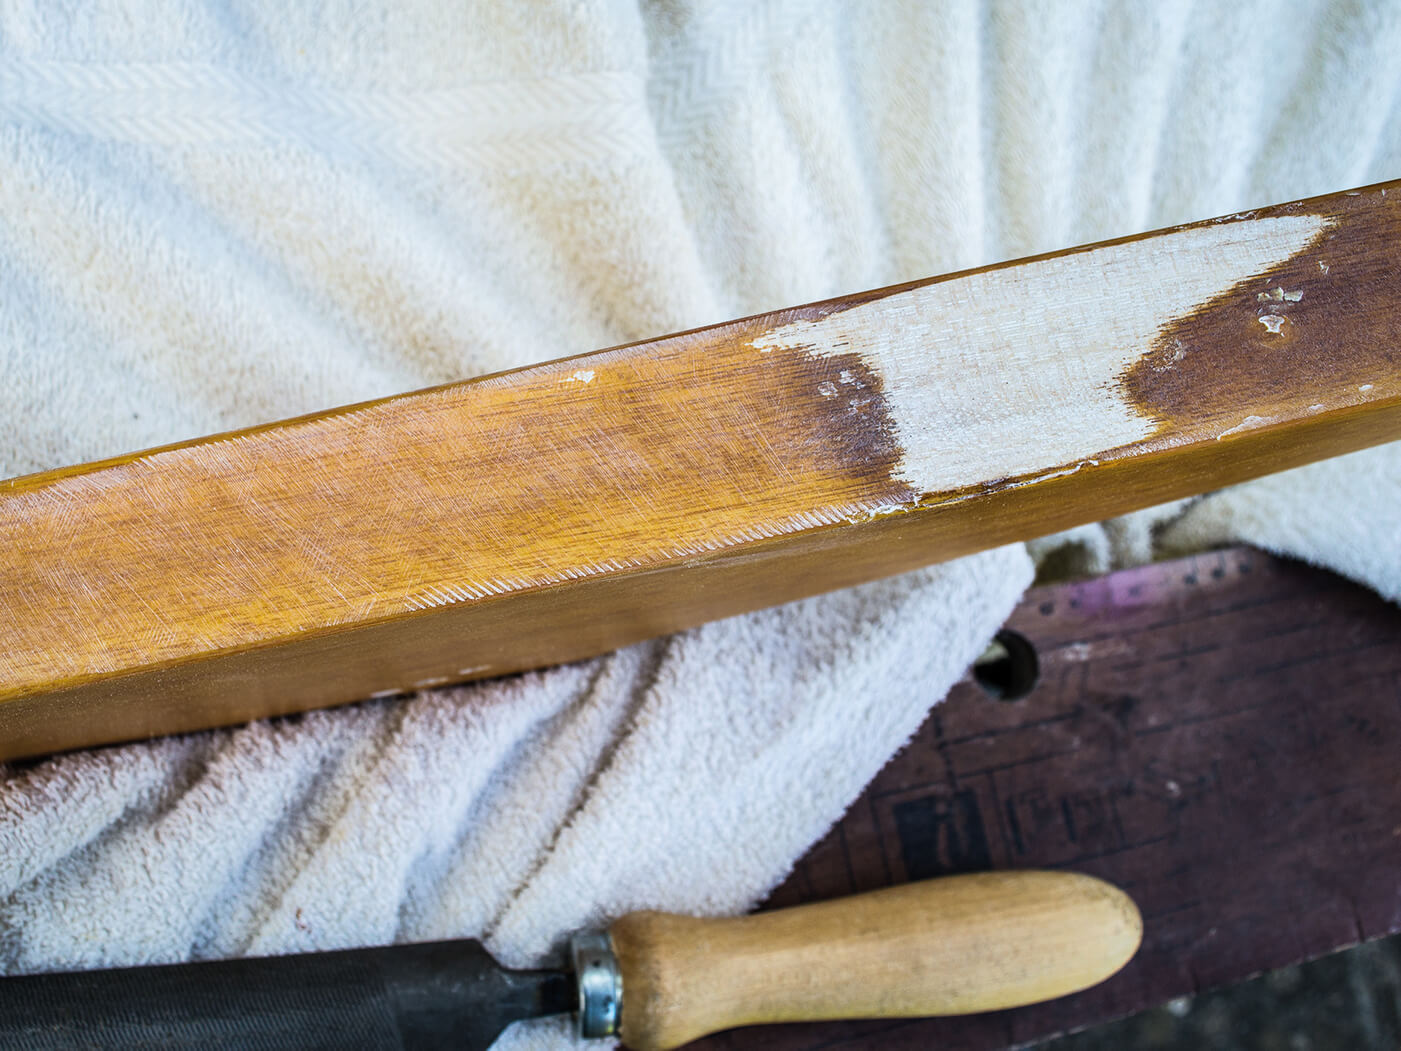
My earlier experiments with scraping the finish revealed that beneath the toffee-coloured gloss exterior there’s a lighter coloured base coat that Epiphone most likely applied as a sealer for the very open-grained Korina. Now, as I begin with the heat gun, I discover that the gloss coat separates to leave the base coat intact.
I have to decide whether to try and remove this base coat so I can get down to the wood, or attempt to preserve it. The base coat is far more heat resistant than the top coat and I realise that if I can keep it intact, I won’t have to bother with grain filler and all the other preparation work usually involved in spraying nitro over open-pore wood.
There are two potential complications. Firstly, removing the gloss coat leaves the base coat slightly pitted. Secondly, I need to establish that the base coat will be compatible with nitrocellulose lacquer. I decide to sand one small area smooth and spray it with Manchester Guitar Tech’s sanding sealer.
The idea is to spray it on thickly to ensure that it will adhere to the base coat and then, after it has dried, level it to determine if it can fill the countless tiny marks in the base coat. It passes both tests, so now I know that I need to keep the heat gun on its lowest setting and concentrate on removing only the gloss coats.
Best-laid plans
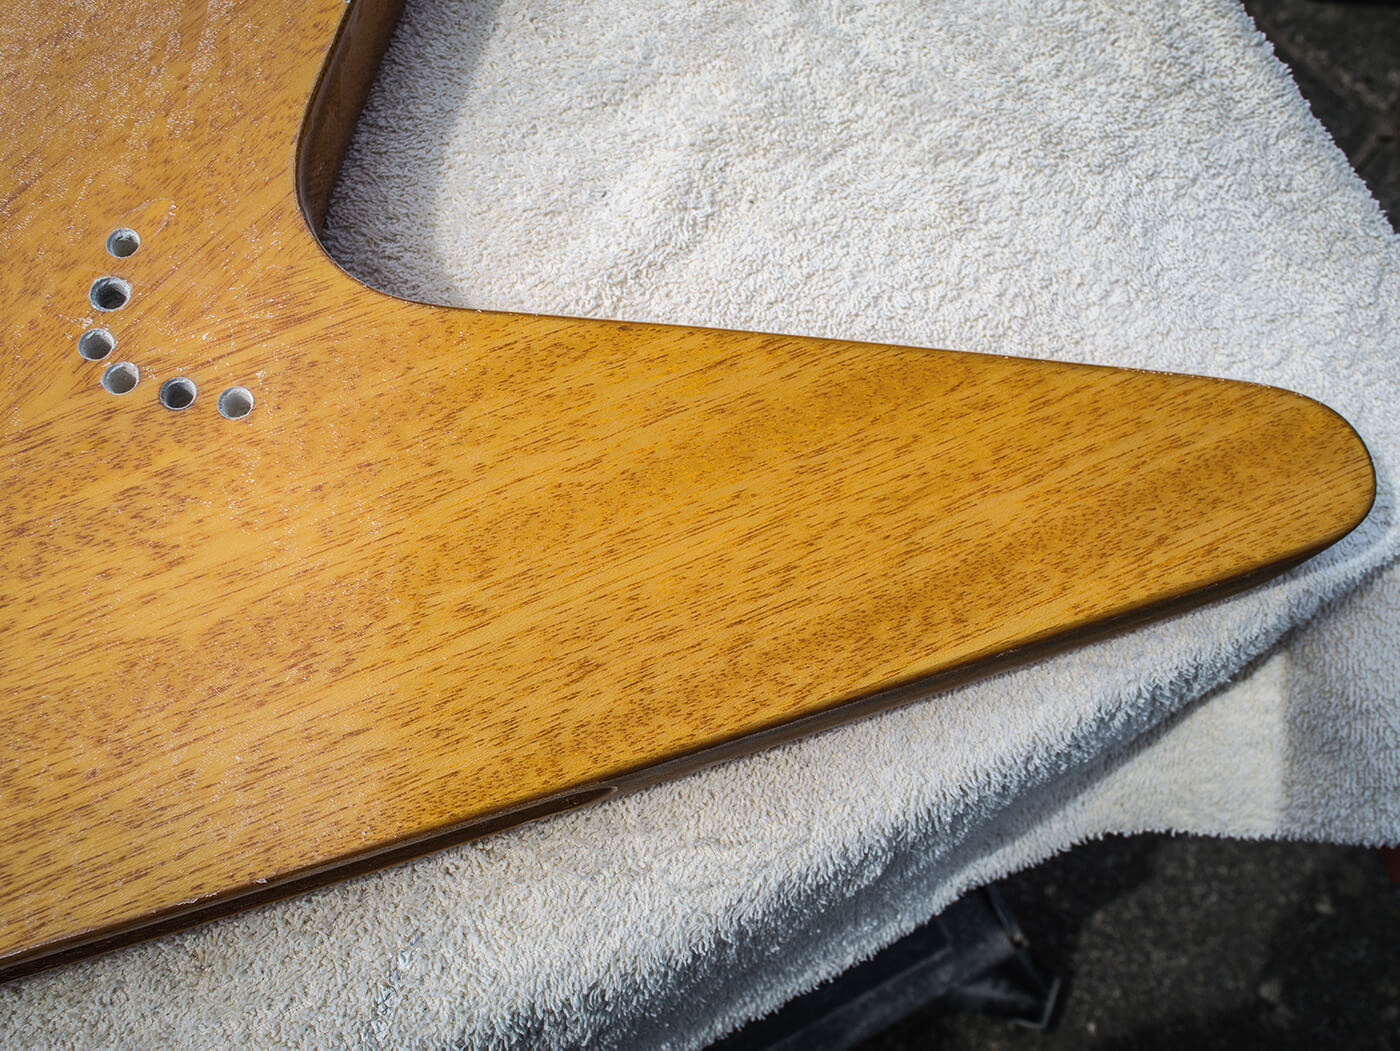
It all sounds simple, and for the most part it is, but one moment of inattention when I’m stripping the bass side of the body causes the finish and the base coat to blister and start popping off in red-hot shards. And of course, a small section of the wood gets scorched.
Incidents like this can be regarded as disasters or learning opportunities and I’m going with the latter. Figuring out how to rectify your screw-ups is a big part of lutherie and I now have to decide on a strategy. The area of damage is about 15cm long and there’s no way I’m going to be able to blend it into the adjacent areas. Instead, I decide to strip the entire side back to bare wood.
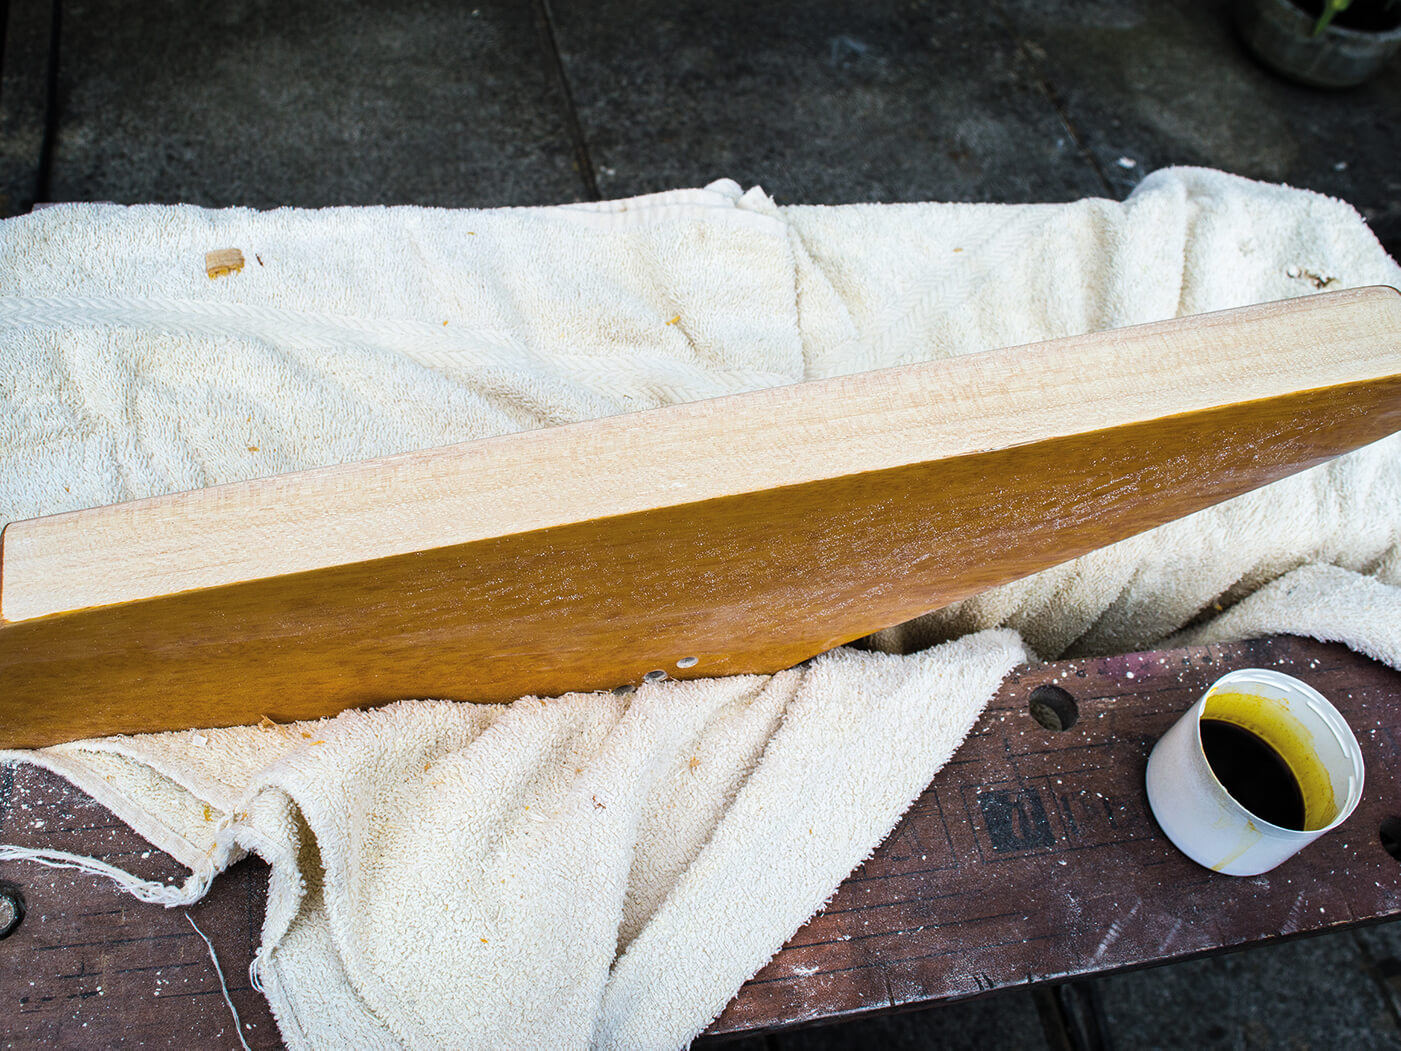
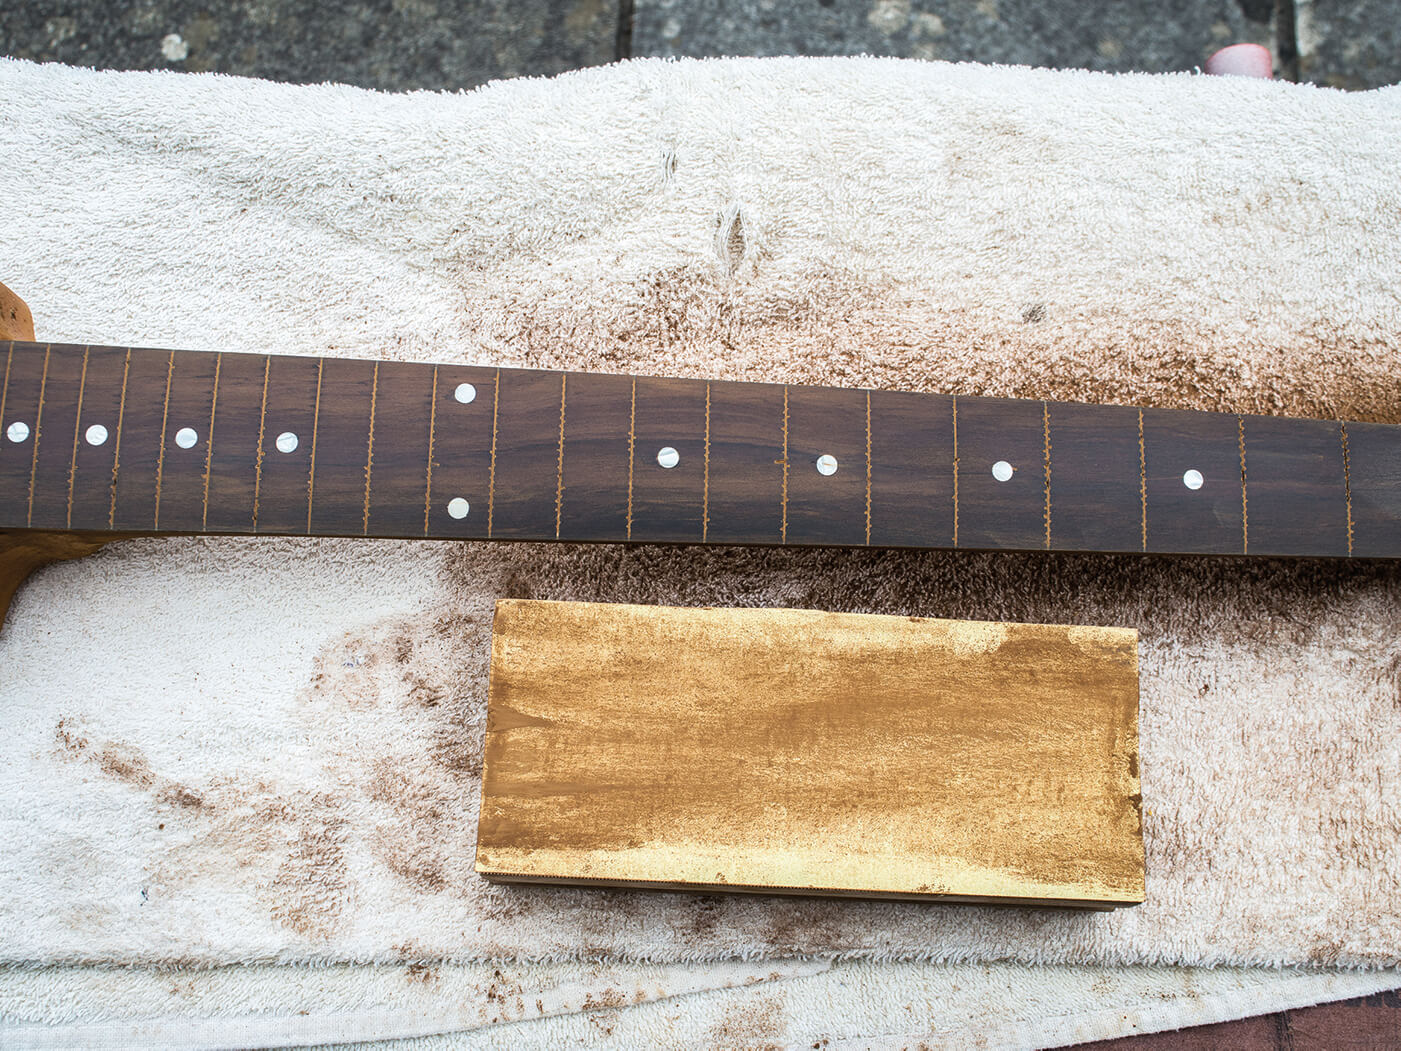
It’s not as easy as it sounds, because I am unable to remove the remaining base coat using the heat gun without the risk of damaging an even wider area. I try sanding and make little progress – even with 80-grit paper. Eventually, I resort to using my rasp and even this formidable tool struggles.
The teeth quickly clog up with dust and I have to use a file brush to clear it every few minutes. But eventually, I get through the base coat and once I’ve followed up with a sanding block, I have a flat and clean wood surface. Now I have to try and even up the colour and mixing StewMac stains – vintage amber with a drop of medium brown in isopropyl alcohol – gets me pretty close.

Shellac is used as a sealer before I apply grain-filler tinted with red stain to try to match the rest of the body. The grain lines end up a little dark, but the background colour is pretty good and I spray the side with more cellulose sanding sealer. Once dry, this is flatted back and it looks passable. Disaster is averted, but I will need to buy a new rasp.
Going dotty
Projects like this always reach the point where the guitar looks worse than it did before you started. However, there is something I need to do before spraying that may redress the balance. I want to get the lacquer off the fingerboard and replace the dots.
I begin by removing all the frets, and stabilising any chips along the fret slots using Super Glue. Drilling a test hole on one of the marker dots reveals that they’re not plastic. Instead, I suspect Epiphone used some sort of filler paste that was packed into the hole and allowed to solidify before the board was levelled and sprayed.
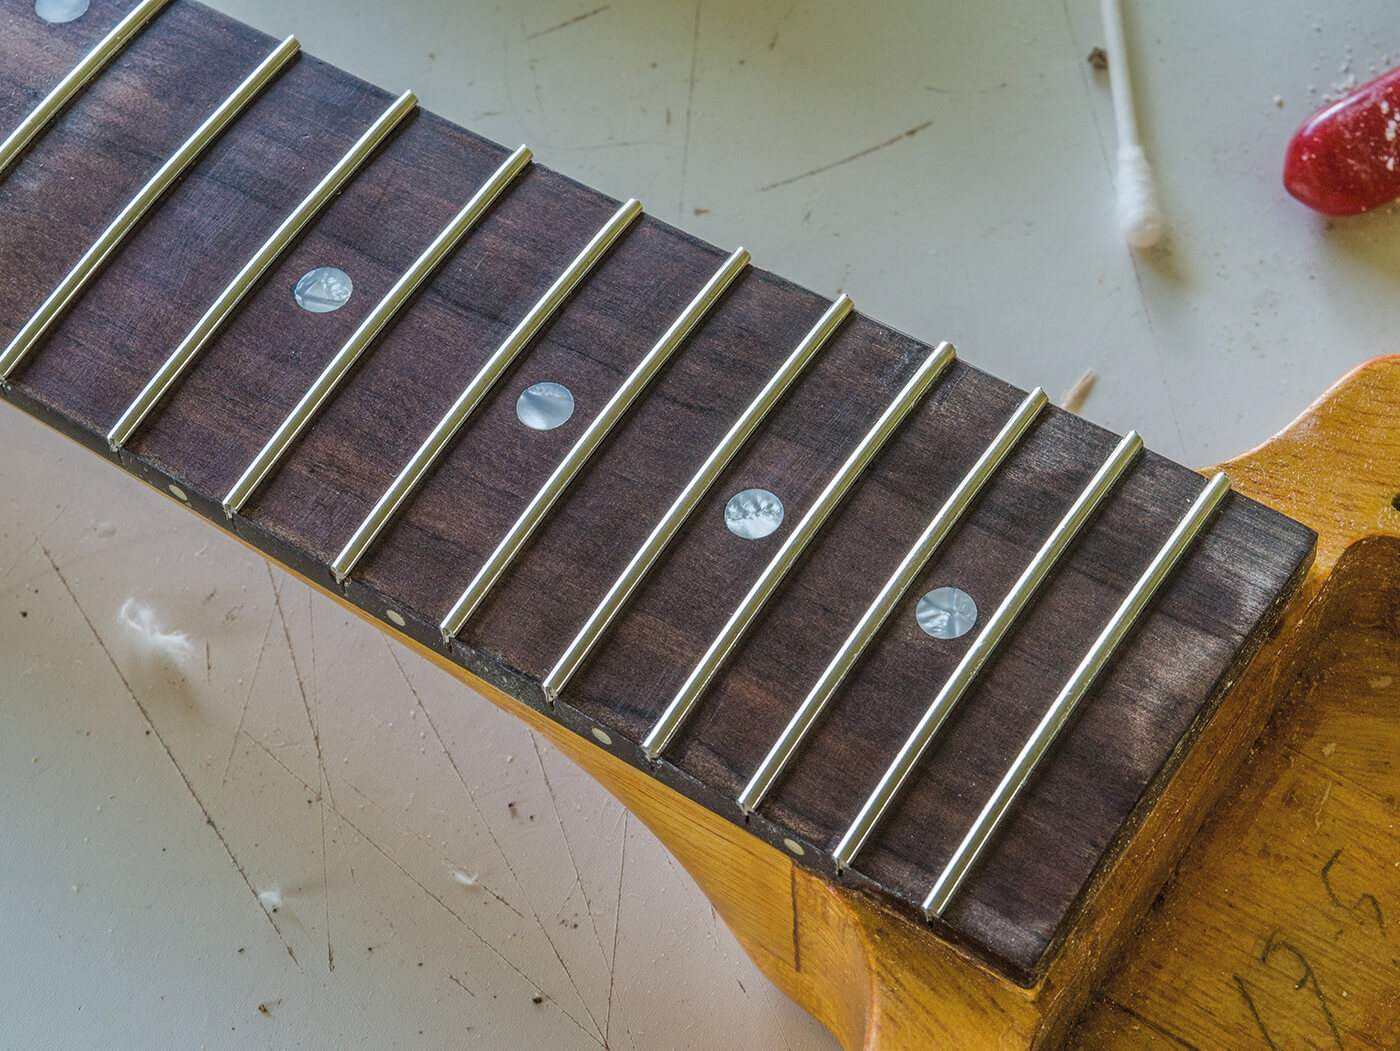
Celluloid pearl dots can be sourced from Rothko And Frost, and at 6mm, their diameter is slightly wider than the factory dots. I carefully mark the centre point of each dot and then drill them out with a 6mm brad-point bit. Centralising the bit is crucial, but I end up with cleanly cut holes and the celluloid dots tap in with a dab of Super Glue.
With the truss rod adjusted to straighten the neck, within a few minutes the dots and fingerboard are levelled using 240-grit paper attached to a 12-inch radius block. Sanding through the coating reveals the grain and true colour of the pau ferro fingerboard for the first time and I think the playing feel will improve along with the looks. The smaller frets that the owner requested are installed and I’ll be dressing the ends before respraying the guitar.
Post-hole plugs
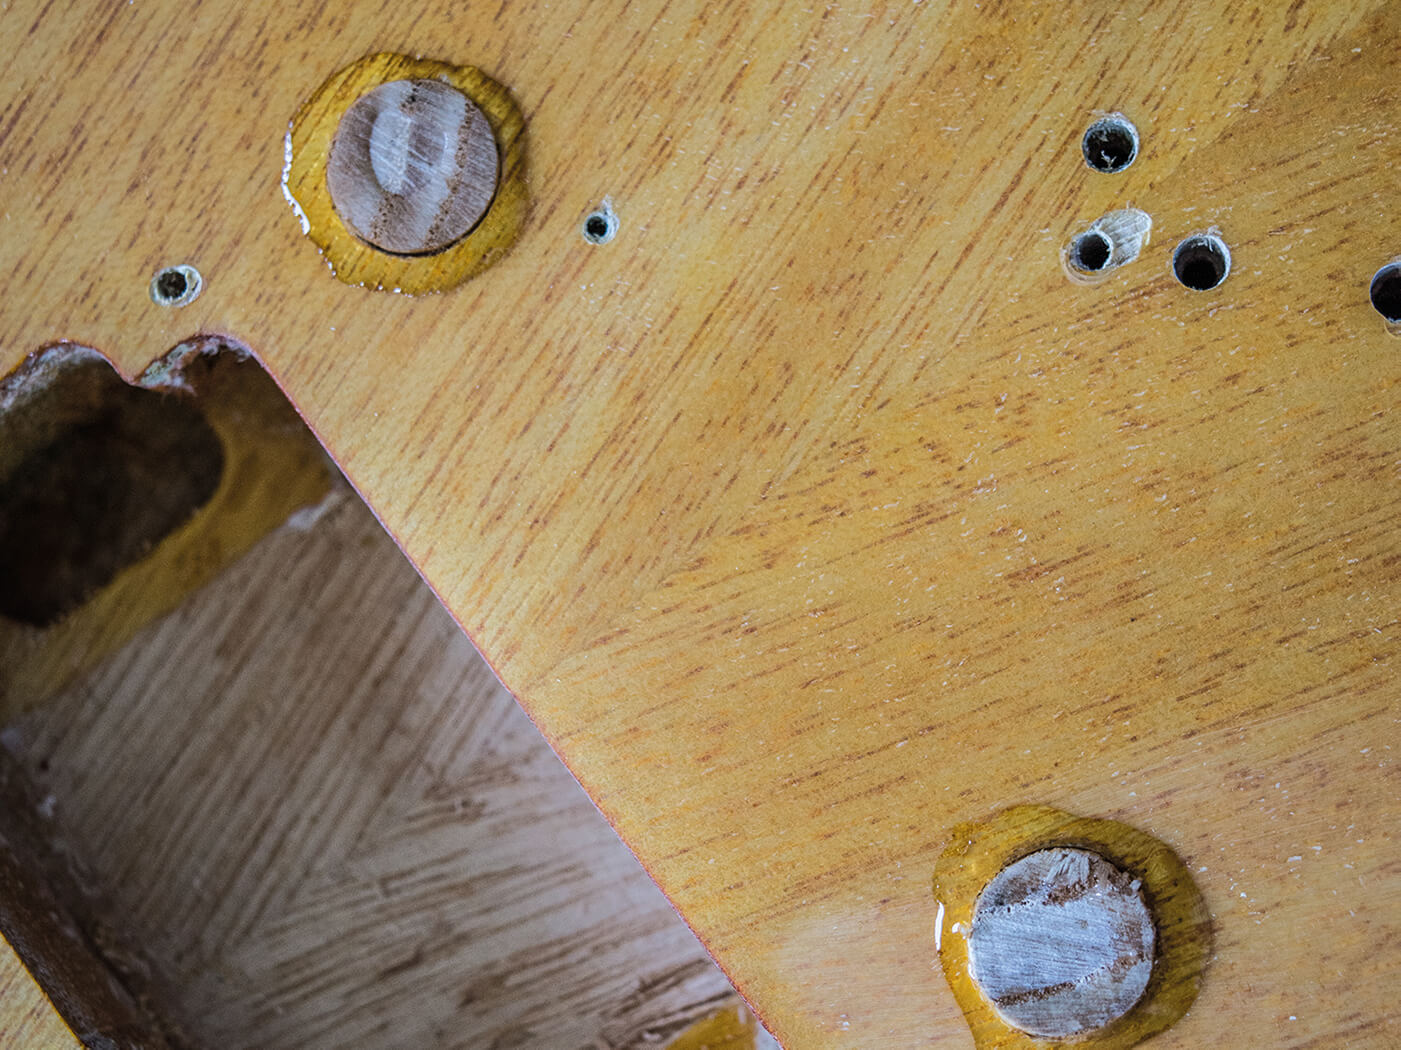
The bridge-post holes were drilled with two different diameters to conform to the shape of the metal inserts. Viewed in cross section, the inserts are ‘T’ shaped, so rather than fill the holes in two stages, I decide to drill out the holes to 0.5 inches. This is slightly wider than the top of the existing post holes, and I tap in two lengths of 0.5-inch ash dowel rod after coating the insides of the holes with Titebond glue.
Once the glue is set, I run a generous quantity of Super Glue around the outside edges of the dowels and leave it to set overnight. Of late, I’ve become a big fan of Super Glue for grain and gap filling and once the dowels are sanded flush with the top, they feel completely smooth.
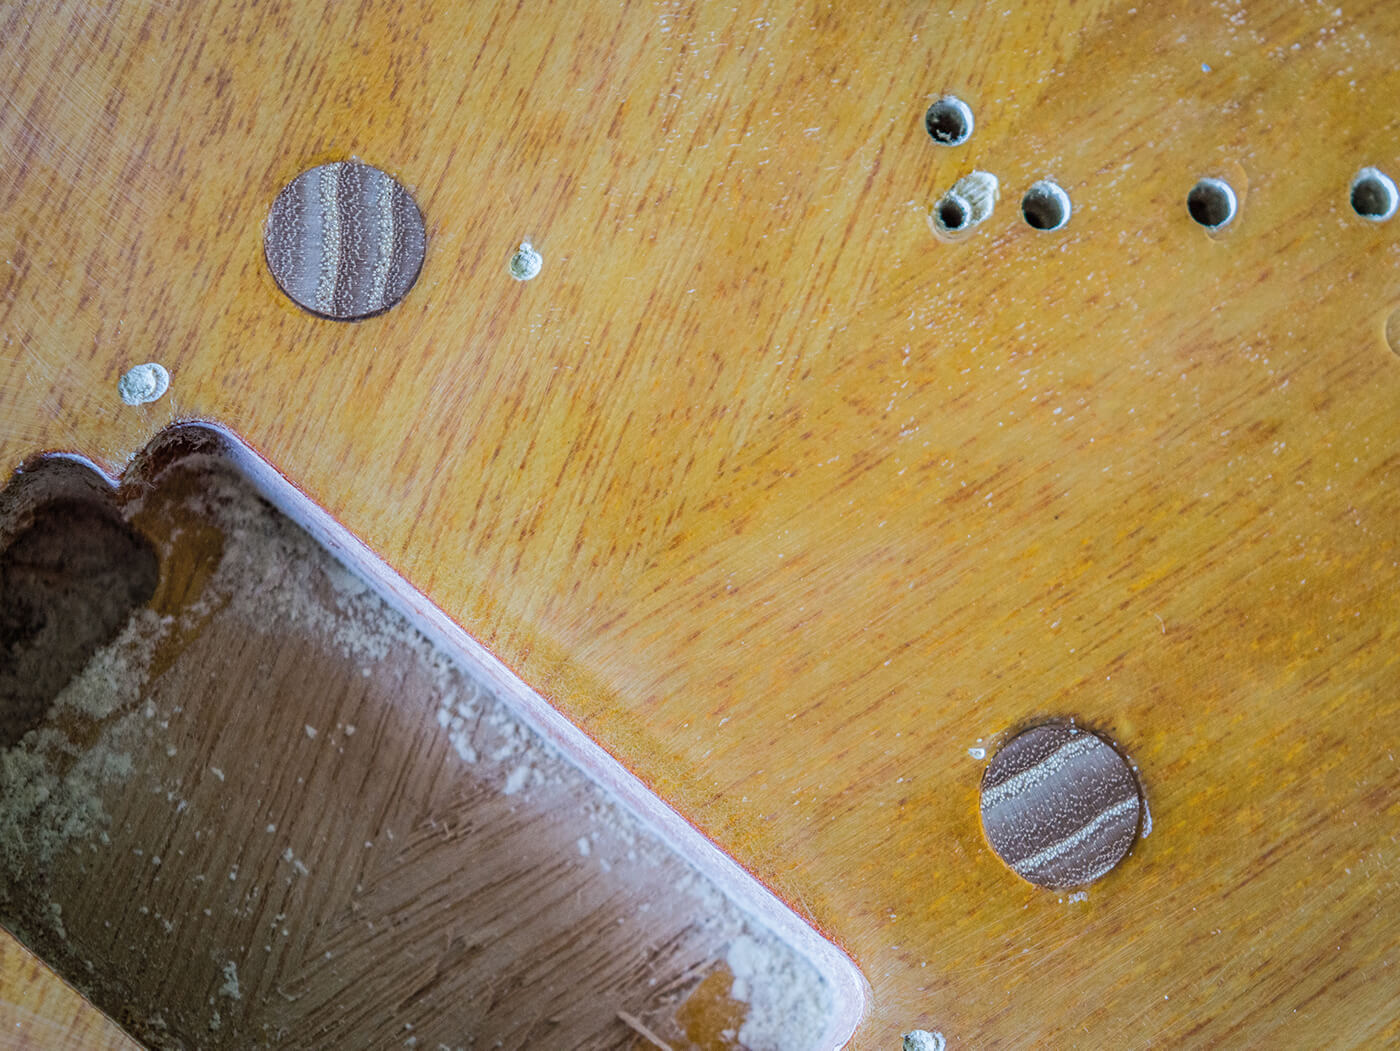
I’ll apply some of the leftover amber/brown stain to the dowels and cover the ends with more Super Glue to seal the grain before spraying. Clearly, it will be impossible to make the plugs invisible without a solid-colour finish, but the pickguard will cover the treble side and I’ll use a second thumbwheel at the base of the string post to conceal the plug on the bass side.
The next time you see this guitar, the respray will be complete and I’ll be covering the relic’ing and reassembly processes. In the meantime, while the lacquer is setting, I’ll turn my attention to re-fretting a Strat neck.
For more DIY projects, check out this page.