Related Tags
DIY Workshop: 1965 Gibson Firebird restoration (Part 1)
It will take some work to make this much-modified vintage ’bird fly again. First it needs a refret and some woodwork…
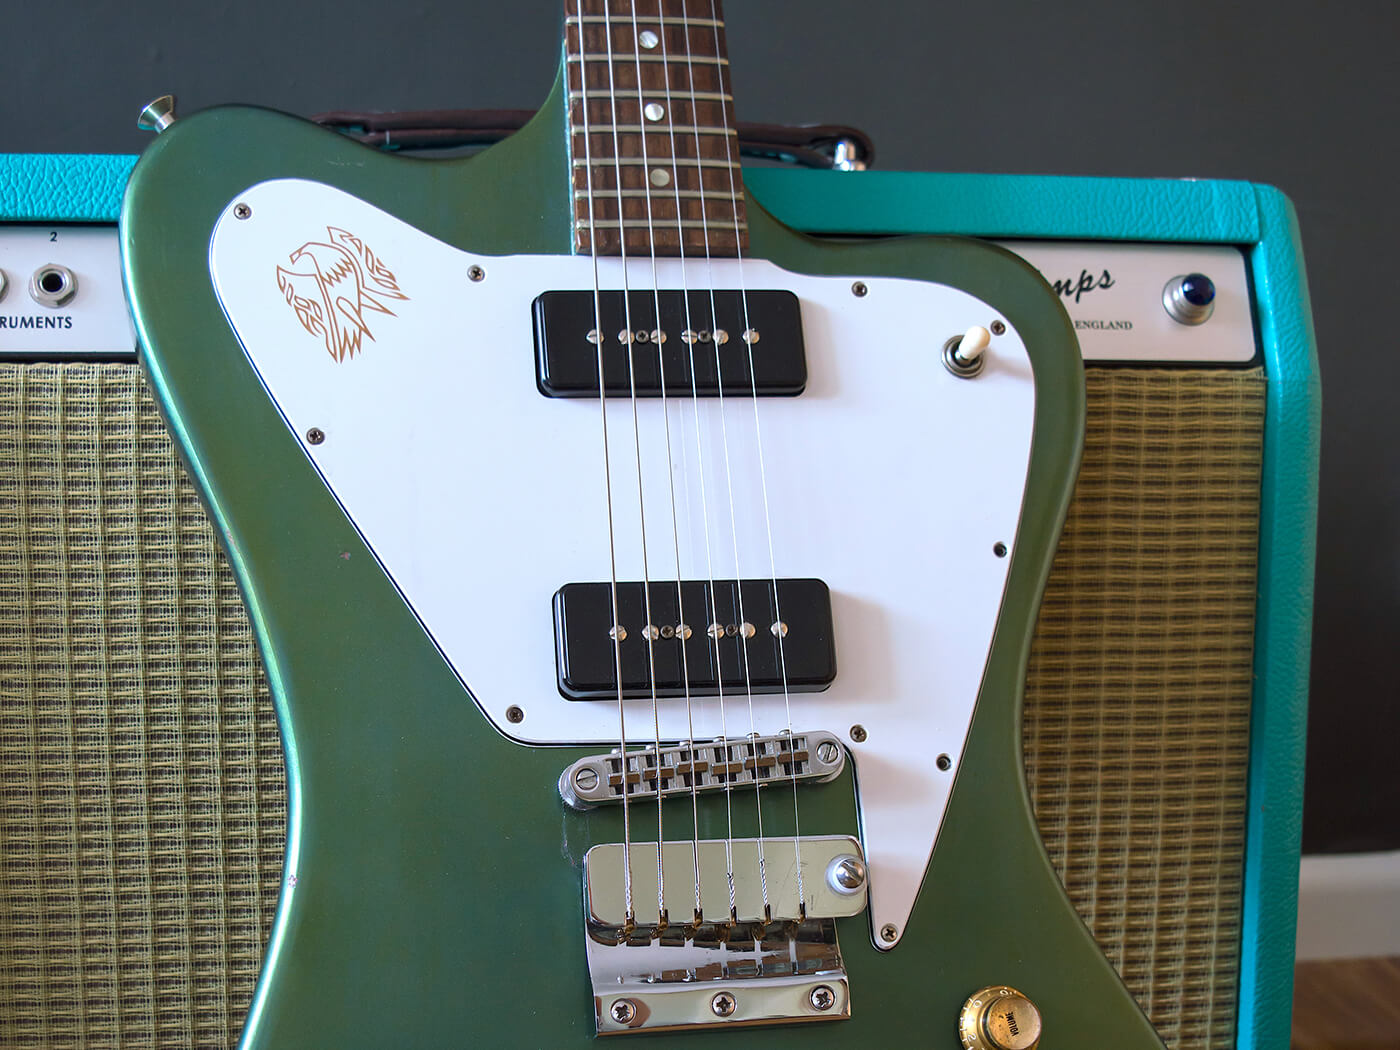
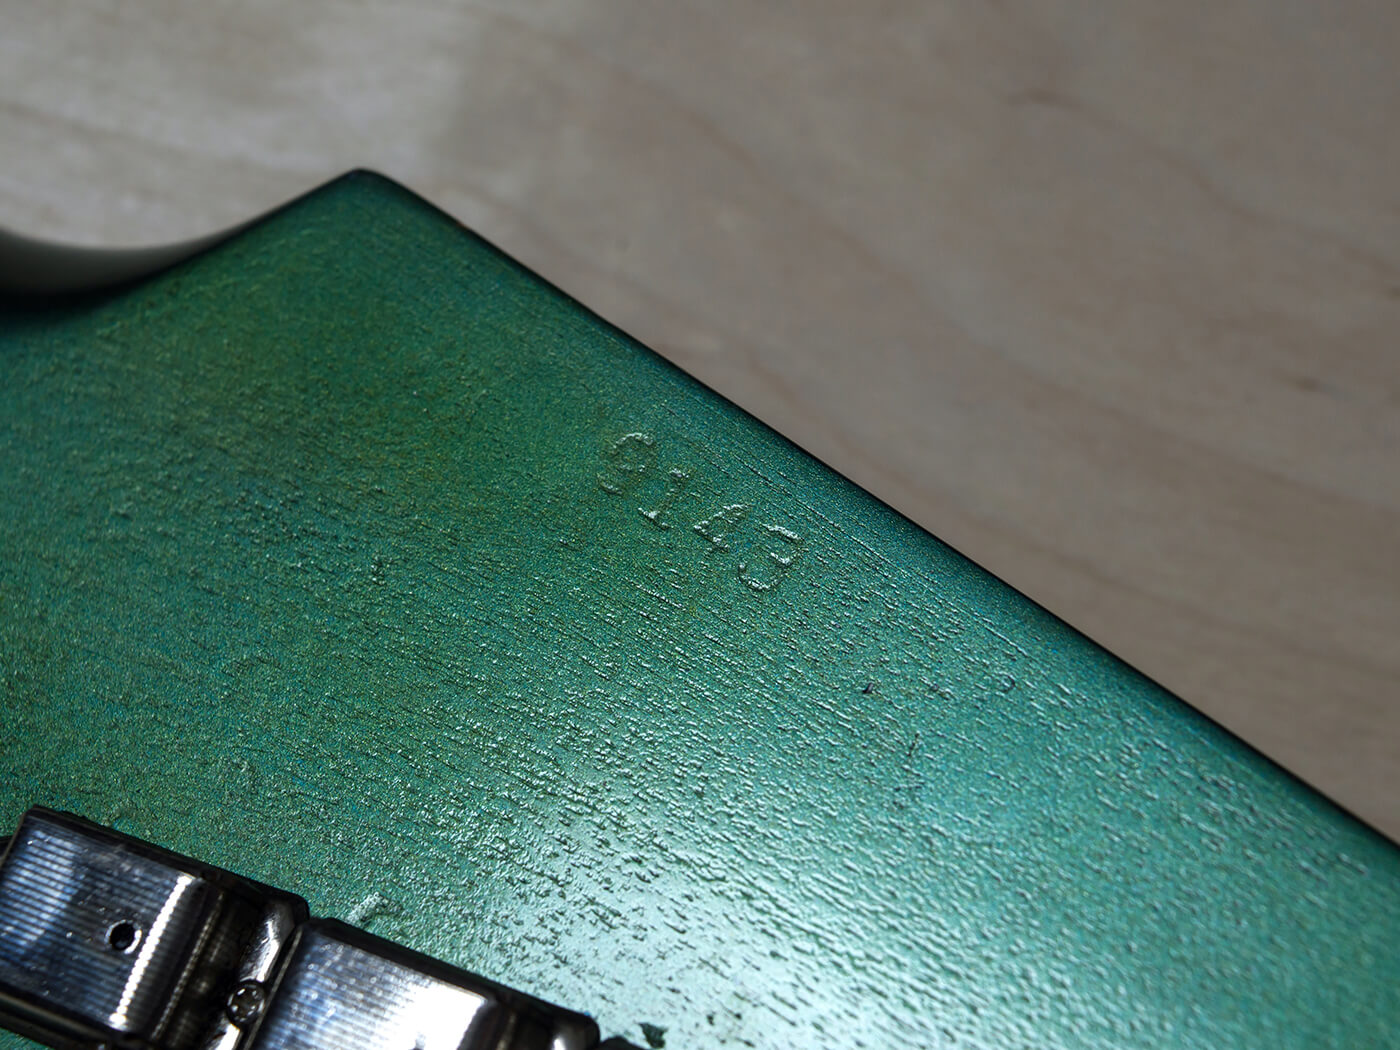
Gibson manufactured original Non-Reverse Firebirds between 1965 and 1969, and the model numbers were I, III, V and VII. There was even a 12-string version too, but that had a different headstock shape. Only four digits of the serial number have survived on this refinished player-grade model, so before I start work on it, in order to work out exactly what it is, I’m looking at the evidence of various bridge fittings showing through the lacquer.
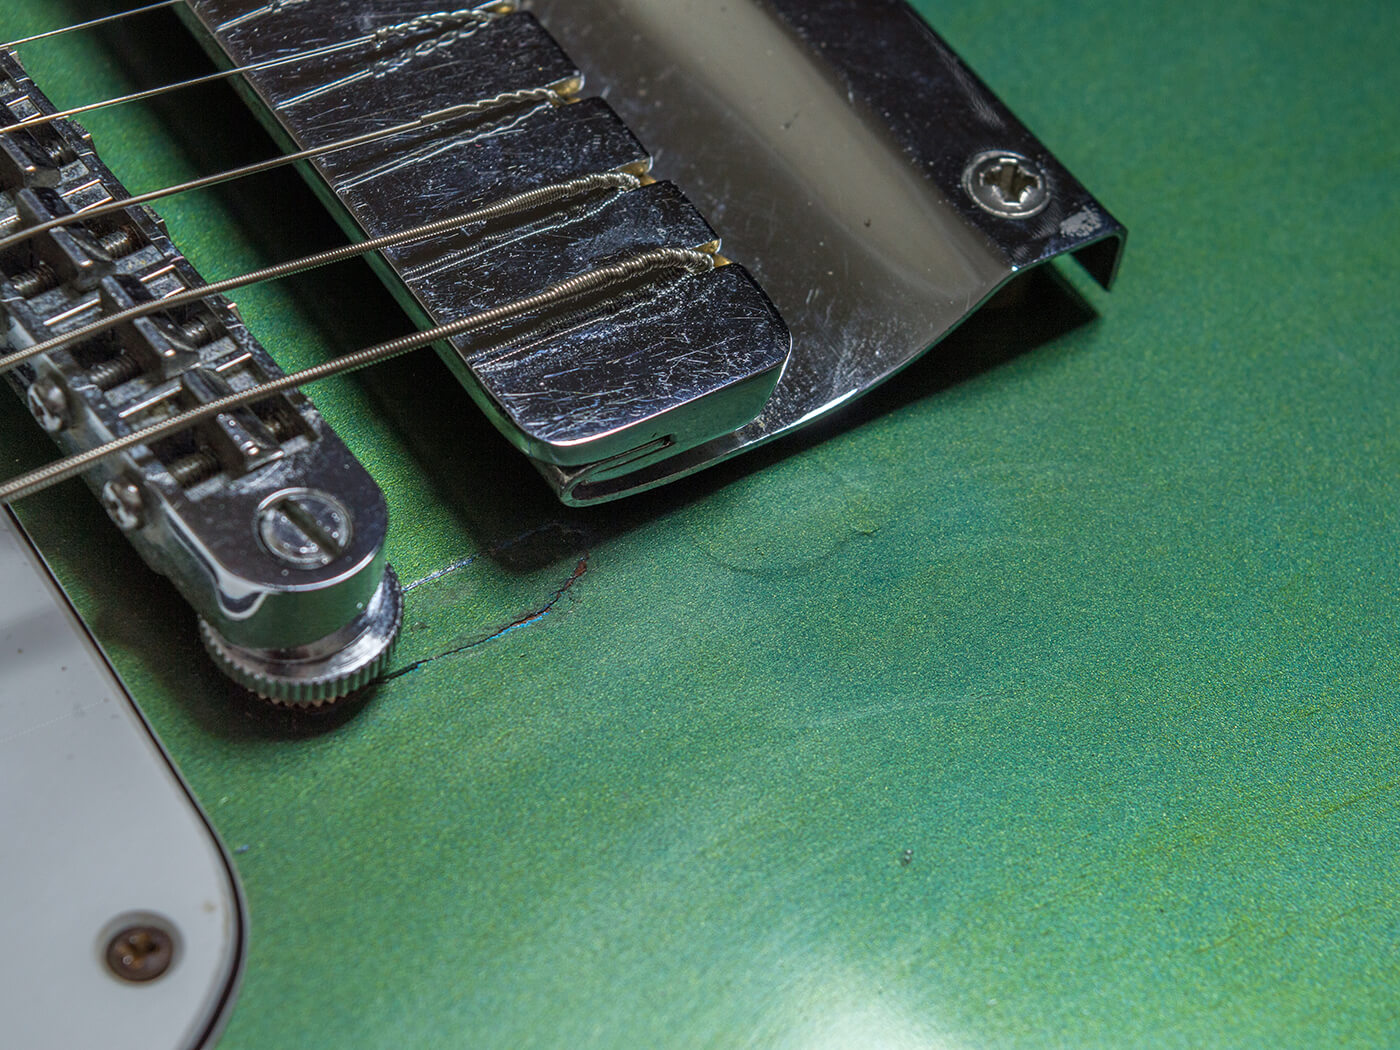
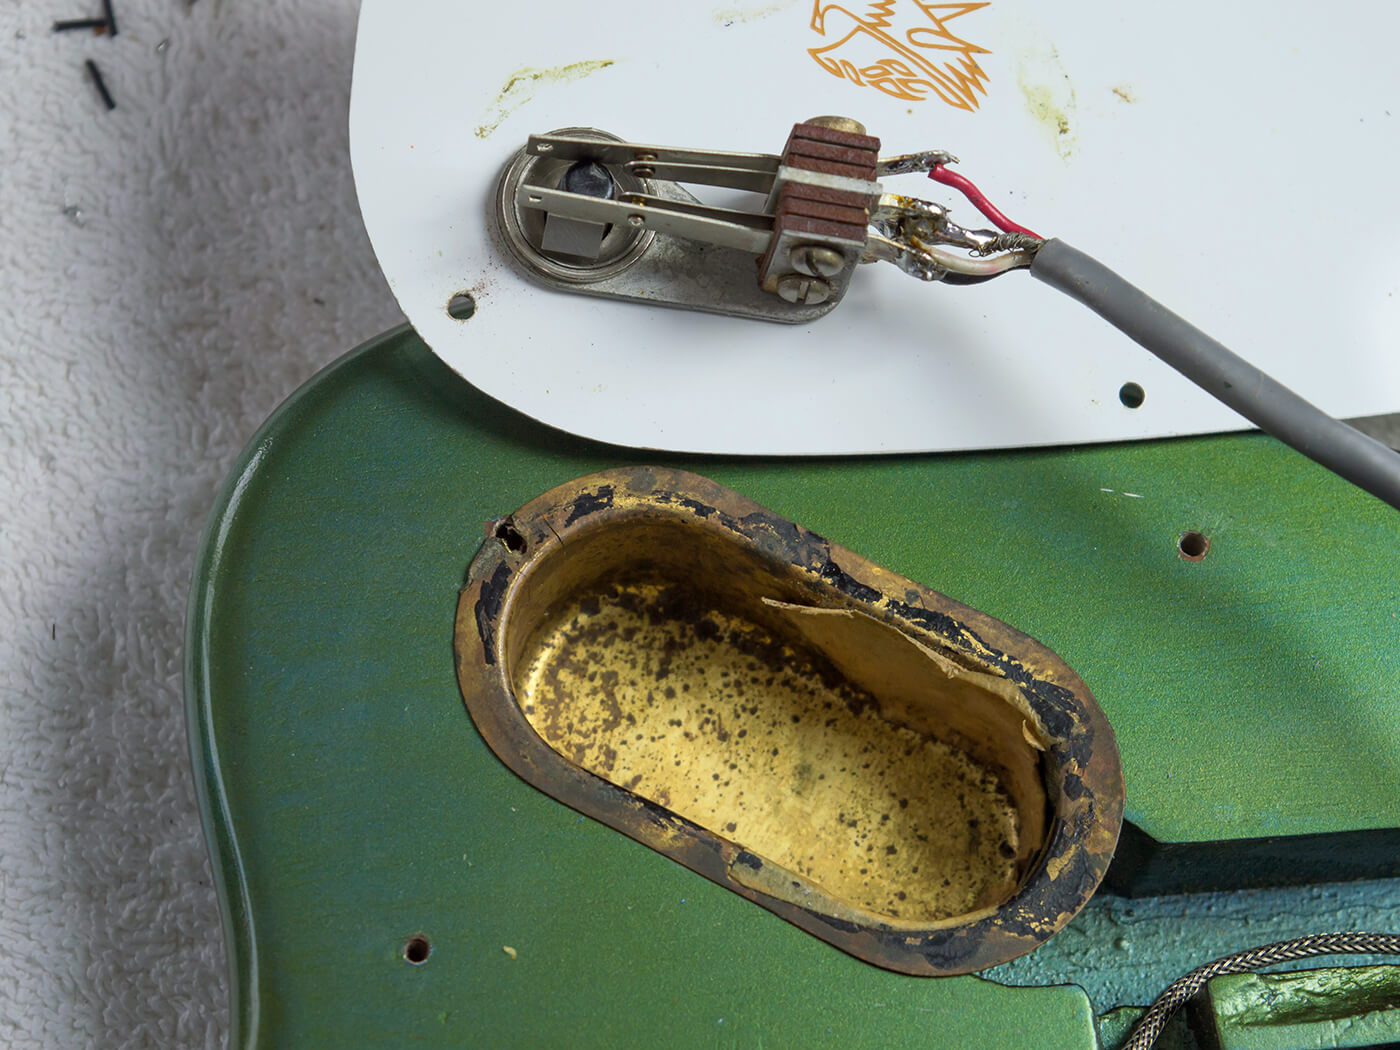
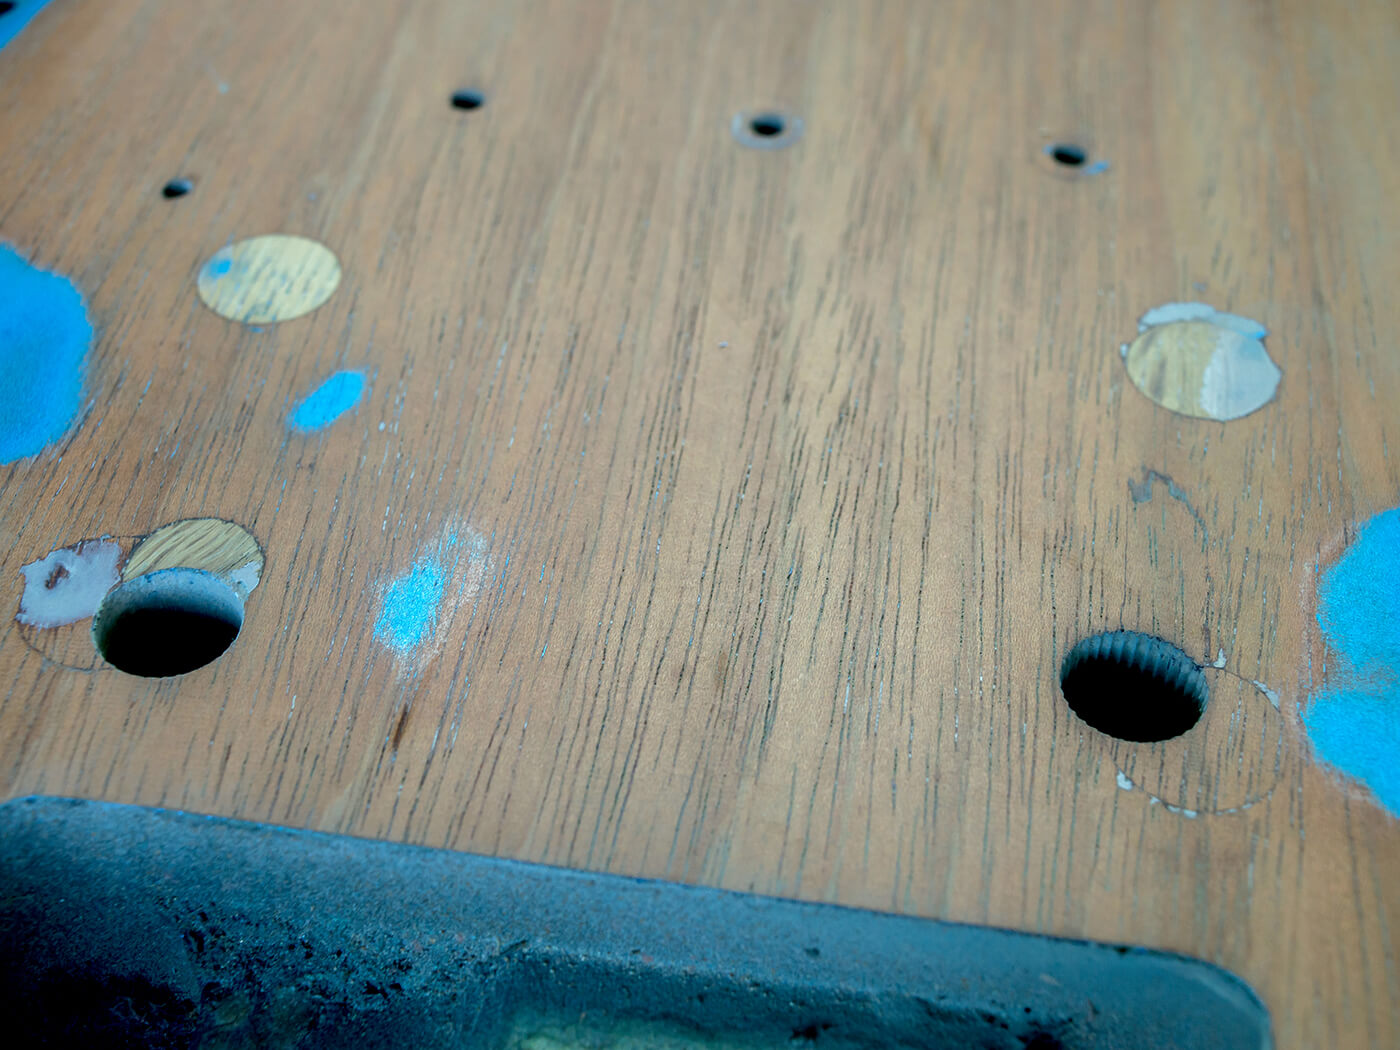
It arrived with a Gotoh tune-o-matic fitted, along with a non-original vibrato. At some point this guitar had a stop tailpiece but the bushing holes have been plugged. Removing wrapover tailpieces was a common modification on 1960s Gibsons – the ‘lightning bolt’ wraptail provided intonation compensation designed for the wound-G string sets that pop and rock players were rapidly migrating away from.
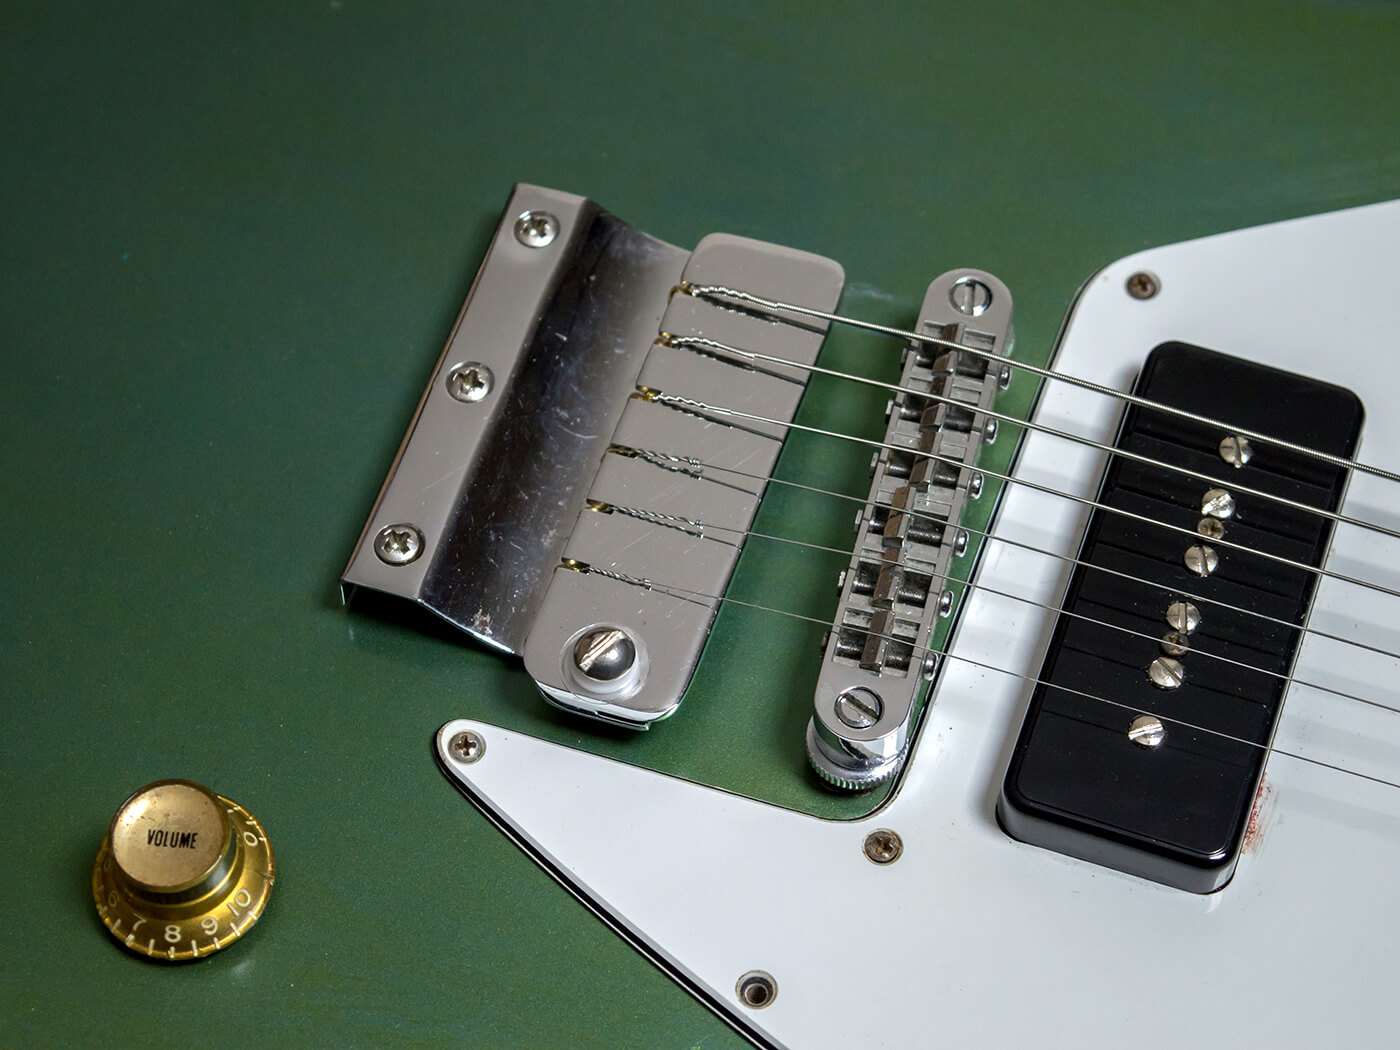
The Gotoh bridge is mounted on bolts and bushings that are similar to wrapover and stop tailpiece types. The treble side bushing hole was plugged, and a second bushing hole was drilled closer to the bridge pickup. The spacing between these bushing holes is too narrow for a wraptail, and no obvious evidence of a wrapover bridge having been fitted is showing through the lacquer.
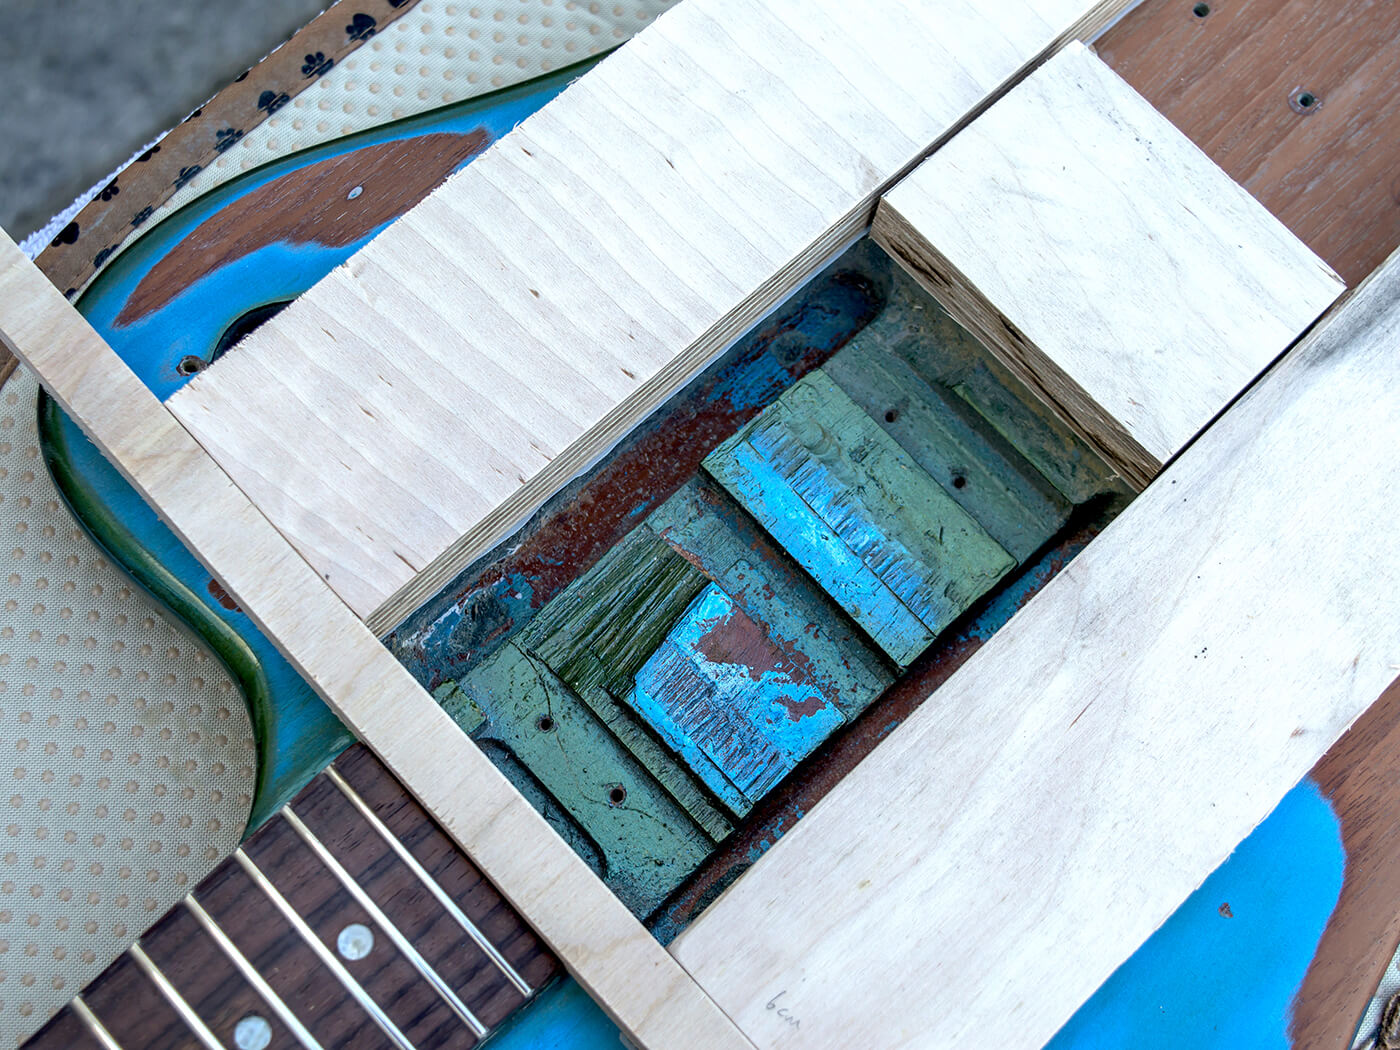
This makes it hard to determine both the model number and the year of manufacture, but there are other clues. The Firebird I and III models had two and three P-90 pickups respectively, but research suggests that all Non-Reverse Firebird bodies were routed to accommodate three pickups. What’s more, in 1965, the bottom of the cavity was routed into a series of steps, with an appearance not unlike that of a quadratic diffuser.
Somebody has knocked off the steps on this guitar, and four small recesses cut into body at the bottom of the pickup cavity indicate why this was done. A previous owner decided to clear some space for humbuckers, and an extra switch rout and wiring channel was most likely added at the same time.
Sometime during 1966, Gibson began suspending P-90s from the pickguard and extra notches were cut on the bass side of the body cavity to accommodate the baseplate ears. The pickup cavity was also simplified to make it more of a ‘swimming pool’ rout. This body is routed in the earlier style, which corresponds to body-mounted soapbar P-90s.
Since there’s no evidence of P-90 screw holes in the centre pickup recess, the indications are that this a very early Firebird I, but it could also be a V or VII converted to P-90s. The only way to find out is to strip the finish back to the wood on the front. If there are no holes for a Maestro Vibrola cover – or if we can find plugged wraptail bushings – we can conclude that this is a Firebird I. But that will have to wait until later.
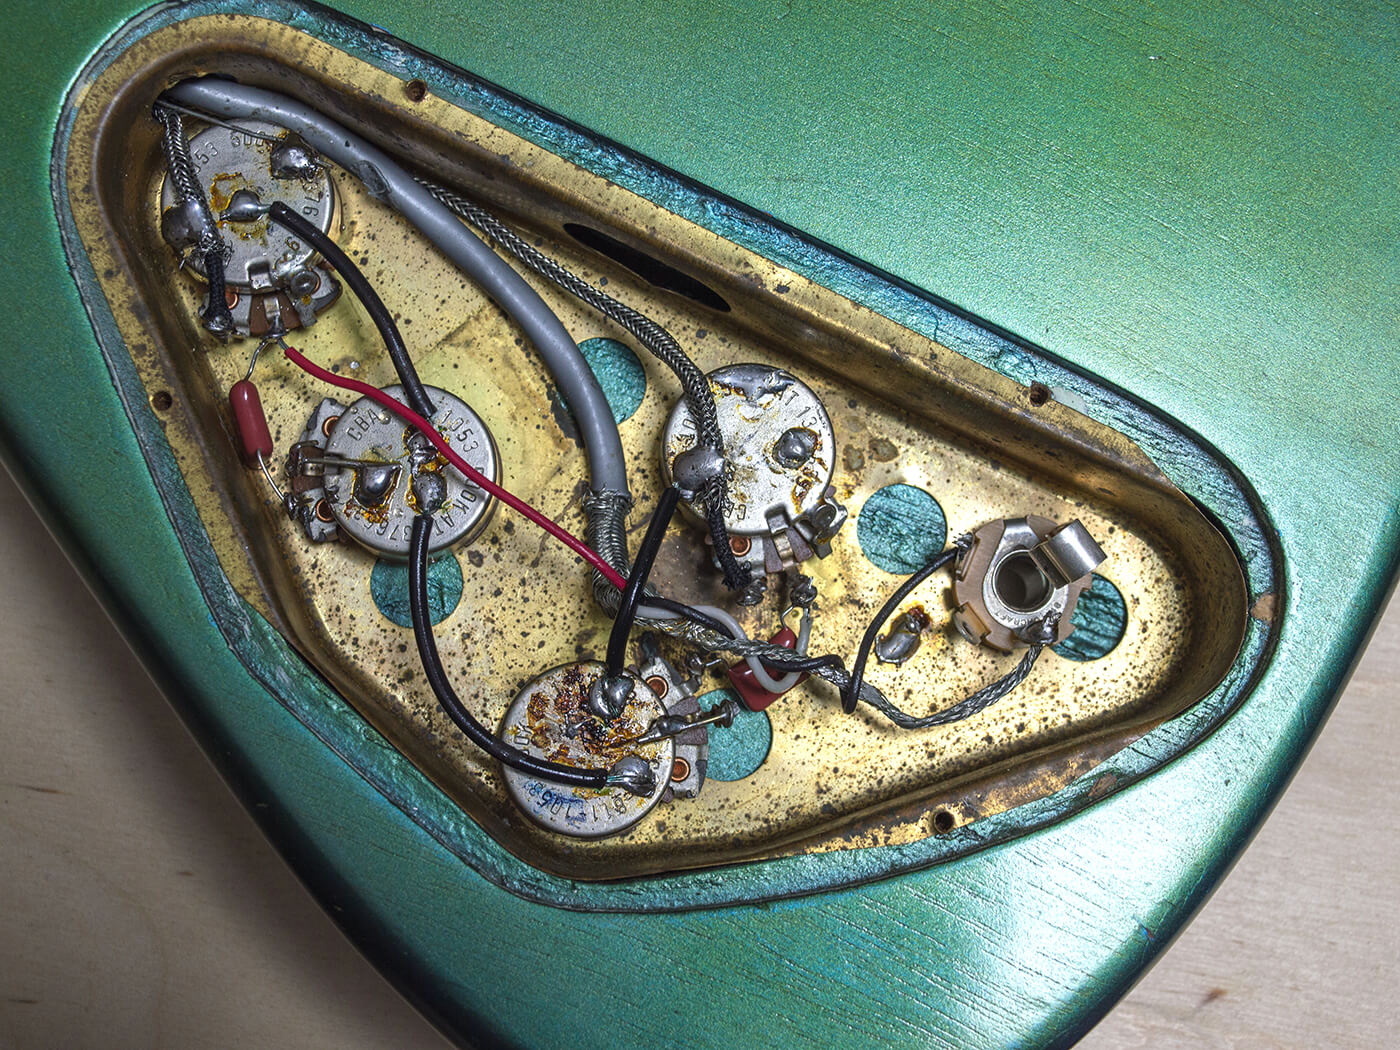
We can be more confident about the year of manufacture, despite half of the serial number being missing. The Firebird’s original wiring harness and potentiometers have survived intact and the potentiometer date codes all show the 39th week of 1965. This is consistent with the pickup cavity and probably means this is a first-year Non-Reverse model.
A toggle switch mounted in the pickguard has probably replaced the original slider switch – although some Non-Reverse Firebirds do have factory toggle switches. The ceramic tone capacitors and original P-90s have also been lost, but the guitar has a set of Monty’s pickups installed.
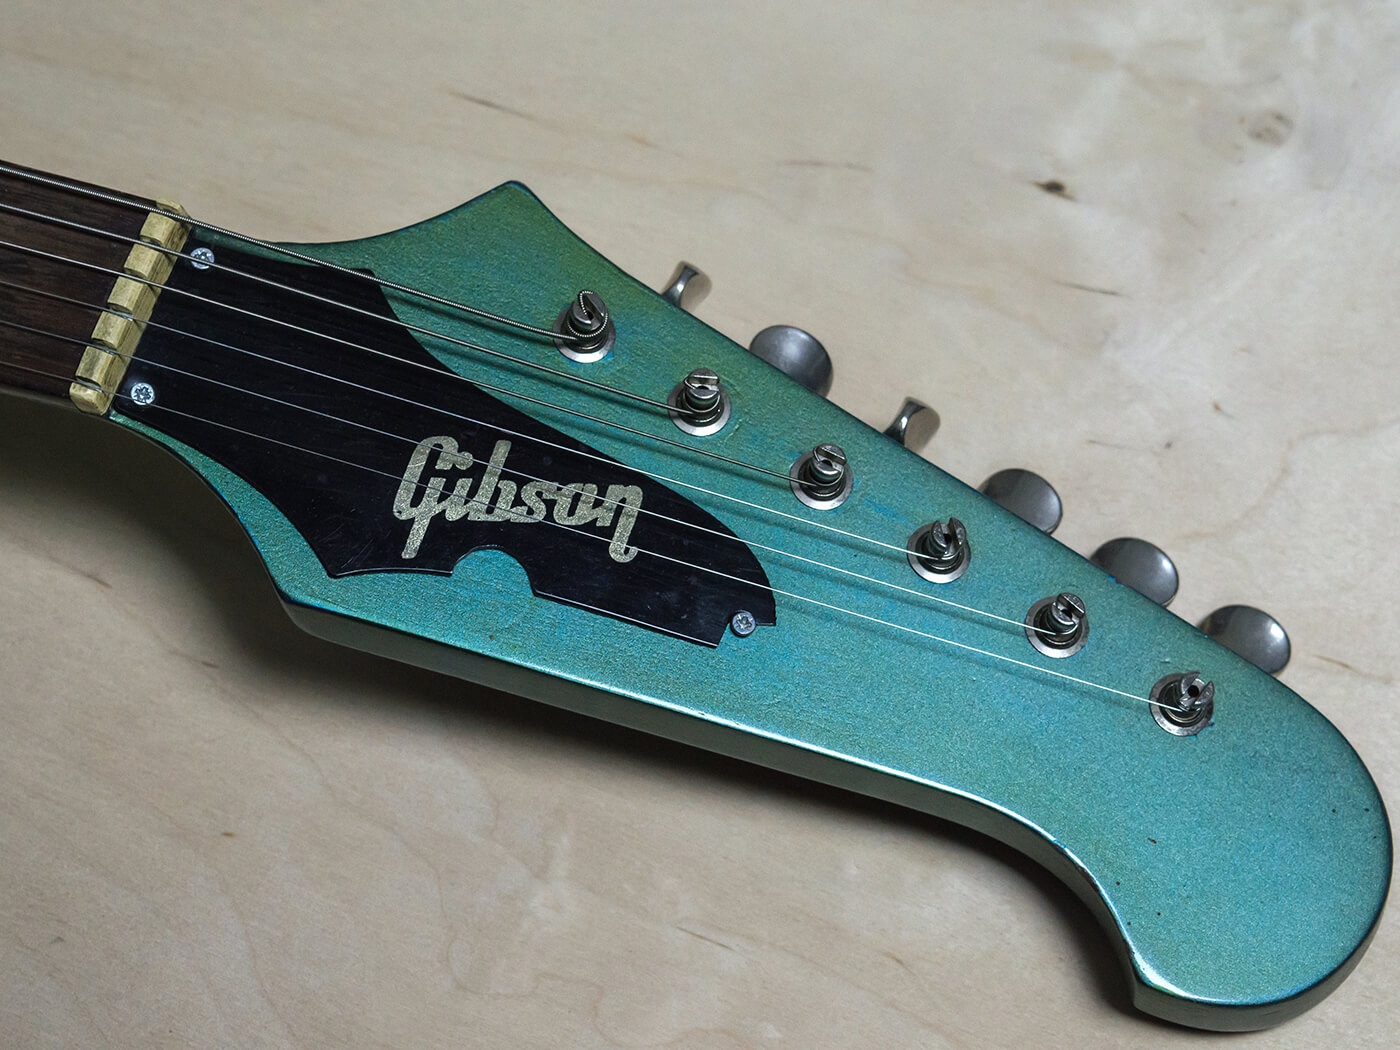
The strangest modifications can be seen on the headstock. This guitar would have left the factory with six plate-mounted Kluson tuners but the headstock was later drilled for a three-a-side arrangement. Judging by the size of the plugs, die-cast tuners were once fitted, but some semblance of the guitar’s original appearance has been restored with a set of six-in-line Kluson-style repros.
Flaking off the finish indicates that this guitar was originally a sunburst, but it’s now Pelham Blue. Well, sort of. Gibson’s Pelham Blue Poly – ‘poly’ meaning ‘metallic’ in 1960s Gibson custom-colour parlance, rather than being an abbreviation for polyester or polyurethane – was an acrylic paint that Gibson sprayed with clear nitrocellulose top coats. As the nitro aged and yellowed, Pelham Blue would develop a green hue.
When replicating vintage finishes, it’s common practice to spray tinted clear coats, but in this case, the guitar’s owner feels the previous refinish was overdone because it’s too green for his liking. In addition, the body surface wasn’t levelled properly and the thinly applied lacquer has sunk into the grain all over the body and neck.
Project plan
The main priority with this project is to respray the guitar in Pelham Blue and to make it look more like a factory finish. There will be some relic’ing too, but the intention is to keep the guitar looking blue rather than its current shade of green.
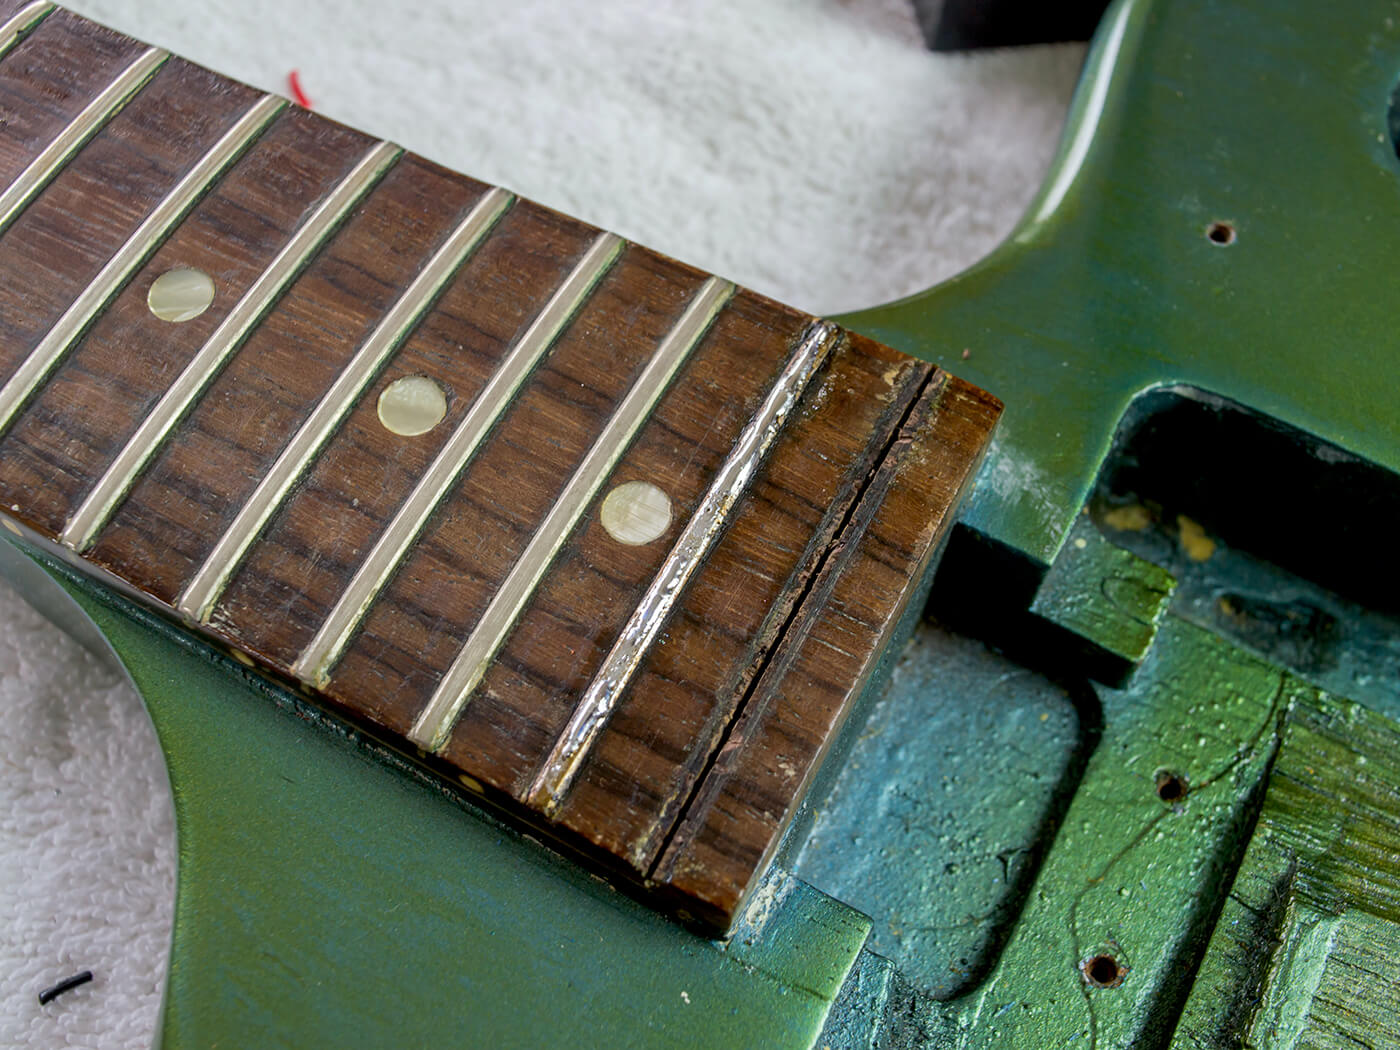
Given all the work that has been done over the years on this Firebird, it’s surprising that it has never been refretted. The factory frets are now too low for clean string bends and controlled vibrato, so I’ll be doing a refret using vintage-style wire. In the process, I’ll also be levelling the fretboard.
The current owner is understandably happy with the sonic performance of the Monty’s P-90s but I’ll be ageing the screws and covers to give them a vintage patina. The wiring is working perfectly, but I’ll source some vintage-style ceramic capacitors to make everything vintage-correct.
When the extra tuners were added, the truss-rod cover was cut to fit around the new tuner bushings, so I’ll have to come up with a way to rectify that. Of course, I’ll be reinstating a wraptail and getting into a bit of metal relic’ing too.
This isn’t going to be a no-compromise restoration. Instead I’ll be taking a more pragmatic approach, using a combination of vintage and repro parts with a view to enhancing playability and vintage vibe – but without breaking the bank.
Frets first
Refretting a guitar involves a lot of snipping and filing to bring the ends flush with the edges of the fretboard, and it’s almost impossible to achieve that without removing some of the finish. Since I’m going to be respraying this guitar, it makes sense to do the refret beforehand.
Having replaced the factory frets of several vintage Gibsons, I’m certain they were installed with hide glue. The glue doesn’t adhere to the fretwire, but it bonds to the wood on the sides of the fret slots and sets very hard to fill any gaps and hold the wire firmly. If you try to tug the frets straight out, you’ll most likely damage the fretboard.
The trick is to heat each fret with a soldering iron, and running some solder along the fret helps to transfer the heat. The glue softens quickly and begins bubbling out from under the fretwire, and pulling the fret when the glue is still soft ensures you’ll get a cleaner extraction.
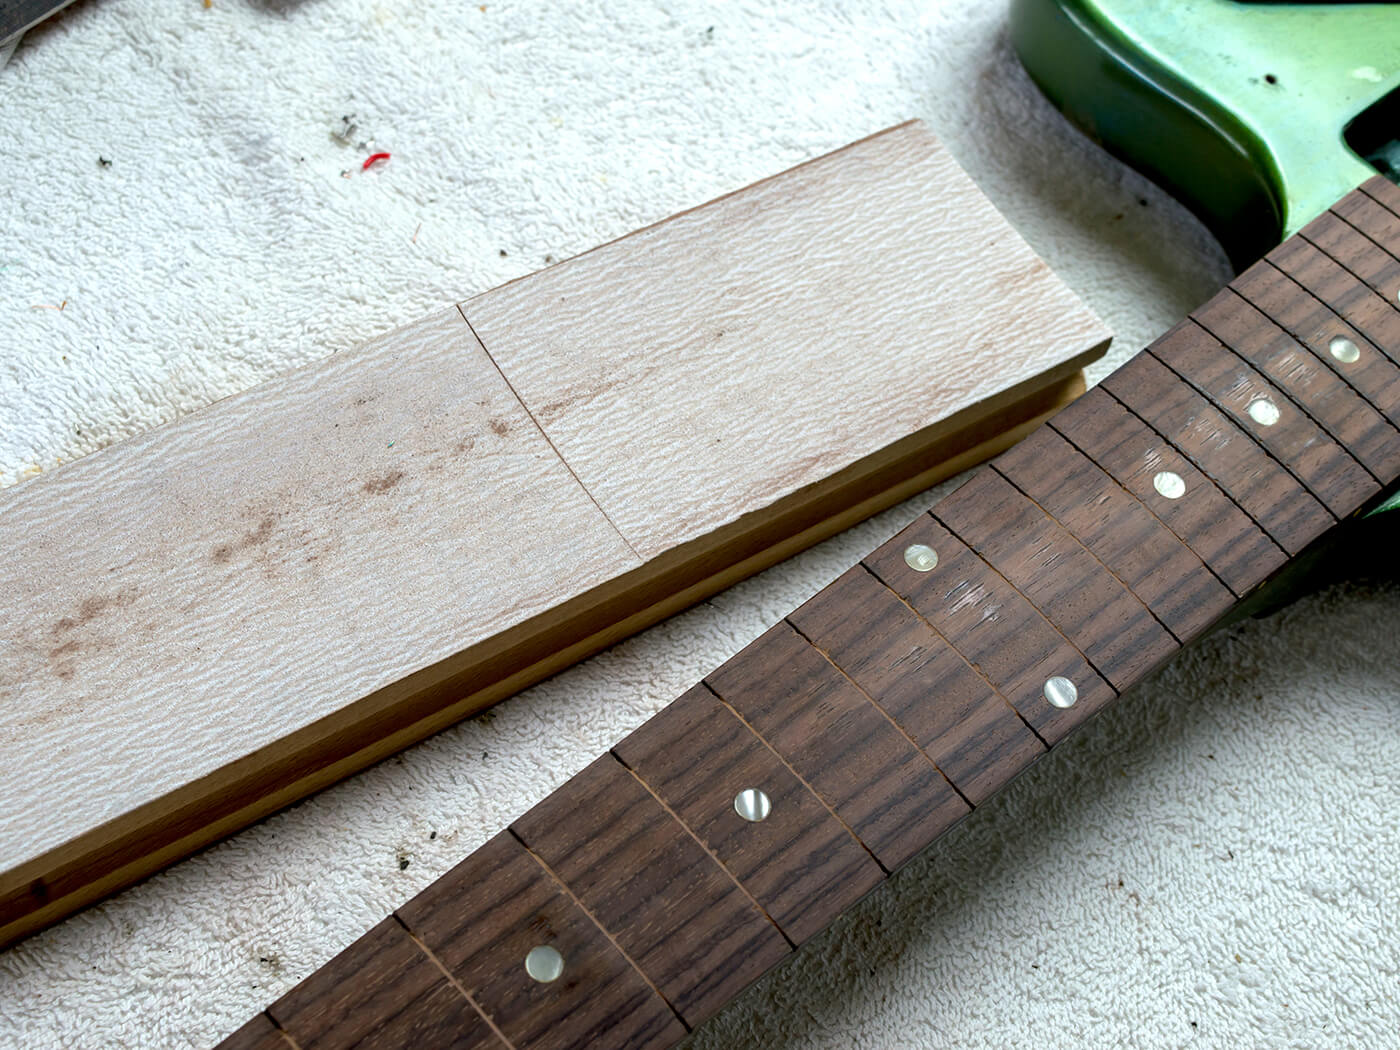
Once I have all the frets removed, a radius gauge determines that this fretboard has a 9.5-inch curve. After adjusting the truss-rod to make the neck as straight as possible, I remove the nut and then attach some 240-grit adhesive paper to a long radius block and level the ’board. I’m mostly concerned with getting the tops of the fret slots level and any low spots between the frets can be left alone because they do not adversely affect playability.
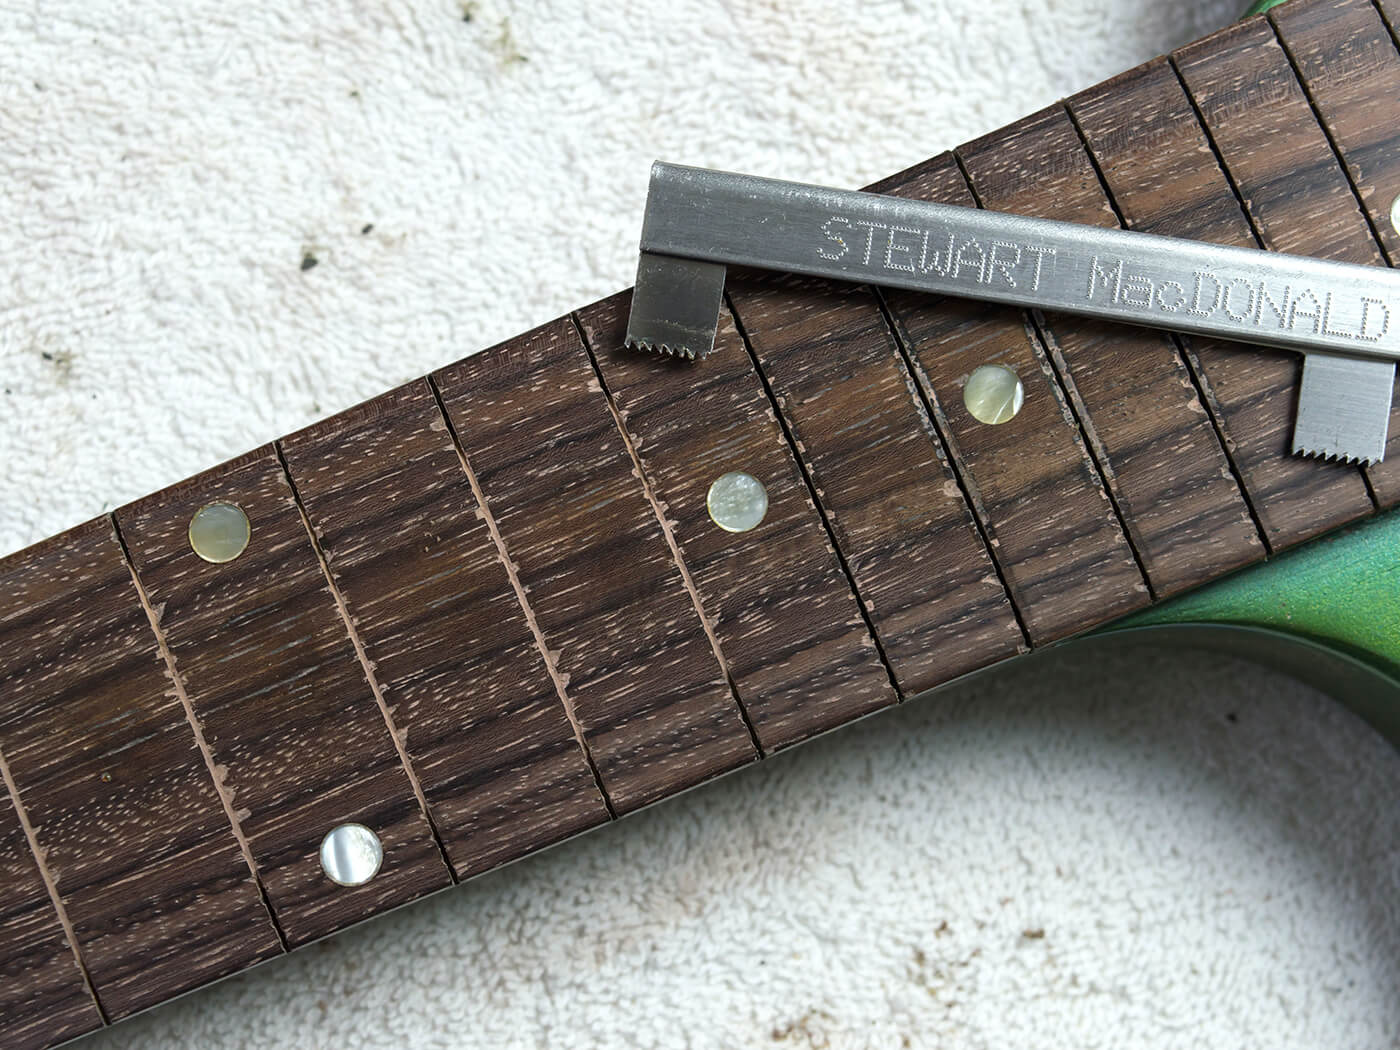
Once I’ve verified the fretboard is level using a straight edge, I lightly hand sand the ’board, working my way up from 400-grit paper to 8000-grit Micro-Mesh in order to give the rosewood a very smooth feel. By this point, the slots are packed with fresh sawdust and old glue residue. I used to clean slots out using a craft saw, but I now use a StewMac refret saw. The dust comes out quite easily and you can hear the crystalline glue crunching as it’s dislodged.
The owner has specified StewMac medium/medium fretwire (item #0148), which is very close to vintage Gibson spec. After wiping them with isopropyl alcohol to remove any oil and dirt, I run three 24-inch lengths through my fret-bending tool to match the ’board radius. Next, to help the fretwire seat flat on the ’board, I very slightly open up the tops of the fret slots using a triangular file.
These days, I tend to press frets into fretboards rather than hammer them in, and I often use a fretting caul attached to a large G-clamp. You can buy them quite cheaply and once you get used to using them, they’re very effective and easy to control.
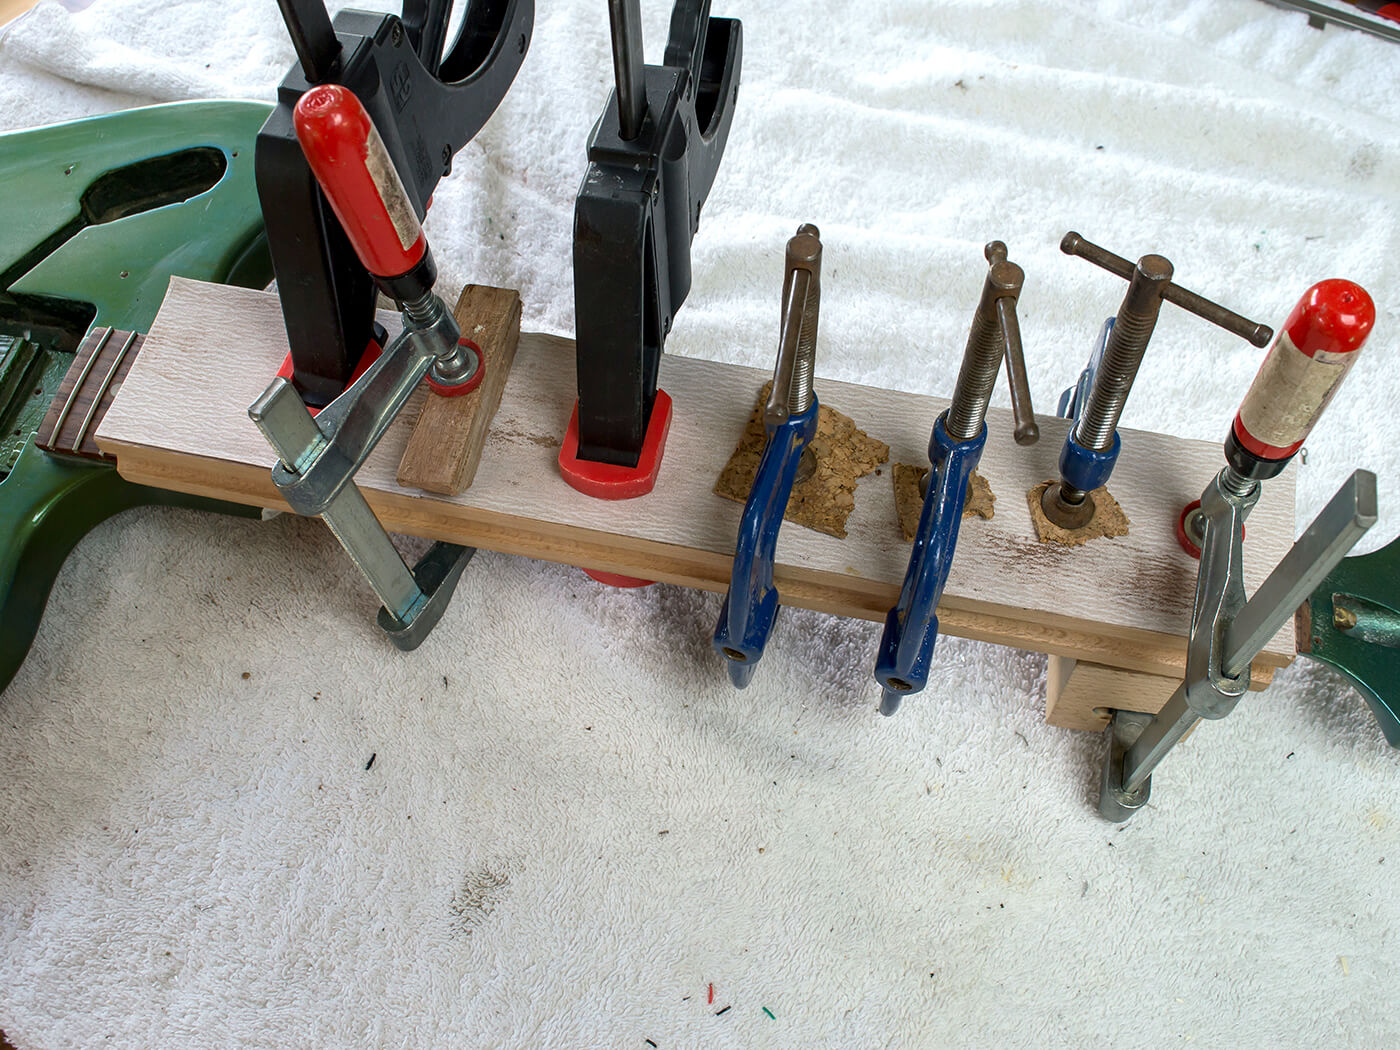
Before fitting each fret, I run fish glue into the slots. Fish glue behaves much like hide glue, but the advantage is that it stays liquid in the bottle and doesn’t need to be heated. The glue dries quite slowly, so I install half of the frets and then clamp them down using a 9.5-inch radius block. After the glue has set overnight, all the frets feel very solid in their slots.
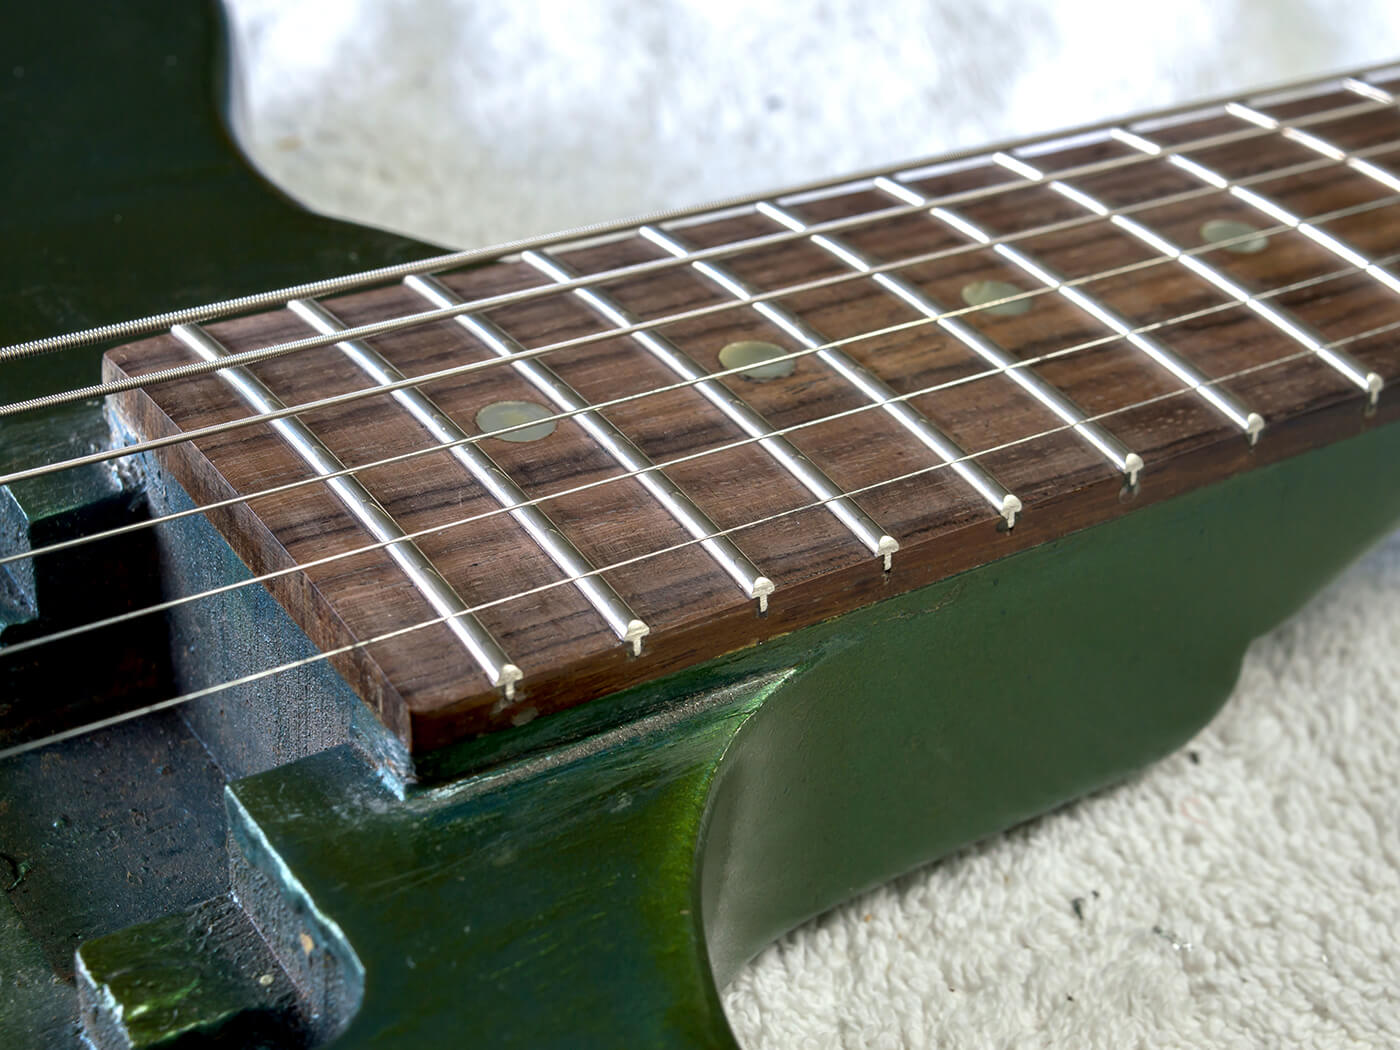
Once the process has been repeated for the remaining frets, I snip off the excess and file the ends using a fret-bevelling tool. Sighting down the neck, the new frets look perfectly level. I decide to shim the nut using some mahogany veneer and restring the guitar. After a truss-rod tweak and a quick setup, I’m delighted to discover that these frets won’t need to be levelled and crowned. I’m only able to get away with this because I took the time to level the fretboard first, and the fret wire was a perfect match for the vintage slots.
Over the bridge
After talking it over with the owner, we decide to sand the front of the body to determine the type of bridge that was originally fitted and thereby identify the model number. He wants to restore the guitar to original spec and his choice of bridge is dependent on the outcome. After spending an hour with an orbital sander and a flat sanding block, all is revealed.
This guitar originally had a wraptail bridge and I’m now confident that I’m restoring a 1965 Non-Reverse Firebird I. The bushing holes were filled expertly with mahogany plugs and whoever did it achieved a perfect fit and oriented the grain to match. Plugs of this sort usually show through the finish, but these were totally invisible. The same can’t be said for all the other holes, which were plugged with a different type of wood.
I’m going to be filling the current bridge bushing holes and drilling out the original bushing holes to reinstate a wraptail. But rather than fit a vintage ‘lightning bolt’ bridge, I’ll source a repro with plain-G compensation.
Righting the routing
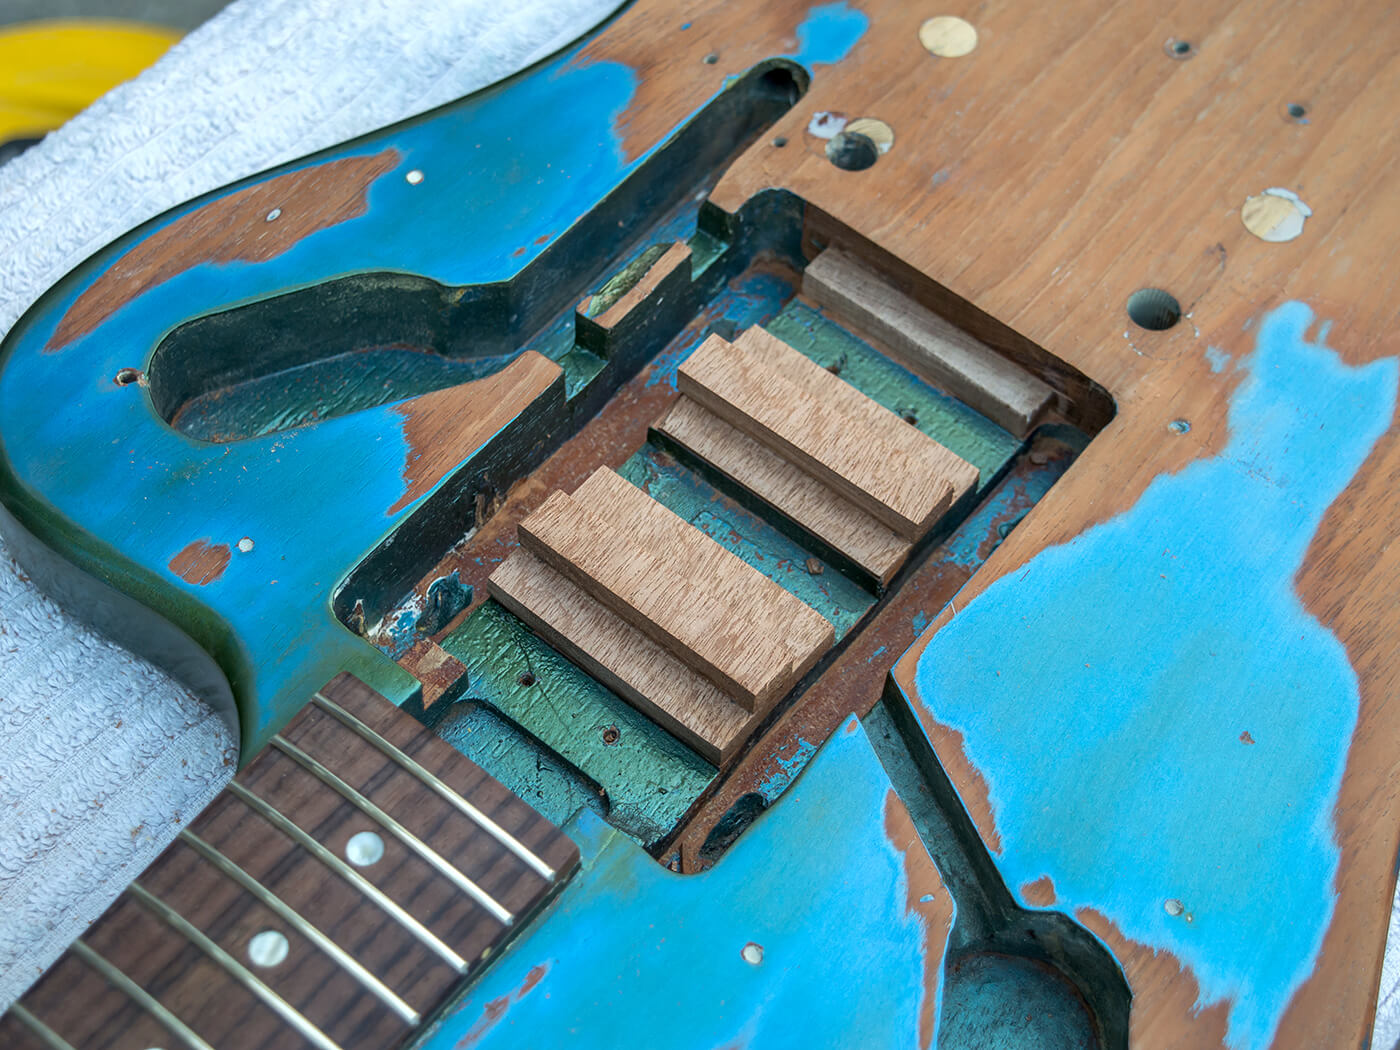
I mentioned earlier that the original stepped routing pattern in the pickup cavity was damaged to clear space for a pair of humbuckers. To finish up this part of the project, I decide to restore the original appearance in the hope that it will discourage anybody from fitting full-sized humbuckers ever again.
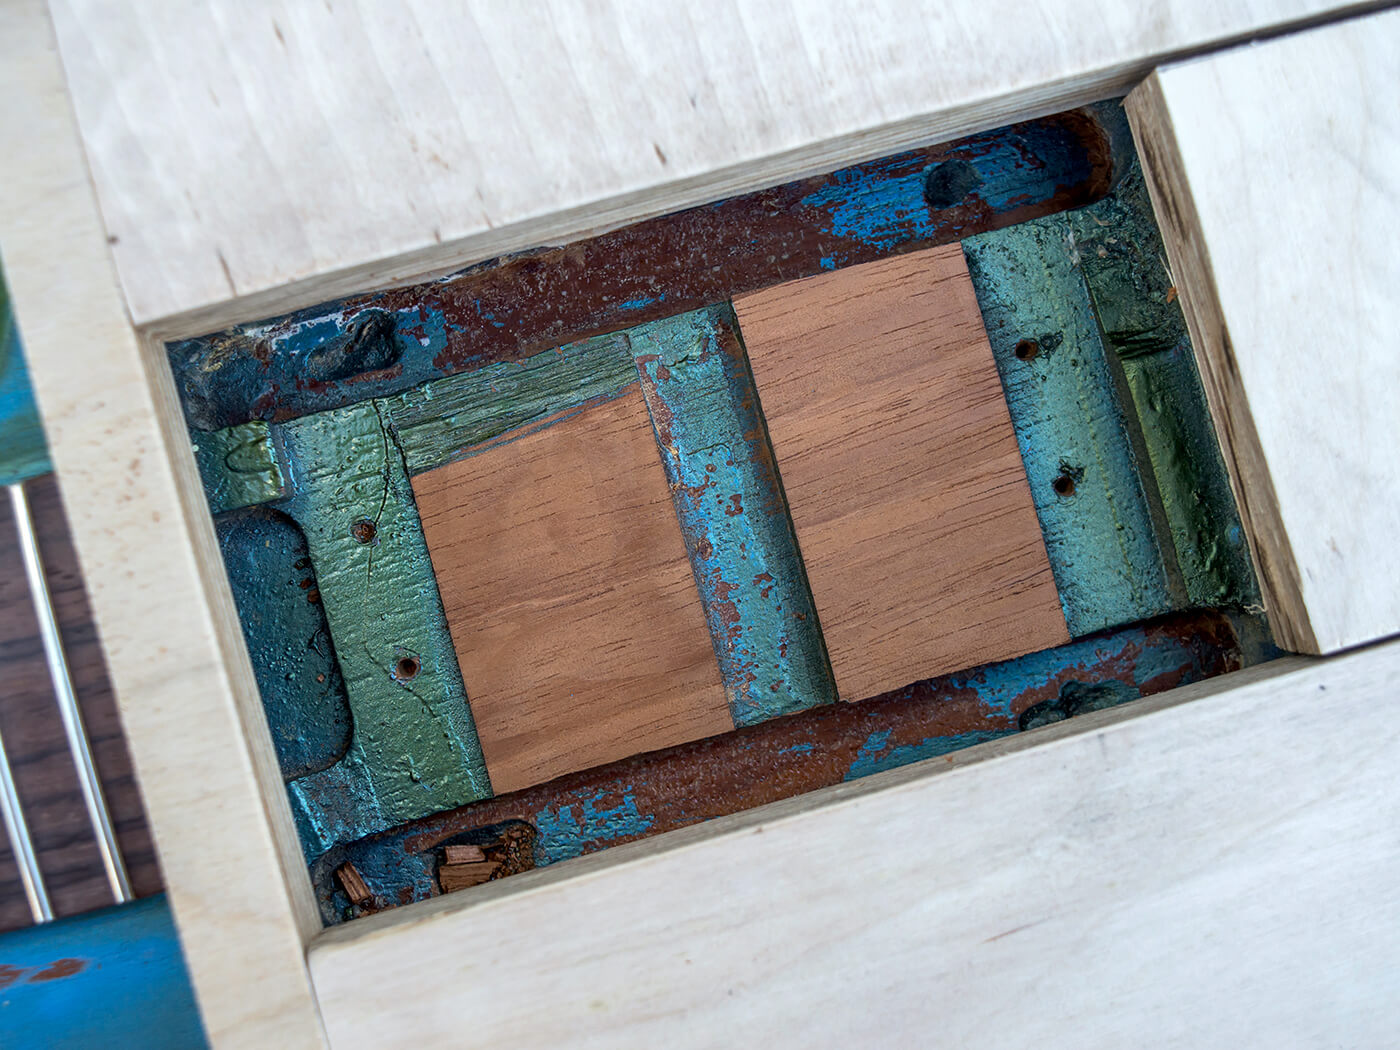
The guitar arrived with its P-90s bouncing around on springs but wherever possible, I prefer to mount soapbar P-90s on wood shims. Reinstating the platforms that the P-90s sit on is the only way to achieve this. The raised section on the bridge side has lost its upper step, but it’s otherwise intact. I’m able to use digital callipers to determine the original size and position of the missing section. The stepped areas on the neck side and the bridge edge of the cavity are more badly damaged, but the heights should be identical.
I use double-sided tape to stick plywood strips onto the body as a platform for my router, and I set the bit depth to skim the top of the bridge-side step – just enough to expose clean wood. The neck-side step and bridge step are skimmed almost level with the bottom of the cavity.
I cut mahogany blocks to size and glue onto the stumps of the original steps, and then I use my router to cut them to the correct height. Two thinner strips of mahogany are cut and glued onto the new steps and once levelled, everything looks as it should. Once the guitar is resprayed, the repairs should be invisible. We’ll revisit this project soon to document the respray, relic’ing and reassembly, so stay tuned.
For more DIY workshops and guides, click here