Related Tags
How to build your own pedalboard
If none of the pedalboards on the market float your boat, it’s fairly straightforward to make your own – and save a few pennies into the bargain. We put on our woodworking apron and safety goggles…

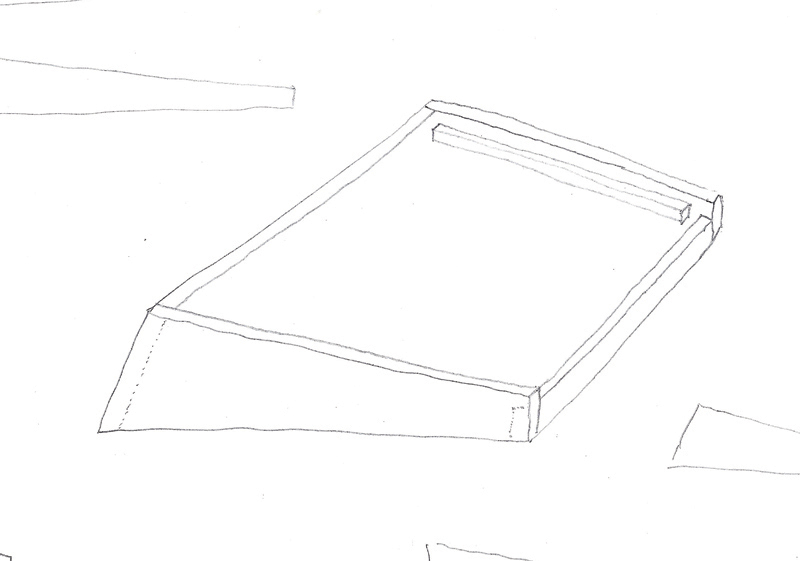
In this DIY workshop we take a look at building a small board from scratch. However, instead of following the ubiquitous Pedaltrain-type formula, we came up with a few of our own twists. The first priority for our design was to keep the power supply off the top of the board so it wouldn’t take up precious stompbox space. Secondly, we wanted to slant the board to provide easier access to all of the pedals and, thirdly, we wanted to make the system modular.
The thinking behind the modular approach was to build a small pedalboard frame with a fixed but accessible power supply and a removable top section. This would allow us to put together several boards for different styles of playing, that could be dropped into the frame and hooked up within a matter of minutes.
For instance, you could have a blues board with a wah, fuzz, overdrive and clean boost. Or what about a spaghetti western board with a Fuzzrite-style fuzz, delay, tremolo/vibrato and reverb?
Or how about a funk board with a wah, envelope filter, phaser and compressor?
The possibilities of the modular system are almost endless, and the advantages are that you won’t be obliged to carry around a massive board loaded with seldom-used pedals, or endure the hassle of stripping down and rebuilding your board every time you need a different set of effects.
What’s more, you’ll need to buy only one power supply, so you may be able to afford a really good one with properly regulated and electronically isolated outputs. Smaller boards with fewer pedals also mean shorter cable runs, which equates to better tone and lower noise levels.
Drawing board
Regardless of the time I spend planning out things in my mind, issues always come to light when I start sketching ideas. Regardless, this was intended to be a simple project, and it wasn’t too hard to figure out.
Drawing out your ideas always helps. You’ll usually pick up errors during the design stage, and you’ll be able to refine your ideas.
The rear panel had to be tall enough to accommodate the power supply unit and the front panel needed to be tall enough to provide sufficient gluing surface area to bond with the sides. I also wanted the rear panel to slant, in order for it to form a right angle with the top panel so the power supply outlets would sit flush with the surface.
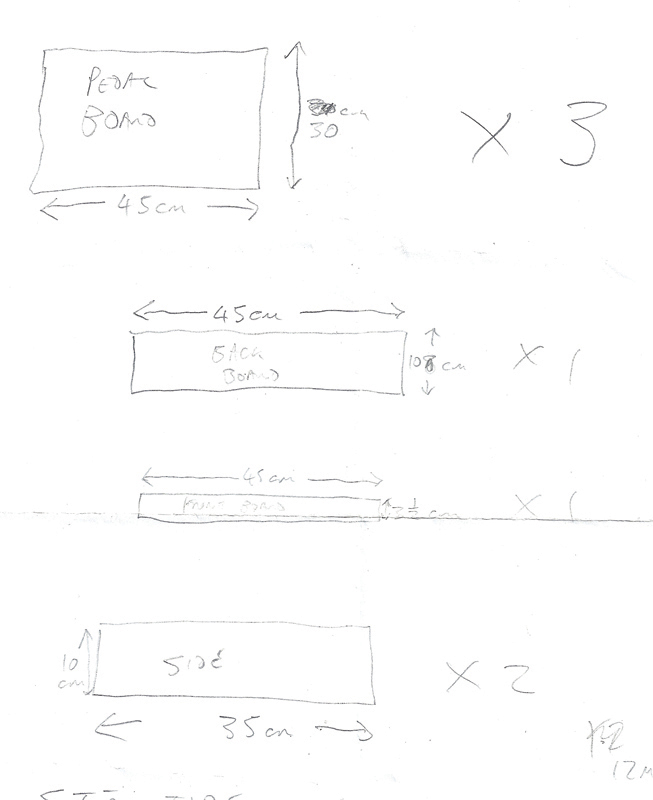
Once you have decided on your design, take a diagram with all the dimensions to the DIY shop.
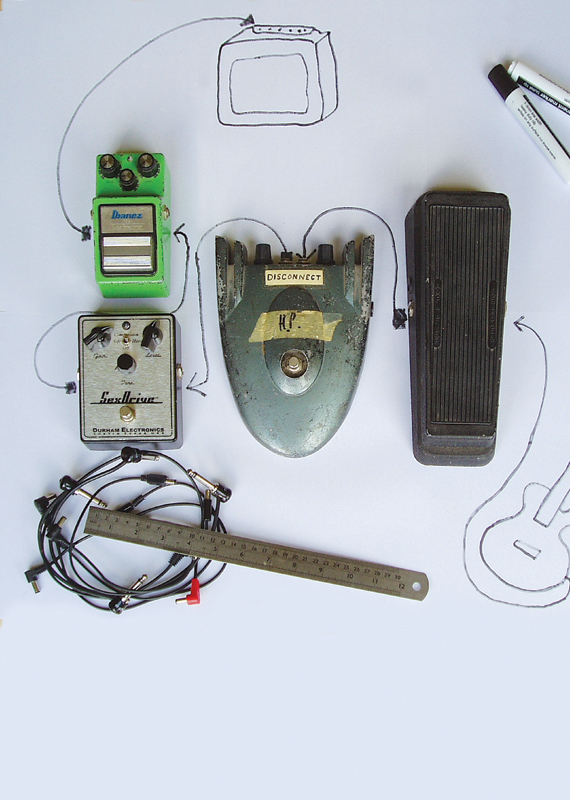
The best way to decide on the dimensions of the board itself is to place the pedals you intend using onto a large sheet of white paper and arrange them into an order you’re happy with. You can trace around the pedals themselves and draw in the interconnects to figure out the cable lengths you’ll need. Arranging your pedals will also help you to determine the shape and size of the board.
Listing the parts
Another benefit of going through a proper design process is that you will be able to draw up a comprehensive parts list. I made every effort to come up with a design that could be built with readily available materials, and it’s always preferable to get everything you need in a single trip.
You could use MDF, plywood or hardwood to construct the frame, but I decided to cut up a pine shelf I had laying around. Pine isn’t the strongest material, but it seems to last well enough in old Fender amps, and it has the advantage of being light.
For the board itself, I was lucky to find some MDF offcuts in B&Q. Most DIY outlets offering wood cutting services have a selection of offcuts, so it always pays to look around. I was able to buy enough MDF to make four boards for just £4. I also bought some planed 25mm square baton to make supports for the board.
Laying everything out is another useful procedure.
The design called for bolts and captive nuts to secure the boards to the frame, and to keep things neat, I went for countersink heads with cup washers.
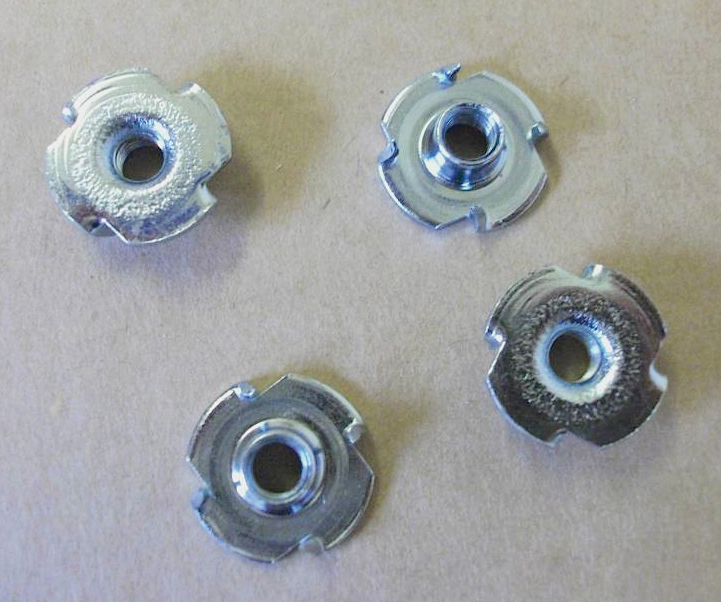
Captive nuts have spikes on the bottom to hold them in place. Drill holes in your support batons to accommodate the captive nuts and tap them into place. You might find a dab of epoxy glue will help to keep them fixed.
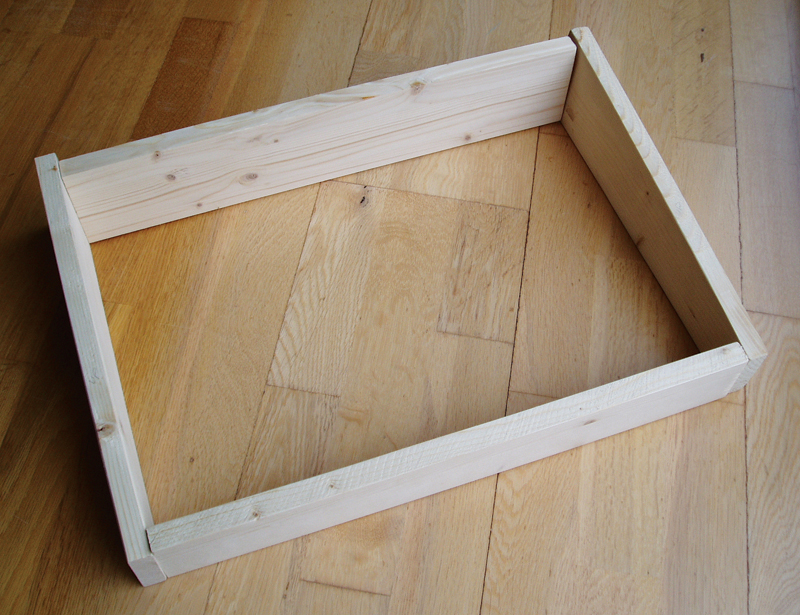
Constructing the frame
Before I got onto the fun stuff, I had to go through the laborious process of cutting the pine to the correct shape and size. I drew the lines onto the wood with a pencil, then cut it with a regular handsaw. Fortunately, pine is easy to cut, especially if you remember to draw the saw teeth over a wax candle from time to time.
With the boards cut out, the fun is about to start.
The whole process took me about 30 minutes, but it you’re fortunate enough to own a band saw you’ll be a lot faster and the edges will be neater. To tidy things up, I clamped the sides together in my workbench and trued the edges with a jackplane.
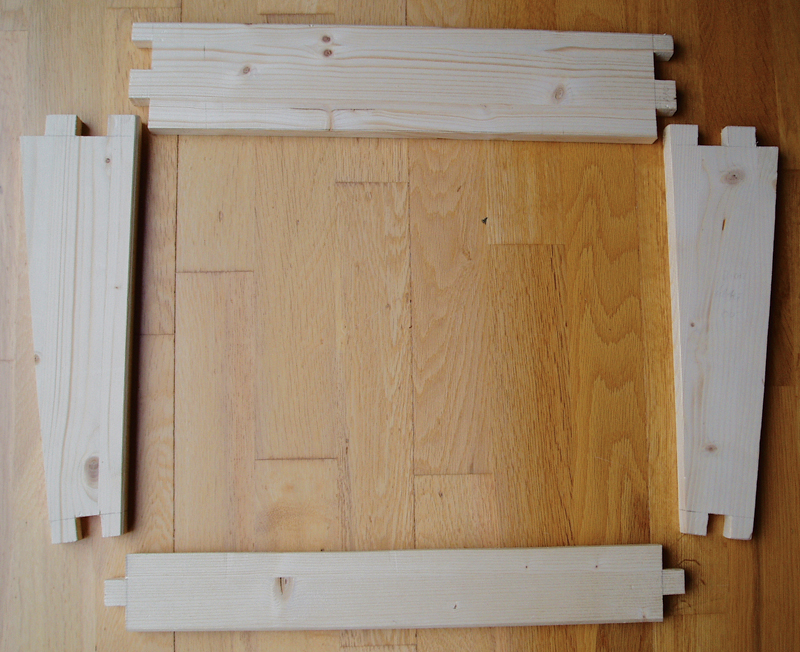
Box joints are quite easy to cut and provide extra surface area for the glue. This adds strength and also helps to achieve properly square corners.
The most crucial thing is to end up with properly square corner joints once your frame is glued up. For this project, I decided to use simple box joints to maximise the surface area for the glue, but you could use square batons instead. To make the cut-outs, I sawed down into the wood then used a chisel to notch them out.
With the joints cut, it’s always a good idea to do a dry assembly before using glue. If there are any issues, it’s best to find out about them before they’re irreversible.
Make sure you do a dry assembly to ensure everything fits and lines up properly before you apply any glue. I was pleasantly surprised that my frame ended up with very square corners without having to jiggle things around. For this project, regular PVA wood glue should be fine. I used Titebond Original because it has a fair amount of ‘open time’, when you can still make adjustments. It also sets rock-hard and has never let me down.
Titebond sticks to wood but not plastic, so I cut some short lengths of square baton and wrapped them in packing tape to help with clamping. Working on one corner at a time, I applied the glue to all of the mating surfaces and spread it out evenly before putting the pieces together.
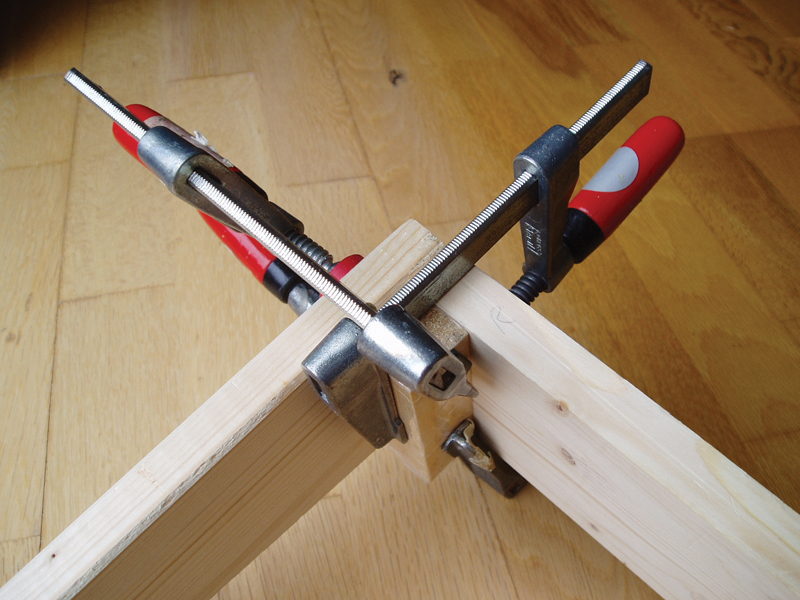
A short length of baton helps to keep the joints square while the glue sets. Wrapping the batons with plastic tape also ensures they won’t stick to the frame.
If you have made fairly tight box joints, the glue might make it harder to get everything nice and snug. So keep a soft mallet handy to tap the pieces into position. After checking the angle with a set square, I pushed a piece of plastic-covered baton into the inside corner and used three G clamps to hold everything together while I waited for the glue to dry.
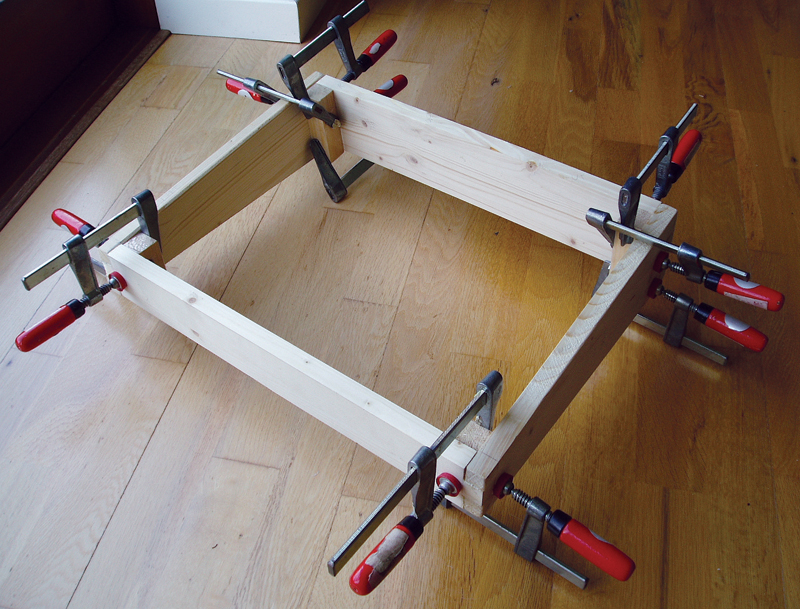
Immediately everything is glued and clamped, you should check all the corners for squareness and make adjustments while you still can. Once you’re happy, leave the glue to set for a few hours – preferably overnight.
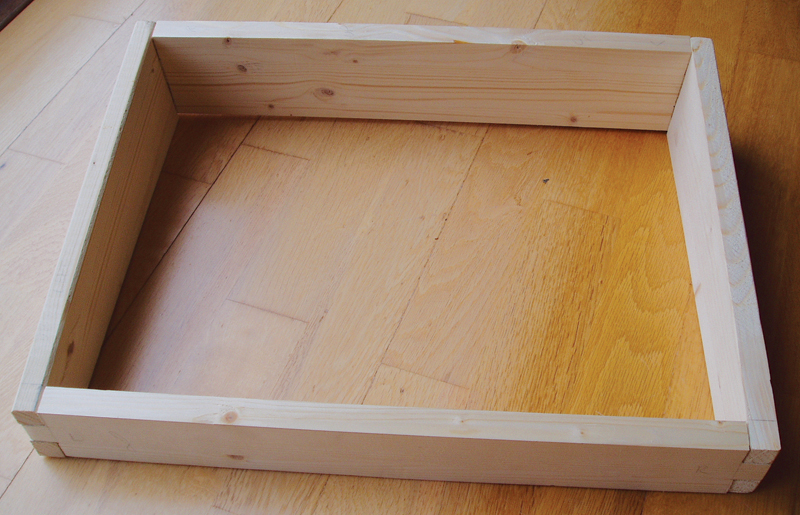
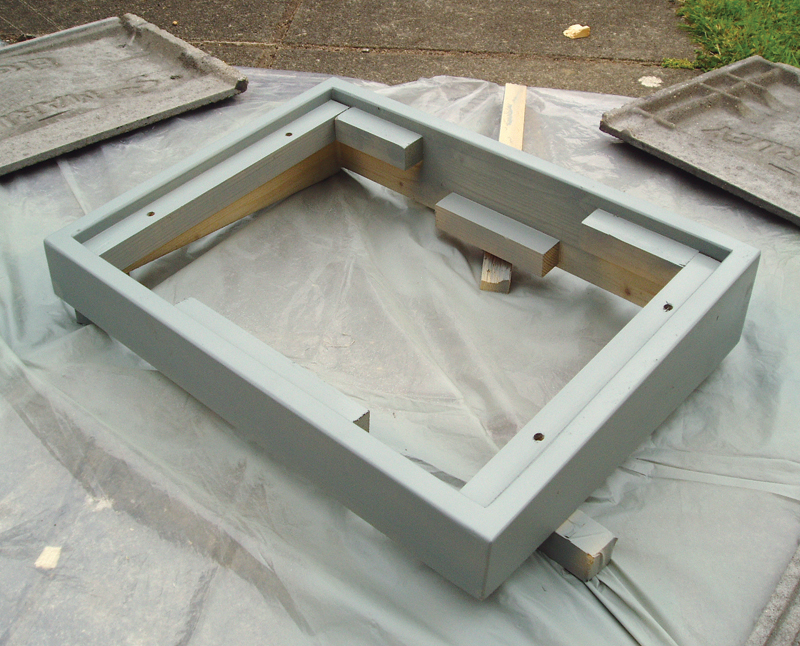
I left the frame clamped up overnight, and was pleased with the outcome. However, there were more than a few gaps and imperfections. Don’t worry if, like me, joinery isn’t your forte, because filler is your friend. Two pack wood filler is much like car filler, and comes in a tin with a tube of hardener that has to be mixed into the filler paste. It can fill any gaps, it dries quickly and sands easily, too. Once painted, you’ll never know it’s there.
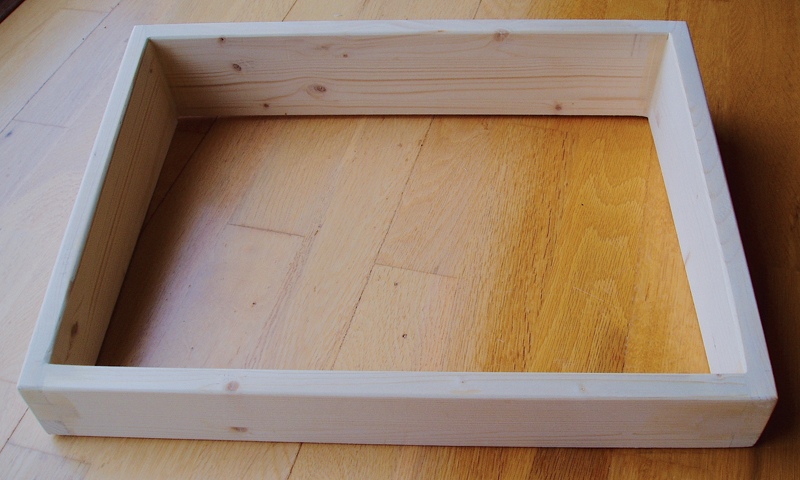
With the clamps removed, you can use two pack wood filler on any gaps and imperfections. Once the filler is sanded, your pedalboard frame should look something like this.
Adding support
The plan was to cover the top boards with carpet tiles and drop them into the frame, so I had to glue lengths of baton onto the inside edges of the frame to support the board. The batons also had to be glued at a depth that would allow the top of the carpet tile to be level with the top edges of the frame.
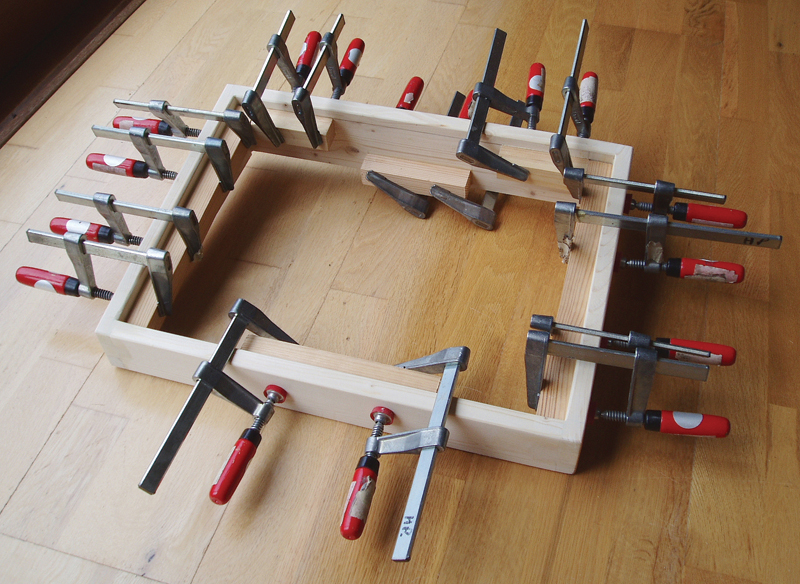
All the support batons can be glued at once. For stage use, it might be a wise precaution to use screws as well as glue. Or maybe run some bolts through the frame and the batons.
All that was needed was to mark out the gluing lines. But before attaching the side batons, I had to drill four bolt holes and press captive nuts into the underside of the batons. Notice how I left enough space on the back panel for the power supply and fixed another piece of baton towards the bottom of the panel for the power supply to rest on.
Applying the finish
When you’re painting over an imperfect surface, it also helps to use textured paint with a matt finish. For this project, I decided to try a textured stone effect finish. Available in aerosols, you can buy this type of finish in most DIY and craft supply outlets. Since I was also painting over bare wood, I first sprayed some all-surface primer. It helps to use a primer that’s a close colour match to your chosen top coat.
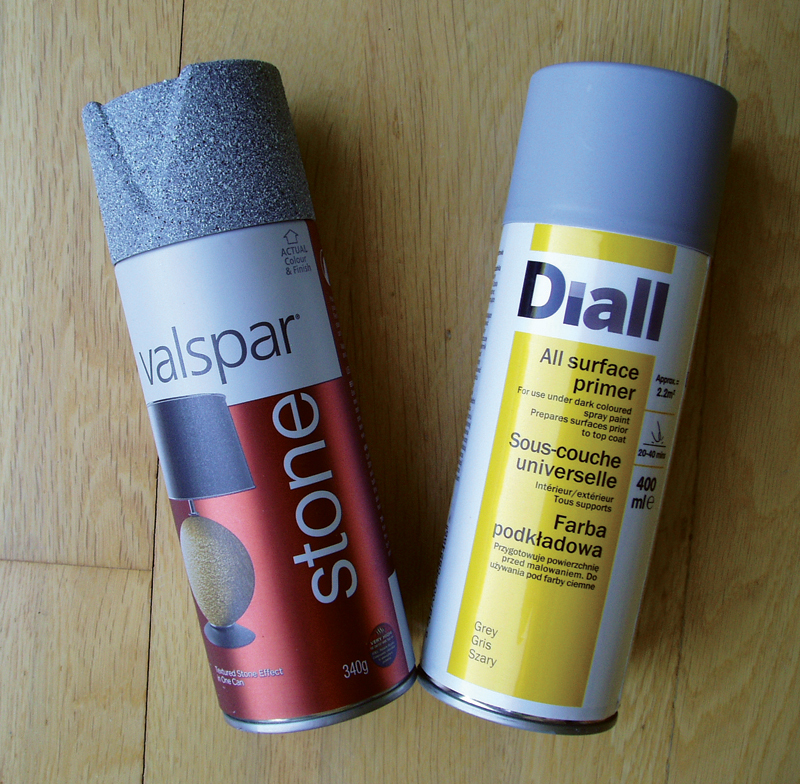
The stone effect paint wasn’t cheap, but the textured surface looks really good and masks any irregularities. Make sure you use a primer that’s a decent colour match for your top coat.
This was nothing like painting a guitar. I simply laid down a large sheet of polythene in my back yard, weighted down the corners and gave the frame a blast. The stone effect went on better than
I expected and made the frame look as if it had been moulded from concrete, but it took a few days before it felt completely dry, and it’s too soon as I write this to comment on its durability.
Spraying is best done outdoors, but make sure you protect areas where you don’t want the paint to go.
Powering up
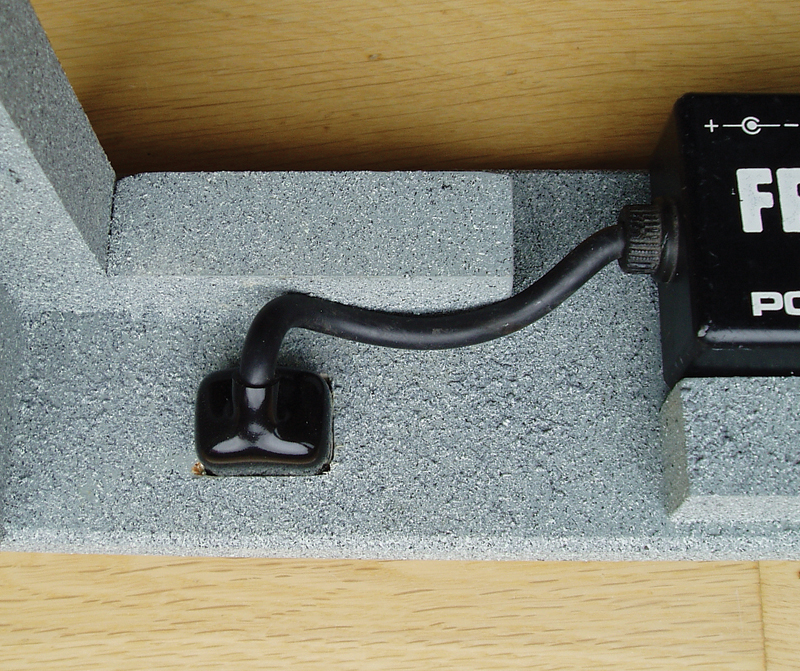
Exposed connections guarantee that you will experience an electric shock at some point, so make sure you buy an insulating cover for your IEC socket. This one is wedged into place in a very tight hole on the back panel of the pedalboard. You can also use cable ties to hold the cover in position.
I certainly didn’t want a mains cable dangling out of the back, so I decided to install an IEC socket. Remember, safety is more important than looking good, so you need to buy an insulation cover along with the IEC socket to ensure no metal parts are exposed. I bought mine from Maplin (see parts list for details).

Here’s the IEC mains socket from the outside.
I cut the cable coming from the power supply to the shortest possible length and pushed it through the hole I cut for the IEC socket in the back panel. The cover was pushed over the cable, and once the wires were soldered to the socket I pulled the cover over the back of the socket.
The trick was to make the IEC cut-out a very tight fit. I was able to get the socket started into the cut-out, then I used a soft mallet to tap it gently into place. The cover ended up wedged firmly between the socket and the wood, and two self tapping screws were used to fix the socket in position.
Shaping the boards
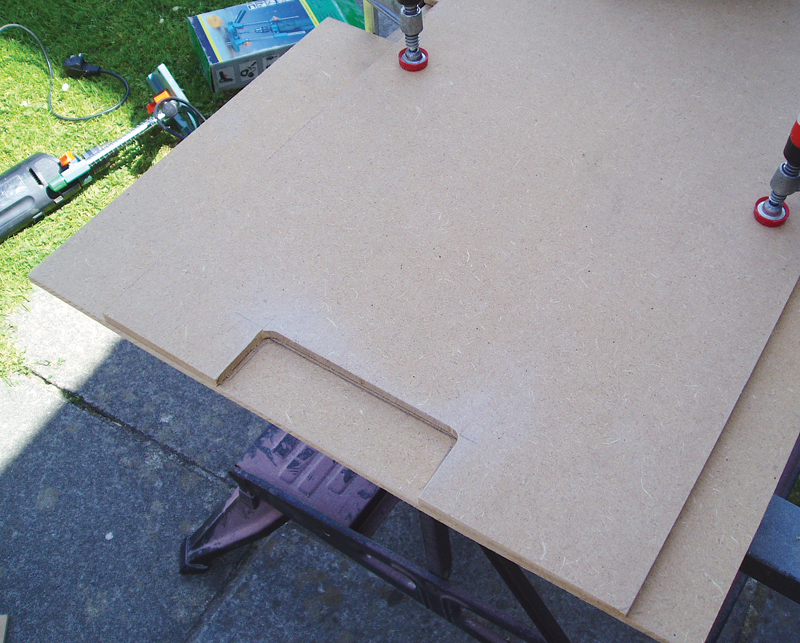
We wanted to make the cut-outs in the pedalboards as neat as possible, so we made a router template from a scrap piece of MDF to use with a bearing bit. It took a little extra time, but we think the end result is worth it. Be very careful when working with routers, though.
Cutting the boards required nothing more than marking the lines directly onto the MDF, cutting them out with a hand saw and cleaning up the edges with sandpaper. However, I did make a routing template to ensure the power supply cut-outs would be as neat as possible.
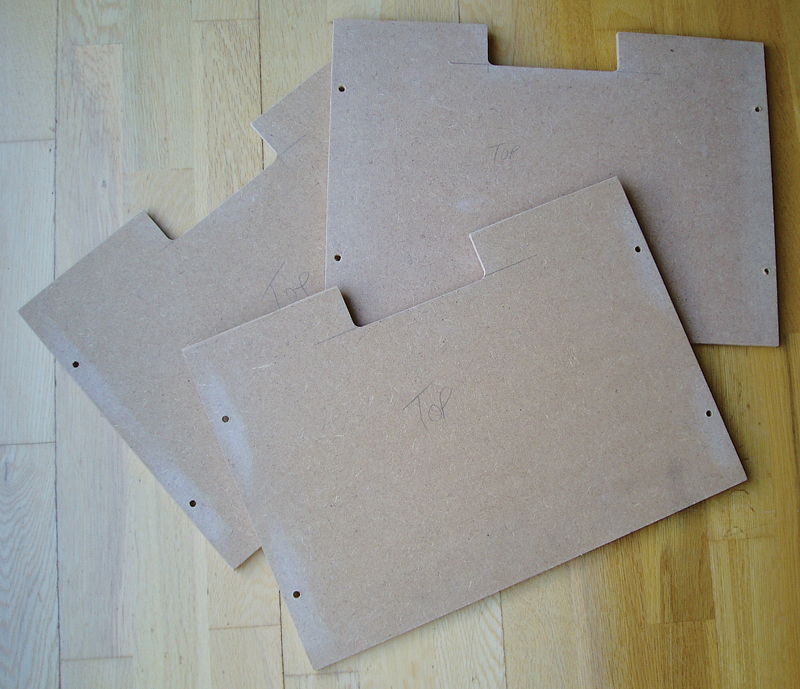
Here are the three boards we made, with cut-outs for the power supply and two holes for the fixing bolts on each side.
Once I was done with the routing, I dropped each board into the frame, clamped it in position and drilled through from the back, using the captive nuts to guide the bits. With the bolt holes marked out, I then used a larger bit to increase the diameter.
I had chosen dark grey carpet tiles, so I decided to spray the edges of the boards black. Before attaching the carpet, it had to be cut to size. I laid each board over the back of a tile and cut around it with a Stanley knife. When you do this, be careful with your fingers!
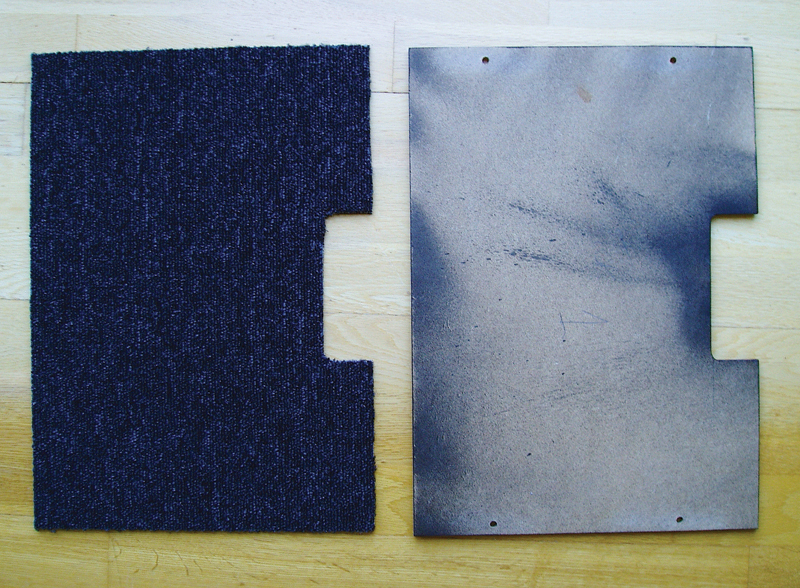
This piece of carpet has been cut to size and is ready to be glued to the MDF board. Notice how we sprayed the edges of the top board black before fixing the carpet tile.
To fix the carpet, you could use carpet tape, but I preferred contact adhesive – and the stuff in aerosols makes the job easy. A soldering iron does a fine job of punching out the bolt holes in the carpet tile, and it has the added benefit of melting the edges to prevent fraying. In fact, you can run the iron along the cut edges of the tile to melt any straggly bits, but do it outside because the smell is dreadful.
Verdict
All that remained was to bolt down one of the boards and load up some pedals. This design worked out pretty well, but there are some refinements that could be made, depending on your requirements.
For instance, you could split the top board, which would enable you to leave certain pedals permanently installed while you swap others. These could include a tuner, an AB switch, a wah or your number one overdrive. Since the board is so small and cheap to build, you could even make two of them and use them side by side or angled for convenience. Without pedals attached, the frame weighs only 2.5Kg, and swapping over the boards takes about two and a half minutes – so long as you use a powered screwdriver. Costs will depend on whether you have any spare wood, but even if you have to buy everything your outlay shouldn’t exceed £40. Good luck, and please send us pictures if you give this project a go.
Kit List
- IEC socket Maplin code: HL15R
- IEC socket insulation cover Maplin code: JK66W
- Timber, paint, bolts and carpet tiles any decent DIY outlet or timber merchants