Related Tags
DIY Workshop: Easy pickup mods anyone can try, part two
After covering humbucker and P-90 mods last time around, this time we take a look at how you can improve the tone of classic Fender and Gretsch-style pickups.
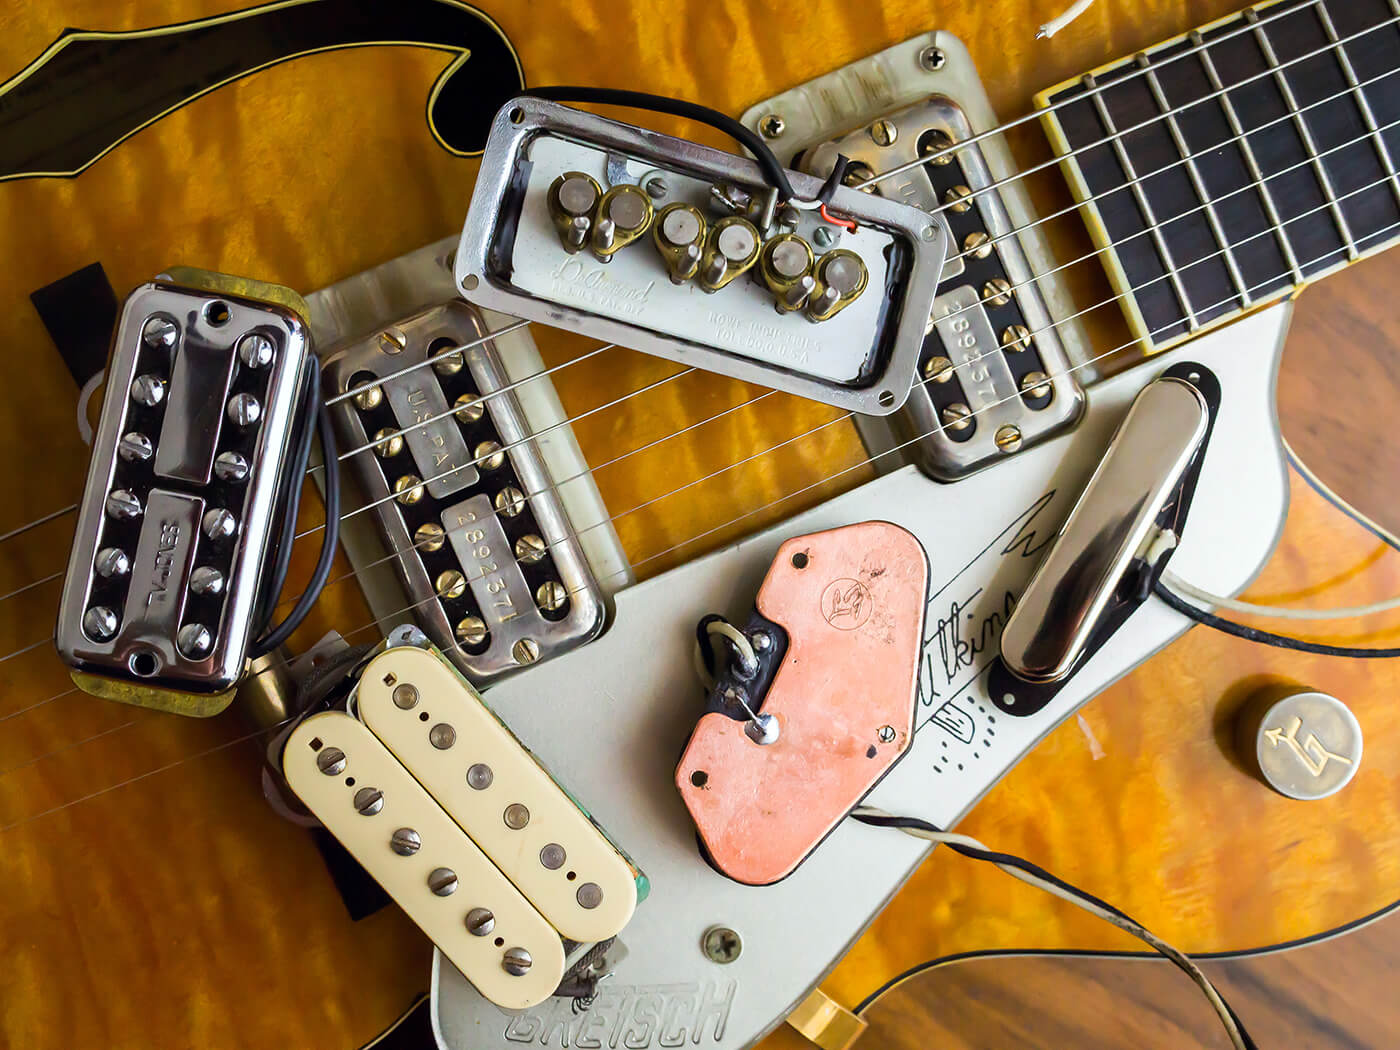
The modular construction of P-90s and PAF-style humbuckers makes it easy to dismantle them and experiment with different parts. Filter’Trons are much the same, and the magnet and screw swaps I covered in the previous instalment will work with them too. Just make sure to get the correct fillister-head screws and larger Filter’Tron magnet.
The scope for modifying Fender single-coils and DeArmond Dynasonics is more limited, but there are still a few neat tricks that will change their tone and overcome some of the problems players encounter. First though, there’s one more humbucker mod that we didn’t have room for last time.
Rewired for sound
Many humbucker fans enjoy coil splitting, tapping and phase switching but you can’t do it with vintage-style humbuckers that have traditional braided wire. Conversely, some players who have humbucker-loaded guitars featuring a bunch of trick wiring options that they neither want nor need may prefer to swap to vintage-style wiring.
Rewiring your humbuckers is a lot cheaper than replacing them. The cover must be removed first – which I described in part one – so, let’s begin with four-conductor wiring.
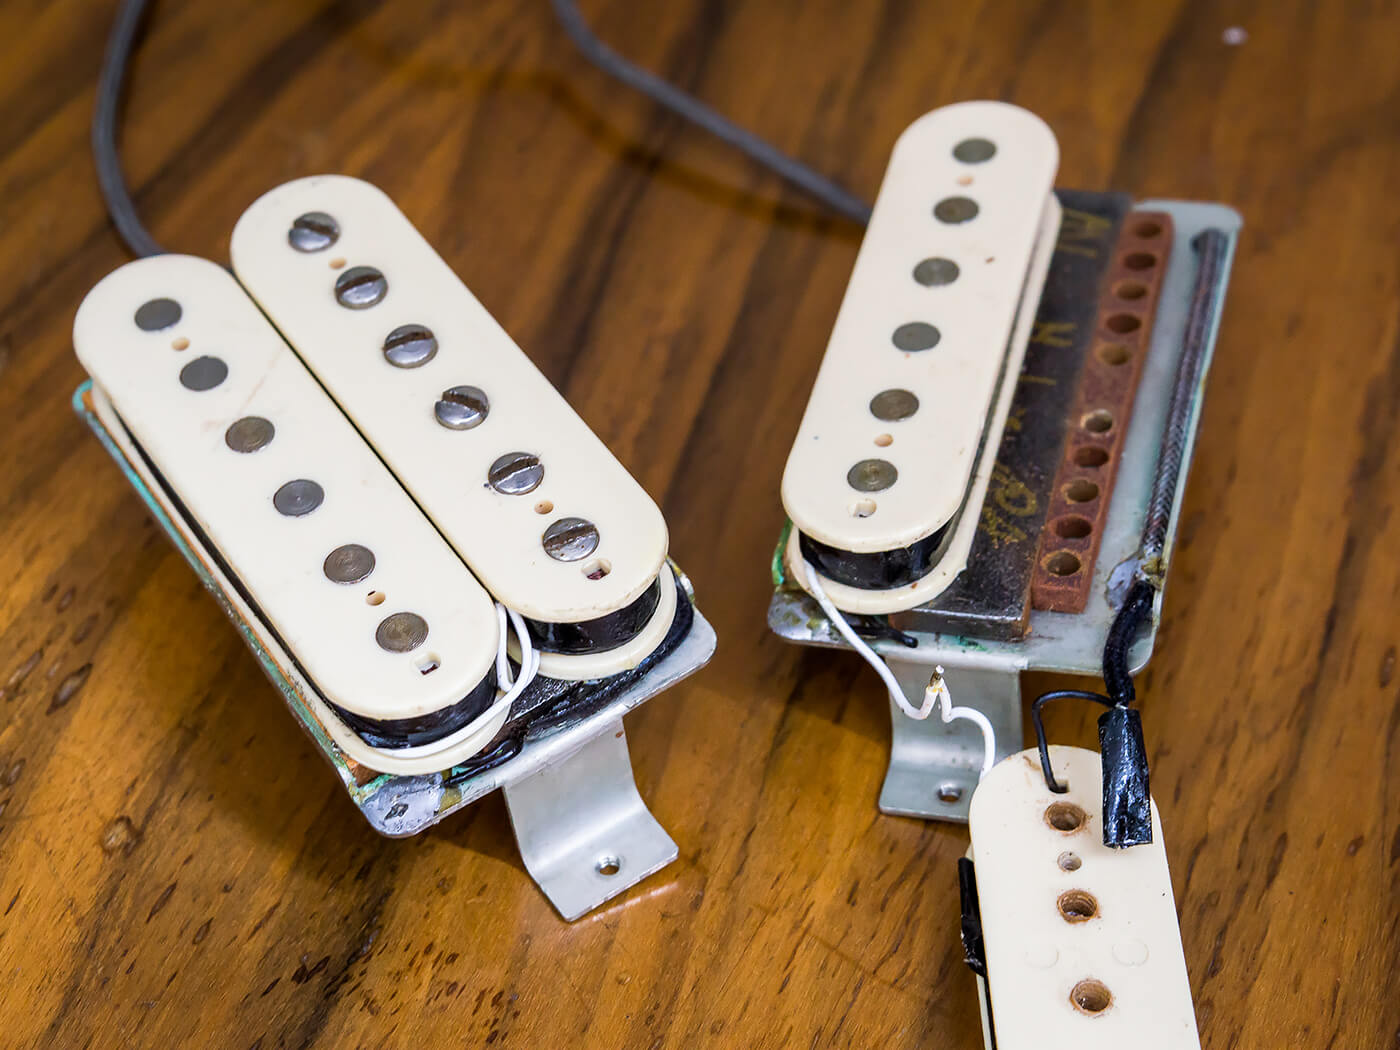
The wrapping tape has to be removed at one end to expose the coil wires and you should be able to see two wires for each coil. One wire of the screw coil will be soldered to the centre conductor of the braided wire and one wire of the slug coil will be soldered to ground – probably to the baseplate itself. The other two wires – the coil finish wires – are joined together and should be tucked in between the two bobbins.
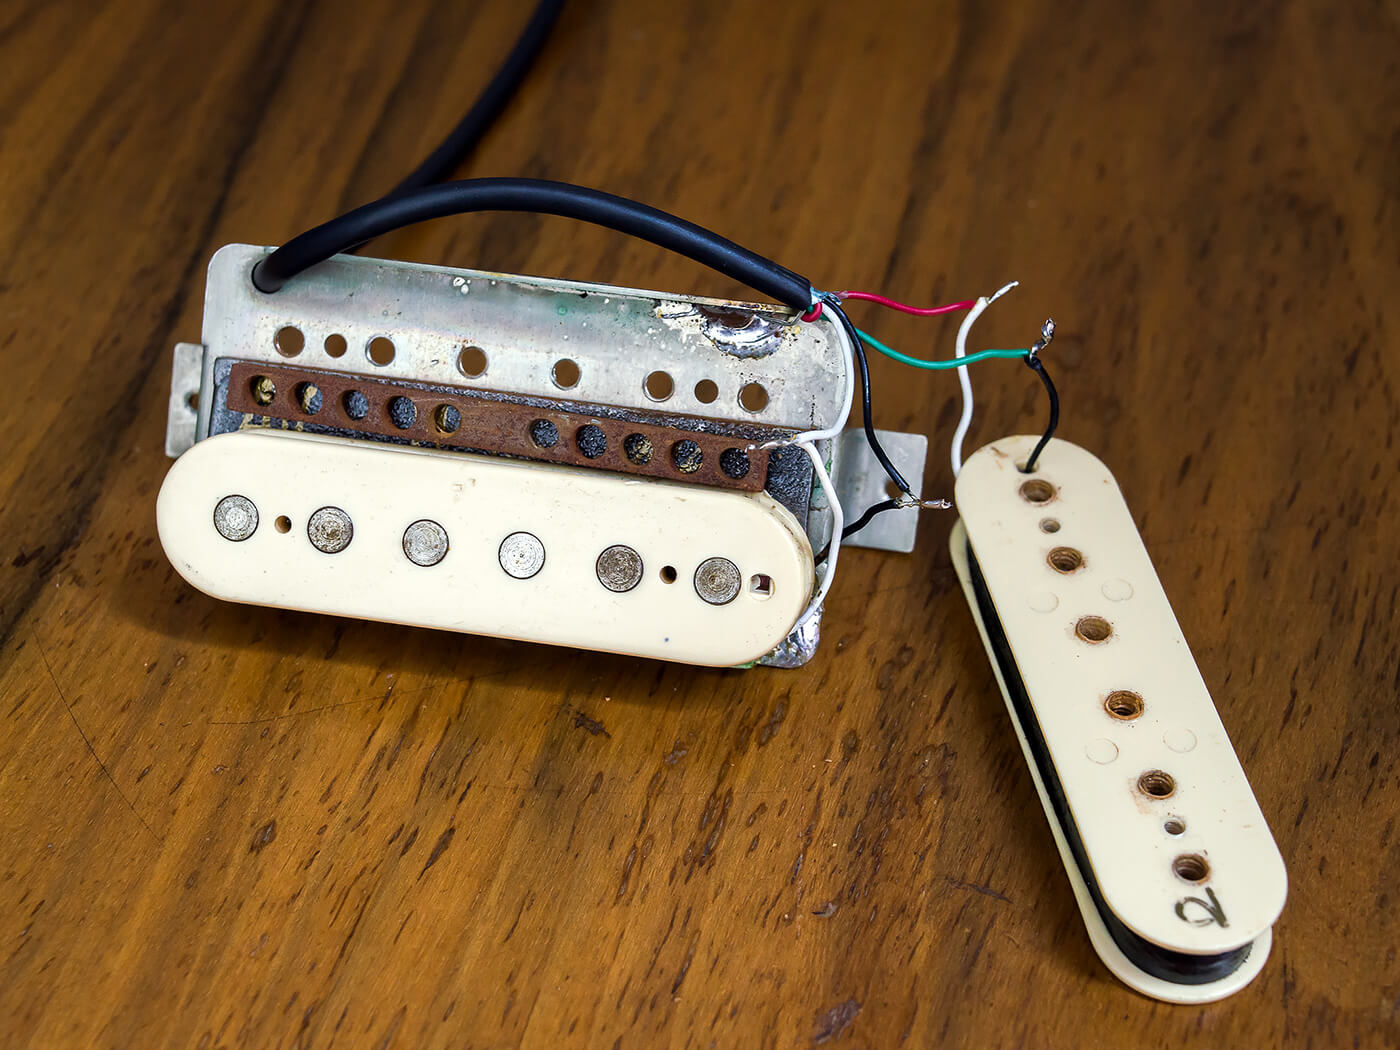
Unsolder all the wires and remove the screw coil from the assembly by taking out the two bobbin screws and retracting the pole screws if necessary. The braiding will be soldered to the baseplate, so that needs to be unsoldered too. When you strip the insulation and screen from the four-conductor wire, you’ll find a twisted bare wire in addition to the black, white, red and green.
Push the new wire through the hole in the baseplate then solder the bare wire to the baseplate and re-attach the loose bobbin. Each of the coloured wires is then soldered to the pickup coil wires and I suggest you search for a pickup colour-code chart. All the manufacturers do it differently, but since Seymour Duncan provides numerous high-quality wiring diagrams, consider following their colour code.
With the connections soldered and insulated with plastic tape, tuck the wires under or between the bobbins and wrap some pickup or insulation tape around them to hold everything in place before reattaching the cover. Converting to vintage braided wire follows much the same procedure – but in reverse.
On a plate
Compared to P-90s and humbuckers, the scope for modifying traditional Strat pickups is fairly limited. Even so, there are a couple of external factors that can be considered.
If you find your pickups a little dark sounding, have a look under the pickguard to see if the pickups are mounted with rubber tubing or springs. Some claim that changing to springs gets you a bit more treble and can even introduce a little vintage-style microphony. Too bright with springs? Try rubber tubing for the opposite effect.
Another option is attaching a Tele-type induction plate to the underside of the pickup to beef up the bass and low-mids, and increase overall output. I’ll go into this in more detail later when I discuss Tele pickups, but this has become a popular mod for Strat bridge pickups, with some players adding induction plates to all three pickups. The slugs usually need to be taped over before the plate is attached. Melted wax is generally sufficient to hold it in place, and you will need to ground the plate.
Wax off
Next is a controversial procedure for reversing the wax potting process. Wax potting is the practice of dipping wound bobbins into molten wax that impregnates the wire coils and helps prevent squealing microphonic feedback when playing with high gain levels at very high volumes.
It’s an effective solution, but some degree of microphony is a key component to vintage pickup tone. The great P-90s, PAFs and Filter’Trons of the 1950s were never wax potted and fans of these pickups usually enjoy high treble ‘air’ frequencies and a greater sensitivity both to playing dynamics and the acoustic properties of the guitar itself.
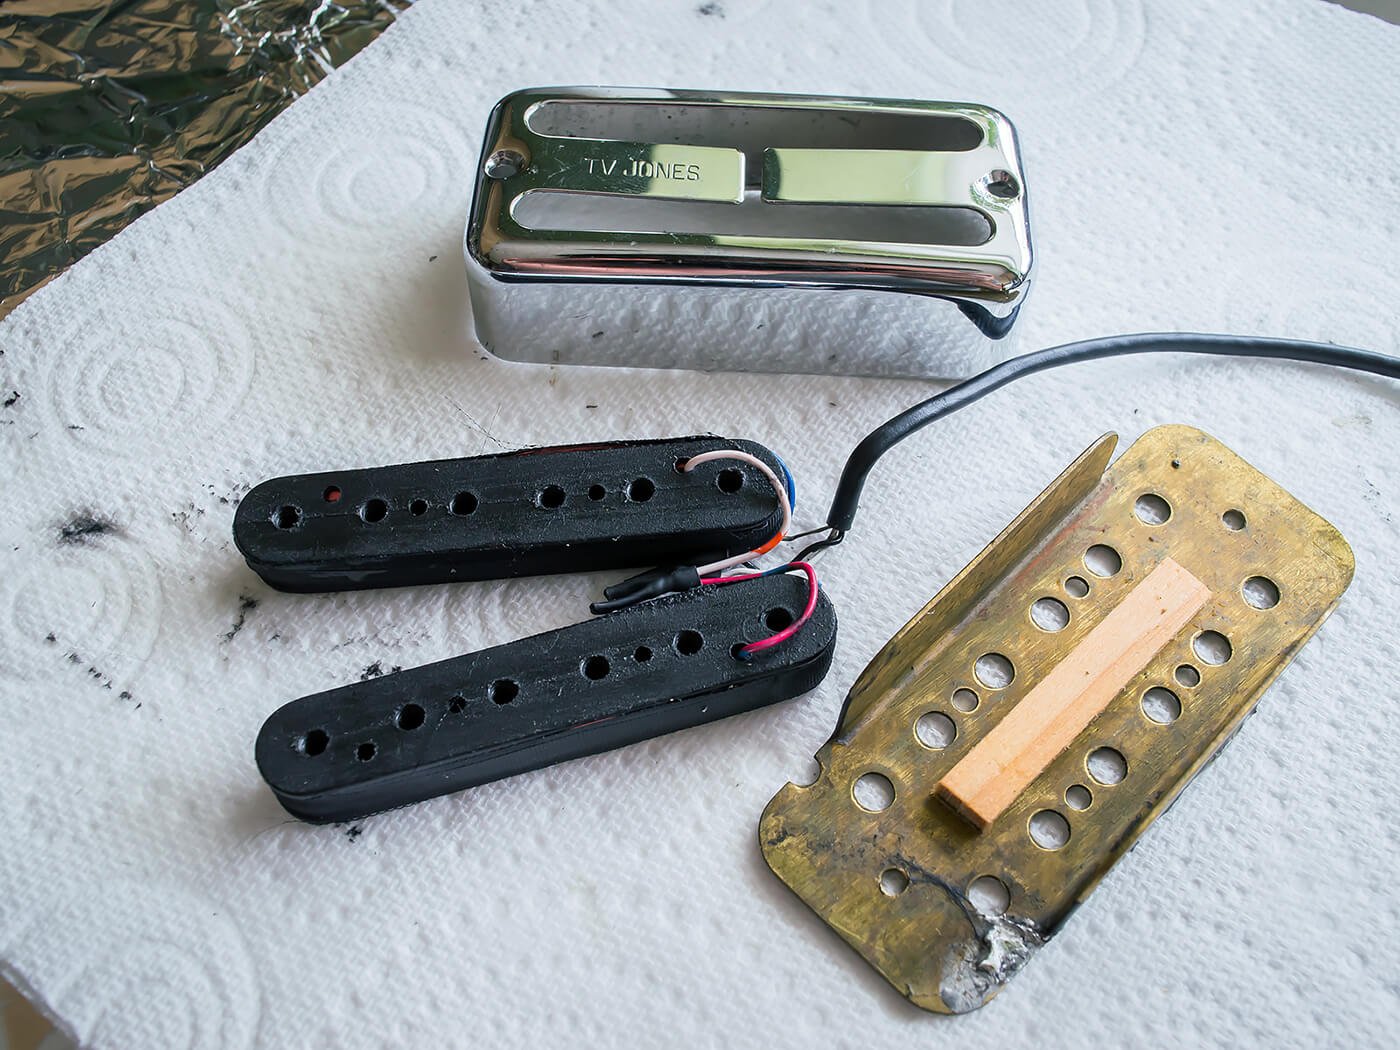
Can wax-potted pickups be un-potted? Some who have tried claim to hear big improvements. We’ve seen people suggest using hairdryers, placing pickups in hot water and even putting them in an oven to melt the wax so it flows out of the coils. Clearly there’s some degree of risk to the pickup, but I decide to take one for the team and place a TV Jones TV Classic pickup in my oven at 70°C for 20 minutes and see what happens.
Before it goes into the oven, I unsolder and remove the cover, extract the magnet – because heat can cause demagnetisation – and place the bobbins, cover and baseplate in the oven. After baking, and cooling down, the reassembled pickup is five grams lighter and the DC resistance reading is unchanged.
The pickup isn’t exactly transformed, but the difference is audible. There’s a touch more microphony and harmonic bloom, along with reduced shrillness in the upper mids and improved clean-up clarity.
The vast majority of the lost wax most likely came off the covers, the baseplate, and outside of the bobbins, rather than the coils themselves. Therefore, the extra microphony could well be coming from the looser assembly now that wax isn’t binding everything together. I do prefer the tone after de-waxing, but I’m not convinced the benefits outweigh the risks and advise caution.
Dyna might
It’s safe to say that when DeArmond came up with their design for Dynasonic pickup, dealing with high-gain and high-volume guitar amps wasn’t a consideration. Dynasonics are bright, clear and almost hi-fi sounding pickups with a unique tone, but they divide opinions.
The most common complaint is the Dynasonic’s tendency to squeal so, the challenge is stopping it. Most experts agree that the excessive microphony is due to all the screws, hardware and slugs dangling below the pickups. The engineering tolerances may reasonably be described as ‘loose’ and when all those metal parts start vibrating, they start squealing – much like a humbucker with a loose cover.
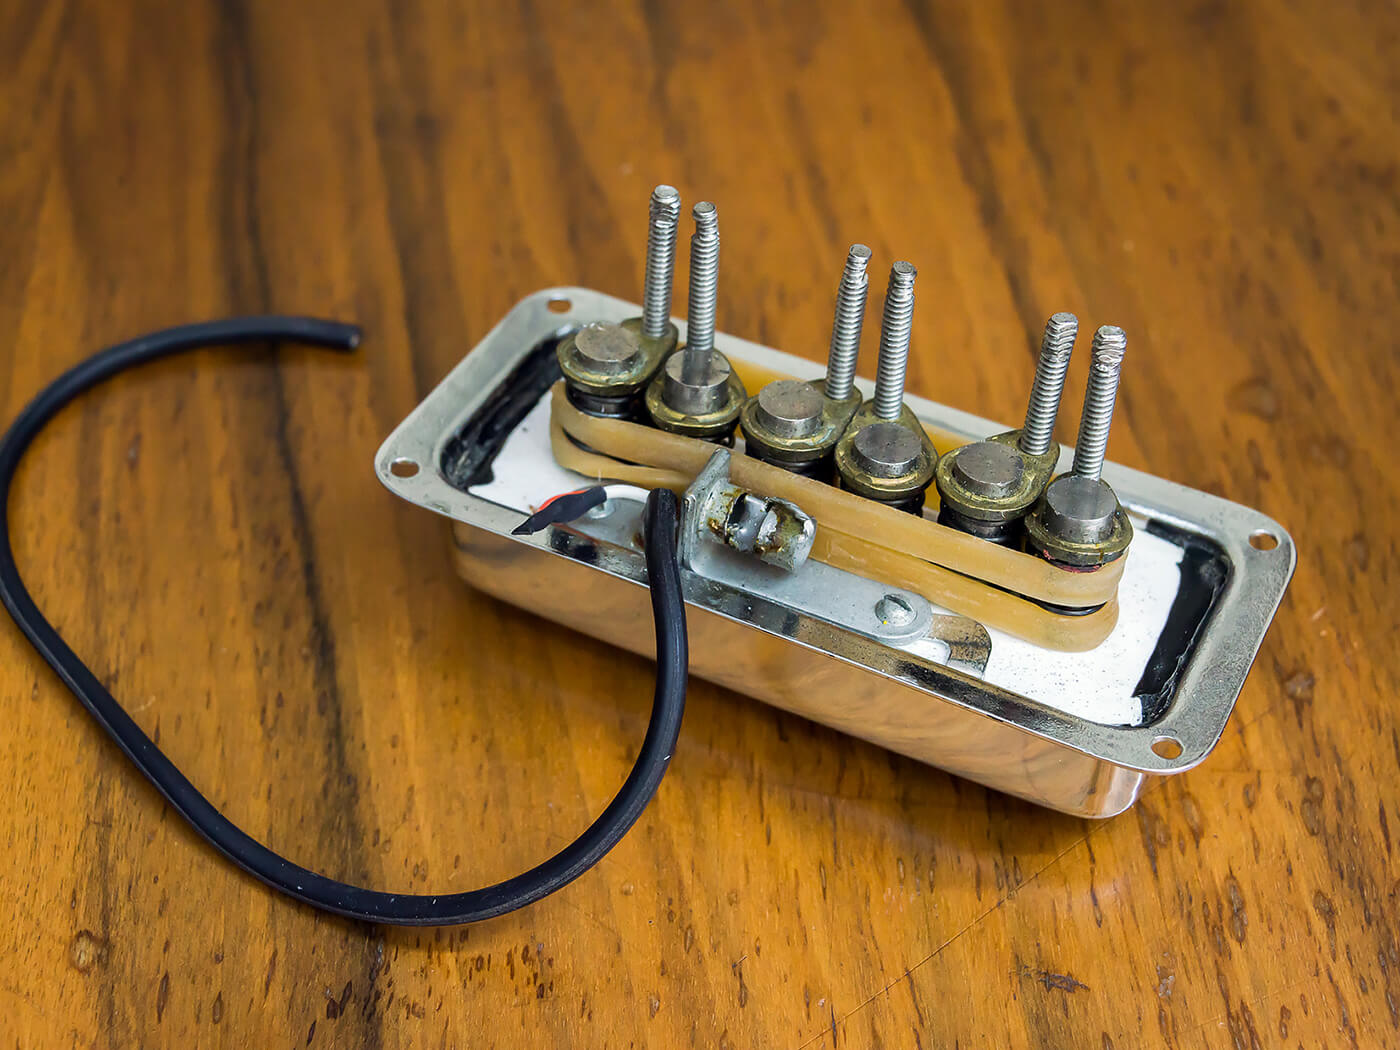
Fortunately, there’s an easy fix for stabilising the assembly. All you need to do is wrap the protruding metalwork tightly with rubber bands. Although this may not eliminate squeal completely, it’s pretty effective.
In theory you could make things even more stable by using silicon sealant, but you’d have a big problem on your hands if you ever decided the polepieces needed adjustment. All that said, Dynasonics have their limitations and if they won’t play nice with your maxed out Triple Rectifier, you may need to rethink your choice of pickups or amp.
Another complaint is a lack of balance that renders only the middle position useable for some players. The magnetic slugs in DeArmond Dynasonics are off centre and Gretsch installed them with the slugs orientated towards the neck and the bridge – just like the screw coils in Gibson humbuckers. As a consequence, the bridge pickup can sound too thin and twangy for some, and the neck pickup can be too boomy.
If you’re experiencing this, try spinning the pickups around by 180 degrees. Dynasonics are held down by four screws, so it’s simply a case of removing the screws and then replacing them once the pickups are rotated. You can do this for both pickups, or just one, and if you check out vintage Gretsches, you’ll see plenty of Jets and so forth that have been modded like this. And best of all, if you don’t like the results of this mod, you can reverse it.
Some neck
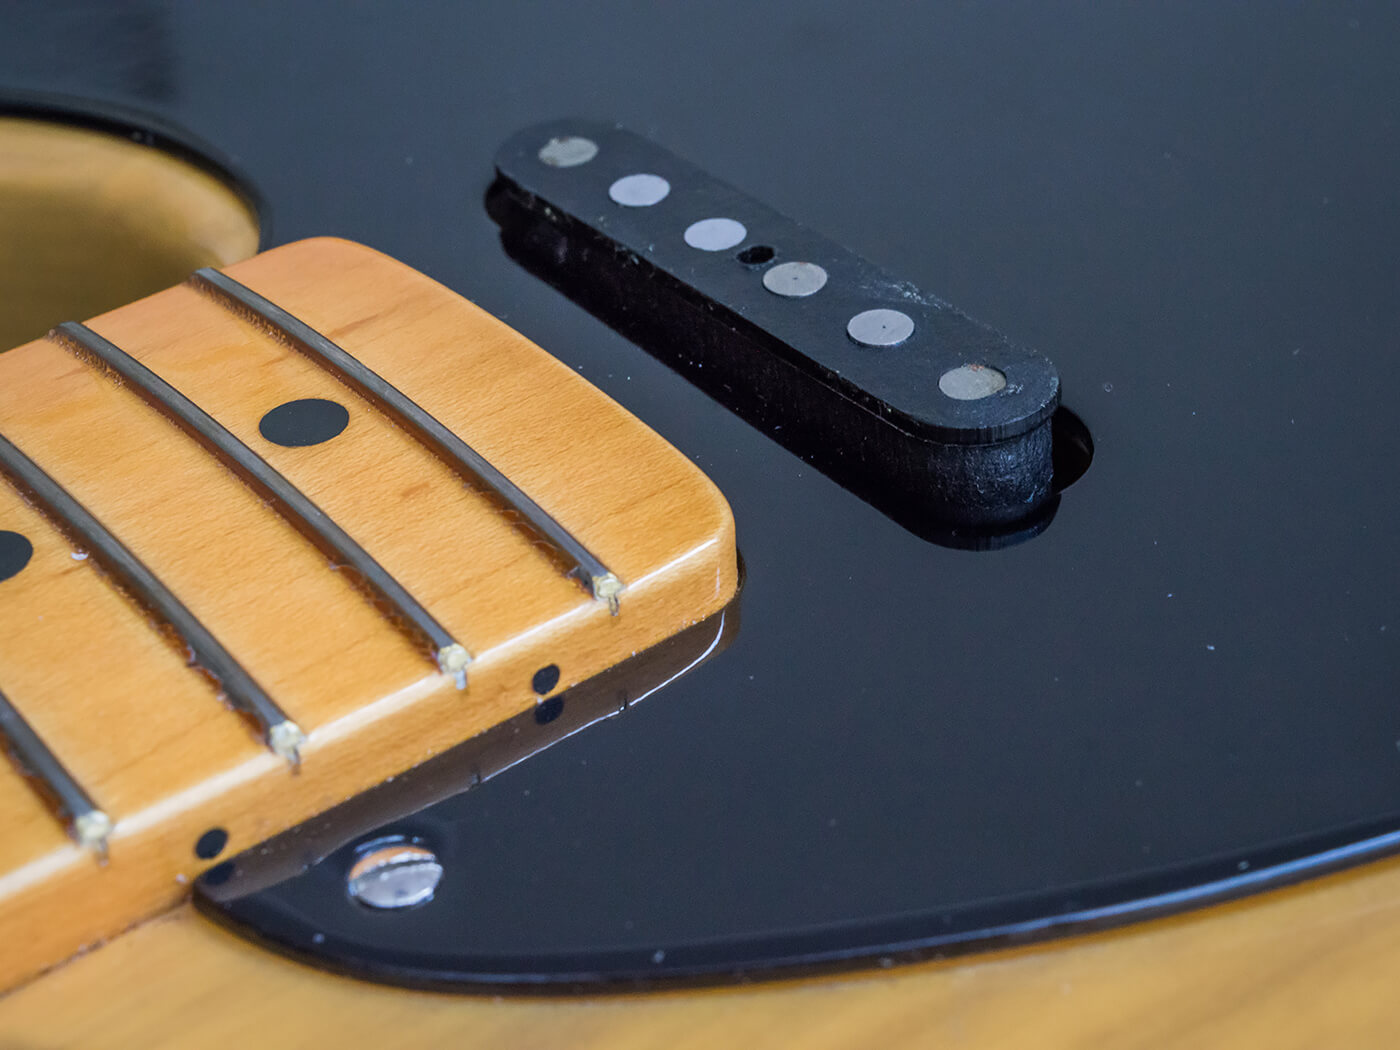
The most common complaint about Telecaster neck pickups is that they sound too dark compared to Strat units. They certainly sound different, but if you think they’re all dull and murky sounding, you probably haven’t heard a good one.
That said, Tele neck pickups can sound somewhat ‘jazzy’ and there are a couple of things you can try in order to open up the treble response before you consider swapping pickups. The issue is often that the capacitance of the metal cover causes treble roll-off, so if yours is steel or brass, try installing a thin nickel cover instead.
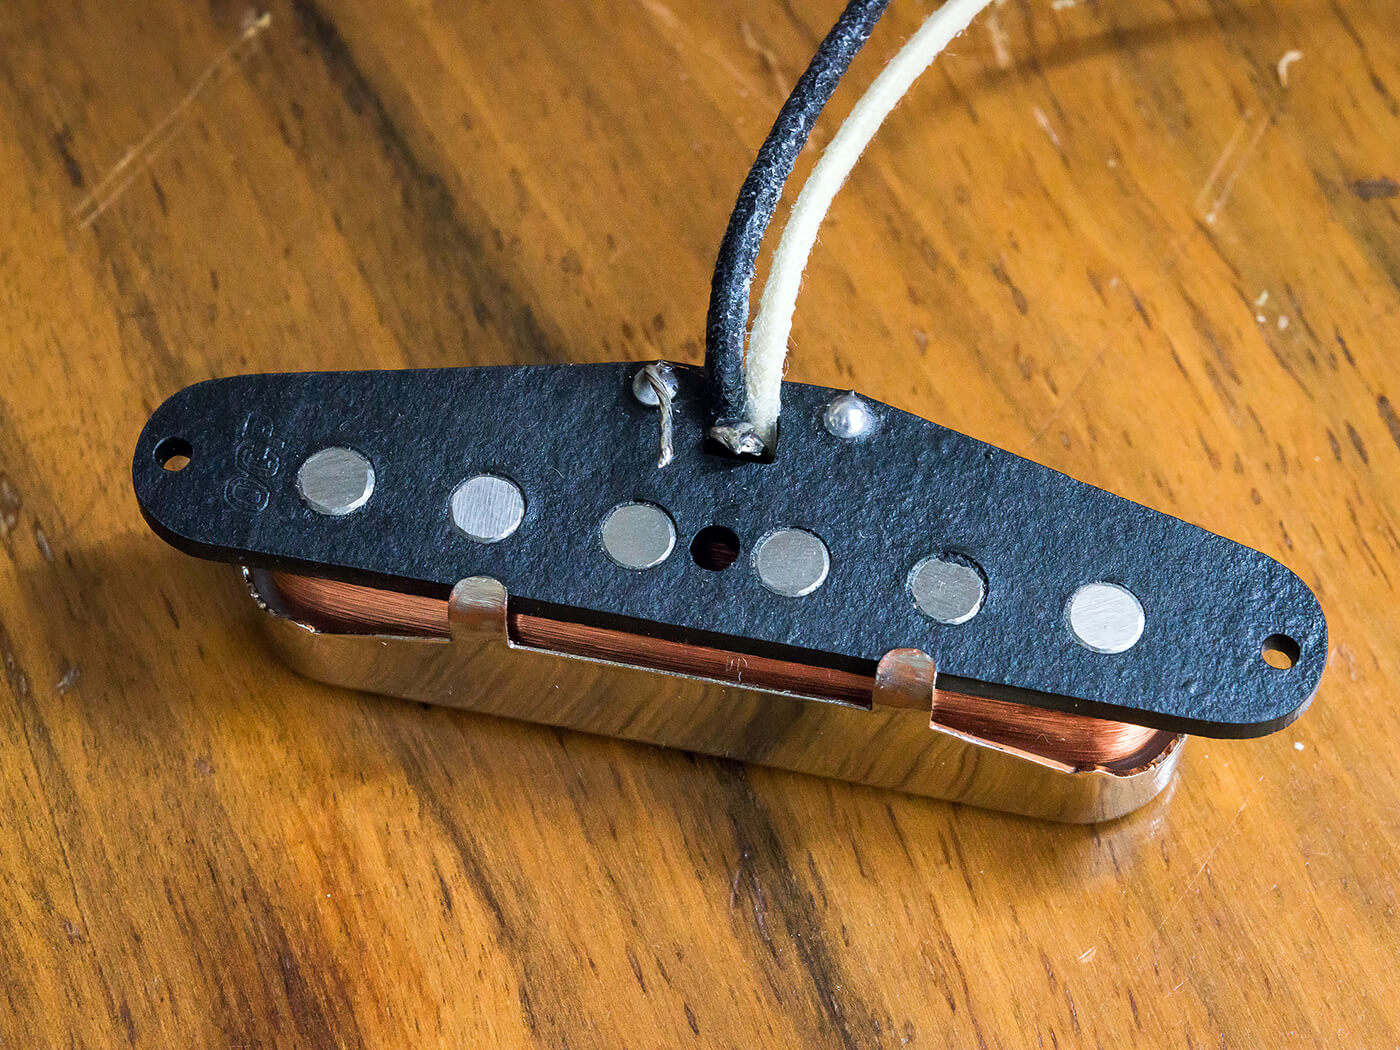
If you look on the underside of the pickup, you’ll see that the cover has a soldered connection to the negative (usually black) lead-out wire. Try unsoldering this connection and see if you prefer the sound. If you do, you can stop there, but you’ll hear a buzzing sound every time you touch the cover.
The next step is to remove the cover altogether, and once you’ve snipped the cover grounding connection, it’s simply a case of bending back the tags and lifting the cover off. But if the pickup is heavily wax-potted, it may need to go in the oven before the cover will come off. Cover removal solves the buzzing problem but leaves the coil vulnerable – especially if the wires are bare in the vintage style.
Search online for ‘pickup coil tape’ and wrap some around the coil to protect it. Not having a cover may also allow you to set the pickup closer to the strings for extra output and brightness. However, the E strings can get lodged under the top of uncovered pickups in the heat of battle, and this can damage the coil.
It’s bizarre that plastic covers for Tele neck pickups are seemingly impossible to find. A grounded open-top metal cover is a good alternative, but black or white plastic covers would be great for achieving a ‘stealth Esquire’ look as well as clearer tones. Somebody start making them, please…
Altered bridge
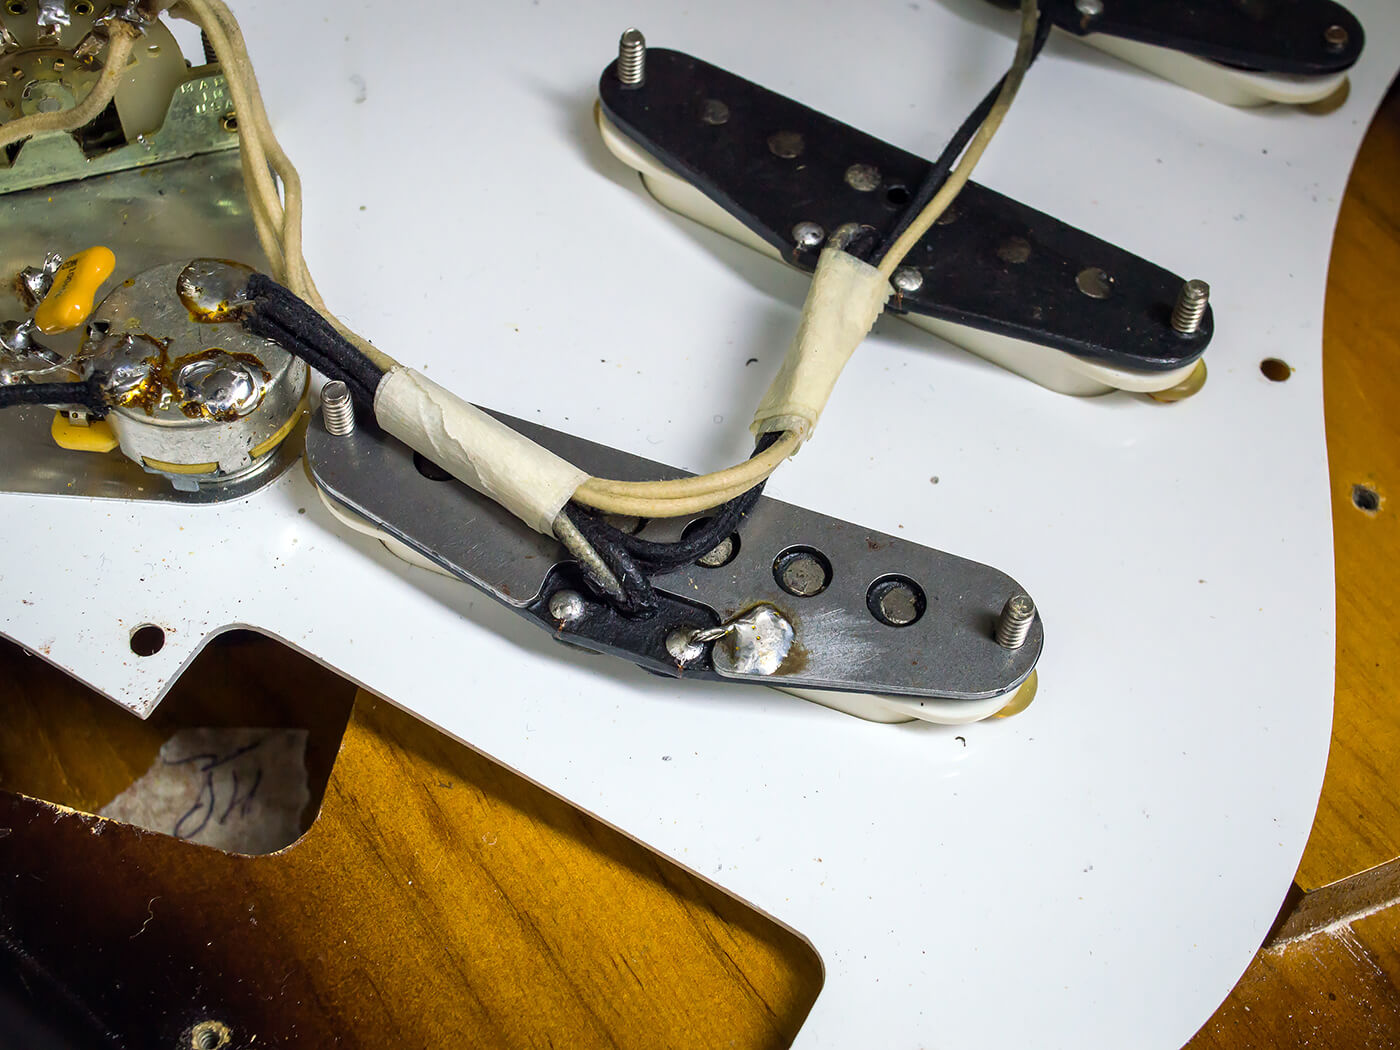
Like Dynasonics, Tele bridge pickups have a reputation for squealing, but there are a few workarounds. It’s generally accepted that the causes of the problem are the metal inductance plate and the way the pickup is attached to the bridge.
I mentioned earlier that you may be able to enhance the treble response and microphony of Strat pickups by using height adjustment springs. Well, here the idea is to do the opposite because microphony needs to be reduced. If you find springs under the bridge, try replacing them with 50s-spec rubber tubing.
You can get pre-cut pieces of tubing for ludicrous prices from guitar parts suppliers, or search for ‘latex rubber tube’ on a well-known auction site and you can buy the stuff by the metre for far less. Make sure the inside diameter of the tube is wide enough for the screws.
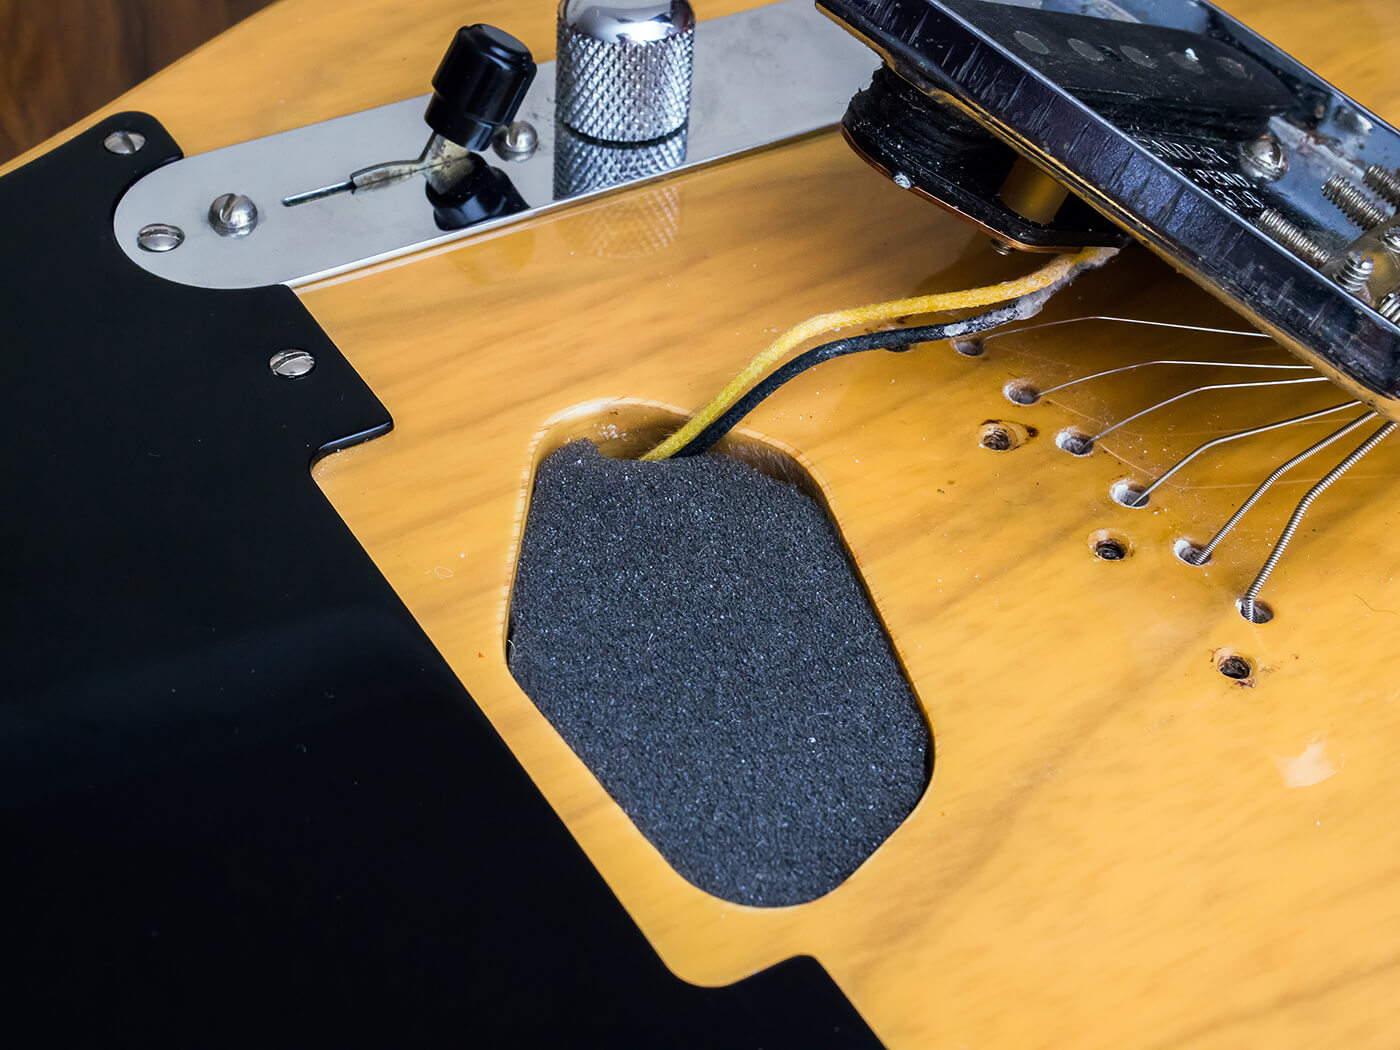
The next thing is to prevent the metal base plate from vibrating. Assuming the plate is firmly attached to the pickup, place some foam inside the pickup cavity to dampen the vibration. The thickness and sponginess are important because if the foam is too thin, it won’t press tightly enough against the pickup. If it’s too thick and insufficiently spongey, the foam will press too hard on the pickup and make height adjustment impossible.
Also consider mounting the pickup directly onto the body. This is a favoured option for various builders, including G&L, while GE Smith specified just that for his Fender signature model. The tone is a little warmer and the Tele bite is slightly softened, but you might find it fiddly without converting to a chopped Tele bridge at the same time.
With care, it’s possible to align the pickup with the cutout in the stock bridge, but to adjust pickup height, you may need to widen the three screw holes in the bridge to get a screwdriver inside.
The pickup itself could be mounted on screws or a foam block, and you’ll need to run a separate ground wire for the bridge plate. The length of the screws would also need to be considered because if they’re too long, you may end up screwing your Tele to your workbench.
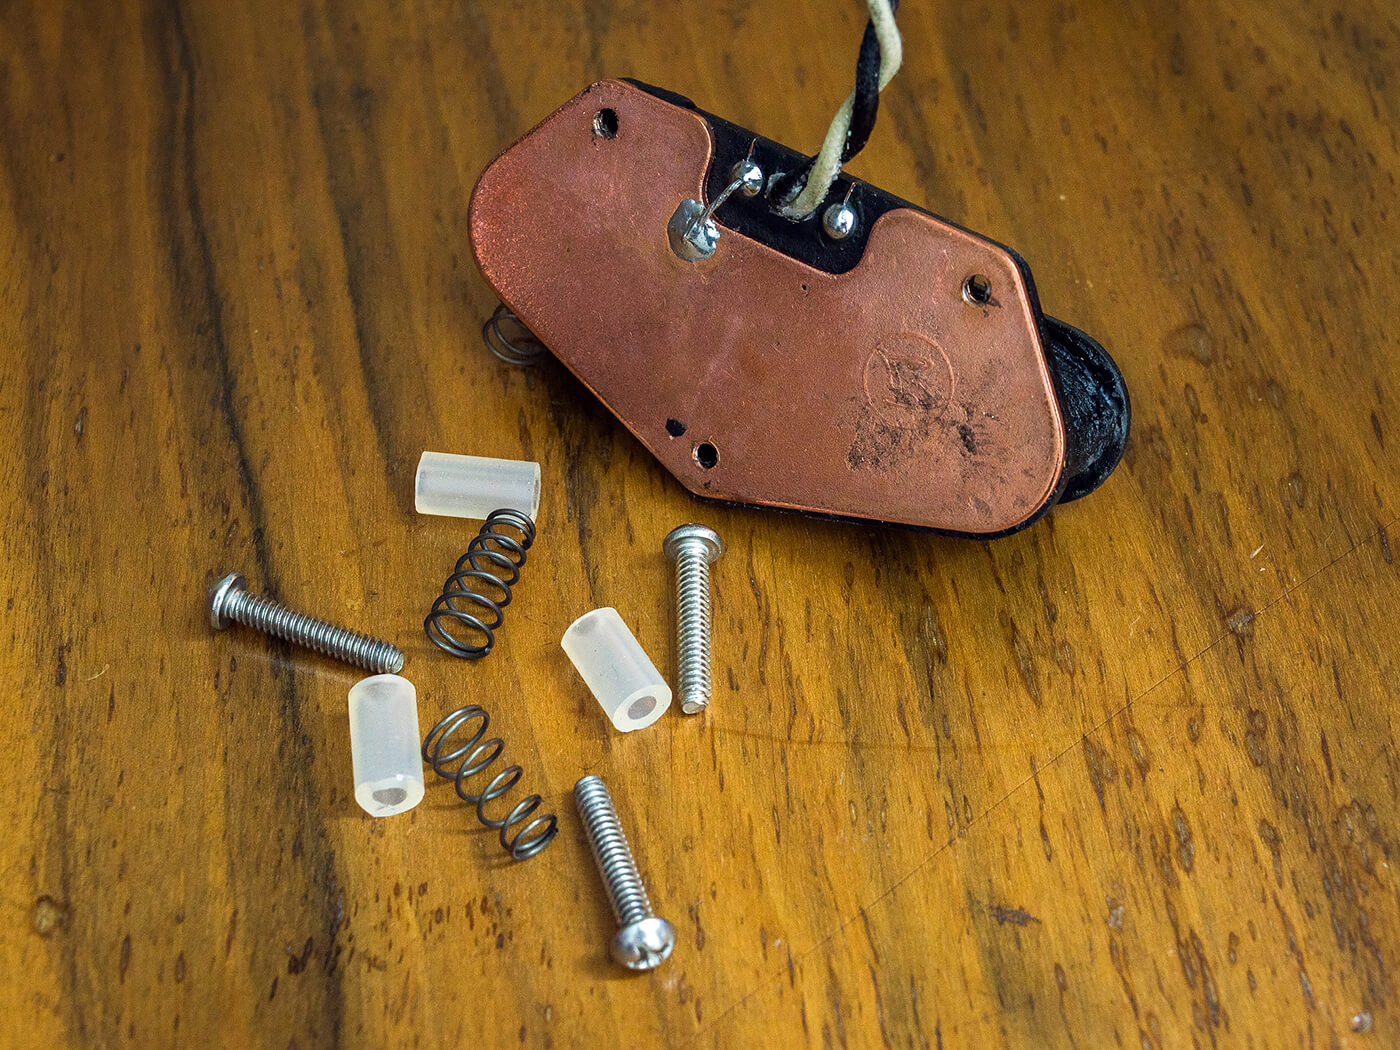
The metal baseplate can also be swapped to tweak the tone – or added if your pickup doesn’t have one. Vintage examples were made from steel plated in zinc or copper, but brass and stainless steel offer different effects. Pickup guru Bill Lawrence identified three areas of influence: ferromagnetic functions, electrodynamic functions and shielding. Only the first two affect tone.
Ferromagnetic functions stabilise and boost the magnetic field, and increase inductance – but only steel plates do this. Steel, copper and brass baseplates all cause eddy current interference, which alters the frequency response of a pickup. The bass and low midrange is beefed up to balance out the trebles. So copper or brass plates can be used to warm up a Tele bridge pickup without increasing output. If you use steel, you get fatter tone and increased output.
Believe it or not, modifying pickups can be just as much fun as changing them, and it’s a lot cheaper to do. You need to be careful because pickups can be fairly delicate, but we think the rewards are worth the risks.
For more DIY workshops and guides, click here.