Related Tags
DIY Workshop: Gretsch Anniversary to 6120 conversion (Part Four)
In the latest instalment of our Gretsch conversion project, Huw Price tackles the headstock, finishes the neck and reshapes the f-holes.

Those of you who have been following this Gretsch restoration may have been wondering why there haven’t been any recent updates. The honest answer is that I was feeling pretty nervous about routing the headstock for binding.
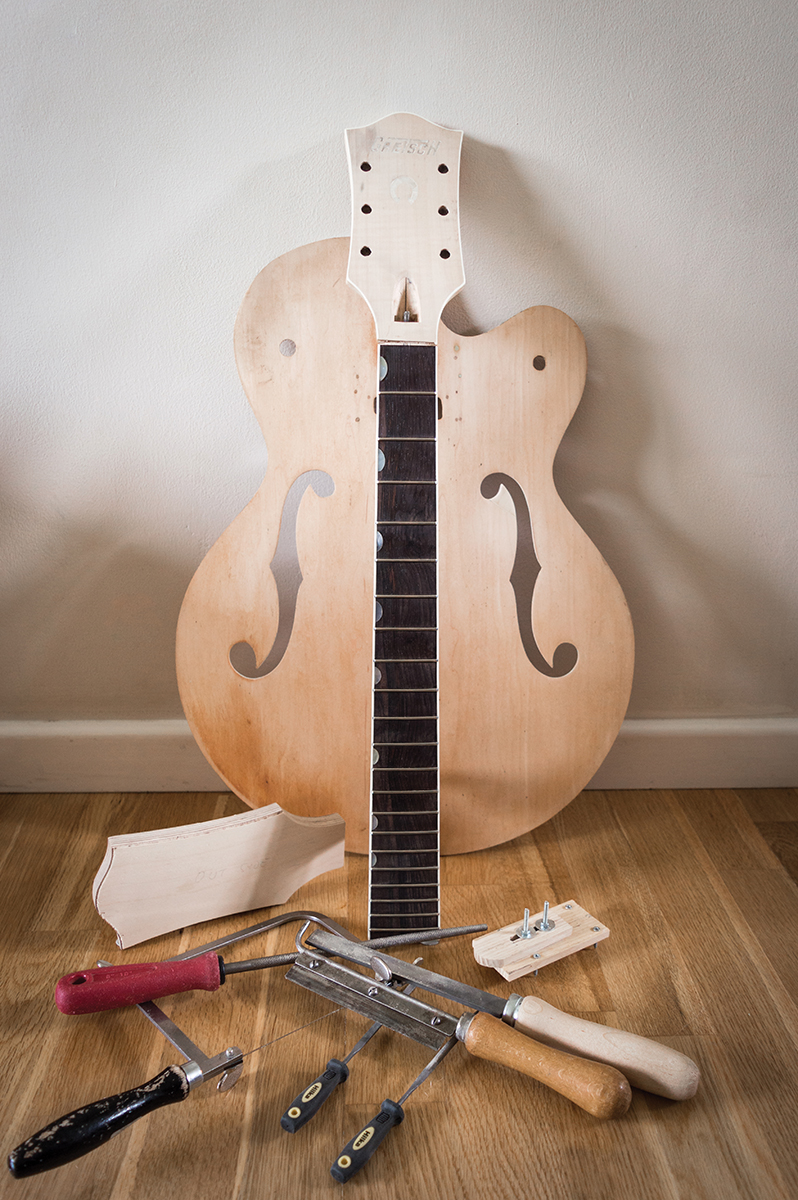
I wasn’t sure how to go about it, so I’d been putting it off. Eventually, I figured out a way to do it and this month I’ll show you how the neck was completed, and the f-holes repaired and reshaped. Hang on because it’s about to get dusty.
Cutting the binding channel
I have bound one or two headstocks before, but I was dealing with uncarved necks from acoustic guitar kits. Everything was nice and square all around the headstocks and all the way up to the nut slot area. Previously, I had used a Dremel tool mounted in a Stewart MacDonald router base with a guide bearing, but I’d had such fraught experiences that I’d decided never to use that set-up again for serious routing.
One of the scarier aspects of this sort of project is the juxtaposition of irreplaceable vintage parts and very sharp tools. Also, the NOS headstock overlay wasn’t cheap and I was very anxious not to mess it up. This guitar’s build quality complicated matters further because none of the headstock’s side surfaces were actually square with the front. There was a noticeable and inconsistent flaring out from front to back that prohibited the use of a bearing-guided router bit.
The fact that the neck was pre-carved presented another problem because the curved areas between the lower headstock ears and the nut taper away. If I used a bearing bit in those areas, I’d end up cutting a binding channel about 5mm wide. Eventually, I settled on a strategy.
Firstly, I squared up the headstock edges as best I could using scrapers and a drum sander. I wasn’t looking for perfection since this was a far from perfect example – and in a sense that’s part of the charm of these old guitars. Then, using two small scraps of wood, I made an adjustable router guide.
I screwed the bottom part to my router table’s surface with two bolts sticking up through it. I made a long slot cut along the centre line of the second part with a rounded tip then pushed the bolts through the slot and the position of the sliding section could be held firm with nuts and washers. The height of the cut was set using the router’s locking plunge feature and the rounded end of the guide tool restricted the depth of the cut.
After testing the router bit and tool settings using scrap wood and a binding offcut, I felt pretty confident. So I gritted my teeth, placed the headstock face down on the router table and went for it. To my immense relief, it worked but I needed to deepen the cut on one side. I marked the current position of the router guide using a sharp pencil, adjusted it by about 0.5mm, tightened the fixing nuts and cut again.

The curves between the bottom ears and the nut were somewhat trickier to execute because the taper in that area wasn’t consistent. I decided, therefore, on a different approach and made a router template from scrap plywood. I marked the curves onto the plywood, cut them out with a fret saw then finessed the curve using a drum sander attached to my drill press, following a line a binding’s width inside the original line to achieve the required cut depth.
I attached the completed template to the headstock front with some double-sided tape and a bearing bit in the router was set to run along the template curve and cut the channel to the right height. Again, this went well and I breathed a huge sigh of relief.
Fixing the binding
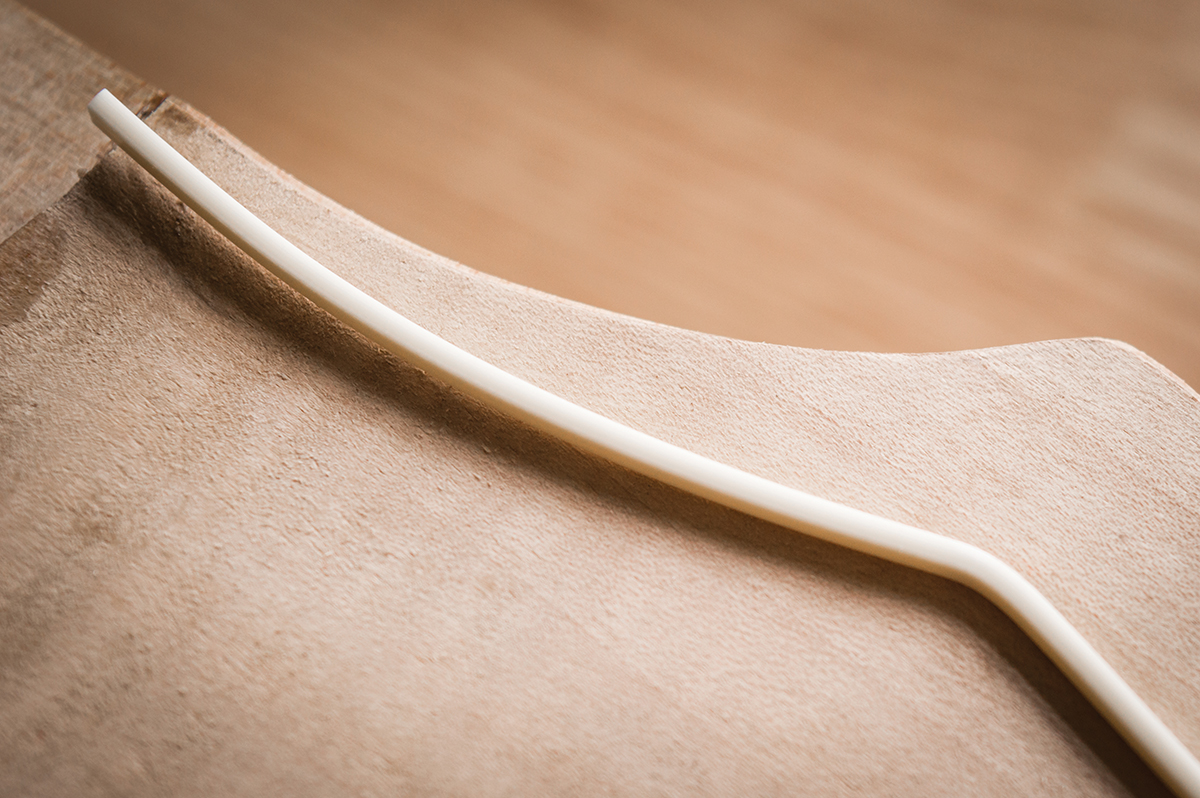
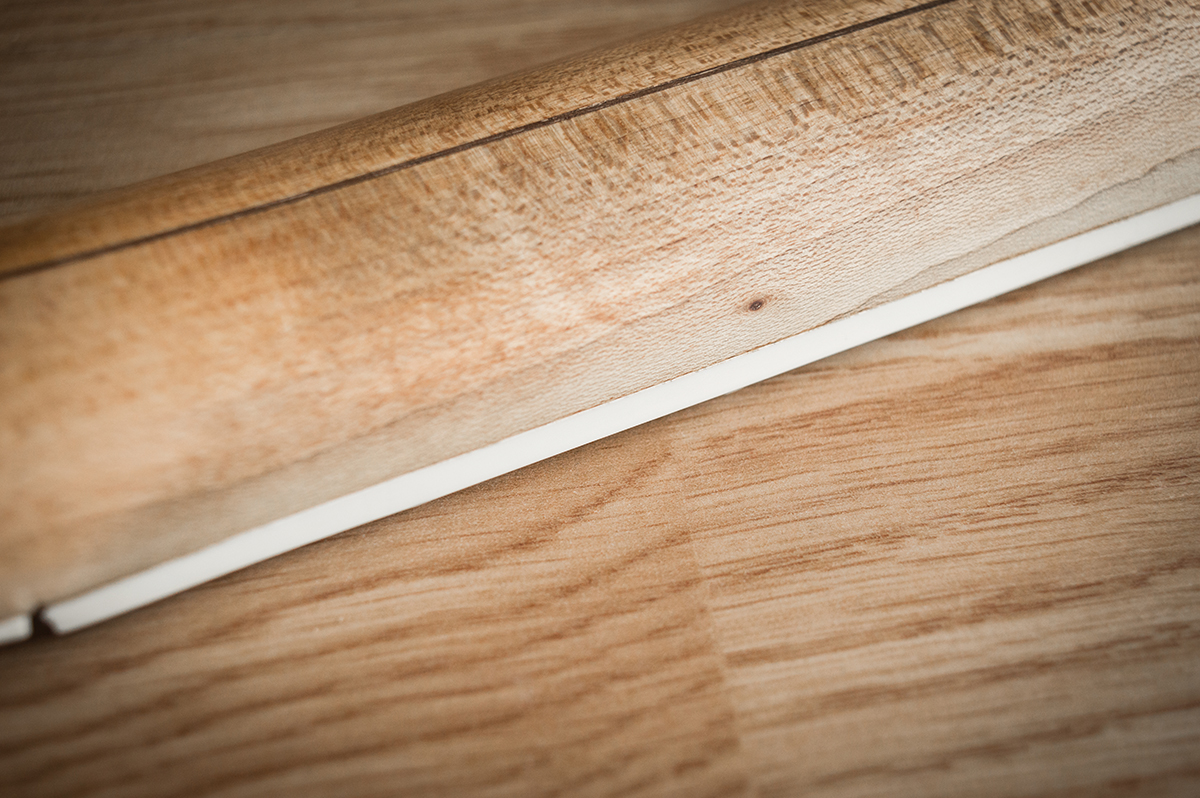
The headstock binding is light ivory cream ABS plastic measuring 2×1.5mm from Rothko and Frost in Gloucestershire. I cut a section into small pieces, put them into a jar and covered them with acetone. With the lid on the jar, I sealed it with tape and overnight the plastic dissolved into a paste about the same consistency as double cream.
Believe it or not, this is the ‘glue’ I used to attach the binding. Firstly, however, I had to pre-shape the binding to conform with the headstock curves because it can snap when bent too far. The pre-shaping was done by heating the binding with a hairdryer, then I slathered the acetone mix all along the cut channel on the bass side.
I lined up the binding, pressed it into position and used multiple strips of masking tape to hold it firm as the acetone mix ‘welded’ itself to the binding and wood . A slight overhang was left at each end and I decided to butt joint the top section just as Gretsch did. No mitre joints for Gretsch. The binding went on in three sections and was set after a couple of hours.
The acetone paste worked even better than I had expected, and it has the added advantage of filling any gaps and compensating for unevenness.
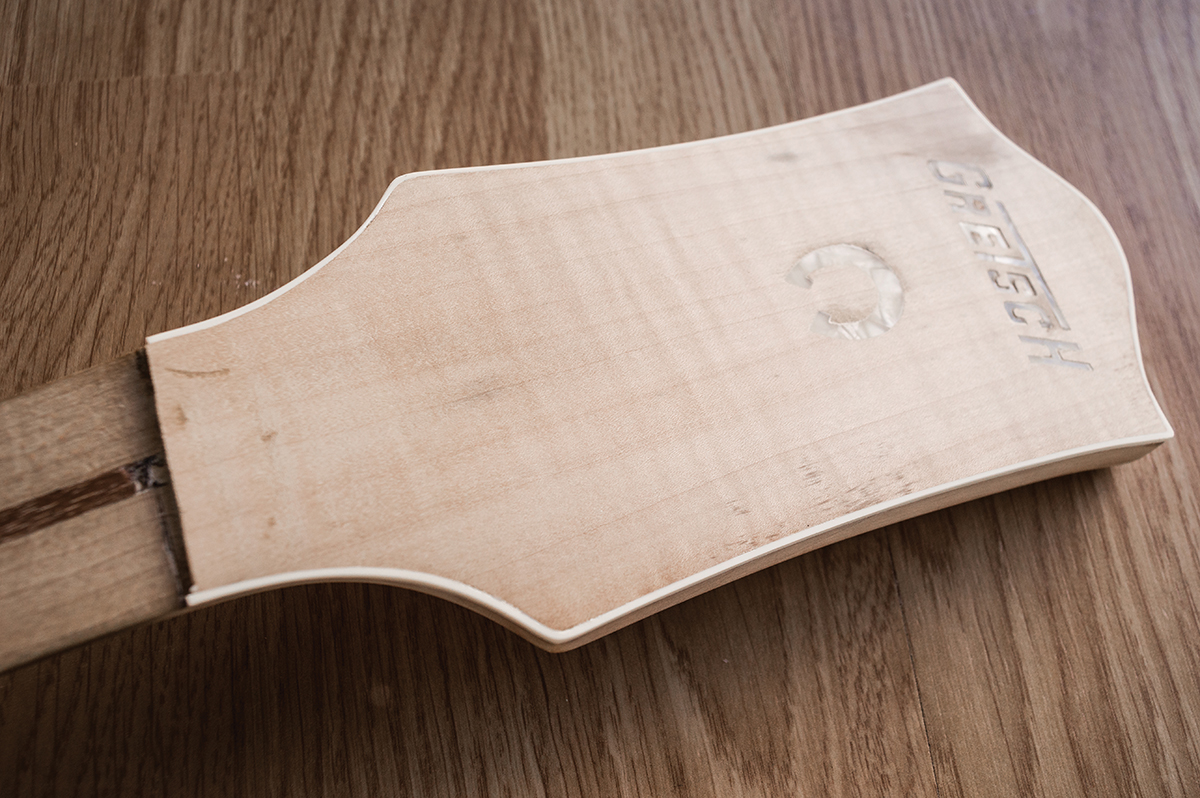
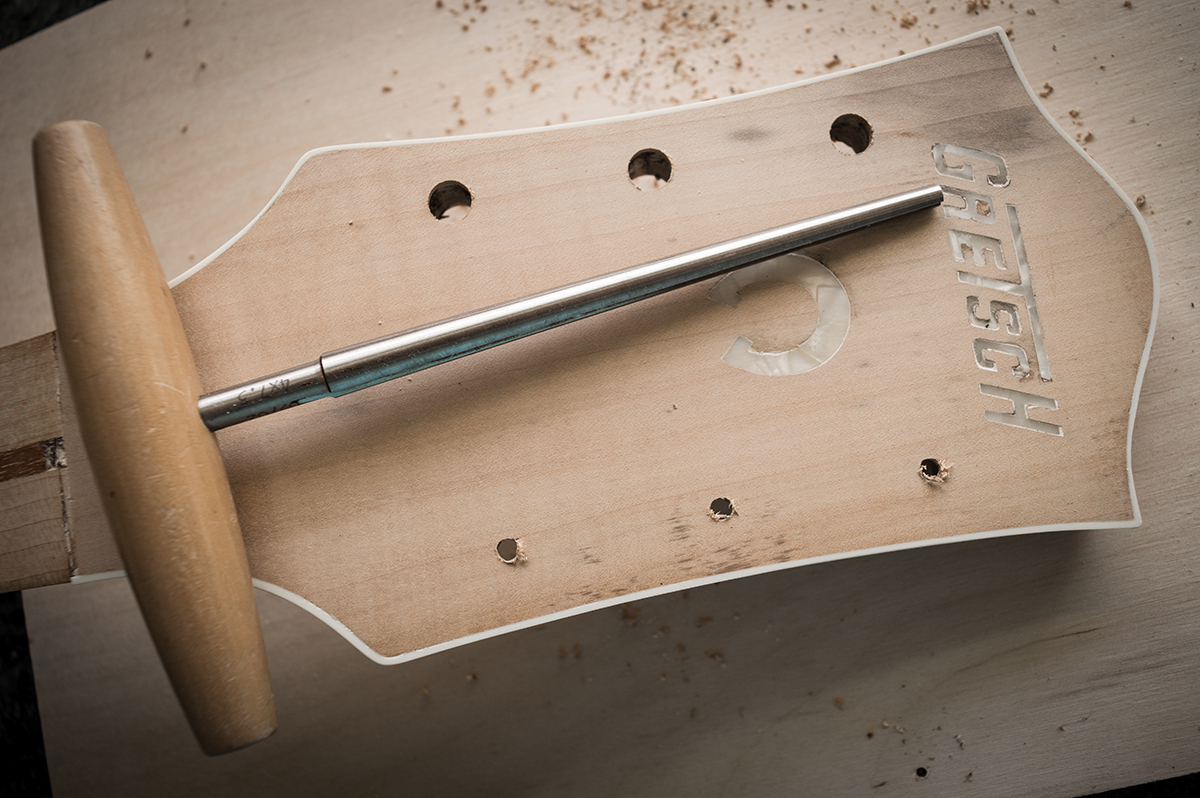
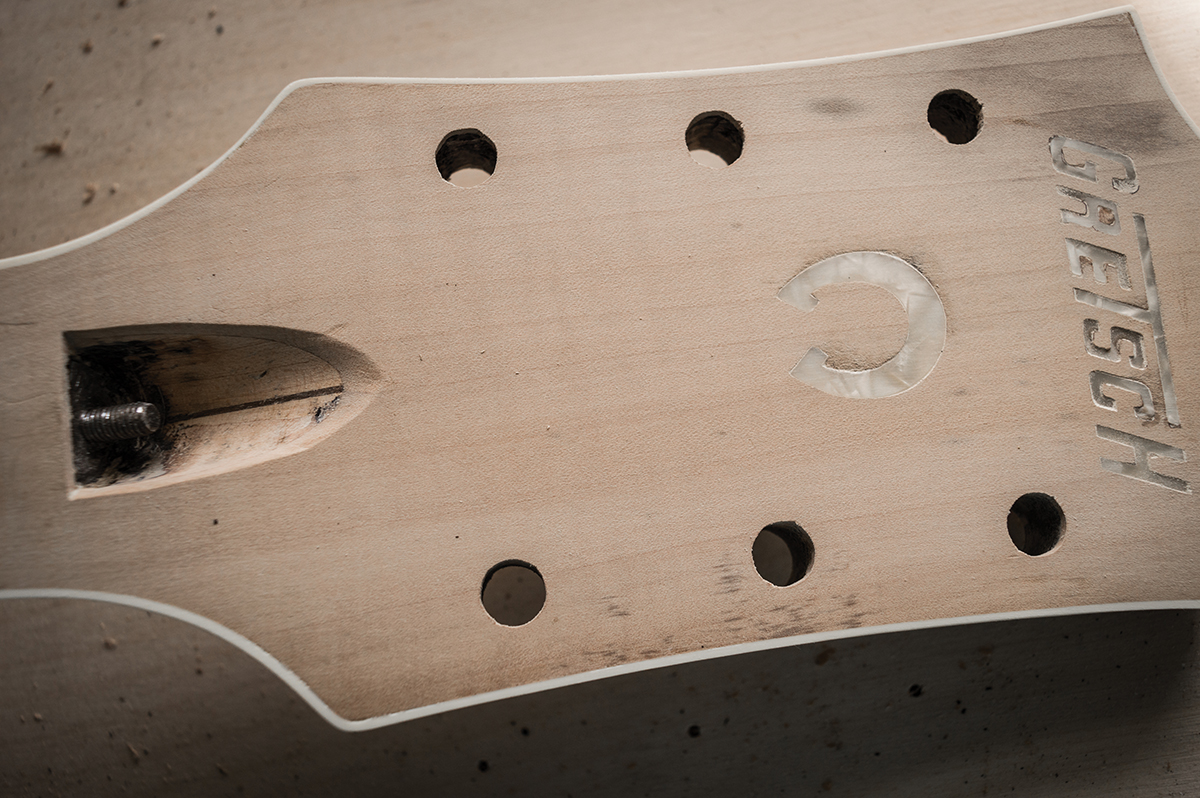
Since the channel was cut fairly accurately, very little Stanley blade scraping was needed to make the binding flush with the wood. Ultimately, the binding depth fluctuates a bit, but so did the binding on the originals, so I’m happy to live with it. Small guide holes were drilled out from the back and I used a reamer to widen the holes for the tuner bushings. Finally, I was able to cut and file away the headstock overlay to reveal the truss-rod scoop.
Fixing the board
Much restoration work had already gone into the fingerboard, with an additional maple layer glued to the back to make up for the loss of depth from sanding and re-contouring the front. The binding had been attached, too, so what followed was a straightforward fret installation.
Actually ‘straightforward’ is probably overstating it, because the fret slots were somewhat inconsistent. Some frets seated fairly well but others didn’t. Very quickly, I realised that I would need to glue in the frets and press them into position. I used Super Glue, a 9.5-inch radius block and a clamp, working one fret at a time.
The fret ends were bevelled with the fingerboard board taped to a flat surface. Installing the frets had introduced a very slight back bow to the fingerboard, but very little finger pressure was needed to flatten the board, so I wasn’t too concerned.
Although the bevelling went well, the end result looked pretty horrible, but once the Super Glue squeeze out had been cleaned up with wire wool, I started feeling better about it.

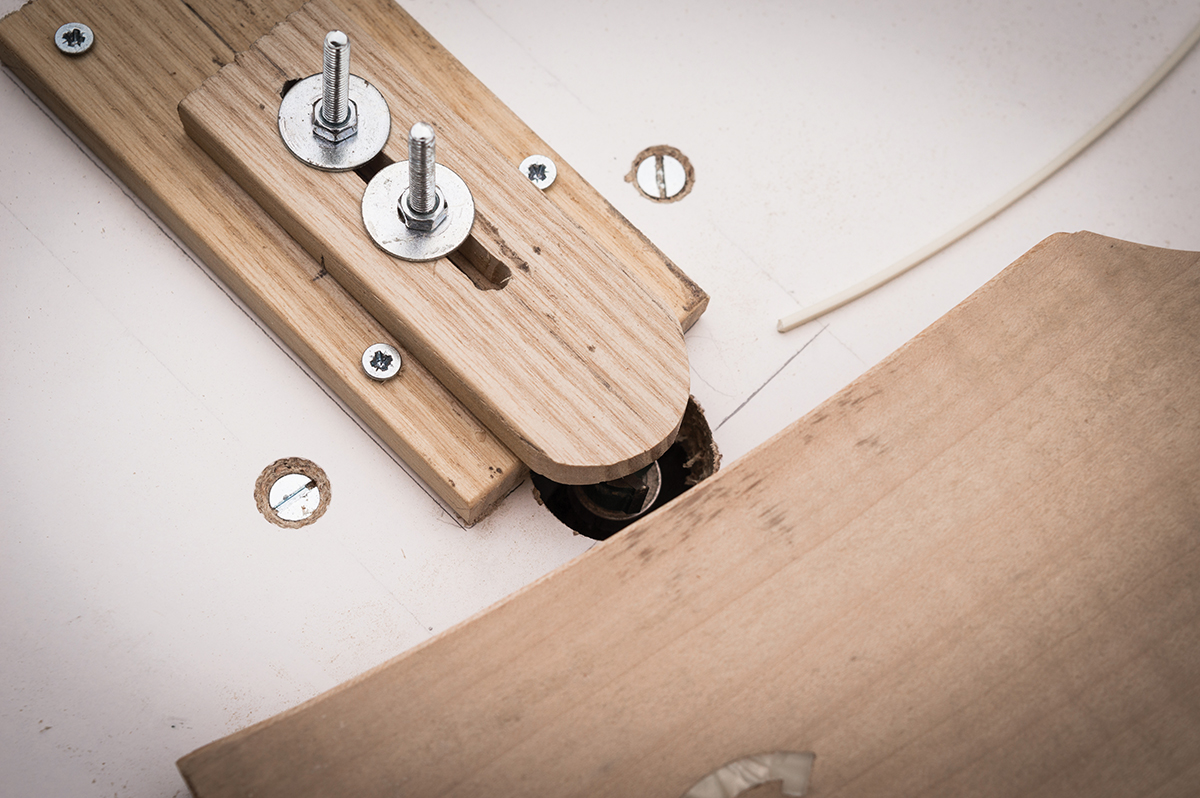
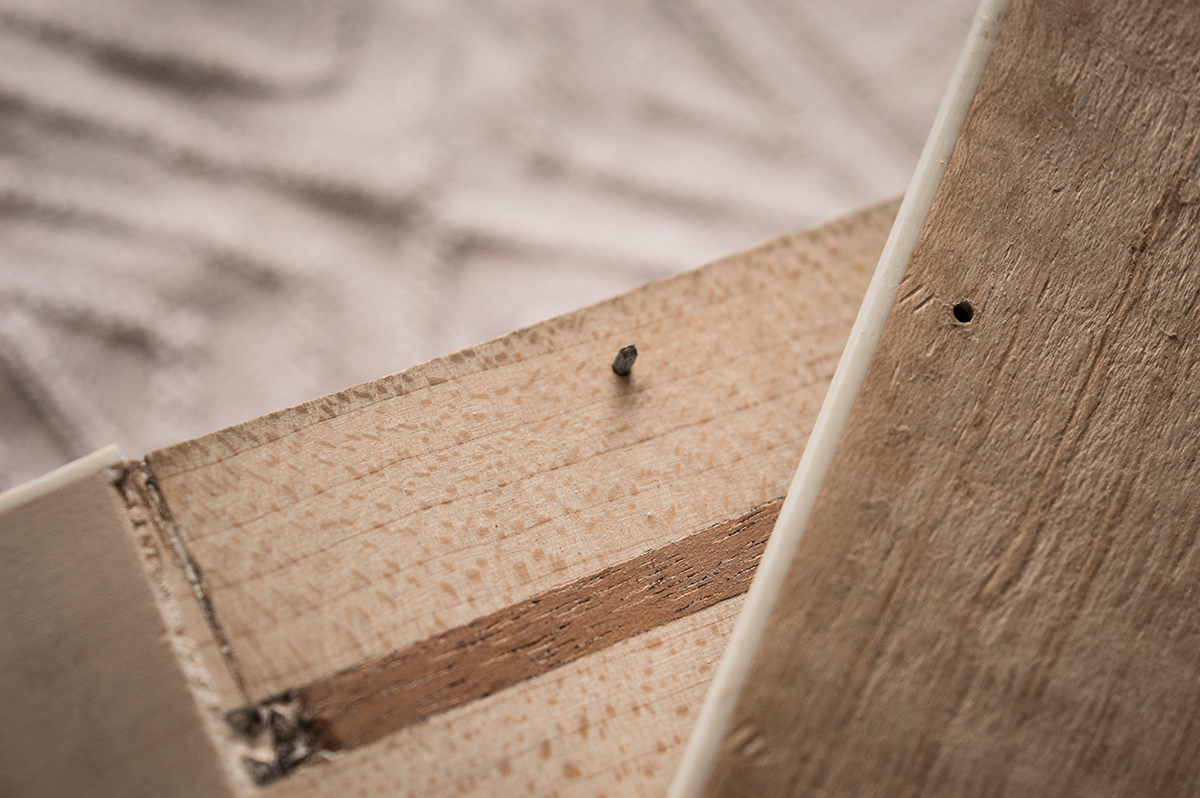
Those who read the second part of this restoration feature may recall that I drilled two locating pinholes – at the first and 20th frets. So, before I installed the frets, I drilled the holes through the new veneer base of the fingerboard. The holes were drilled to accommodate tiny locating pins that would ensure the fingerboard went back onto the neck in the correct position and stop it sliding around on slippery glue.
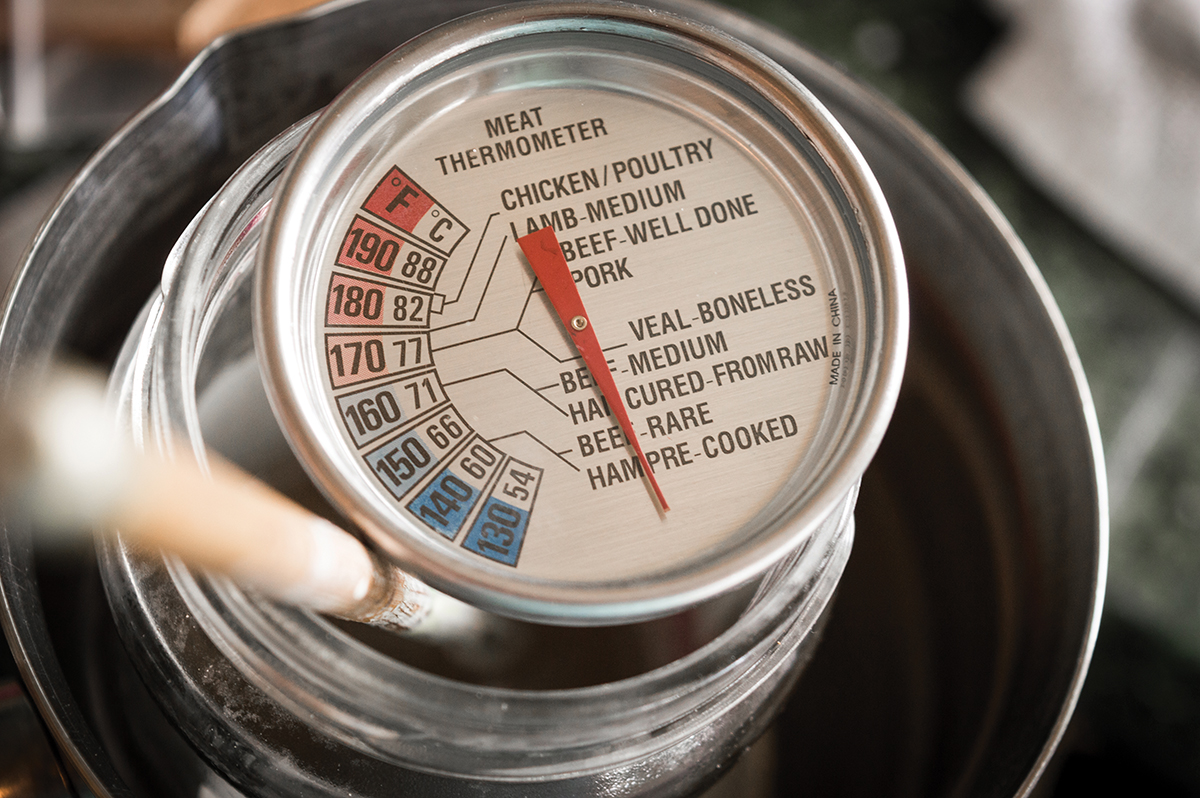
I decided to go with hot hide glue because that was what Gretsch used and it will allow a future restorer to dismantle the neck if required. I swotted up on hide glue preparation, poured some glue pearls into a jam jar, added the recommended quantity of water then set the jar aside overnight.

The glue pearls looked like frogspawn the following morning when I placed the jam jar in a saucepan of water and heated the glue gradually. Temperature is crucial and I was aiming for 60ºC. To get it right, I bought a cooking thermometer from Tesco for £4 and kept it in the glue pot the whole time.
As it’s heated, the glue becomes runny, and when it hit the right temperature I brushed it onto the back of the fingerboard, lined the board up with the pins and clamped it to set overnight. Once cool, you can store hide glue for a short time in the fridge or long-term in the freezer. Be sure to label it because it’s not the sort of stuff you’d want to put on your toast by mistake.
Scraping by
The fingerboard sides were straight and true, but the neck itself wasn’t. I had attempted to leave a slight binding overhang after the fingerboard was glued on, but the overhang depth was far from consistent. In some areas, it was almost as deep as the binding itself.
This inconsistency probably had more to do with play wear than with shoddy craftsmanship. The neck wood in the ‘cowboy chord’ area showed a lot of oxidation, which means the finish had worn away through playing, and some of the wood had been worn away too.
This had resulted in an asymmetrical profile that actually felt extremely comfortable. The only solution was to trim the binding to conform to the neckwear – as if it had been on the guitar since new and had worn along with everything else.
At the other end, the fingerboard extension had ended up about 0.5mm wider than the binding; so the binding overhang was scraped using a fresh Stanley knife blade. I took care to follow the neck contour and avoid creating a lumpy ‘shoulder’ at the wood/binding transition. The wood was sanded flush to the binding at the top end using a flat block and I took the opportunity to sand out all the scratches and uneven staining.
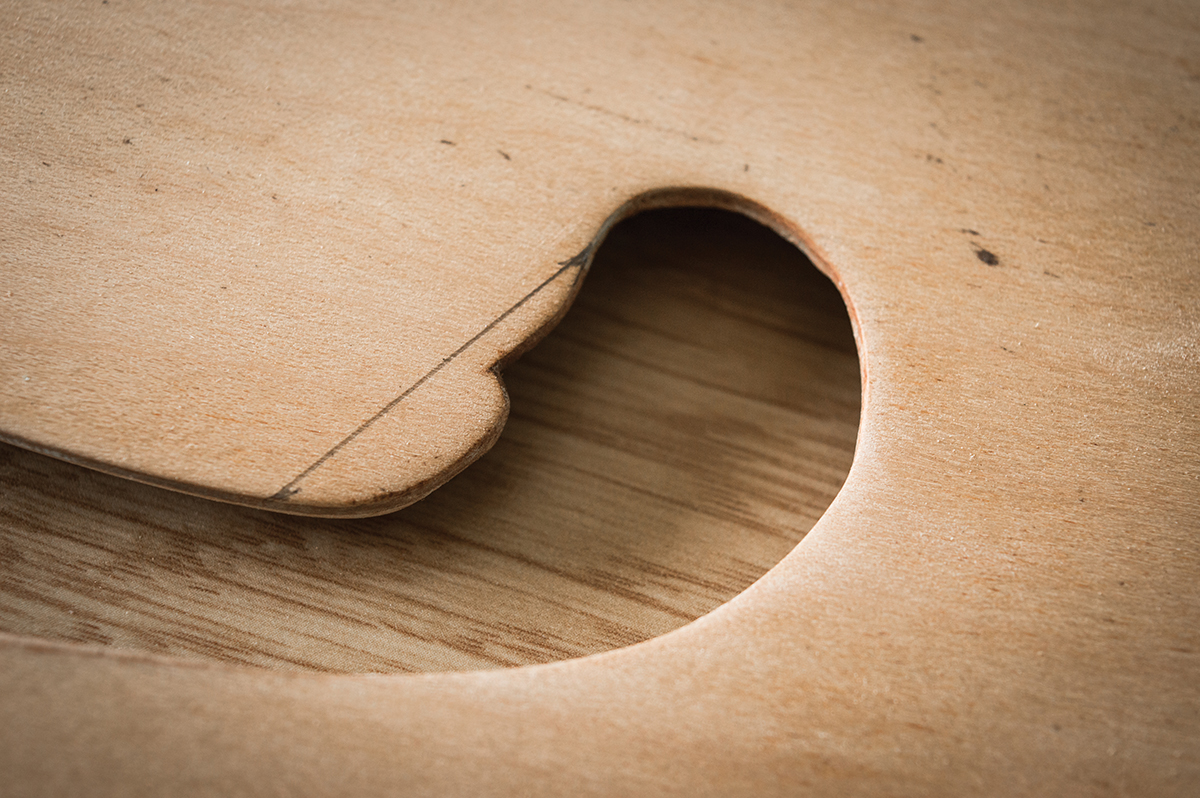
Fixing the holes
Two differences between the Anniversary and 6120 f-holes are the shape and the binding. Only the 6120’s had f-hole binding and the Anniversary’s holes were squared off rather than pointed.
My friend Daniel Nicholas sent over some highly detailed photos of his 6120’s f-holes with a ruler in shot. This allowed me to print off the photo to exact scale to make a 6120-shaped f-hole template.
I used a craft knife to cut out the f-hole shape along the inside binding line in the photo and placed it over the Anniversary’s f-holes to determine how much modification would be needed. As it turned out, I needed to remove only small quantities of wood to sharpen the square cuts to points and widen the gaps very slightly.
Having marked the 6120 f-hole outlines onto the Anniversary top, I reshaped the f-holes using a rasp, files and sandpaper. Everything went smoothly and quickly on the bass side. However, there was a slight complication with the treble-side f-hole.
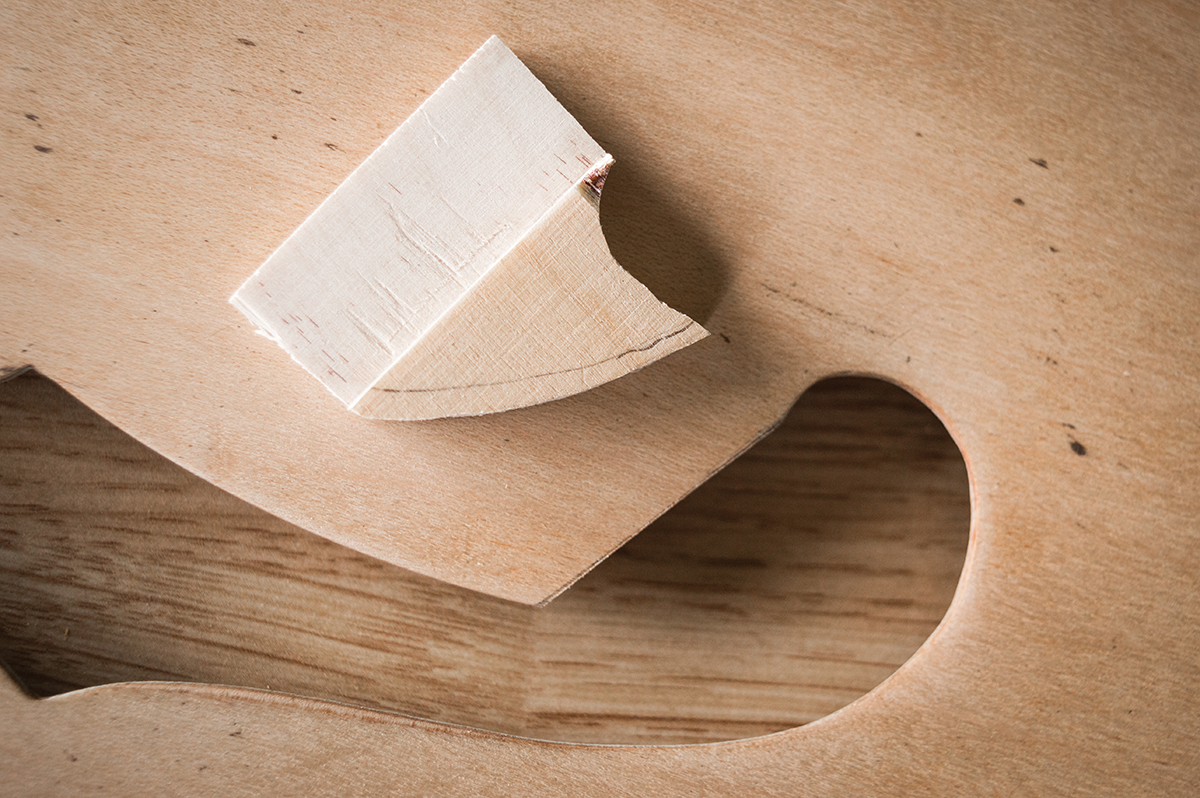
You may recall from previous articles that the treble-side hole was slightly damaged and a section under the pickguard area had snapped off. I made a straight diagonal cut across the damaged area with a fine-toothed veneer saw . Next, I cut straight across a scrap piece of five-layer plywood, going two layers deep to match the thickness of the Anniversary top and chiselled out a ledge.
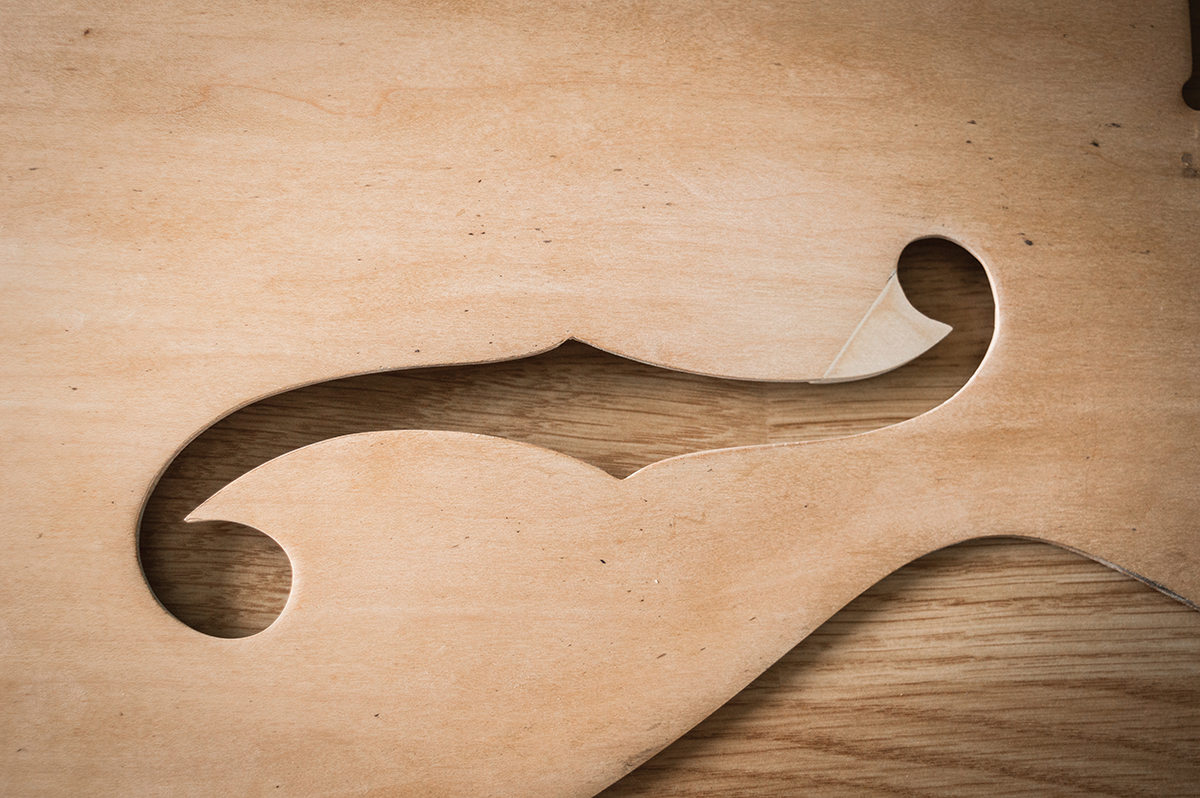
The plywood butted up against my diagonal cut in the Anniversary top and the ledge provided a gluing surface to attach the patch from the back. Cascamite glue seemed like the best option, and once it was set I made a template from the other hole, transferred the outline onto the patch and reshaped the area. The joint felt extremely solid and I used two-pack wood filler to fill any gaps and smooth the transitions.
Admittedly, it’s not the finest bit of woodworking you’ll ever see, and if I were simply planning to respray the top the repair would be obvious. However, that was never my plan. This three-ply top had lost so much of its original thickness through at least two stripdowns that the top layer of ply was almost completely sanded through.
The top’s tap tone was also flubby and indistinct, which may account partly for the dull and muted tone I heard when I first strung up the guitar before restoration began. So, given all the extra pickup screw holes, f-hole damage and loss of thickness, my intention from the start had been to re-veneer the top. Unfortunately, you’ll have to wait for the next instalment to see how that turns out.
I’d like to sign off by mentioning two good friends who have helped out with this project from the start. Firstly, Tony Berrington, who dragged his gorgeous ’59 6120 all the way to Wales for me to prod, poke and measure. Secondly, Daniel Nicholas, who sent incredibly detailed reference pictures of two vintage 6120s, along with meticulous measurements of every bit of binding, inlay, dot and hole. Thanks fellas.
Check out the other parts of this project here.