Related Tags
DIY Workshop: Gretsch Anniversary to 6120 conversion (Part Six)
As he reaches the end of his epic Gretsch conversion project, Huw Price tackles body binding, re-sets the neck, routs pickup holes, stains and sprays before moving on to the final assembly.
Getting the binding on was hard, scraping it flush was even harder, and it was the least enjoyable part of this restoration
It’s well over a year since the freezing day when I bought hose for my steam needle tool to get this project underway. But that’s enough nostalgia because the editor has told me it’s time to get it finished – and he makes a fair point.
So, this month I’ll be binding the body, re-setting the neck, routing the pickup holes, staining, spraying and reassembling. If all goes to plan, there’ll be a playable Gretsch at the end of it.
Body binding
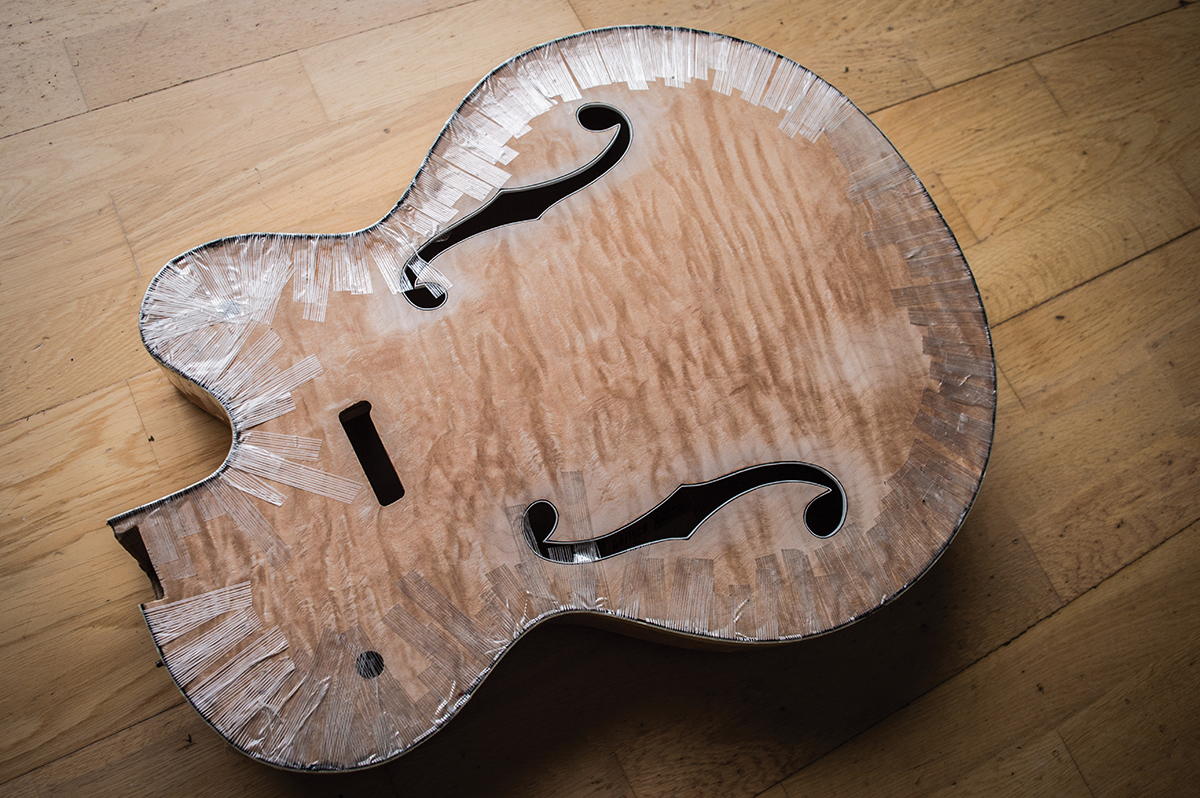
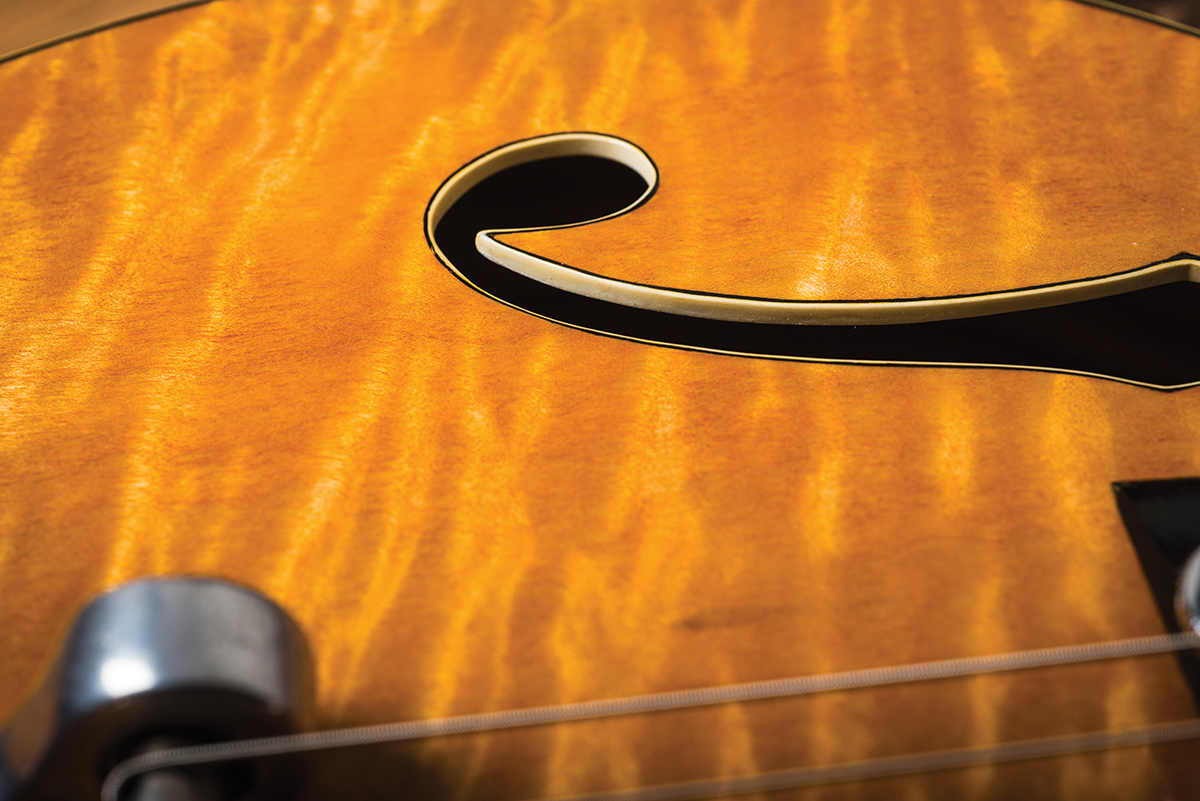
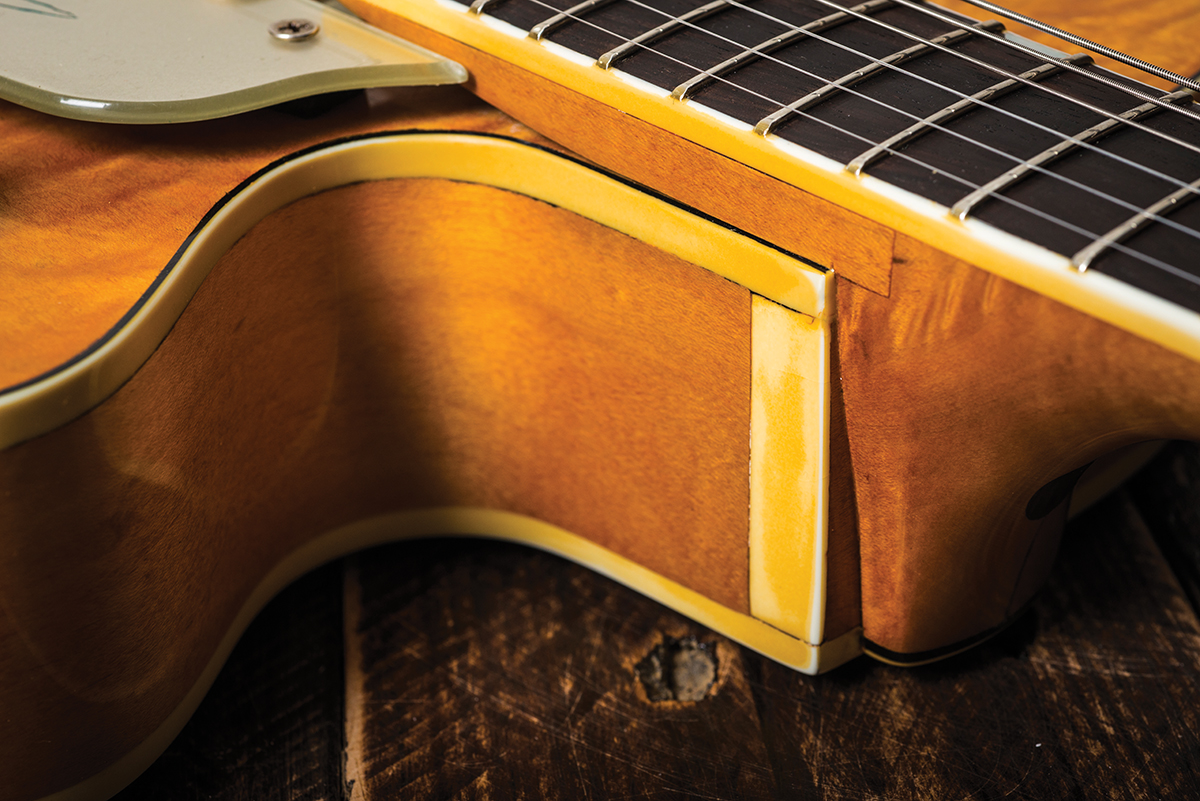
Having glued the top back on, I needed to re-bind the top of the body. Had it not been for the extra thickness of the veneer, it would have been possible to reuse the original binding, which had come off intact. Instead, I used 1mm black from Rothko & Frost, and some 1.5mm off-white from Allparts UK.

Although the off-white was very pliable, the black too easily snapped when bent. With cutaways and curves to negotiate, I had to pre-bend the black binding by heating it with a hot air gun. I applied both layers simultaneously using Weld 16 plastic cement, holding the binding in place with some Rothko & Frost binding tape.
It was a stressful and mucky experience, but I just about got away with it. Had I used a 0.5mm black layer and fixed the binding with Superglue gel, the result might have been better, and less scraping would have been required.

Weld 16 is a very effective binding glue, but I would only consider using it again for single-colour binding, because black melts into white with potentially messy results.
Neck re-set
Although I’ve built and restored a handful of acoustics, the neck sets have never been perfect. The angles have always been fine and, as far as I’m aware, the joints have never failed, but there have always been slight gaps between the heel and the body.
It quickly became apparent that this Gretsch neck re-set was going to be problematic. The sides were neither square nor straight and the original centre line didn’t correspond with the actual centre of the body.
There was also the issue of the joint itself, which was cut so badly that the Gretsch factory had built up a quarter-inch thick shim using mahogany veneer. I figured this old guitar deserved something better than my rudimentary woodworking ability, so it was back to Patrick Alexander’s workshop in Bristol to get the job done properly.
Even with Patrick’s daunting skills and specialist tools, this re-set took the best part of a day. Patrick began by establishing the centre line, with the original tailpiece mounted onto the body. Shims were made for the neck block to close the gap, and he gradually tightened the joint by filing away high spots that he identified using blue chalk.
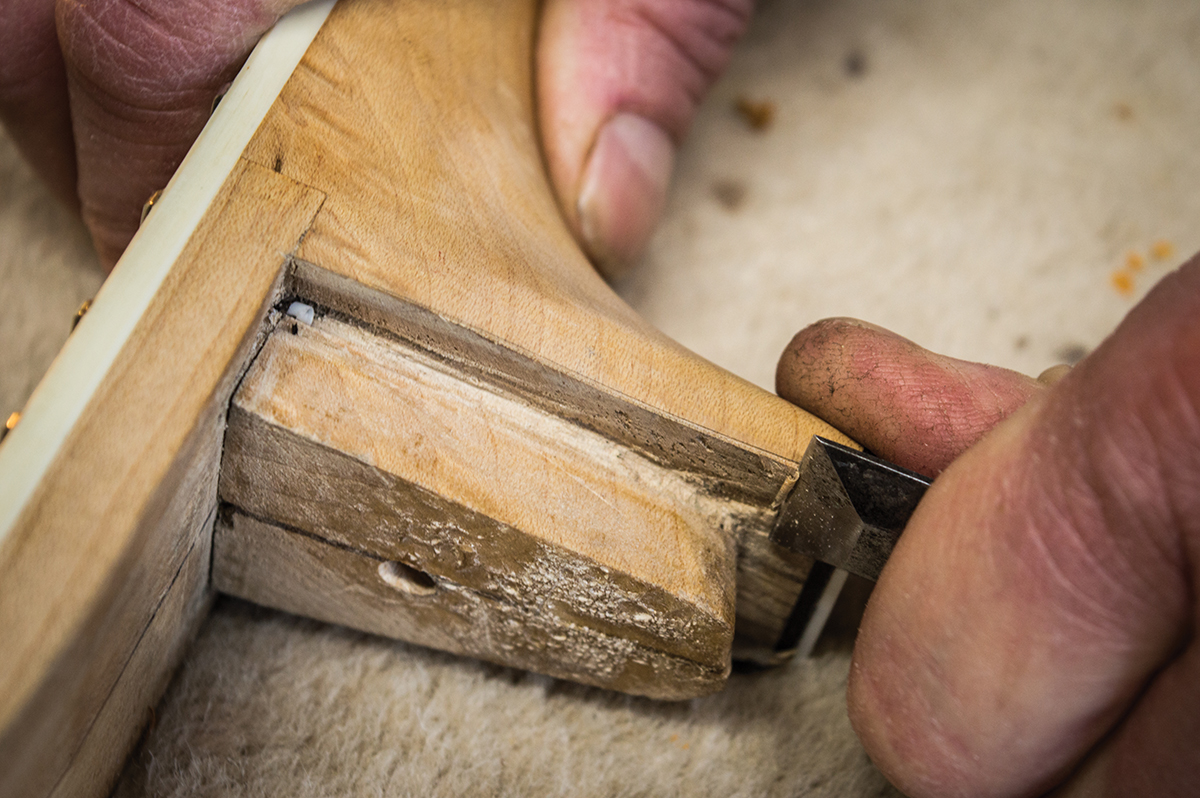
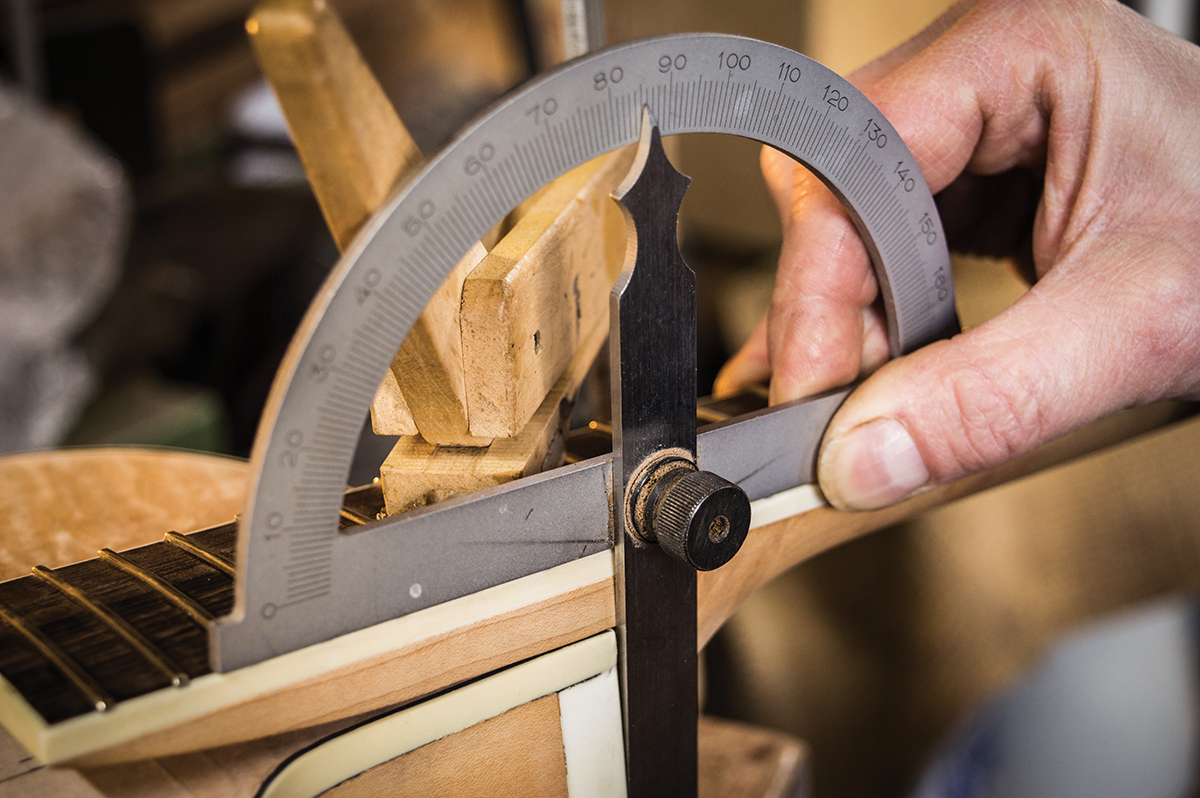
The heel edges had to be carefully shaped using chisels in order to conform the body’s curves, and also to achieve the correct back angle.
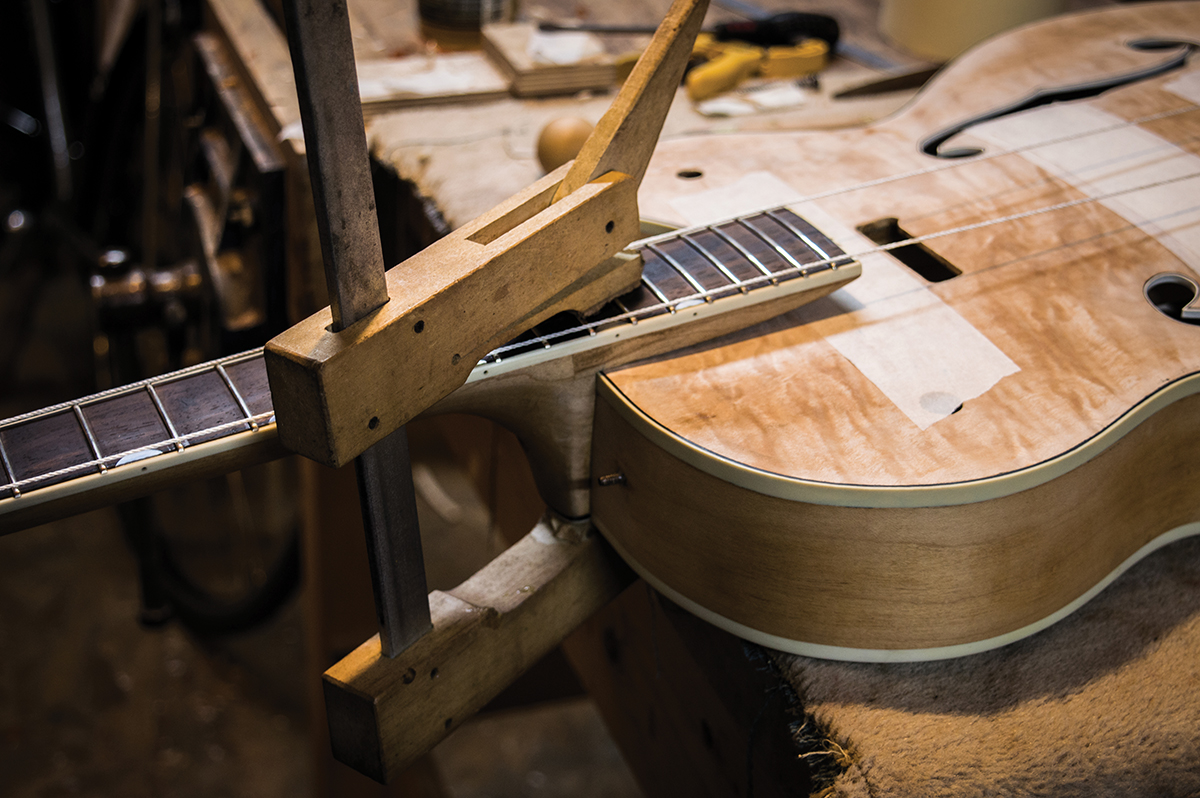
Considering this guitar had twice been stripped and sprayed, it’s probable that the sides acquired their unwanted curves somewhere along the way as a result of over-sanding. Eventually, Patrick decided the joint was as tight as it would ever be, so we applied hot hide glue and clamps before reinstating the neck screw. Since the screw is so far up the heel, it seems implausible that Gretsch used them in lieu of clamps.
We concluded it was more likely that the screws would have been introduced soon after the necks had been glued and clamped. Since hide glue grabs fast, maybe the screws were merely intended to hold the necks until the glue cured fully. After all, wood screws are cheaper than clamps when you’re making hundreds of guitars.
Sounding board
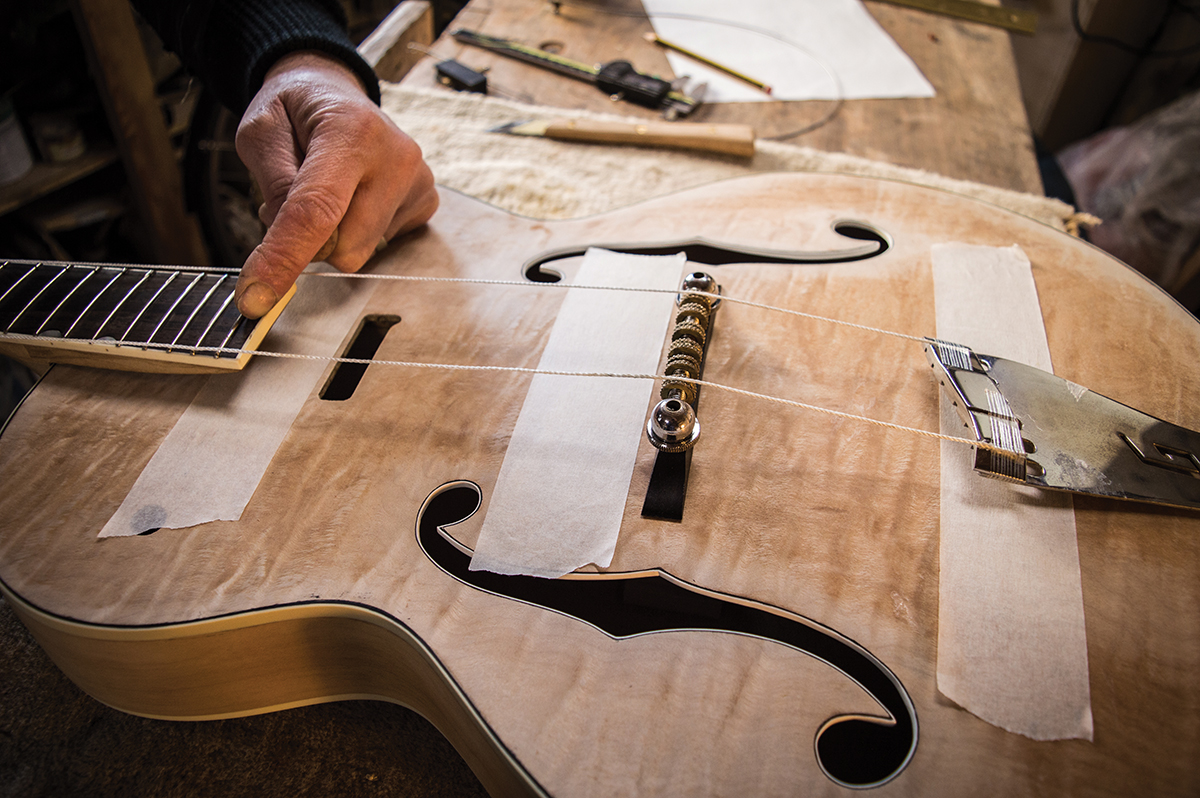
With Patrick’s warnings ringing in my ears, I duly waited 48 hours before putting the tuners and the shimmed nut back onto the guitar and stringing it up. I had long imagined this moment, and it was a thrill to find that everything lined up properly, with the strings equidistant from the board edges and a healthy break angle over the bridge.

The tone was transformed from the dull and muted thud I heard when I first bought the guitar. After it had settled overnight, the Gretsch revealed its new voice with increased volume, brightness and sustain. I could hear the effect of the trestles too, with a firmer midrange and longer sustain than I would normally associate with traditionally made acoustic archtops.
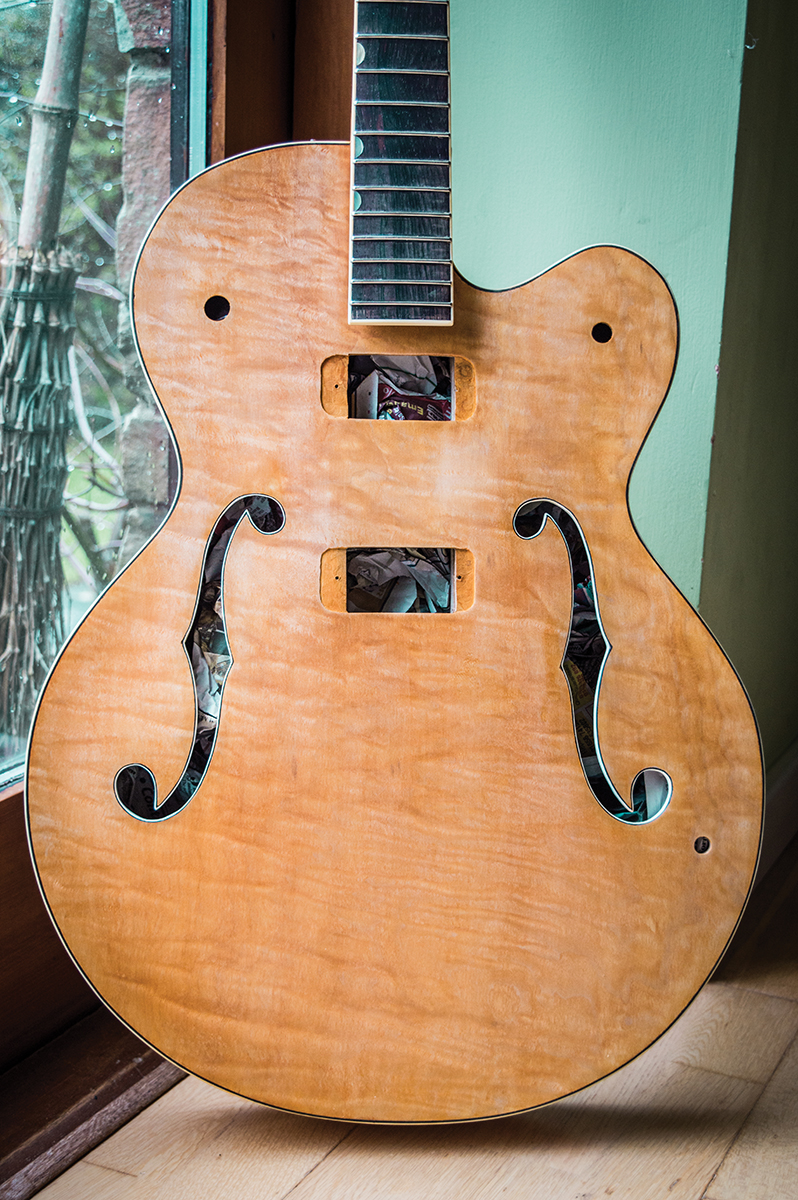
Pickup positioning
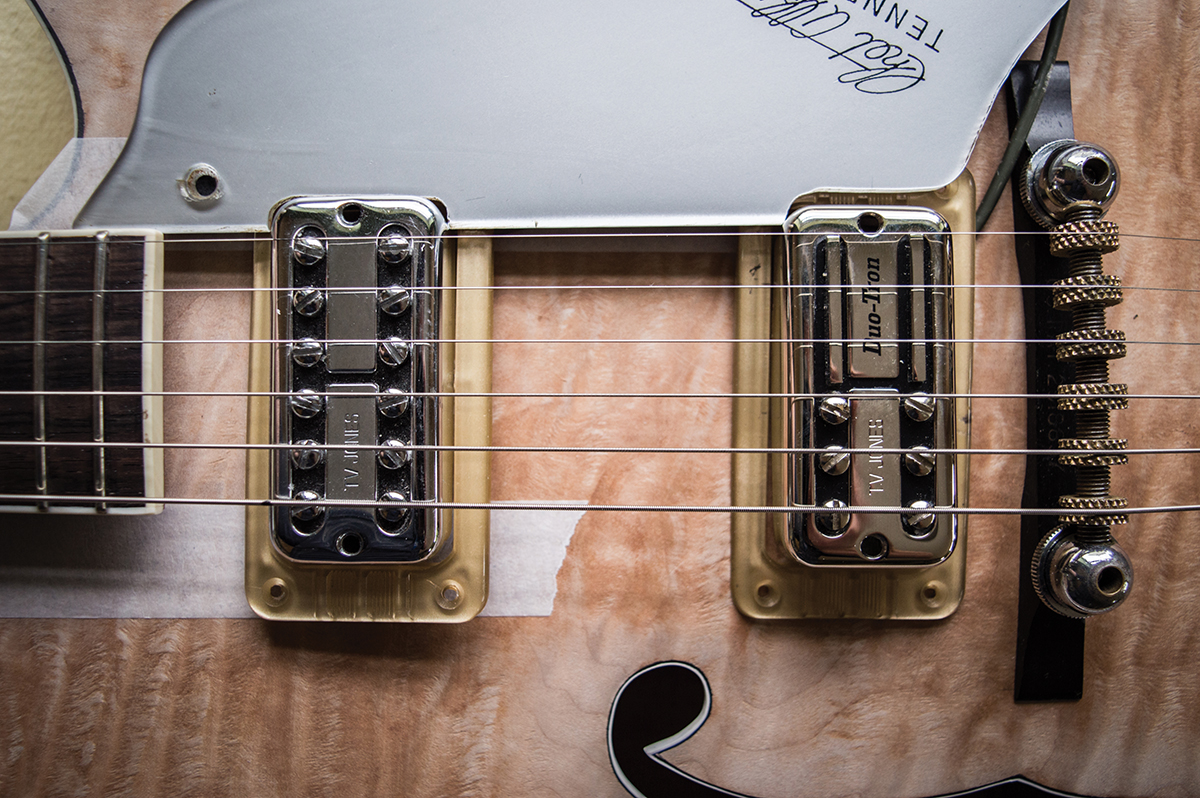
With the Gretsch back up and running, and a working centre line established, it was time to position the pickups. Vintage 6120 owner Daniel Nicholas provided me with accurate measurements of polepiece positions relative to the 12th fret. However, the neck pickup looked strange when I used Daniel’s dimensions.

The issue was that Anniversary models have one fret fewer than the 6120 – 21 rather than 22 – so the gap between the neck pickup and the end of the fingerboard seemed excessive. If I closed up the gap, the spacing between the neck and the bridge pickup increased – and that looked peculiar, too.
After much deliberation and moving things about, along with my Tennessean pickguard, I made a decision. In stock form, the octave harmonic coincides with the edge of the neck pickup cover. Since the harmonic is above the polepieces on Les Pauls and Strats, I figured the Gretsch’s sound might actually benefit if I moved the neck pickup 1cm closer to the fingerboard.
At the same time, I decided to maintain the standard gap between the pickups by moving the bridge pickup towards the neck, too.
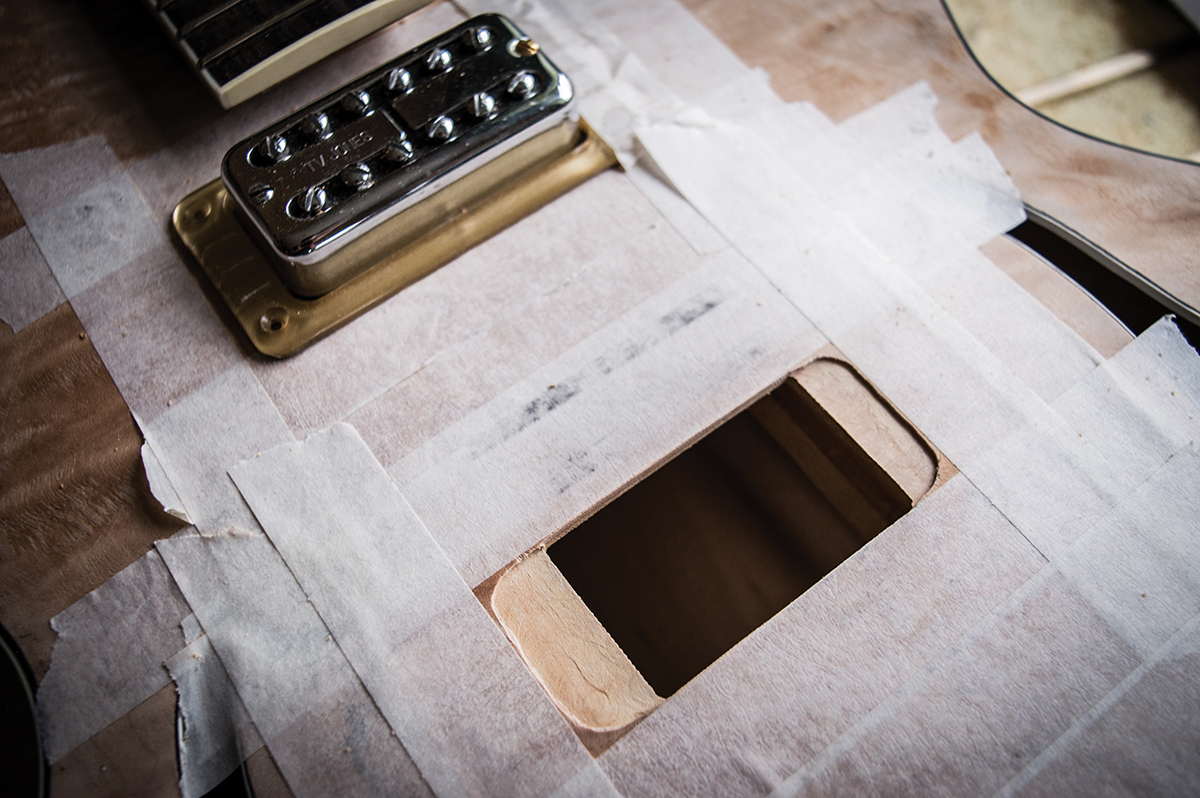
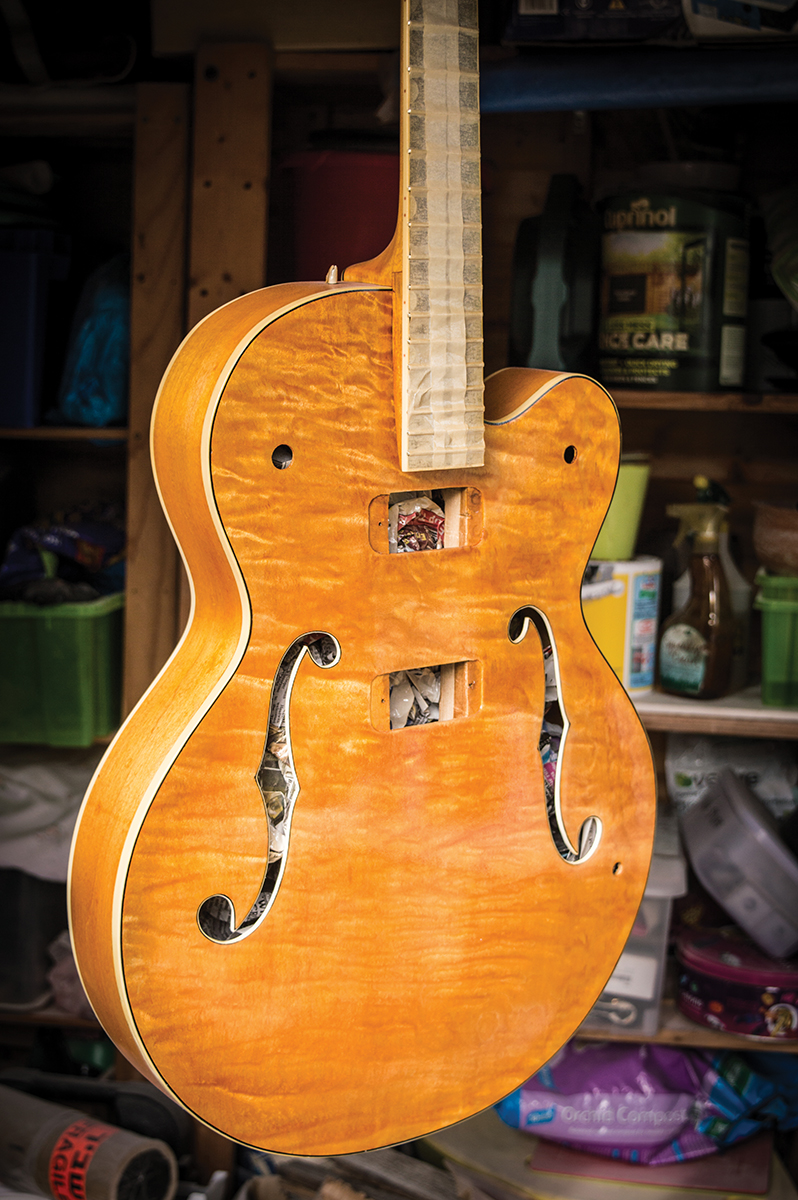
With the pickup positions decided, I drew around the covers, applied masking tape to protect the top and drilled pilot holes . Using my Dremel in a Stewart-MacDonald router base, I gradually cut through the top, taking the cuts fairly close to the braces and the edge lines before using my rasp and files to finesse the edges.
Vintage Filter’Trons have base plate extensions that sit in recesses routed into the top. These recesses are generally deeper than they need to be, and it’s common to see vintage Filter’Trons jacked up on shims or foam rubber spacers to get them closer to the strings.
Since I didn’t want to rout deeper that I needed to, I established the polepiece-to-string gaps I wanted with a set of TV Jones Setzer Signatures in a La Cabronita, figured out the pickup heights and the body-to-string gap on the Gretsch, then performed a simple calculation to determine the rout depth needed to achieve the required polepiece-to-string gap for the neck and bridge pickups.
The routs were done freehand using the Dremel. Although it sounds scary and the results are somewhat less than ‘perfect’, at least they look fairly authentic. There’s no doubt that the guys at the Gretsch factory routed freehand, and the results were occasionally chuckle-inducing.
With a set of pickups sitting in the routs and the guitar strung up, I made fine adjustments to the pickup positions to align the polepieces under the strings and drilled pilot holes for the cover screws.
Looming large
There was no way I was going to wait until this guitar was finished before trying it out, but to do so I had to make up a wiring loom. As I have mentioned previously, my plan was to configure this guitar as a ‘hot rod’ with simplified controls, so part of my reason for a test run was to decide whether I would be happy with master volume and tone controls.
Thankfully, a simplified loom was easy to assemble and install – the big pickup cutouts and wide f-holes providing easy access. To test the wiring and pickups, I drilled one hole in the position usually used for the neck pickup volume control.

Should a future owner want to change to a vintage arrangement with a mud switch and individual volume controls, only two extra holes and a new loom would be required. Having established that I was happy with the hot-rodded wiring, after a week or so of Gretschy fun I forced myself to strip the guitar back down and get it ready for spraying.
On the dot
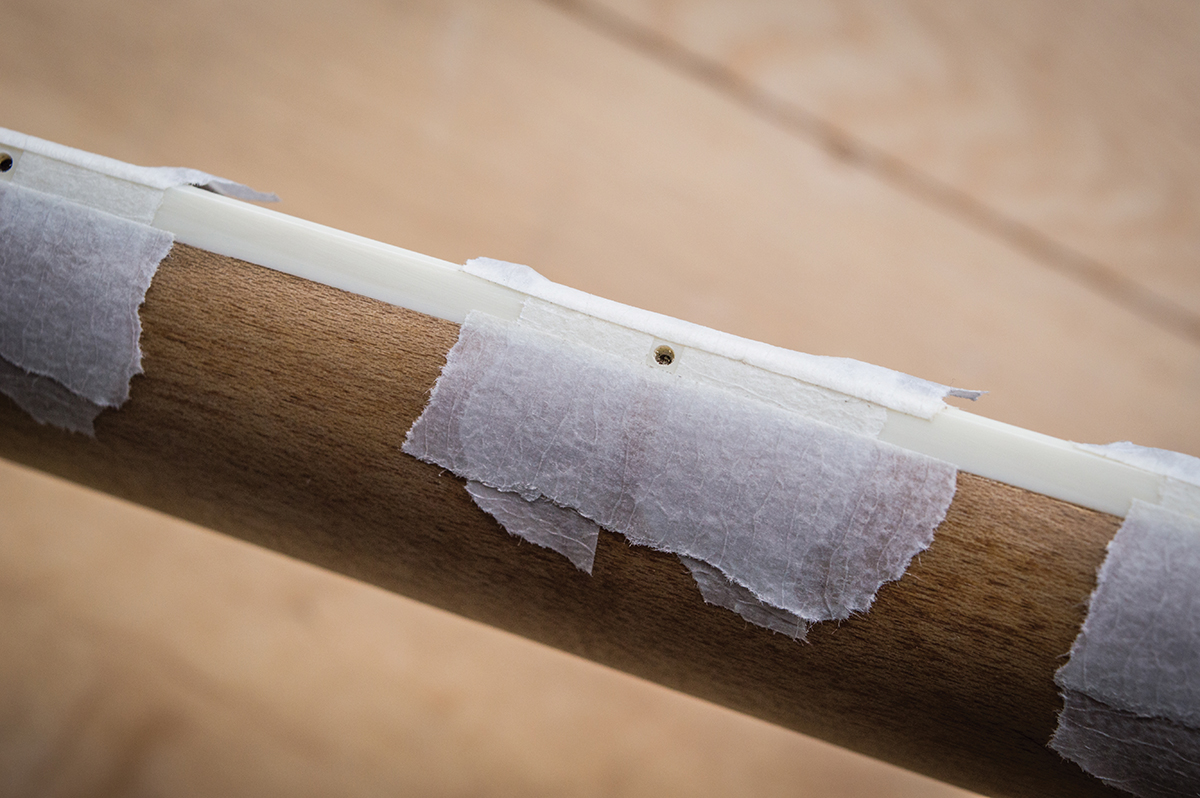
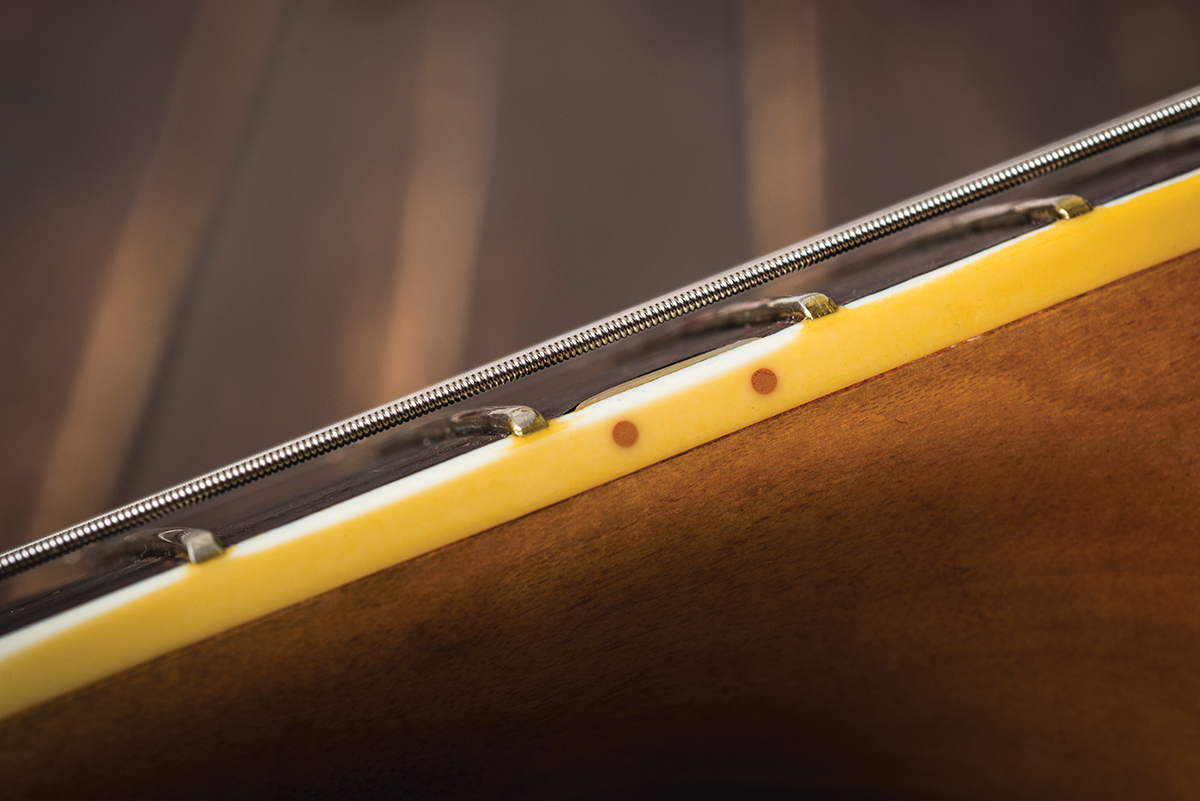
One of the dilemmas with vintage guitar restorations is whether to replicate some quirks and inconsistencies of the original manufacturing process that could be improved. Gretsch’s approach to dot marker positioning on the side of the fingerboard is one example.
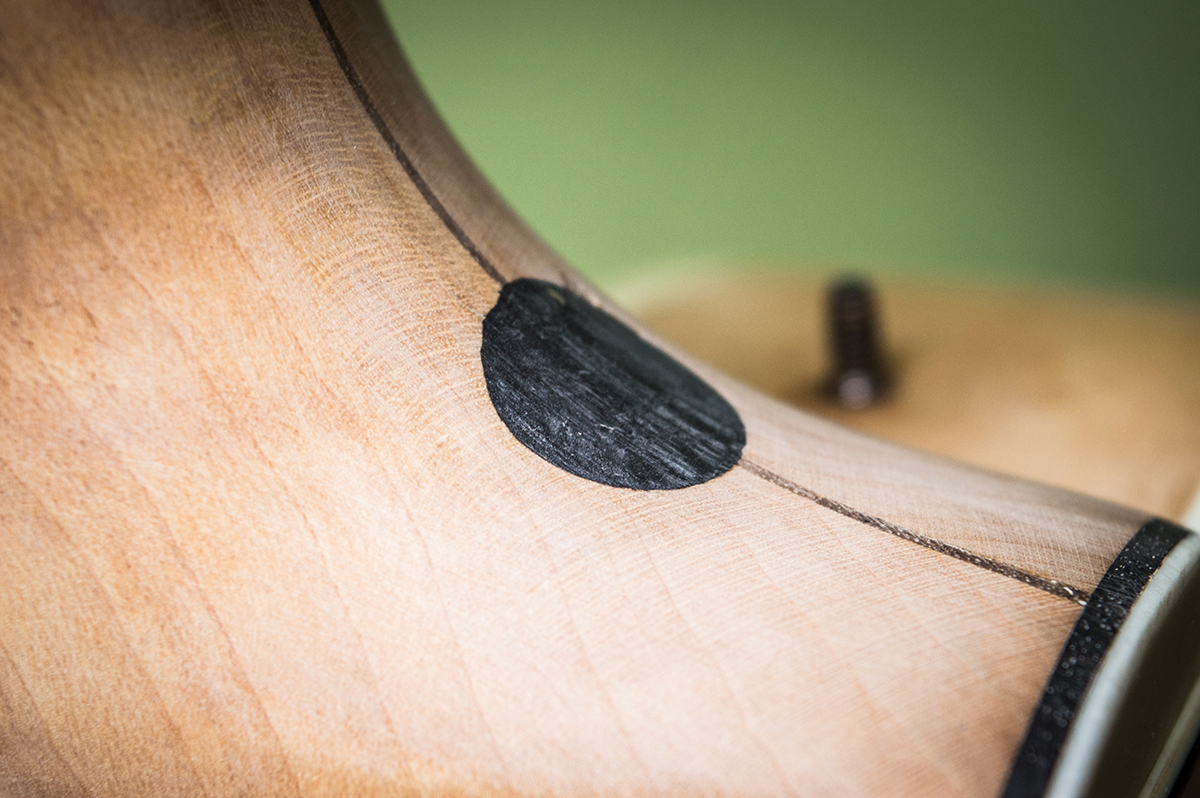
Most guitar manufacturers, then and now, would attempt to position the dots dead centre between the frets and between the top and bottom binding edges. In contrast, Gretsch simply ‘eyeballed’ it with inconsistent and occasionally alarming results.
I decided to ‘eyeball’ it too, but I was careful about it. Prior to the neck re-set, I had drilled 1/16-inch holes into the binding for the dots while I still had easy access. Daniel Nicholas sent over fantastic close-up pictures of the dots on his vintage Gretsches and I mixed some red stain into Rustins natural grain filler to replicate the faded dirty pink appearance. The paste was pressed into the holes, allowed to dry and sanded flush.
The big ‘O’
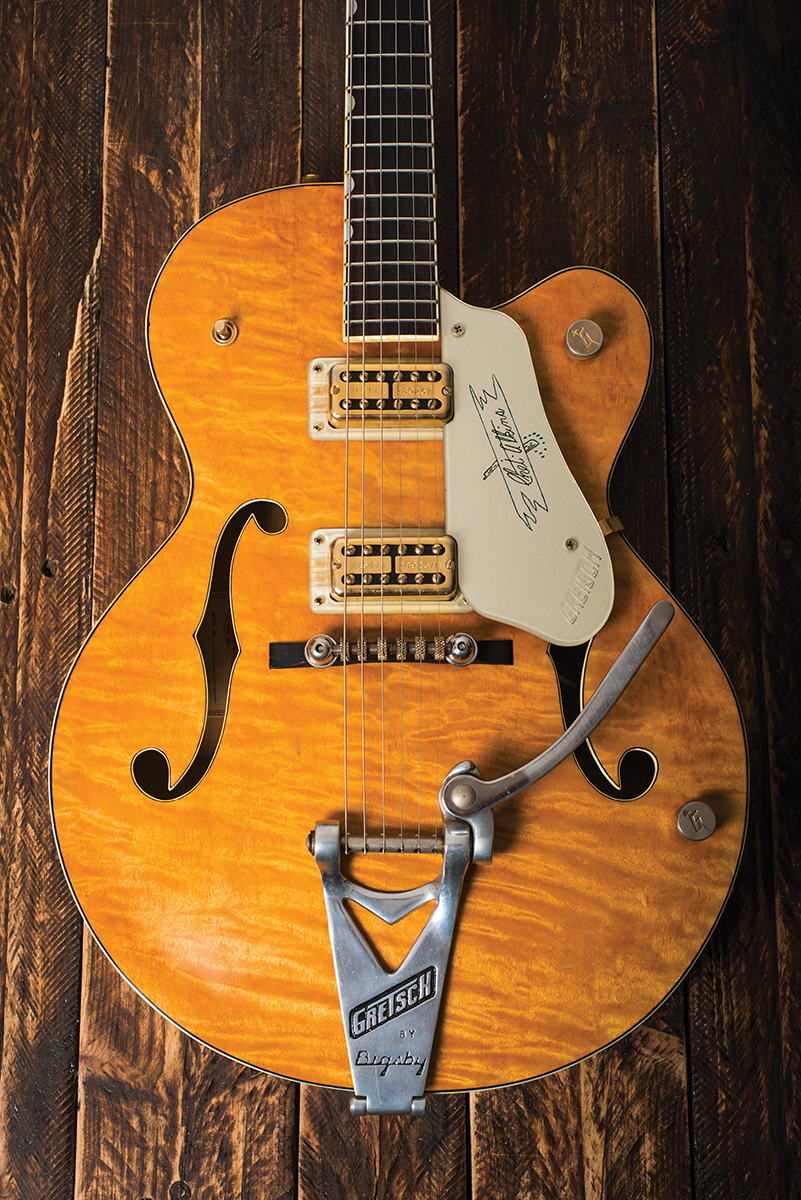
Gretsch used stain to achieve the iconic orange finish of the 6120 models but, just like vintage Gibsons, they were prone to fading. So, now you can look at a bunch of vintage 6120s and the colour shades will vary dramatically. This is good news for restorers because there is no ‘correct’ shade of orange. I collected pictures of examples I liked the look of to try to replicate their finishes.
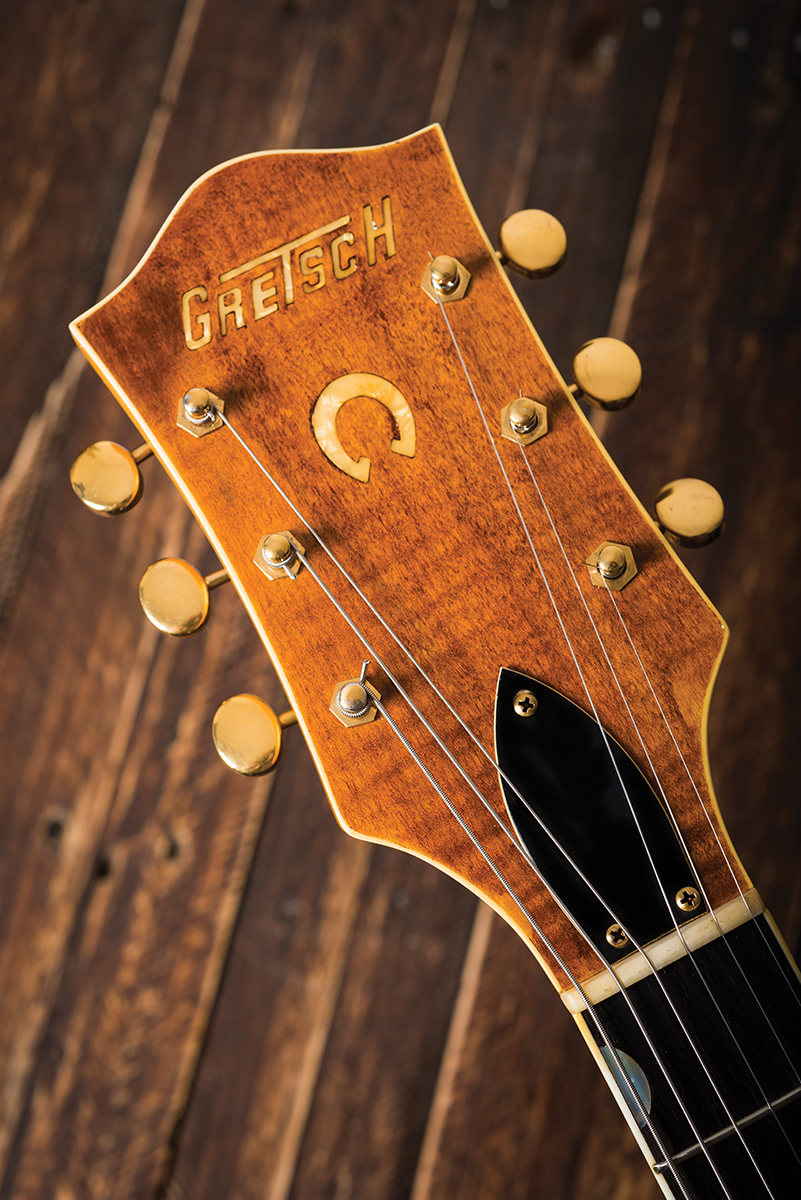
Fortunately, this stage of the project coincided with a trip to Manchester, where I hooked up with Steve Robinson – aka Manchester Guitar Tech. I had previously sent him pictures of my favourite 6120s, and he kindly mixed up some amber and orange stains.
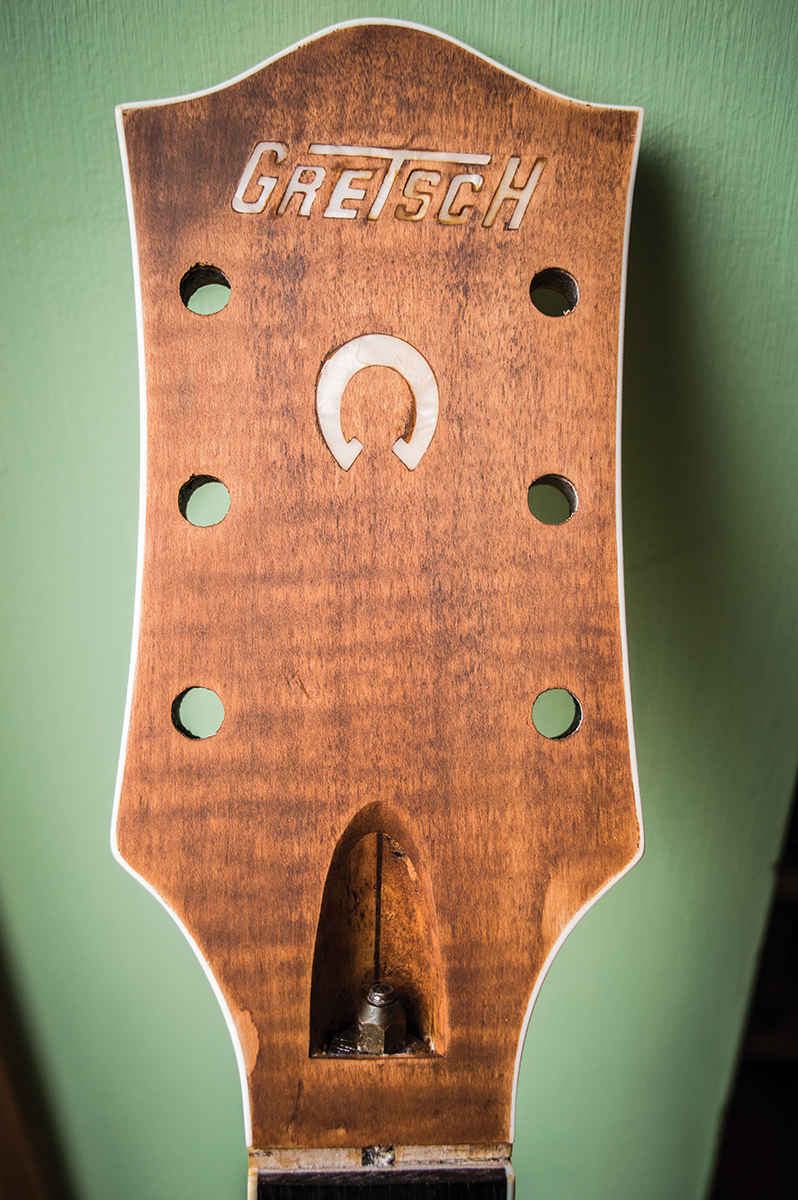
Back home, I tried the stains on some maple veneer off-cuts, which I sprayed with tinted clear lacquer to get an impression of how they’d look after finishing. I went with Steve’s amber stain diluted 50/50 with isopropyl alcohol for the neck and body, and Steve’s orange mixed with medium brown and amber Colortone stains for the headstock overlay.
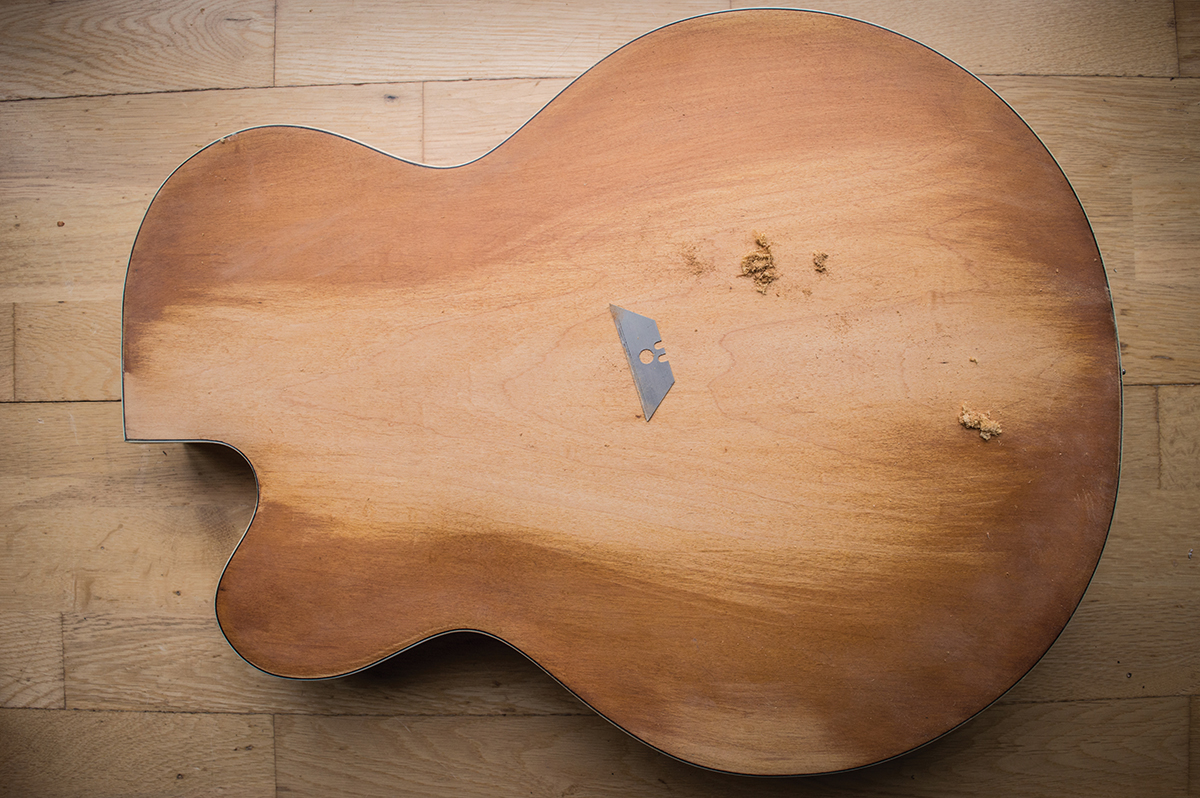
Prior to applying the stain, I filled the neck screw hole, scraped and sanded the entire guitar with 320-grit paper then rolled the corners of the replaced binding . For the top, I dampened the veneer to raise the grain and sanded it back – repeating the process three times. A torn-off piece of cotton t-shirt was used to apply the stain, which dried rapidly having been dissolved in alcohol.
Tests had already shown that the stain wouldn’t penetrate the binding, so cleaning it off the plastic would be quick and easy. The whole guitar was sanded with 320-grit paper and wiped down with a tack cloth, then the staining and sanding process was repeated. After three cycles, the guitar was finally ready for spraying.
Get your coat on
As always, Manchester Guitar Tech supplied the necessary lacquer – a can of tinted clear and three cans of clear gloss. Compared to open-pore woods such as mahogany and rosewood, spraying maple is a breeze because no grain filler is required.
After emptying the body of splinters, sawdust and stray pieces of sandpaper, the guitar was carefully vacuumed and wiped down with tack cloth to remove any remaining dust, then stuffed with newspaper. The first few coats of tinted clear were misted on to seal the surface, while minimising the chances of the stain running.
Once the tinted clear coats had mellowed the appearance sufficiently, I built up the clear coats with two cans of clear gloss, sanded back with 600-grit then emptied a third can of clear gloss. Once the lacquer had cured, I cut it back with 800, 1200 and 1500-grade wet and dry paper, followed by 4000-, 6000- and 8000-grit micromesh. No polishing compound was used because I prefer a softer sheen on relics and restoration projects.
Hardware
Having already owned the husk for a few years before starting this project, I managed to acquire the necessary parts along the way. Initially, I had planned to keep costs down by using repro parts and relic’ing them, but waiting gave me the opportunity to find some vintage bargains. Soon, I began to consider this guitar as a home for stray Gretsch parts.
 The vintage parts eventually included a set of chrome Waverly tuners, a 60s V-cut Bigsby, an original pickguard bracket and a set of 60s Filter’Trons with gold covers. The space control bridge was original to the guitar, and since I preferred its sound to the bar bridge from my Tennessean, I decided to use it instead of a vintage-correct bar bridge.
The guitar also came with strap buttons and a gold pickguard with a square-cornered cut-out for a single DeArmond. I don’t know if it was vintage or a reissue, but I suspect the latter.
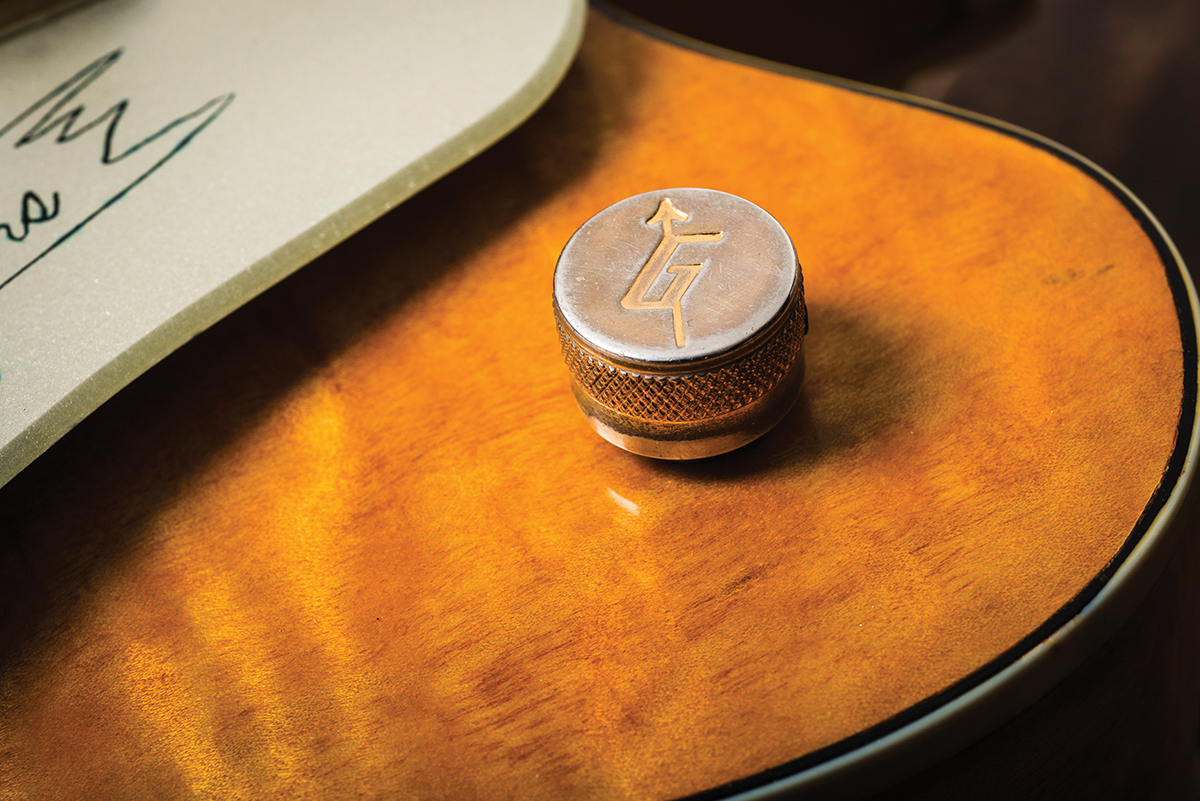
I cut Filter’Tron-style notches, along with a curved back edge into the pickguard, which was simple enough with a table router. Finally, I made a water slide signpost decal and chose a shade of greenish-gold at my local car paint suppliers to coat the back of the pickguard and repro pickup rings.
A 1960 Gretsch 6120 would have had gold-plated hardware, so the chrome tuners, pickguard bracket and strap buttons went to Wedgwood Brass, Cardiff for gold plating.
The repro knobs, jack socket and switch were shaken about in a bag to induce surface scratching and dents, then I rubbed away some of the gold with Brasso to reveal the nickel base coat before dulling the metal in PCB etching fluid and washing everything thoroughly in water.
Rounding up
Although it would have been easy (perhaps easier) to do a vintage-correct 6120 conversion, that was never my intention. All along, I have been making my idealised version of a vintage 6120; keeping the features I wanted and ditching those I dislike, such as the flat ebony fingerboard, zero fret, bright orange colour and convoluted controls.
This is a guitar I intend to enjoy as a regular player rather than a wall hanger that only gets an outing when I need a ‘special effect’.
So was it all worth it? I’ve put around £1,250 into this guitar, and had I been obliged to pay for all of this work to be done you could easily triple that. A refinished Gretsch Single Anniversary probably isn’t worth more than £750, and a 6120 conversion is worth only what somebody is prepared to pay for it.
Then again, Gretsch guru Ed Ball estimates the value of quilted top 6120s from the 1960 359 batch at $12,000 to $16,000.
 This was a very personal project that was all about creating the Gretsch I’ve been dreaming about since the 1980s. Although I’m not in the habit of naming guitars, I’m calling this one Clyde because it’s so big and orange. I’ve learned a lot along the way, and greatly enjoyed the whole process.
Now, turn the page to see pictures of the finished guitar – maybe some of you will feel inspired to try something similar… Huw sends his thanks to the late Gene Sword for making such a fine start on this restoration out in Oklahoma City, plus Daniel Nicholas, Patrick Alexander and Steve Robinson, without whose help, encouragement and expertise I couldn’t have done this.
 Check out the other parts of this project here.