Related Tags
DIY Workshop: Gretsch Anniversary to 6120 conversion (Part Two)
Our Gretsch conversion project gathers pace as Huw Price separates the fretboard from the neck, strips the headstock veneer and readies the body for the next step.
Well, the old Gretsch has dried off and settled down, so it’s time to crack on with the 6120 conversion. The next jobs I have lined up are to separate the fingerboard from the neck and strip off the headstock veneer. The body also needs to be readied for f-hole resizing and the installation of trestle bracing. That means the top is going to come off, and so the binding has to be removed. You’ve guessed it – yet more scary stuff involving heat and sharp objects. So, crossing my fingers while I still have some, let’s get to it.
Overlay obliteration
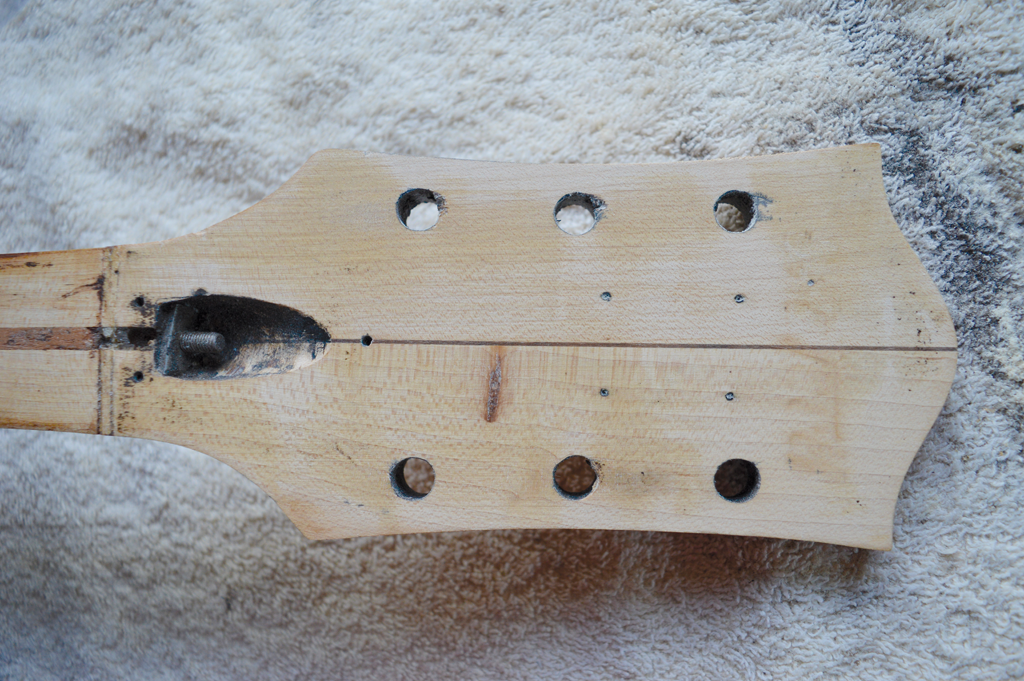
There were various reasons why I couldn’t retain the original headstock inlay. It was badly damaged in the areas around the tuner holes, which seems odd because there is no evidence of any tuners other than the original Waverlys ever having been fitted. Perhaps, then, the original bushings were glued in and took some timber with them when they were removed for respraying.
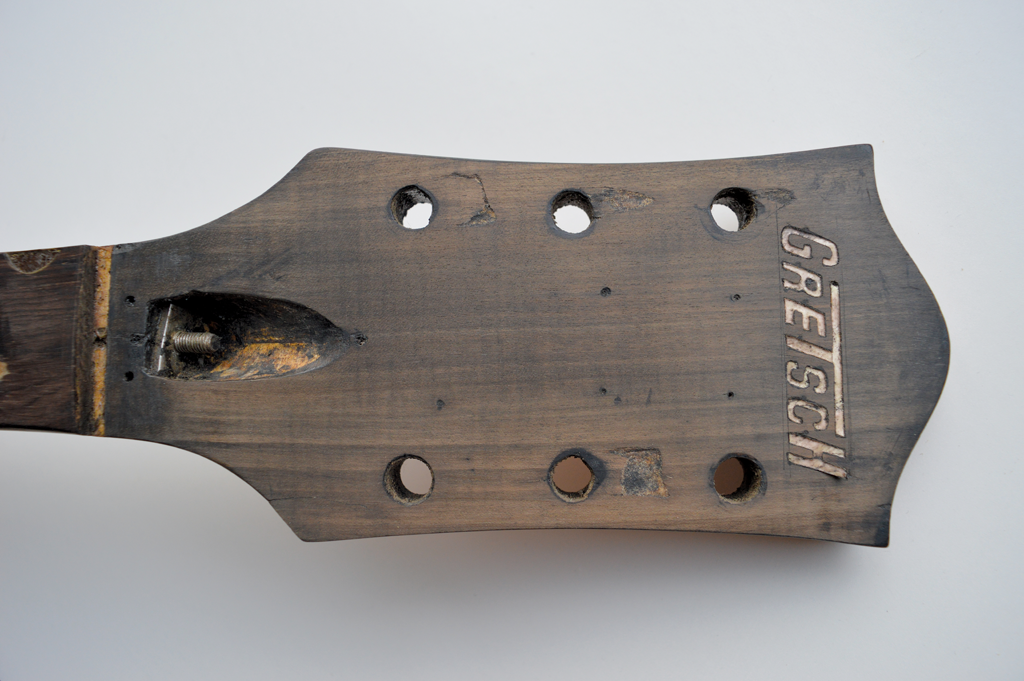
Since this is an Anniversary model, the overlay had originally been painted black. This allowed Gretsch to use up scraps of maple veneer, and this overlay had a join down one side. The maple had also been stained black at some point and there was no way to return the wood to its natural colour. Lastly, there were four nail holes left from the pins that secured the metal Anniversary nameplate, and the 6120 horseshoe logo won’t cover those up.
It would have been nice to be able to retain the original logo, but on these models Gretsch used some sort of pearloid plastic rather than genuine pearl. Paint stripper had taken its toll and although it looked OK from a distance, close-up the logo was just a shrunken mess of congealed plastic.
I’m not sure what glue Gretsch used for the headstock veneers, but I can report that if it had used the same stuff for neck joints there might have been fewer failures. No matter how much heat I applied with a clothes iron, it proved very reluctant to let go. The maple more or less disintegrated, leaving a powdery layer of sawdust and glue behind. With the wood removed, I cleaned off the residue using a Stanley knife blade as a scraper.
Locating pins
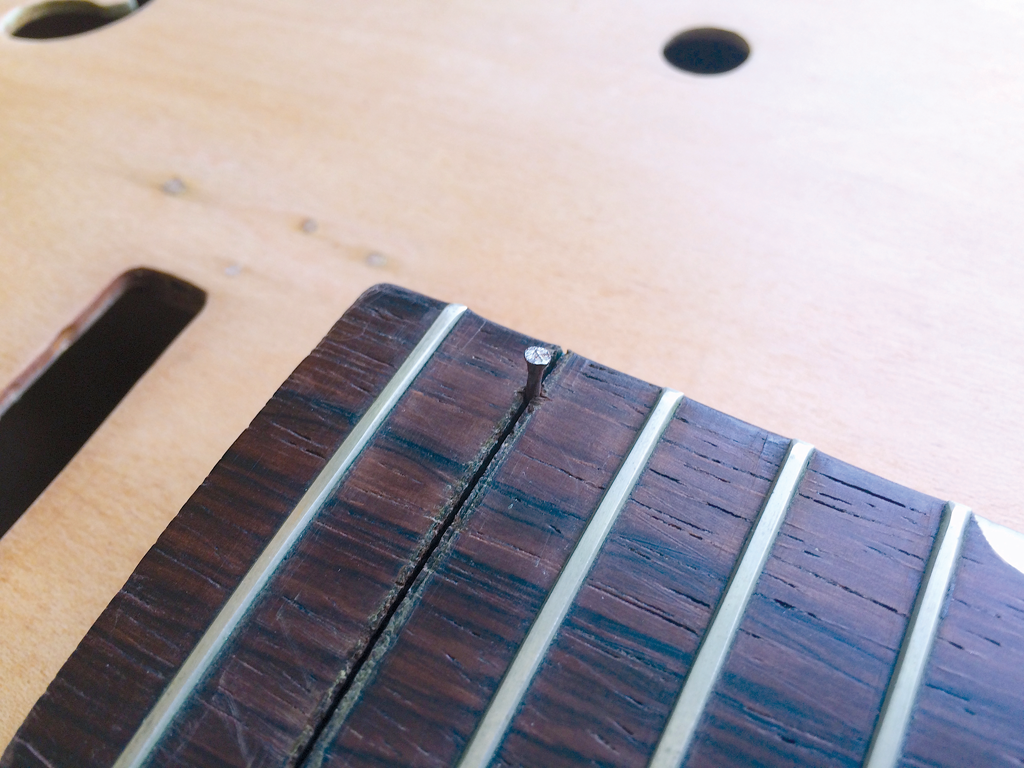
I know from past experience that gluing fingerboards onto necks can be a tricky business. Before it grips, glue provides a lovely slippery surface for the board to slide around on, and clamps can push the board all over the place; I find that locating pins make the whole process much easier.
With that in mind, I pulled out the first and 20th frets and drilled a pilot hole through each fret slot into the neck beneath – one on the treble side and the other on the bass side. Small pin nails were tapped through the holes then removed. Hopefully, these pins will make it easier to glue the board back onto the neck later.
Lifting the board
Before dismantling a neck, it’s important to test that the truss rod functions properly. It’s not unknown for old truss-rod threads to be stripped, or for rods to be snapped. Fortunately, this one worked fine, so I slackened it off, removed the bolt and work on the fretboard commenced.
Veneer excepted, the Gretsch factory seemed to favour hide glue, so heat was needed to soften the fingerboard glue. This time, I used a clothes iron on its maximum setting with the steam turned off. Leaving the frets installed ensures the iron doesn’t burn the wood, and some people maintain the metal transfers the heat more efficiently. I worked on one small area at a time, positioning the iron and setting a timer for 10 minutes.

The trickiest part was getting the separation started. Although the iron softens the glue, I found it necessary to use a putty knife, too. I also heated the putty knife on a gas ring to ease things along a little and eventually got it to slide under one corner of the fretboard in the nut area.
The key here is to work slowly and be patient. As soon as the putty knife stops sliding under the board, pull it out then heat it up and go a bit further in. When it stops for a second time, put the iron over the next few frets, wait for another 10 minutes and then repeat the whole process.
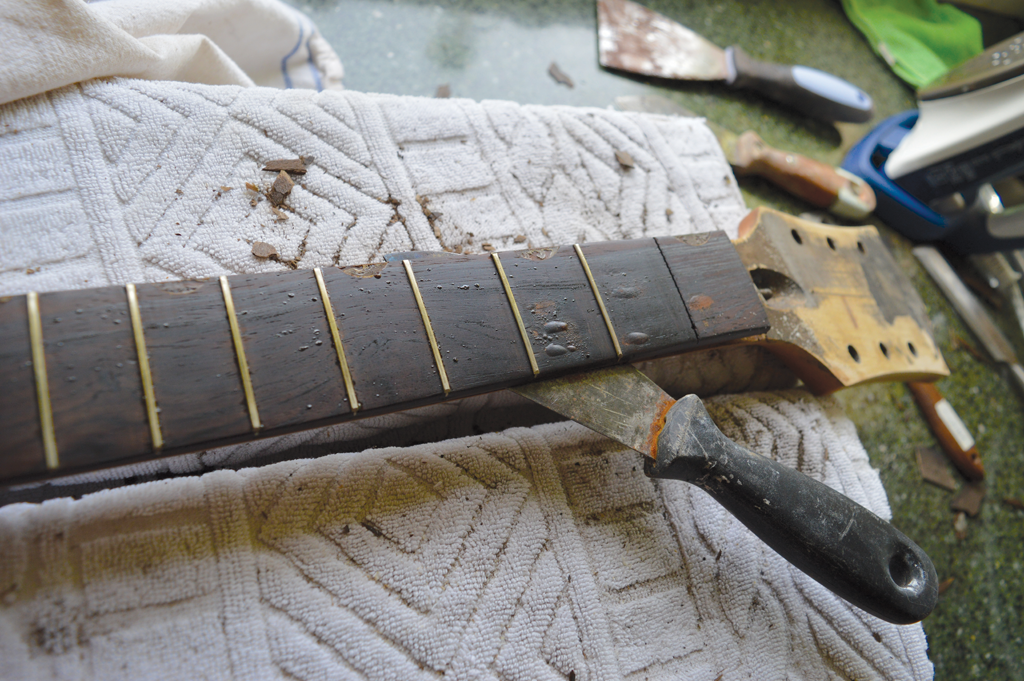
After about 30 minutes, the fingerboard was off and I hadn’t done any damage to the board or the neck. As I was working the iron along the neck, I used the heating-up time to remove the frets from the lifted areas of the fretboard. It’s always best to heat frets before removal to melt any glue that might be in the slots.
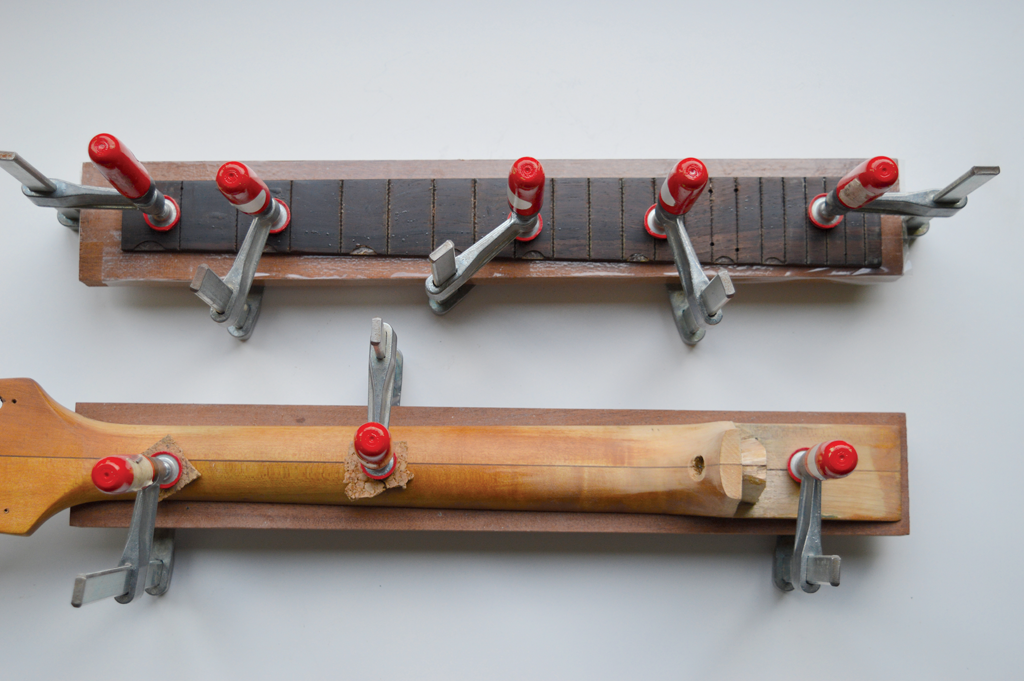
The iron had caused quite a lot of the glue in the slots to boil and squirt out, so the frets pulled up very easily. As soon as the board was off, I clamped it and the neck onto flat planks that I had covered with plastic tape. My hope was to keep them as flat as possible while they cooled down, and the plastic was used to prevent any soft glue from sticking to the planks.
Clean up
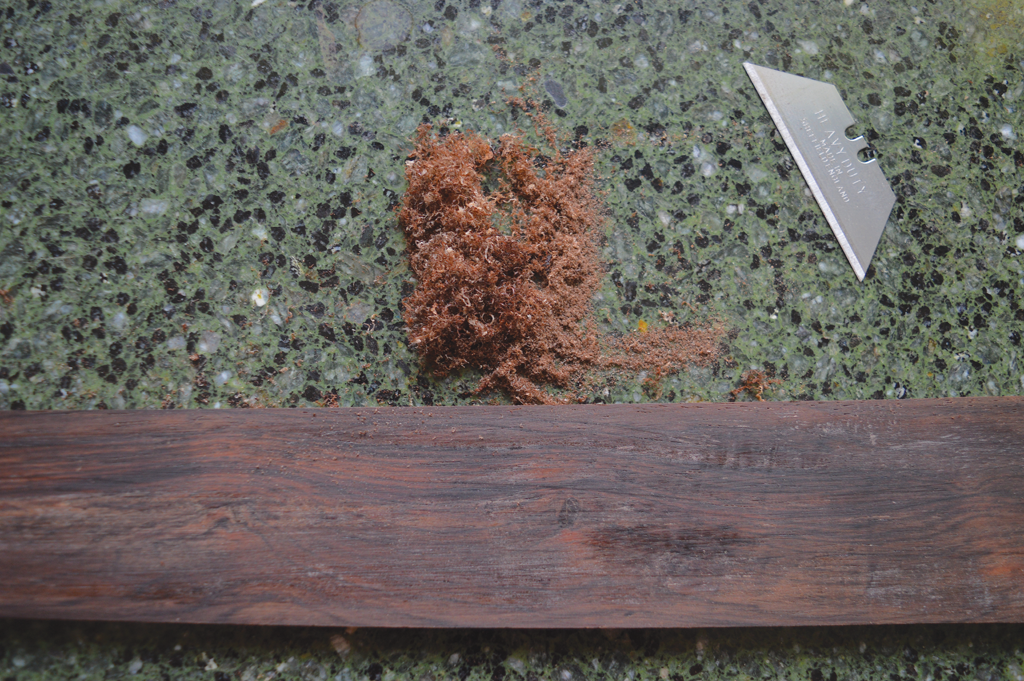
Later in the day, I used a Stanley knife scraper to clean up the back of the fretboard and the top of the neck. The idea is to remove the glue residue while removing as little wood as possible. Scraping the glue off the board revealed some beautiful grain, and my guess would be that it’s very old-growth South American rosewood.
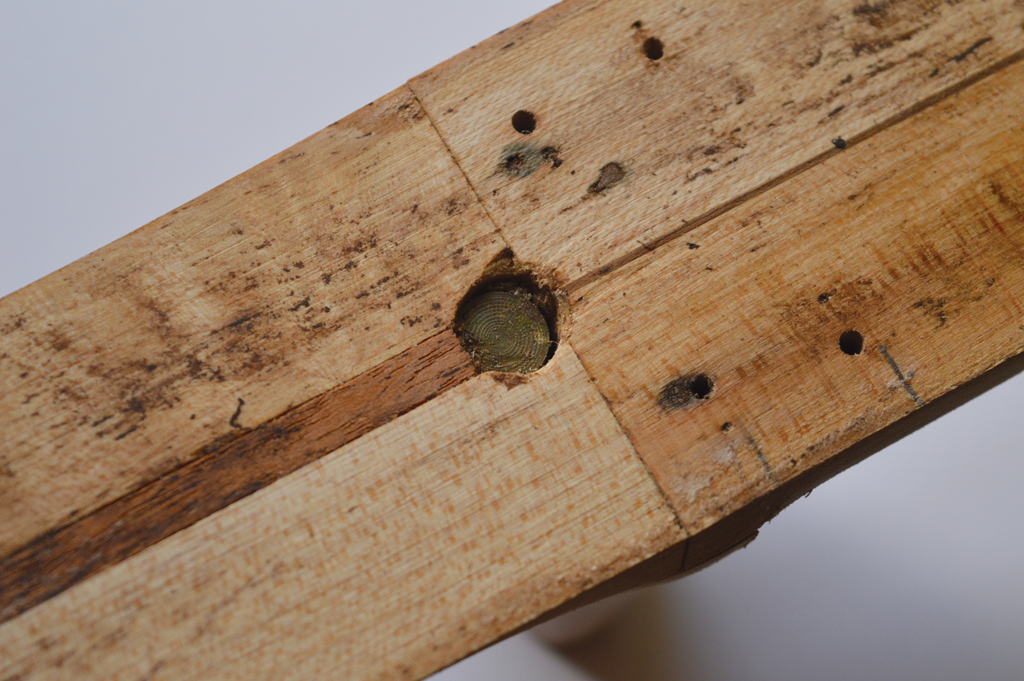
This reinforced my determination to restore and re-use the fretboard. It was also interesting to see the truss-rod anchor and the walnut strip glued into the truss-rod channel.
With the glue cleaned off, I clamped the neck and fretboard back onto the planks to hold everything steady while I shifted attention to the body.
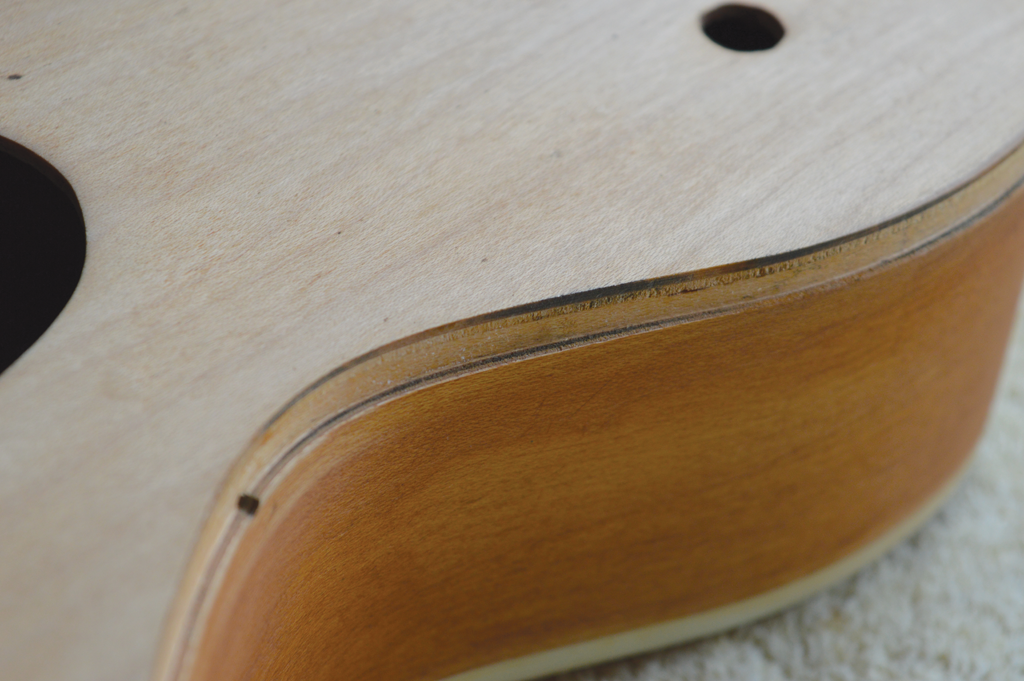
Binding removal
Yes, more heat and more sharp things, but everything went smoothly and quickly. This time, I used a hairdryer as a heat source, applying the heat to about 10cm at any one time. Gretsch used hide glue to fix the binding, so heating it up through a thin strip of plastic was very easy.
The delicate part is prising the binding away from the binding channel, and I used a small chisel attachment on a craft knife to get started. Before long, I swapped over to a narrow flat-head screwdriver – the type used for electrical work. The blade was narrower than the binding, and the trick to avoid damaging the wood is to twist the screwdriver blade gently back and forth to prise the binding away while keeping the blade well away from the edges. If you hear wood fibres breaking, stop immediately and apply more heat.
With one join at the tail block, I set myself the challenge of getting both pieces of binding off intact. I’m pretty chuffed to say I managed to do exactly that, which means I may have the option of re-using the original binding when I’m reassembling the body.
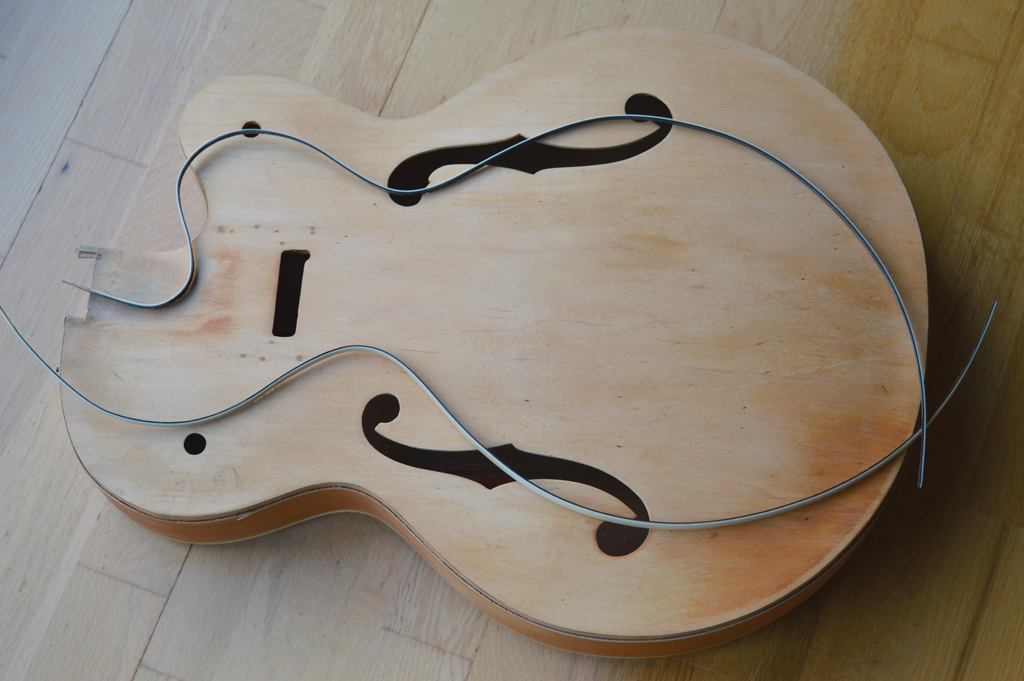
I was very surprised how cleanly the binding came out. There was some glue residue on the binding, but none was left in the routed binding channel on the body.
The hardest bits to remove were the areas inside the curves of the waist and the cutaway, but using more heat, gentle prising and applying some patience seemed to work pretty well.
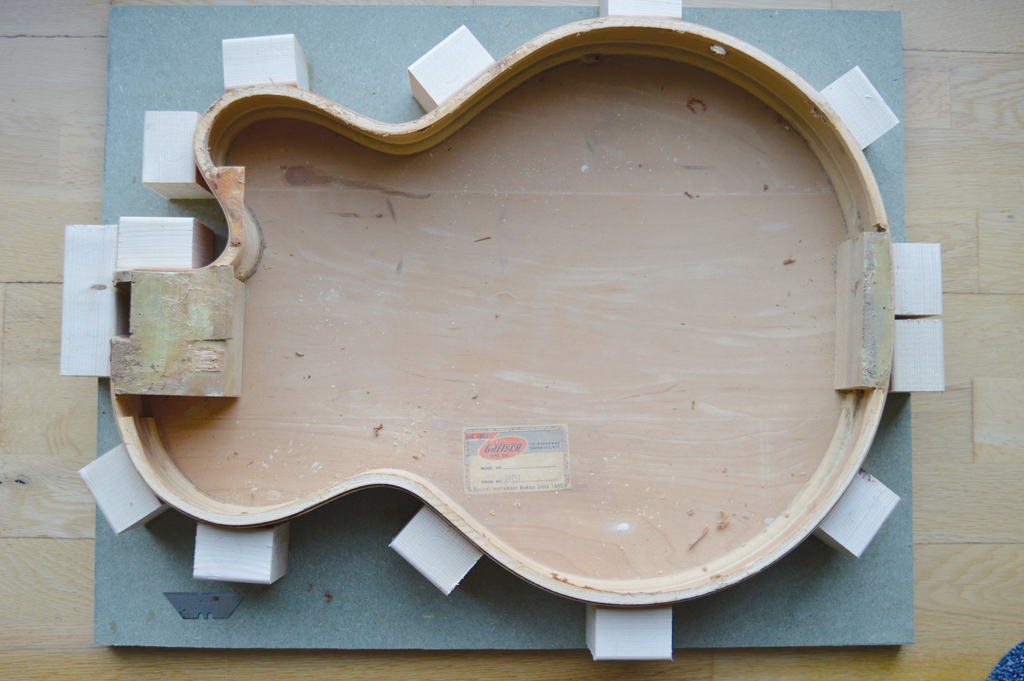
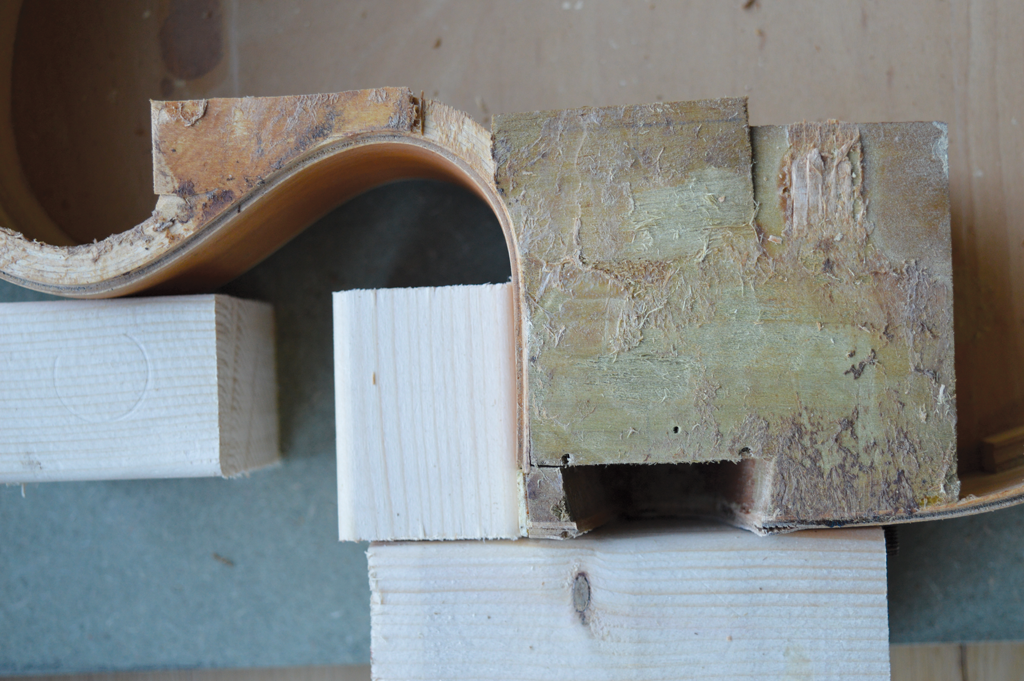
Making the mould
I once popped the top on an old Washburn parlour guitar, and when I came to replace it I found that the sides had flared outwards. This slightly complicated matters, so I decided to try to avoid having the same thing happen with this guitar.
I used an 18mm-thick backing board measuring 50x60cm and cut out several blocks of wood from a pre-planed 3.5x6cm piece of timber. I glued and clamped two blocks square to the rear edge of board with a small gap between them for the strap button thread. I followed this up with a second block at the neck end of the body, gluing and clamping only I after I had ensured the front and back edges of the body were square to the blocks.
With the body sandwiched between the blocks, I worked my way around, butting more blocks tight against the sides and gluing them in position. Once the glue had set overnight, I removed the clamps and the body was held firmly in position. I also made pencil marks on the body and the block so that I could re-align the body if, later on in the process, I needed to remove it from the mould.
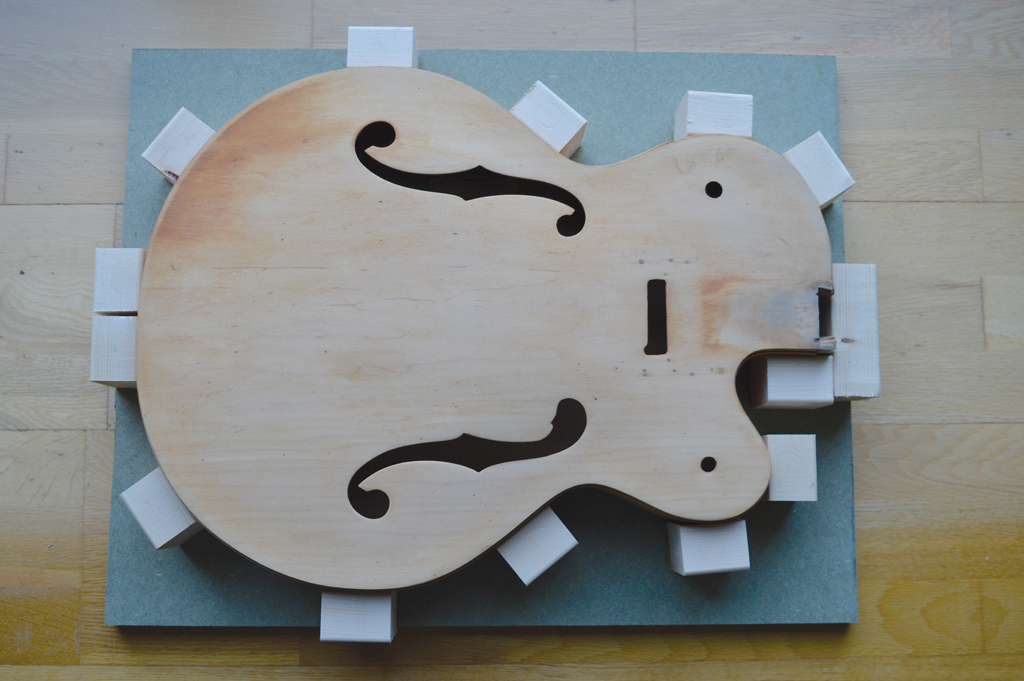
Although this, in theory, should prevent the sides from spreading outwards with the top removed, there’s nothing to stop them squeezing inwards. If they do, I’ll just have to figure out another solution for that.
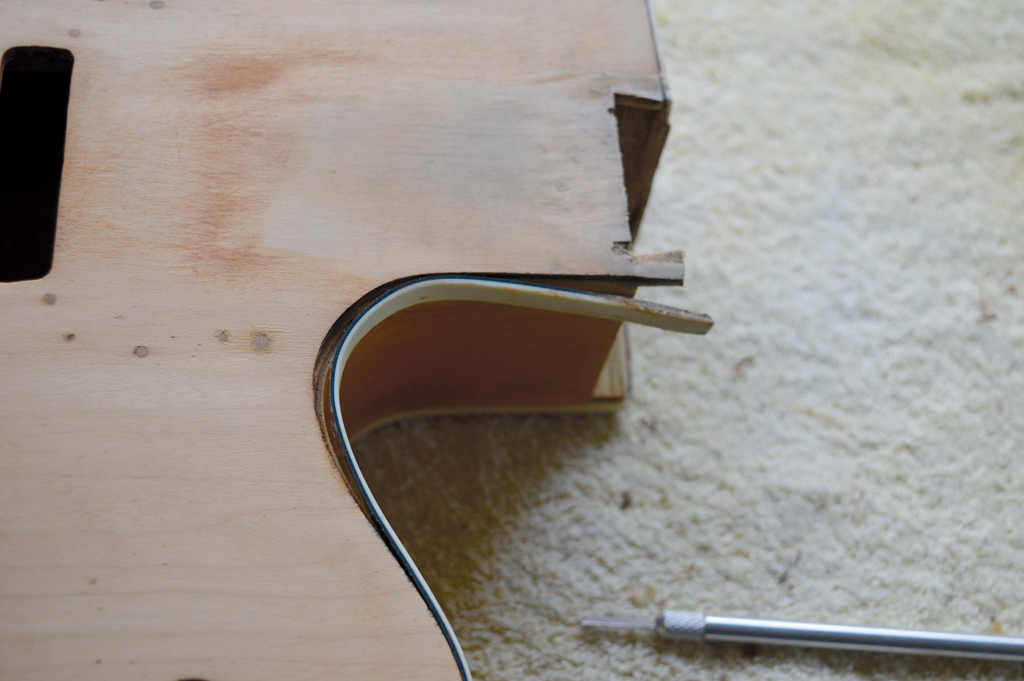
Popping the top
Before proceeding with the top removal, I drilled two very small pilot holes through the top – one each at the neck and tail blocks. I’m guessing that it might be tricky to line everything up when it’s time to glue the top back on, so a pin through each hole should ensure that at least the front and back ends finish up in the right place.
Fortunately, the top was held on with hide glue, so I used the same method to remove it as I did when separating the fingerboard from the neck. However, this time I set the iron to the lowest heat, for synthetics rather than linen, and protected the top with an old tea towel. My main concern was to avoid separation of the ply layers that formed the top plate, so I left the iron on the body for only a couple of minutes at a time.
However, I did make sure that my putty knife was very hot as I slipped it into the seam between the top and the kerfing. As always, you must try to avoid forcing anything. If the iron has done its job and the knife is hot enough, it will slide right in. As soon as it stops, you should stop too and re-apply the iron while heating up the putty knife.
Some parts will go easier than others, and don’t forget that the gluing surface area is far greater at the tail and neck blocks. The neck block is particularly massive, so the knife will need to slide some way in. I also found the treble side brace protruded all the way through the kerfing, so this area took a bit more work to free off. The whole top removal took about 40 minutes.
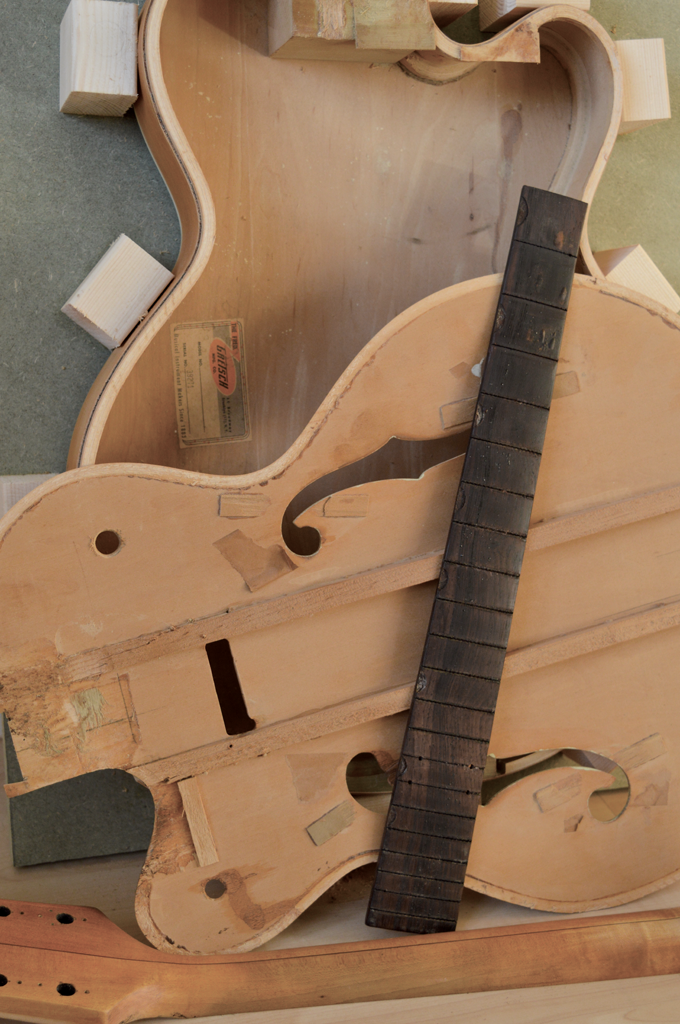
A glimpse inside
When the top did eventually come away, I checked for damage but everything looked pretty good. Before re-gluing, I will need to scrape the old glue off the top of the linings and from the underside of the top’s edges. The ends of both braces will need to be re-glued, too.
Removing the top provides a great opportunity to discover how the Gretsch factory did certain things. For instance, rather than using traditional segmented kerfing, Gretsch used solid linings that it must have bent to match the curves of the body.
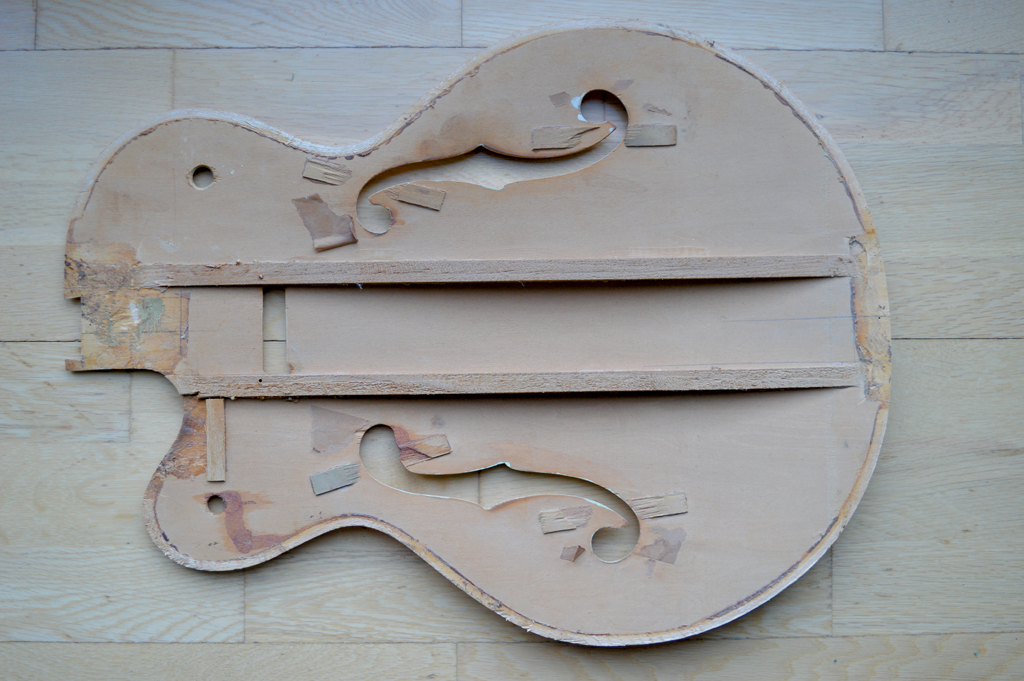
There are also some interesting chunks of wood and scraps of paper glued to the underside around the f-holes. One of the things Gretsch would have wanted to avoid was finish blowing through the f-holes and into the body cavity when spraying guitars. It seems that thin scraps of wood, much like popsicle sticks, were glued across the f-holes and paper was glued onto the back of the sticks.
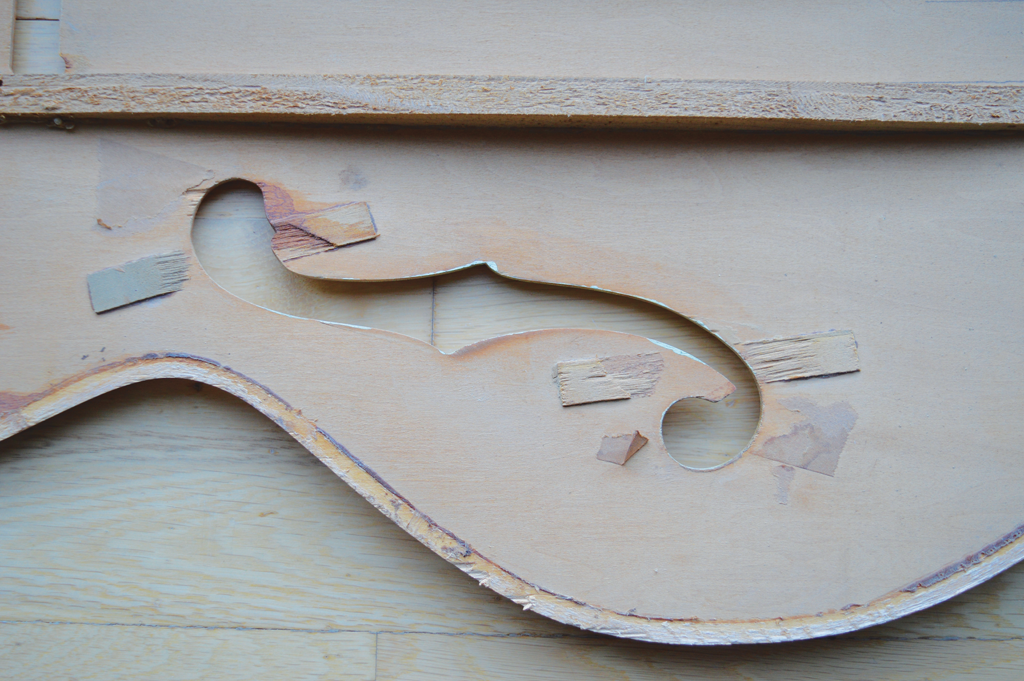
The paper would have acted as a barrier to the lacquer, and gluing it on the back of the popsicle sticks ensured there was a gap between the paper and the f-holes. This would have prevented the lacquer from pooling up on the paper. Presumably, the factory would have punched through the popsicle sticks and snapped them off once the lacquer had dried. The scrap pieces of wood and paper would then have been fished out. It’s also nice to be able to get a good look at the logo for the first time.
So, with the disassembly complete, it’s time to start the restoration and conversion work. Check in next time as attention shifts back to the neck.
Check out the other parts of this project here.