Related Tags
DIY Workshop: Martin Kit Build (Part Four)
At last, the time has come to finish making the body of our acoustic guitar kit. However, things are rarely as straightforward as we hope.
When we last left our Martin acoustic kit build, we’d taken the opportunity to customise the guitar by altering the brace positioning and shaping them to ‘tune’ the back and tops. This is where mere guitar kit assembly crossed over into something approaching proper building, and it demonstrates why a Martin kit may get you closer to your ideal instrument than anything you could buy off the rack for an equivalent price. This time around we’re putting the body together.
Chopping blocks
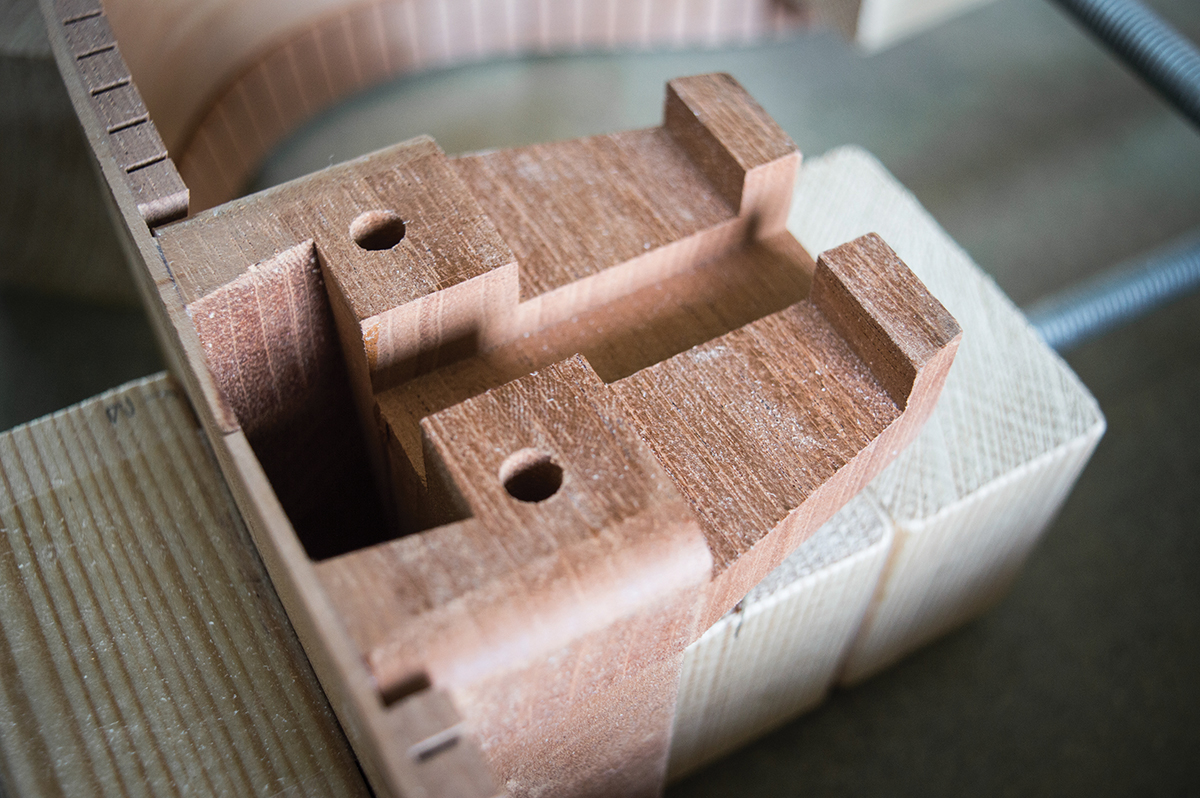
Before gluing the front and back onto the sides, adjustments must be made to the neck block. The first isn’t strictly necessary, but I’m choosing to remove the protruding ledge because vintage models didn’t have them.
I also feel that truss rod access will be easier, but I can’t deny that my calculations were a bit off and the popsicle brace is in slightly the wrong place. There’s nothing too technical about removing the ledge, and I merely saw it off then tidy things up with a sanding block.
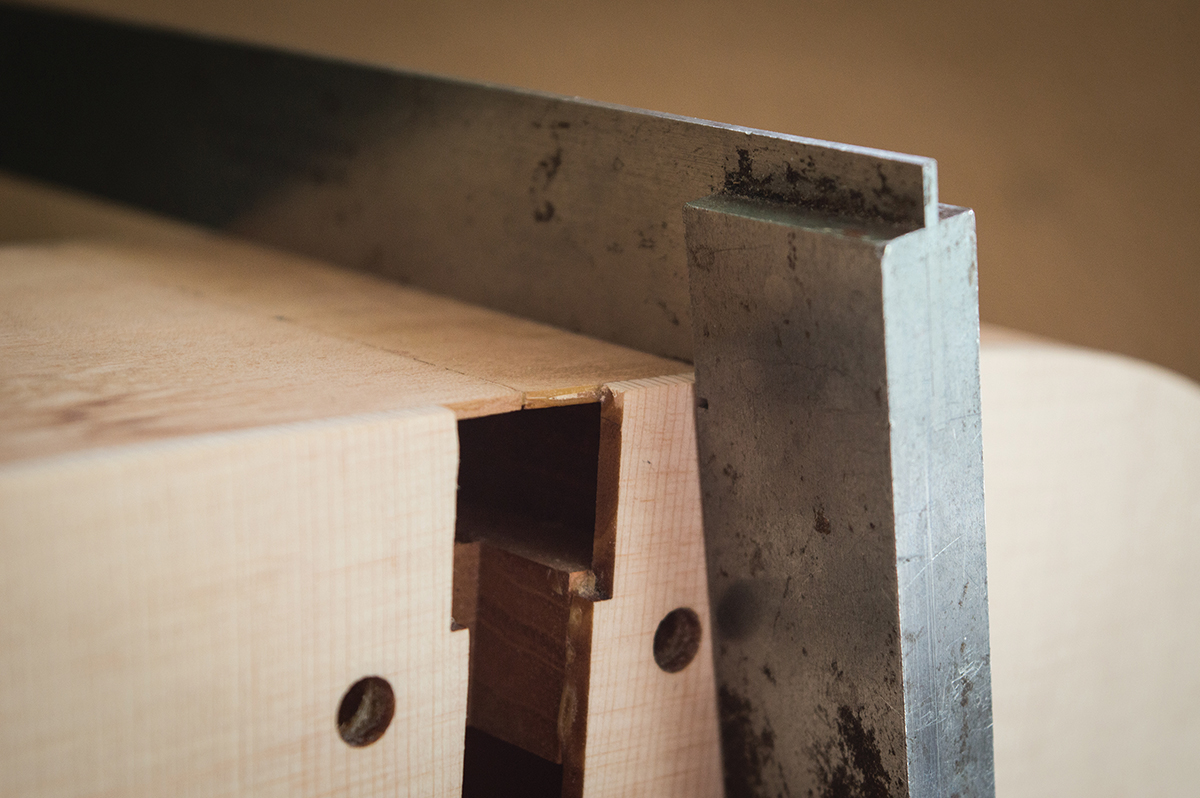
As supplied the neck block is taller than the sides in the neck join area. The sides are glued to the block with the top of the block and the side edges carefully aligned, but where the back is to be glued on, the neck block protrudes about 1cm beyond the side edge. Clearly the excess has to be trimmed off, but it’s a mistake to cut the block square to the sides. Remember that from the waist onwards, the sides slope down to bring body depth to a minimum across the top of the upper bout.

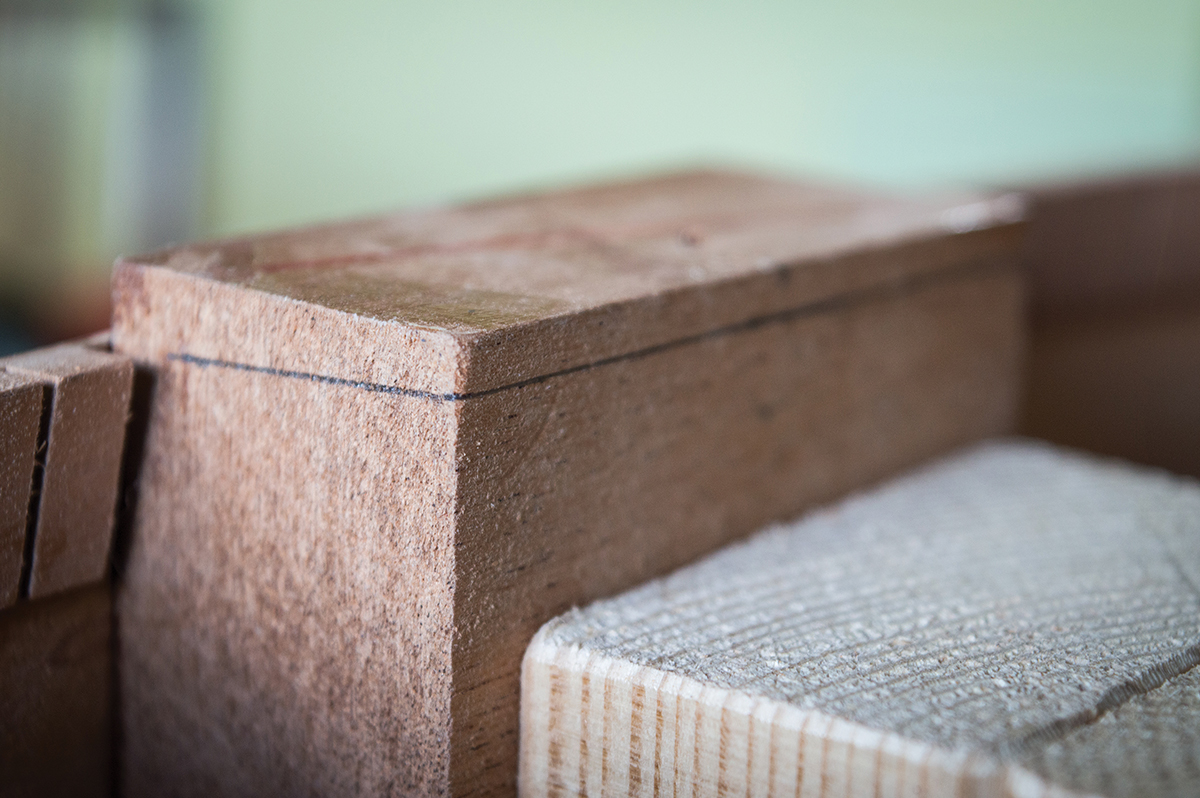
If you cut the block square and then glue the back on, you’ll end up with a ‘dimple’ in the back where it flattens out over the block. To avoid this, you must cut the neck block at an angle that matches the slope of the sides. I place a steel ruler across the internal surface of the block, drop it down to touch the sides at both ends and draw a line straight across. This gives me a line for the top of the slope and I draw lines onto the sides of the block to connect the top line to the top of the rims.
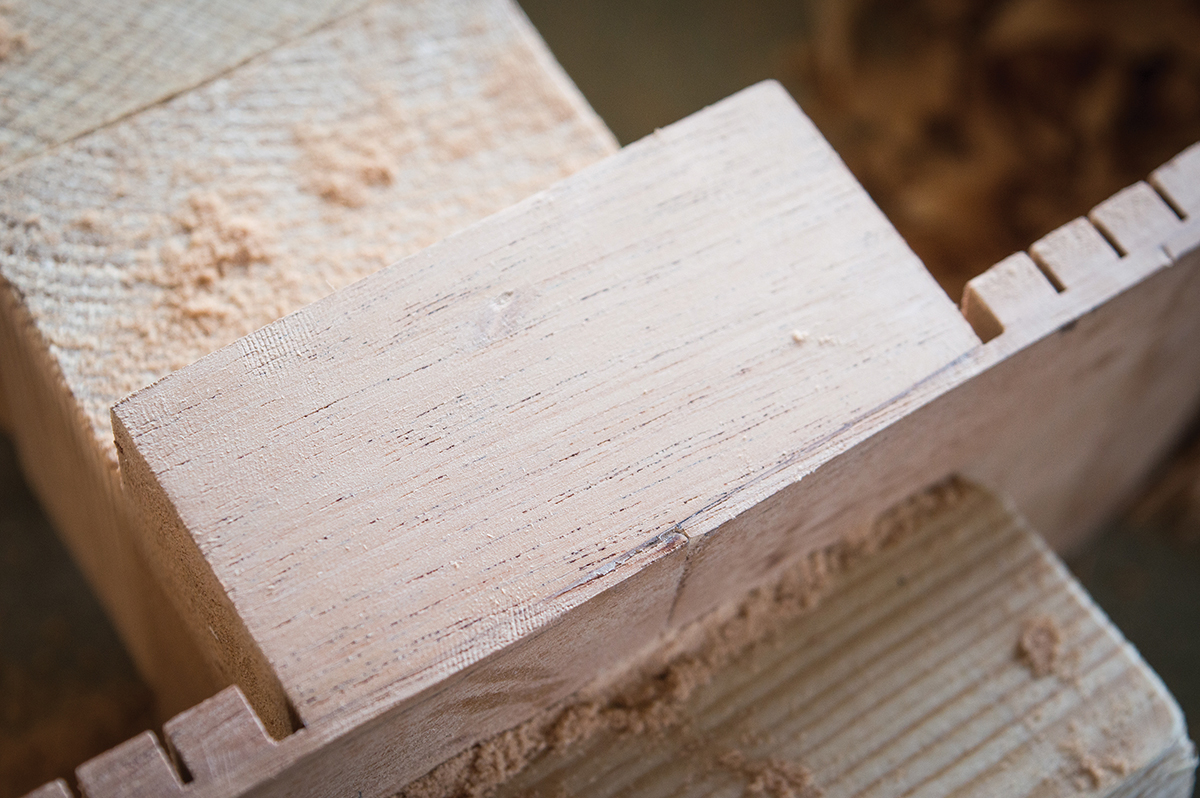
Rather than use a saw, I remove the majority of the unwanted wood using a small block plane and follow up with a rasp. Both remove wood quickly and I work carefully to take the block down to the pencil lines. With just a fraction of a millimetre left to go, I finish the job with my sanding block, which ensures a flat surface largely devoid of file marks.
Patching up
One more task must be completed before the body is glued together. Look inside most all solid-wood acoustic guitars and you’ll see small wooden braces glued to the inside surfaces of the rims. Although they no doubt add a bit of stiffness and structural strength, the real purpose for these kerfing-to-kerfing struts is to protect against side splits.
In the event that a guitar does receive a whack, or the wood experiences excessive temperature or humidity changes, side splits along the grain line may result. These cracks should stop when they reach one of these side braces, and be prevented from spreading too far.
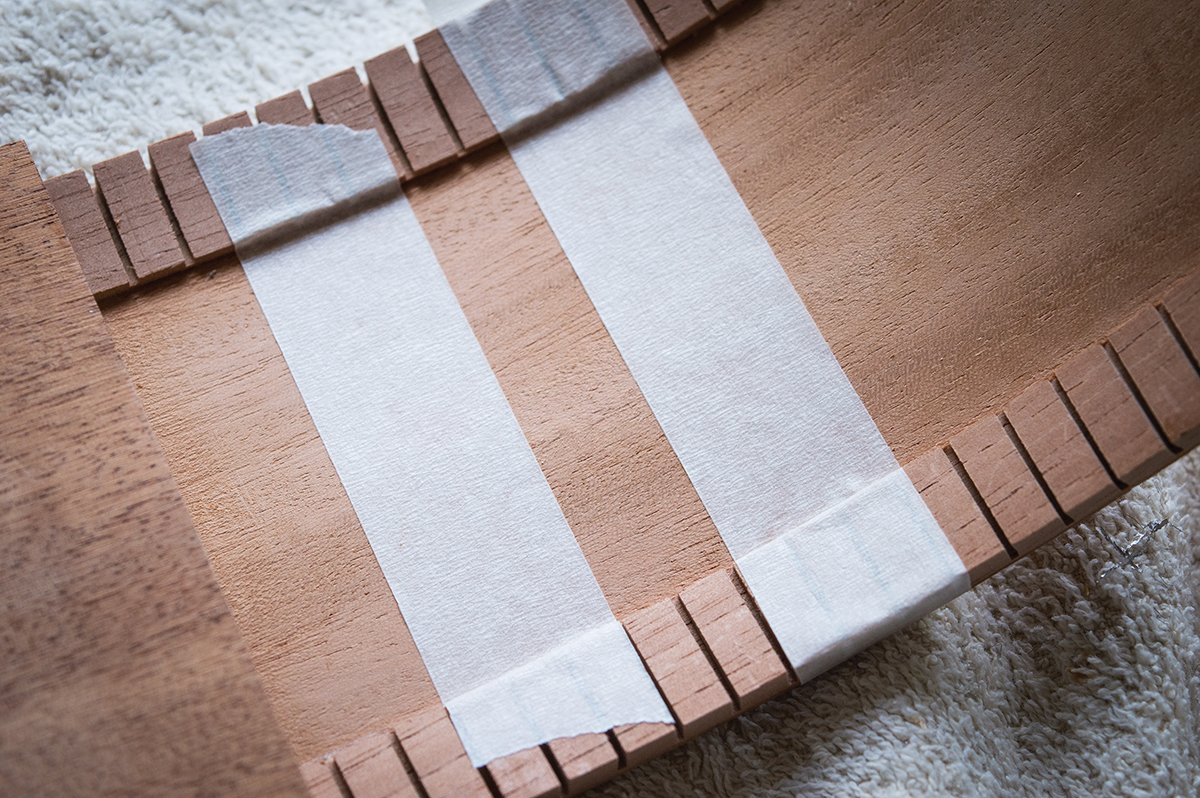
During the vintage era, it was more common to glue strips of fabric onto the sides to achieve the same result. Although side struts are provided with the kit, I figure that if I’m going vintage style on the top bracing, I might as well address the sides in the same spirit.
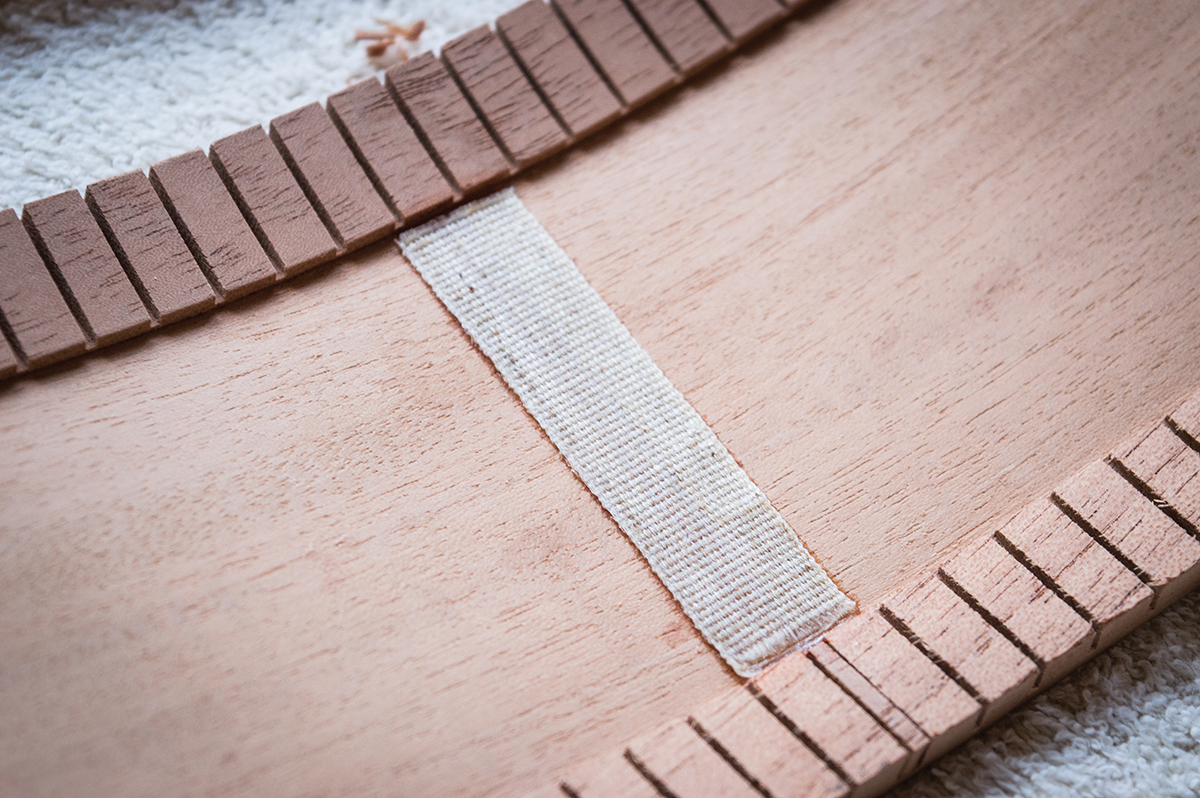
I find some pure cotton ribbon at a fabric shop and although it’s not black in colour like the vintage stuff, I quite like the look. Realising things could get messy, I decide to fix masking tape on the sides, leaving a ribbon width gap between pairs as I decide where the patches will be. The hide glue pot goes back on the heat, and while it’s coming up to temperature, I cut all my ribbon strips to the correct lengths. When the glue reaches 60°C, it acquires a water-like viscosity. A length of ribbon is dropped into the glue, where it absorbs the glue and is removed using a tweezers.
I quickly place it onto the correct spot on the side, press it down and dab off any excess glue. The masking tape is then removed, leaving clean wood either side of the patch. The process is repeated until all the patches are done and after the glue has set overnight, the sides are placed back into the mould with the back facing upwards.
All on deck
This is where things begin to get really exciting, because I will finally see the body coming together and looking like a proper guitar. It’s time to glue the back onto the rims, but I need to figure out how to clamp it. The block mould I made has been holding everything square since the start of the project, but since it’s built on a rectangular slab of board, the jaws of my G-clamps are too shallow to reach the edges.
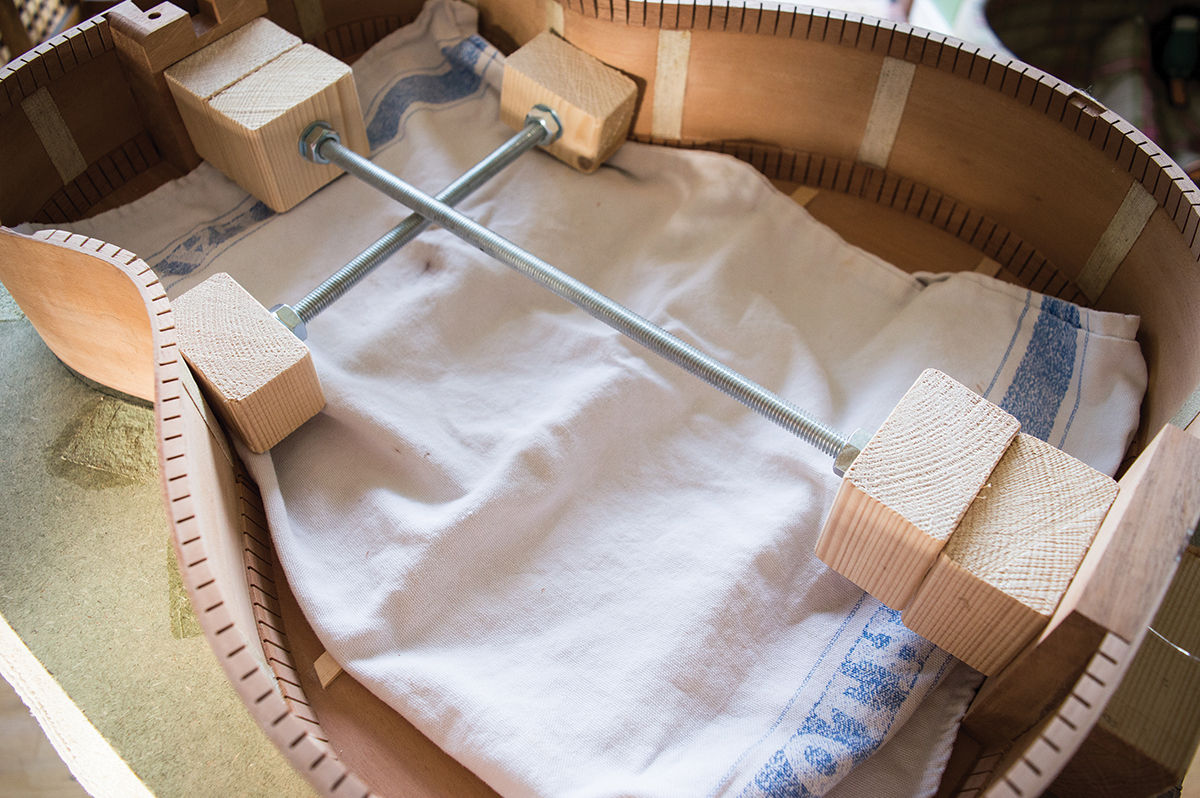
I consider two options – securing hook bolts onto the blocks and attempting to use bolts and wide diameter washers as improvised clamps, or building a proper go-bar deck. Eventually I decide on the latter, and building one is quick, easy and fun.
A trip to B&Q produces two pieces of 18mm plywood cut from a single piece of 4×2. Save yourself a load of work and get them to cut it. I also buy four one-metre lengths of M8 threaded steel rod, 16 nuts, 16 3cm diameter washers and four nylon nut covers. Total cost is a shade under £30.
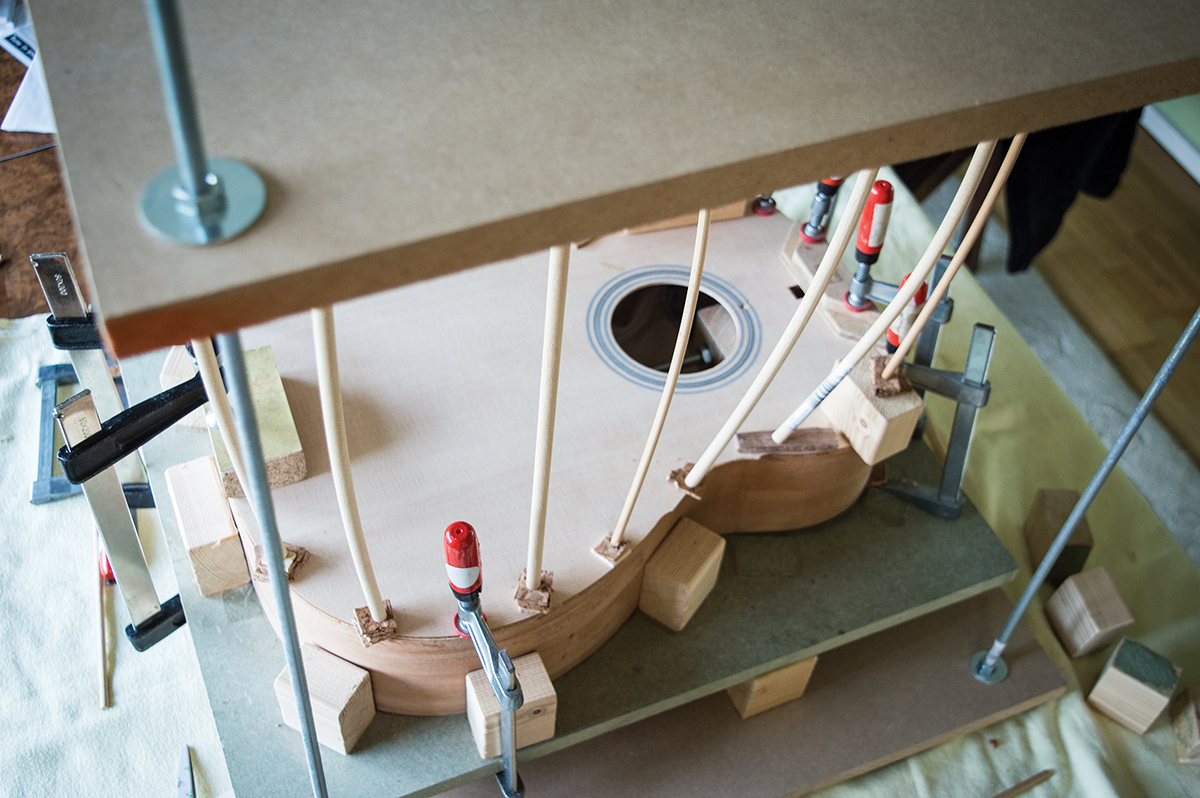
Back home, I align the boards, clamp them together and drill a 10mm hole in each corner. A nut and washer go onto the end of each threaded rod and are set about 2.5cm from the end. The rods then go through the holes in one of the boards and with about 1cm of rod protruding, a second washer and nut go onto each rod and they allget tightened up. With a nyloncover slipped over each of the outer nuts, the base of the go-bar deck is now complete.
The base is placed on a flat surface and the nut and washer process is repeated to secure the top of the go-bar deck. I place the guitar mould onto the base and set the gap between the go-bar deck’s top and what will be the upper surface of the guitar’s back about 1cm shorter than my lengths of dowel. The structure is a little wobbly, but I know it will stabilise once a few go-bars have been positioned.
Because I tend to prefer acoustics that have lively backs, I decide to cut the braces just short of the sides rather than tuck them into the kerfing. Slight adjustments are made to the length of the back graft at the tail block to ensure a snug fit and I have a dry run at clamping the back using a combination of G-clamps where they reach and go-bars where they don’t.
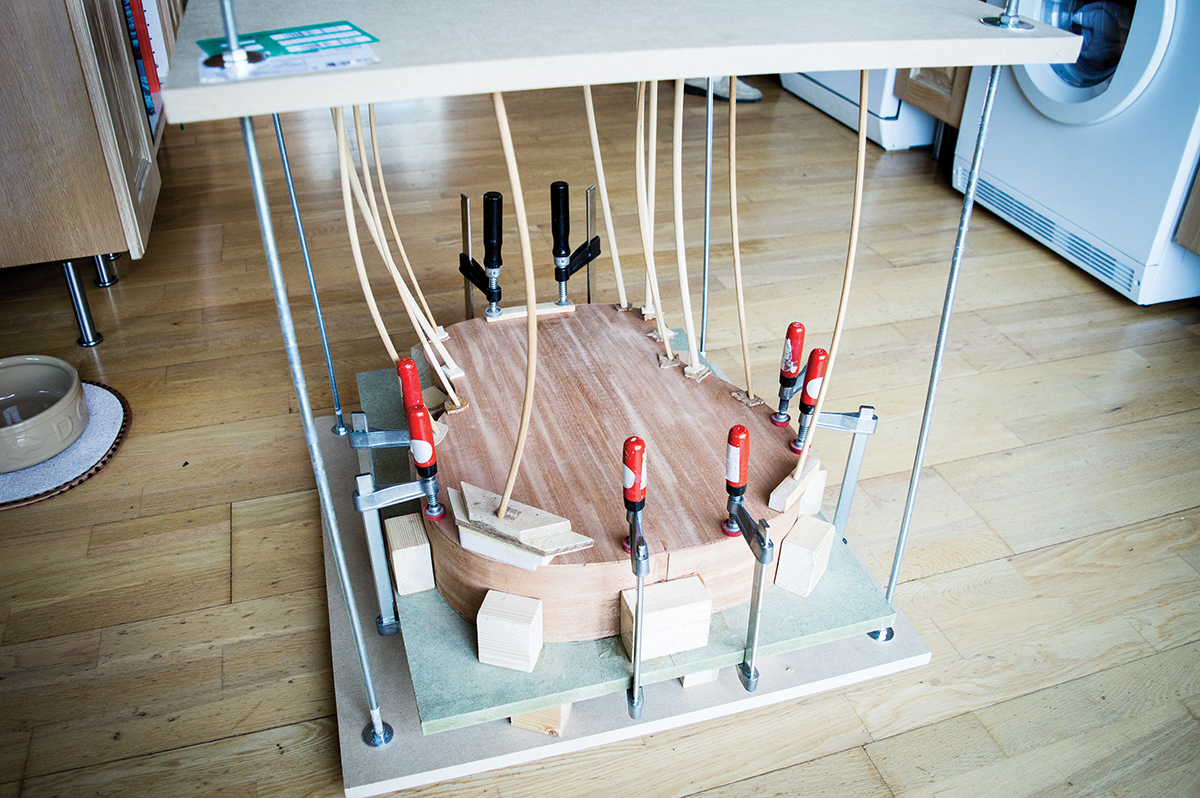
With all my G-clamps, dowel go-bars, blocks and spacers ready and organised, I apply Titebond Original glue to the relevant places. So far, the whole project has been done with hide glue, but the since the glue has to be applied over a very wide area, and the open time is so short, I opt to play it safe.Along the kerfing, I try to strike a balance between enough and too much by squeezing out a thin and fairly even line. To distribute the glue, I dab it lightly with my finger rather than wipe and spread. The object is to keep the glue on top of the kerfing and not to press it into the gaps.
With glue also applied to the neck and tail blocks, I position the back and use G-clamps to press the back onto the blocks. Care must be taken because the back actually bends to conform to the taper of the sides. Ensuring the centre join lines up with centre marks I have pencilled onto the blocks, the mould is placed on the base of the go-bar deck. The go-bars press the back tight against the kerfing and I set it aside overnight to dry.
Squaring off
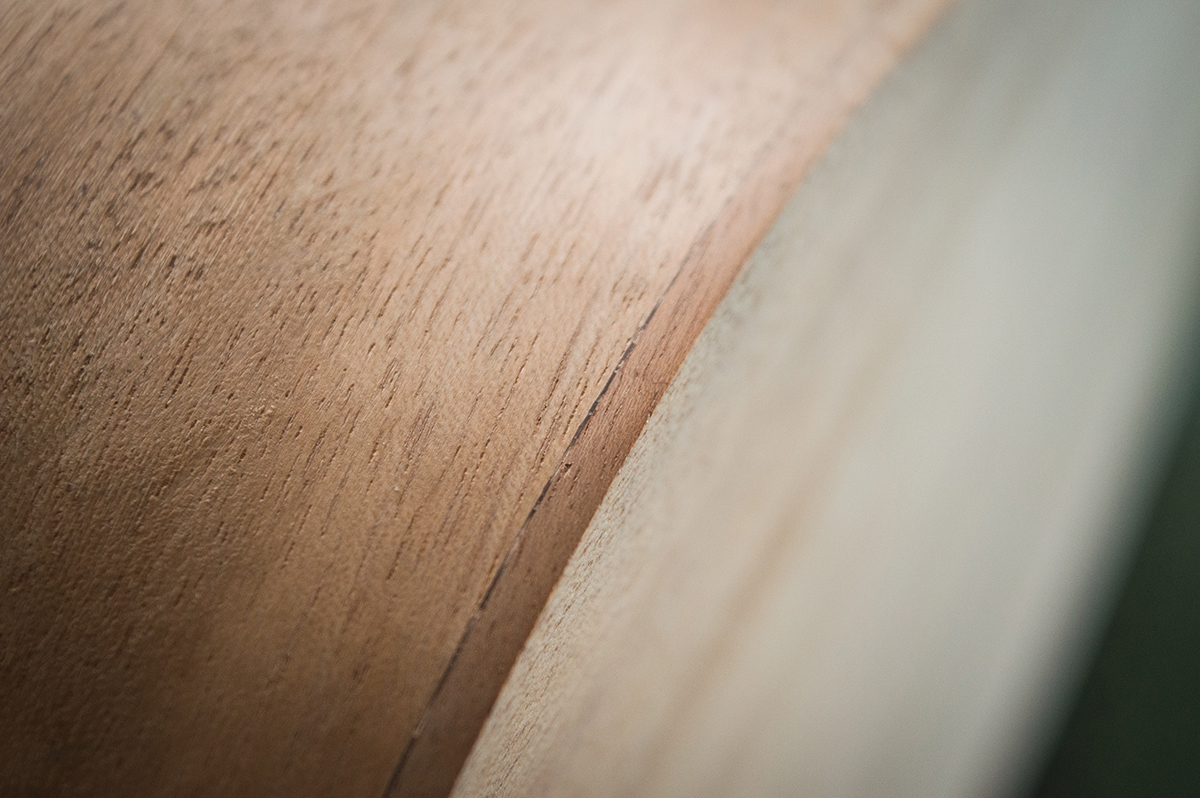
With the clamps and go-bars removed, I spend some time tapping the back to gauge how well it rings. Suitably encouraged, I decide to trim the edges while the assembly remains in the mould. Martin’s back plates are cut oversized so there is a fair amount of wood to be removed in some areas. In others, there’s fairly little overhang.
No doubt the quickest way to trim the edges would be to use a flush cutting bit in a router table. However, I genuinely enjoy carving wood, so my favourite new chisel gets a light honing and I set to it. Pretty soon I discover the best method is to take off a little at a time. When cutting across the grain, make the first cut at an angle to remove the corner then turn the chisel blade upright to shave the edge square.
When cutting with the grain, make shallow passes because it’s all too easy to cut too deep. Rather than try to remove all the wood with the chisel, and risk cutting into the sides, I leave it a millimetre or so proud around the edge and then bring it flush and square using a sanding block. This whole process takes me just over an hour. Power tools would be quicker, and they’re indispensable on a production line. However, there are no time constraints when you’re building a guitar for fun, and I relish the hands-on approach.
The half-finished body needs some persuasion to slide free from the mould, and it feels far more rigid and stable with the back attached. There is relatively little glue squeeze out, and what there is flakes off easily with a chisel blade in a craft knife. I’m feeling proud of myself, until I realise that I forgot to do the inlay on the tail block…
Inlay overview
In my defence, I would point out that this is the first acoustic I have built in years and this Martin kit is different to all the others. Previously the sides had to be trimmed to fit into the mould and the four ends butted up against each other along the neck and tail blocks.
The sides of this kit are cut short, which means they butt together at the neck block, but there’s a half-inch gap at the heel block. This is pretty crucial because the router bit used to cut the binding channel has a guide bearing that follows the surface of the sides.
With no inlay filling the gap, the router bearing will drop into it and the binding channel will be uneven. With the sides butted together, this has never been an issue and I have always cut out the recess for the heel inlay after cutting the binding channel. With this kit, it would have been easiest to do the inlay before gluing the back on, but either way I now have to do it before I set about gluing the top.
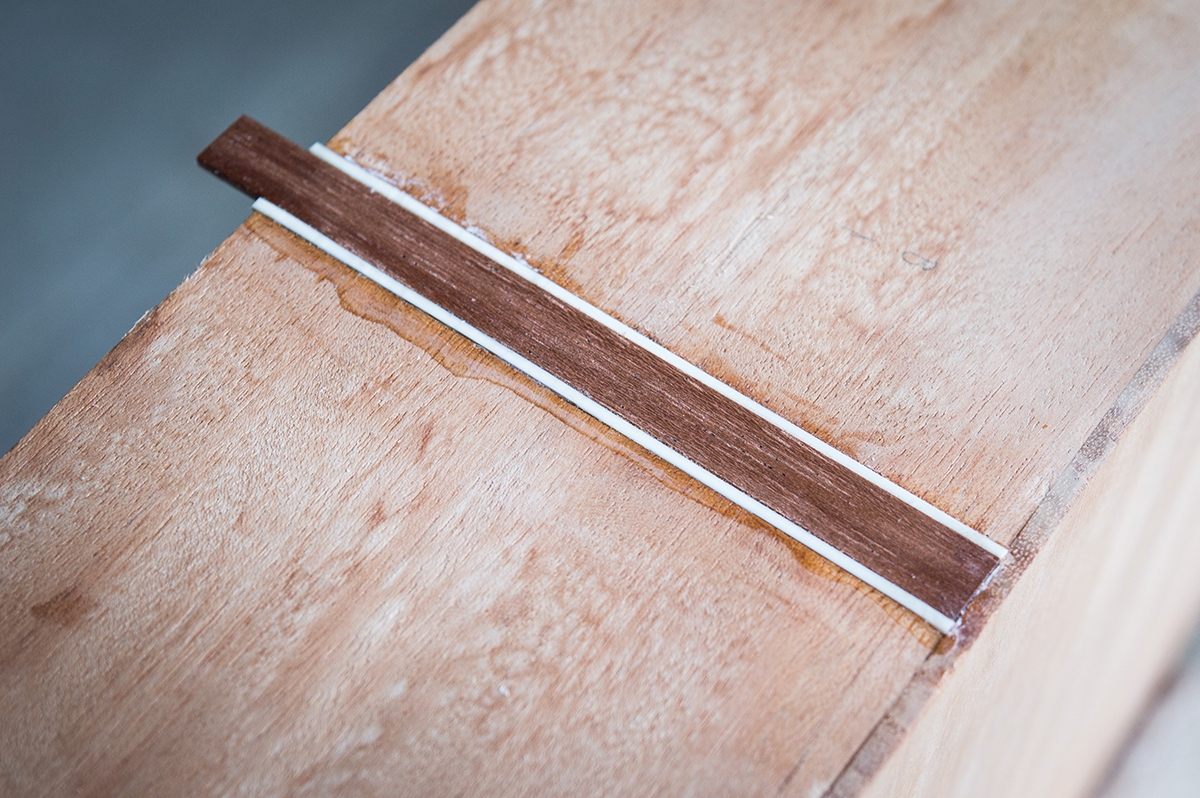
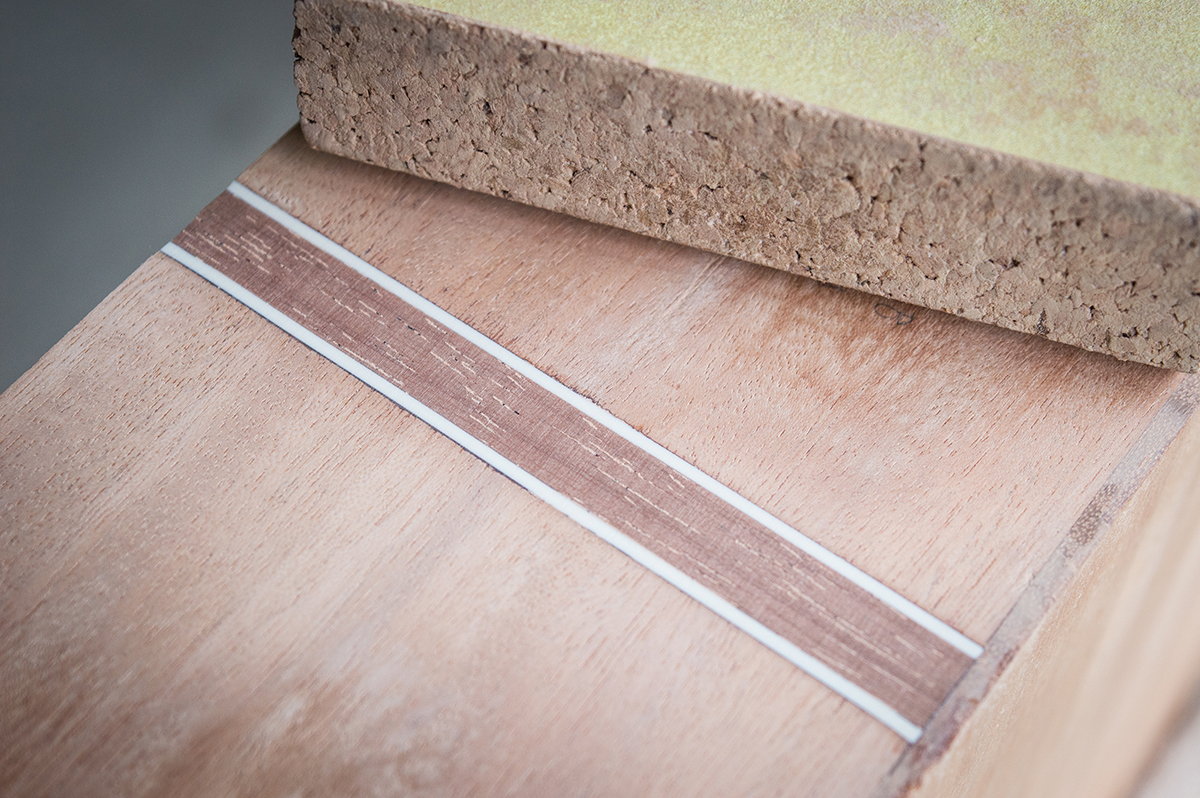
The kit includes a piece of tapered black plastic for the tail inlay, with two lengths of black/white purfling. Instead I choose to retain the parallel sides and use a strip of mahogany, also supplied with the kit, edged with cream binding to match the ivoroid that I’ll be using to bind the guitar.
After cleaning off any glue, and squeezing out and truing the edges with a chisel, the binding strips go in next, secured with superglue. The mahogany strip is trimmed to fit and glued in with epoxy. When the glue is dry, I trim the excess with a saw and tidy everything up with a sanding block.
Closing the box
Gluing the top on is much the same as gluing the back, but there are some differences. The ends of the X braces and the lateral brace need to be tucked into the kerfing, so the exact positions are marked, notches are cut into the kerfing and the X braces are trimmed so they’ll sit just inside the rims. As I’m making the kerfing notches, I remove small quantities of wood until the top drops in snugly.
A few of the blocks are removed before the body will go back in the mould facing upwards, and I place a towel under the body spacers to protect the back braces and apply Titebond glue as before. The tapered sides allow the tail block to touch the backing board while the neck area is raised about 15mm off the surface. That’s sufficient clearance to get four G-clamps around the neck area with another at the heel block. The mould is transferred to the go-bar deck, clamped up and left overnight to dry.
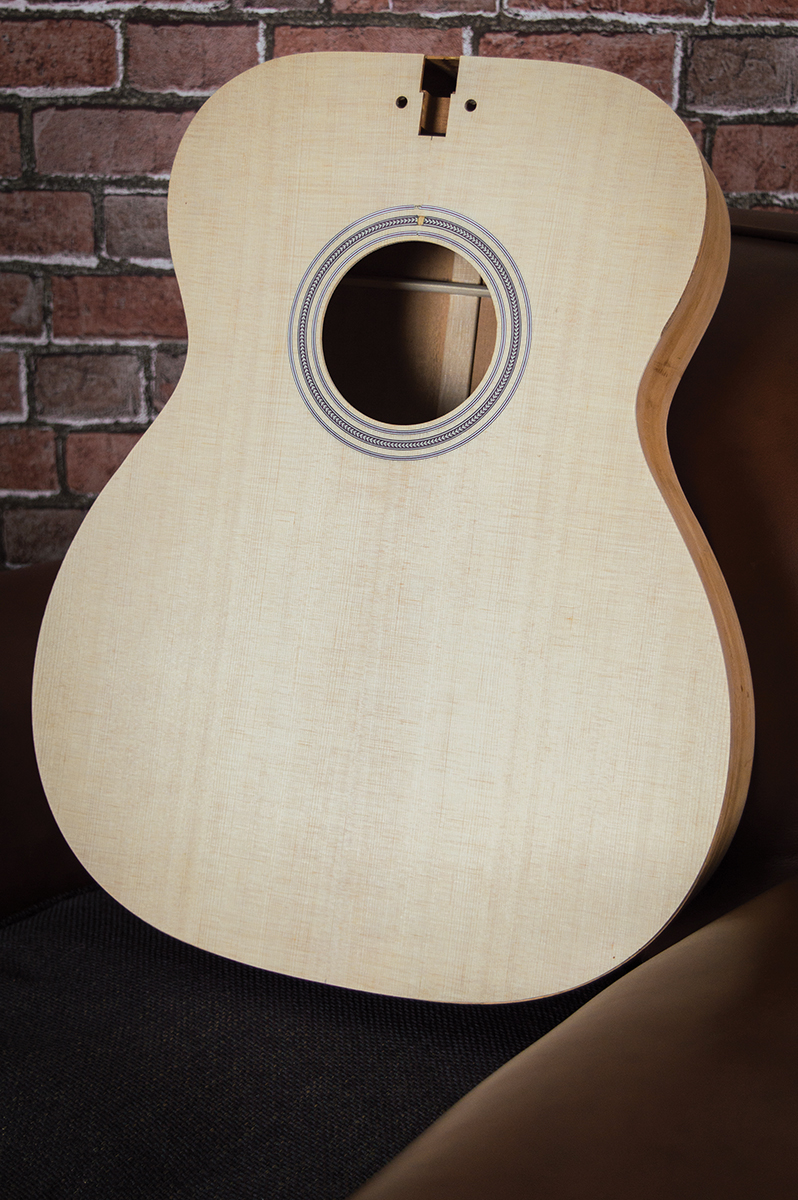
Although there was plenty of overhang with the back plates, the top is cut almost exactly to size and there is absolutely zero margin for error. In fact it’s too small in some areas and I take great care to ensure that where it does stop short of the sides, the gap is less than the width of the binding I plan to use.
After having to knock off a couple more mould blocks, I breathe a sigh of relief when the body eases out in one piece. The neck block and top have remained square and the tap tones are encouraging. With the body complete, attention now shifts to body binding and making the neck.
Read part five here.