Related Tags
DIY Workshop: Greco to Les Paul Goldtop conversion (Part Six)
Having finally got our Goldtop project playing, we now have to strip it all down once again for lacquering.
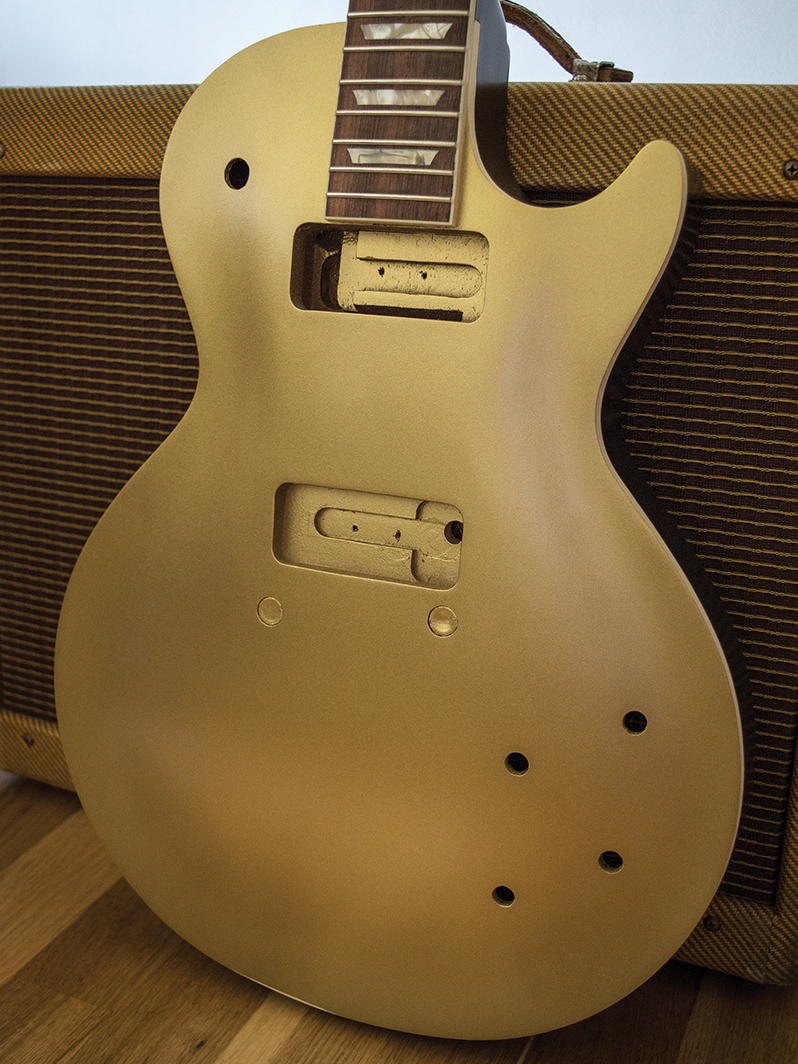
I should start this instalment of our Goldtop conversion project with an apology. I’m aware some of you have been waiting a while for this and the explanation is that dropping in those Tyson Tone P-90s and stringing it up was a mistake. I’ve been enjoying playing the guitar so much I haven’t felt like stripping it all down again, but we can’t leave a project half-done, and now’s the time to finish the job.
Of course it needs to be sprayed, but before that can happen, there’s a load more prep work to be done. Stripping the guitar was a tough job and there are still plenty of specs of poly finish all over the body and headstock. I load my sanding block up with 180-grit paper and set to it. This process takes several hours but at the end the previously rough and pitted mahogany looks and feels pretty good.
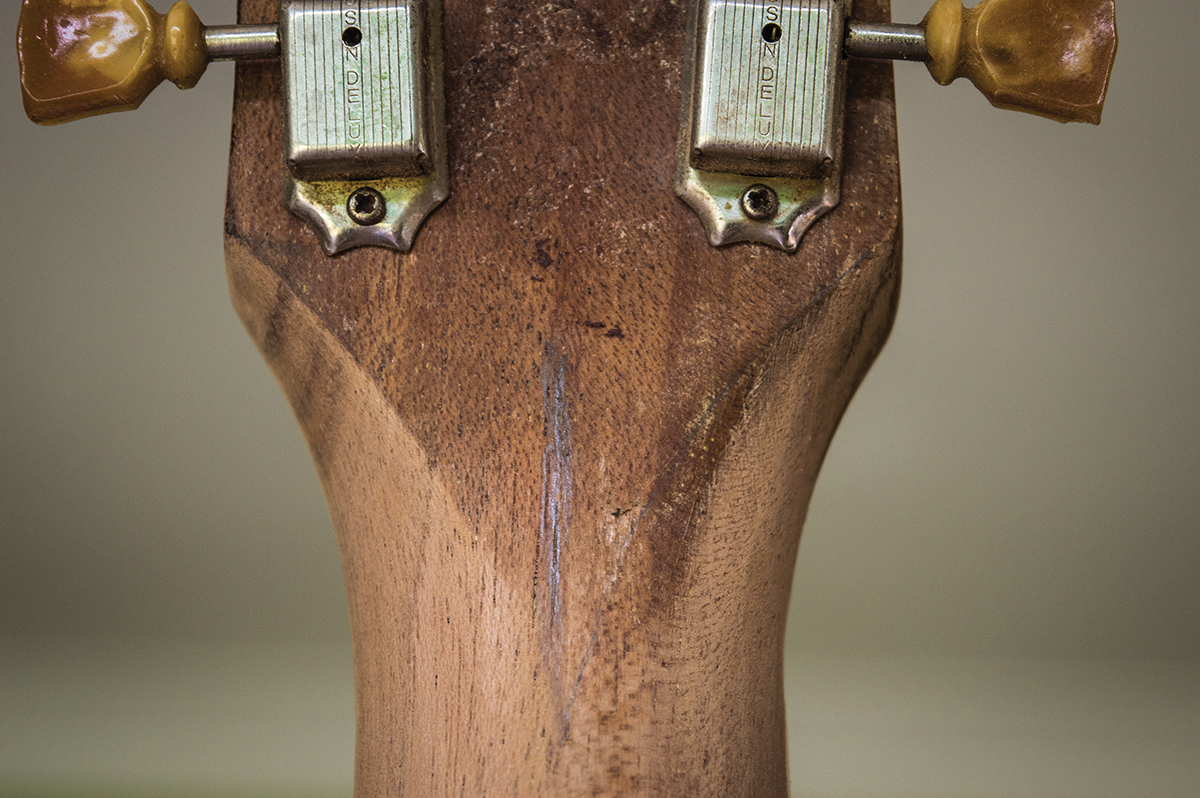
The Greco headstock shape differs slightly from Gibson’s and here we begin sharpening up the volute area
Filler is used in some areas where there are gaps between the wood and the binding. A few of the dents – some of which I inflicted when stripping the body – are filled with wood dust and superglue. I also take the opportunity to finesse the transition from the headstock to the neck and sharpen the bottom corners of the headstock ‘ears’ because they tend to be too rounded on Grecos. The guitar is almost ready for finishing, but there’s something I want to try first.
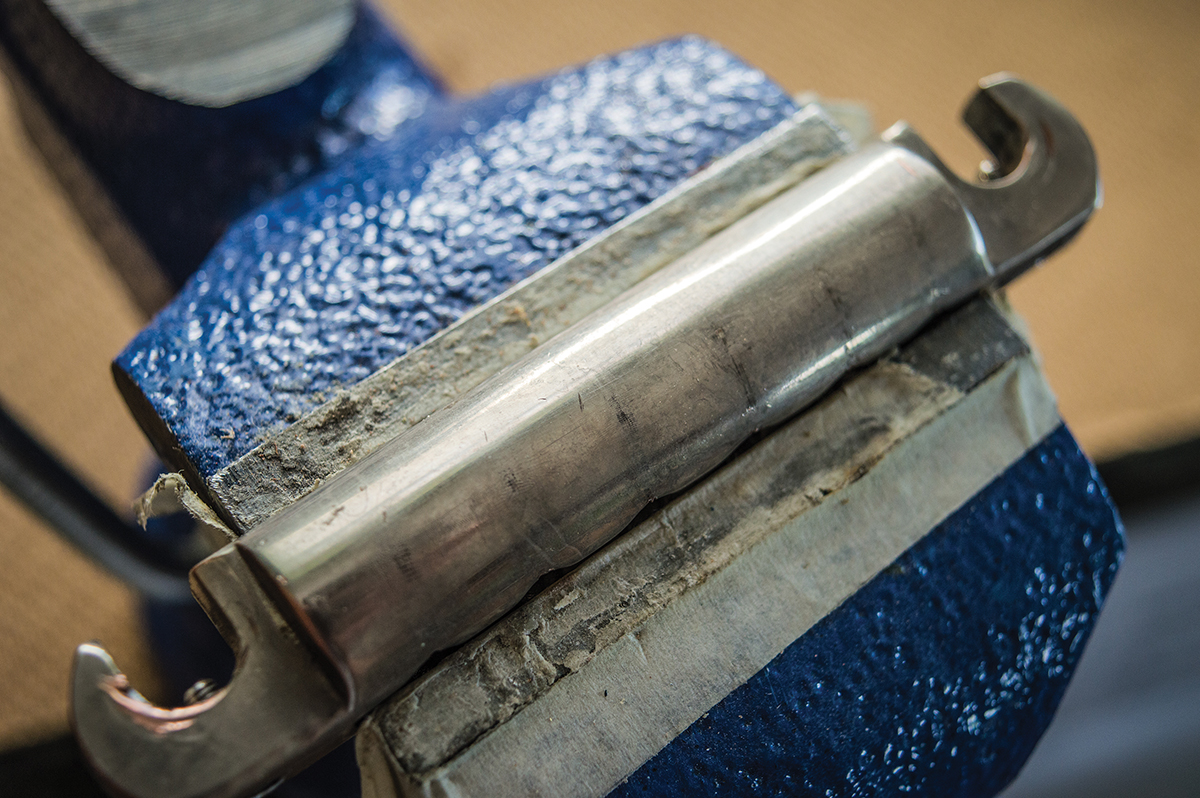
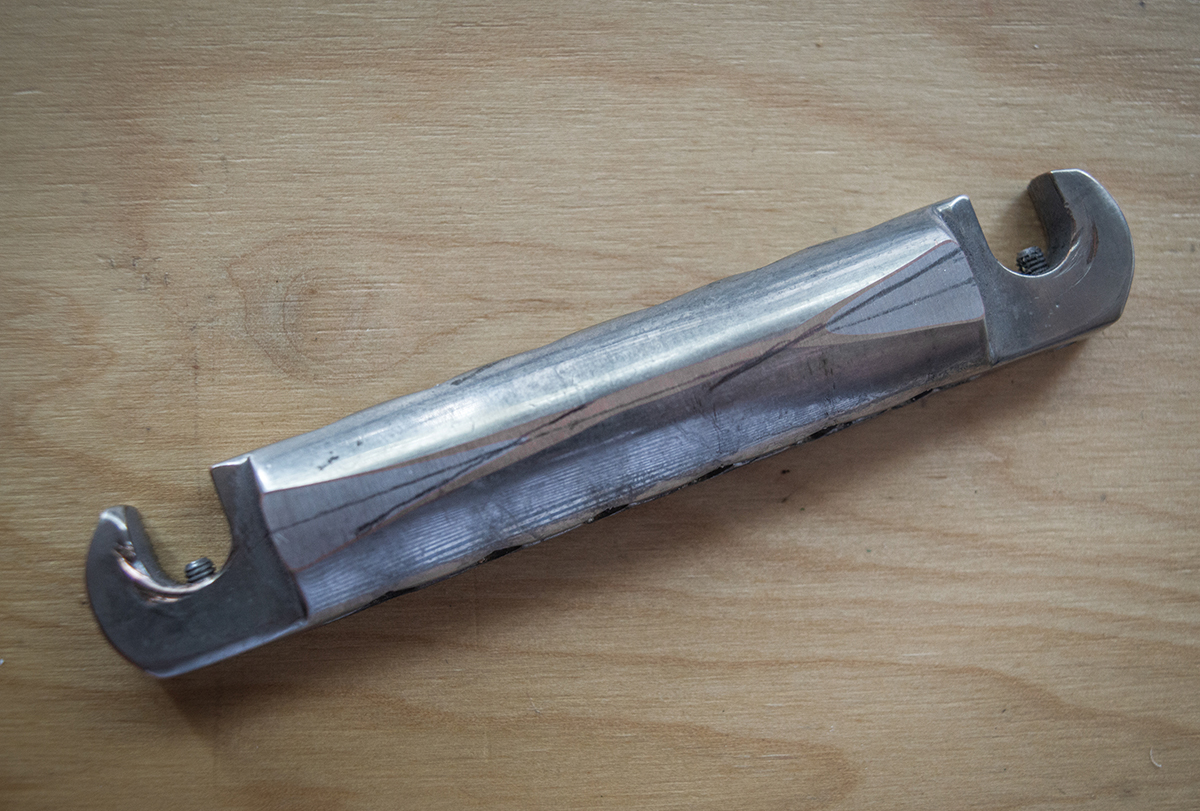
The bridge is clamped in a vice ready for re-shaping
Crossing The Bridge
There are a few reasons for feeling unconvinced by the Faber aluminium tailpiece that my mate Patrick adapted for wrapover use. The first is something that is commonly found on vintage and modern guitars with wrapover tailpieces – sitaring or buzzing because the gently rounded top of the bridge fails to provide an adequately clean take off point for the strings. Secondly, I chose to radius the board to my preferred 10 inches rather than 12, so for optimal playability the top curve of the bridge needs to be a bit tighter. Thirdly the intonation just isn’t as good as it could be.
Various bridges are available that promise improved intonation from wrapover style bridges. The MojoAxe bridge is very popular with vintage fans because at a glance it looks like a stock item, but it’s subtly machined to provide intonation compensation for plain G strings along with crisp take-off points for all the strings.
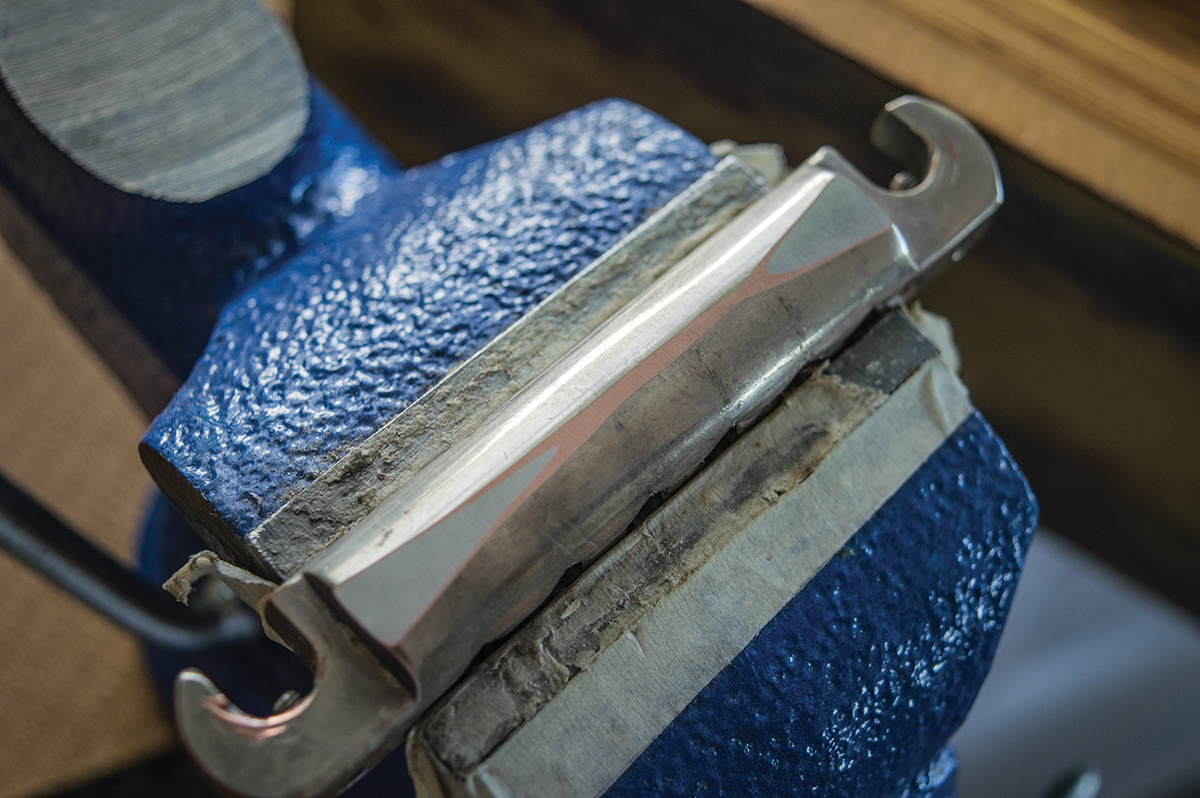
The radius block creates a tighter curve, which is why the sanding marks are wider at the edges than in the centre
As luck would have it, I get the chance to try one and it essentially solves the intonation problem while sounding excellent. However, the MojoAxe bridge is designed for a 12-inch radius and ordering one from the US won’t leave me much change from £150. So I decide to try making my own version using the Faber.
With the bridge clamped into a vice, I sand the top with 320-grit paper taped to a 10-inch radius block – you can buy one on eBay for less than £10. The process is pretty quick and I stop sanding when I can see that I have a sanding line all the way across the top. I mark the centre line and then mark two angled lines for each set of three strings.
The bridge is marked with a centre line and two angled lines to guide the shaping file
A file is used to remove material from the areas in front of the lines, which re-positions the take off points for the strings and sharpens the drop-off angle to help the strings ring more cleanly. After the initial cuts, I put the bridge back onto the guitar, string it up and I’m pleased to find it’s already playing better than before.
The wound strings sound fine, but intonation isn’t spot on for the plain strings, so I remove the bridge and do a bit more filing. The procedure is repeated a few more times and eventually I’m able to get the intonation “close enough for jazz”.
Working through various grades of sandpaper followed by micromesh removes the file marks and brings the aluminium back to a smooth and shiny surface. I might try removing the remaining nickel plating, along with the copper layer beneath, and then polishing the bridge. Failing that I can get it re-plated, but that decision can wait.
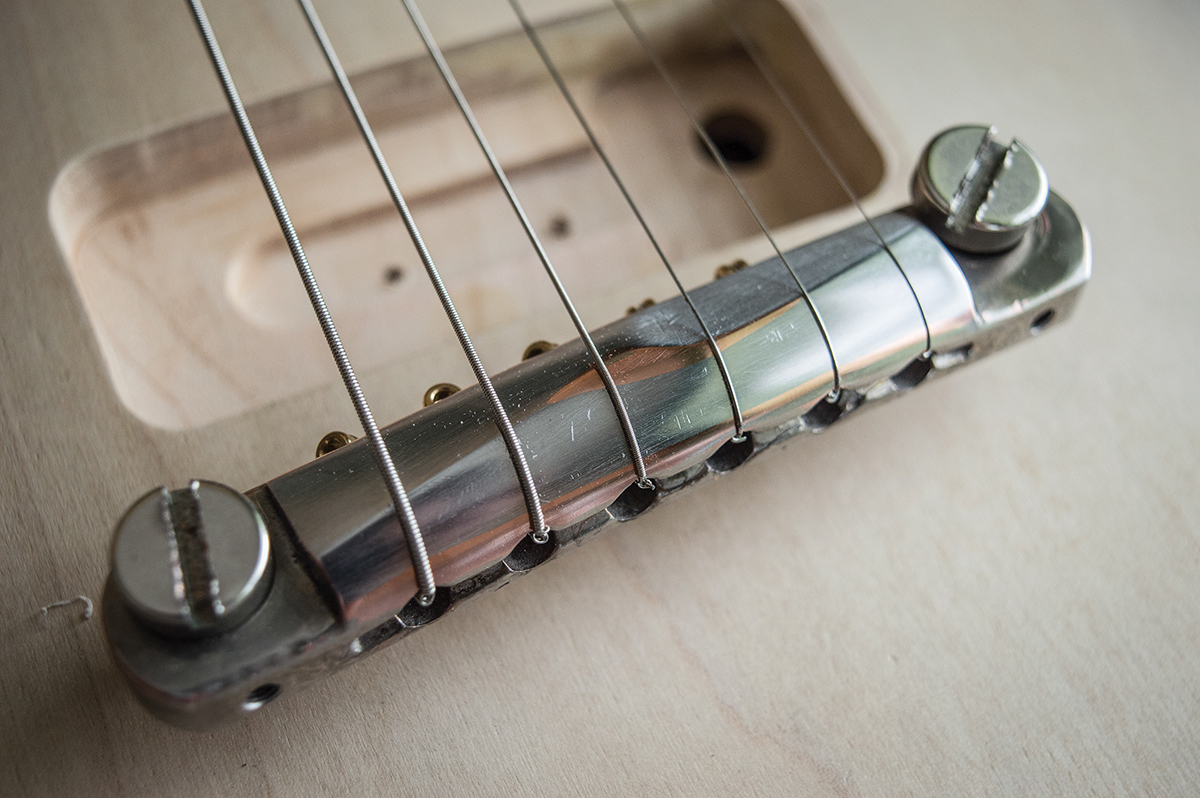
Re-shaping the bridge improves intonation but more preparation will be required before it’s ready for re-plating
Filling In
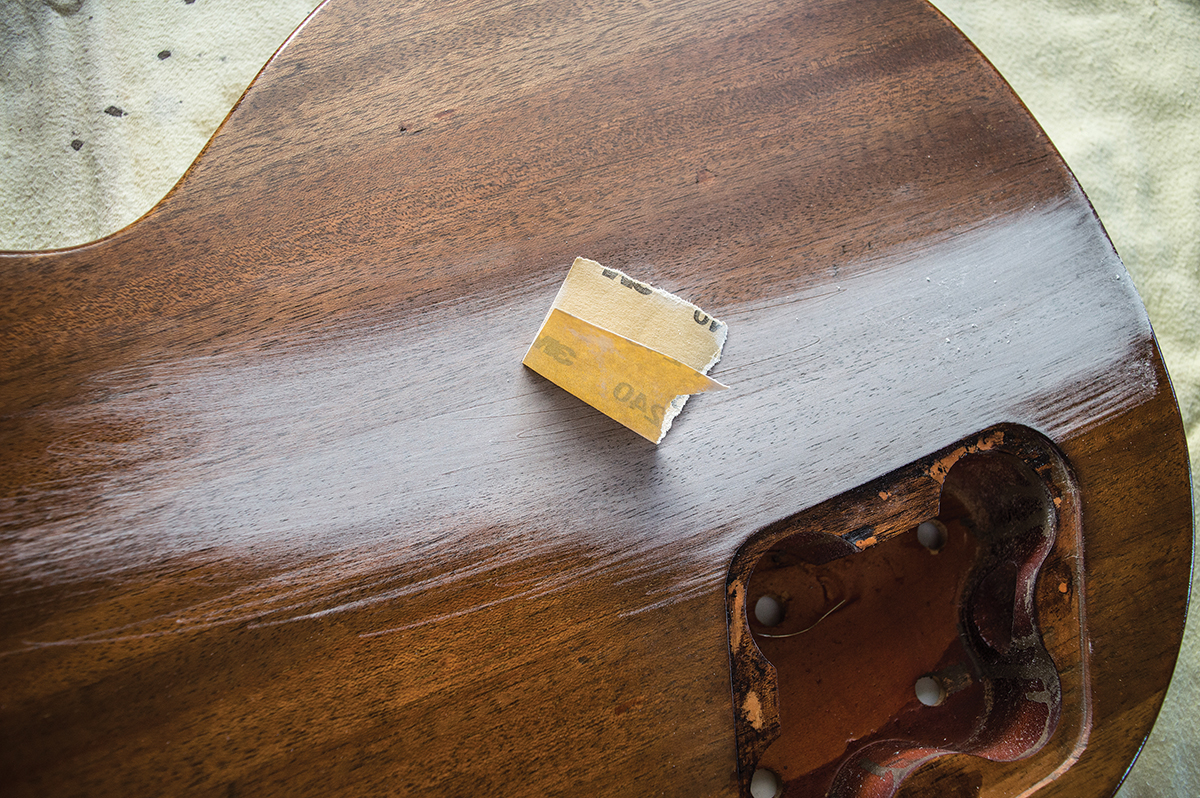
The finishing process begins by masking off the fingerboard, binding and top of the body. I cut out a paper shield that covers most of the top and use masking tape around the edges and the binding. Protecting the pale maple top is necessary because I’m using a fairly dark grain filler for the open-pored mahogany and masking tape makes cleaning up the binding a lot quicker.
The intention has never been to make an exact ’54/55 replica, so I’m not doing the back in light brown. After all, the body is a three piece with fairly obvious join lines and the neck heel is stacked, so I feel a darker back will help to disguise the joins – especially if I lay the brown lacquer on thick around the edges and the heel. Of course all-gold is an option, too, but I personally prefer the contrasting colours.
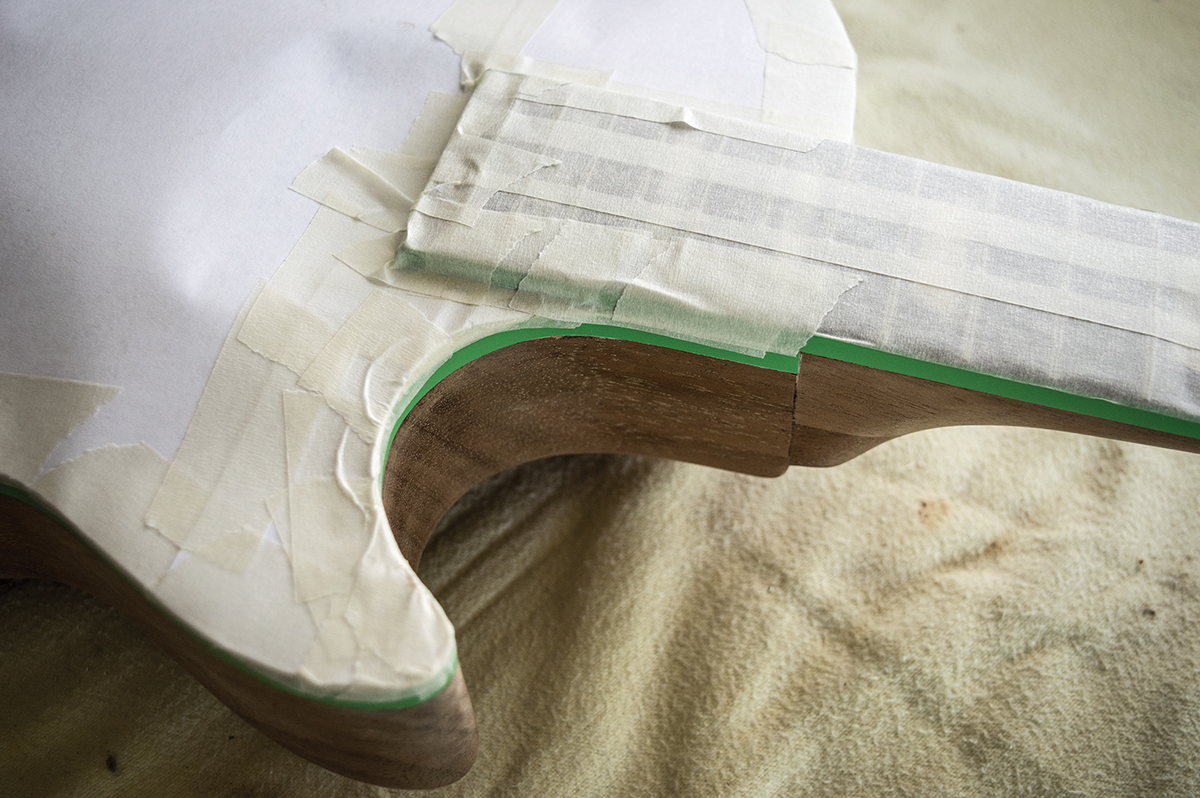
Masking tape and a shield for the top help to minimise clean-up work after grain filling is completed
Steve Robinson (aka Manchester Guitar Tech) kindly supplies some burnt umber powder pigment that I mix with some Rustins ‘teak’ grain-filler to get a chocolate brown colour. The paste is then diluted with white spirit to achieve a consistency similar to double cream. Once spread over the mahogany and pressed into the wood with a cotton rag, the paste is allowed to dry off for a few minutes before the excess is wiped off.
The grain filler is then allowed to dry overnight and I sand the body until the only filler that remains is set into the wood grain. The filling and levelling process is repeated until I eventually achieve a flat surface. The masking tape and protective plastic covering are removed and after cleaning up a few areas of binding by scraping with a blade, I’m ready to begin spraying.
Burnt umber powder is used to darken some Rustins teak-coloured grain filler
All About That Base
Fresh masking tape is applied over the fingerboard and headstock face, with a new shield made for the front. The neck and body are sprayed with a few coats of Manchester Guitar Tech’s clear sanding sealer. It’s absolutely brilliant stuff that makes achieving a flat spraying surface a whole lot easier. The sealer goes on thick and dries rapidly, but I leave it overnight before sanding.
It’s very easy to sand and comes off as a fine powder when I use 320-grit paper. I don’t use a sanding block, preferring to use a small piece of sanding paper folded over for grip. I apply as little pressure as possible and allow the paper to do the work. Wiping down regularly with tack cloth removes the powder and any low areas show up as shiny spots when you hold it up to the light. I find it helps to look across the surface to assess progress.
The trick is to keep at it until all the shiny spots are gone and if you sand through to the wood, don’t worry too much, but stop sanding in those areas. Once the back, sides, headstock and neck are done, the guitar gets a final rub down with a clean tack cloth and I’m ready to begin with the colour coats.
Manchester Guitar Tech’s cellulose sanding sealer flats back easily to provide a smooth surface for the lacquer coats
Into The Darkness
When doing this type of project, I find it beneficial to spend some time online examining images of the type of guitar I’m trying to emulate. One search tuned up a 1956 Goldtop with a dark back that I really liked. The sides and heel area were a deep tobacco brown but the grain on the back of the body was clearly visible through a more faded reddish brown. I decided to adapt this look with a subtle burst around the body edges to disguise the body joins.
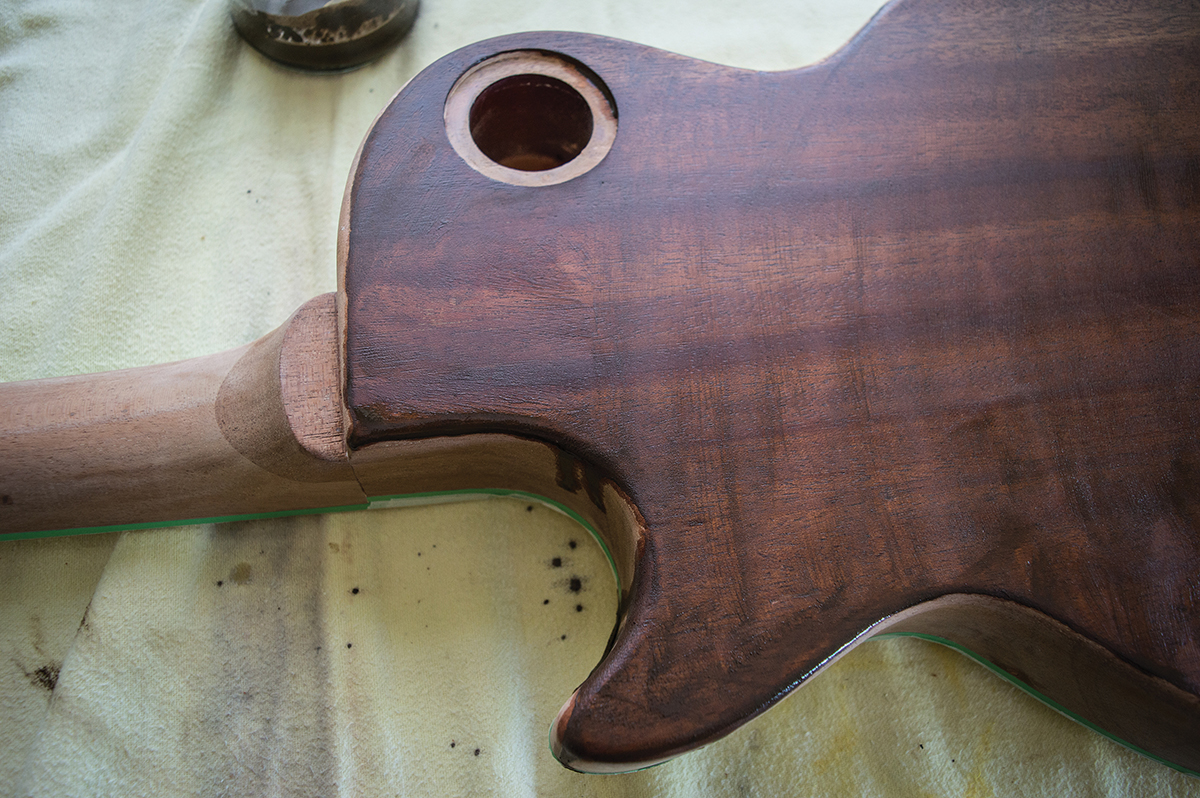
Following Steve’s advice, I start with his Medium Brown, applying a couple of coats over the back and going a little heavier on the headstock, heel and sides. At this point I leave most of the back of the neck unsprayed. Next, I move onto Tobacco Brown and spray the sides and heel, while keeping clear of the back itself.
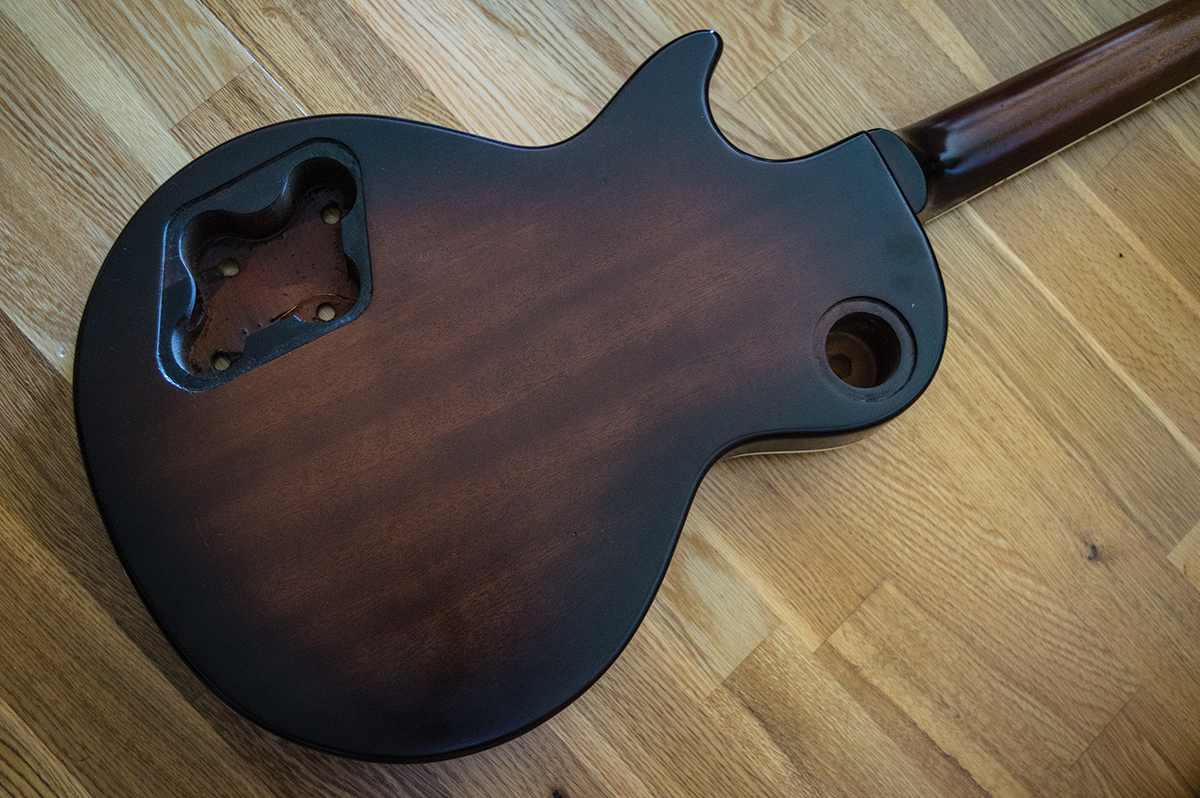
Tobacco brown conceals the join lines and the stacked heel, but we leave the neck and the centre of the body lighter in colour
The darker brown builds up quickly and the heel and body join lines soon vanish. Moving the aerosol can directly over the centre of the body, I direct the spray outwards and beyond the edge before pressing the nozzle. As it’s spraying, I direct the lacquer inwards until I see it settling on the body edges and work my way all around the edge to create the burst effect. This takes care of the join lines that could previously be seen from the back.
Tobacco Brown is also sprayed over the headstock and lightly feathered into the back of the neck. Combined with the Medium Brown coats I sprayed first, this creates a nicely graded transition. Lastly I spray a few coats of Steve’s regular clear gloss to gel everything together and set the guitar aside.
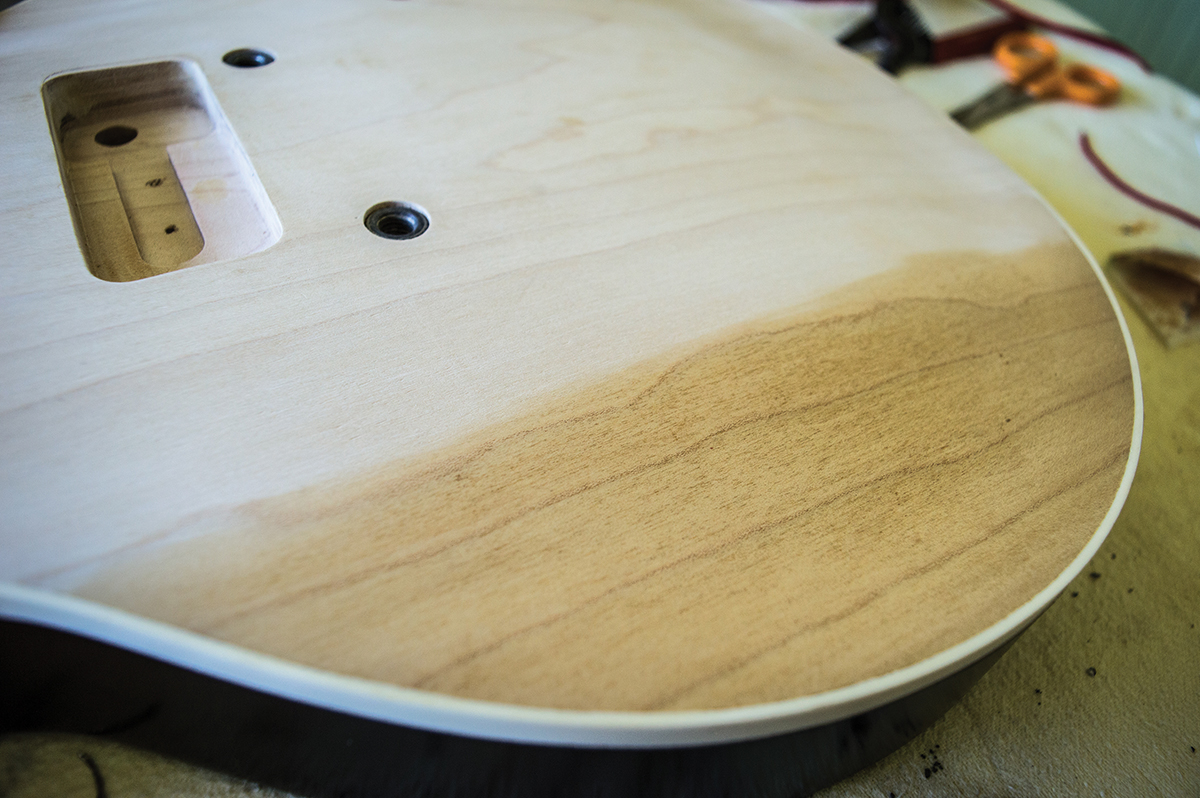
Tinting the maple with Colron Antique Pine stain provides a more vintage correct look
Laying Foundations
The maple veneer is very pale in colour but the exposed maple on vintage Goldtops appears either as a more amber colour or grey and oxidised. To achieve a similar look, I treat the maple with Colron antique pine stain. Doing so reveals a couple of long hairline cracks in the veneer that were invisible to the naked eye. Once the stain has dried, I run some water-thinned superglue along the cracks, allow it to set completely and sand the surface of the veneer flat.
A little more stain is applied to the sanded areas and I follow up with some light tint clear coats of lacquer to get the colour just right. Having examined several vintage Goldtops, there are always clear coats beneath the gold coats, so there’s no reason for me to deviate from the formula. Since I want a perfectly flat surface for the Goldtop, I use more sanding sealer over the tinted coats, then sand it flat.
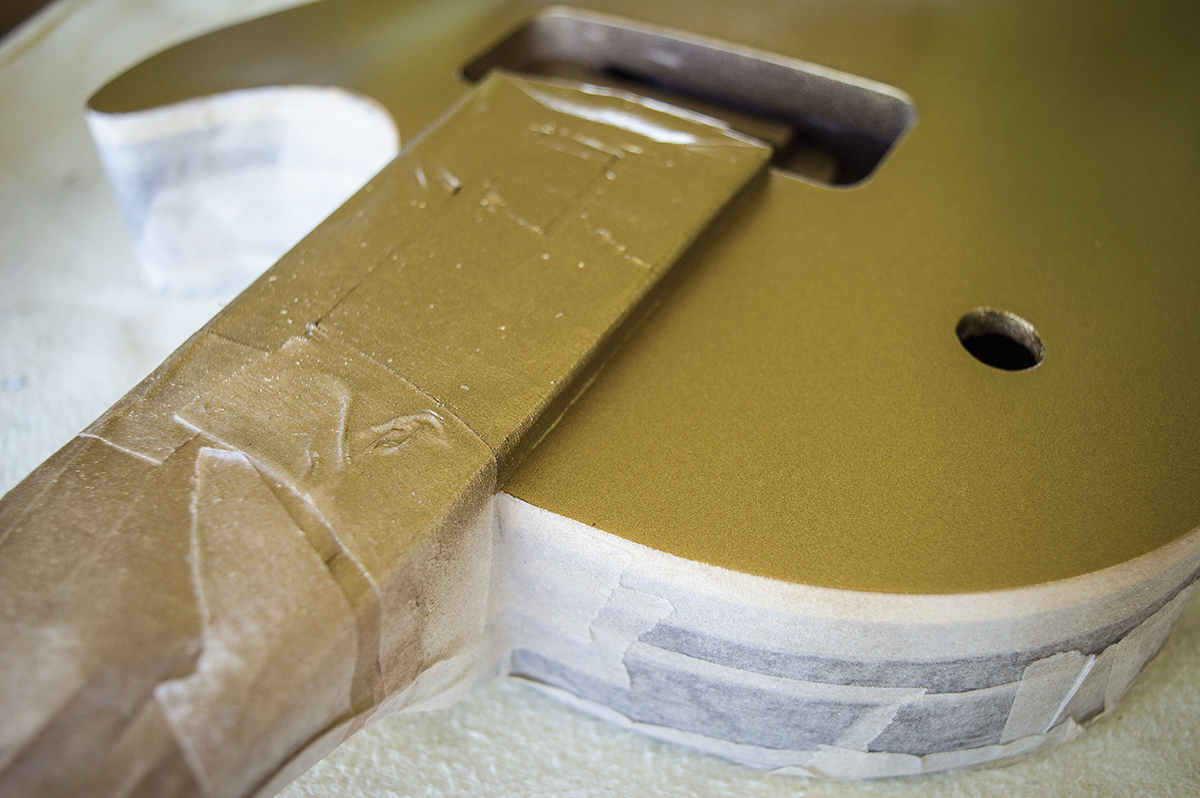
This time the back and neck are shielded with masking tape is applied to the sides prior to spraying the gold coats
Bronze Beats Gold
The wonderful goldtop lacquer Gibson used originally underwent some notable changes over the decades. The magic formula was forgotten by many, which resulted in countless dubious Goldtop refinishes, but the subject is now better understood. The original product was made by suspending bronze powder in clear lacquer and you can buy vintage-correct Goldtop lacquer from our old friend Manchester Guitar Tech.
This is crucial because the authentic verdigris look of a vintage Goldtop only occurs when the bronze powder oxidises. Somewhere down the line I’m planning to relic this guitar and I’d like to make the ageing look as convincing as possible. I’m not confident that I’ll achieve that with green stain alone, so bronze has to be best.
Getting back to the business at hand, I carefully mask off the neck, back and sides so that only the areas that I want to end up gold are exposed. I’m pleased to find that the Goldtop lacquer sprays just as easily as regular lacquer. Even so, I’d suggest shaking the can for a few minutes to ensure that the contents are all mixed up properly. It takes about three quarters of a can to achieve a completely even and opaque coverage.
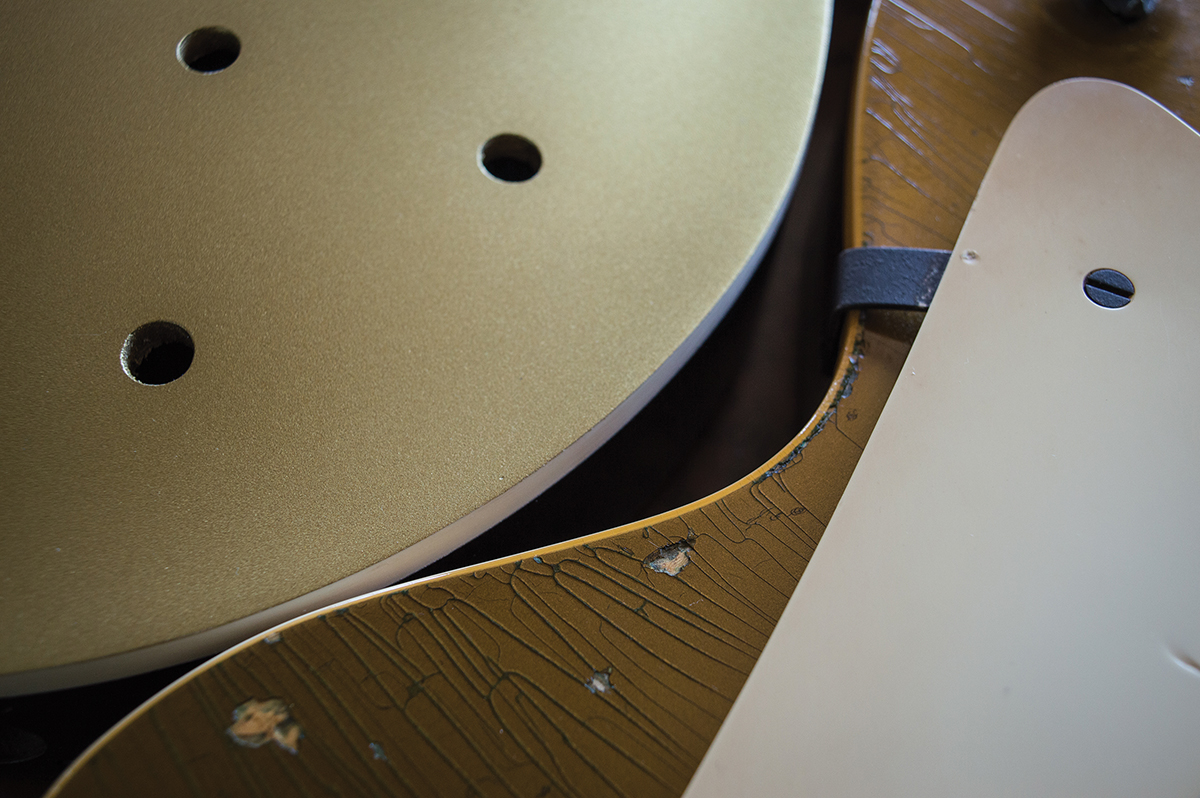
The extent of the lacquer yellowing over the binding on this ’54 Goldtop reveals why the freshly applied Goldtop lacquer looks so different
To emphasise the metallic look, Steve suggests finishing the gold spraying with a light mist coat to leave bronze particles standing up on the surface. Following up with a few light coats of clear locks the particles in place before the clear top coats are applied.
I choose not to do this because none of the vintage Goldtops I’ve seen have a particularly metallic appearance. After my final gold coat, I apply a couple of coats of clear, and I’ll leave it at that for now. Lined up beside a genuine ’54, the difference is quite marked, but I’m hoping to remedy that by spraying some tinted clear coats over the top.
With the finish done, it’s time to put it all back together, and see if this guitar still sounds and plays as well with the finish on…