Related Tags
How to install a Bigsby on a Gibson ES-335
They fell out of favour for a long time, but these days, having a Bigsby on a vintage-style Gibson is a cool as it gets. Here, we show you how it’s done and make a few other tweaks along the way in pursuit of the ultimate ES-335.

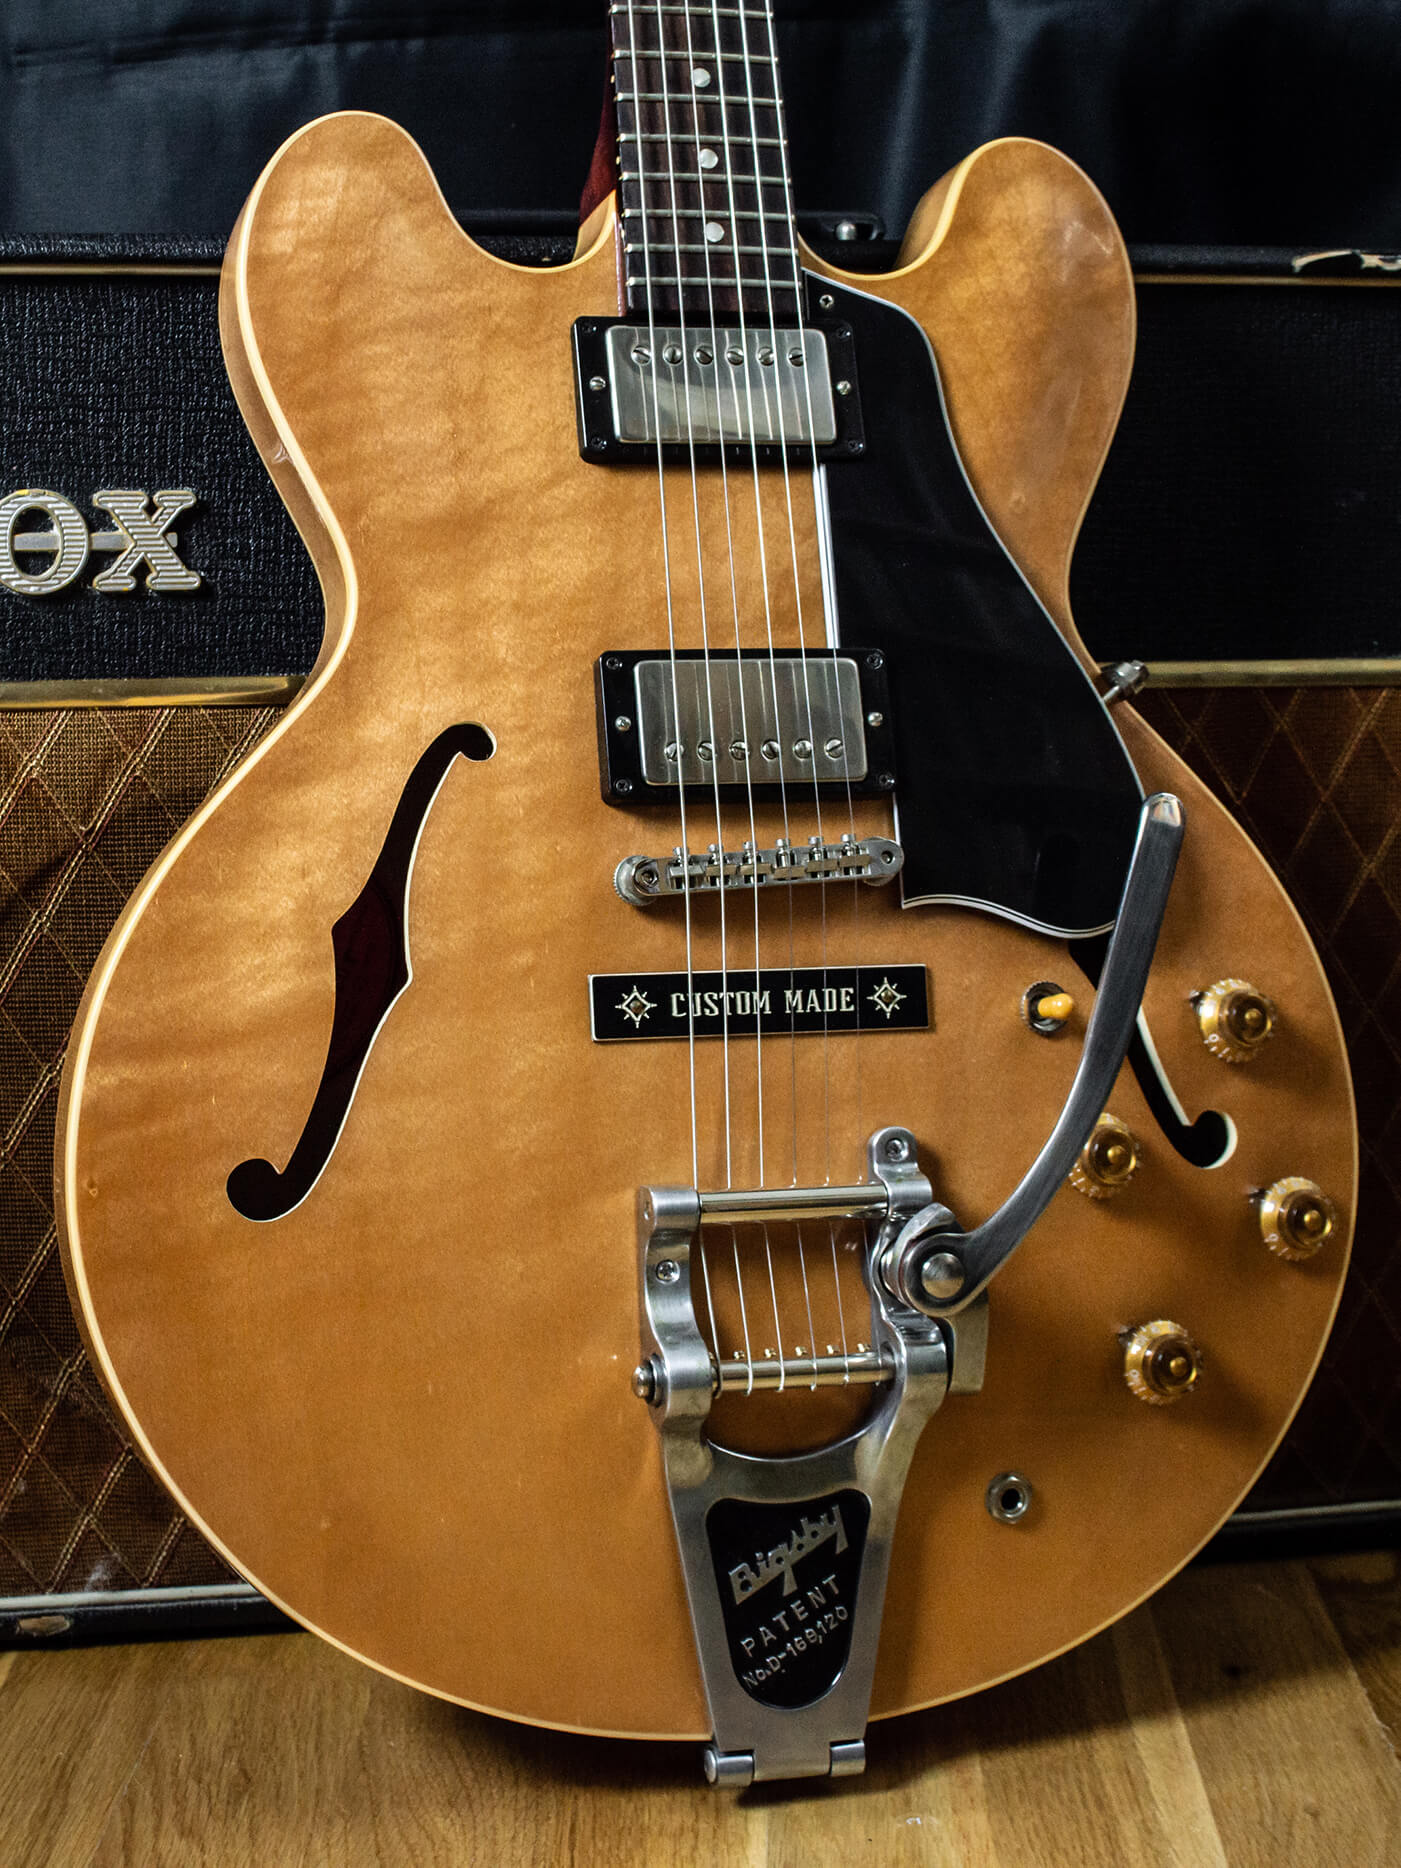
Only relic finishes cause more of a commotion in the online guitar community than the humble Bigsby tailpiece, but converts will tell you that these chunks of sandcast aluminium still represent the most expressive and musical vibrato system ever invented for guitarists. Here, I’m taking a recent Gibson Memphis 1958 ES-335 reissue and swapping the stopbar for a Bigsby B7.
There are, of course, several innovate ways to install a Bigsby without making permanent modifications to your guitar, but the feeling in this office is still that sonically speaking, there’s no substitute for screwing that thing directly into the body. With that commitment made and the guitar in bits on the workbench, it seems sensible to take the opportunity to make some further upgrades – including the pickups. Time to see if an already very good guitar can be made into a great one…

Wiggle room
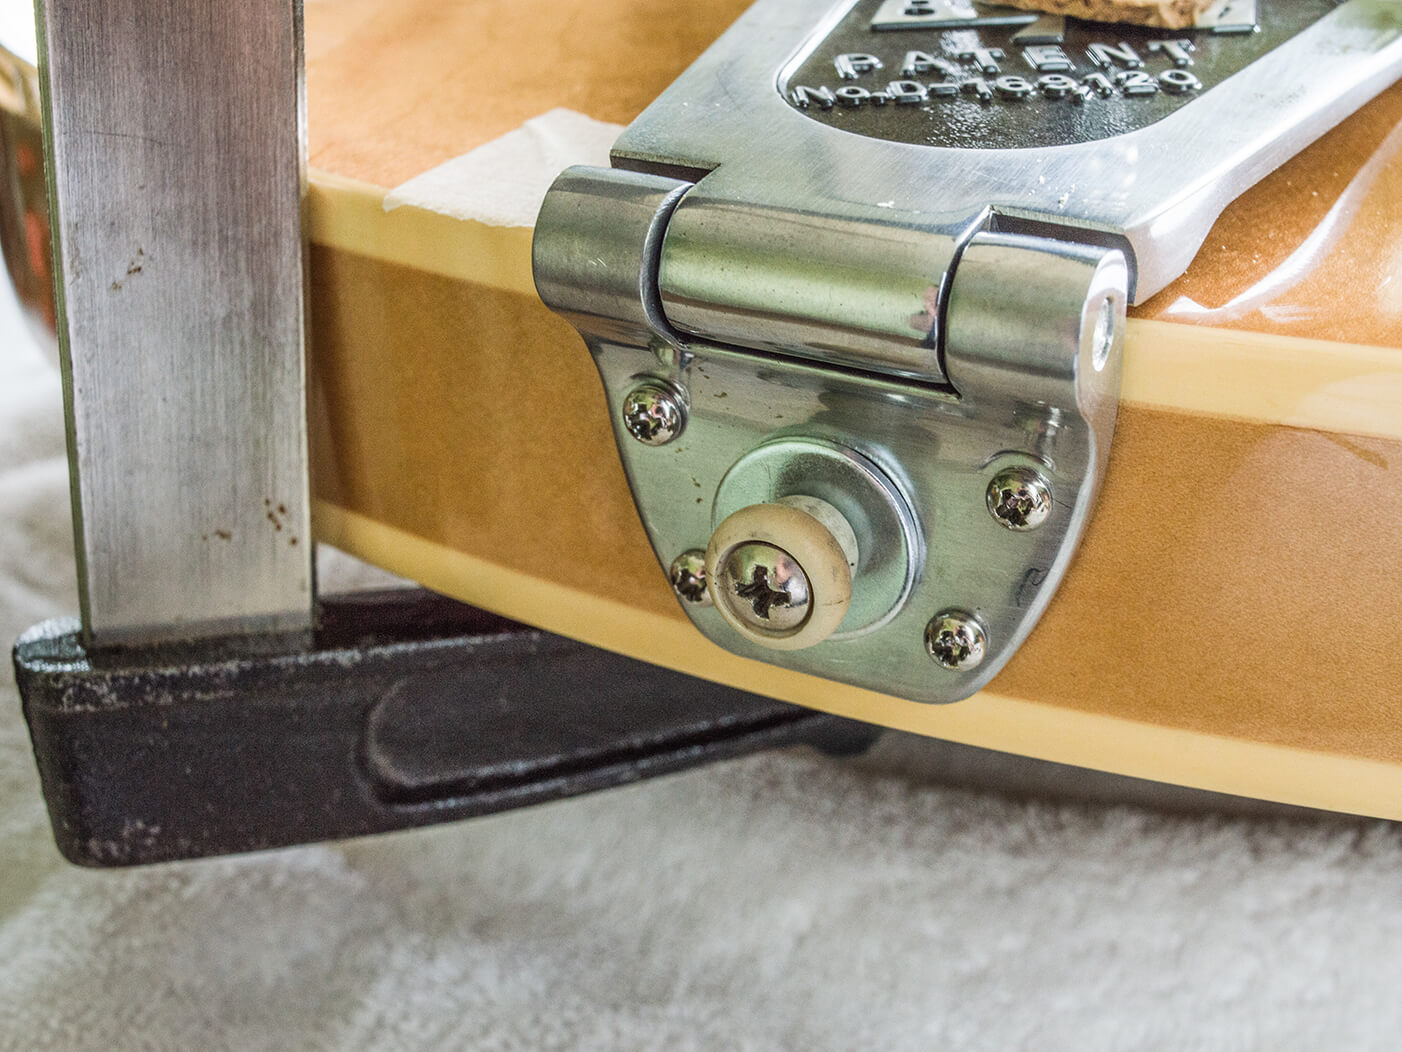
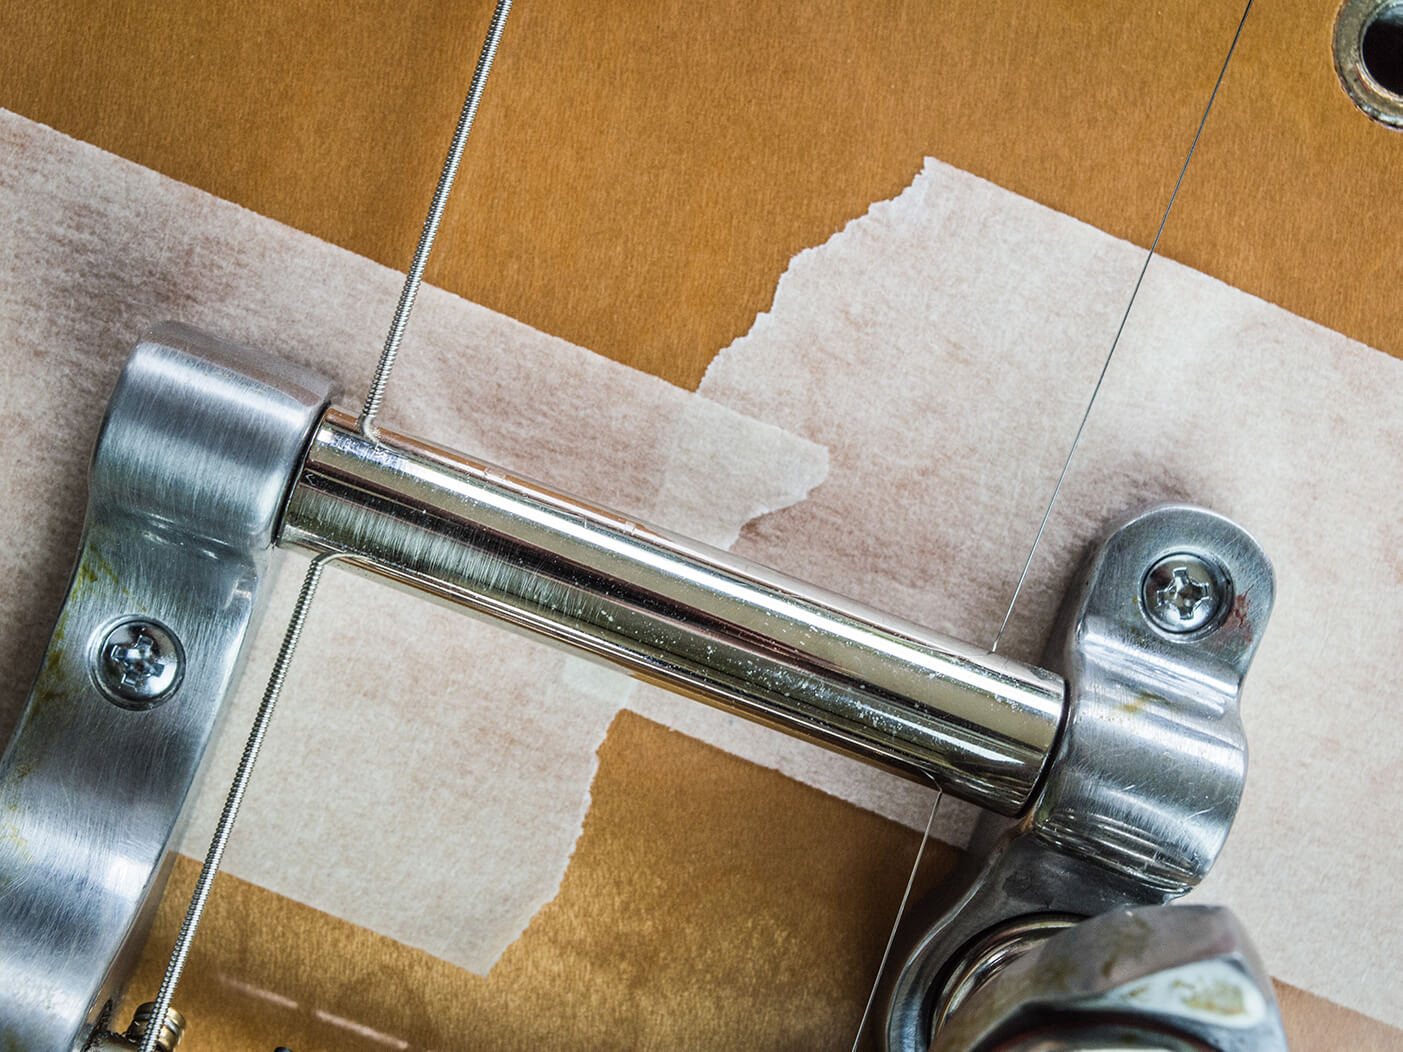
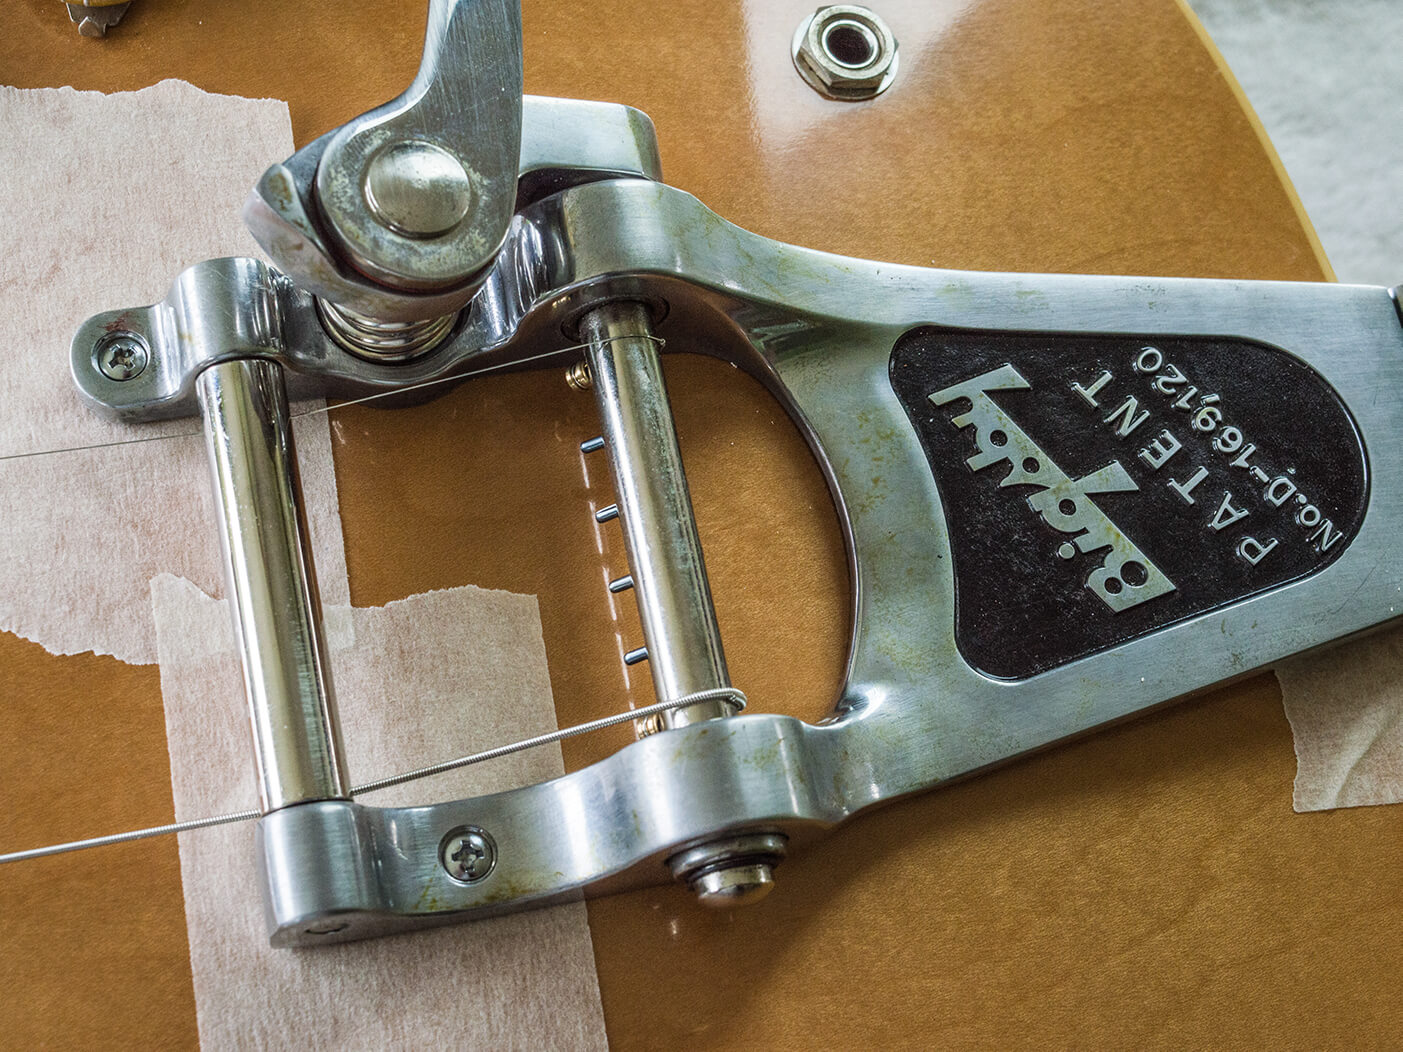
It’s vital to get a B7 positioned on the centre line, but Bigsby hinges always have a bit of play in them. This means you can fine-tune the position of the front section to ensure that the strings follow as straight a path as possible over the bridge, under the roller and onto the securing pins.
I begin by removing the guitar’s stop tailpiece, tailpiece bolts and strap button. With the button removed, masking tape is used to mark the centre of the button’s screw hole. This helps to position the Bigsby dead centre and it needs to be held in place.
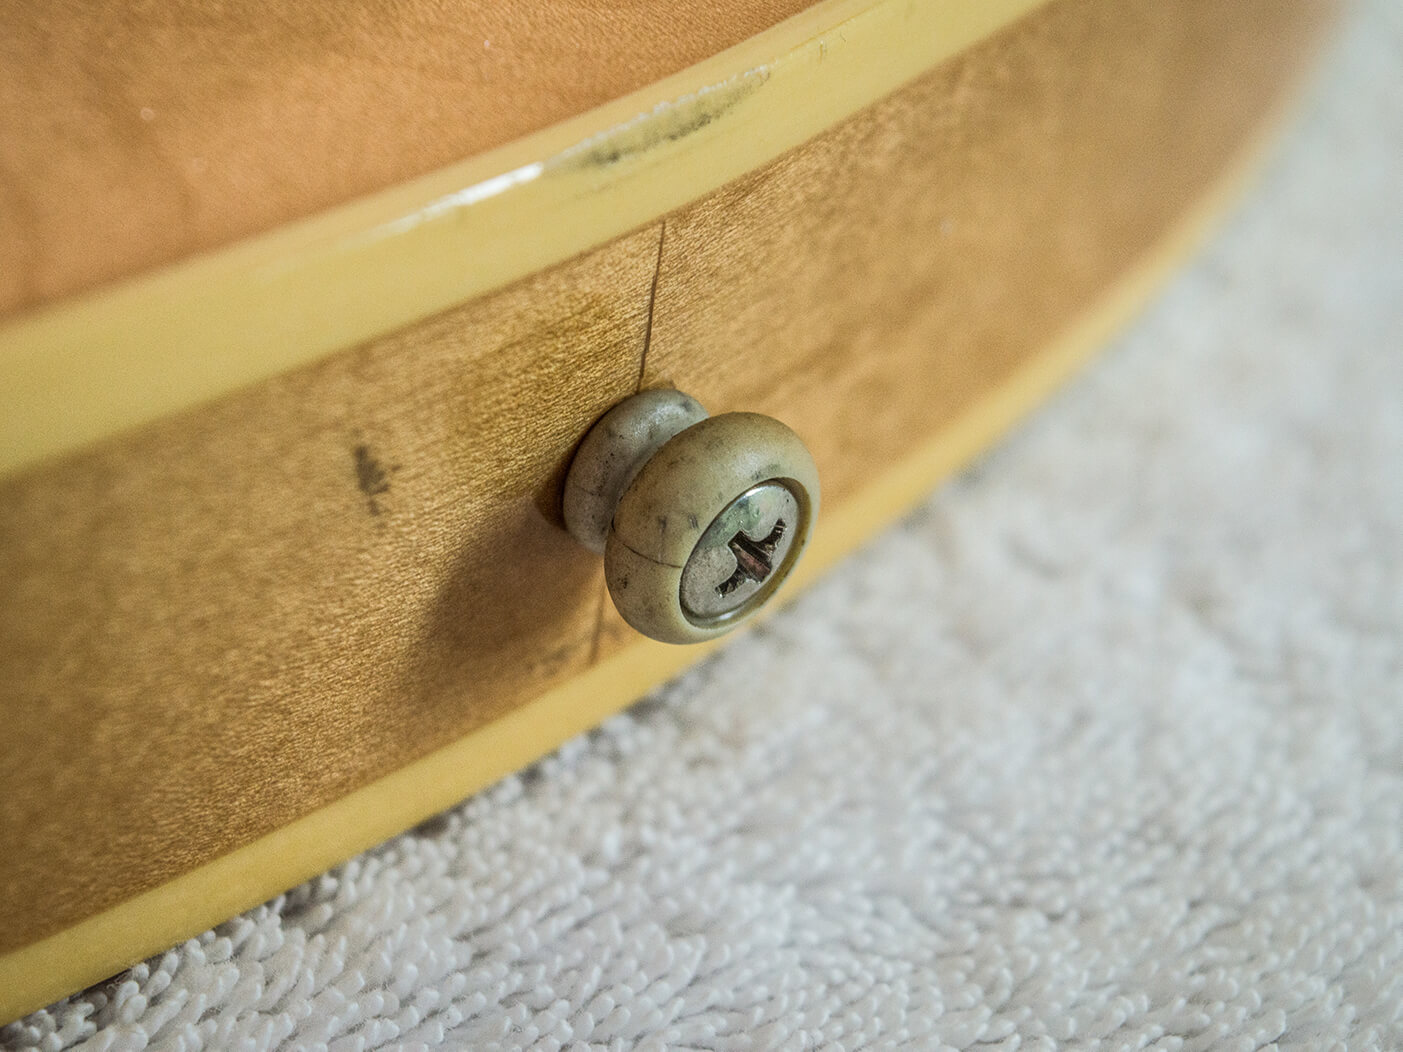
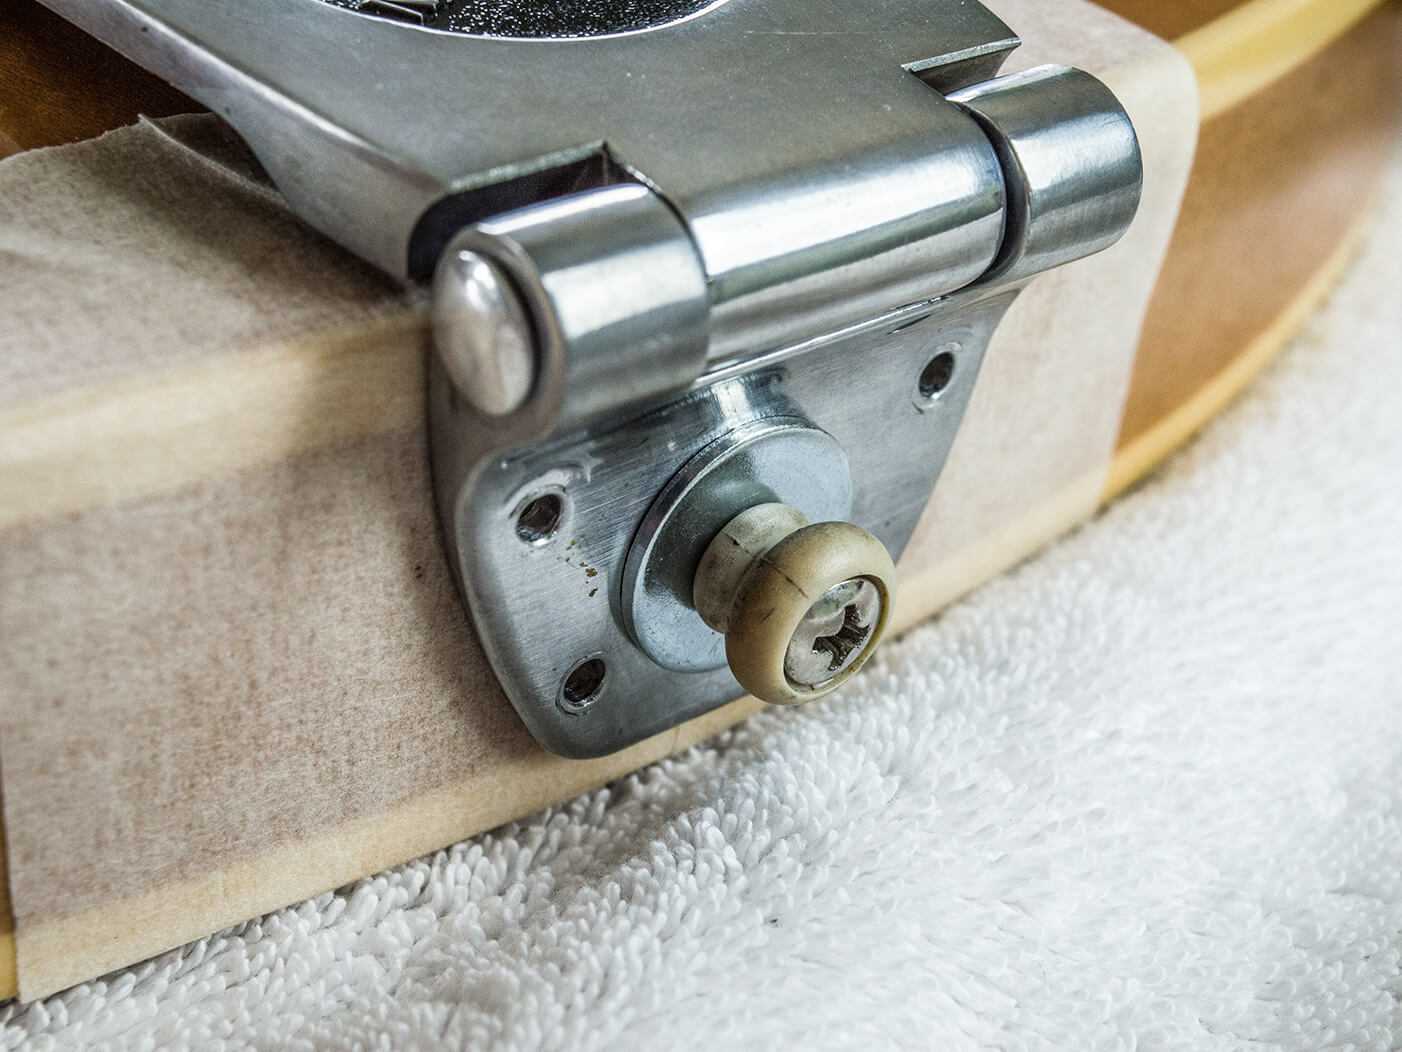
Although the vintage-style strap button on this reissue model is made from white plastic, it’s drilled for a long fixing screw. This is ideal, because it can anchor the Bigsby while I get everything aligned. The Bigsby B7 has an opening for a strap button in the hinge plate; I have to use a large washer so the button screw can clamp the Bigsby in place. It probably wouldn’t be sufficient under full string tension, but it will do for now.
B7s are easier to fit than some other Bigsby tailpieces because they’re screwed onto the top of the guitar. Being fixed this way means that uneven string tension cannot pull them out of whack, but you do need to be absolutely sure that the position is correct before committing to those screw holes.
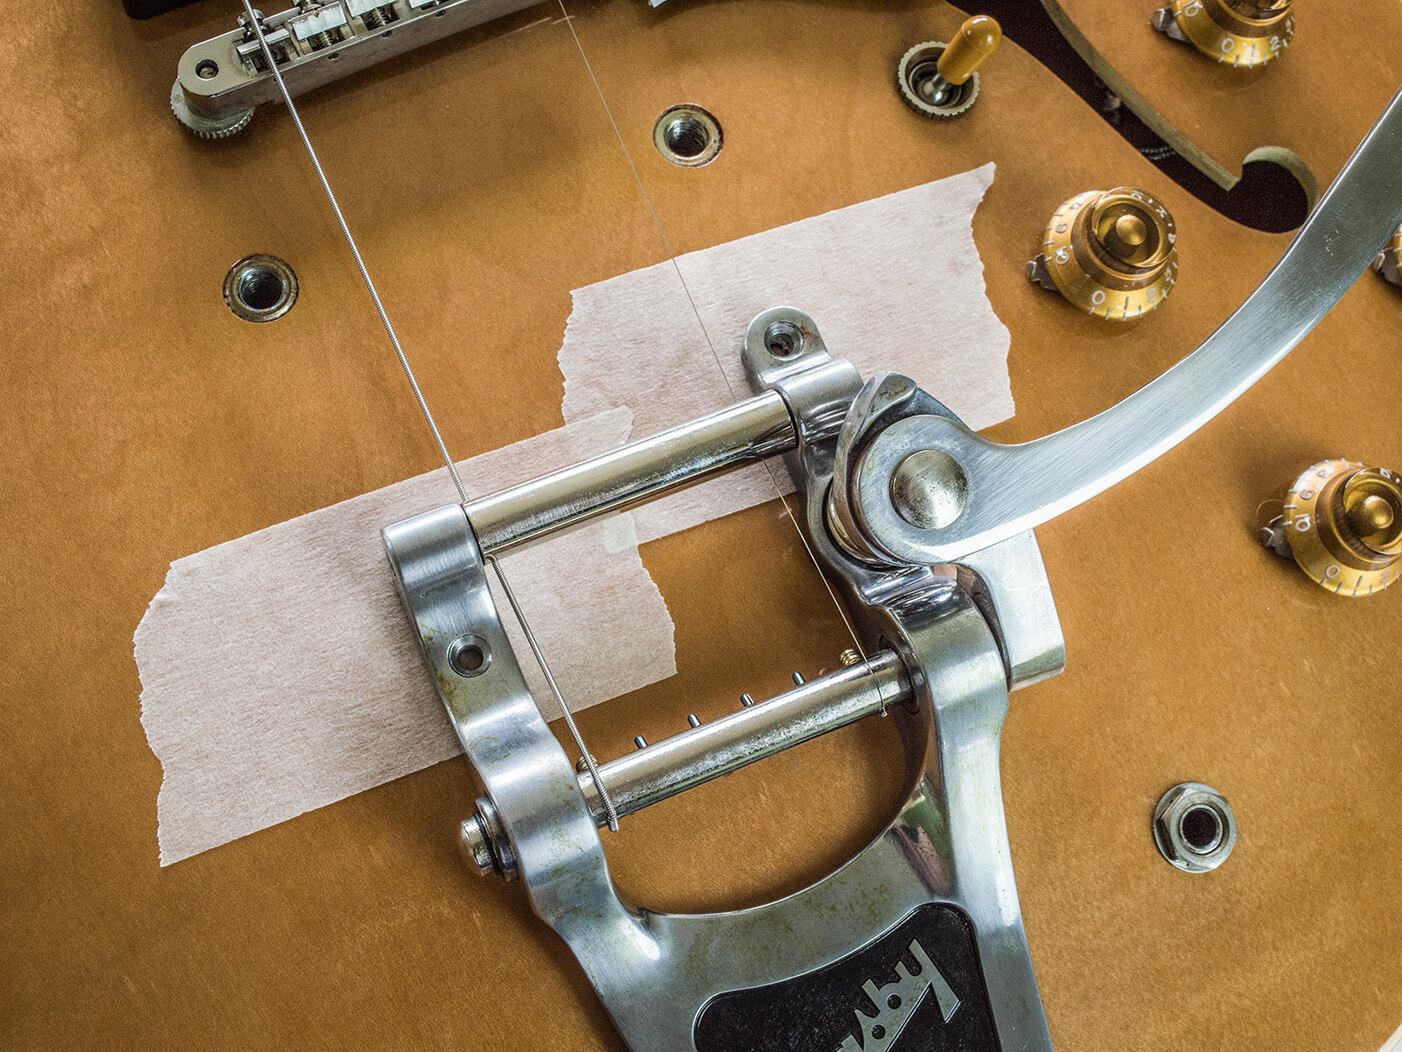
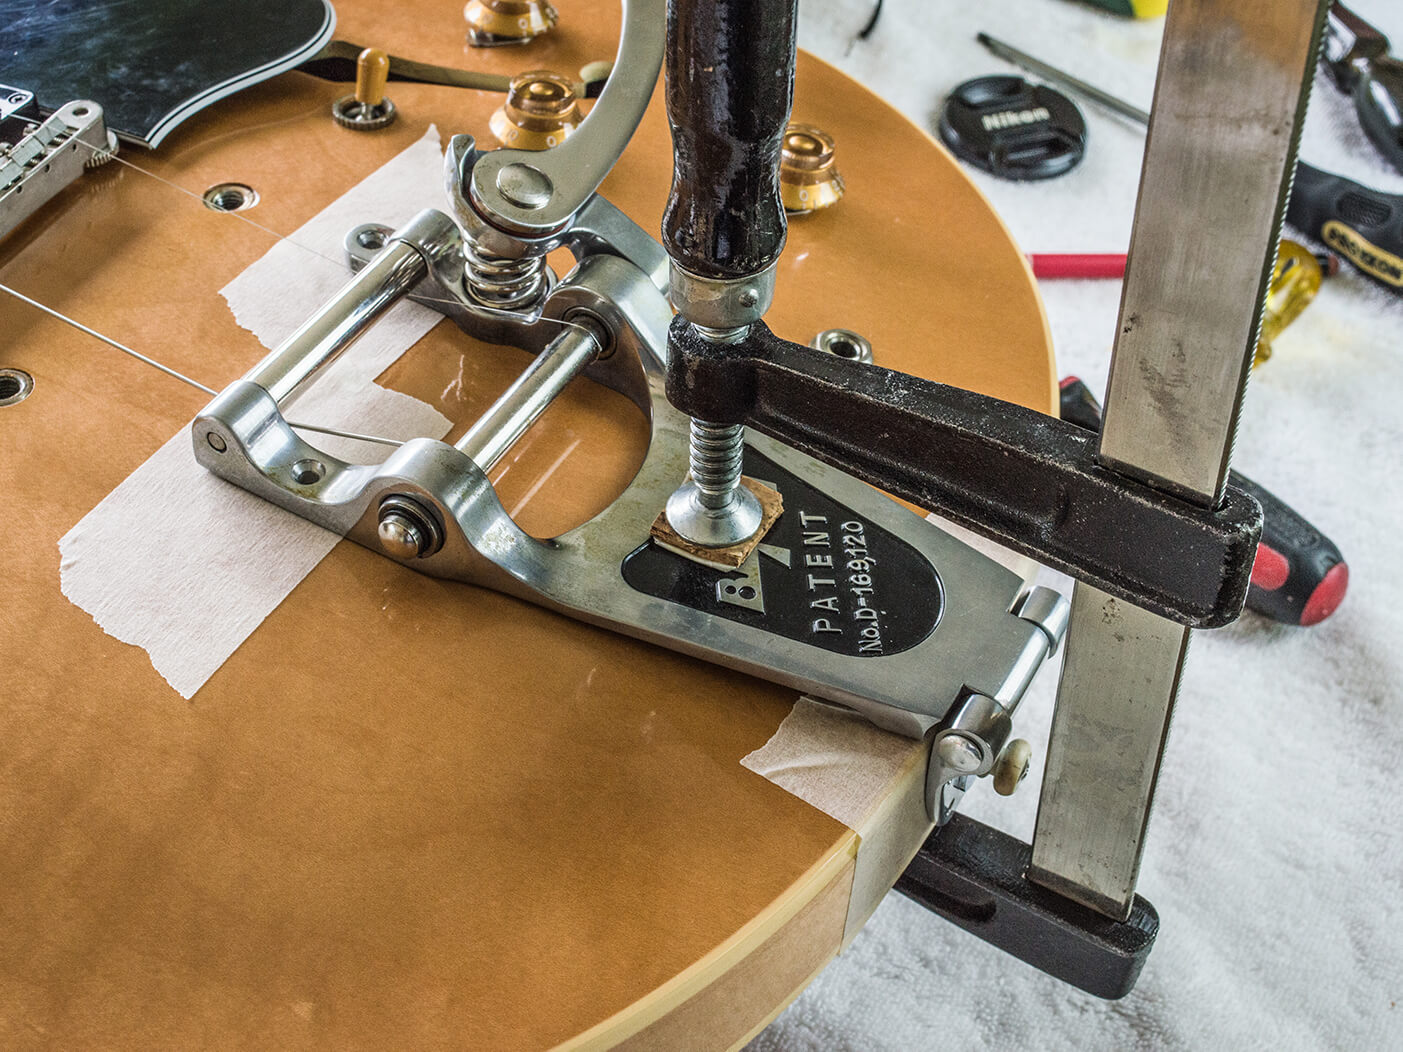
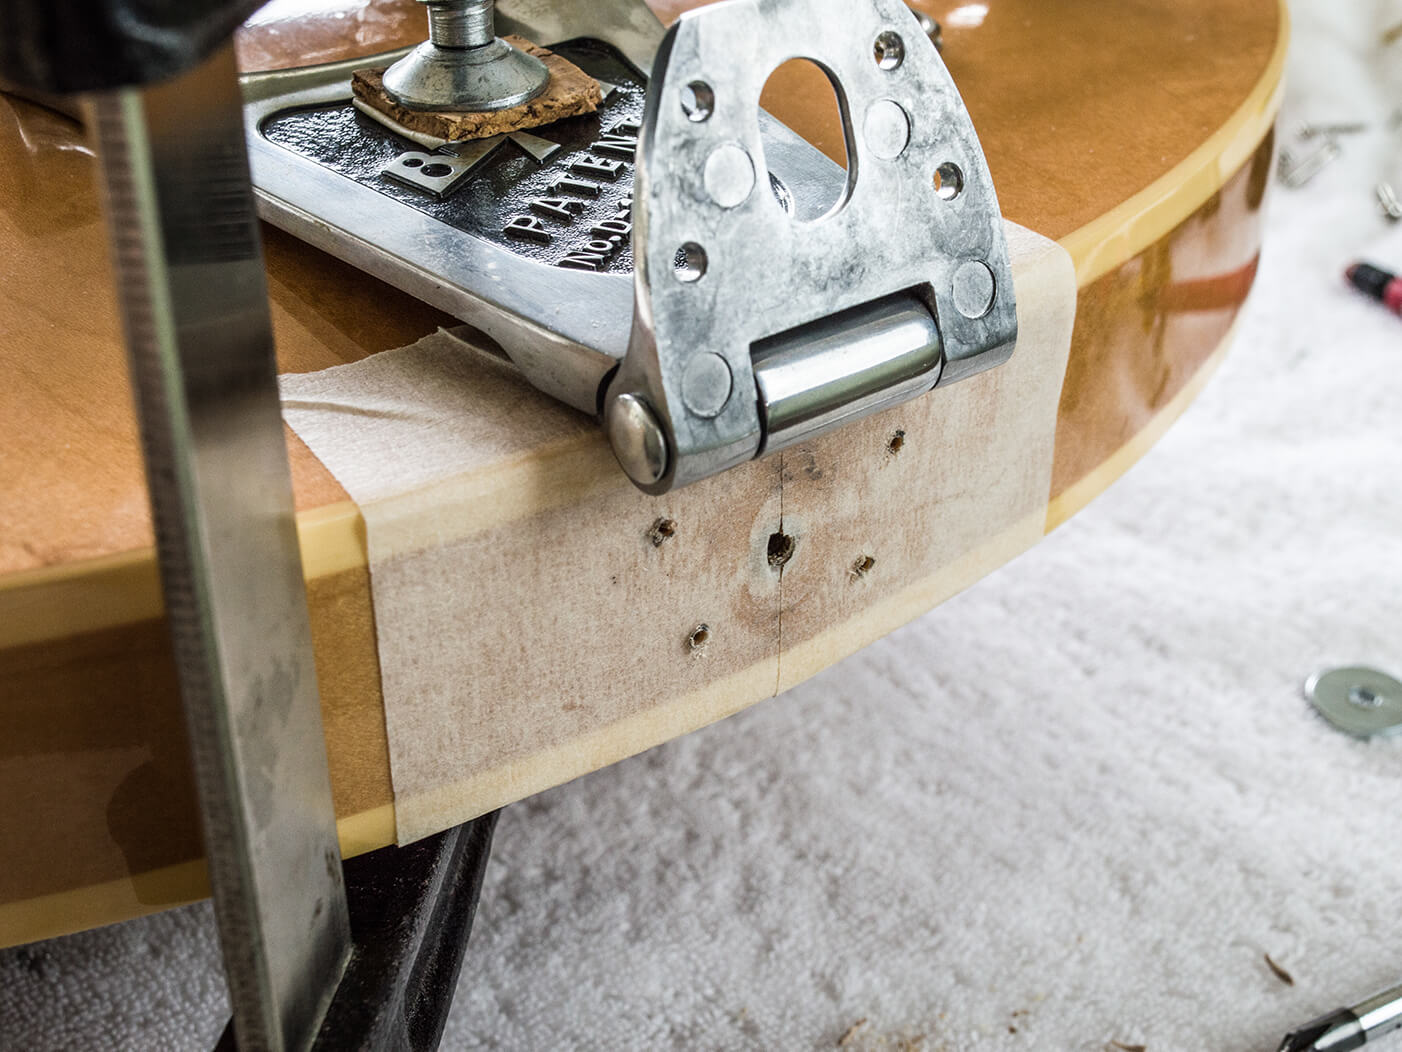
To help with alignment, I fit both the E strings to the guitar and tune them up just enough to eliminate any slackness. A large clamp with cork protection pads is gently tightened, allowing the Bigsby to be adjusted but stay where it’s put.
Once I’m convinced the alignment is as good as it’s going to get, I tighten the clamp a little more and drill pilot holes for the four fixing screws at the back and the two on the top. The screws are put in – it’s important to use a screwdriver that fits the screw heads properly and a little wax on the screw threads can help to ease the process.
Staying grounded
Hopefully, it’s apparent that fitting a Bigsby isn’t a particularly daunting undertaking. There is, however, a complicating factor because without the stop tailpiece, the strings aren’t connected to ground and the guitar will generate unwanted noise.
Gibsons with stop tailpieces and wrapover bridges have ground wires in the bushing holes. Although the wire is still in situ, now we’ve installed the Bigsby, the strings are now connected to the tailpiece and don’t make contact with the stud bushings. To re-establish a ground connection, I have to run a wire from the Bigsby and I want it to be invisible.
The standard way to do this with semis and semi-solids is to drill a hole through the side of the body at the tail, where it will be hidden by a Bigsby or trapeze tailpiece. With hollowbodies such as ES-330s, Casinos and so forth, you can drill straight through; however, the centre-block complicates things with semi-solids.
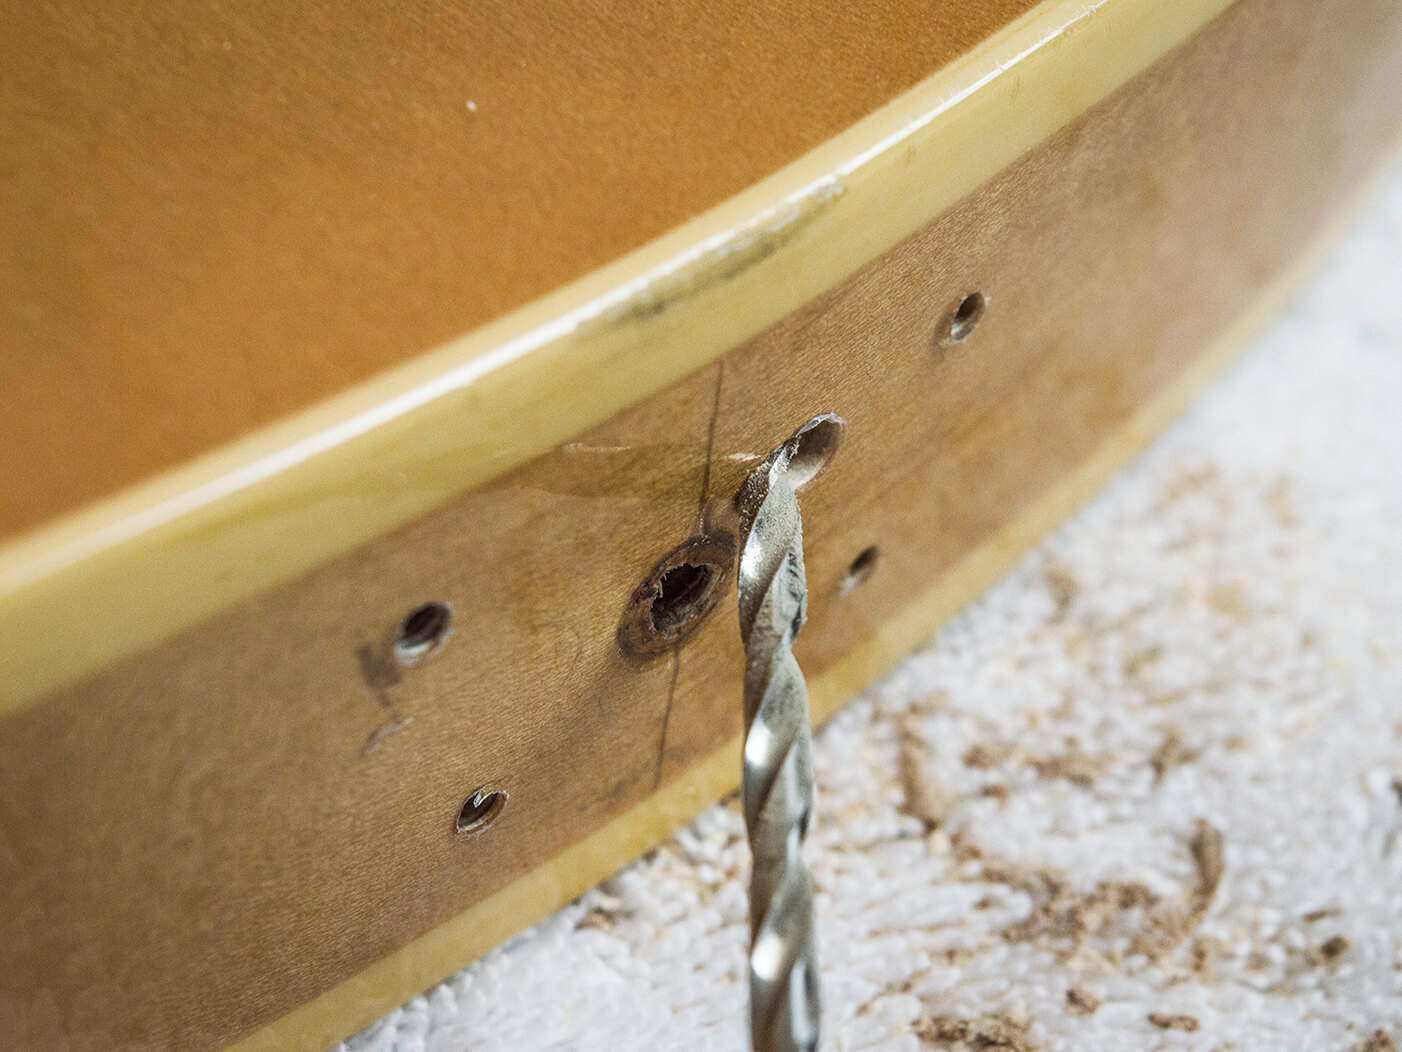
To get a ground wire into the body, I have to drill through the side at an angle using a 100mm-long drill bit. It may sound straightforward enough, but the last thing I want is for the drill bit to skate across the glossy lacquer and create an unsightly scratch – even if that would accelerate the natural relic’ing process…
To prevent this from happening, I drill a pilot hole about 5mm deep using a drill bit with a wider diameter than the bit I’m using for the ground wire hole. This allows me to get the end of the ground wire drill bit inside the pilot hole and it prevents the bit from sliding as I get the hole started.
The bit is just long enough and I take care not to press too hard, because I don’t want the drill’s chuck to hit the guitar when the bit breaks through the side of the block.
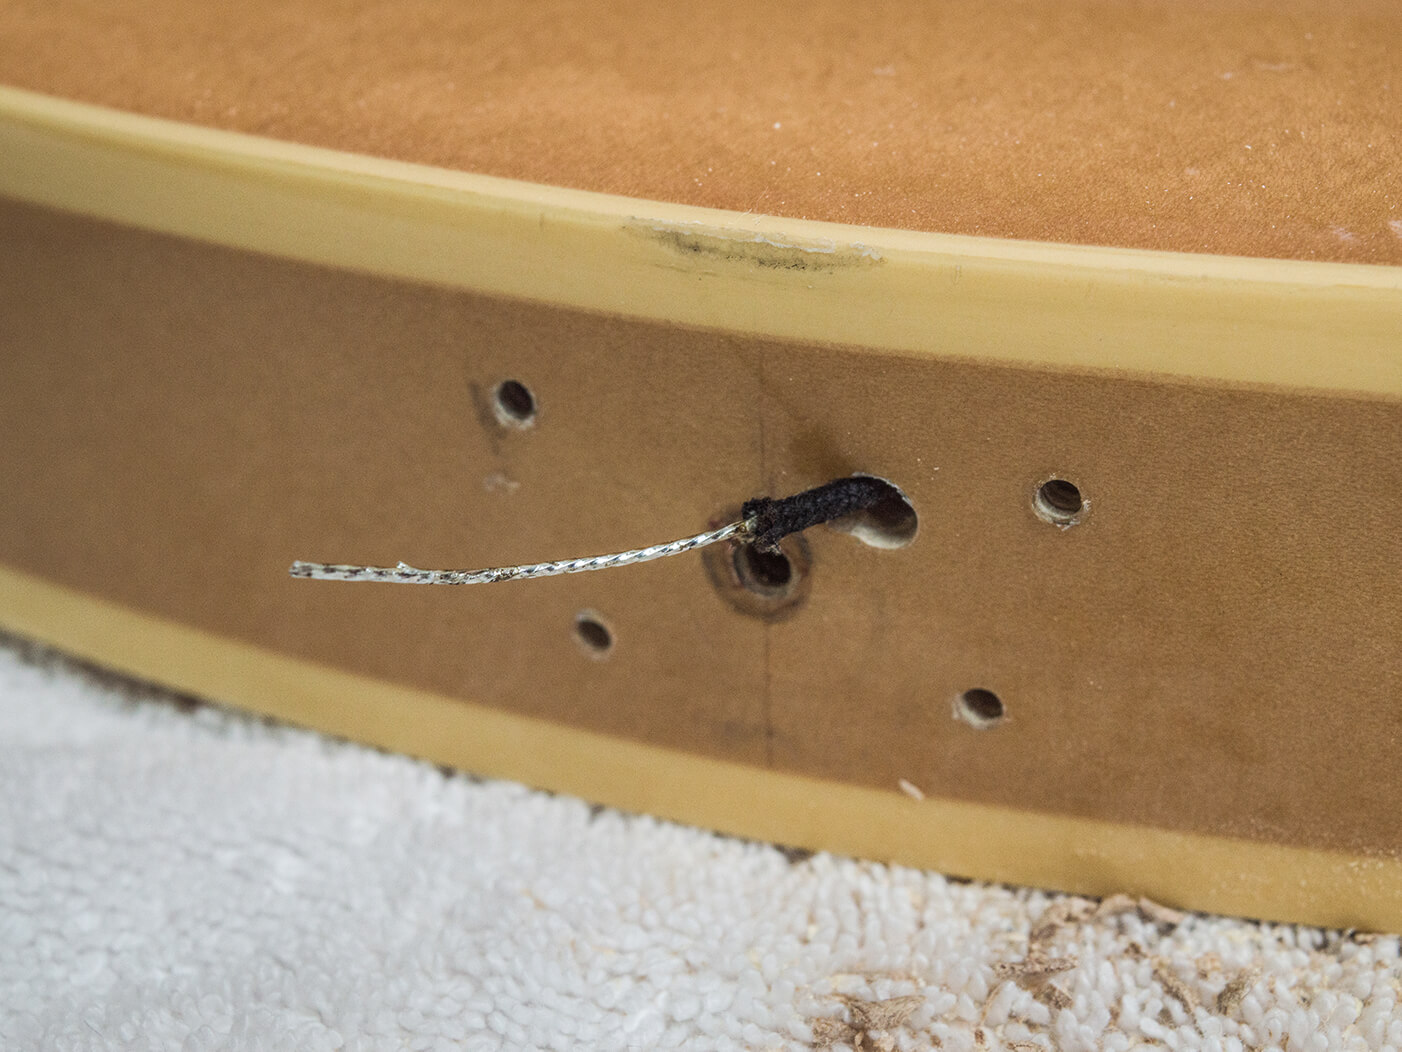
A length of black, cloth-covered braided wire is prepared by stripping of a few centimetres at the end and tinning the exposed wire with solder. Few soldering irons are powerful enough to solder onto a Bigsby, but simply screwing the hinge plate tight against the wire provides more than adequate contact. The other end of the ground wire can be soldered onto one of the braided pickups wires or a pot casing, and everything will work as before.
Peculiar customs
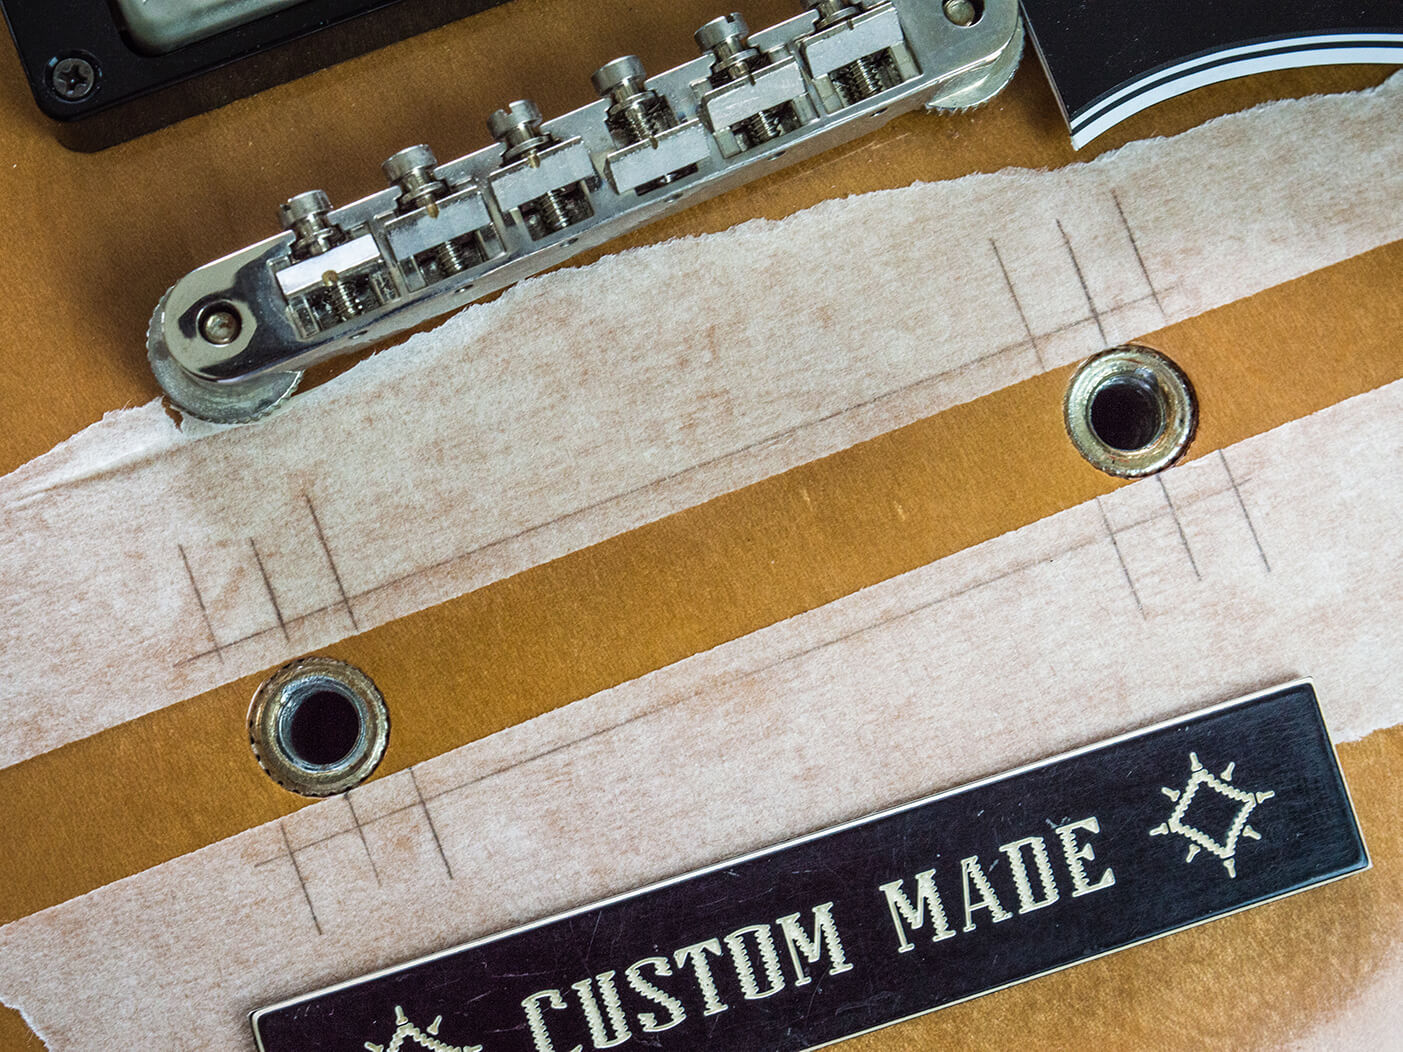
Up until 1965, ES-335s had stop tailpieces and the bodies came off the production line with bushing holes. Clearly, the bushings weren’t required if a Bigsby was being fitted and something had to be done about the two holes. When Gibson installed Bigsbys to factory guitars, they were considered custom orders and plastic covers were made to conceal the bushing holes.
These covers were engraved with ‘Custom Made’ and a star motif at each end. Leaving the bushings in situ beneath the cover allowed owners to change their minds about the Bigsby and revert back to a stop tailpiece – something many did as Bigsbys fell out of favour.
Replica ‘Custom Made’ plates that look the part are few and far between, but Peter Wilson Guitars on Reverb.com make pristine and aged versions that are about the best we’ve seen.
The nicely relic’d plate arrived with adhesive backing for fixing to the guitar – I’ve never found applying stickers to nitro finishes works out well in the long term, but since some of these cover plates were originally fitted with metal pins, they would look vintage-correct on this guitar.
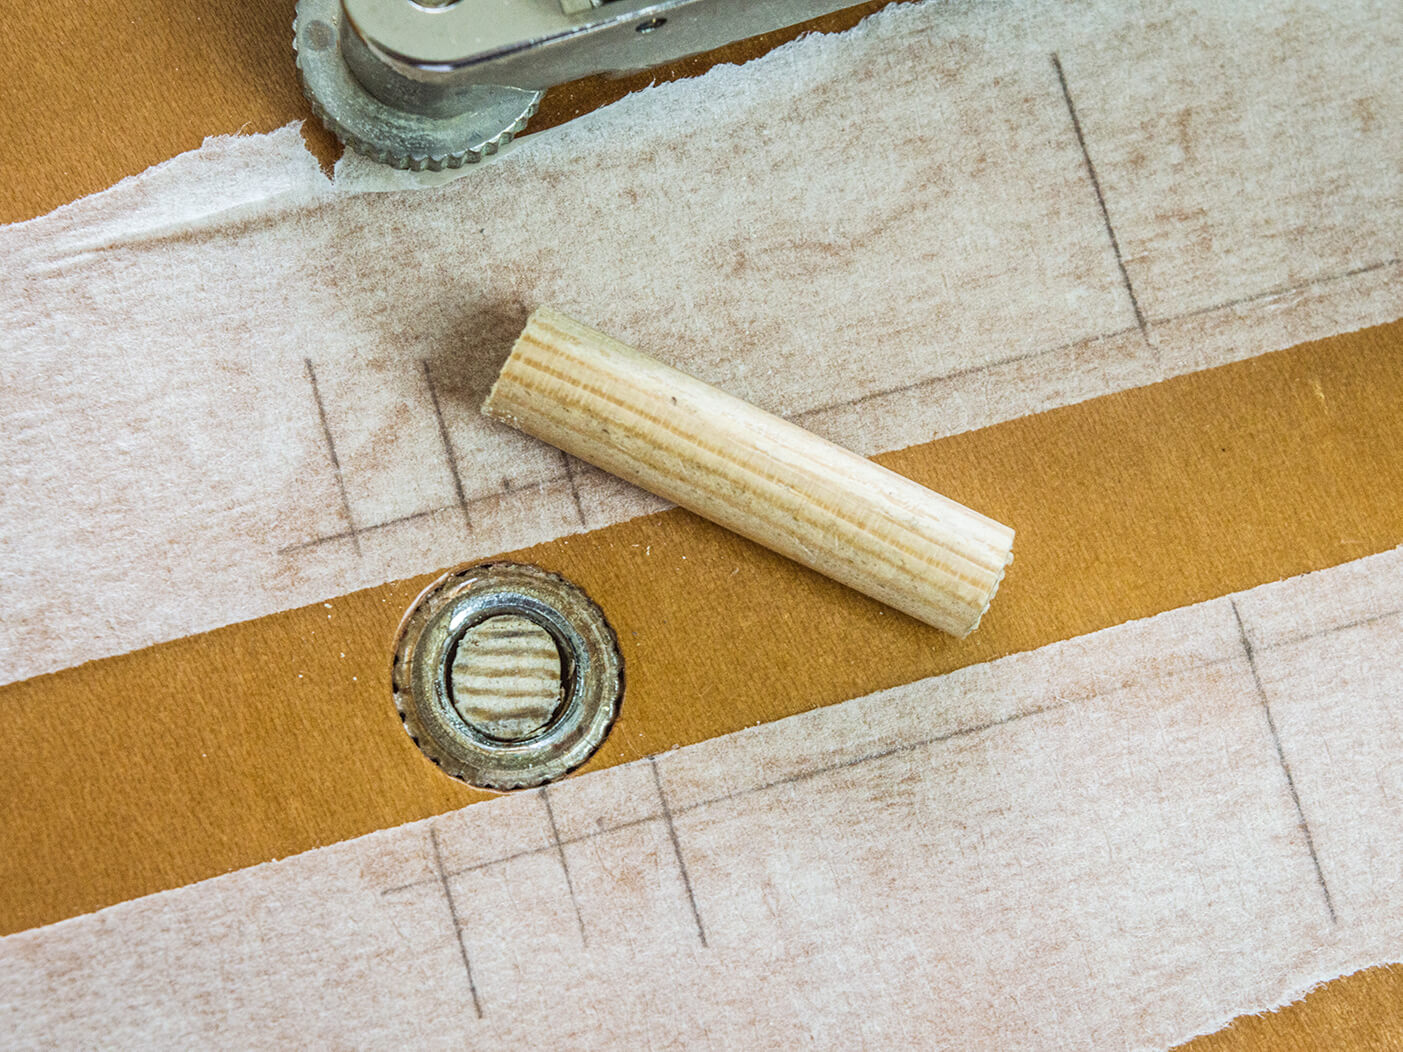
I’m disinclined to make unnecessary holes in the guitar’s top, so instead I’m trying something I’ve seen on other Bigsby-loaded Gibsons. The trick is to wedge wooden dowels into the bushings and tap the pins for the ‘Custom Made’ plate into the dowels. In this case, 7mm dowels are the best fit, holding tight enough, but still easy to pull out. I simply push the dowels in and mark the top of the bushings with a pencil. The dowels are removed, cut to the required length and then pushed back into the bushings.
To get everything lined up, I use one of the finest, most versatile and indispensable tools available to luthiers – a roll of masking tape. Generally speaking, I prefer the low-tack variety and you can use it for protecting paintwork, clamping binding, retrieving lost parts through f-holes, marking out and plenty more besides.
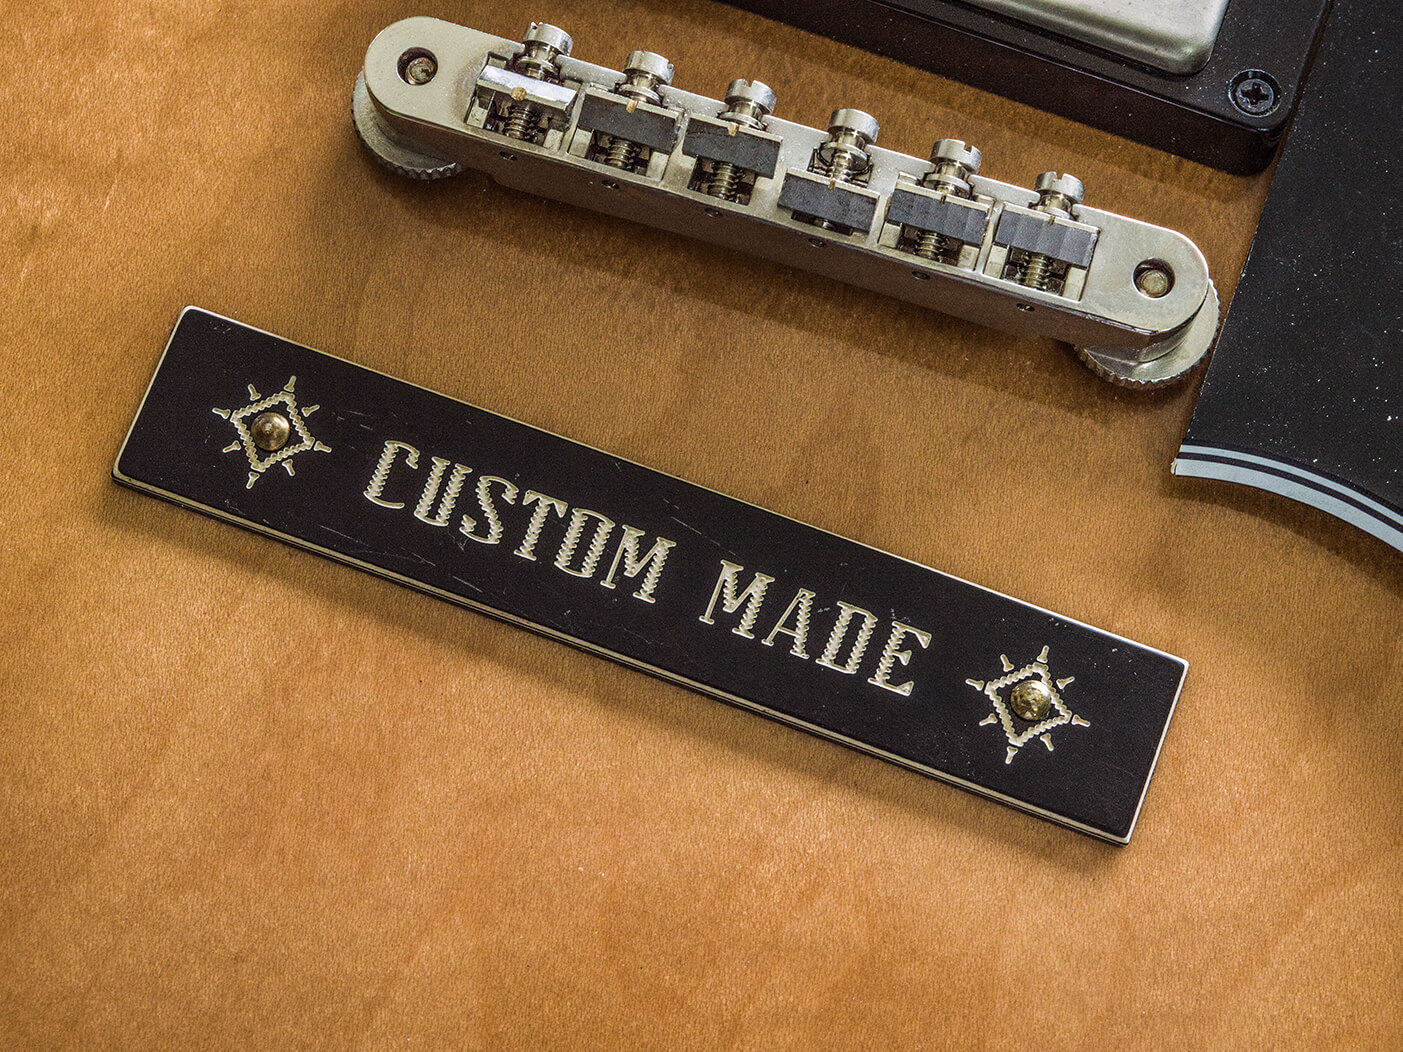
By establishing the exact positions of the dowels, I’m able to drill through the cover plate in the centre of the star motifs. The plate is then held in position by masking tape as I gently tap in a brass escutcheon pin at each end. It’s probably an affectation, but I drilled the holes through the cover plate by eye so they’d end up very slightly off centre – simply because that’s the way vintage ones always appear.
Cover versions
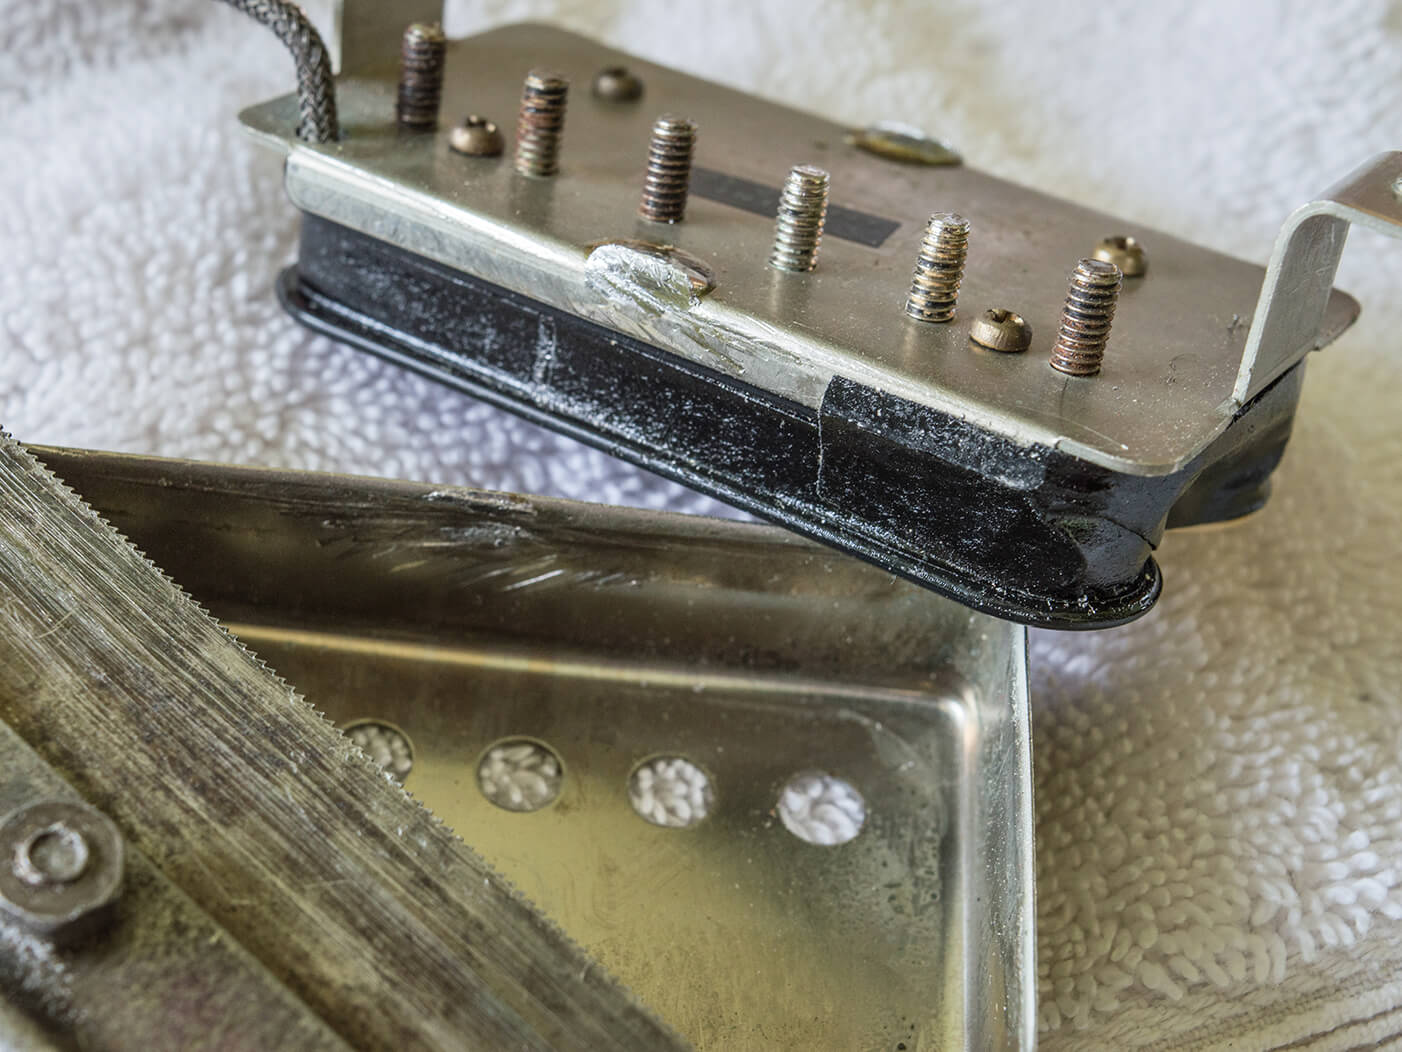
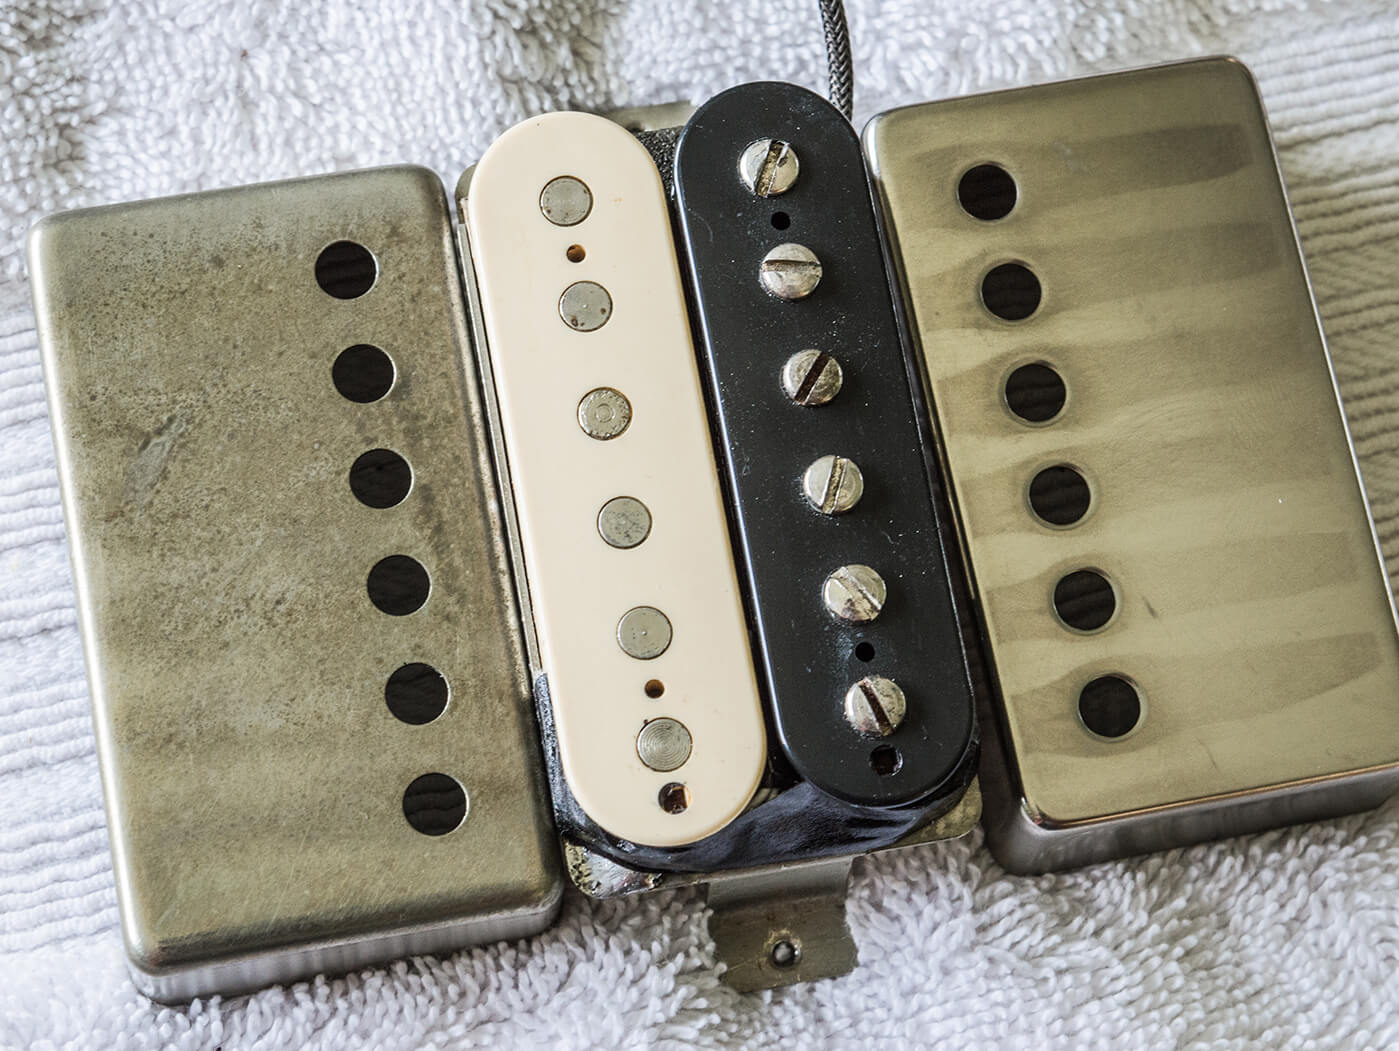
No guitar revamp would be complete without a pickup upgrade and the pickups of choice here are a second-hand set of Monty’s PAFs. Some people are highly attuned to the look of PAF replica covers and although the original Monty’s covers have a nice patina, the guitar’s owner has managed to source some covers from German pickup makers Amber with the look he prefers – complete with vintage corners and radiuses, and even tiny punch recesses around the screw holes.
Here’s how I swap PAF covers…
The pickup covers are fixed onto the baseplates by two blobs of solder. Rather than attempt to desolder the covers, it’s actually easier to slip a very fine saw blade between the cover and the base plate and then saw through the joint. Be patient, keep the saw square and angle it so that the blade doesn’t cut into the edges of the cover or go too deep inside and damage the bobbins or coils.
The covers may need to be lightly clamped to hold them steady while you’re sawing. But don’t clamp the areas adjacent to the joints, or you may find it impossible to get your saw blade between the cover and the baseplate.
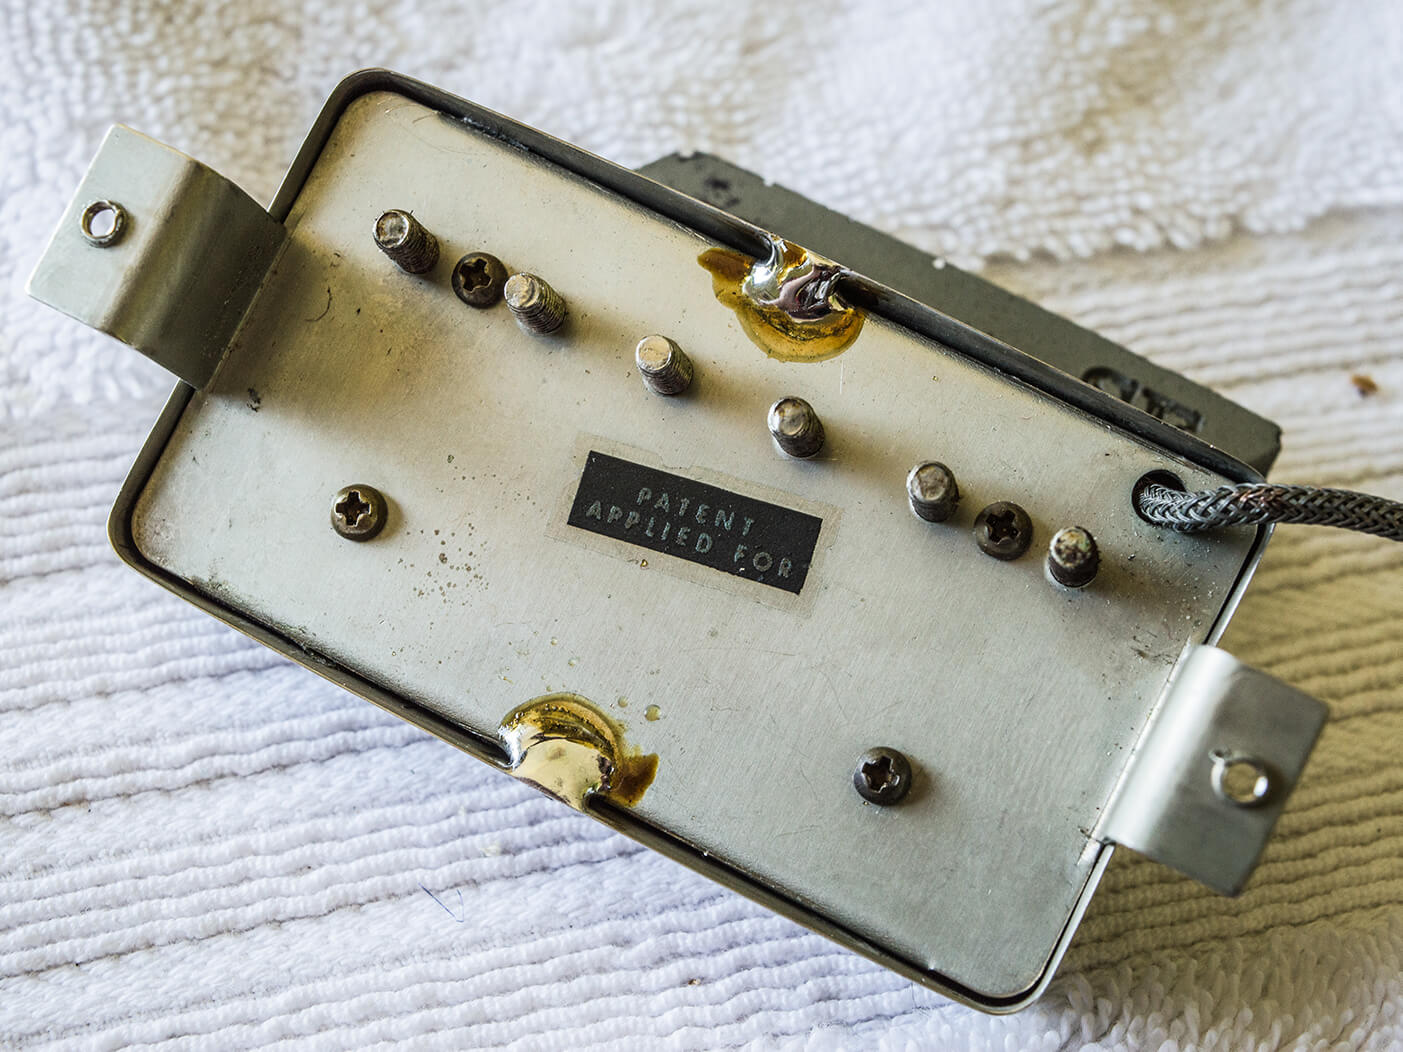
Having broken through the solder joints, the covers lift off fairly easily. The new covers are pushed on and I clamp them tight ready to be soldered on. I also discover that it’s better for the pickups to be placed upright and on their sides rather than flat, while soldering the joints.
Gravity is your friend and the molten solder will flow where it’s needed rather than pool up on the baseplate. After a quick resistance check with a multimeter to ensure I haven’t broken the pickups, they’re ready to be installed.
Swap stop
Here’s where we hit out first and only snag – on this guitar, Gibson Memphis faithfully recreated the earlier ES-335 construction style with no wiring loom access hole in the side of the bridge pickup rout. The entire loom went in through the f-hole at the factory, but after an hour or so of trying, I’ll concede it’s going to take a better luthier than me to get the damn thing back out.
Besides which, the second-hand Monty’s PAFs came out of a Les Paul and since the wires were cut accordingly, they are too short to reach the volume controls anyway. Instead, I decide to de-solder the existing pickup wires while working through the f-holes and run fresh wires from the volume pots to the pickup cavities.
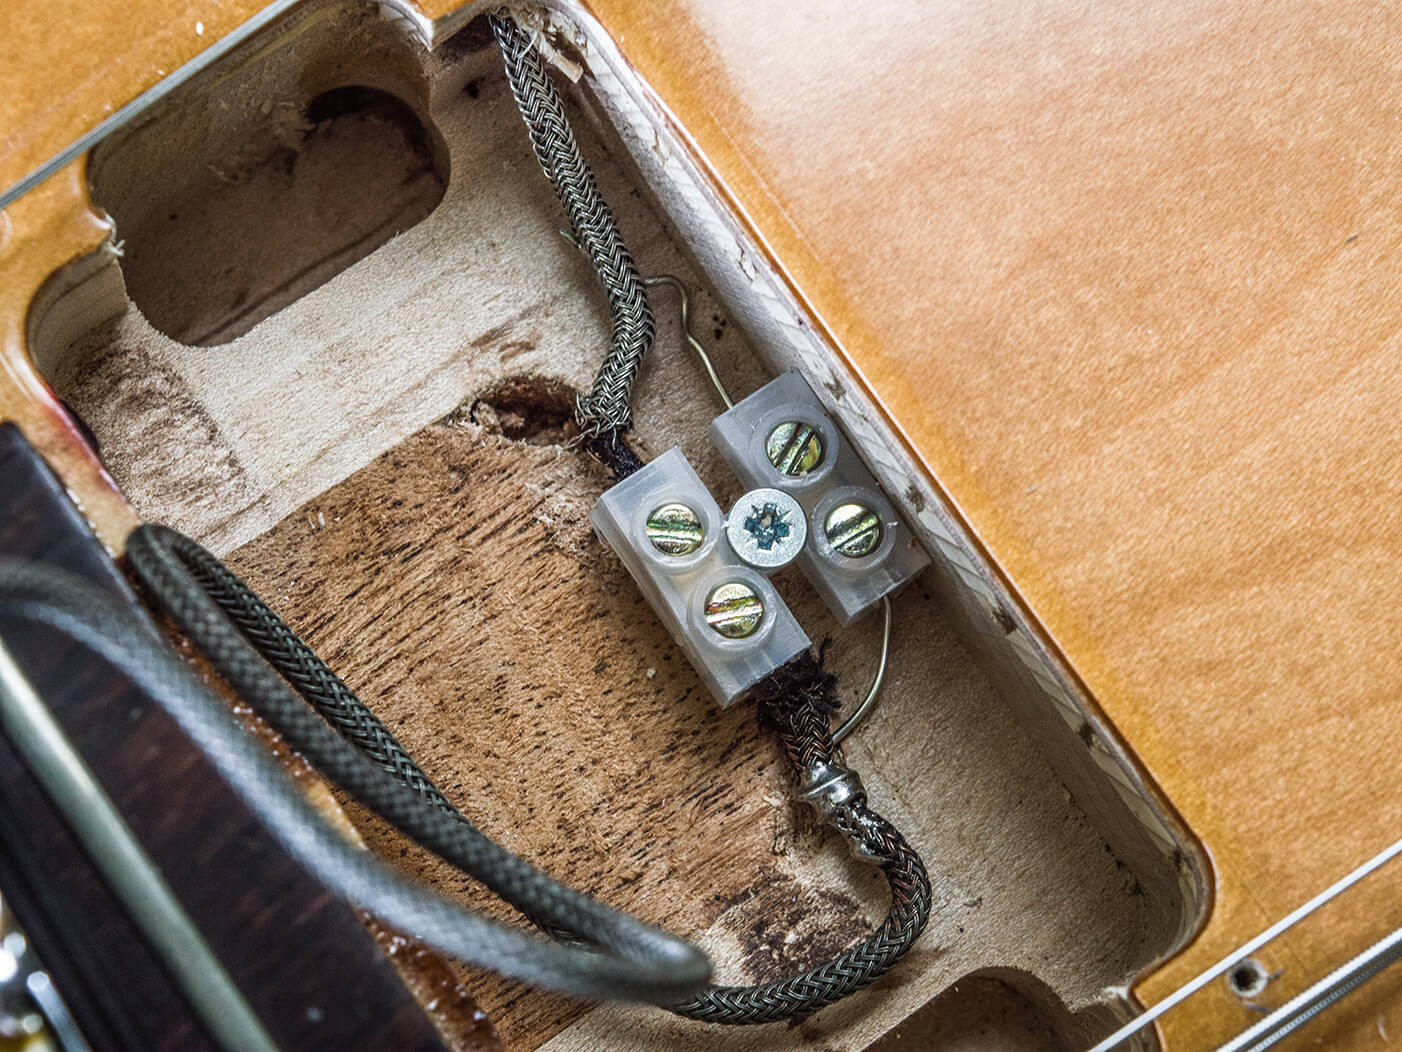
I then install an electrical screw terminal in each pickup hole to create solderless connections for the pickups. This means they won’t need to be sent back for new lead-out wires to be attached and if the guitar’s owner fancies trying some different pickups in the future, swapping them out will be quick and easy.
Getting a handle
No doubt many ES-335 owners have considered having a Bigsby conversion, but may have shied away due to concerns about it adversely affecting tone. Having previously tried a stock trapeze tailpiece on my own ES-330 – just out of curiosity – I quickly reverted to the Bigsby for the extra midrange weight and sustain it provides.
Clearly a stop tailpiece semi-solid is a very different proposition, but not so long ago, I fitted a vintage Bigsby B7 to a 1964 ES-335. Now before any of you begin rattling off outraged emails, I should point out that the guitar in question left the factory with a Vibrola – a device that adds a lot of unnecessary weight, feels somewhat unnatural to use and generally results in tuning chaos.
The owner had removed the Vibrola and even sourced a vintage aluminium tailpiece. Although the guitar sounded fantastic, he couldn’t live with all the holes in the top and decided a B7 would improve the look. Neither of us expected it to improve the tone too, but that’s exactly what happened. And it’s the same story with this guitar.
In a nutshell, the B7 somehow manages to enhance the ‘semi’ without detracting from the ‘solid’ character of an ES-335. To my ears, the tone is freed up and more dynamic. Sustain was impressive to start with, but it’s even better with the Bigsby, and there now appears to be an extra degree of woodiness and harmonic complexity. Granted, Bigsbys aren’t for everybody, but tone suckers they emphatically are not.
Of course, none of this matters unless the pickups are capable of capturing the enhanced acoustic qualities. Monty’s are among our favourite PAF replicas, and they perform exactly as expected. Their naturally bright, clear and detailed character suits this guitar perfectly and no doubt this revamped ES-335 will be seeing action very soon indeed.
Get busy with our other DIY projects here.