Related Tags
How to replace electric guitar pickups
Learn how to wire, solder and set up new pups.
Why you need this
- Broken pickup
- Tone upgrade
What you need
- Screwdrivers
- Soldering iron
- Solder
If your pickup is broken, changing it qualifies as maintenance. But most of us change pickups in search of improved tone or completely different sounds. Here, we’ll deal with like-for-like replacements, using pickups that have the same dimensions and fixing mechanisms.
To get started, you’ll have to remove the strings and gain access to the wiring. Depending on the type of guitar, pickup wires will be soldered to the volume control or the selector switch. You’ll have to trace the wires to figure out what goes where.
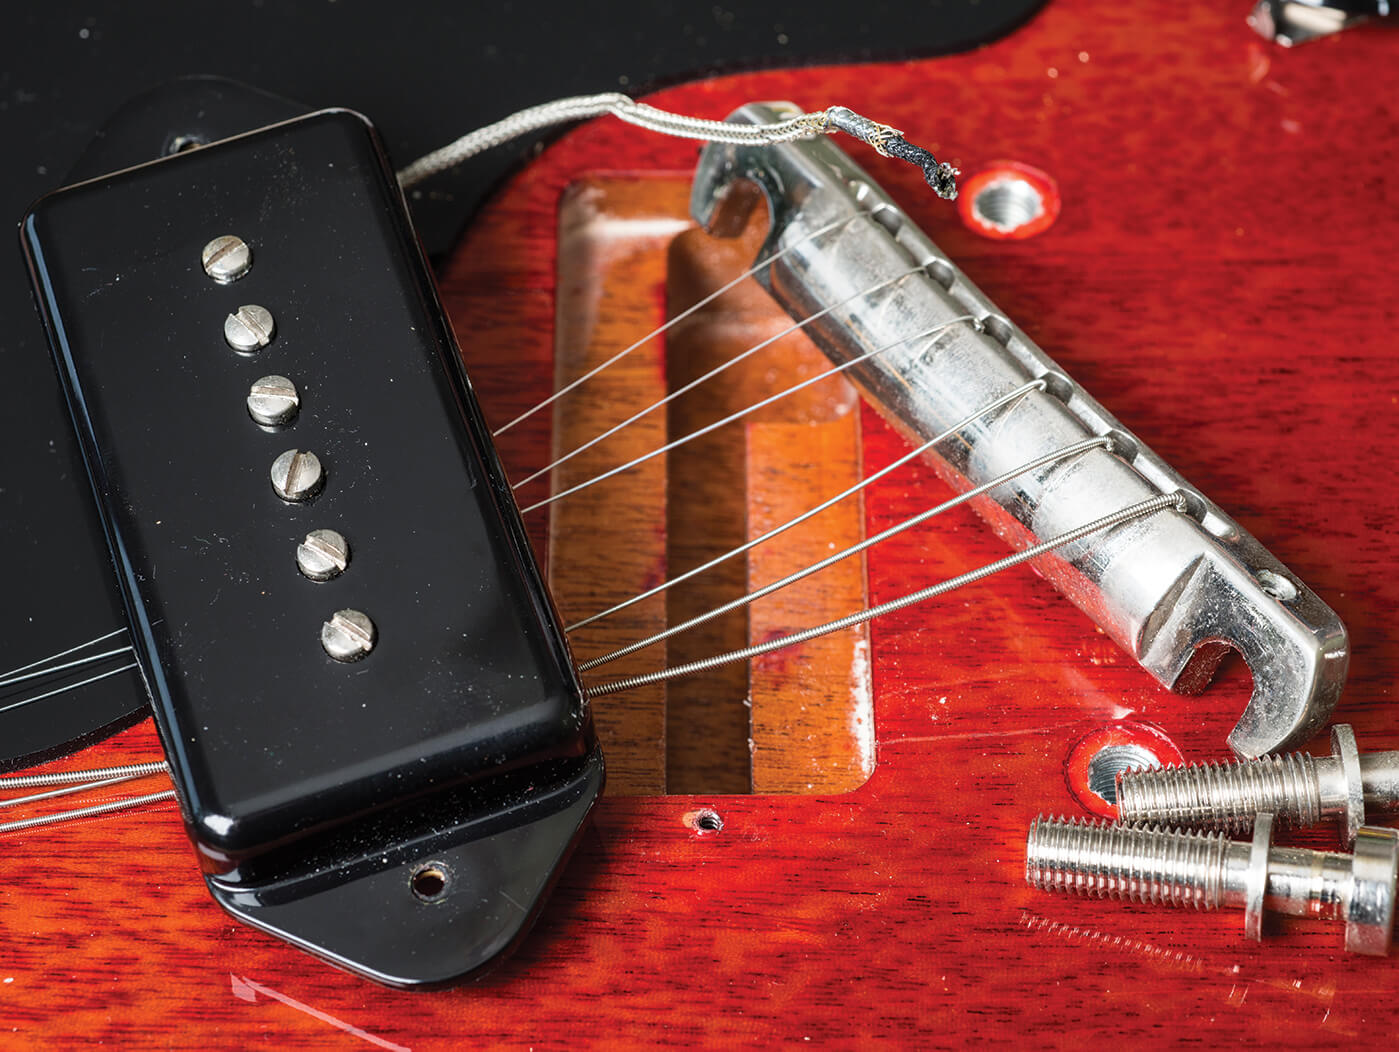
Draw a diagram or take a photo with your phone to ensure that everything is put back in the right place. This is particularly important with coil-tapped pickups that may have multi-strand cables connected to toggle or push/pull switches. It’s usually best to de-solder the pickups before separating them from the guitar itself.
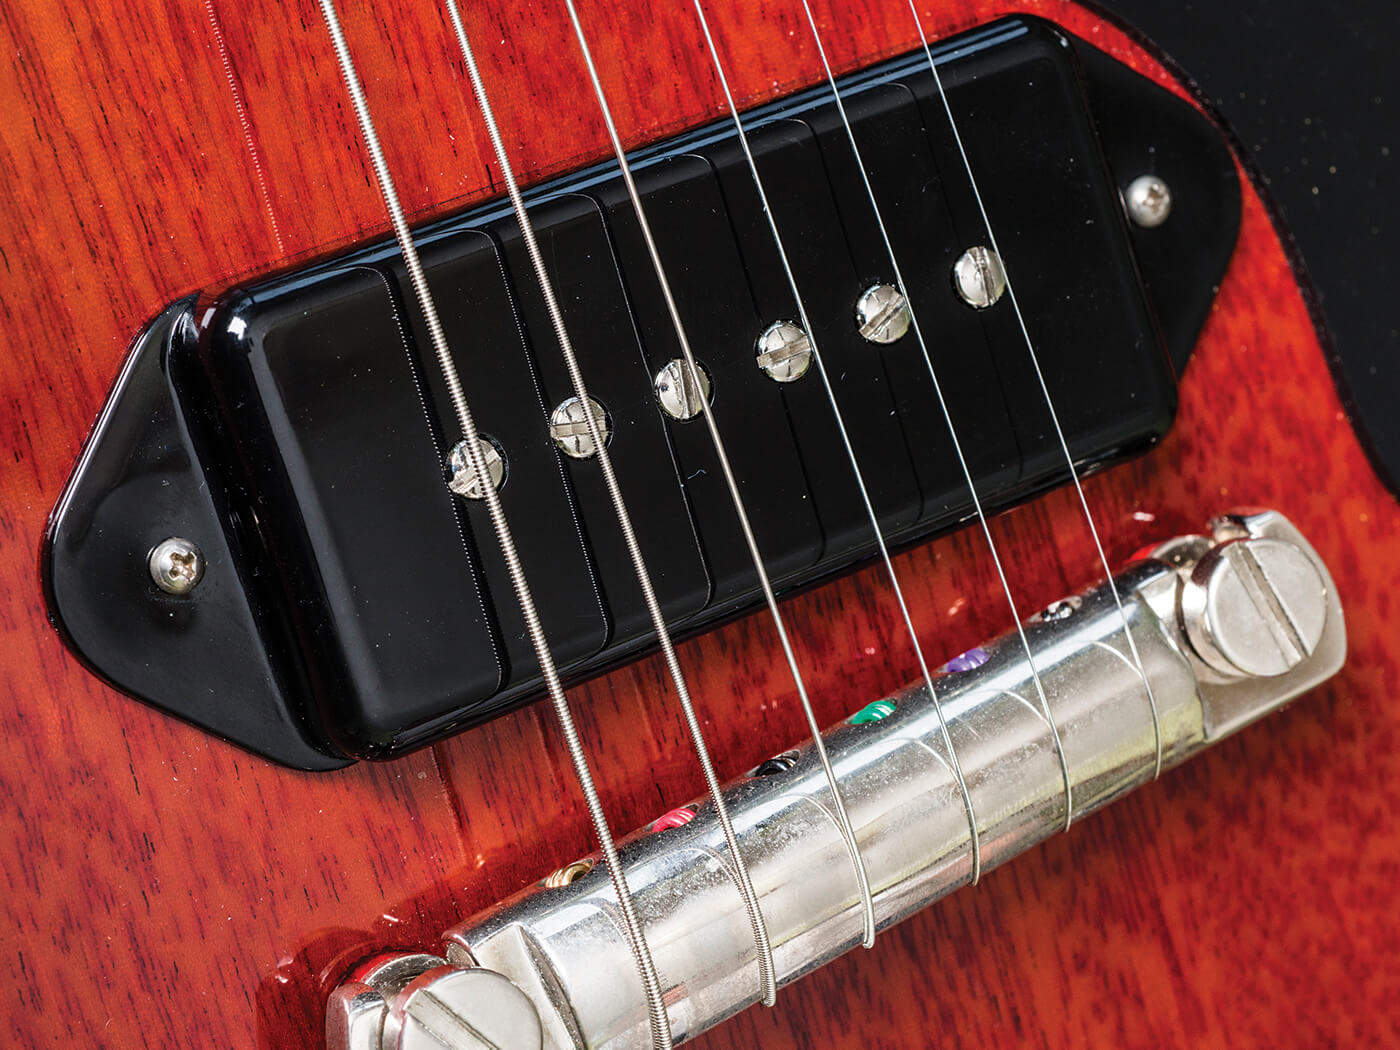
Humbucking pickups tend to be suspended from plastic surround rings; you need to remove the four screws holding the ring to the body before removing the pickup height adjustment screws. Strat pickups are suspended from the pickguard and Tele neck pickups are often screwed into the body. Tele bridge pickups are the most fiddly because they dangle from the bridge plate, so the bridge has to be taken off before the pickup can be removed.

Keep any screws, springs and tubular spacers safe, because you may need to re-use them. You can now mount the new pickups onto the guitar, scratchplate or bridge then re-solder the connections.
It’s advisable to test if the wiring is correct before you re-string the guitar. Just plug in the guitar with the amp volume set low and tap the polepieces with a screwdriver. Once you’ve established that the controls and the switch are working properly, you can go ahead and re-string and reassemble the guitar. That’s not quite the end of the process, however, because setting the pickup height – or more accurately the proximity of the pickup to the strings – is absolutely critical to getting the best from any set of pickups.

Up close to the strings, a pickup will sound bright, loud and aggressive. Setting it further away may achieve a sweeter, clearer and more dynamic tone, but setting a pickup too low can result in a lifeless and dull response. Remember, you can also adjust the bass and treble balance by tilting a pickup at either end.
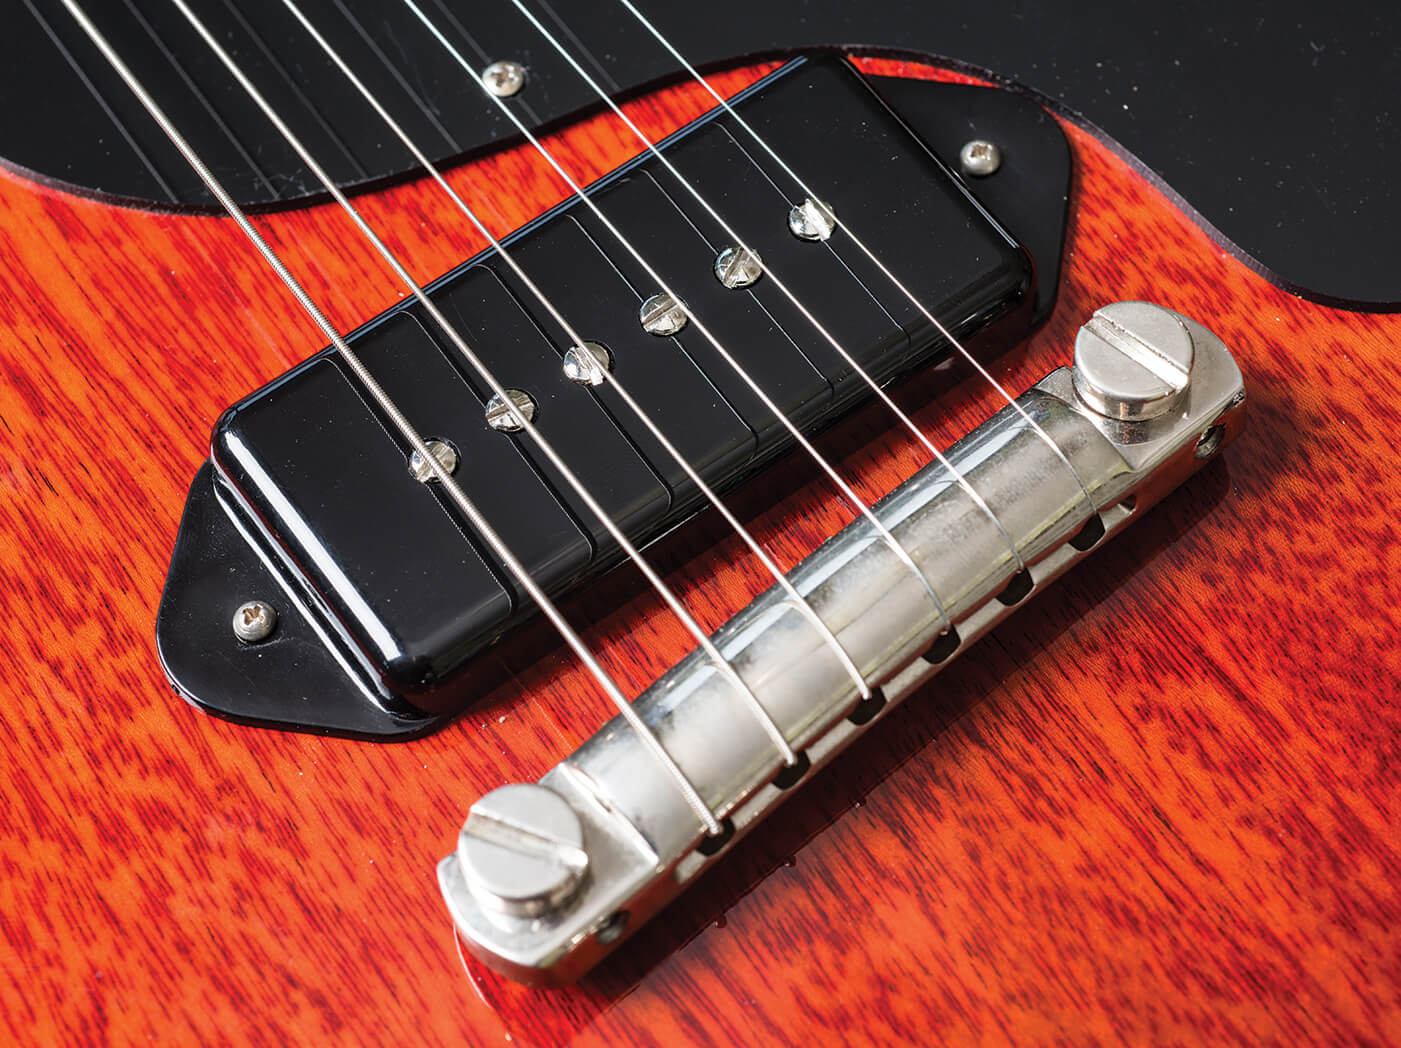
Try starting with the bridge pickup and, once you’re happy, move to the neck. Attempt to match the volume levels between the two pickups before fine-tuning the neck’s bass and treble response. If you have a middle pickup, too, try to achieve even levels across all three pickups.
Check out more of our DIY guides here.