Related Tags
How to bring an obscure 60s guitar back from the dead
British-made Grimshaw guitars of the early 60s could hold their own with many of the USA-made instruments of the time, but this SS Deluxe model needs a little TLC.
Post-restoration
Only dimly aware of the Grimshaw brand? Never heard of it at all? Although there’s not a great deal of content featuring Grimshaw guitars available online today, we’ve all heard one in action courtesy of Joe Moretti’s spine-tingling guitar playing on Shakin’ All Over by Johnny Kid & The Pirates back in 1960.
Pete Townshend would of course go on to cover the song many times with The Who, and his own Grimshaw SS Deluxe was a real favourite – albeit modified with a trio of Rickenbacker pickups and the Californian brand’s headstock nameplate.
Founded in Lancashire over 5,000 miles away from the SoCal sunshine by Emile Grimshaw Snr and Jr, the company was established in 1930 to manufacture banjos, mandolins and guitars. By 1935, Grimshaw could even boast a Premiervox electric guitar in its catalogue, assembled in the UK largely from Rickenbacker parts. 30 years later, Townshend’s Rickenbacker parts were likely salvaged from the carcasses of smashed instruments, rather than specially imported.
Guitar production had been ramped up after Emile Sr died in 1943 and by the late 1950s, Grimshaw’s most successful model was the aforementioned SS Deluxe. The ‘SS’ stands for short scale, and it was popular with first-generation British rock ’n’ rollers.
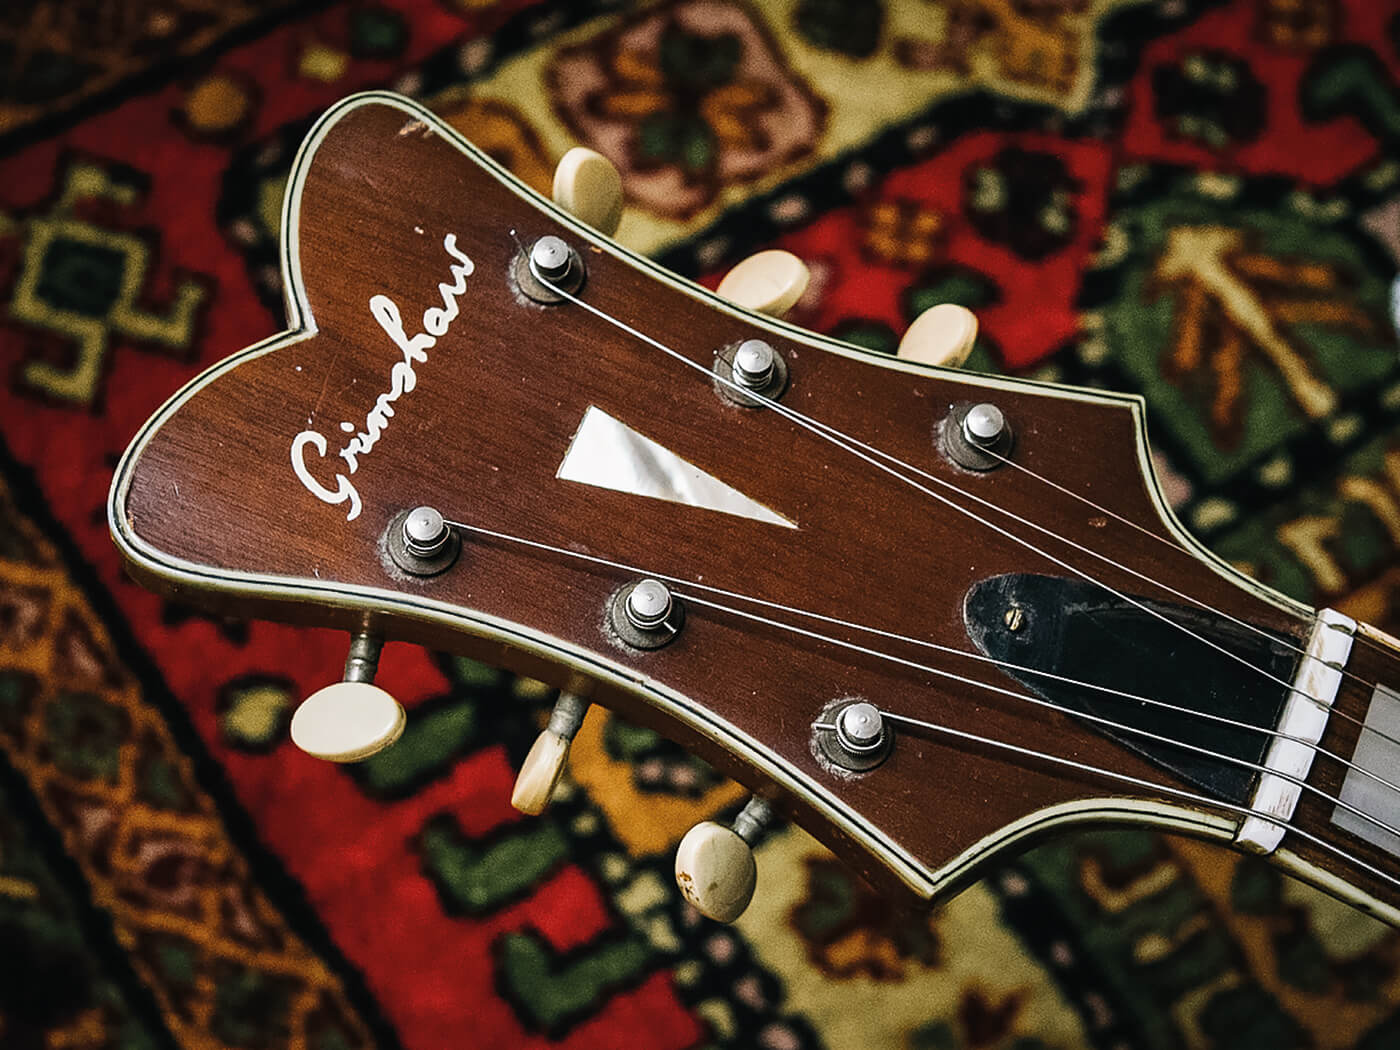
I must confess that I was only dimly aware of the Grimshaw story when my friend Jim Lewis gave me the instrument featured here, but grimshawguitars.co.uk head honcho Eric Sandiford has identified it as an early 1960s SS Deluxe. He describes it as a MkII version, due to its altered headstock shape and adjustable truss-rod.
Eric suggests a production date of 1962-1964, but it’s hard to be exact because SS Deluxes weren’t given serial numbers. The model came with f-holes and the more desirable teardrops, and although the 1950s examples are most sought after, Eric says the electronics were superior on the later models. Inside the body of this guitar, a label features the address of Grimshaw’s sales HQ between 1962 and 1975, on Great Pulteney St in London’s Soho.
Later on, Grimshaw moved into solidbodies with the Les Paul-inspired GS30. Gibson apparently granted Grimshaw a license to manufacture a humbucking pickup based on Seth Lover’s design and remarkably, when new, a GS30 would have cost you more than a secondhand Burst. The company finally ceased trading in the mid 1980s and Emile Grimshaw Jr passed away in 1987.
Project planning
Although a lot of affection remains for British and European made guitars from the pre-Beatles rock ’n’ roll era, even the most diehard enthusiasts would probably acknowledge that Gibsons, Fenders and Gretsches were better instruments. That said, the closer I examine this guitar, the more impressive I find it. The build quality is easily on a par with Gretsch models of the time.
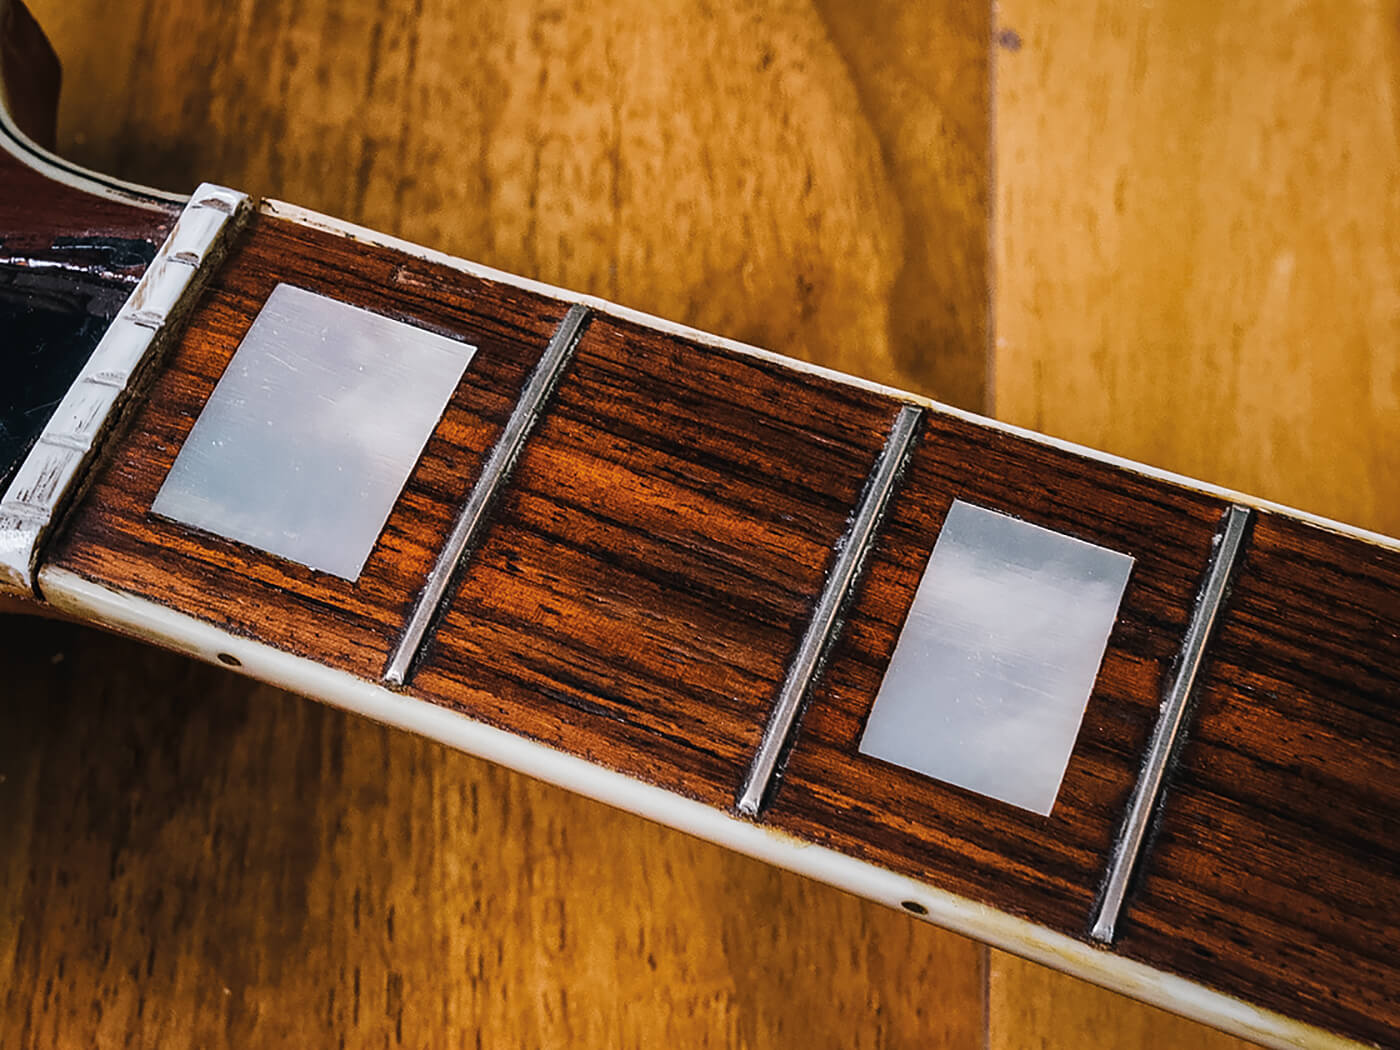
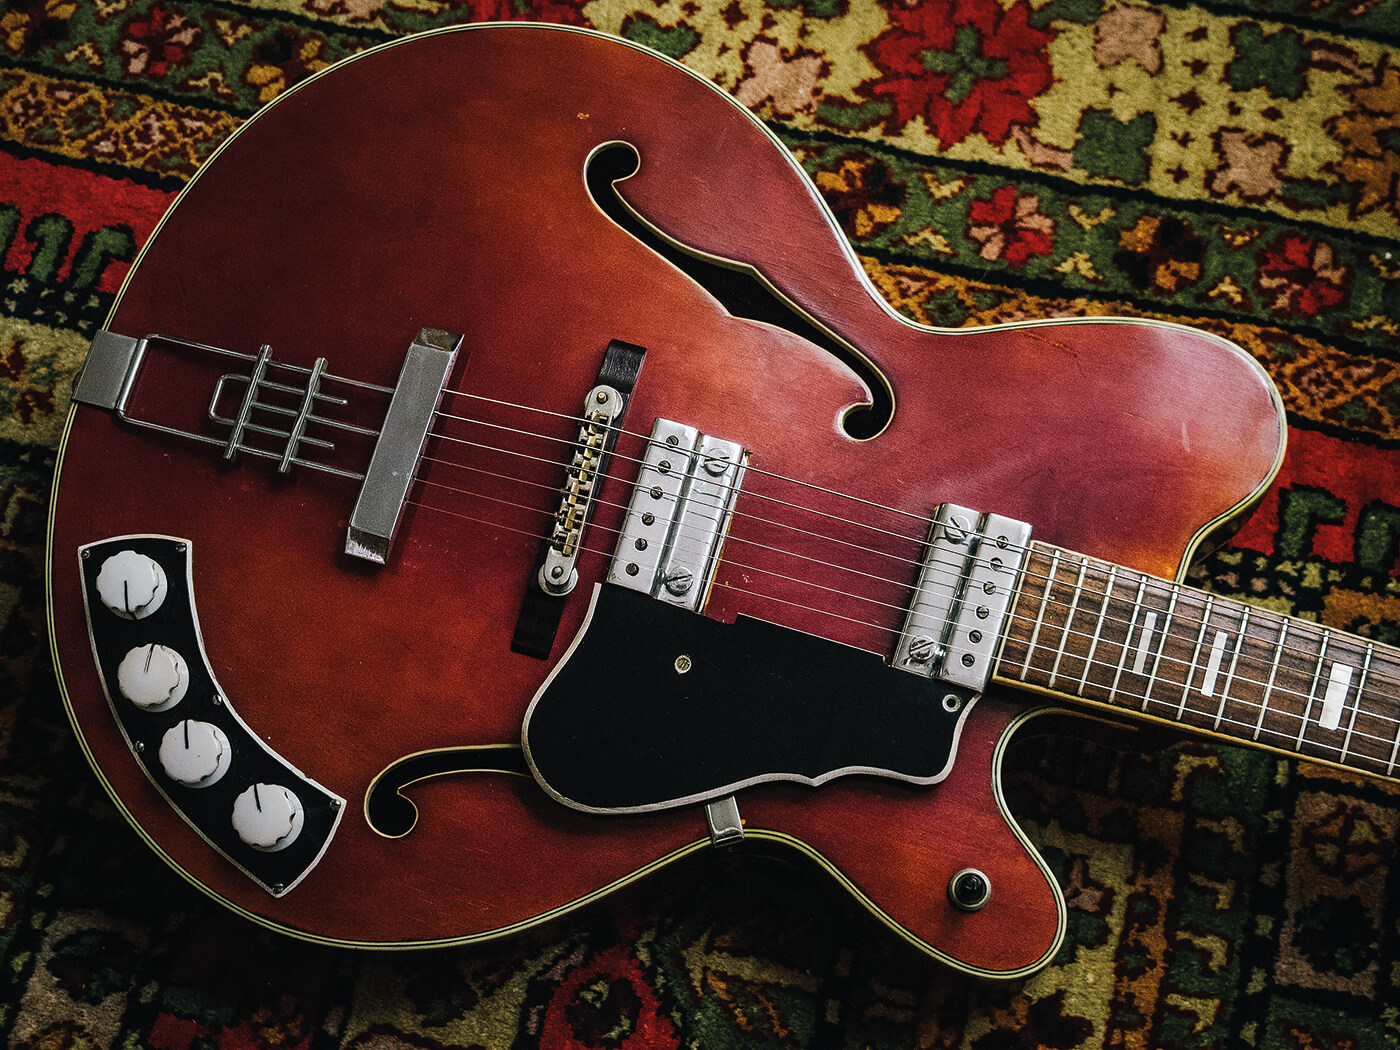
The offset body shape looks surprisingly contemporary in a West Coast boutique sort of way, and it’s made from laminated wood that appears to be maple. The neck is certainly mahogany and the fretboard is high-quality quartersawn rosewood.
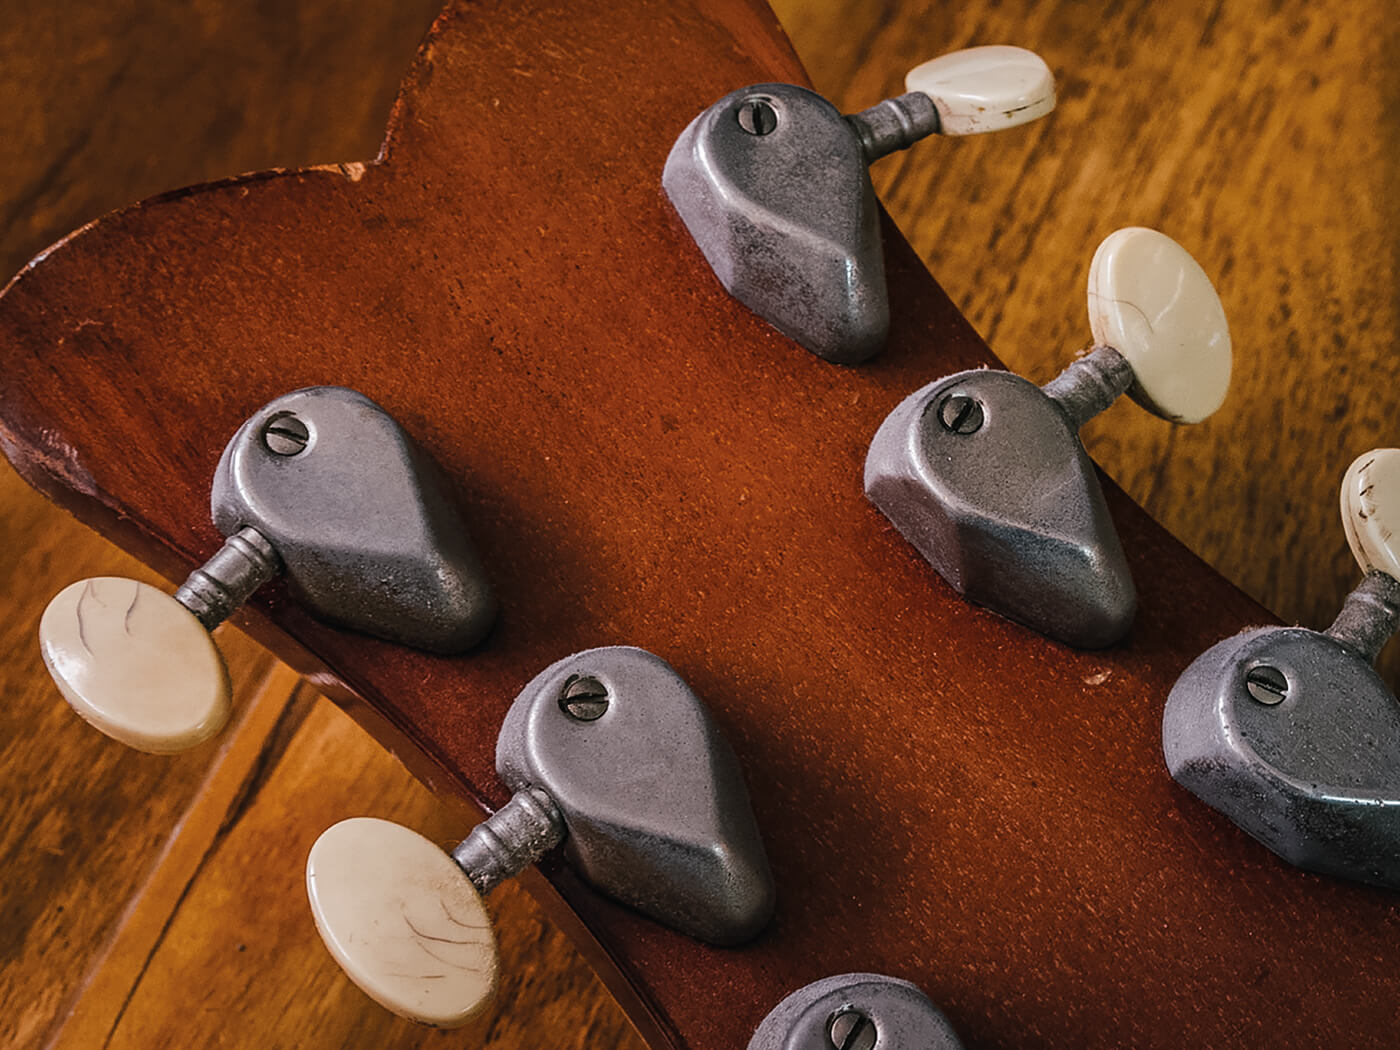
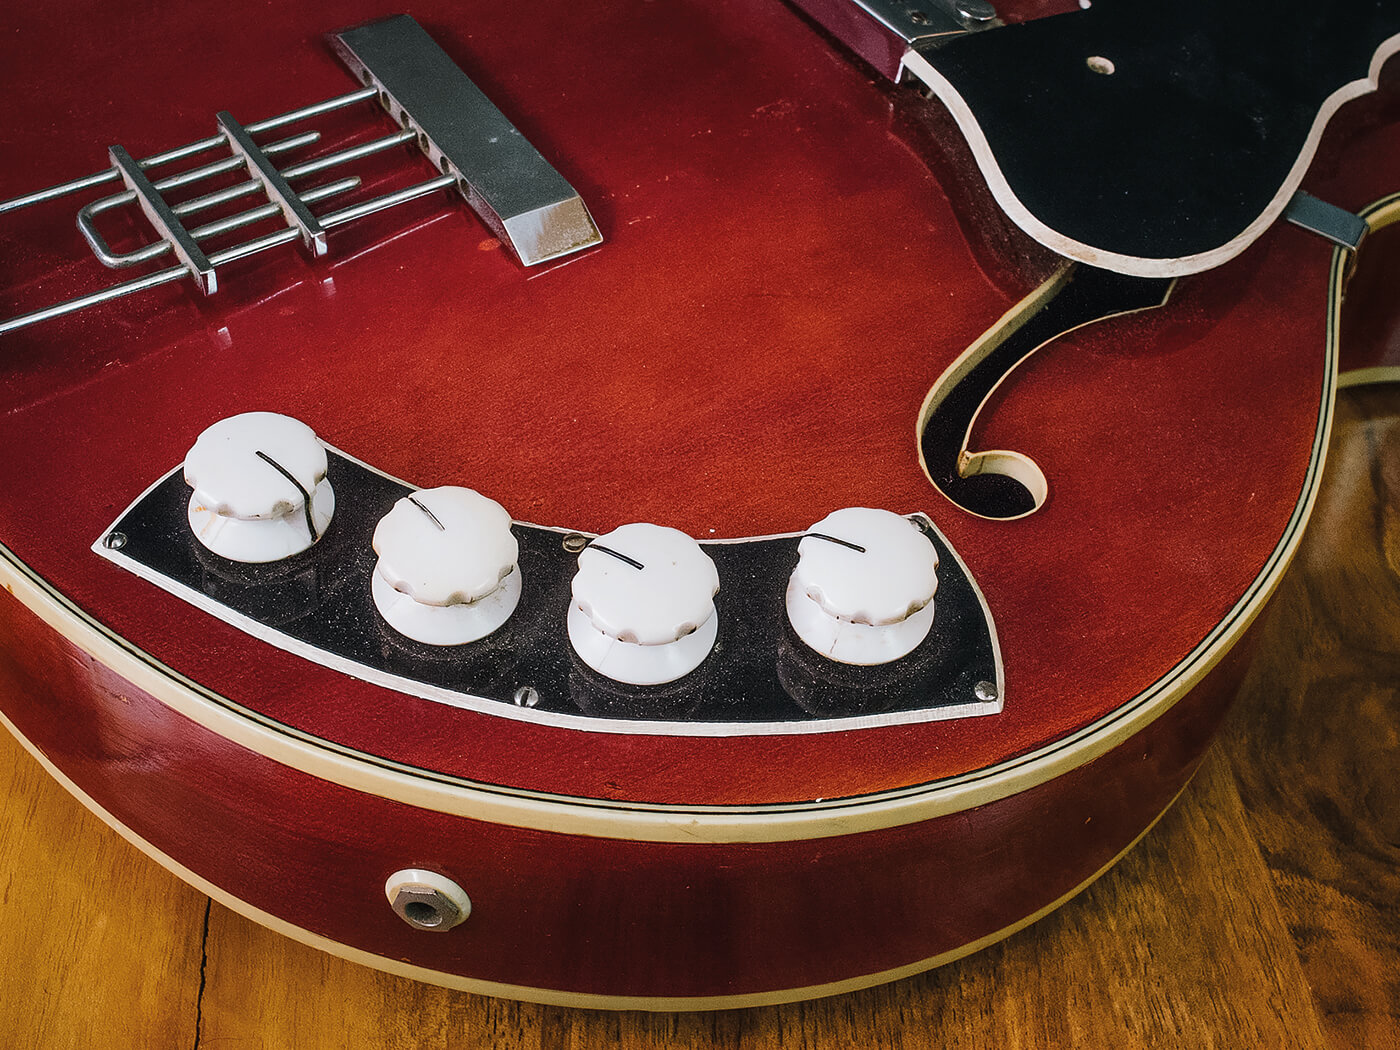
The body and headstock have multi-ply binding, with single ply binding for the fretboard and f-holes. The controls are reminiscent of some older Epiphone jazz models and the Van Ghent tuners still turn smoothly and feel solid. I love the faded cherry colour, too, although I suspect it may have been touched up in some areas over the years. The bridge is currently missing but the tailpiece remains, along with the stepped single-coil pickups.
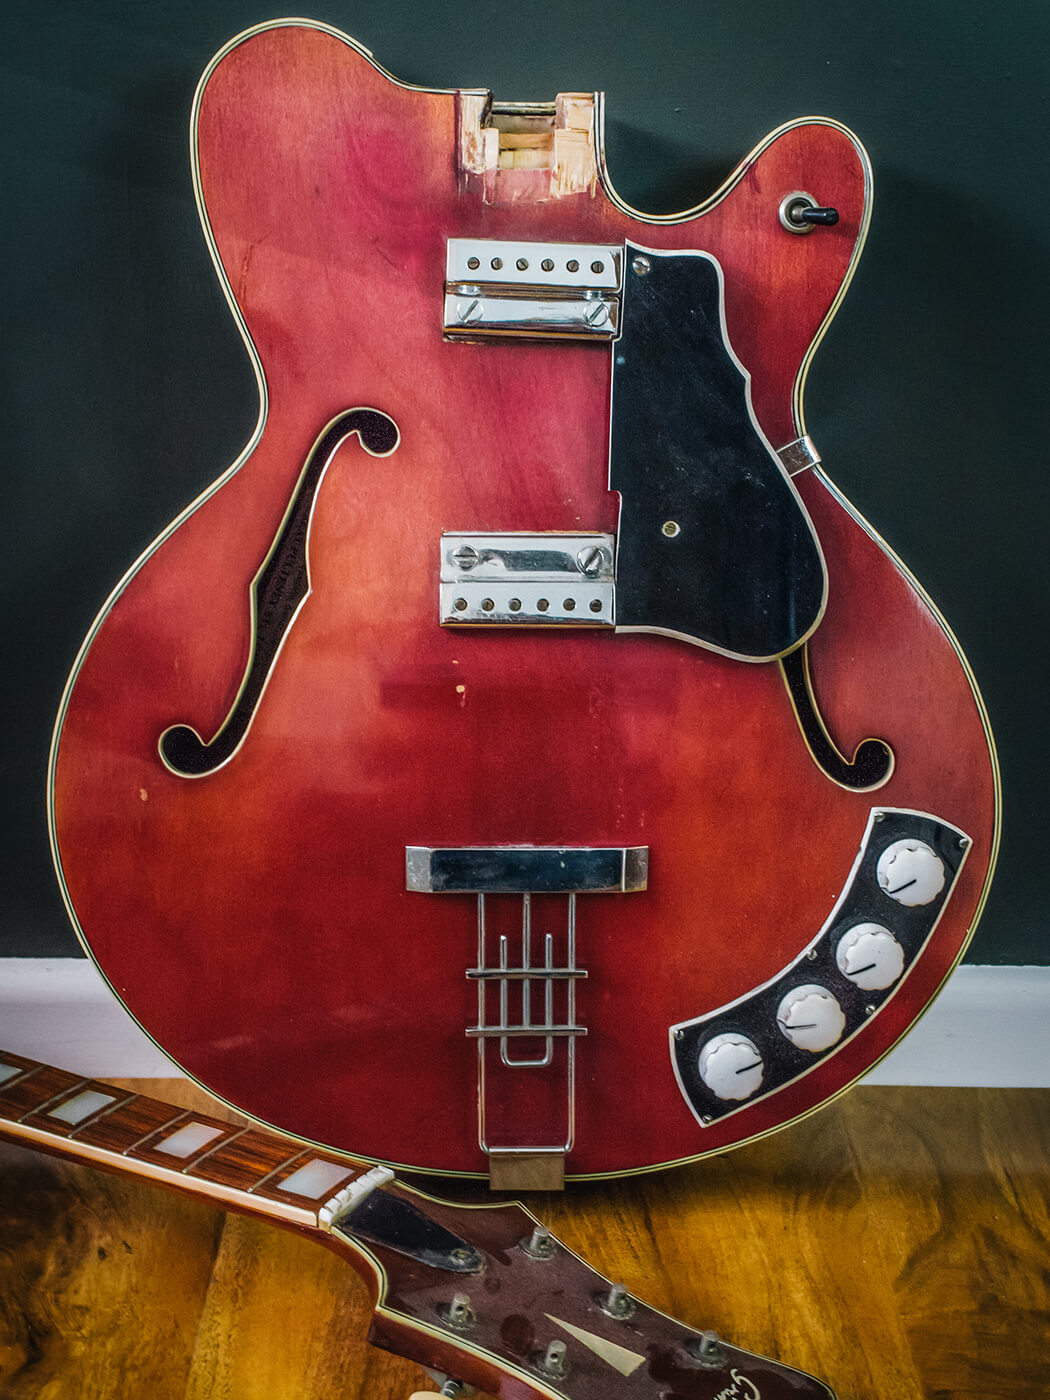
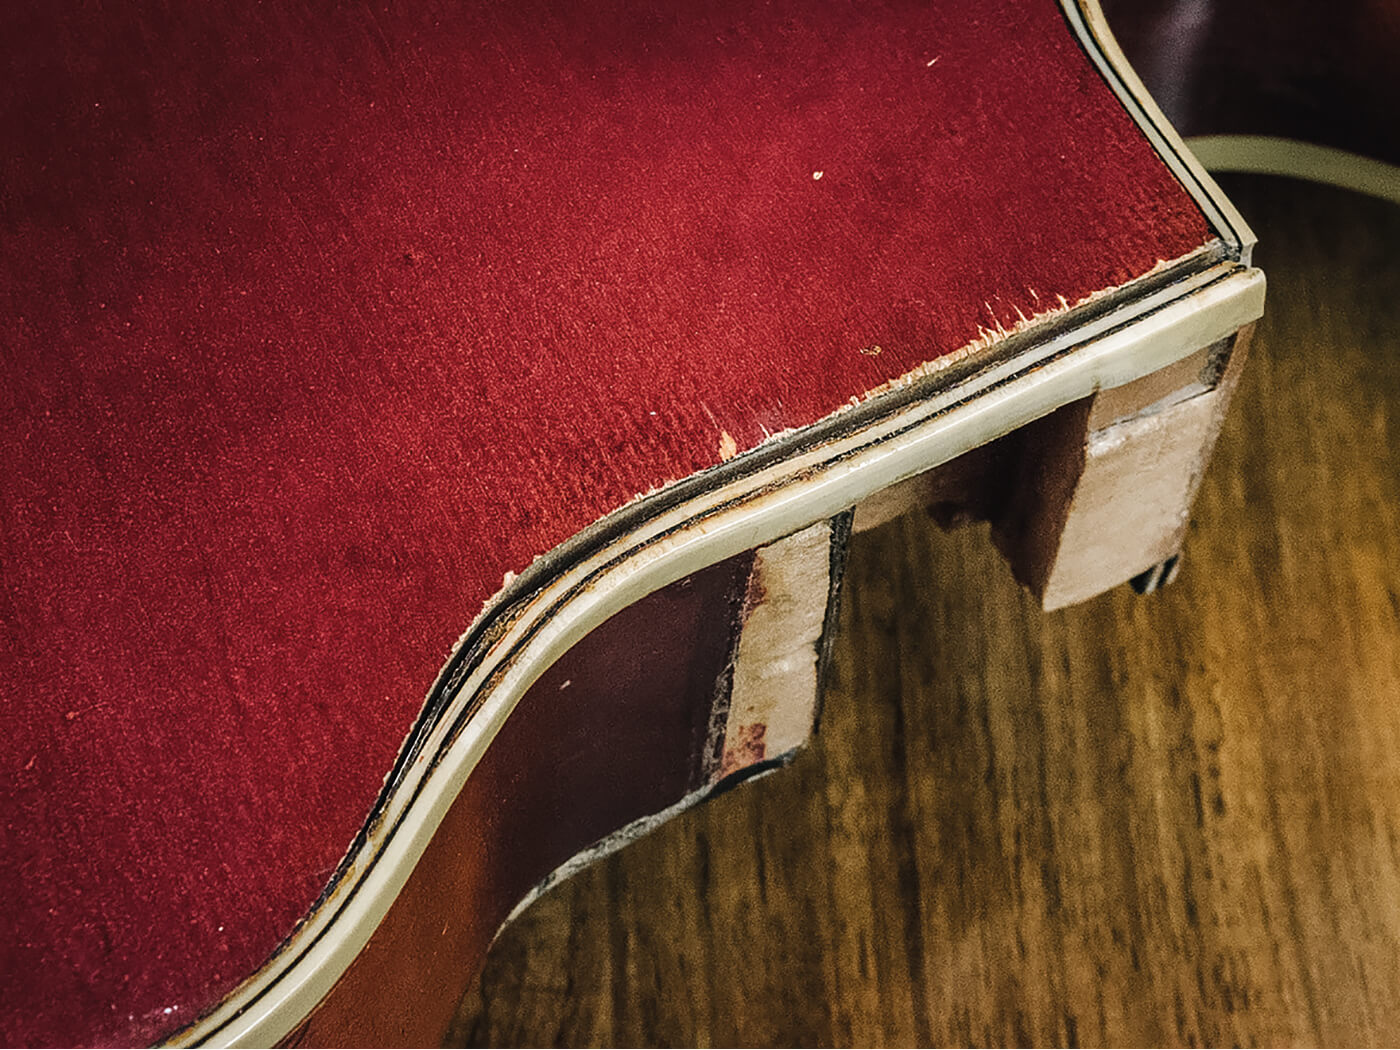
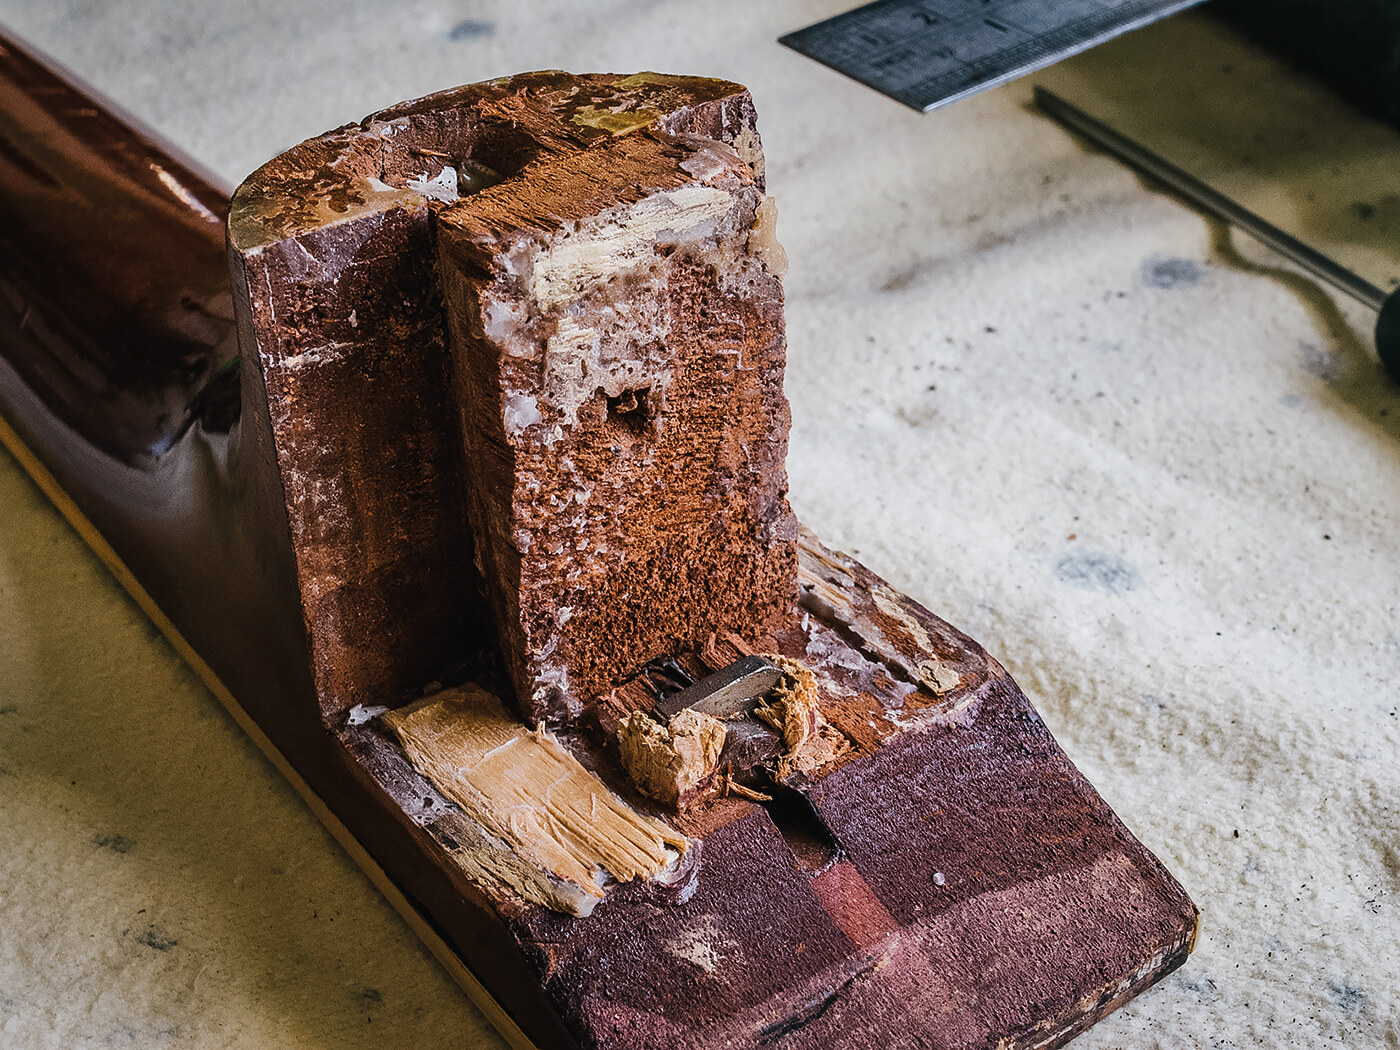
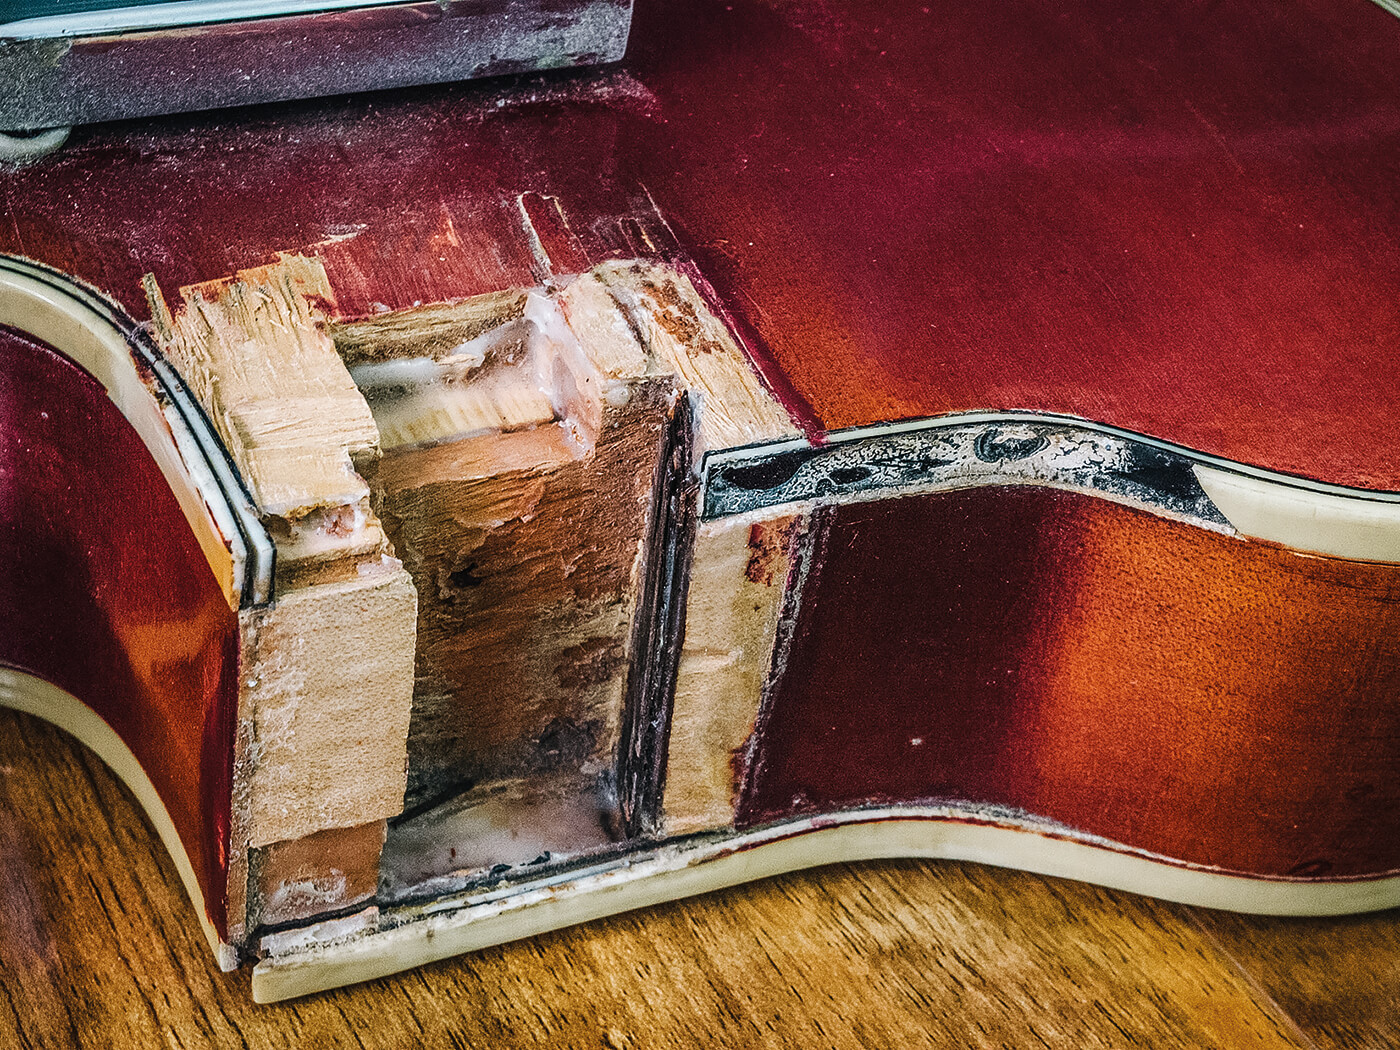
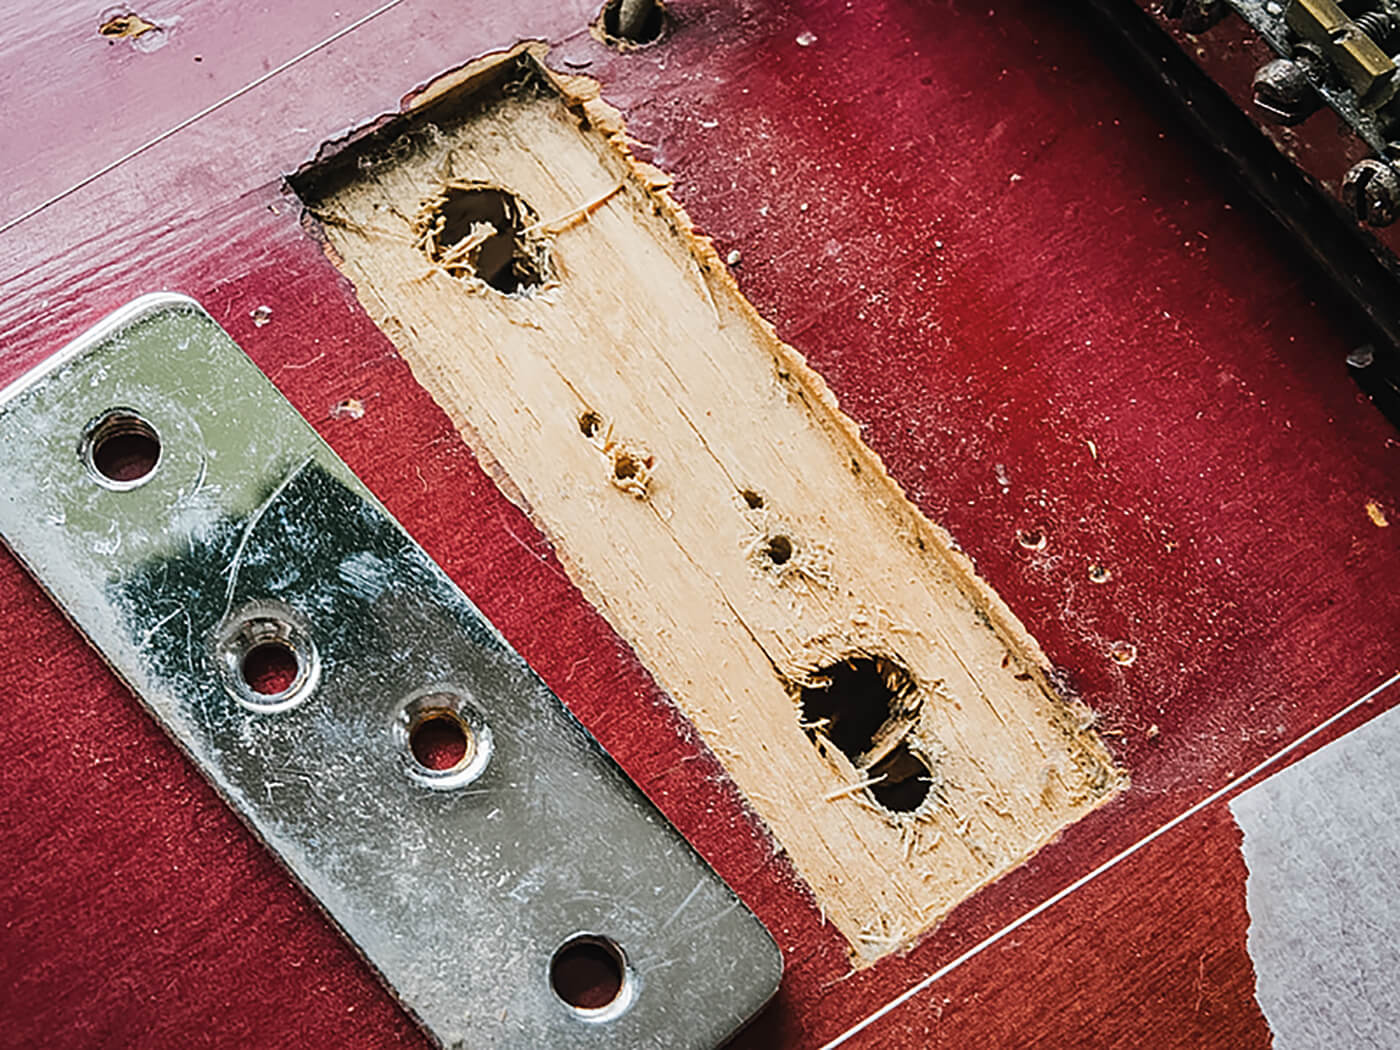
As you’ve no doubt surmised from the photos, the main issue is that the body and neck have become separated. Judging by the splintered wood on the top of the body, and copious amounts of splintering around the heel, the separation may have involved some trauma.
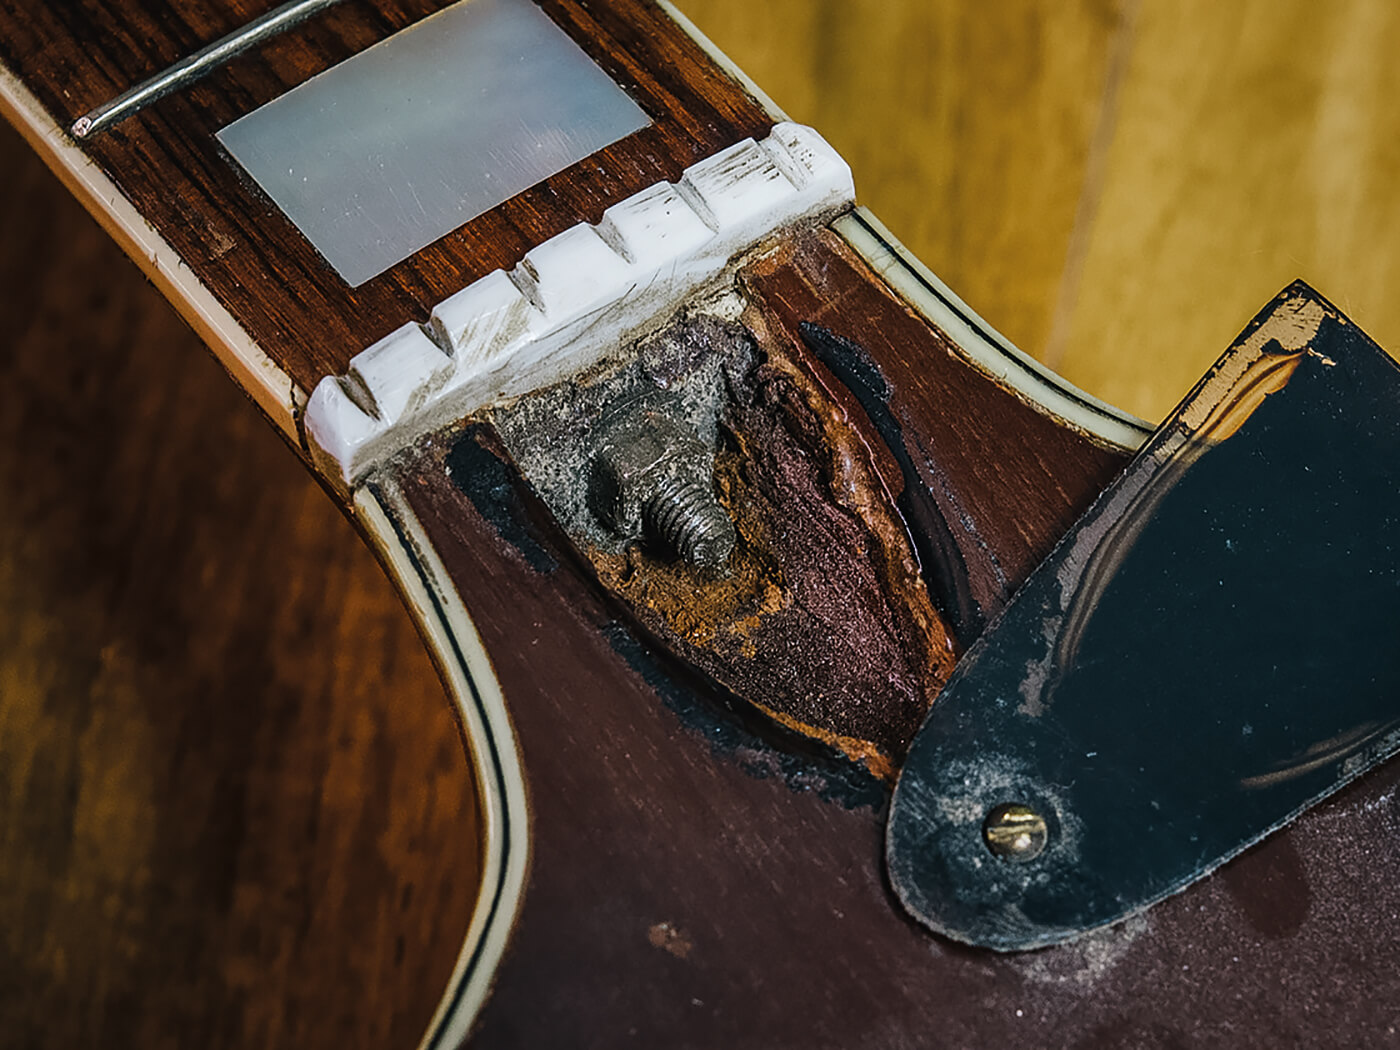
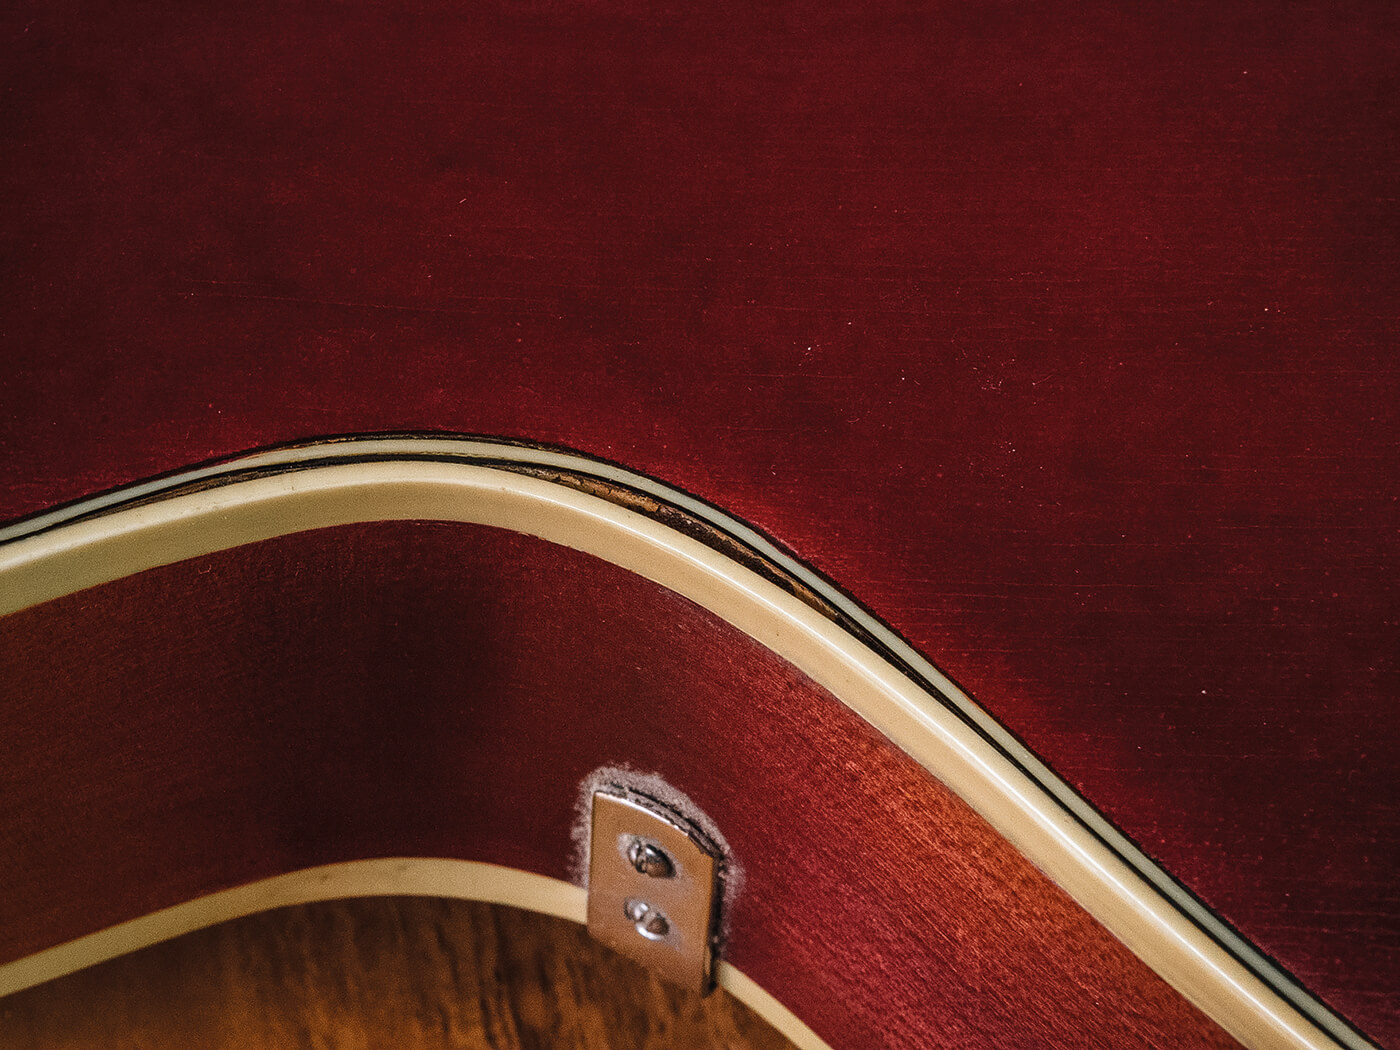
An excess of glue in the heel block might indicate a previous attempt at repair. There’s also a ‘countersunk’ screw hole that passes through the heel into the heel block – in the Gretsch style – but I can’t say for sure if it was done that way in the factory. The rear binding is warped and buckled in that area, too, which may have been caused by a heat source.
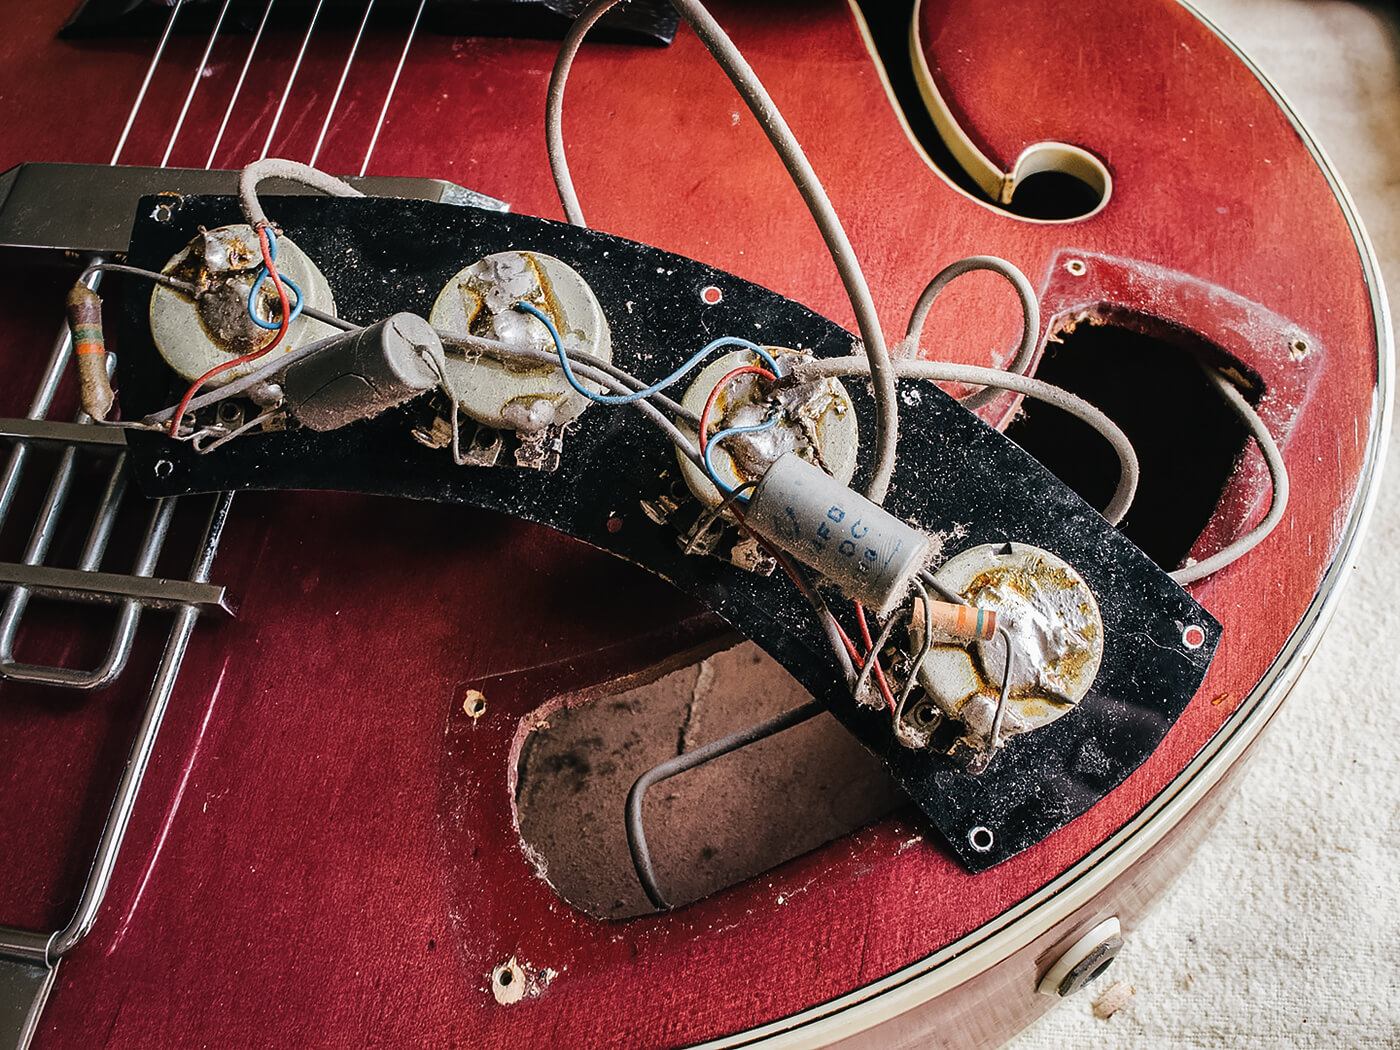
A quick electronics check demonstrates that both pickups are working, but the controls will need some figuring out and a lot of contact cleaner. Besides that, I’m going to be doing a whole lot of binding repairs, and using techniques that may be applied to plenty of old guitars. Only one section is actually missing, but much of the binding is loose in the cutaways, and it has shrunk away from the body in the waist area. The heel cap has also vanished, and without it there will be a sizeable gap under the heel.
This won’t be a painstaking and meticulous restoration. Instead, I’m focusing on addressing the cosmetic and structural issues, and getting this guitar playing again to find out how it sounds.
Binding blues
I begin with the waist and cutaway areas, where shrinkage has left gaps between the binding and the body. This is a very common issue with old guitars and I’m pleased that the binding hasn’t split. It feels quite taut and there’s insufficient play for it to press back into position.
Rather than cut it and glue in a patch, I decide to heat the binding with a hairdryer. Plastic will soften if sufficient heat is applied, but care must be taken with the lacquer. I’ll use a paint stripping heat gun when I’m binding Les Paul bodies and the like – but only if there’s no finish on the guitar.
After a few minutes the binding starts to become malleable and I use a mallet handle to press it back into the waist. The handle is oval, which helps because I can twist it around to best match the curve in the area in which I’m working.
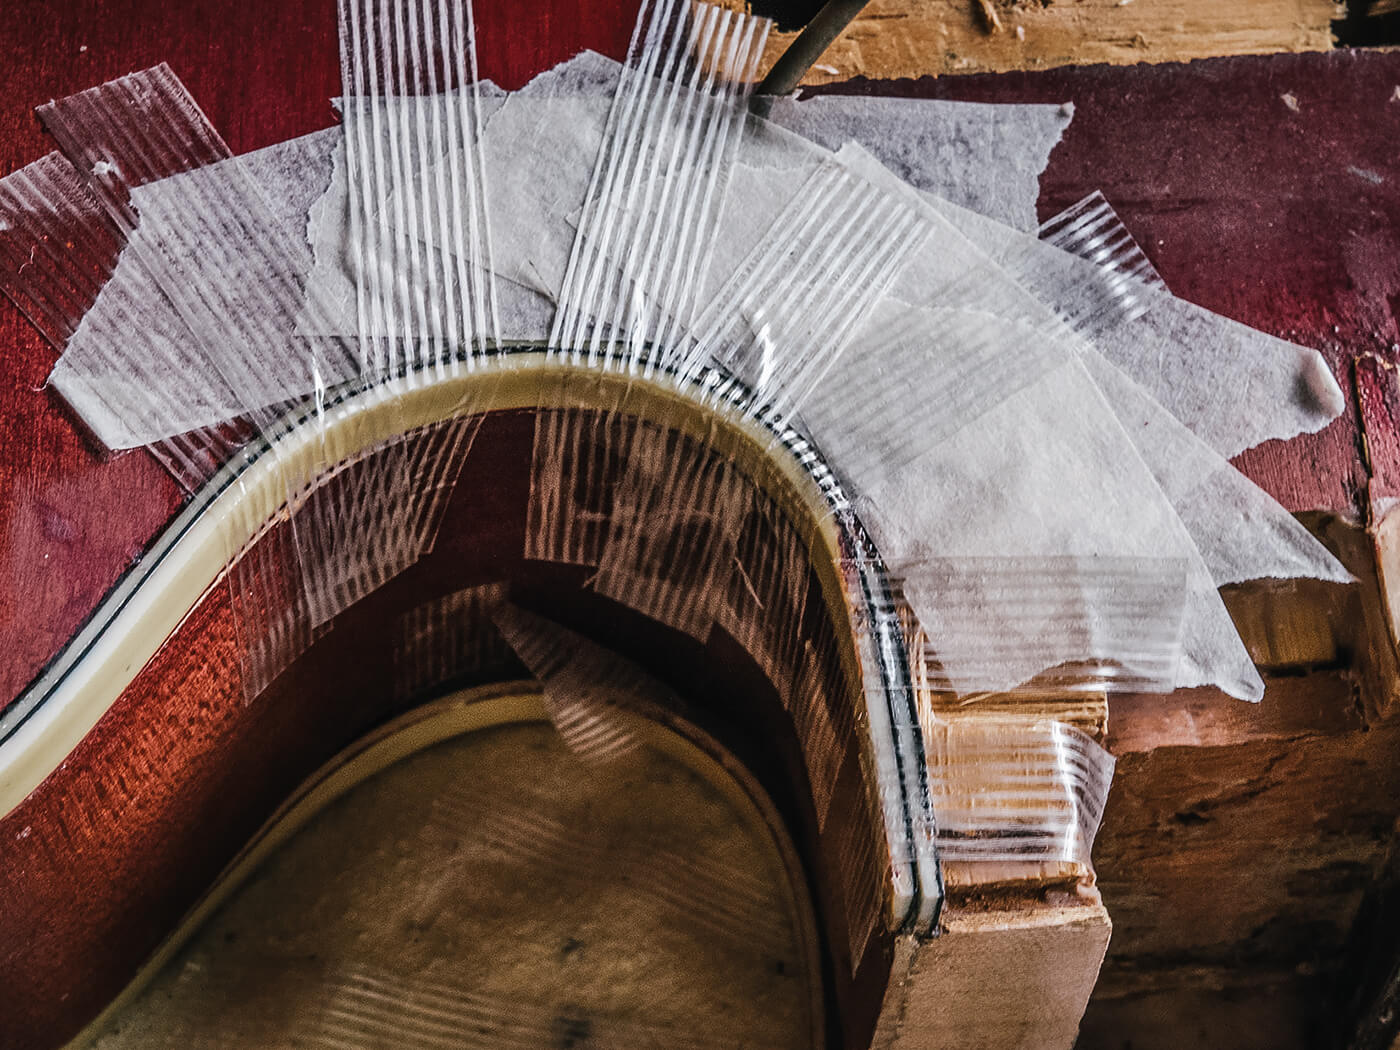
Once I’m confident the binding has stretched sufficiently, I apply gel superglue in the routed channel and hold the binding in place with strong binding tape. Masking tape usually works fine too, but here I want something a bit stronger. The process is repeated for two other waist areas before I shift to the cutaway.
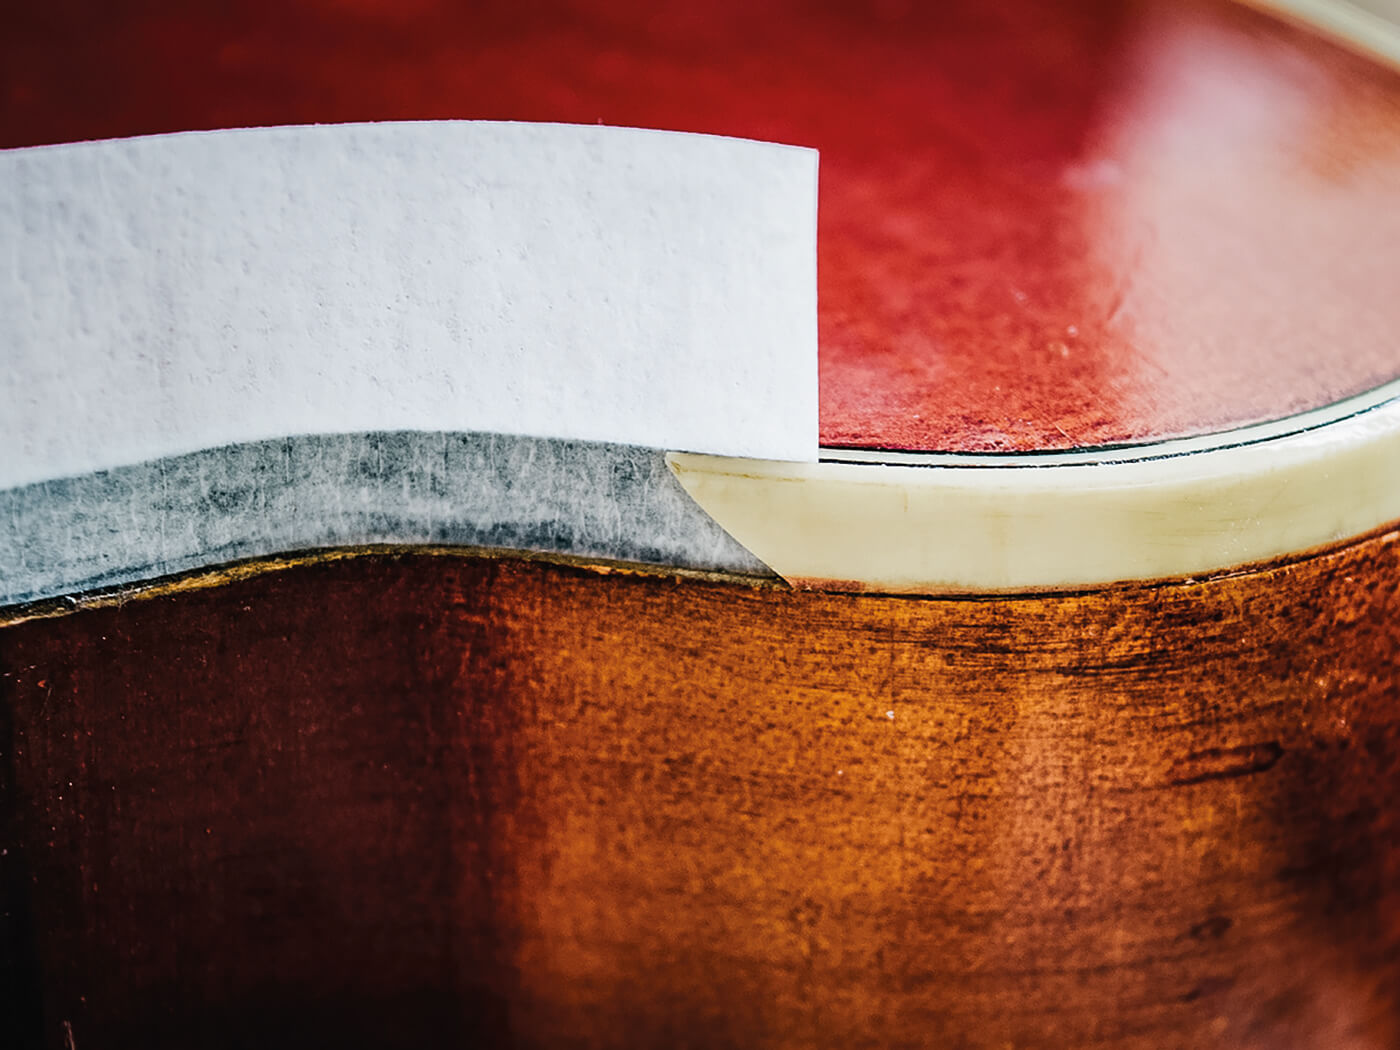
The problem here extends over a wider area and it’s complicated by the fact that the black and white layers are separating. Because I have an end piece to work from, I carefully unpick the binding from the body and separate it all the way to the cutaway horn.
The original glue has turned to powder and I use a craft knife to clean it off ready for some fresh glue. Fortunately, no heat is required this time, but the re-glued shrunken binding now stops a few millimetres short. Adding a small extra piece will fill the gap.

After reattaching the binding in the neck heel area, I get to the trickiest part. The missing section on the upper horn has to be replaced, so I have a rummage through my offcuts to find the best match. Whether the original binding snapped or was cut, I can’t say, but it’s a neat and clean angle. After cleaning off the powdery glue, I lay some masking tape in the channel, extending behind the point where I’ll make the join.
Using a very fine pencil, I mark the binding line, remove the tape and place it over the piece of binding I’ve selected for the patch. This gives me the angle I need to cut the new binding to butt it up against the old. A bit of finessing with a craft knife and abrasive paper is needed, then I apply the hairdryer treatment to pre-bend the binding patch before sticking it on.
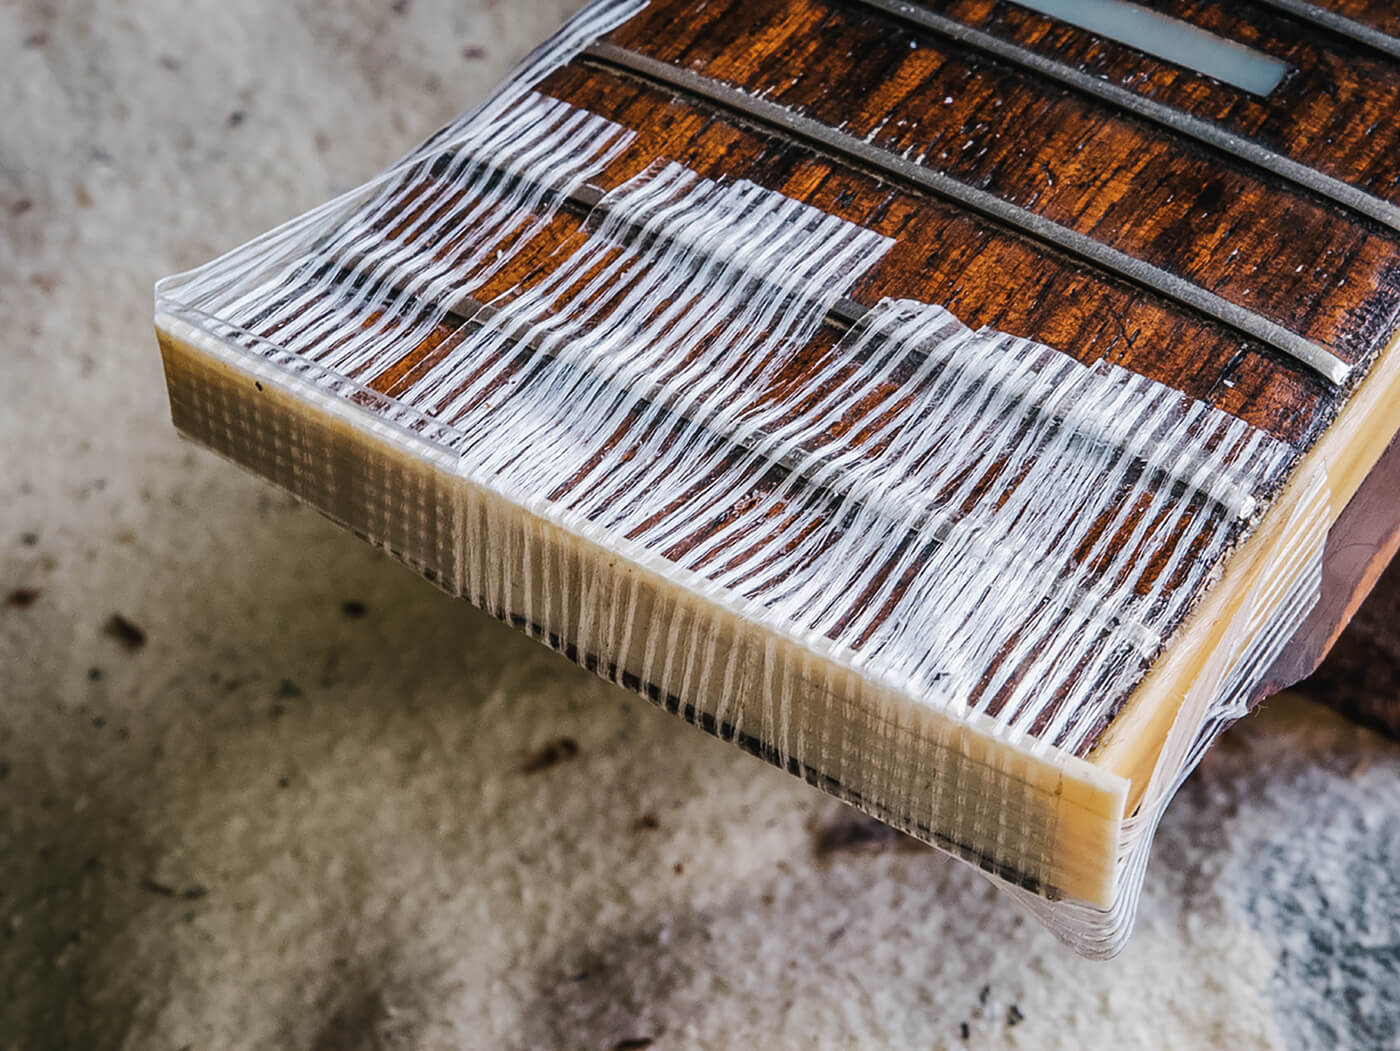
This time, because there are gaps to fill, too, I use a paste made by dissolving pieces of binding in acetone. Finally, I add a strip of binding to the end of the fretboard to replace the missing piece. Grimshaw used butt joints rather than mitres, so I do the same.
Blending in
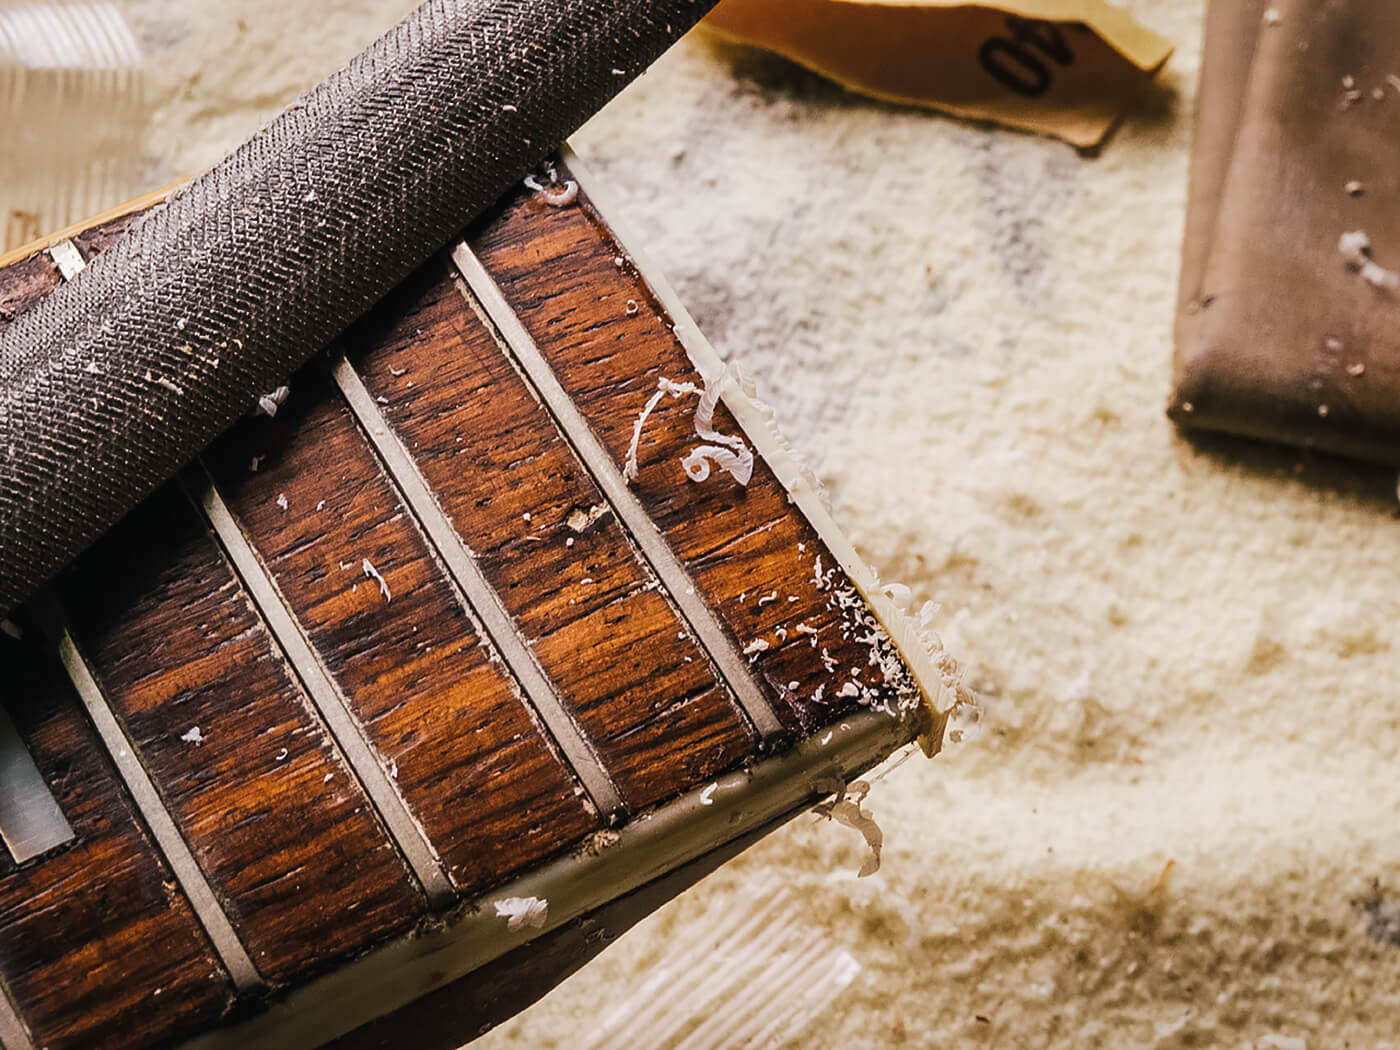
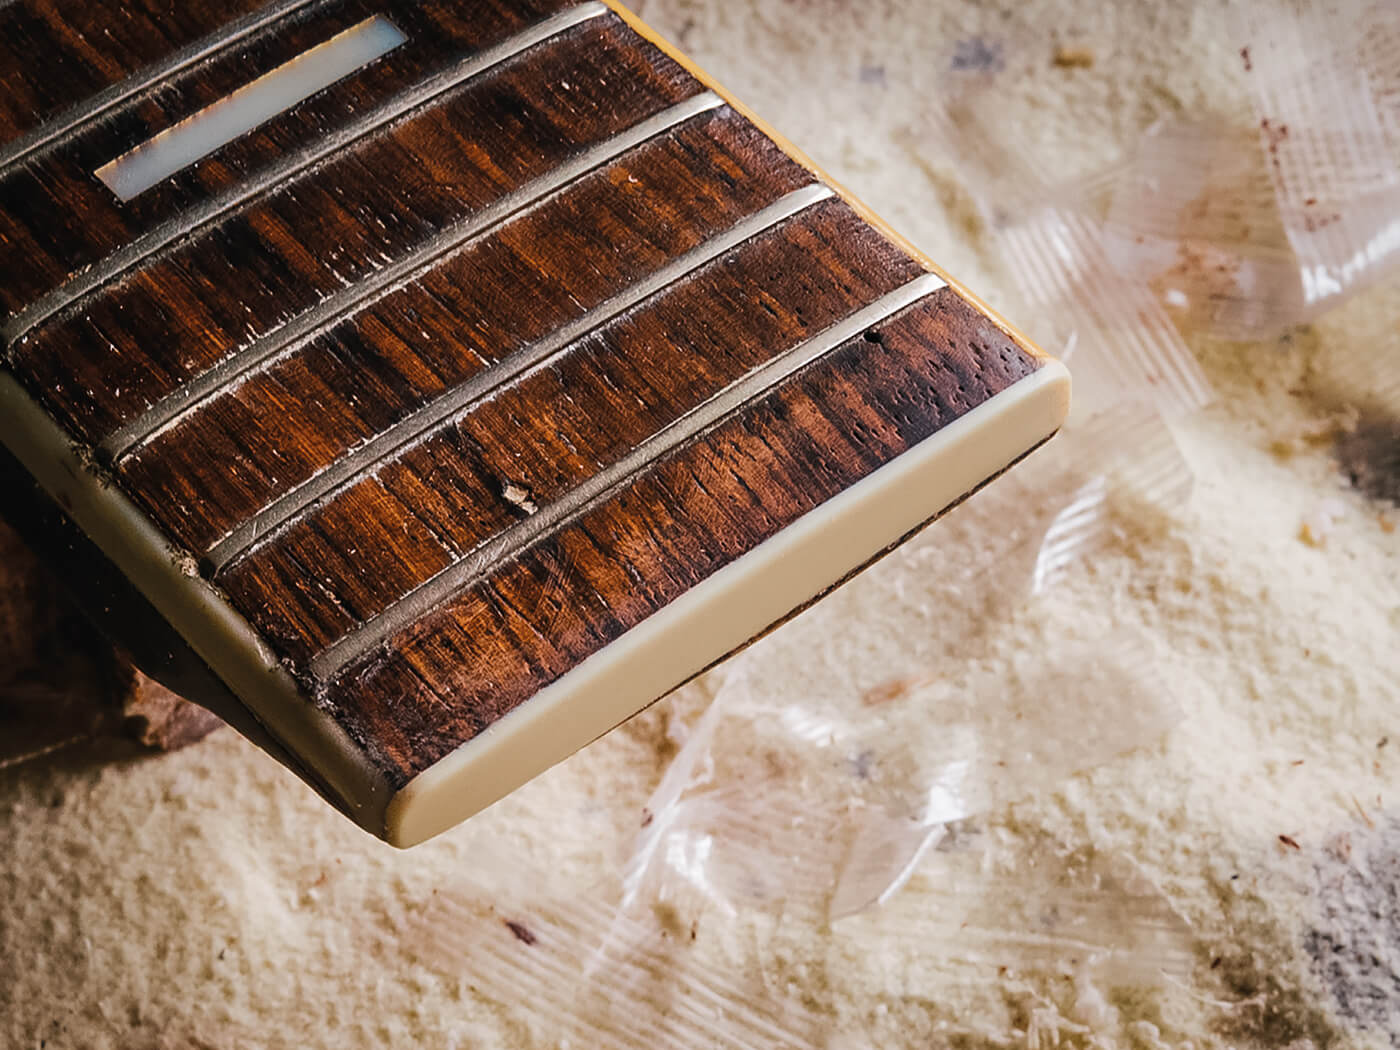
The binding repairs are done, but now I have to scrape and sand off the excess binding and glue. For this I use a utility knife blade as a scraper and follow up with ever decreasing grades of abrasive paper and Micro-Mesh. Eventually everything feels smooth, but the repaired areas are clear to see because the yellowed lacquer no longer covers them.
To blend everything in, I use a very cheap Humbrol airbrush. They’re designed for model-making and cost less than £20. A can of aerosol propellant costs about £10 and the airbrush is ideal for small touch ups. I mix nitrocellulose lacquer 50/50 with thinners in the airbrush’s glass bottle, add one drop of Stewart-MacDonald Vintage Amber tint and the colour match looks pretty good. The spray is so fine, I don’t even need to mask off the body or cut and polish to blend in the repair.
Neck set
I have no idea what glue Grimshaw used, but it’s white and opaque in appearance, and there’s plenty of it in the neck pocket. There are several layers of rosewood veneer glued to one side of the pocket and they’re still solidly attached. I need to get back to the wood to reset the neck, so I peel off the outer layer of rosewood veneer using a sharp chisel and then clean both sides of the pocket with a rasp.
I tidy up the neck’s dovetail the same way and once I have four clean gluing surfaces, I test fit the neck. It’s important to achieve the correct back angle and get the neck square with the body’s centre line. To check alignment, I press the neck into the joint, hold it tight with a clamp and put two strings in the outer positions.
Everything looks pretty good, but I decide to glue two layers of veneer onto the bass side of the neck pocket and a single layer on the treble side. Once the glue has set, the neck will no longer slot into the pocket – which is exactly what I wanted.
Neck setting begins with applying chalk to the sides of the pocket and trying to insert the neck. It goes in about 1cm, then I extract it and examine the chalk marks that have transferred onto the dovetail. I shave away a tiny amount of wood where I see the chalk marks and place the neck back in the socket. It goes a little deeper, before I have to remove it, shave a bit more wood off the dovetail and try again.
Each time it presses a bit further into the slot and after about 20 minutes, the neck presses all the way in and the joint is so tight I have to tap the neck out with a rubber mallet. After a final check with the strings lightly tensioned, I clean off all the chalk residue, apply some Titebond Original glue and leave the neck clamped overnight. [To read read more in-depth accounts of this process check out Huw’s Gretsch Anniversary conversion and Martin kit build articles – Ed]
Test run
Pulling a tune-o-matic on a rosewood base from my parts bin, the Grimshaw is strung up with a set of 10s and tuned to pitch. Everything feels stable and solid, and I finally get to hear what an SS Deluxe sounds like. It’s loud, very balanced and resonant, and has surprising sustain.
A peek through the control cavity reveals why – there’s a solid spruce plank running through the centre of the body. It’s not quite an ES-335 style centre block, and it’s only fitted top the top, but the effect is very similar and the unplugged tone is a mashup of ES-335, ES-295 and a trestle-braced Gretsch.

The temporary bridge’s string-spacing is a little narrow, so the strings don’t quite line up with the tiny pole screws in the pickups – even after I’ve re-positioned the bridge pickup. Consequently, I can’t be confident that I’m hearing them at their best. The tone definitely has a retro twang at the bridge and a woody jazziness at the neck, but while they sound clear, they’re not especially powerful or bright.
The guitar’s owner Jim is confident about relocating the original heel cap and bridge, and a proper setup will be done once he has. It already plays so nicely and sounds so good, going the extra mile will certainly be worth it – I feel it has the potential to be pretty special. Grimshaw guitars have been somewhat overlooked on the vintage guitar scene, but if you do come across one, don’t pass up the chance to try it out.
For more DIY guides, click here.