Related Tags
DIY Workshop: Rift Amp Modifications Part One
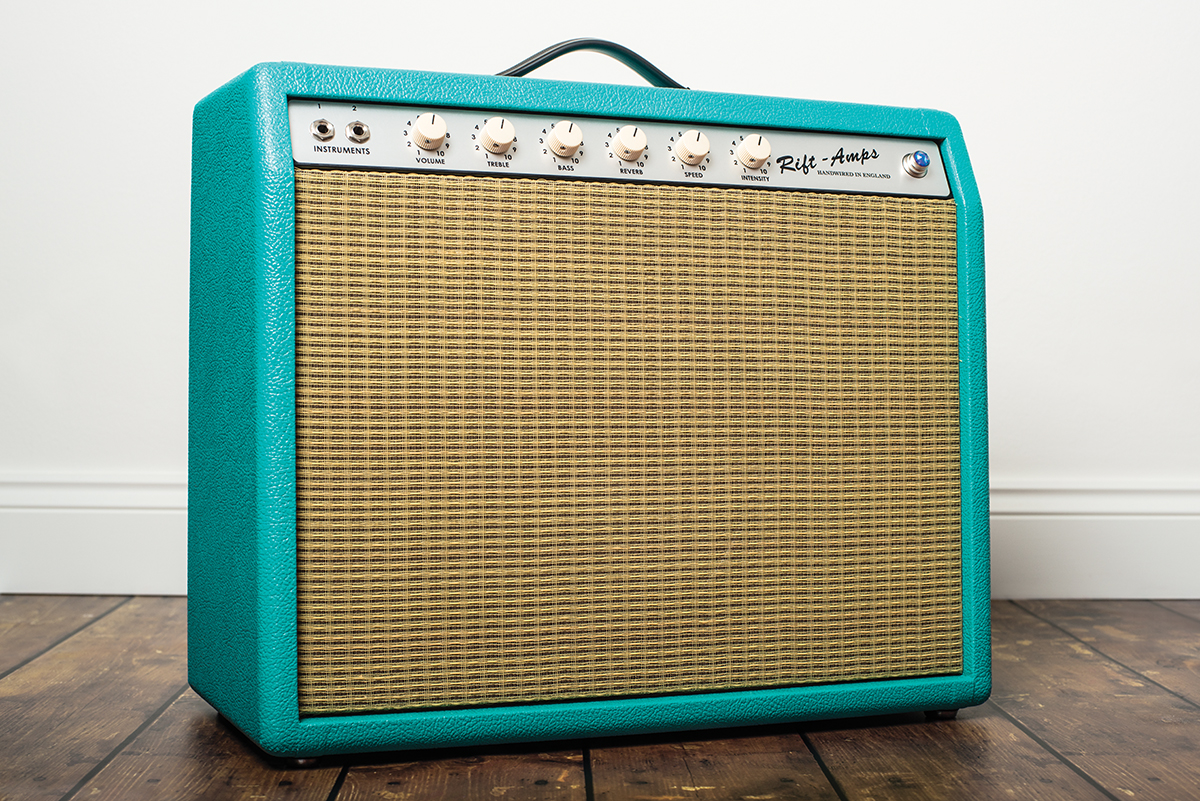
We like tweed, brownface and blackface amps, but can one amp do it all? We find out if three goes into one with G&B’s Rift PR18…
Although there are subcategories and weird transitional models, vintage Fender amp circuits are mostly divided into three varieties – namely tweed, brownface and blackface. Of course, there are the silverface and Rivera models that could also be regarded as classics in their own right but, for the purposes of this article, we’ll be confining ourselves to the earlier types.
Some readers may recall our workshop feature detailing the electronic restoration and modification of a 1957 Fender Vibrolux (G&B October 2015). If you missed it, you can read it here. The amplifier in question had a replacement output transformer from a Fender Princeton. Although a Triad #108 output transformer would have been fitted in 1957, by 1959 Fender was installing the Princeton-spec Schumacher 125A1A in the tweed Vibrolux. This continued into 1960.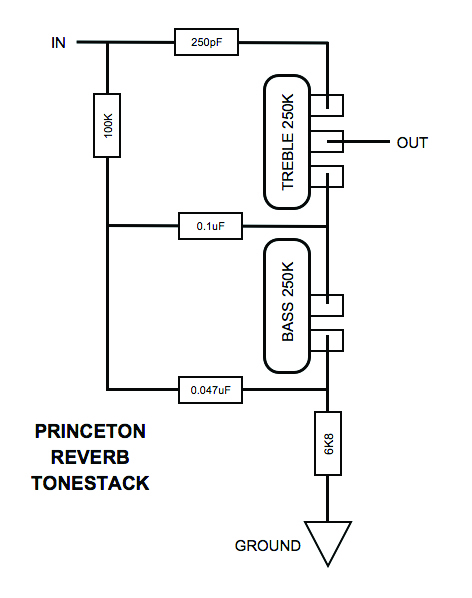
The Princeton Reverb tonestack is a carry over from the bigger late-50s tweeds and has a scooped midrange characteristic
Upon closer examination I noticed that besides some voltage variations, a handful of components and the frankly odd input arrangement, the Vibrolux circuit was virtually identical to a brownface non-reverb Princeton. The restored Vibrolux ended up sounding incredible. The Princeton Reverb has many similarities to the brownface Princeton and the Vibrolux; the most obvious difference is the addition of spring reverb. Less obvious are the extra valves and a redesigned tonestack with an entirely different tone.
The rub is that they are all pretty great-sounding amps that do various things very well indeed. In recent years, some boutique manufacturers have achieved great success by adding reverb and tremolo to classic tweed circuits that never had those effects – such as the 5E3 Deluxe.
It occurred to me that it might be possible to approach things from the opposite direction and see if there was a way to coax tweed and brownface tones from a Princeton Reverb-style amplifier. Of course, I needed a donor amp and we already had a rather wonderful PR18 that the editor and I built with considerable assistance from Chris Fantana of Rift Amplifiers.
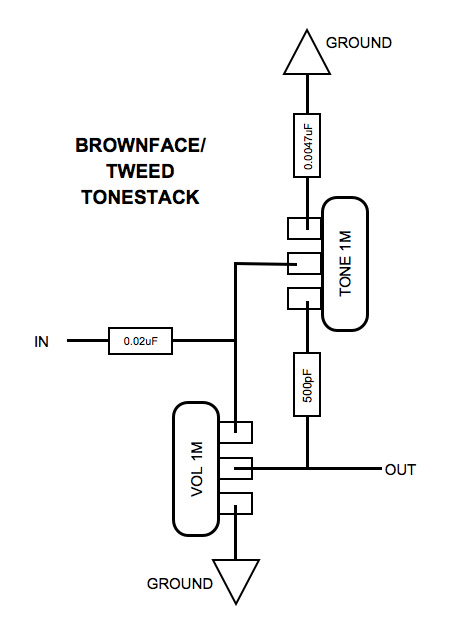
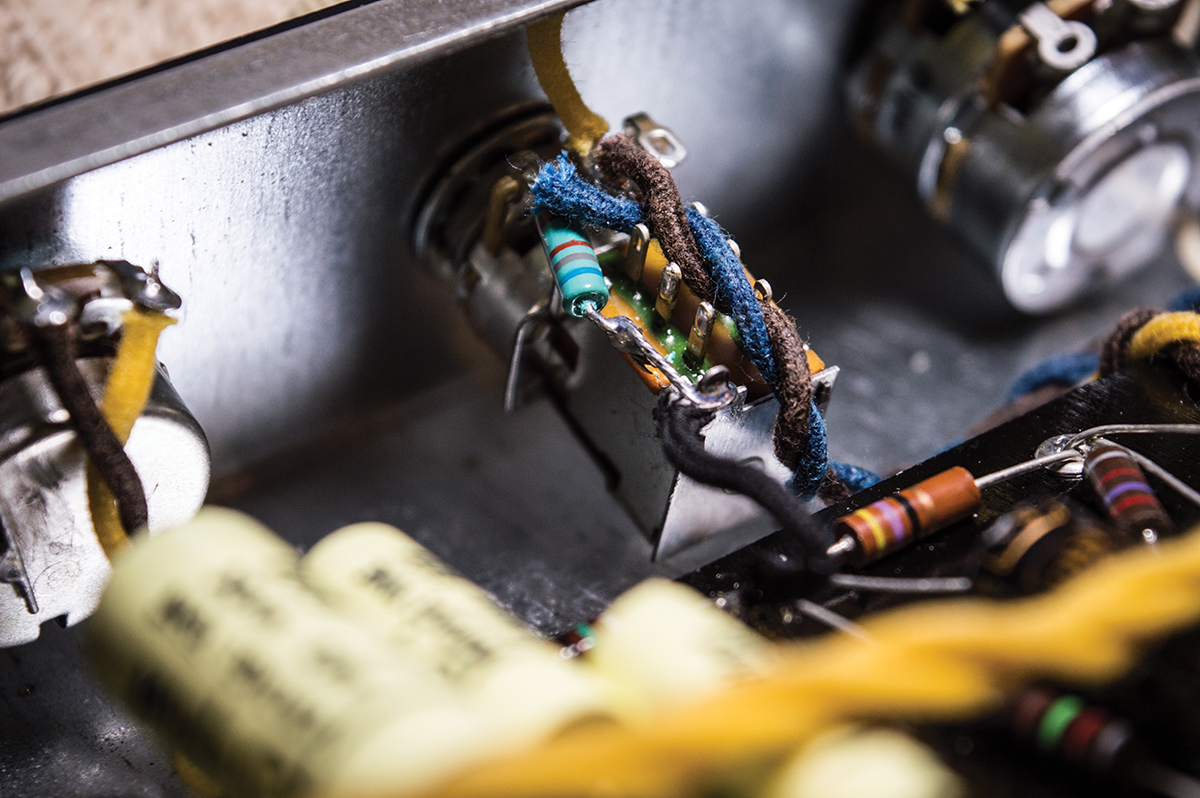
The brownface Princeton tonestack equates to lower power tweeds and has a flatter response with lower signal loss
Three considerations were paramount. Firstly, I wanted to retain the stock PR18 tone, because it has become a firm favourite for clean atmospheric tones and edge of breakup blues with P-90s and semi-solids in general. Secondly, I didn’t want to end up with a complex control layout and a plethora of fiddly switches. Thirdly, the reverb and tremolo effects had to remain available in each and every mode. In essence, this project is an experiment to see if three really can go into one.
Tonestack lightning
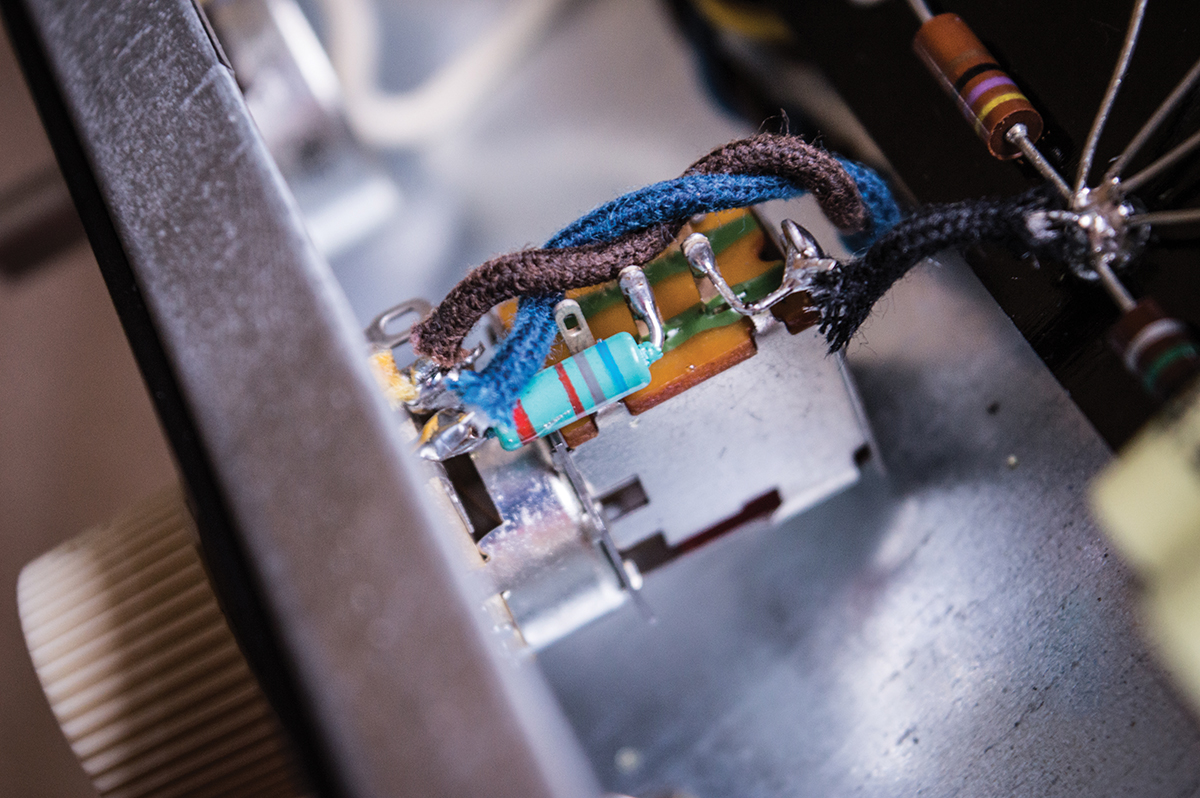
This switch was used on G&B’s Rift PR18 to disconnect the 6K8 resistor from ground and bypass the tonestack
When I was younger, I thought that blackface and silverface Fenders produced clear and uncoloured guitar tone. I was right about the first point, but I eventually learned that the tonestacks Fender had designed for those amps were extremely coloured.
Previously, Fender had employed a single tone control, but for the blackface amps a new control layout was devised with bass and treble controls and an extra middle control on higher-spec models. There was obviously something about it that worked, because the same tonestack soon began showing up on Marshalls, Voxes and countless other amps, and is still widely used today.
In simple terms, Fender’s tonestack takes the signal that’s amplified by V1a, then applies attenuation across the entire frequency range by dumping the signal to ground. Turning up the tone controls doesn’t actually boost the various frequency bands as such, because the system is passive not active. Instead, the effect is to place more resistance between the signal and ground in those frequency bands. In other words, you’re reducing the amount of attenuation rather than applying a boost.
With the 6K8 resistor soldered directly to the switch’s ground tag, the push/push is freed up for tonestack switching
Actually, it’s even more complicated than that, because all the controls interact and the treble control actually balances two different filters depending on its position. In fact, the Fender tonestack gets so complex and convoluted it would justify an article on its own, but we’ll save that for another time.
The upshot is that the tonestack doesn’t actually have a flat frequency response, even when treble, middle and bass are all set to 5. The default tone of this stack has a ‘smiley face’ curve where the midrange is considerably scooped. The Princeton Reverb’s stack doesn’t even have a middle control and the scooped mids are preset by a 6K8 resistor running from the bass potentiometer to ground.
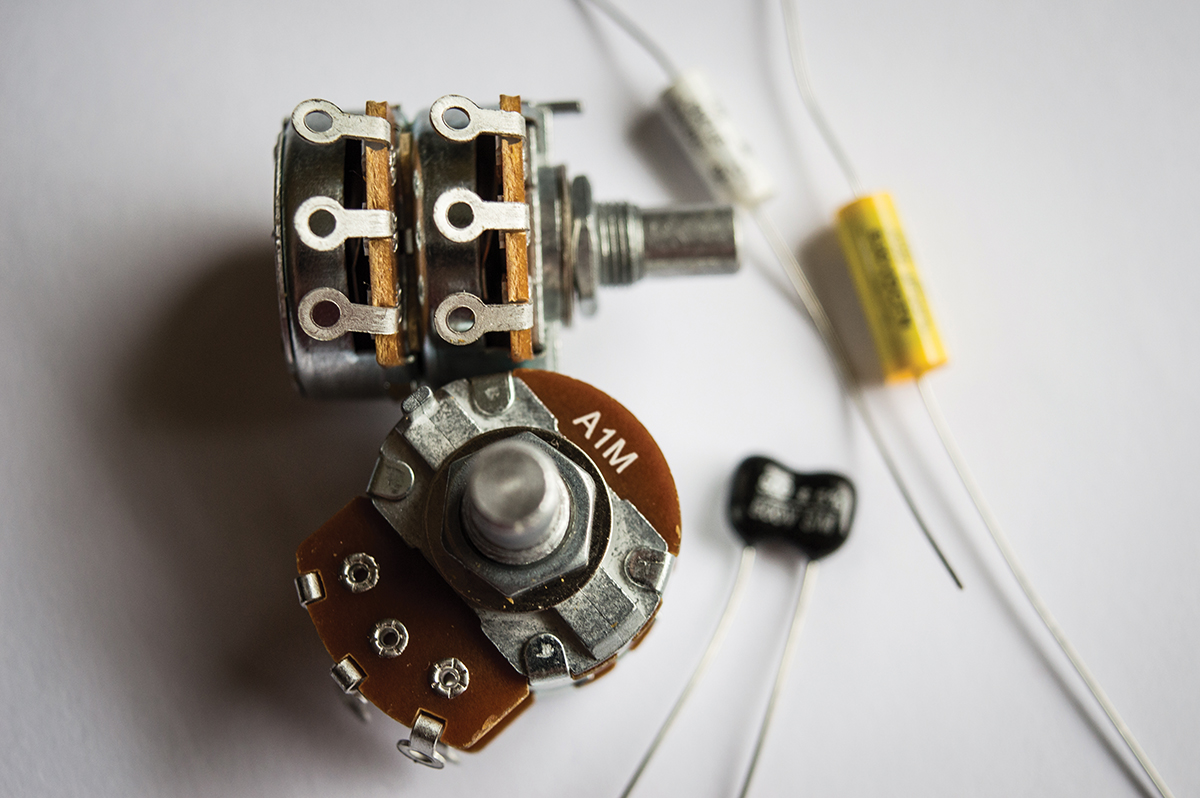
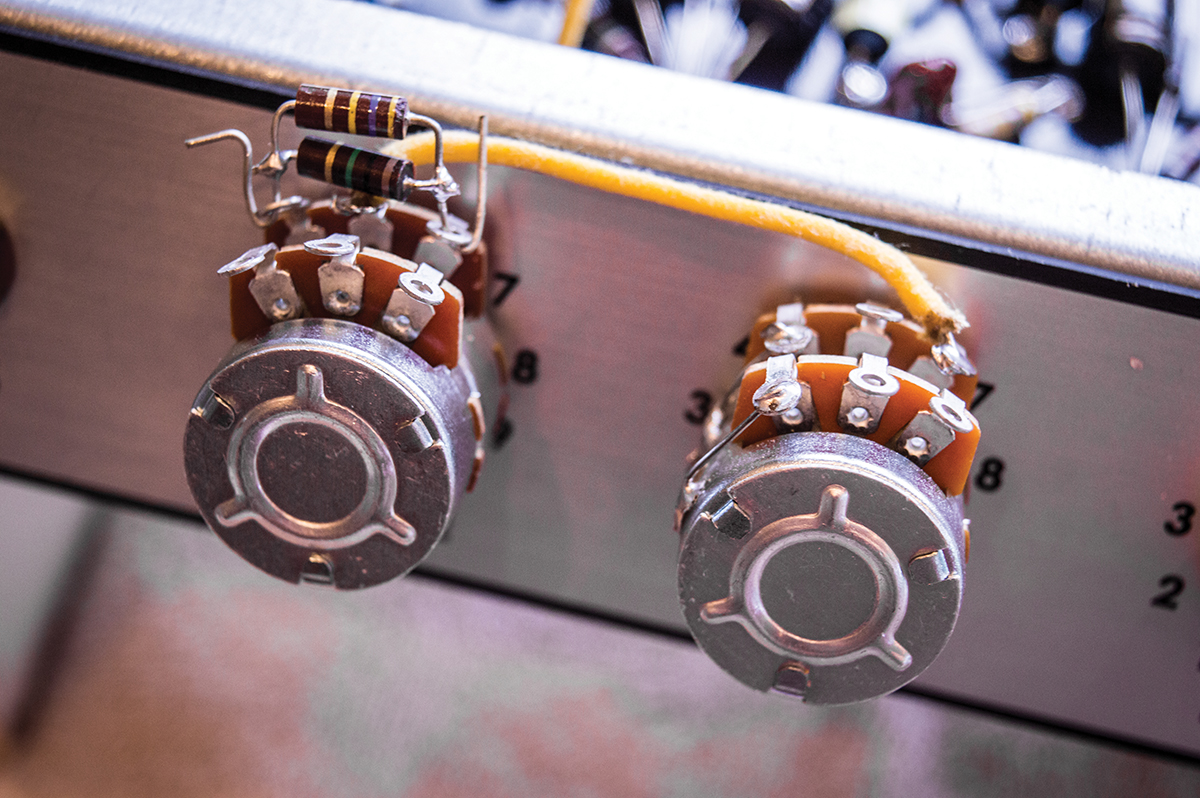
These 1M dual-gang pots are from Amp Maker. Each potentiometer acts independently of the other
In part, this explains why Tube Screamer-type overdrives work so well with amps that have this type of tonestack – the mid bump of the overdrive fills in the mids, while the bass and treble roll-offs prevent the overdriven tones from getting too boomy and too shrill. In short, they ‘neutralise’ the tonestack.
I used the phrase ‘applies attenuation across the entire frequency range’ a little earlier. What that means is that the tonestack lowers the entire guitar signal. So V1a bumps it up and the tonestack knocks it back down. Techie types describe it as being ‘lossy’ and it means that Fender had to install an extra amplification stage after the tonestack to restore the signal level.
The switch is actually integral to the bass potentiometer, but it appears separately here for clarity
The Vibrolux and brownface tone circuits are identical and work as a simple treble bleed that sends high frequencies to ground via a 0.047uF capacitor. The tone control works in conjunction with a 500pF ‘bright’ capacitor wired across the volume potentiometer. Below a certain point, the tone control slices off treble; around midway, it’s essentially neutral and then, above a certain point, more upper frequencies find their way through the bright cap – making the amp brighter and louder.
Maxing out the volume control takes the bright cap ‘out of circuit’ so tone interacts with volume. As well as being simpler than the Princeton Reverb stack, the tweed/brownface stack isn’t lossy, so there’s no need for an extra amplification stage and there’s no inherent mid scoop. The upshot is that the tweed/brownface circuits sound louder, fatter and throatier. Kept clean, it also allows you to hear a truer representation of your guitar tone.
Switching stacks
Chris Fantana was never particularly keen on our original suggestion for a tonestack bypass switch and neither the editor nor myself have found much use for it. By disconnecting the 6K8 resistor from ground, you do get a big increase in midrange and gain, but the effect sounds quite harsh and crude . So I decided to hardwire the 6K8 to ground and free up the push/push on the bass control for stack switching.
We had no 330K resistors in stock, so we paralleled 470K and 1M resistors to change the 1M potentiometer value to 242K
Although 1M volume pots are used in all three amp circuits, the Princeton Reverb has a 250K treble potentiometer rather than a 1M tone pot. Dual-gang 1M controls seemed like the way to go and I sourced a couple from Amp Maker (ampmaker.com) in the UK.
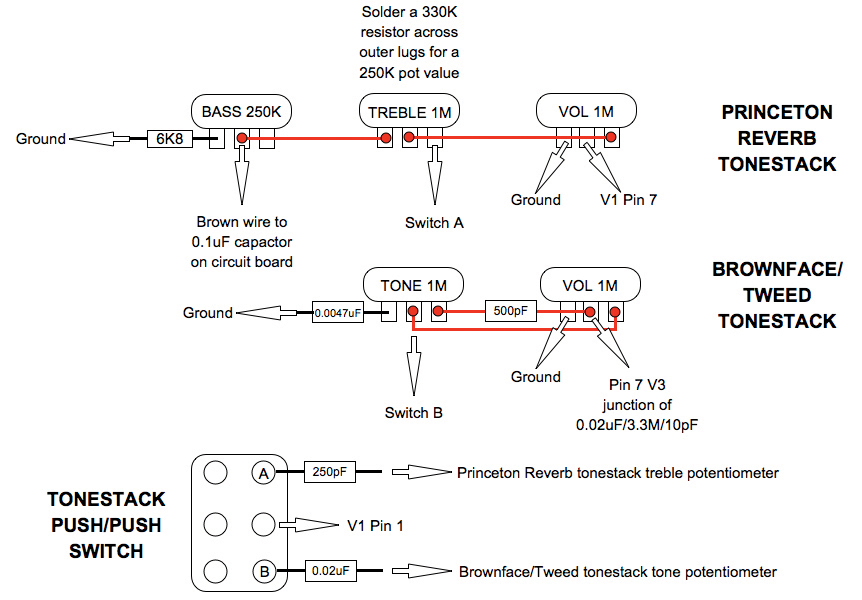
Soldering a 330K resistor across the outer lugs of a 1M potentiometer turns it into a 250K potentiometer – or 248K, which is close enough.
Here, the blackface tonestack connections are made and tested
After making careful notes of the stock wiring, I lifted the connections from the volume and tone controls and removed them from the chassis. I placed the new dual-gang pots through the vacant holes from the outside of the chassis to hold them in position while I soldered the interconnecting wires and the ground connections . The pots were then mounted inside the chassis and I hooked everything back up as before, to establish that the Princeton Reverb stack was still functioning properly.
The next stage was to install the 0.047uF and 500pF capacitors and connect up the tweed/brownface stack for testing. To do this, I had to remove the 250pF capacitor from the main board and solder a jumper wire in its place. A 0.02uF coupling capacitor was soldered onto the end of the white wire that previously served as the input to the Princeton Reverb stack and the other end of the capacitor was soldered to the tweed/brownface volume control.
The brownface tonestack tests good, meaning it’s time to tidy the wiring and implement the switch
For this stack to function properly, I had to skip the make-up gain stage entirely and solder the volume pot output directly to pin 7 of V3. Again, it worked exactly as I had hoped, with a noticeable midrange lift and a slight volume boost.
Having established that both tonestacks were okay, it was time to tidy up the tonestack wiring and try and make them switchable. The switch was a double-gang double throw, which meant I could switch the inputs and outputs simultaneously and completely disconnect the unused tonestack from the circuit &.
Reverb relocation
Those readers who are familiar with the Princeton Reverb circuit will already have realised that there is no way the stock reverb circuit can work with the tweed/brownface stack engaged. This is because the reverb send comes after the make-up gain stage for the Princeton Reverb stack, but the tweed/brownface stack rejoins the signal path beyond this point. So it effectively bypasses the reverb send.
Lately, you may have read some highly enthusiastic reviews of Swart amps in these pages and a big part of the appeal is the full-bodied reverb tone. Checking out Swart’s reverb circuit and the Gibson amps that inspired it, it can be seen that the reverb feed is taken after the first amplification stage, rather than post-tonestack.
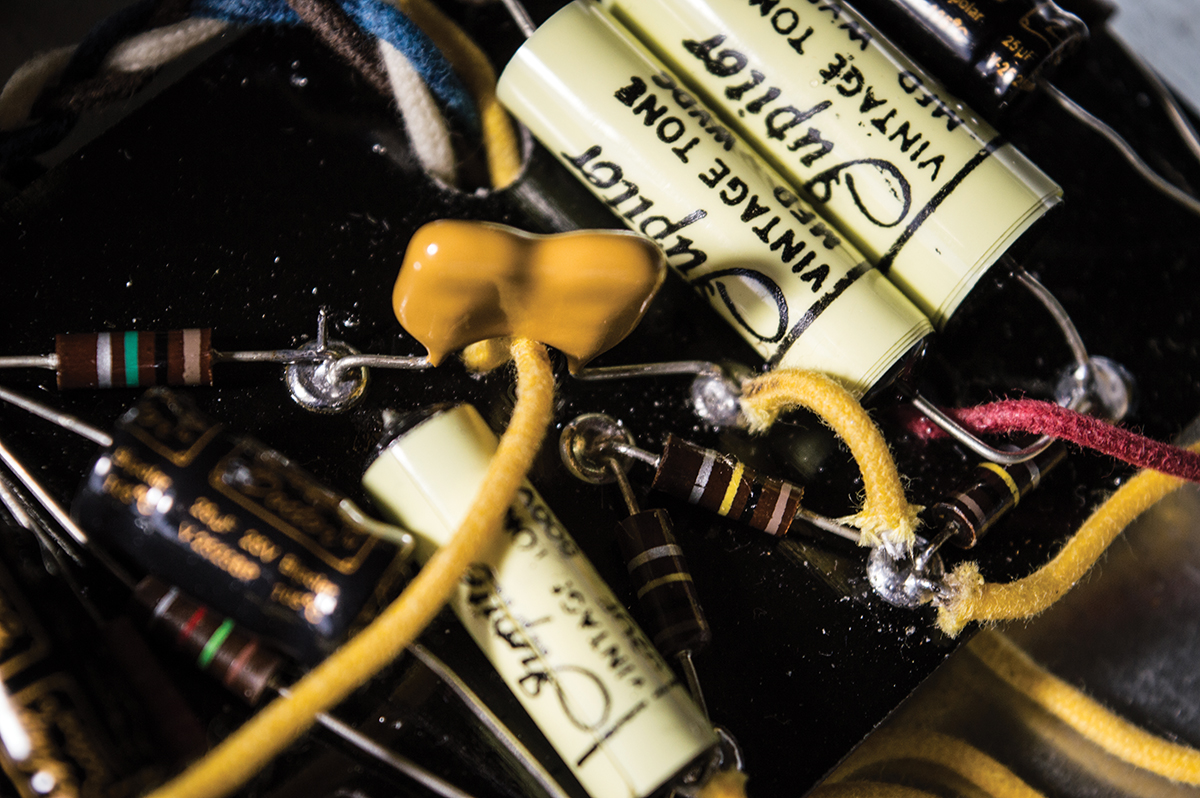
Both tonestacks are wired up and the 500pF capacitor has heatshrink applied to its readout wires
Although a coupling capacitor is placed between the anode of V1a and the grid of the reverb driver valve, there’s a fairly full frequency signal reaching the reverb. Contrast this with the stock Princeton Reverb arrangement, where the tonestack scoops away the midrange and a 500pF coupling capacitor then rolls off more of the low end.
The signal reaching the reverb is mostly the upper midrange and top end of the guitar signal, so as a result, Fender reverb effects can seem like they’re separate from the dry guitar tone and the effect can be a bit grainy and splashy when the reverb is turned up high. Many people like this tone, myself included, but I find it more useful as an occasional effect. At lower levels, I struggle to find the balance between too much and too little reverb. In contrast, the Swart-style reverb tends to gel better with the dry signal – more like a studio effect – and the splashiness isn’t apparent.
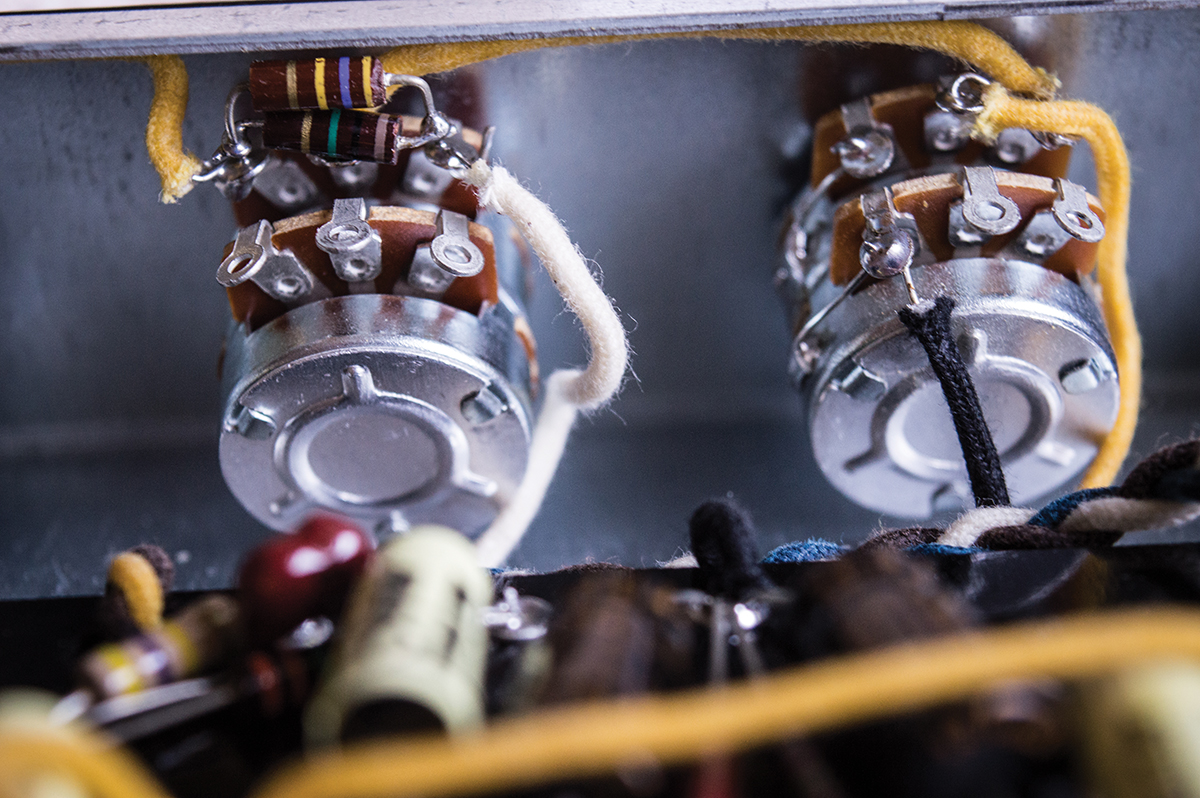
The white wire comes from pin 1 of V1 and the 250pF and 0.02uF capacitors lead to the blackface and brownface stacks respectively
To make the reverb work with both tonestacks, I began by lifting one leg of the 500pF capacitor where it joins the 0.02uF capacitor coming from pin 6 of V1. A new wire was soldered to the lifted leg at one end then soldered to the loop wire that had replaced the 250pF capacitor when it was relocated to the tonestack switch. Everything worked as I had hoped, but I was hearing some weird artefacts in the reverb.
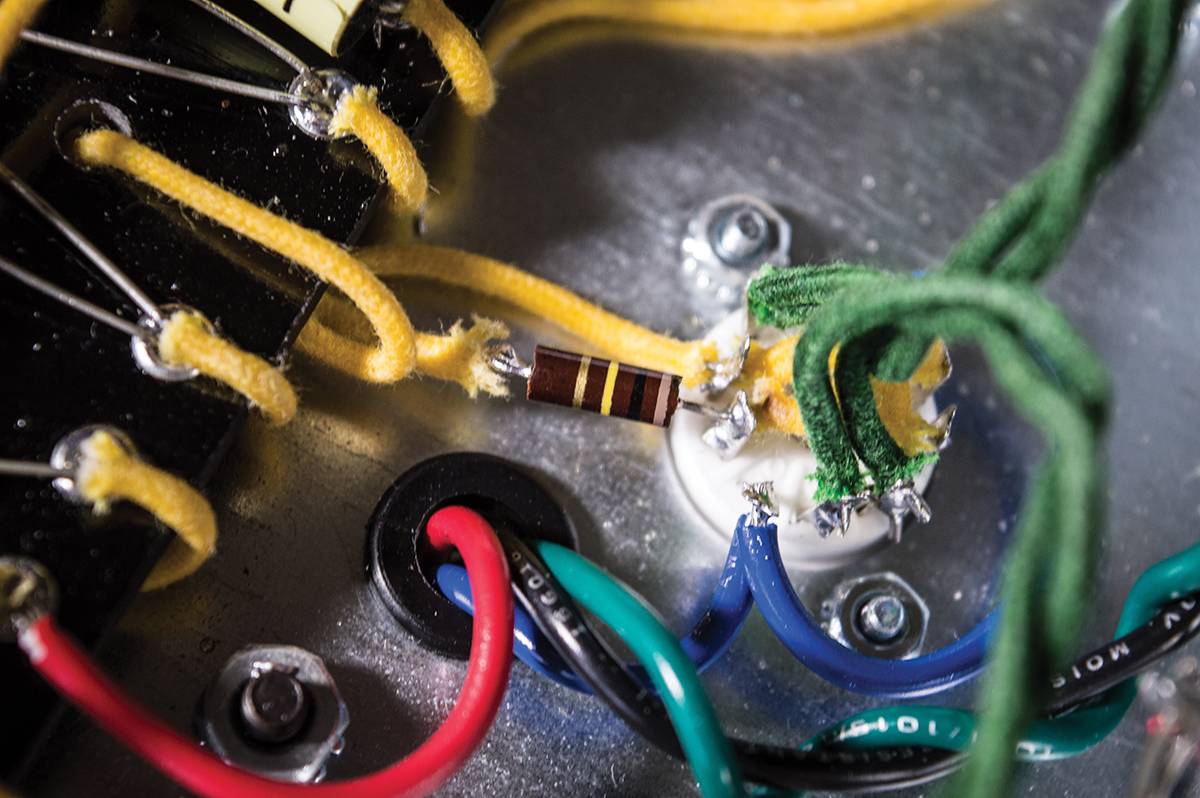
A 100K resistor was used to tame the level of the reverb send before reaching the 12AT7 driver valve
Figuring this was probably a result of excessive signal, I wired a 100K resistor between the hookup wire and pin 7 of V2 . This fixed the overload issue, but the reverb sounded a bit thin. After a few attempts playing boutique bingo with capacitor values, I settled on a value of 3300pF, which I wired between the stock 1M grid resistor of V2 and the loop wire. To my ears, this value provided the best balance of reverb tone and clarity with some bass rolled off, but a full and lush effect.
Back together
Although I can hear a slight pop when switching between tonestacks, it doesn’t bother me unduly – and I’m delighted that I can era-hop without losing what I liked about the Rift PR18 to start with.
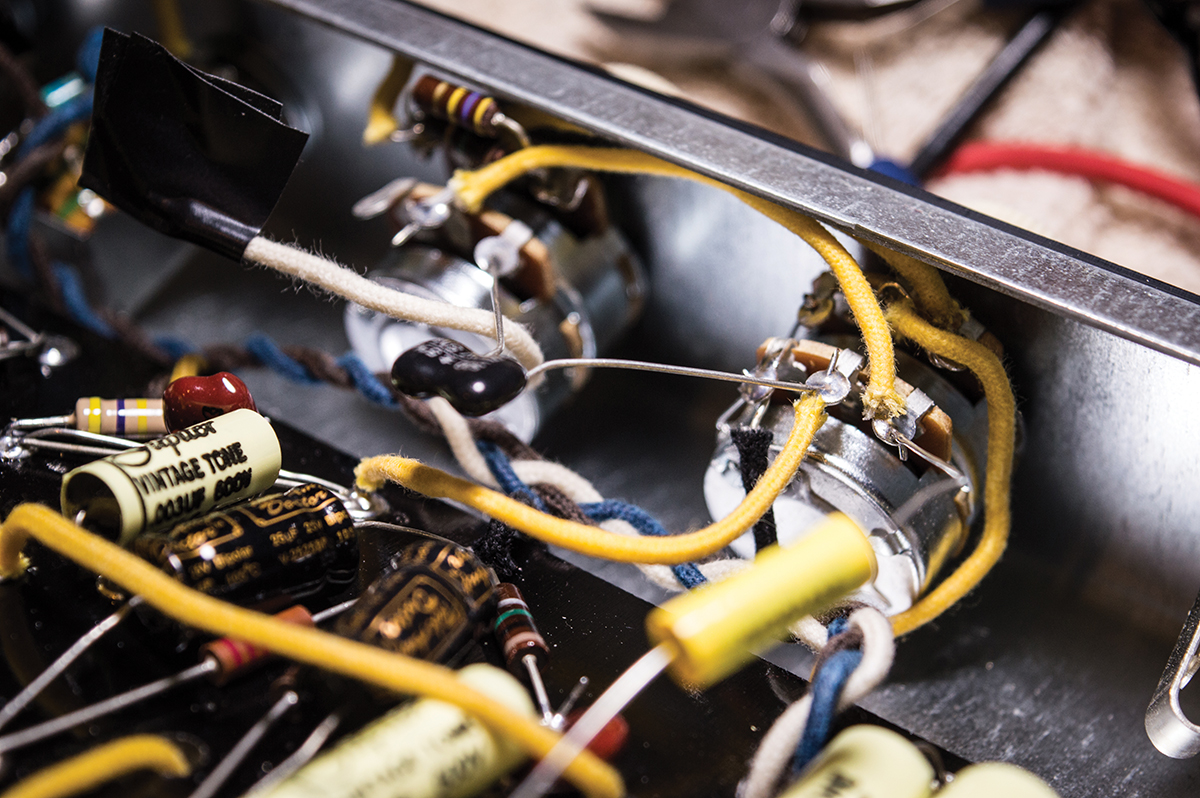
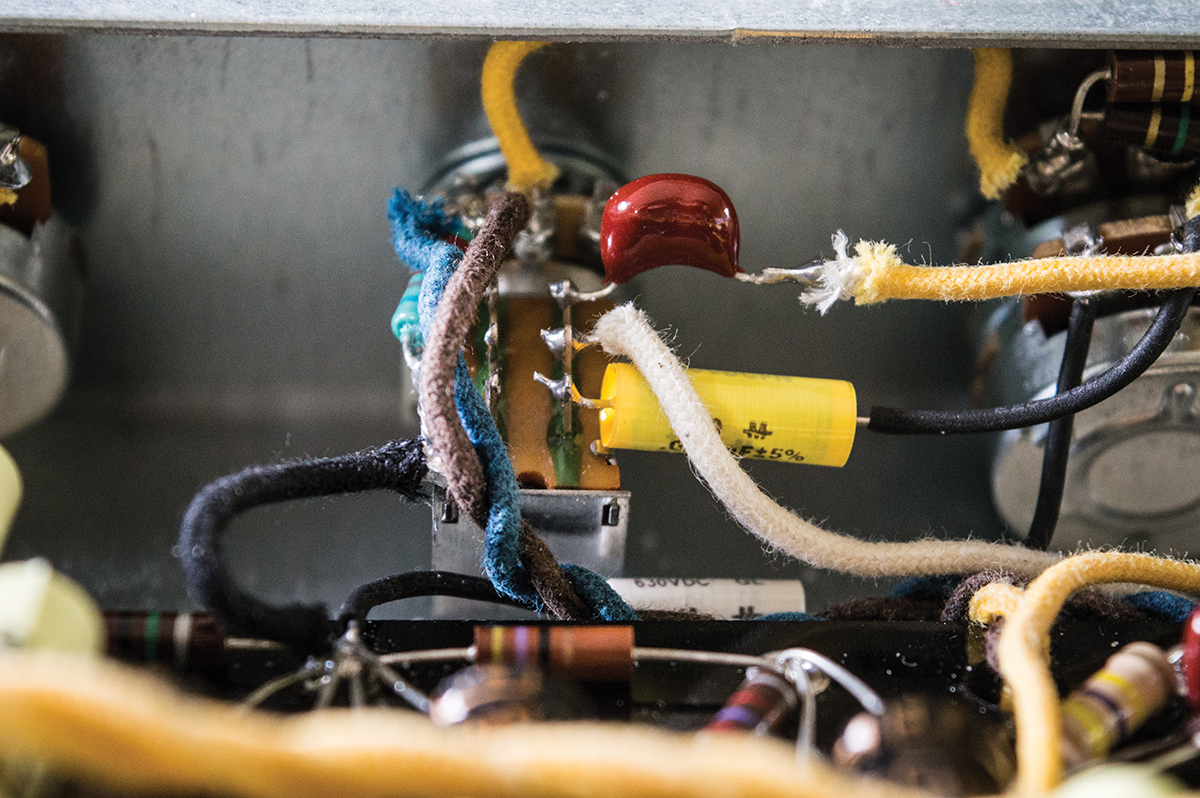
The mustard-coloured 3300pF capacitor connects between the 1M grid resistor and the wire loop that replaced the 250pF capacitor from the blackface tonestack
There is a big change in tonal character, but the level difference isn’t excessive and the treble/tone knob doesn’t need drastic adjustment as you go from one mode to the other.
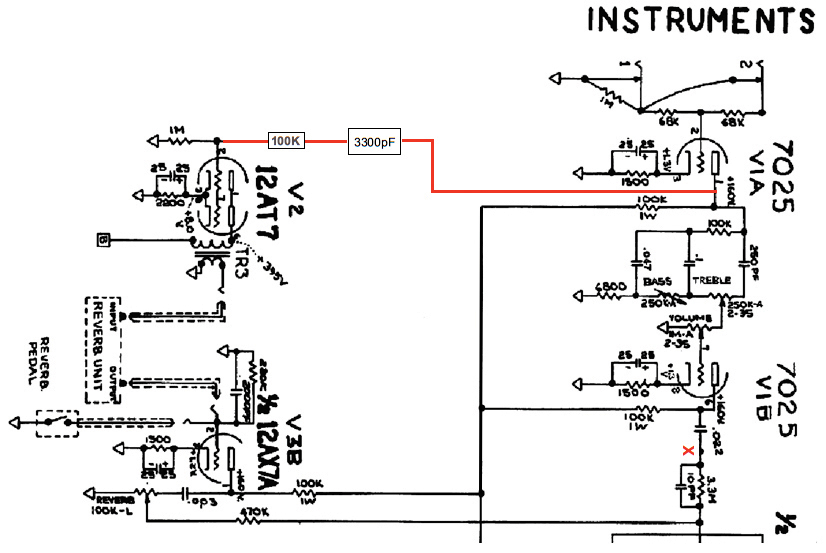
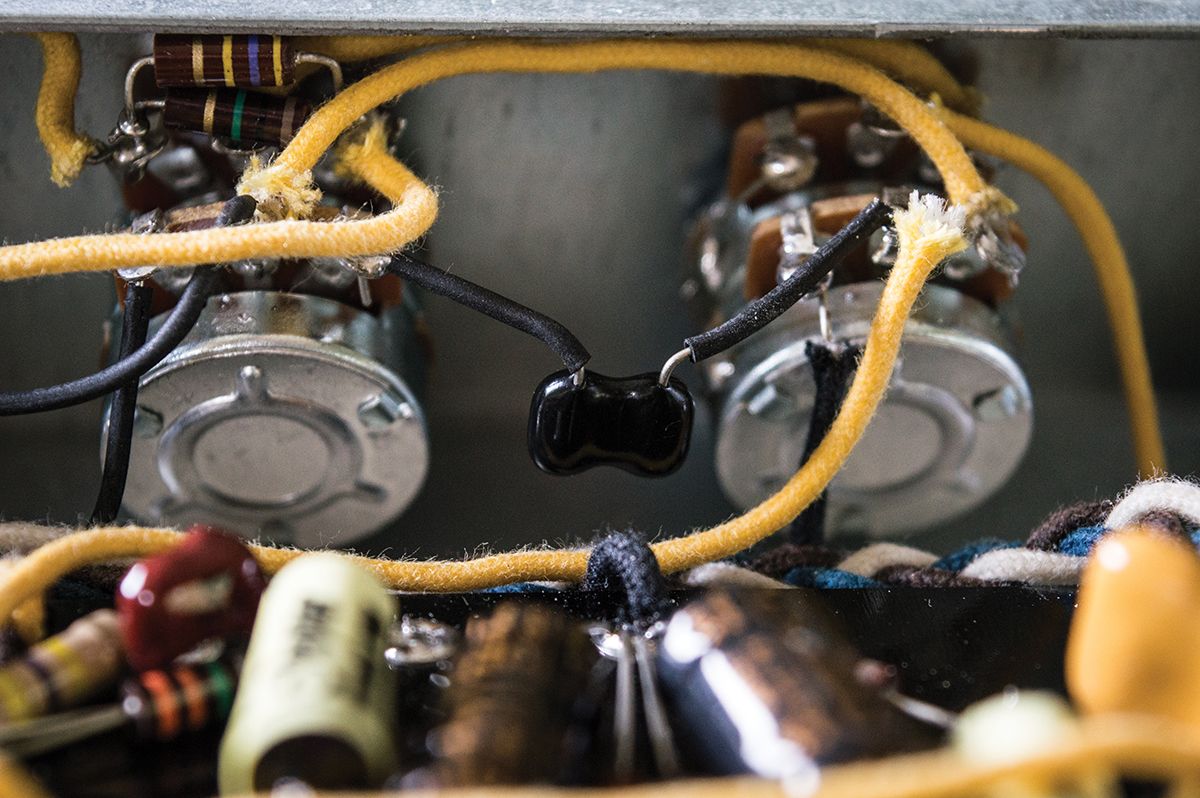
The reverb send was relocated from point ‘X’ to pin 1 of V1a with a 3300pF capacitor replacing the stock 500pF capacitor and a 100K resistor to tame the level
I’m particularly pleased with the reverb and while it may not please Fender reverb fanatics, I find the configuration I ended up with a bit more playable and useful for my style. I’m done for now, but my head is spinning with ideas about biasing, negative feedback and even tweedier tones. Unfortunately, all that will have to wait until Part 2, so see you next time.