Related Tags
Tech Talk: How to eliminate rough or sharp edges on tuner posts
Strings breaking at the tuner end? Here’s how to fix it.
All strung up and ready to go back to work
During the course of guitar repairs, I believe that an instrument can tell us what it needs to be its best self. A dry fretboard crying out for a drop of linseed oil, a vibrato that won’t return to pitch for lack of lubrication, or a buzz that appears only when a specific chord is played (which often points to strings rattling behind your fretted notes due to a lack of relief) – every symptom has a cause, and every cause a treatment.
This idea seems to manifest most frequently with the very common issue of string breakage. When a string breaks, it’s good practice to pay attention to not only how it breaks – i.e. what the player was doing in the moment – but also where it breaks.
If the string breaks at the saddle, it stands to reason that the saddle has a burr or sharp edge that needs to be smoothed away with a file. If it’s behind the saddle, then surely there’s a hidden cause for the problem, as was the case with the Telecaster Deluxe and its hardtail bridge in the first instalment of this very column.
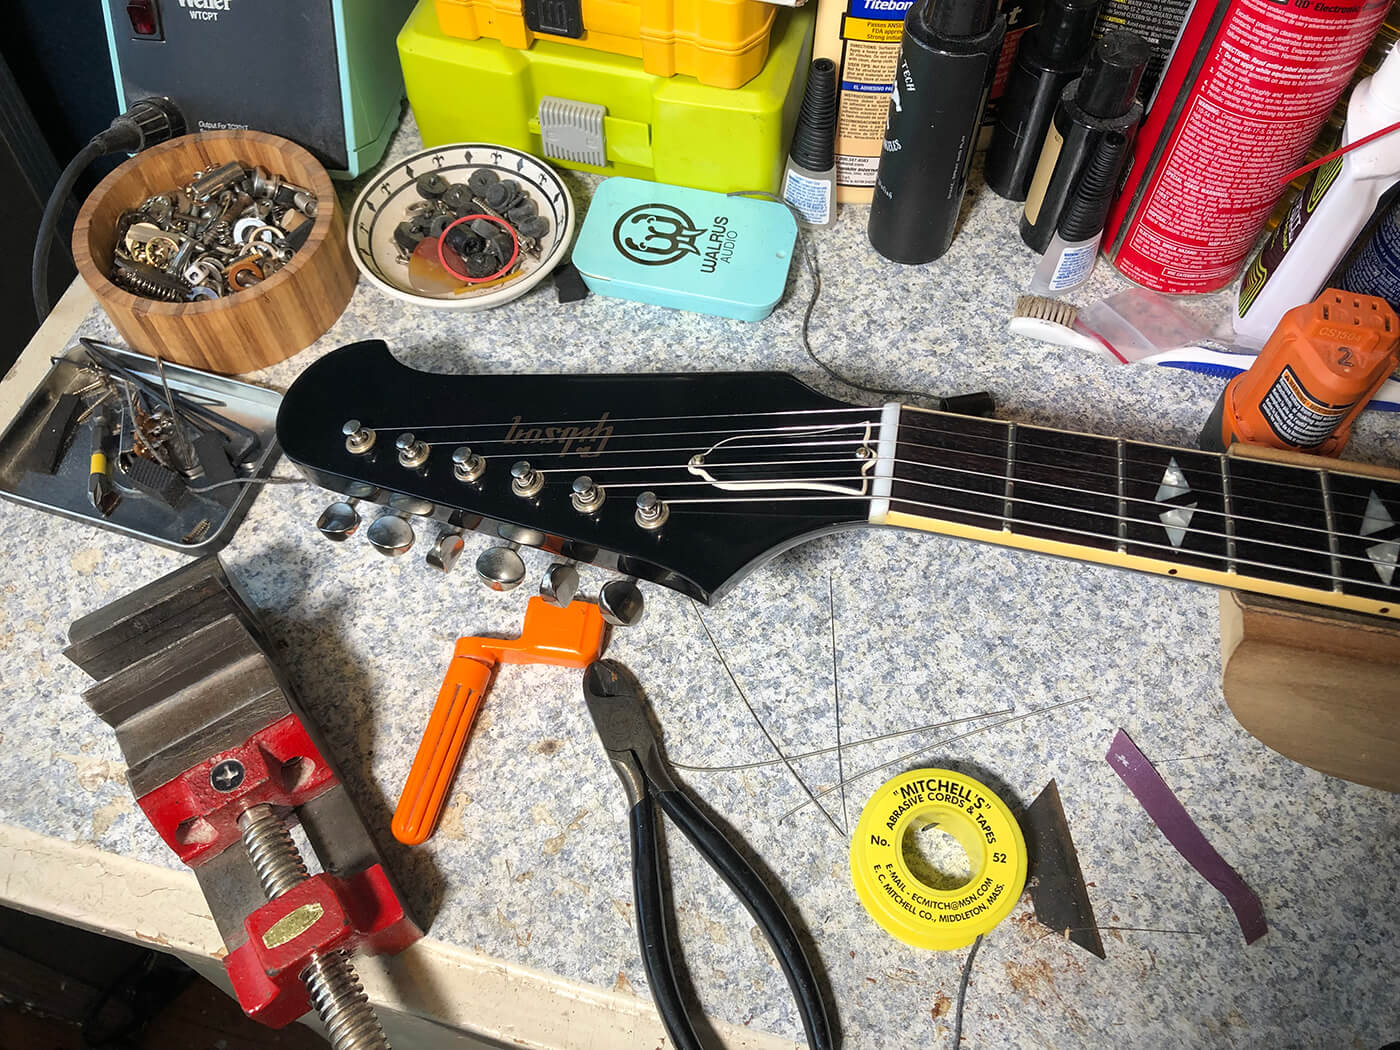
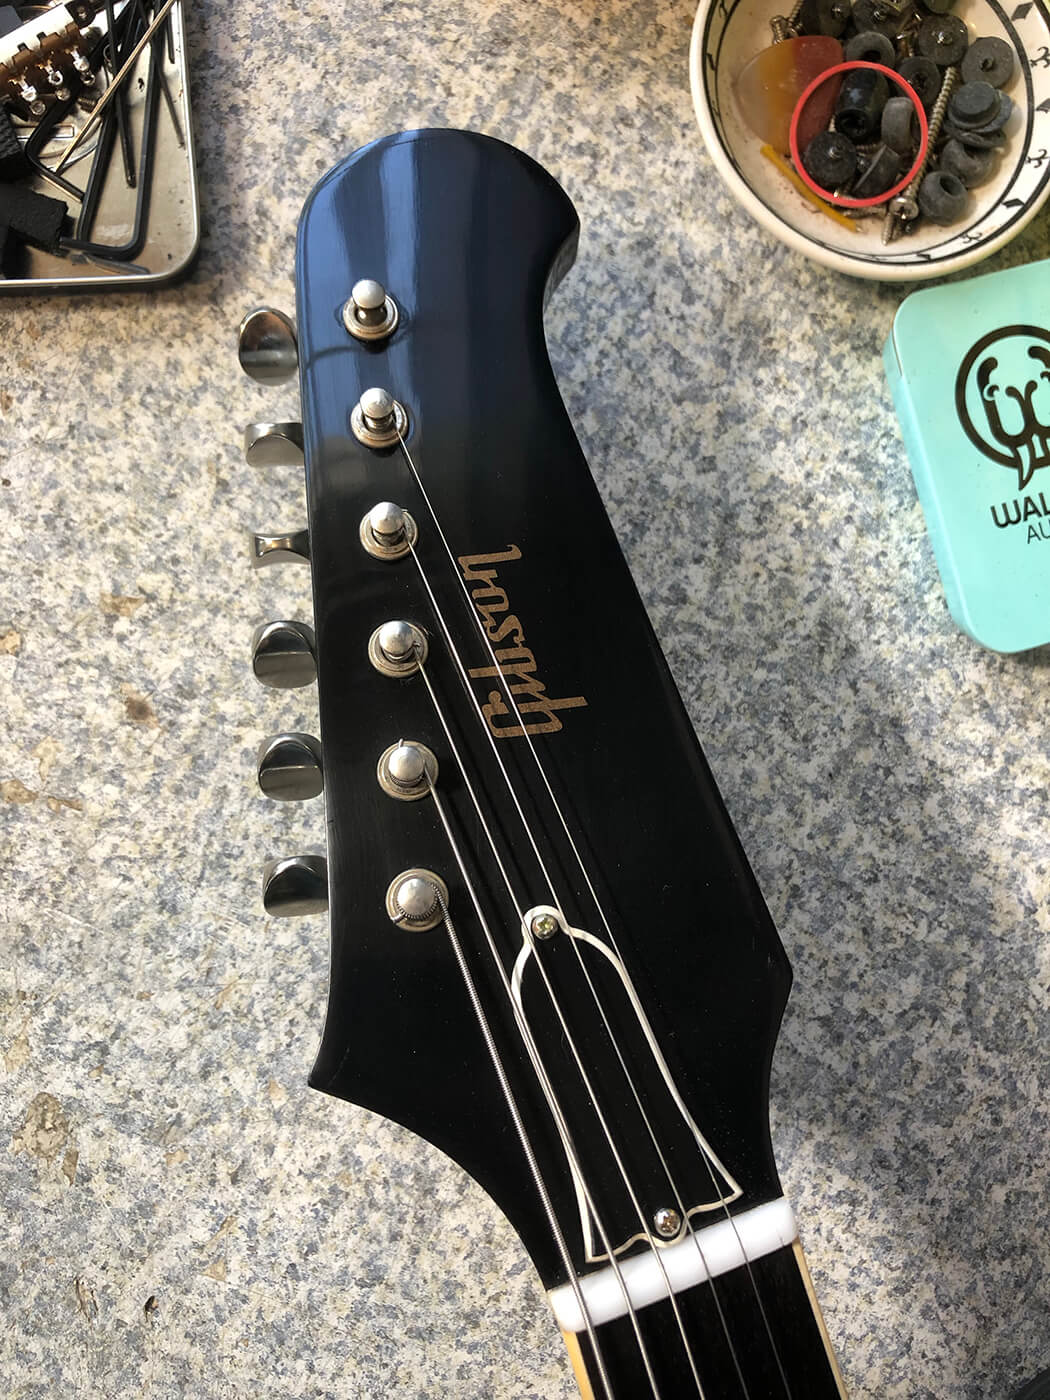
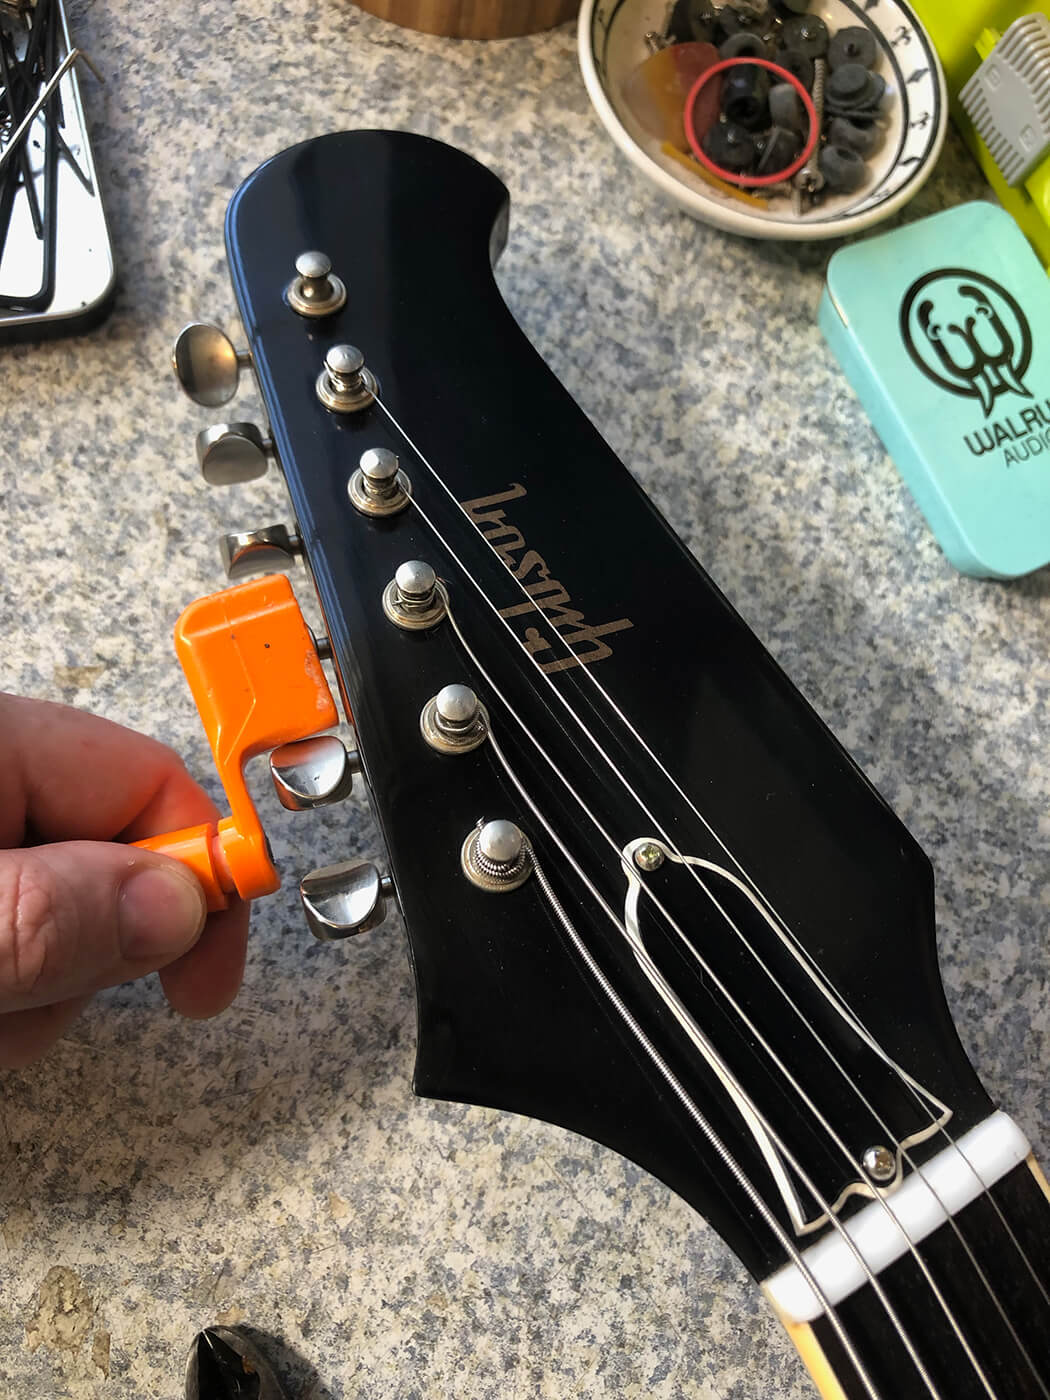
In the case of my new Gibson Trini Lopez reissue, which no doubt you are familiar with at this point, a string which broke at the headstock revealed an underlying issue that I hadn’t yet noticed.
I was in the middle of tracking here at home when it all went south. I’ve been fortunate through this very strange period of history to have plenty of things to do remotely to keep money rolling in while also feeling creatively fulfilled. This means I’ve taken on more guitar repair jobs than I normally expect, and I’ve also had some music to work on with friends such as engineer/producer extraordinaire Brian Frederick, who is also one-half of the electronic pop outfit Subtle Smiles.
Brian’s been good enough to throw projects my way over the past few months, and while I normally have the time to fire back rather quickly, the weeks leading up to this article have been incredibly well-booked, so I was running a bit behind.
I’d been at my desk for only about an hour, and having just nailed down some good tones with the Line 6 Helix, I got about halfway through a solo when my high E string snapped, throwing the trapeze-equipped Trini out of tune and stopping my session dead in its tracks. I could have swapped for another guitar, but with nothing else in the quiver that matched its semi-hollow charm, I texted Brian an apology: “Uhhhh it��’s going to be a few more days, I think. I had an accident.”
As is standard procedure for a broken string, I replayed the snap in my mind, cataloguing every minute detail as if I were Vincent D’Onofrio in Law & Order: Criminal Intent.
The facts
- I was in the middle of a solo
- I was bending the string up a whole step
- I was definitely digging in with the pick
- There was no indication of needing to re-tune prior to the break
- The string broke at the tuner
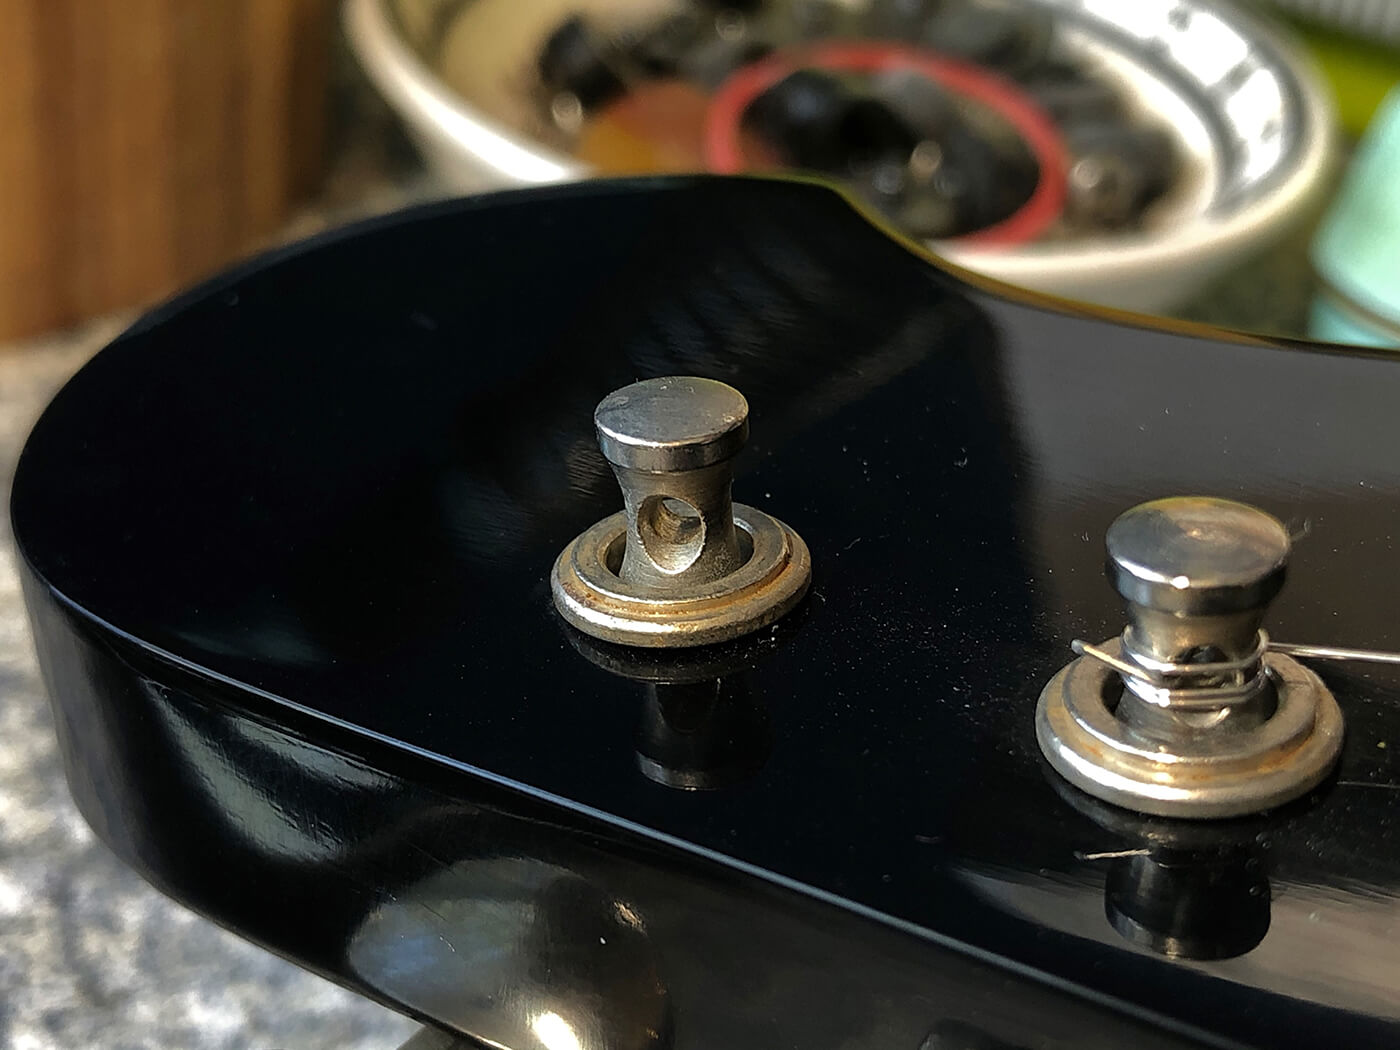
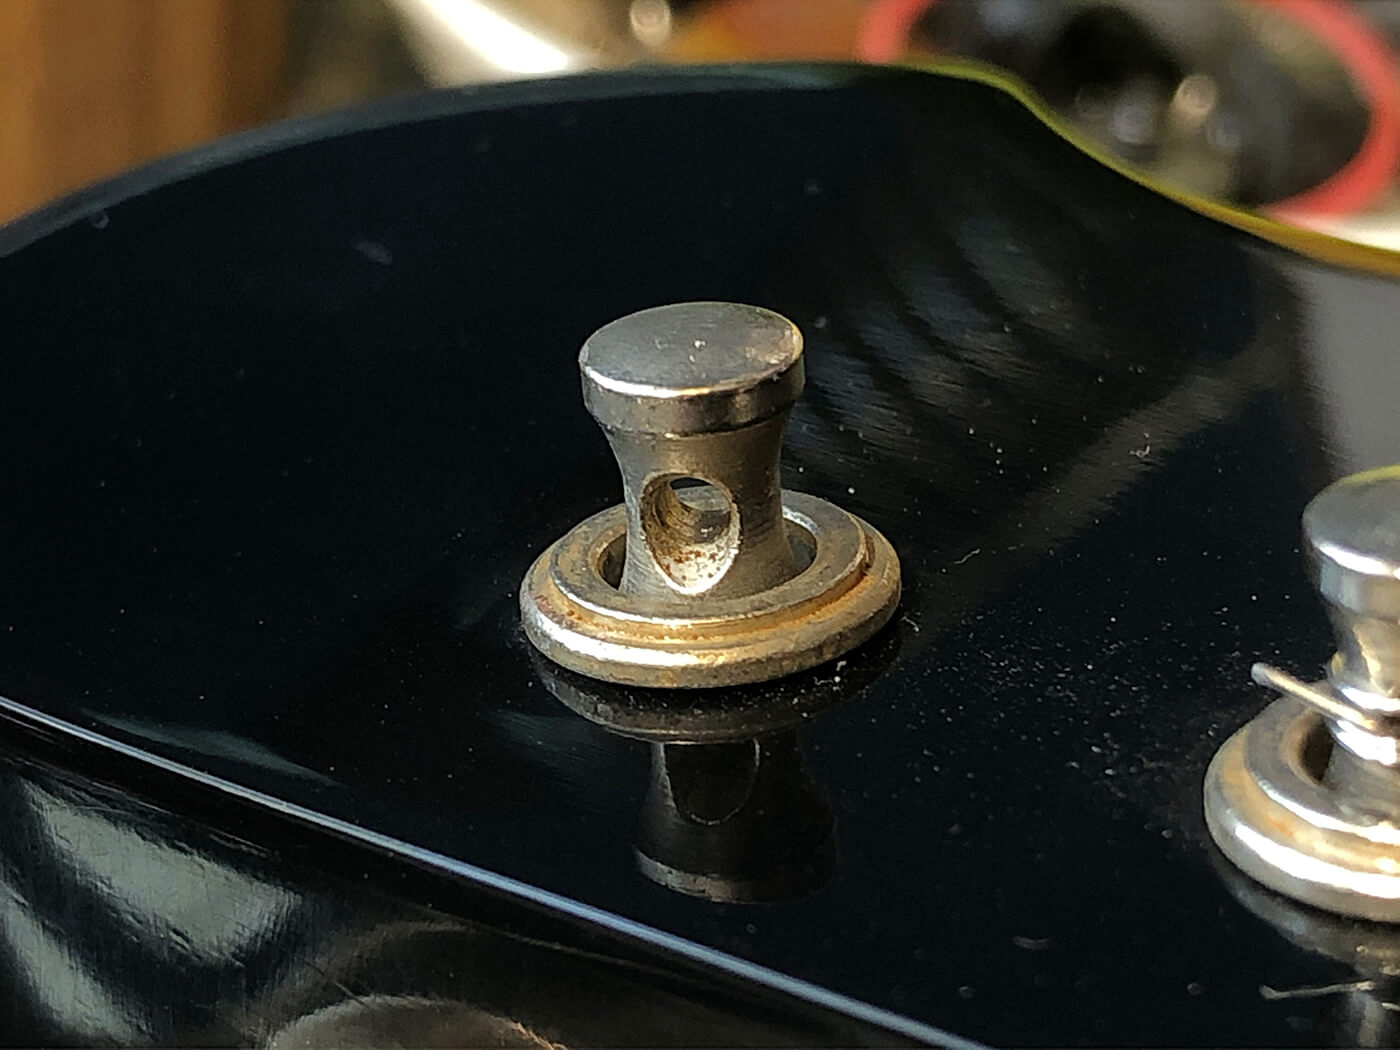
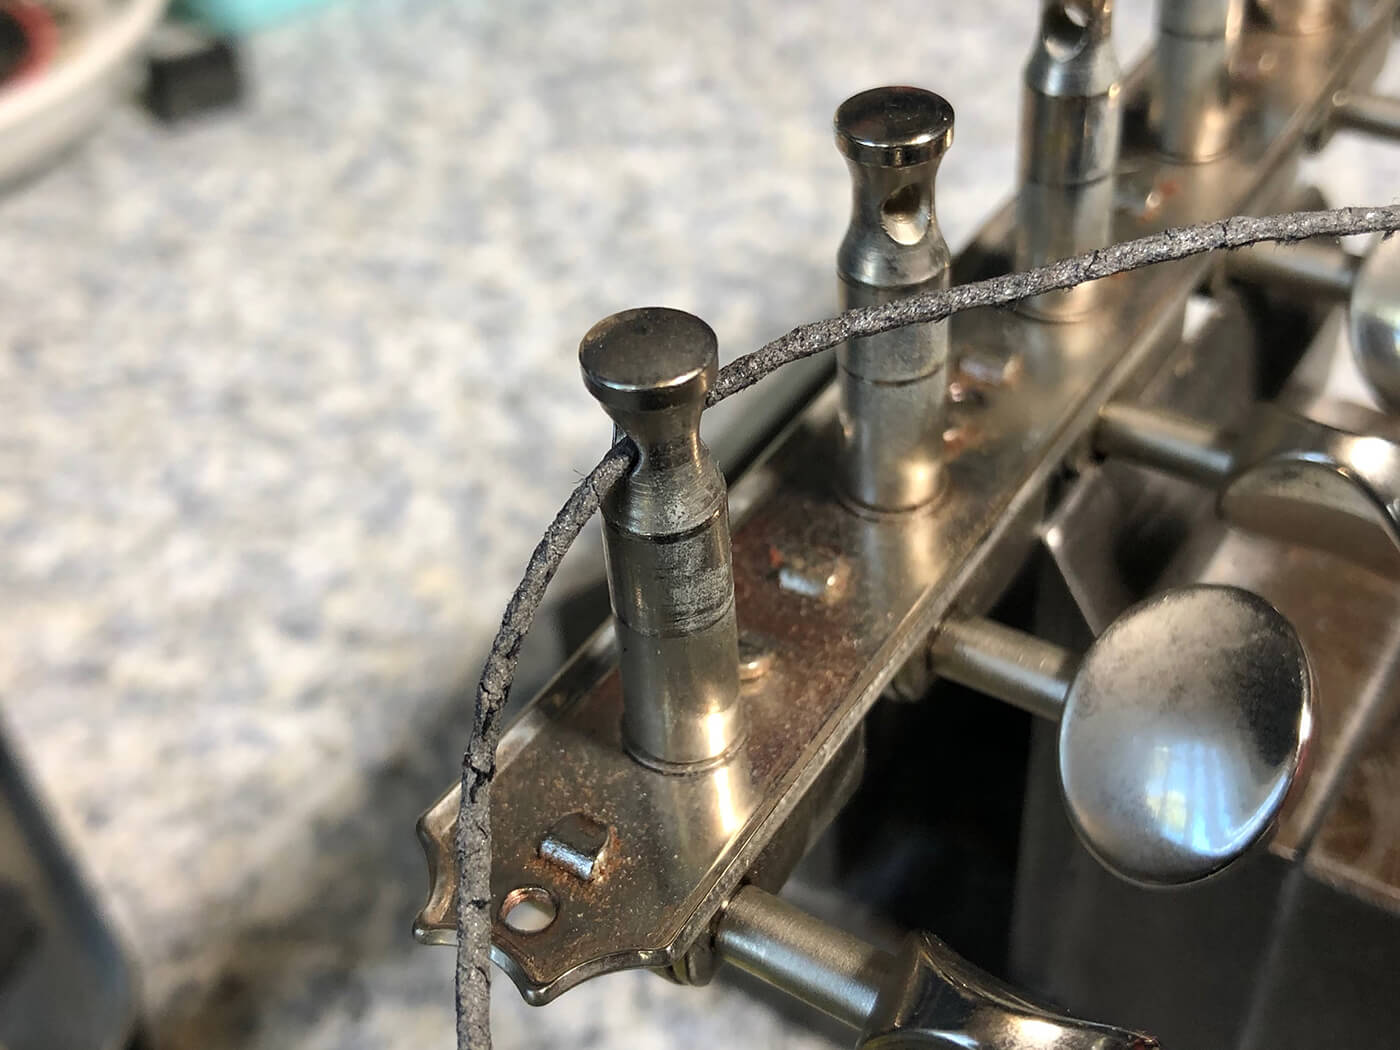
Once that last bit of information bubbled to the surface, I knew to inspect the guitar past the nut for any irregularities. And sure enough, when I reached the tuner the culprit revealed itself. There was the bit of remaining string coiled around the post, and when I pulled it taut with my fingers, it stopped at the pass-through hole. Squinting, I could see sharp edges around the entire perimeter of the hole. This was the true reason for my wiry woes.
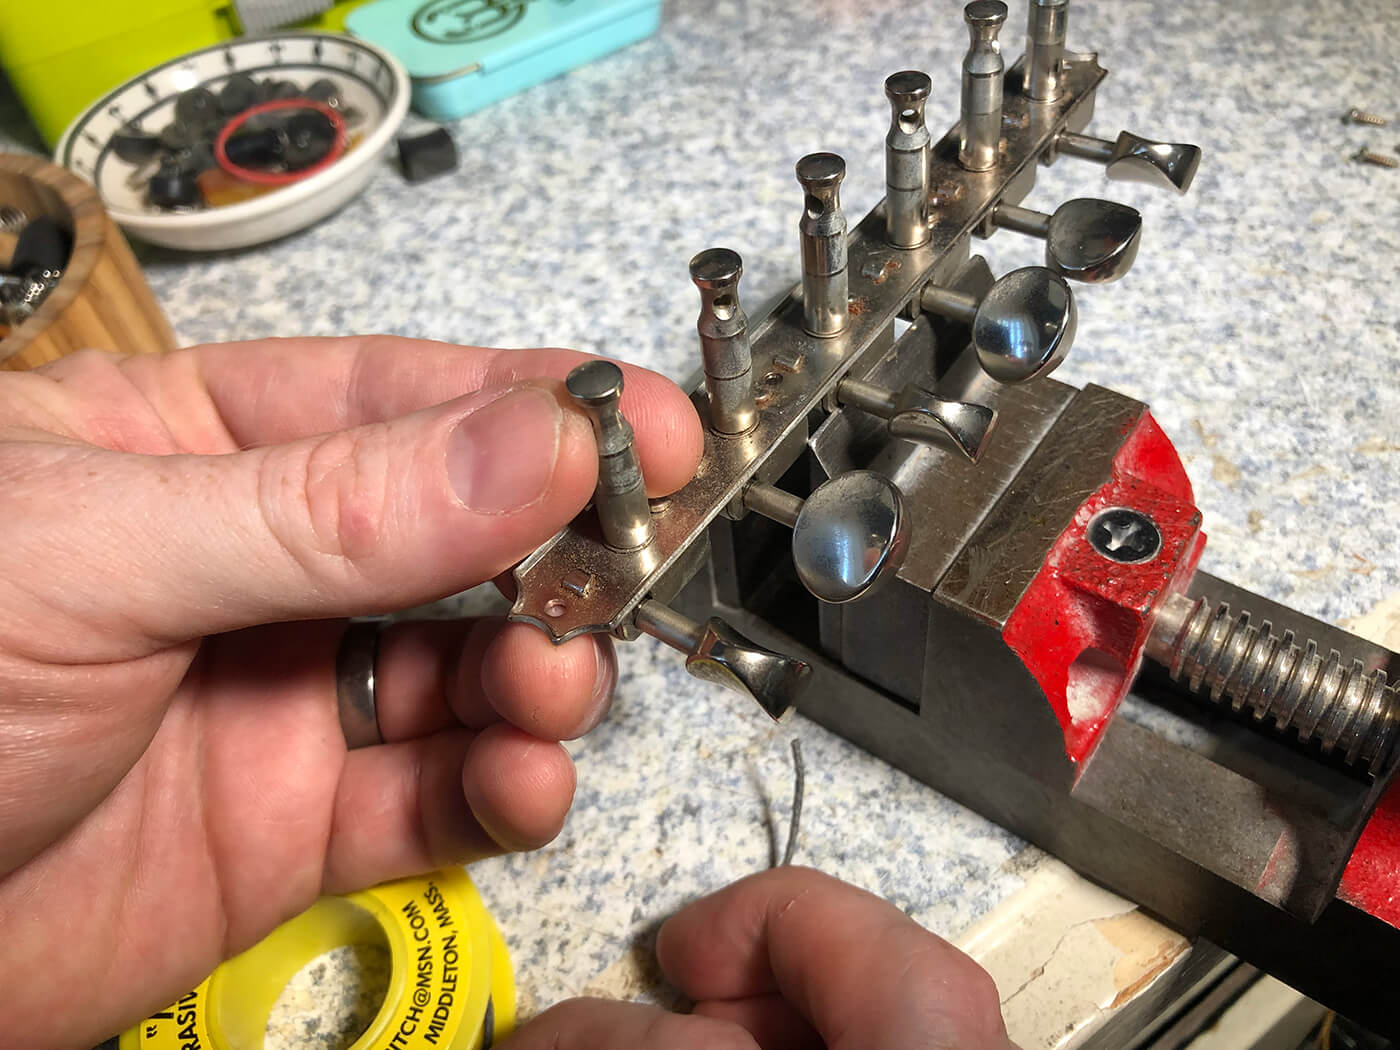
To fix this, I began by detuning and clipping the strings, then removing the tuners from the headstock to minimise any risk of messing up the finish while I worked. Trini Lopez models and non-reverse Firebirds use ‘strip’ tuners, which are the same Kluson-style parts you’d find on a Fender, only mounted to a metal strip that mounts with four screws instead of seven. This alleviates concerns about tuner alignment and makes the job slightly easier, the drawback being ease of replacement in the event that one tuner goes bad.
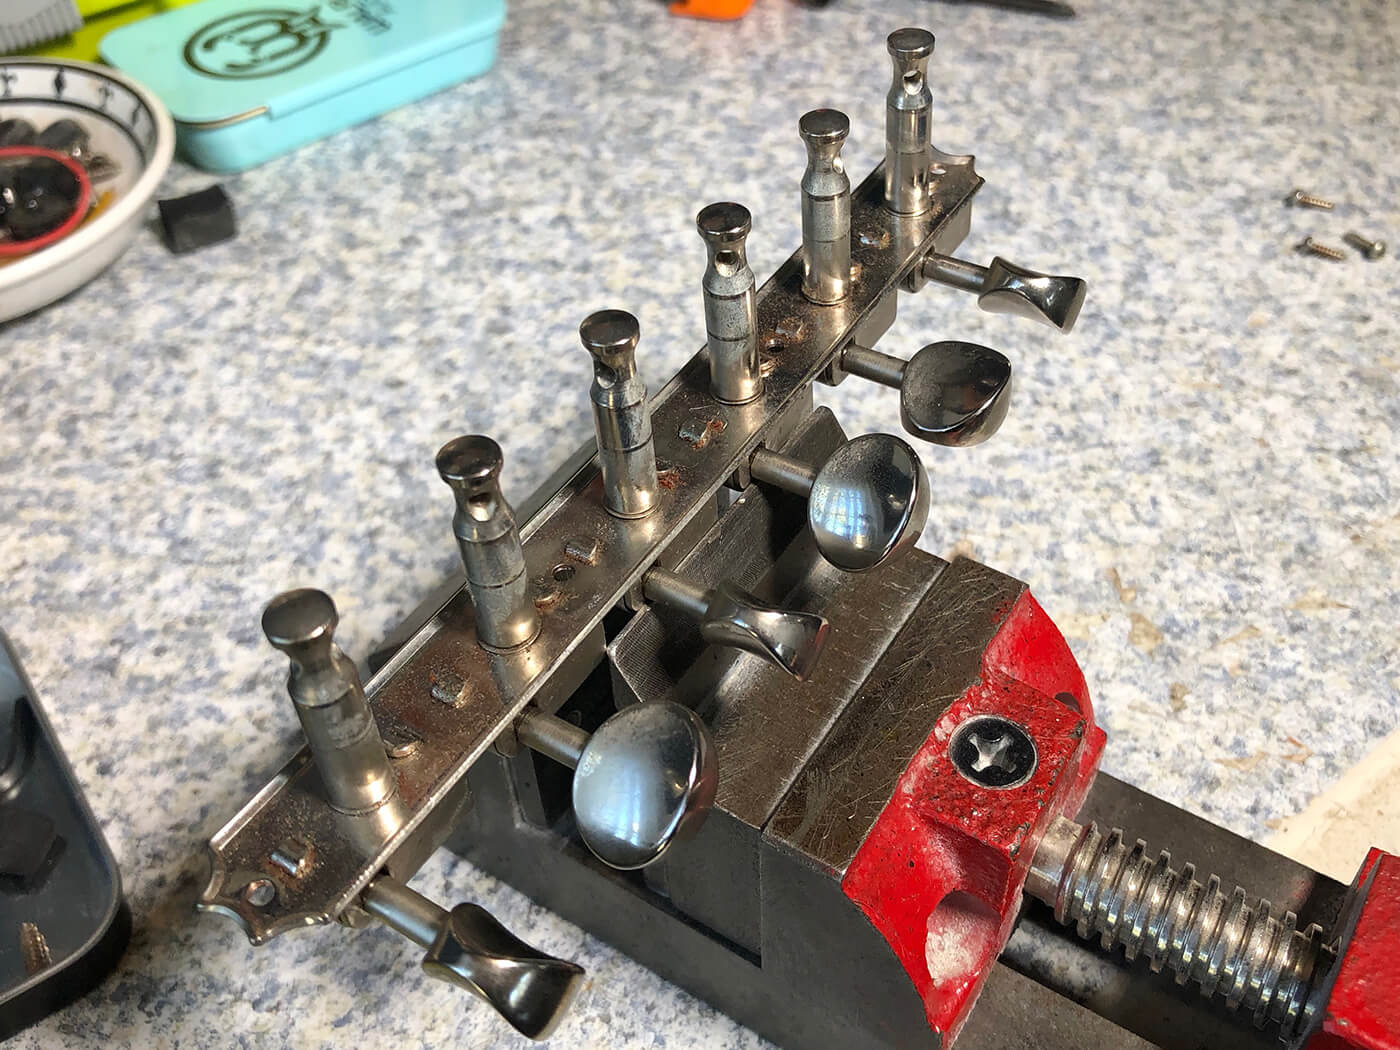
Once I had the tuners free from the headstock, I set the guitar aside and mounted them in my small StewMac vice for inspection. Up close, I could see that all six tuner shafts exhibit the same roughhewn tooling, so for the sake of peace of mind I’d have to work on all six.
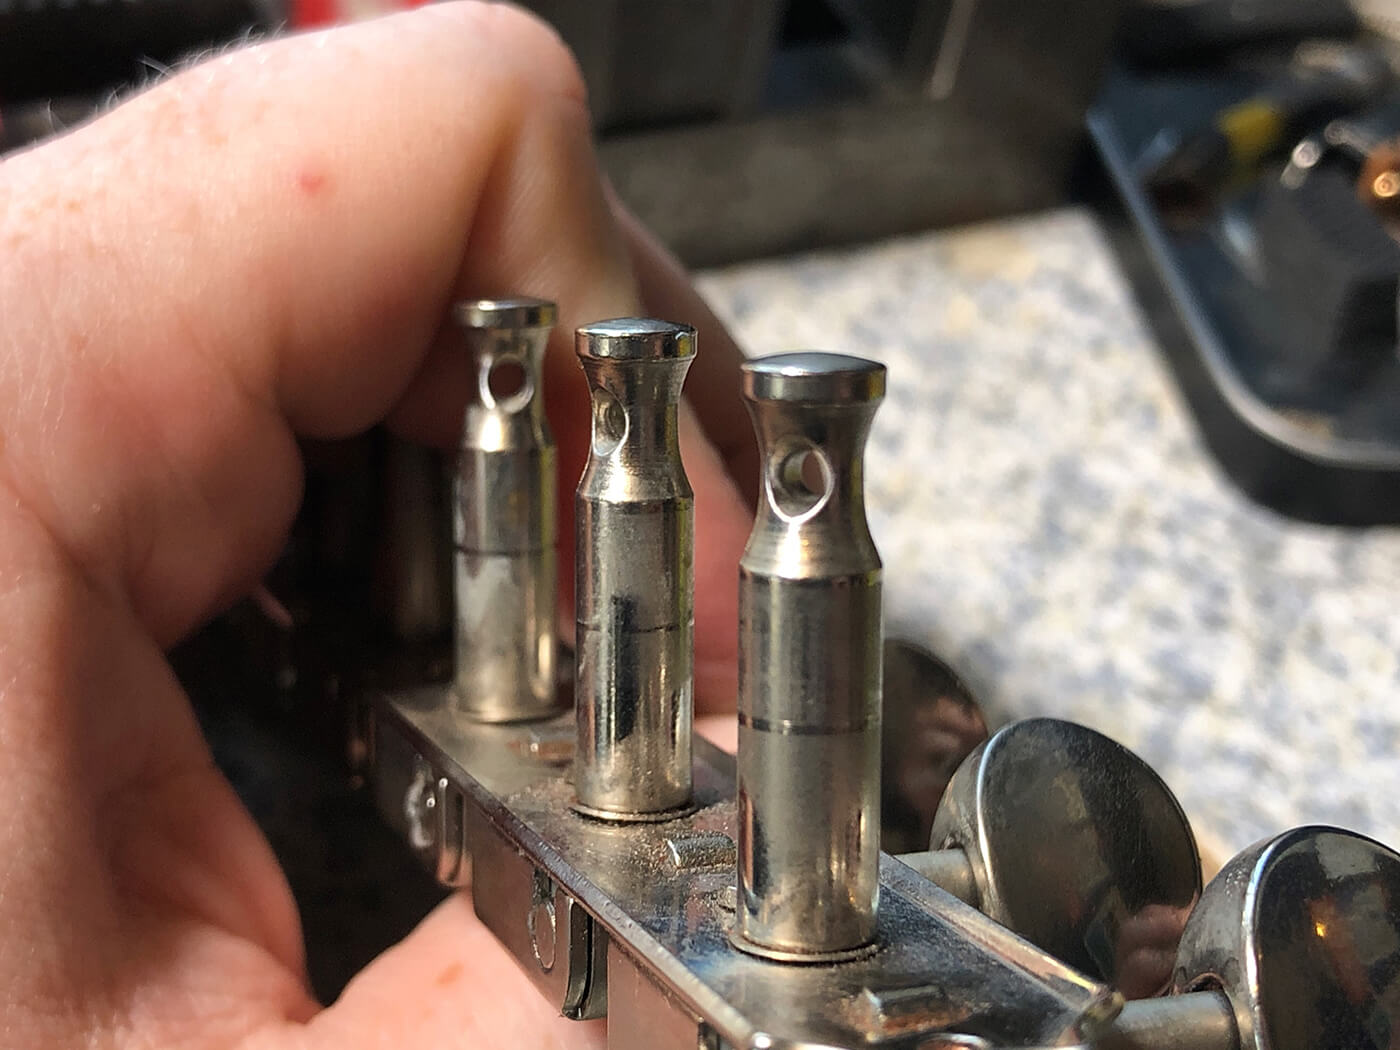
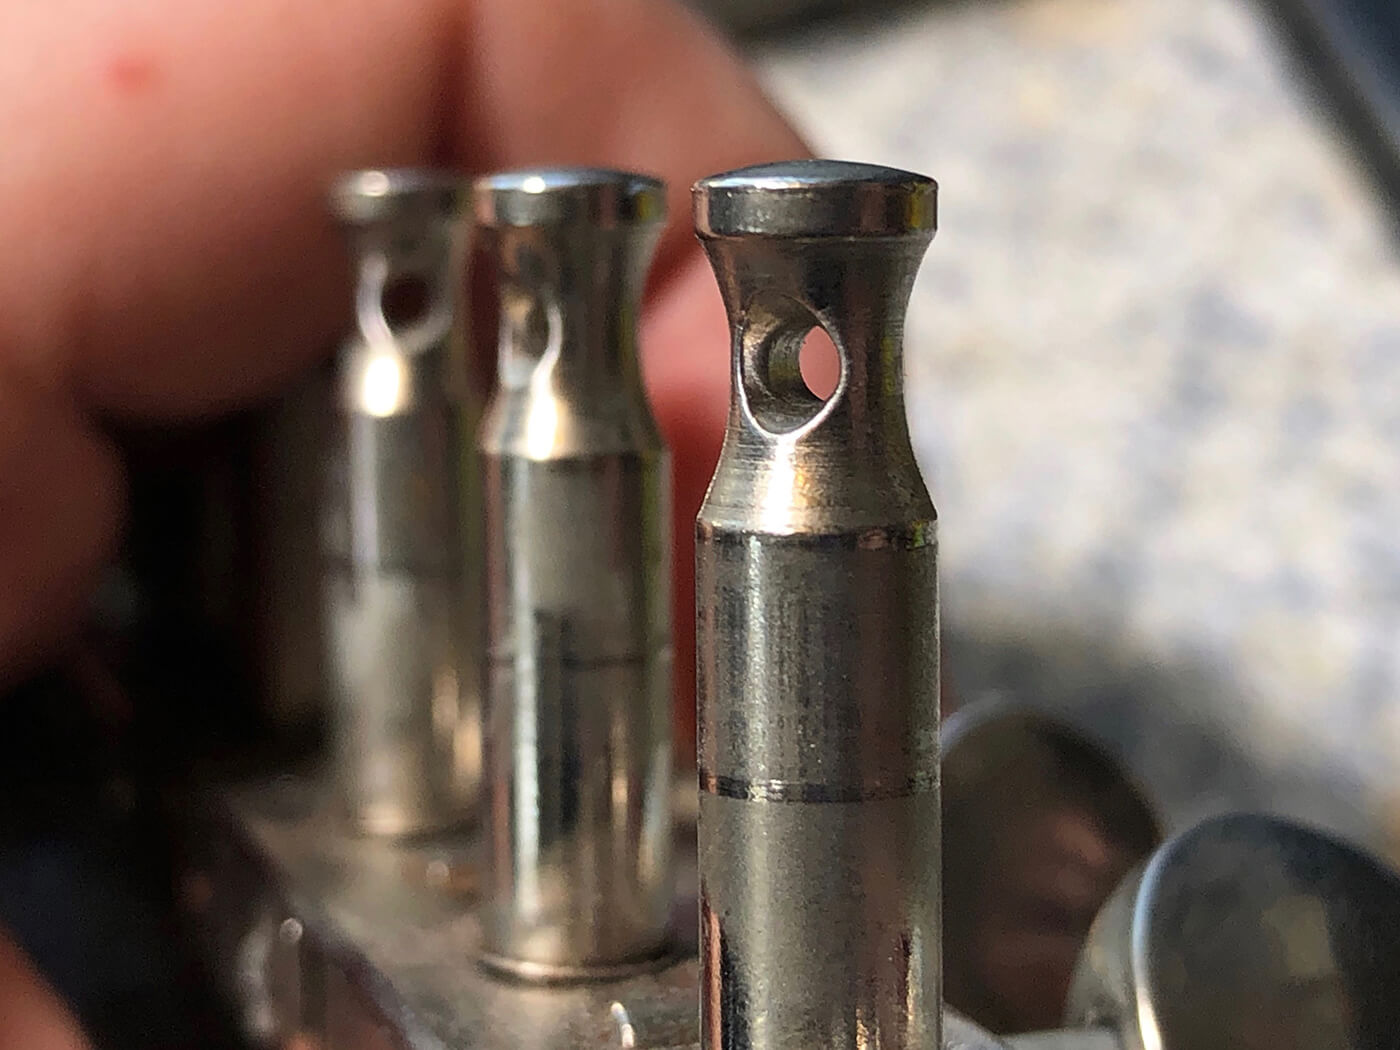
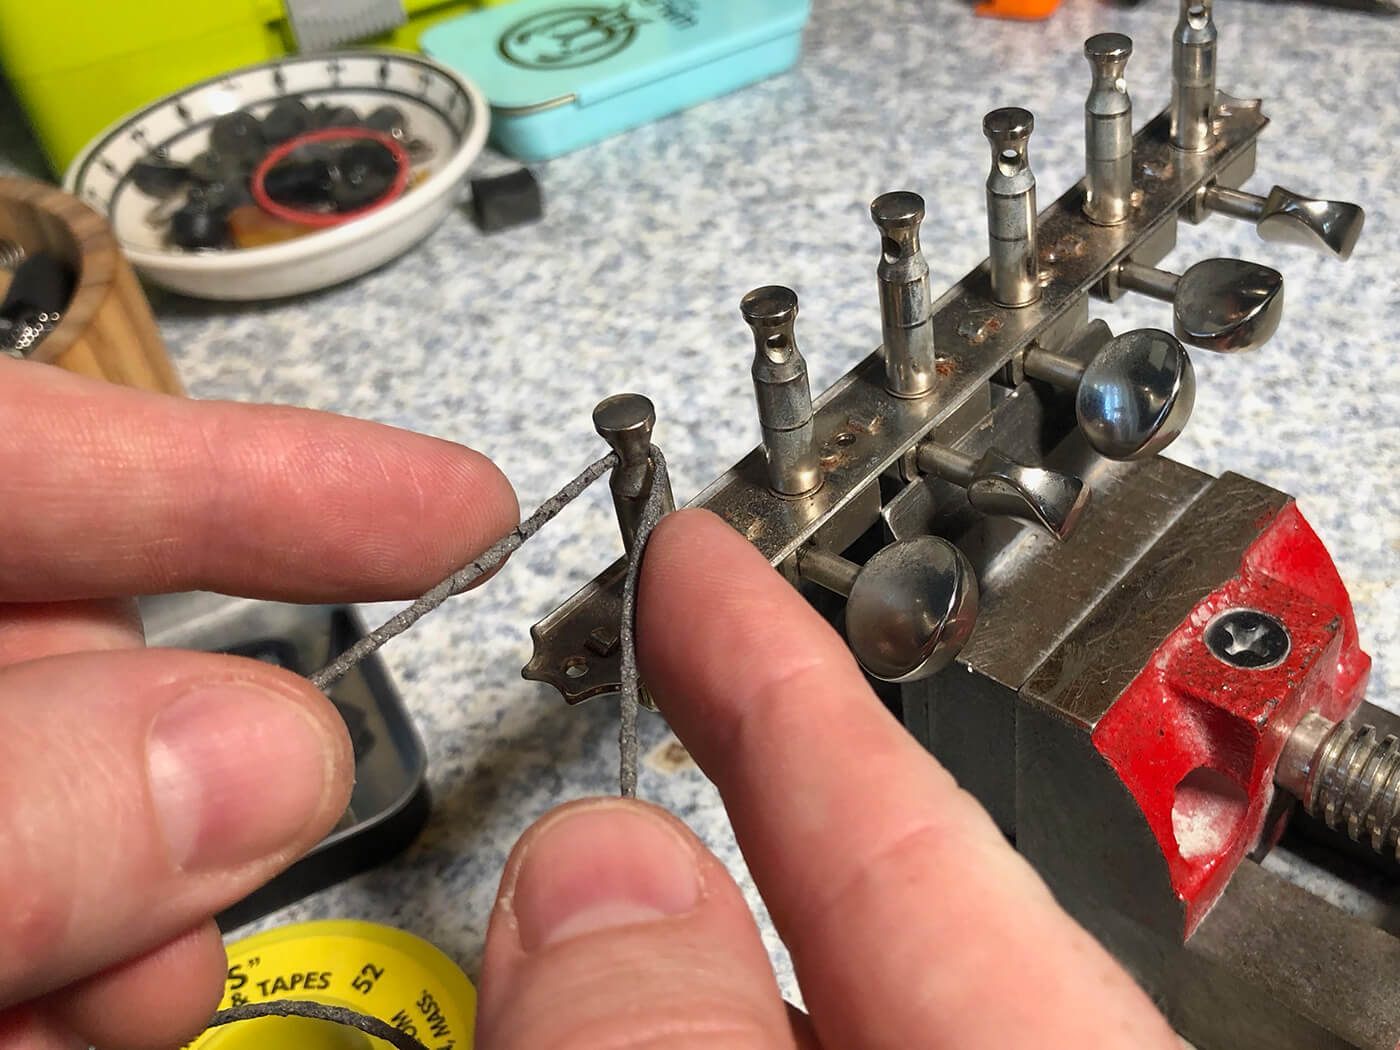
With the tuners held firmly in place, I reached for my trusty roll of Mitchell’s abrasive cord. As I’ve mentioned in a previous instalment of this column, abrasive cord is essentially sandpaper on a rope, perfect for use in hard to reach places and for smoothing out rough edges on guitar hardware. In the case of these tuners, the #52 size is suitable for passing through these tuner shafts and buffing out those sharp edges.
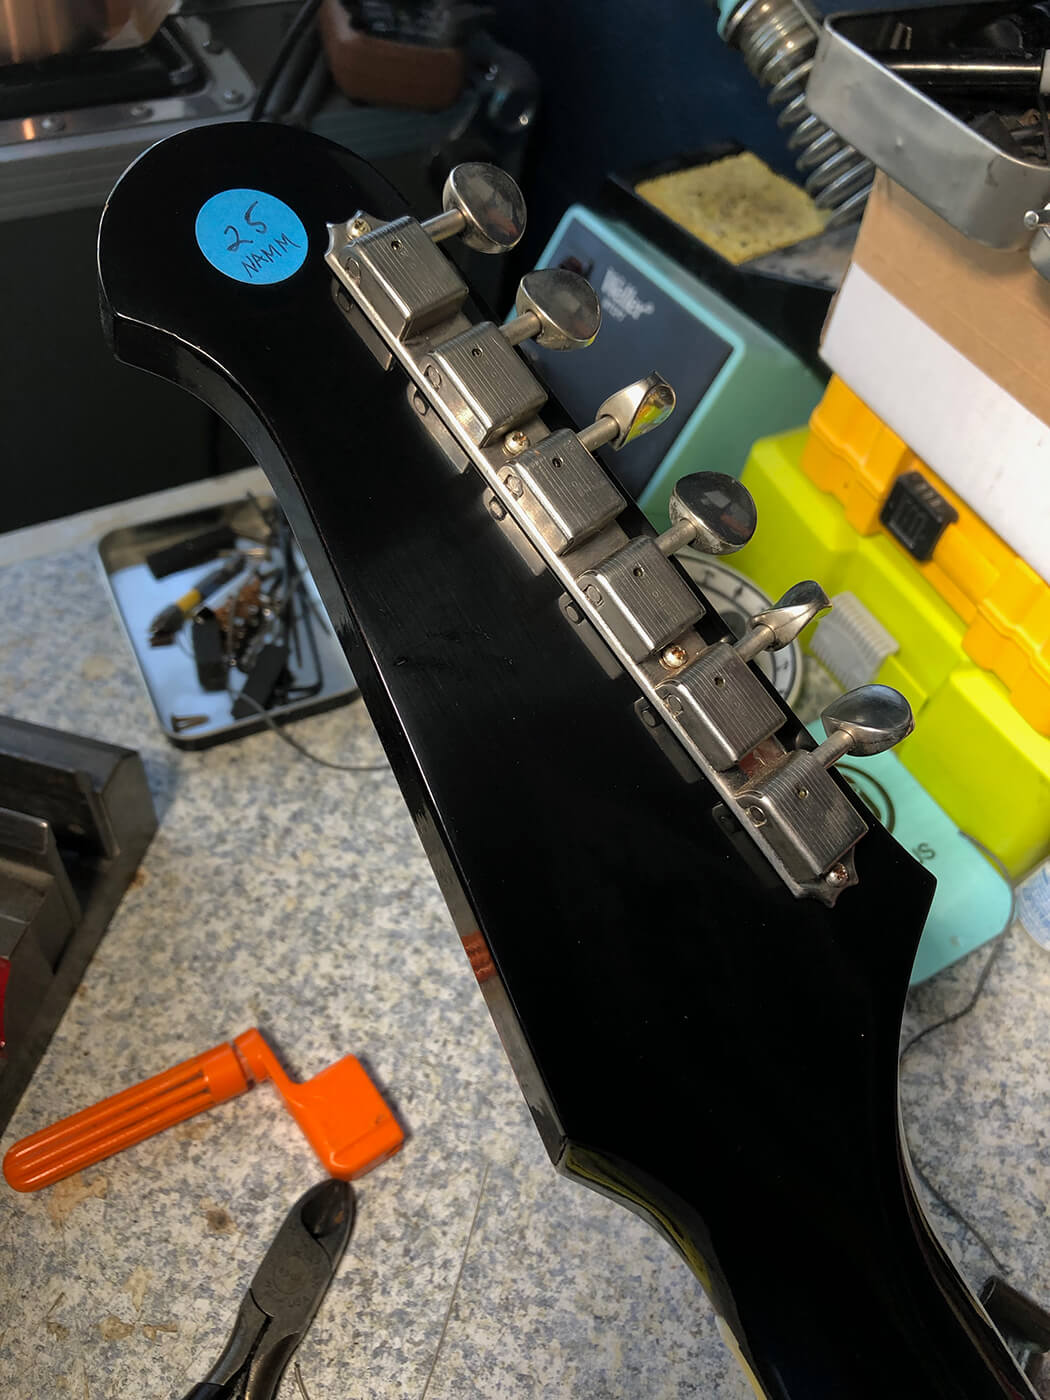
It really is just as simple as threading the tuners and holding a length of cord with both hands, and moving them in a back and forth motion until you’ve rounded off those harsh corners. Rinse and repeat for the other five tuners, check your work to make sure you’ve done the job well, then reinstall the tuners and string as normal.
This is the kind of job that you can really only be sure you’ve done correctly after some time has passed, the main benefit being increased string longevity. Once again, the guitar will let me know if it needs further attention, so until then I’ll just have to get back to recording and see if I can make it through that solo.
Follow Mike on Instagram @puisheen.