Related Tags
Tech Talk: How to fix a Jazzmaster vibrato
Vibrato making an annoying ‘clunk’ when the arm is depressed? Here’s how to fix it
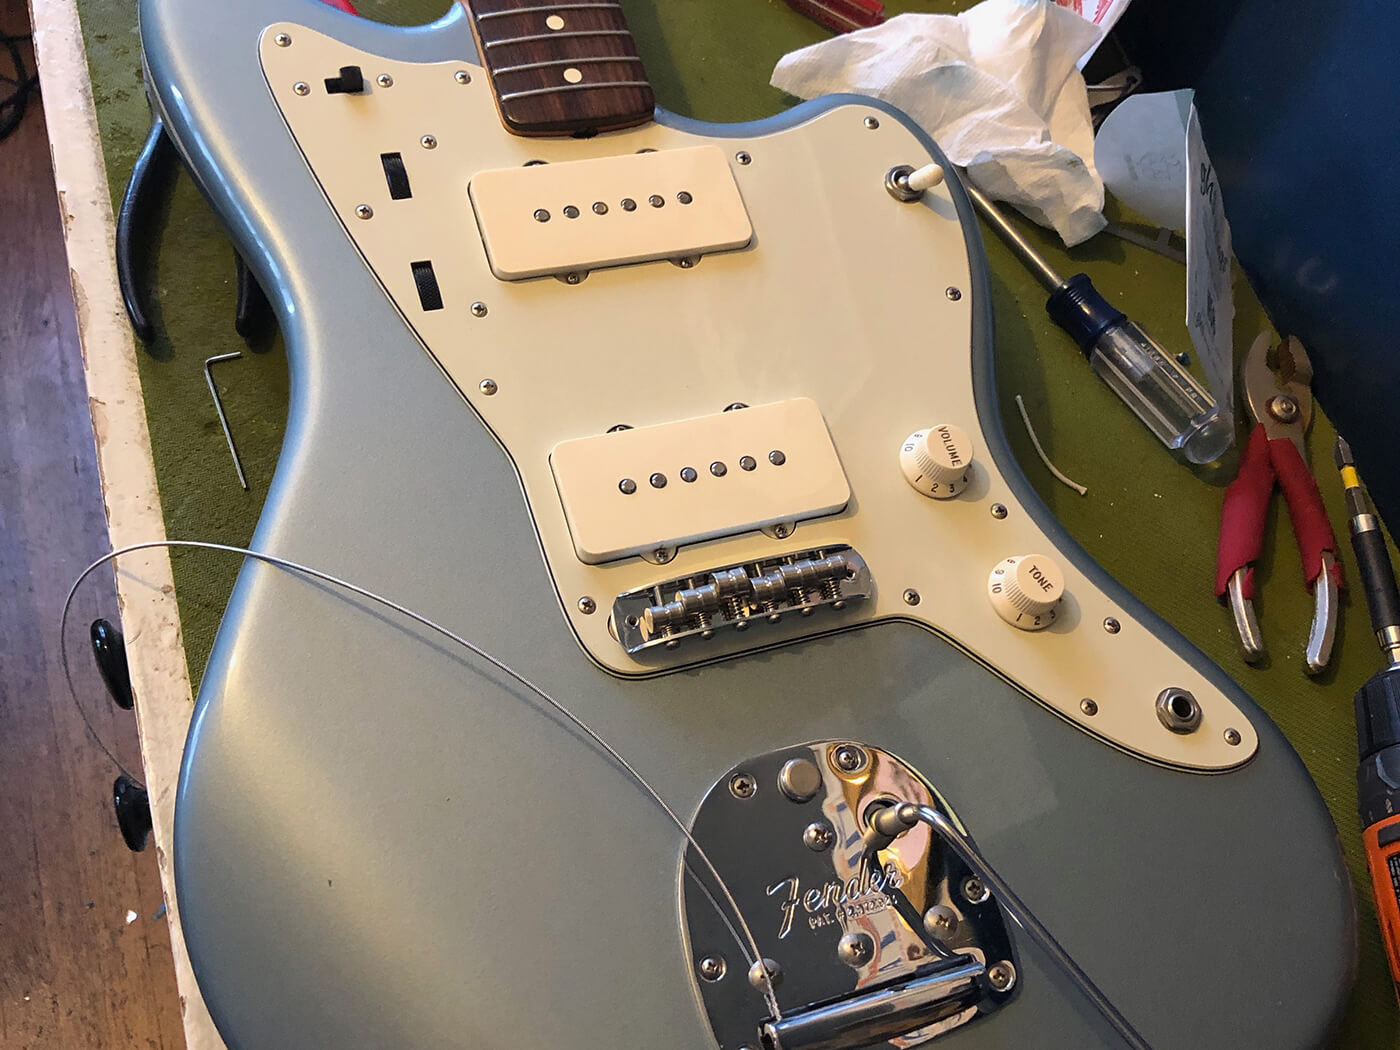
Blue Ice Metallic is one of the rarer, more beautiful finishes in the Fender Custom Color chart. All images: Michael James Adams
“Another day, another Jazzmaster.” As true a maxim around these parts as any other. Even truer maybe, given the fact that at this point in my career, I really only say yes to working on offset guitars. That’s a choice I made a long time ago, and while I do get the occasional Les Paul or Telecaster, my heart belongs to the underdogs of the Fender catalogue.
Today’s task was tracking down a few errant wiring faults on this lovely, early Fender American Vintage Jazzmaster in Blue Ice Metallic, all of which went just fine. The job was nearly complete when I stumbled upon an unrelated issue the owner hadn’t mentioned: when depressed fully, the vibrato settled with a loud, metallic ‘clunk’. Well, that’s not ideal is it?

It’s entirely believable that the owner never realised this issue existed at all, given the fact that he uses the vibrato in a rather subtle manner. However, the problem revealed itself the very moment I tried to use it for plunging pitch bends and icy stabs of quick warble. So, what’s the story here?
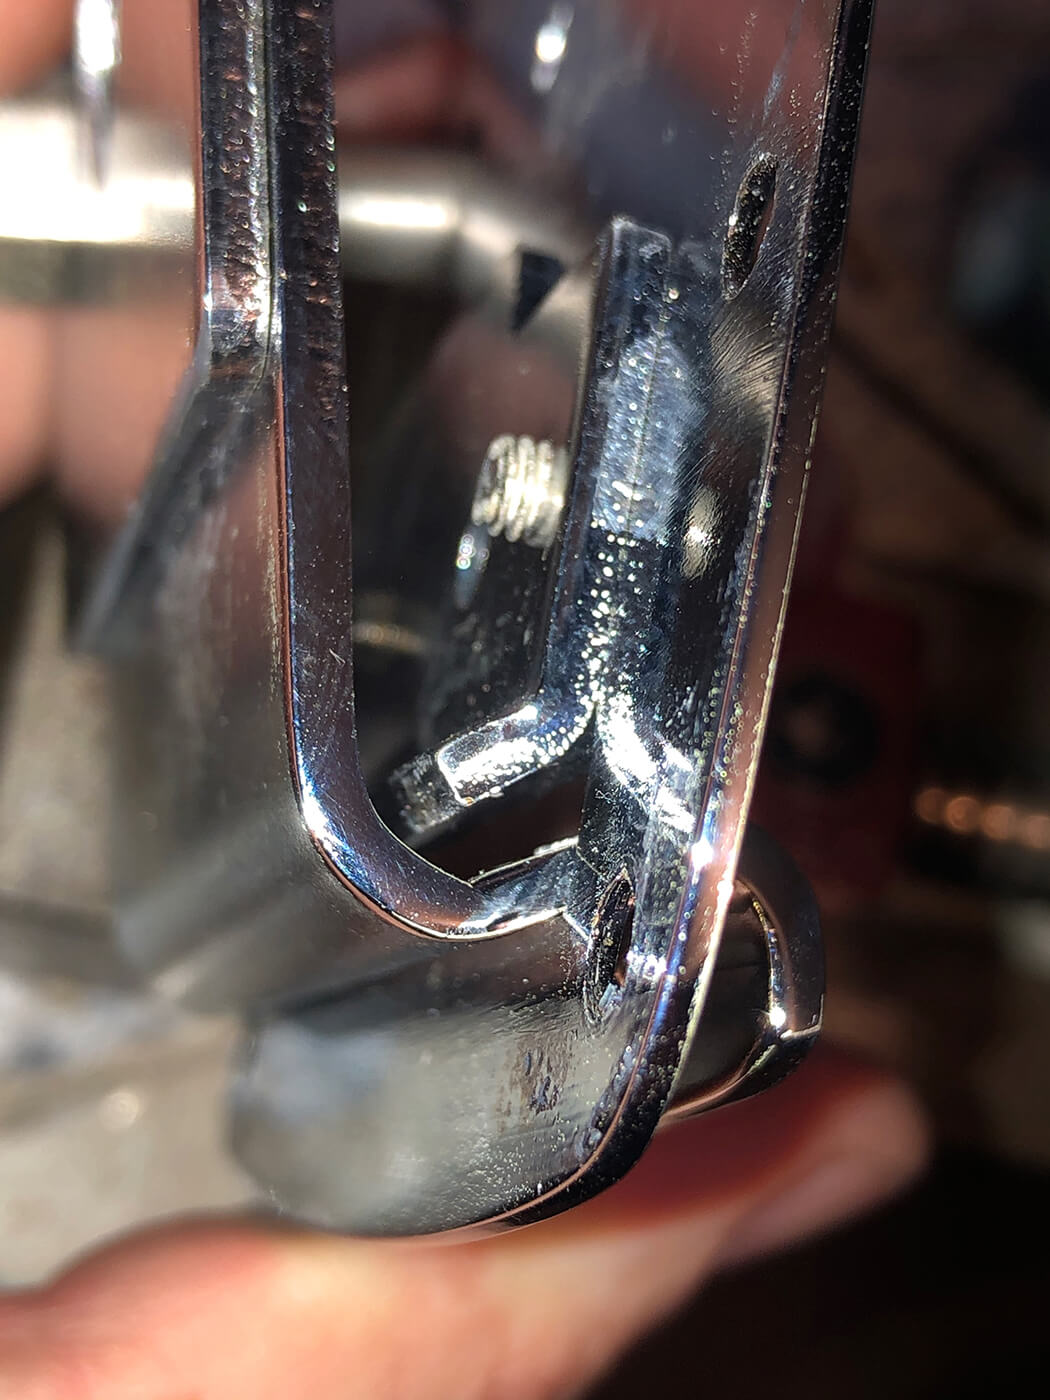
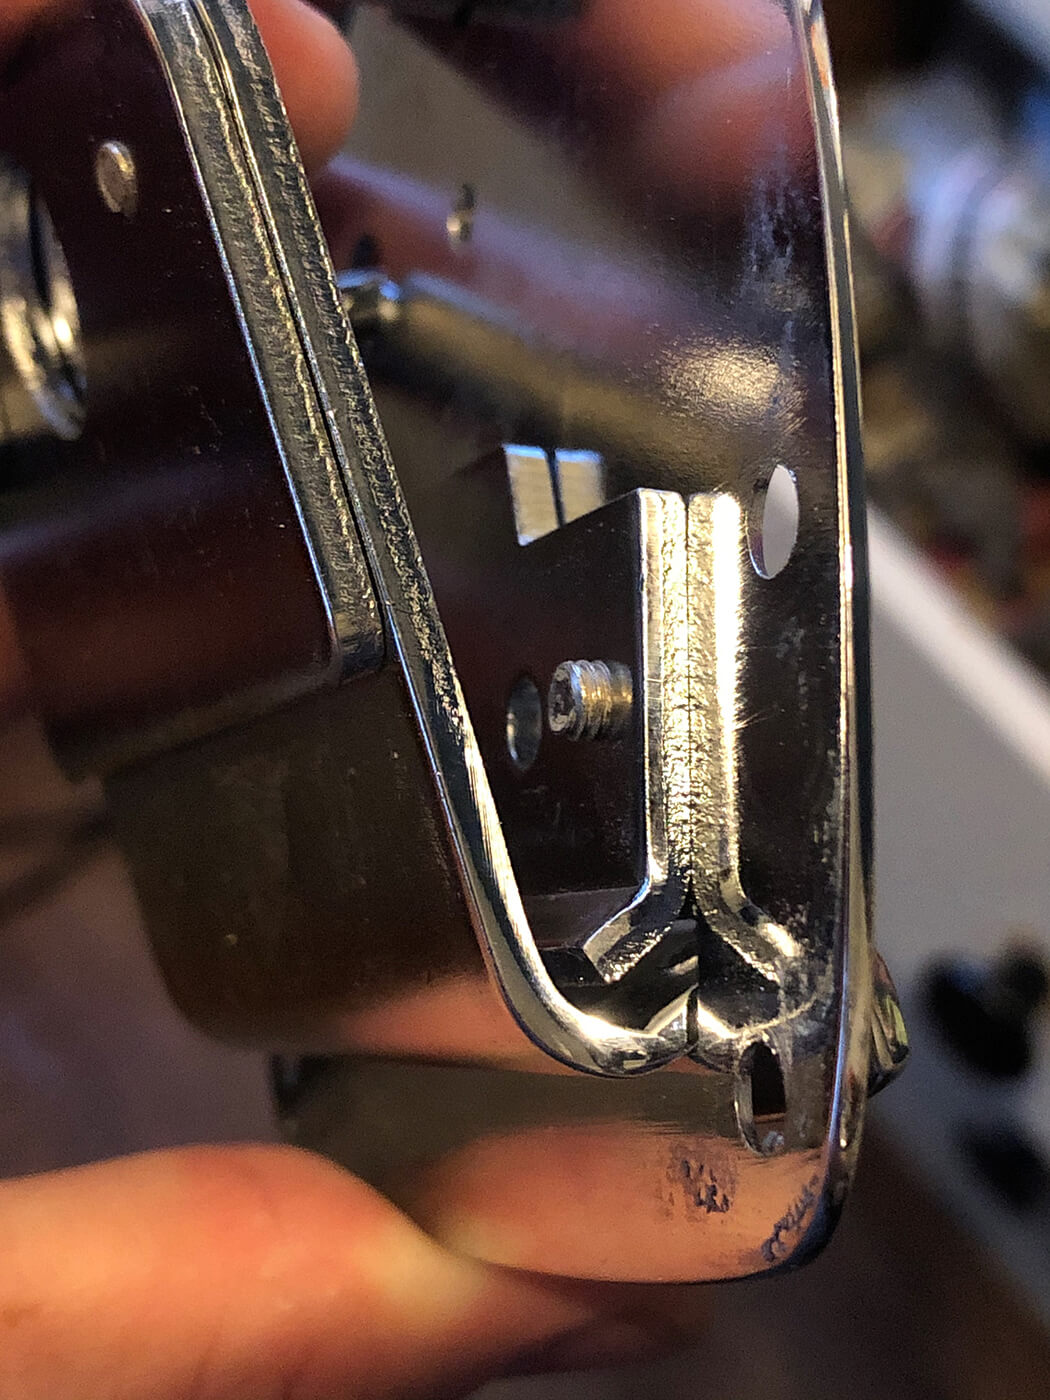
There’s a crucial point of contact between the bent, stationary metal pivot plate and the string anchor plate, which is the part of the vibrato that actually moves when you depress the arm. Under normal circumstances, that fit is tight and sharp, sort of like a knife edge. However, if the pivot plate is malformed or worn down from years of use, the edges become dull and the string anchor has a tendency to shift.
Now, this problem certainly crops up more frequently with the more affordable import vibratos, a trade-off in quality compared with the more upmarket versions available from Fender, Mastery, and Descendant. Still, we’re working with an AVRI here, and yes, it can even happen to them.
To address this issue, all that’s needed is some reshaping on the two protruding legs of the anchor plate, a relatively simple procedure that anybody can do at home provided they have a screwdriver, some gritty sandpaper, a level surface on which to work. And yes, this works on every make of vibrato from the $20 Allparts special up to the American Vintage unit.
How it’s done
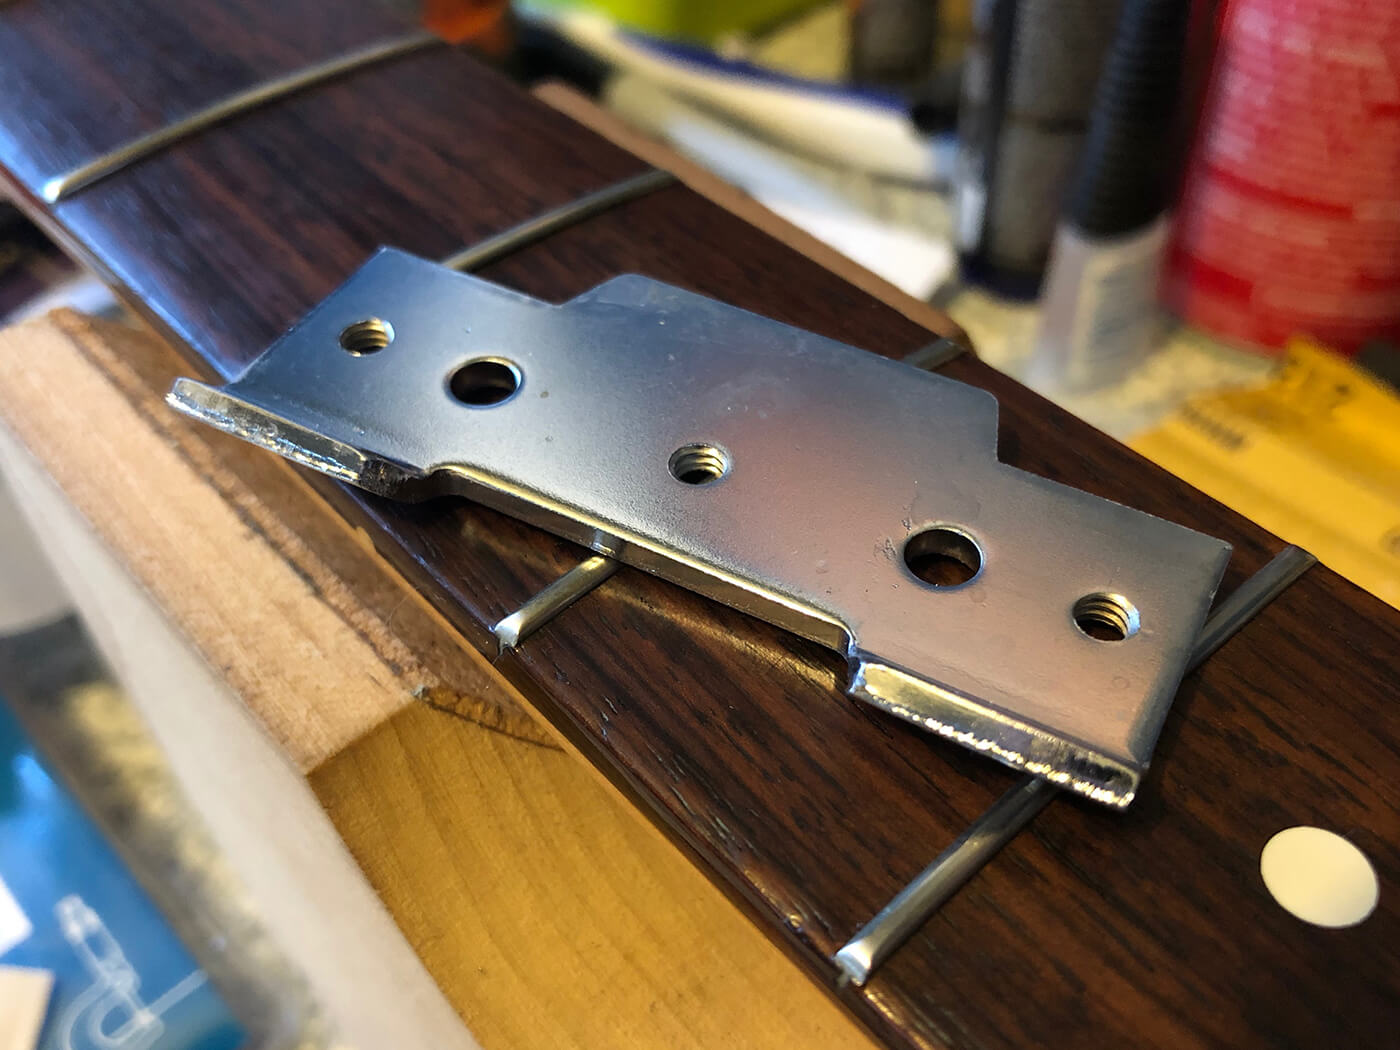
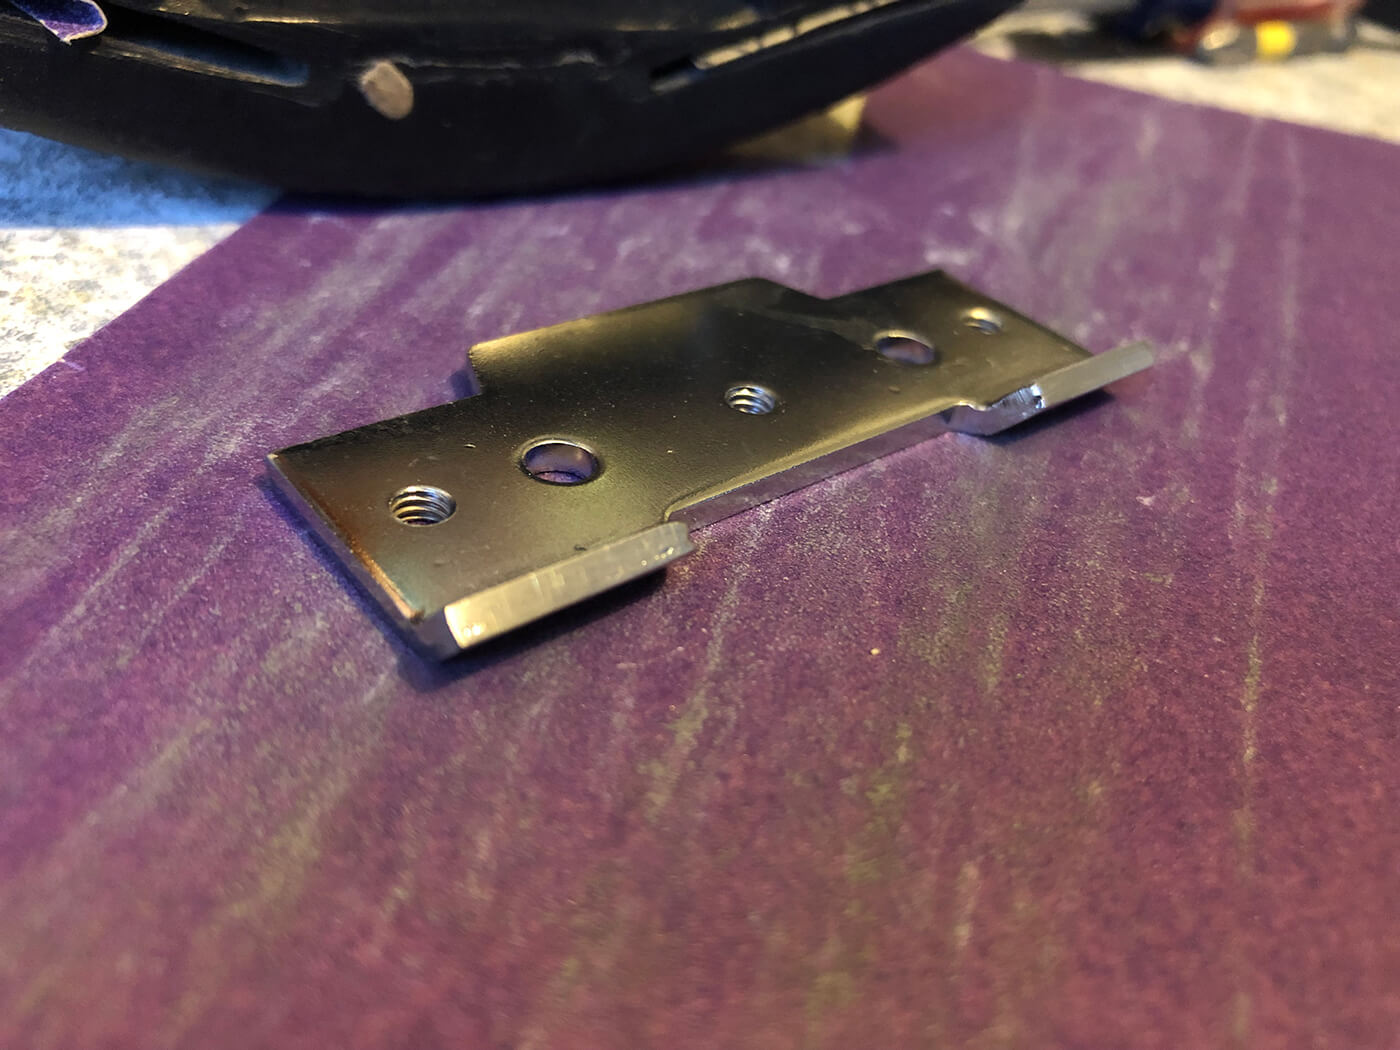
First, I remove the vibrato from the body via its six mounting screws, then dismantle the vibrato by unscrewing the spring and plunger from the tension adjustment bolt. After that, the string anchor plate slides out from its slot in the body plate, and from there, all that’s left are the three bolts which secure the pivot plate to the body plate.
With the pivot plate separated, we can now see more easily how poorly formed this particular plate really is, with a sloppy surface on the ends of its legs. Close-up we can see rounded corners and what looks like an overflow from casting. This inconsistent surface means the anchor plate never seats properly, causing the mechanical clunk I mentioned earlier.
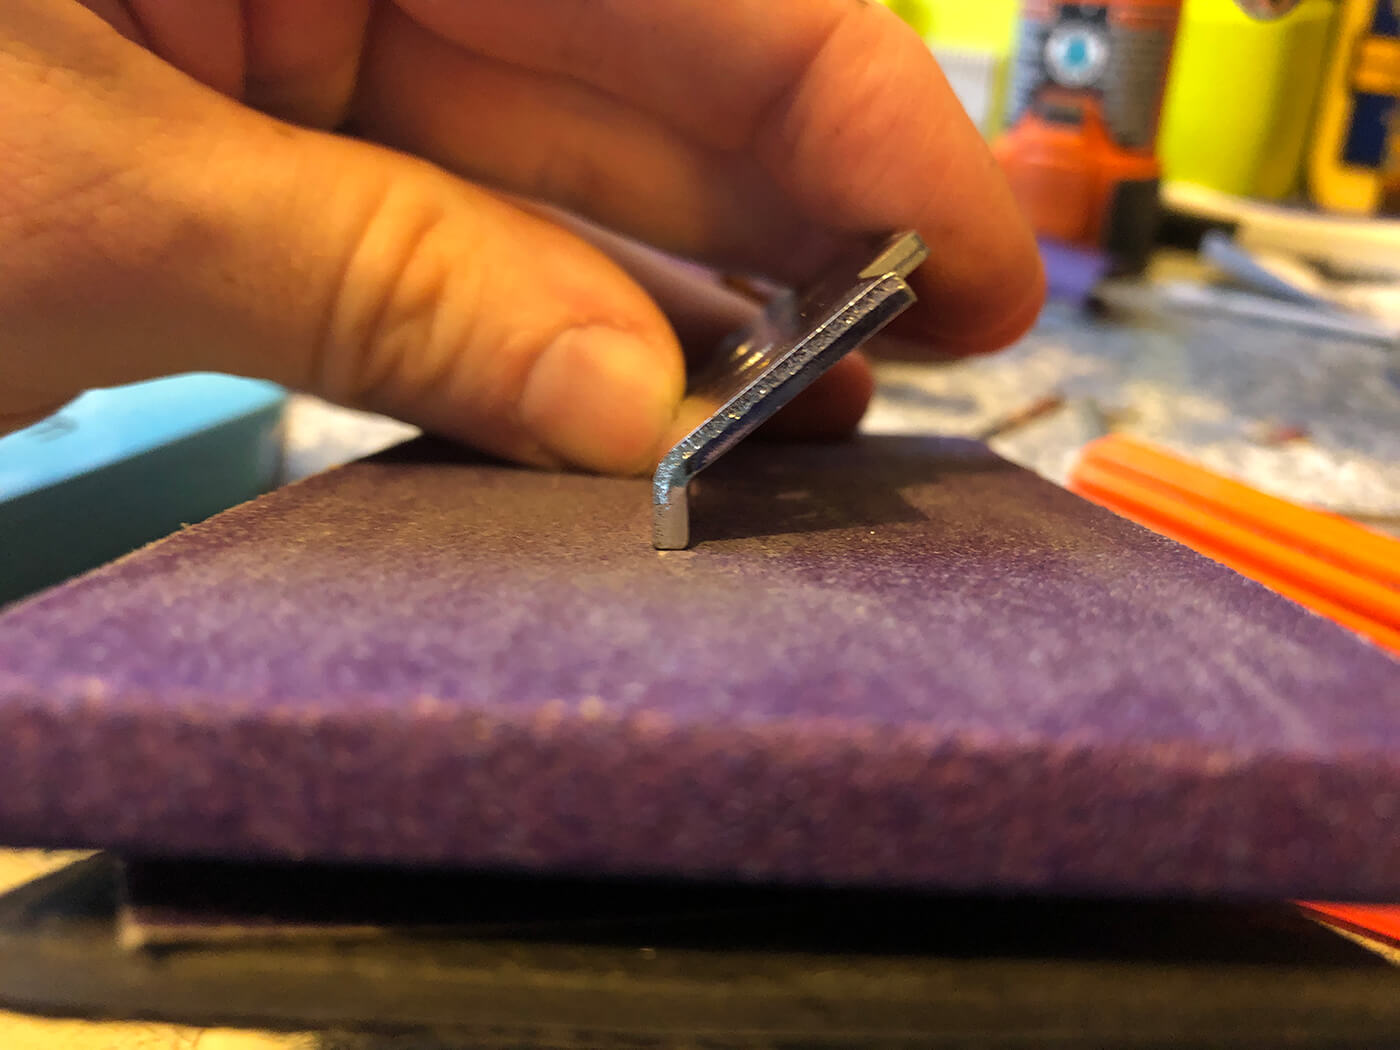
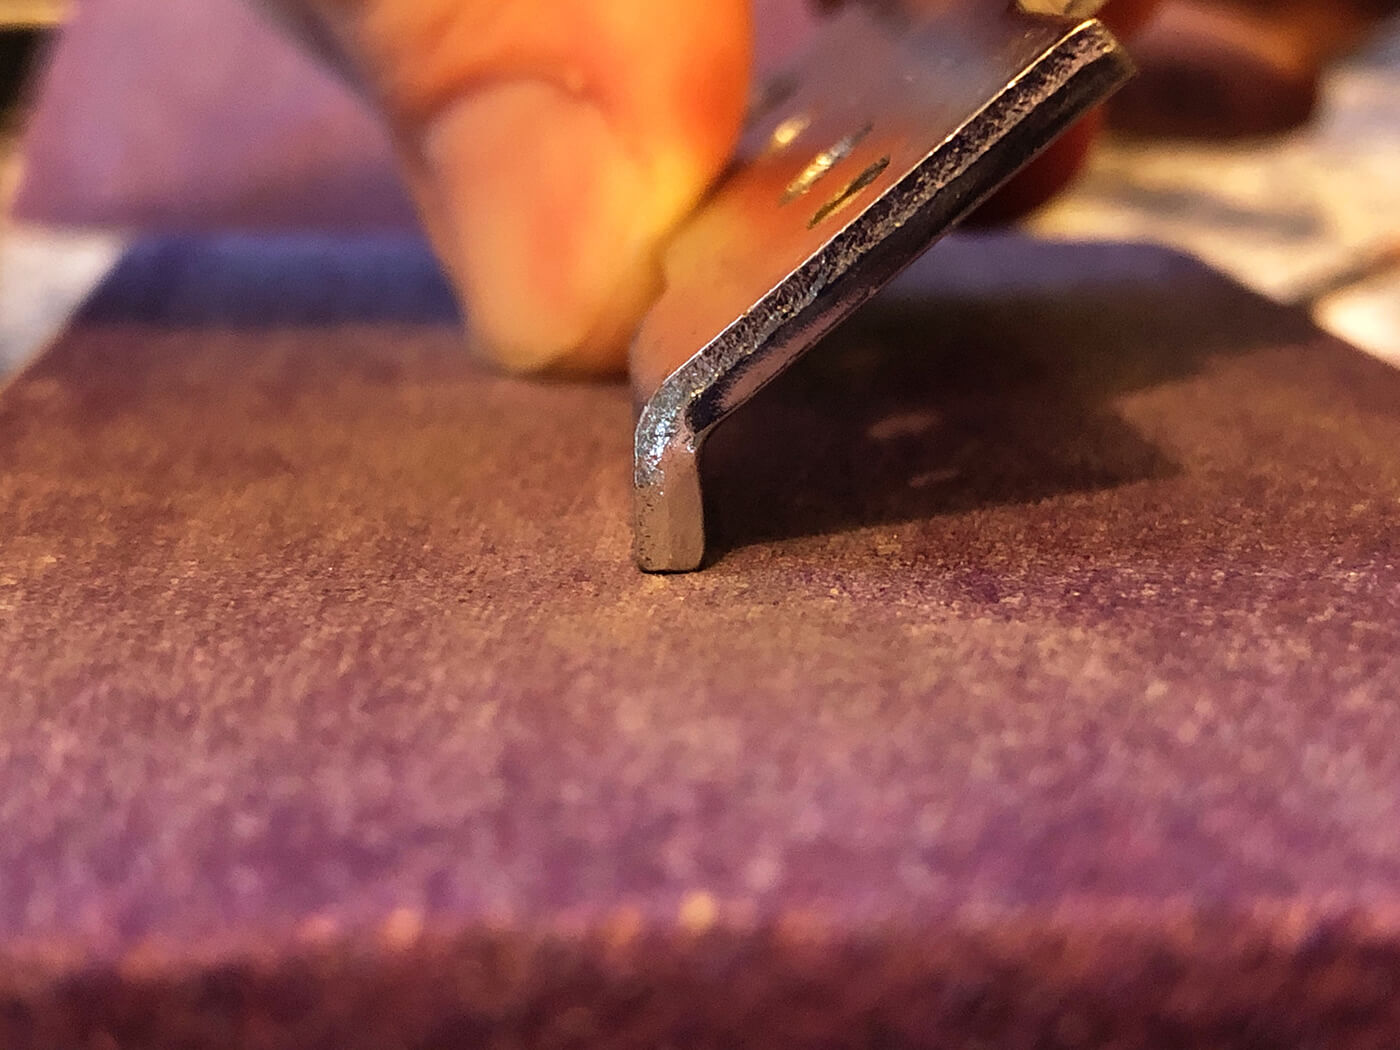
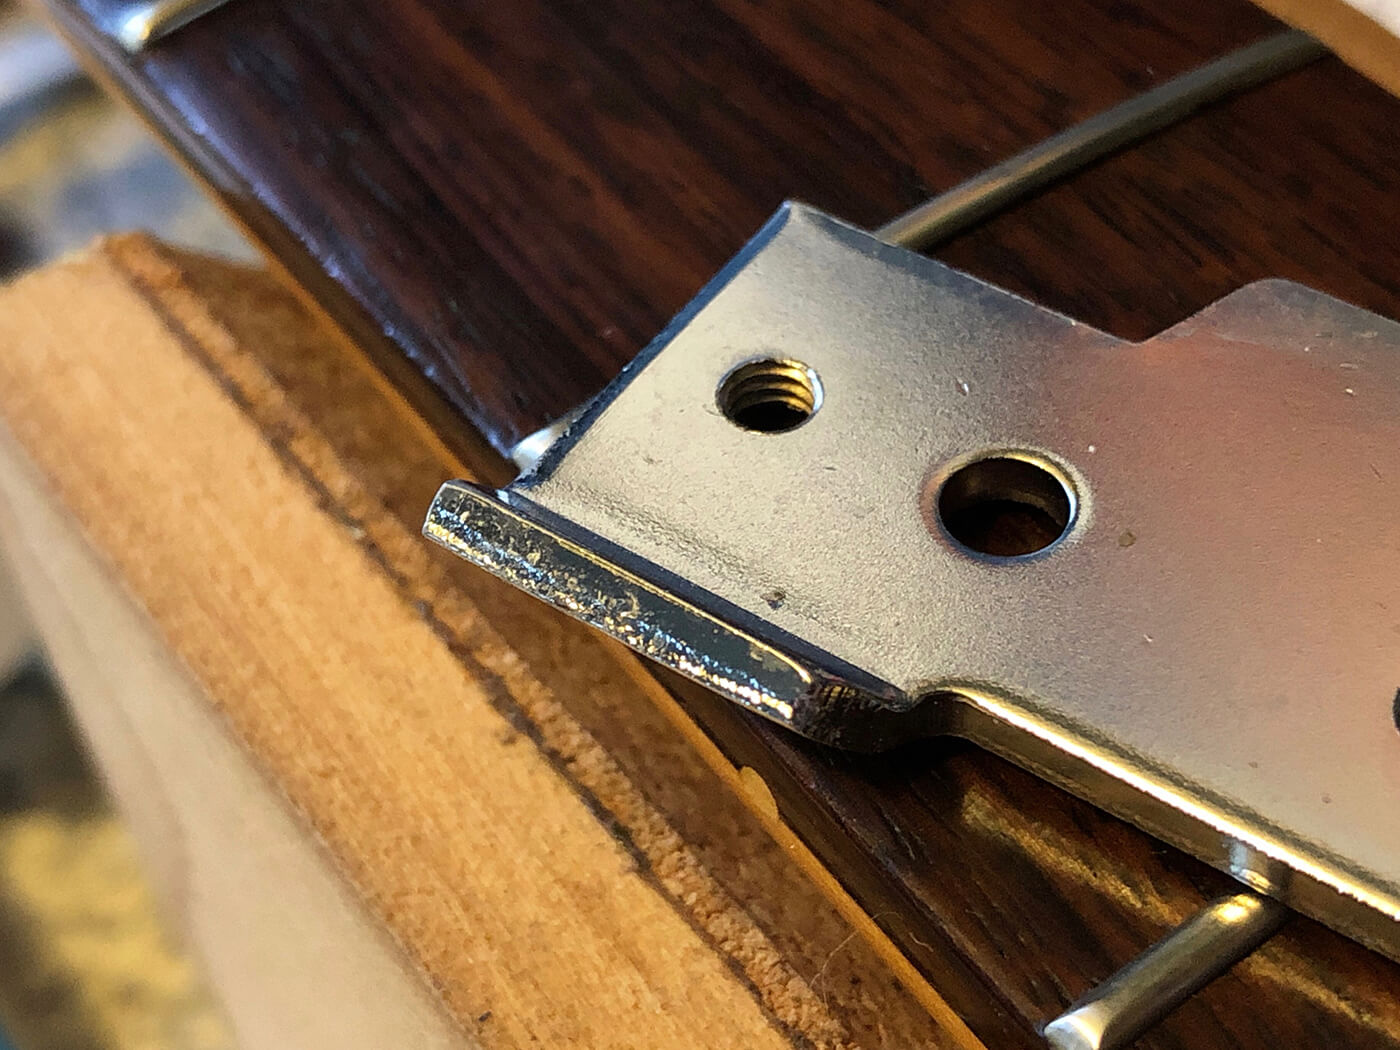
With the inspection of the pivot plate finished, we’re going to grind down those rough-hewn edges for a flush, sharp surface. Here, I’ve placed a sheet of 120-grit sandpaper flat on my bench, and holding the plate firmly in my hand, working the piece back and forth with moderate pressure and making sure to keep the legs relatively upright as I go.
If you have access to a belt sander, this can be over in a few moments, but, working by hand, the operation takes around five minutes of careful sanding, checking the surface, and sanding some more. And while precision is great, the important bit is smoothing out the imperfections, not necessarily achieving perfect 90-degree angles and razor-fine edges.
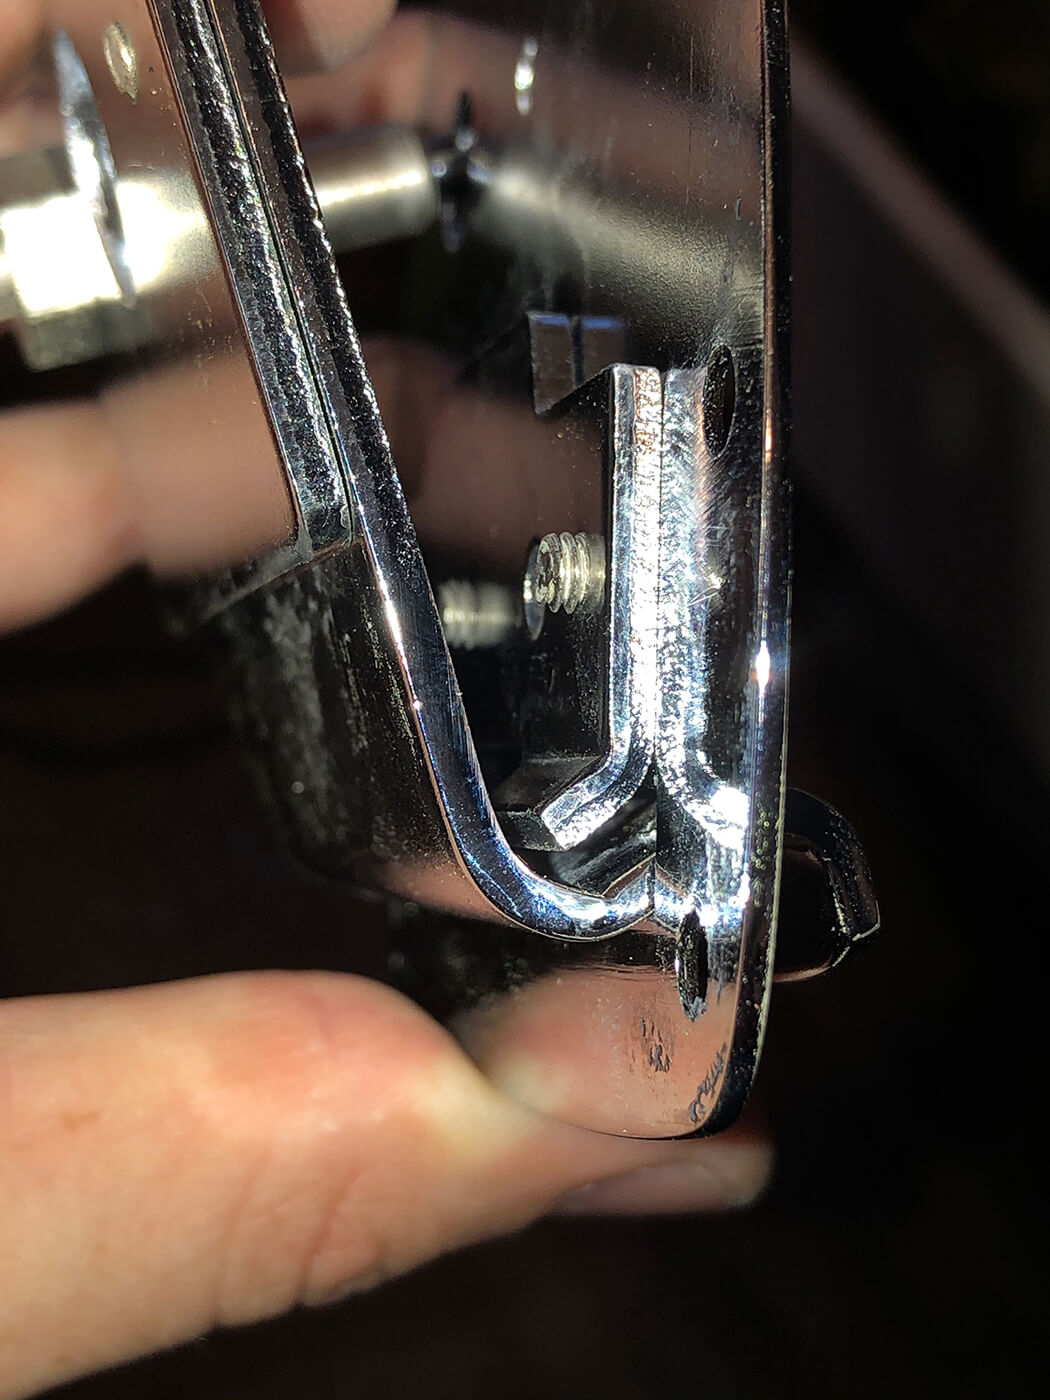
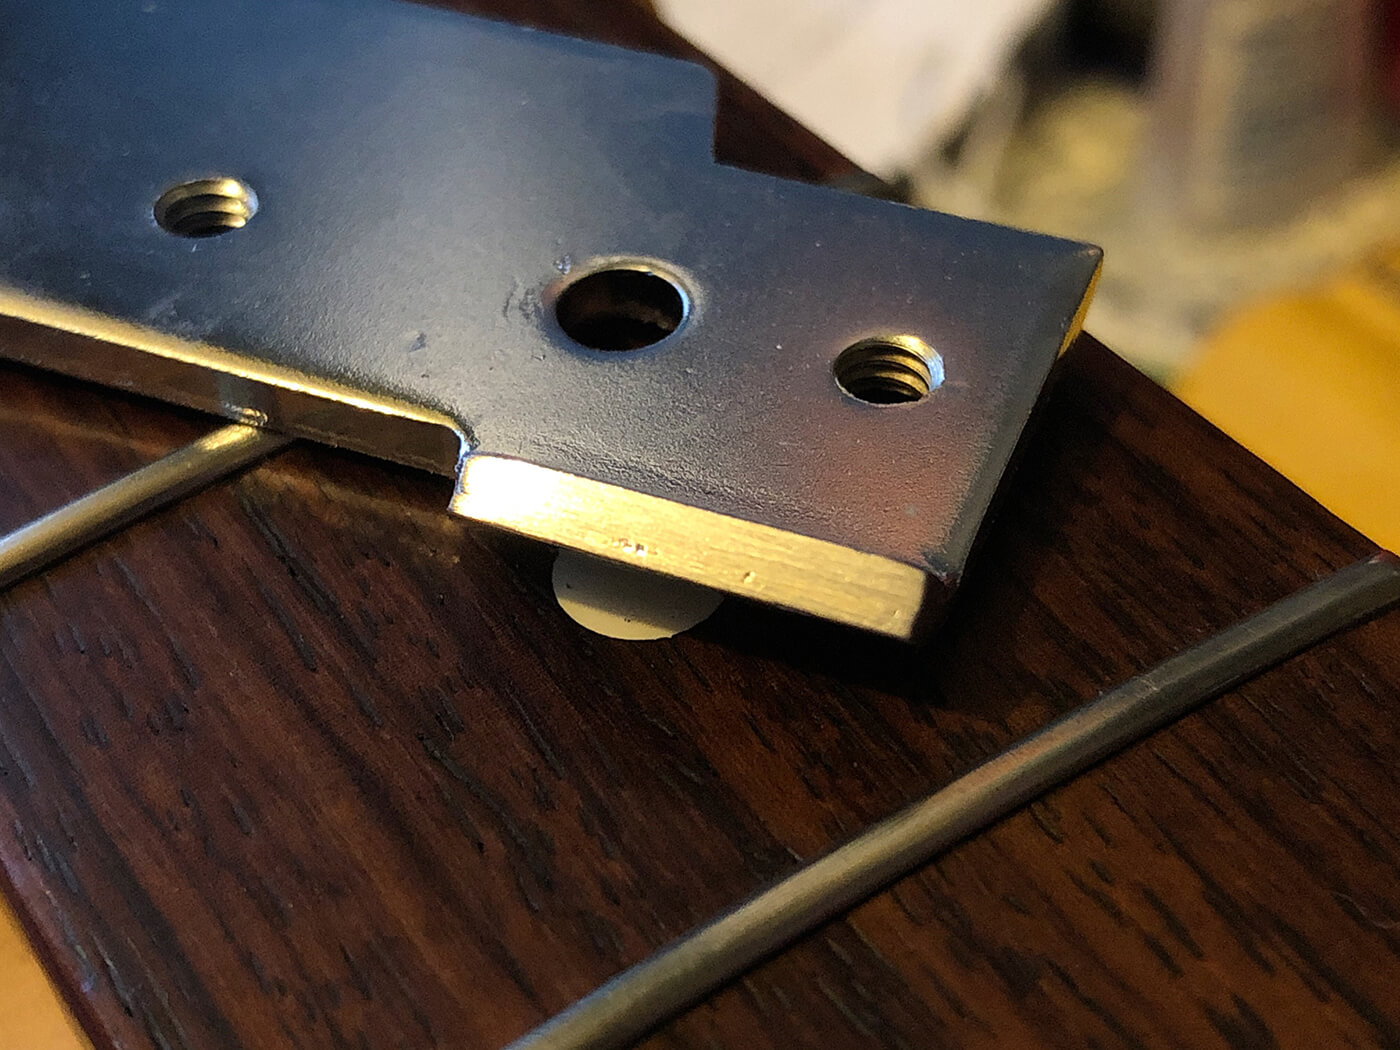
Compare the before and after shots here and see for yourself how much of a difference I’ve made. Upon reassembly and stringing up, that clunk is nowhere to be found, and the vibrato now possesses a newfound smoothness of operation that it simply didn’t have before. I know this fix seems simple and perhaps insignificant, but as in many other areas of life, it’s the finer details that really count here.
Follow Mike on Instagram @puisheen.