Related Tags
DIY Workshop: Gretsch Anniversary to 6120 conversion (Part Three)
In the latest instalment of his conversion of a vintage Gretsch from a single-pickup Anniversary model into his dream 6120, Huw Price fearlessly tackles the restoration.
I want to start this month’s workshop with an apology. This Gretsch was previously owned by a gentleman named Gene Sword, not ‘Clyde’, as I mistakenly wrote in the first instalment. I’ve been told his widow Carolyn and their family have been following this restoration with interest out there in Oklahoma, so I hope I can do Gene’s guitar justice and finish the job he started.
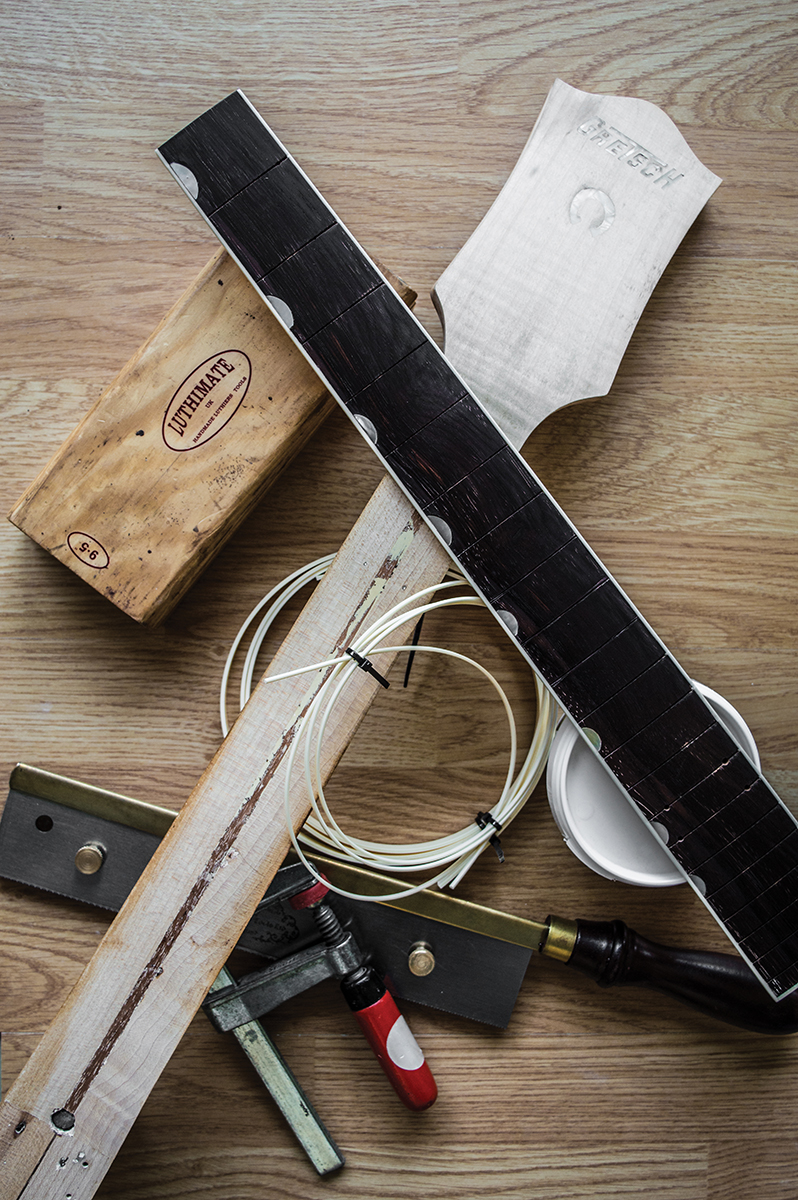
And so to business. I’ve been putting off this part of the restoration because it required a lot of planning and there was some fiddly woodwork involved. To be honest, I’m generally happier with a soldering iron than hand tools. Before getting on to the fun stuff, though, the neck and fingerboard had to be properly restored.
Saving the ’board
I could probably have made things a lot easier if I had bought a pre-slotted and radiused ebony fingerboard, but there was no way I was going to junk that Rio rosewood fingerboard unless I had to. However, it was in a shocking state when the guitar arrived and it looked even worse after it had been separated from the neck.
The main issue was play-wear divots on the first three positions, which had been filled with glue and wood dust, but the dust used wasn’t rosewood. It was a light-coloured wood and to disguise the repair, the ’board had been painted over. Hoping they weren’t too deep, I decided to try and sand through the repair patches and re-radius the ’board at the same time.
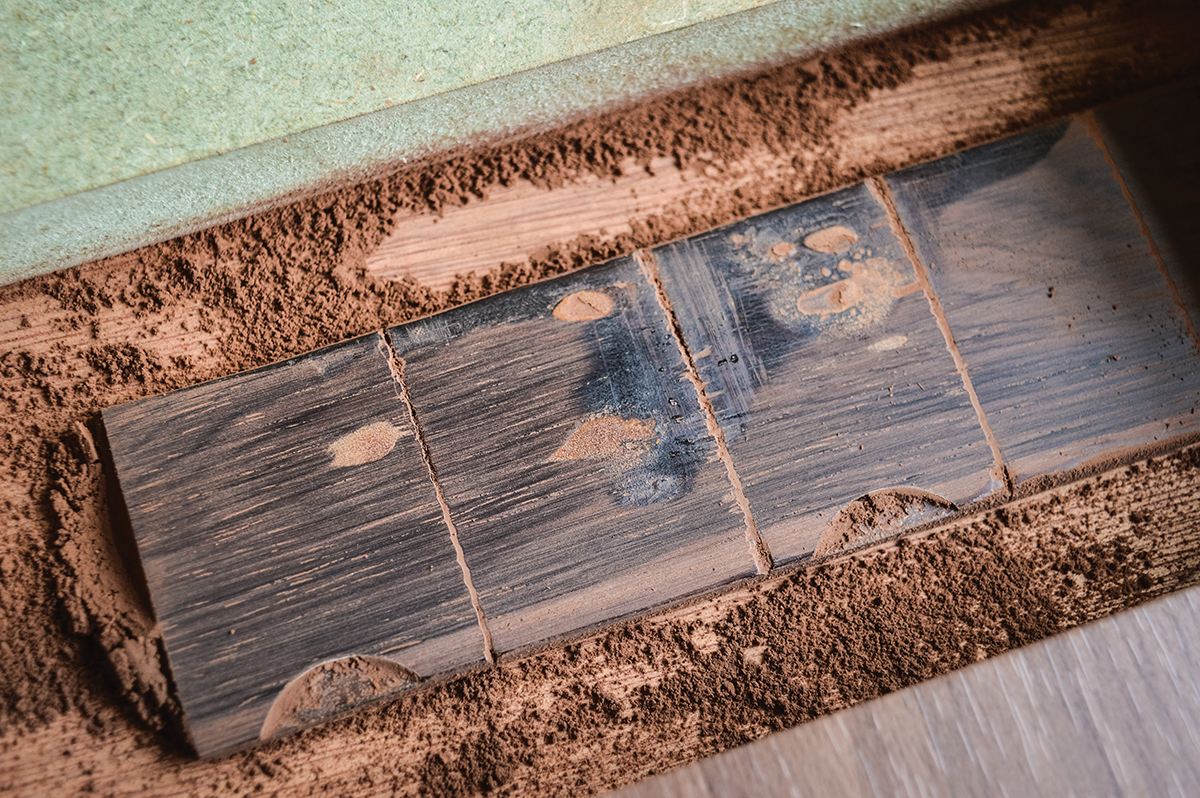
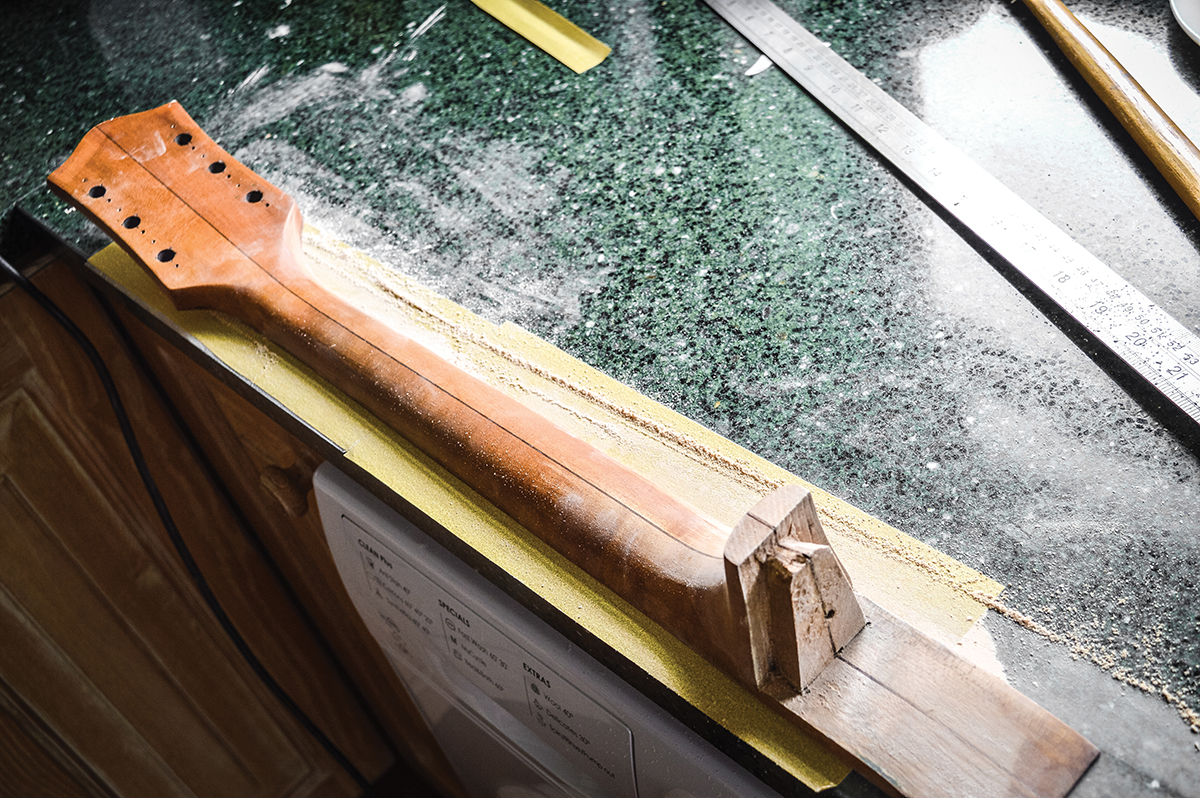
The ’board started looking worse before it looked better. The repaired divots show up as light patches; the dark areas are the parts the radius block hasn’t yet reached
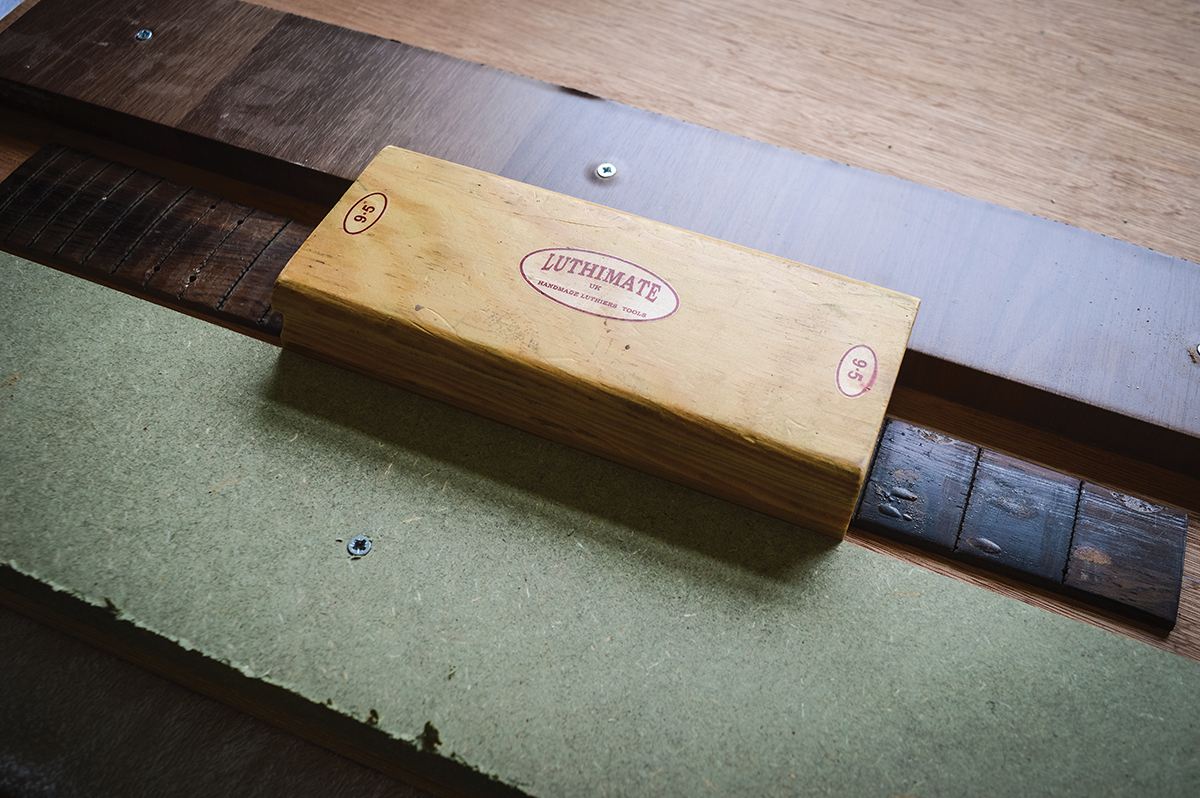
This guitar originally had a 7.25-inch radius, but I prefer 9.5 inches and I figured that flattening the radius would allow me to concentrate the sanding on the patched areas in the middle of the ’board, while leaving the edges more or less untouched.
The ’board was hardly flat, either, and sighting along it with a straight edge, I could see numerous low spots. I used a 9.5-inch radius block with 320 grit paper taped to the underside, plus a lot of elbow grease and patience.
I also had to make up a jig to guide the block. Taking a flat piece of plywood and two pieces of wood with dead-straight edges, I attached them to the plywood base, ensuring the gap between them was identical to the width of the radius block, then drew a centre line between them.
After marking the centre point at both ends of the fingerboard, I applied double-sided tape to the underside of the fingerboard and stuck it down between the guides, ensuring it was dead centre. Some notes here – collect the dust as you go and bag it up for future use. Also, vacuum up the work area and the sandpaper to keep things moving quickly. I find 3M SandBlaster is best for this sort of job, because it doesn’t clog up.
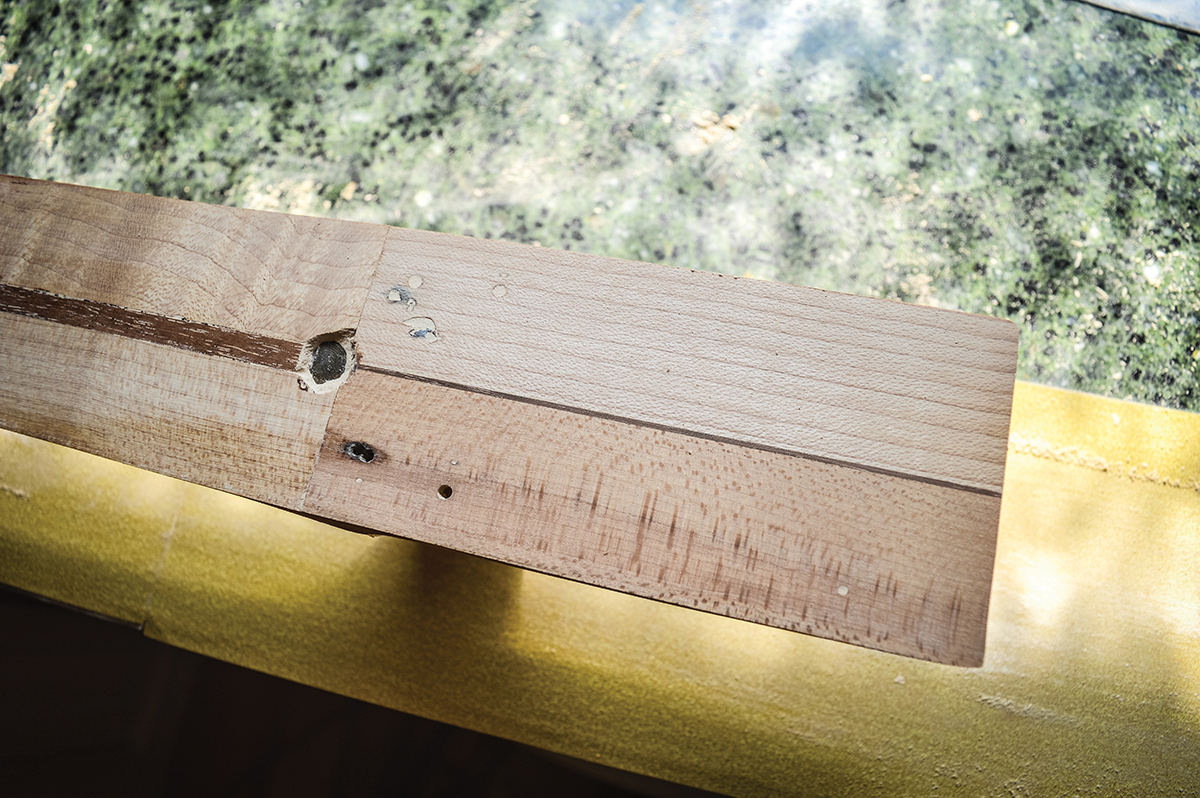
The veneer-and-fingerboard sandwich was clamped to a flat board while the glue set. Afterwards, a craft knife was used to trim off the excess veneer
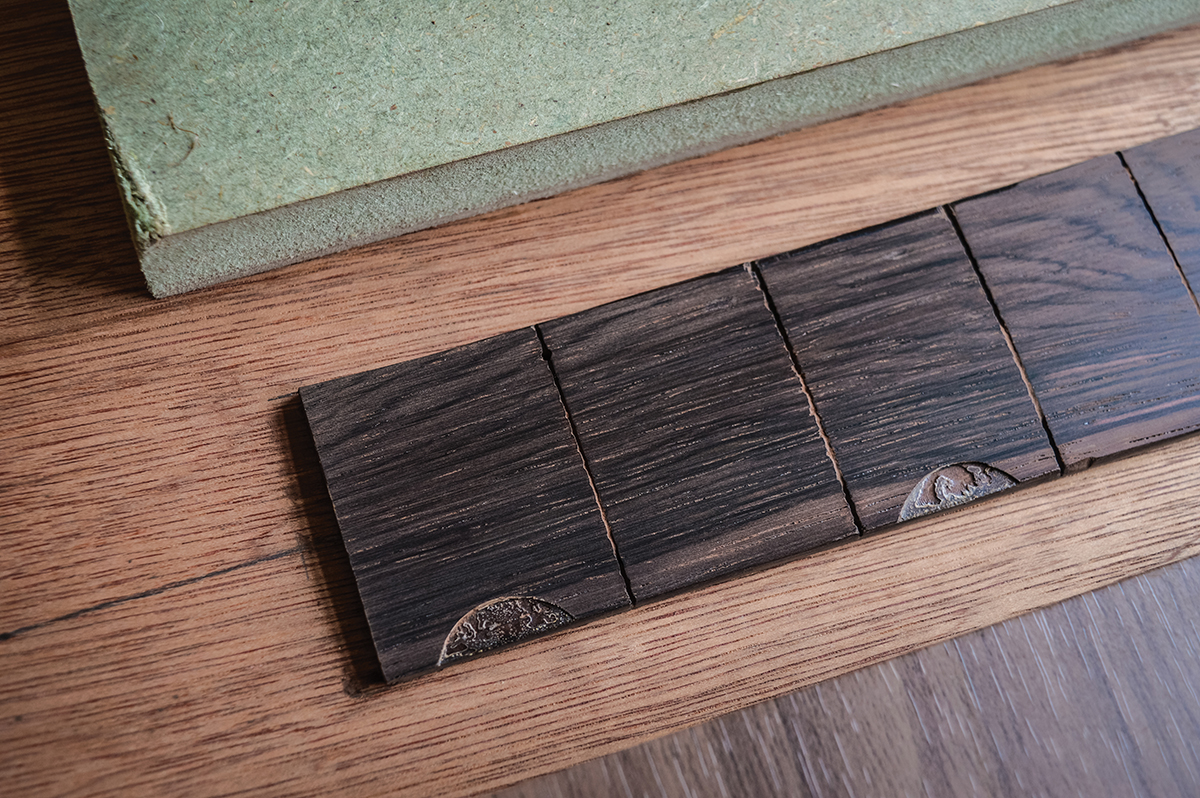
It took a while, but eventually I got past the repair patches and ended up with a clean and flat 9.5-inch radius fingerboard. I was also pleased to see the beautiful rosewood grain and colour properly for the first time.
Adding strength
Having taken measurements before and after, I could tell the ’board had lost about 1.5mm in thickness. I had to prise it off the sanding jig very carefully and it felt a bit bendy and flimsy for my liking. Since the neck had felt just a bit too skinny for my taste when I played the guitar, I decided to reinforce the ’board and make up the thickness by glueing veneer to the bottom of the ’board.
Rosewood proved hard to get hold of, but I already had some leftover maple veneer. At 0.6mm thick, I decided to layer two pieces and I used Cascamite to glue them to the ’board. It’s the same type of urea formaldehyde glue that Gibson used to attach maple caps to Les Pauls in the 1950s.
Once the glue had set, I trimmed off the excess with a craft knife and trued up the edges with a sanding block – taking care not to remove any rosewood. Now the ’board felt stiff and strong, and I noticed the tap tone had changed from a murky boing to a clear ping.
Prepping for binding
Since the plan has been to turn this into a 6120-inspired replica, I had always intended to bind the fingerboard. Even so, the ’board edges had suffered so much wear and damage, it would probably have needed binding anyway.
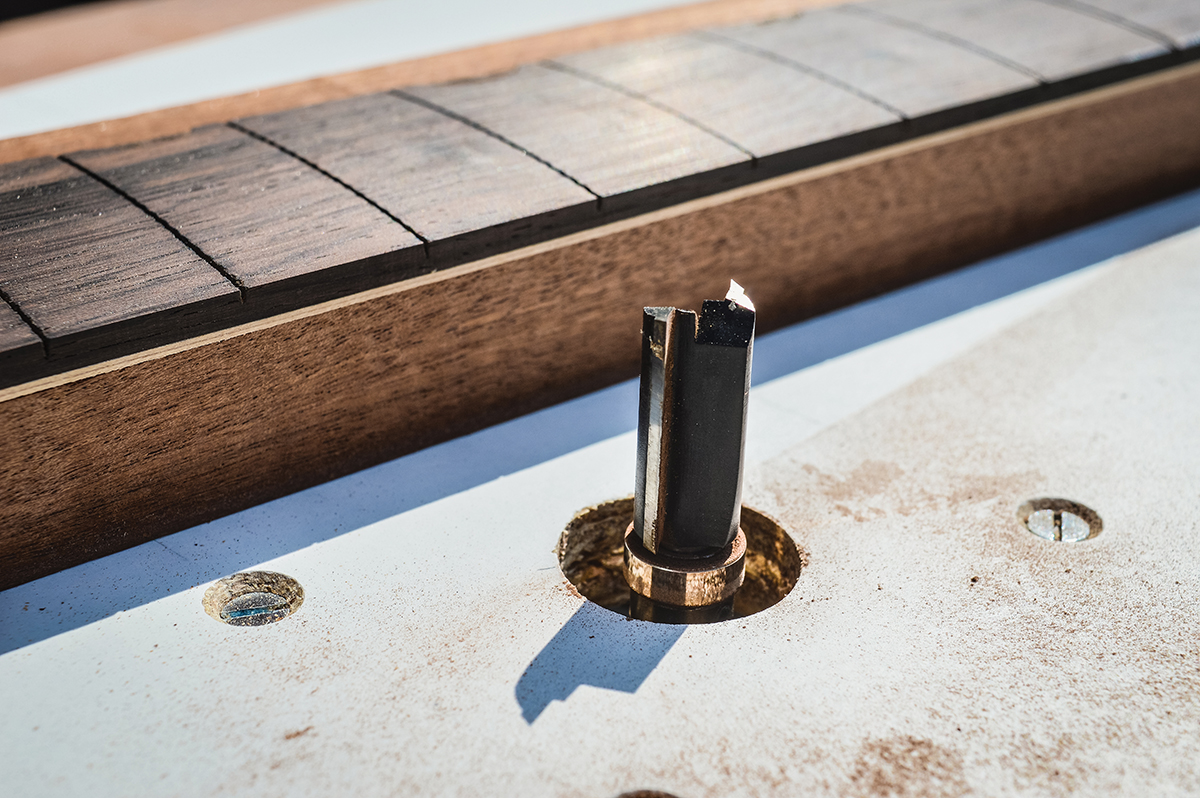
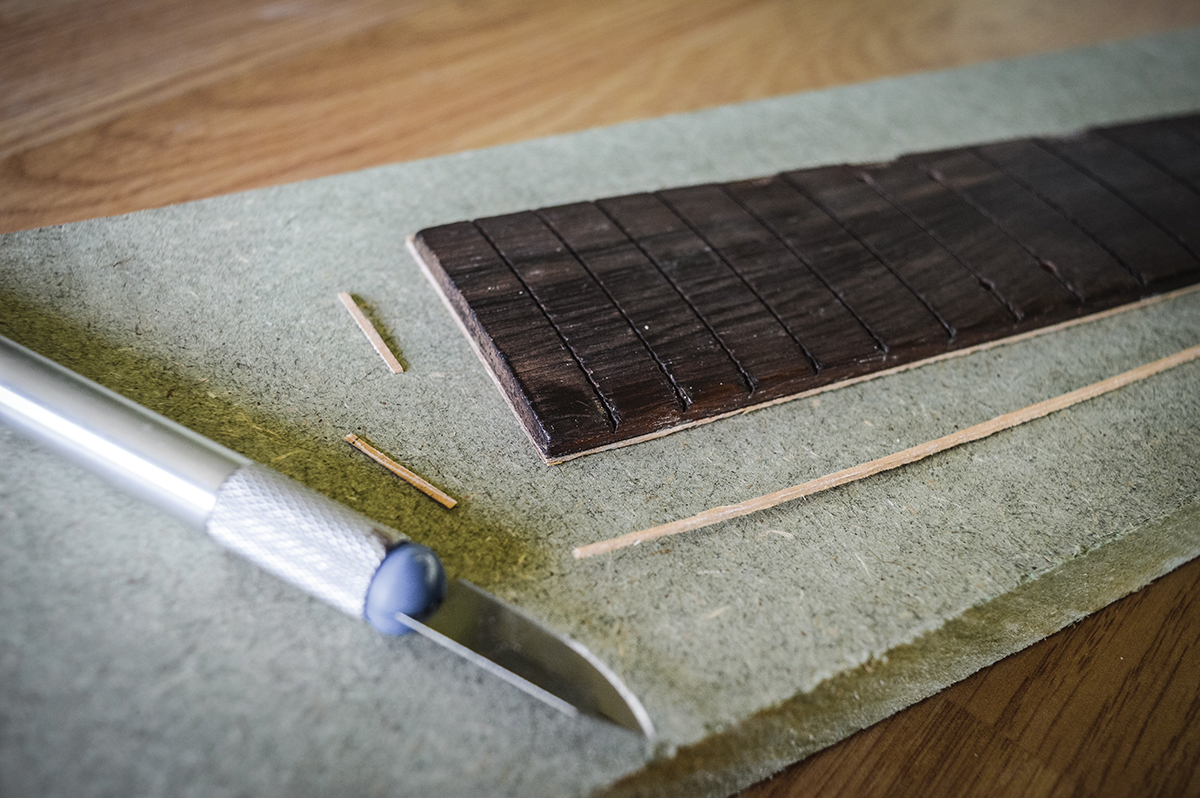
I sourced some light ivory cream binding from Rothko & Frost, which was a pretty good match for body binding. The fingerboard binding measured 5mm tall and 1.5mm wide, so I had to slice off just under 1.5mm from both sides of the ’board.
To do this, I used a routing table with a bearing-guided cutter bit. I taped the ’board to a dead-straight piece of timber, with an overhang of about 1.25mm. The timber guided the cutter and it took only a few seconds to trim both sides of the fingerboard. They were so dead straight and square I could stand the fingerboard up on its edges.
Adding the inlays
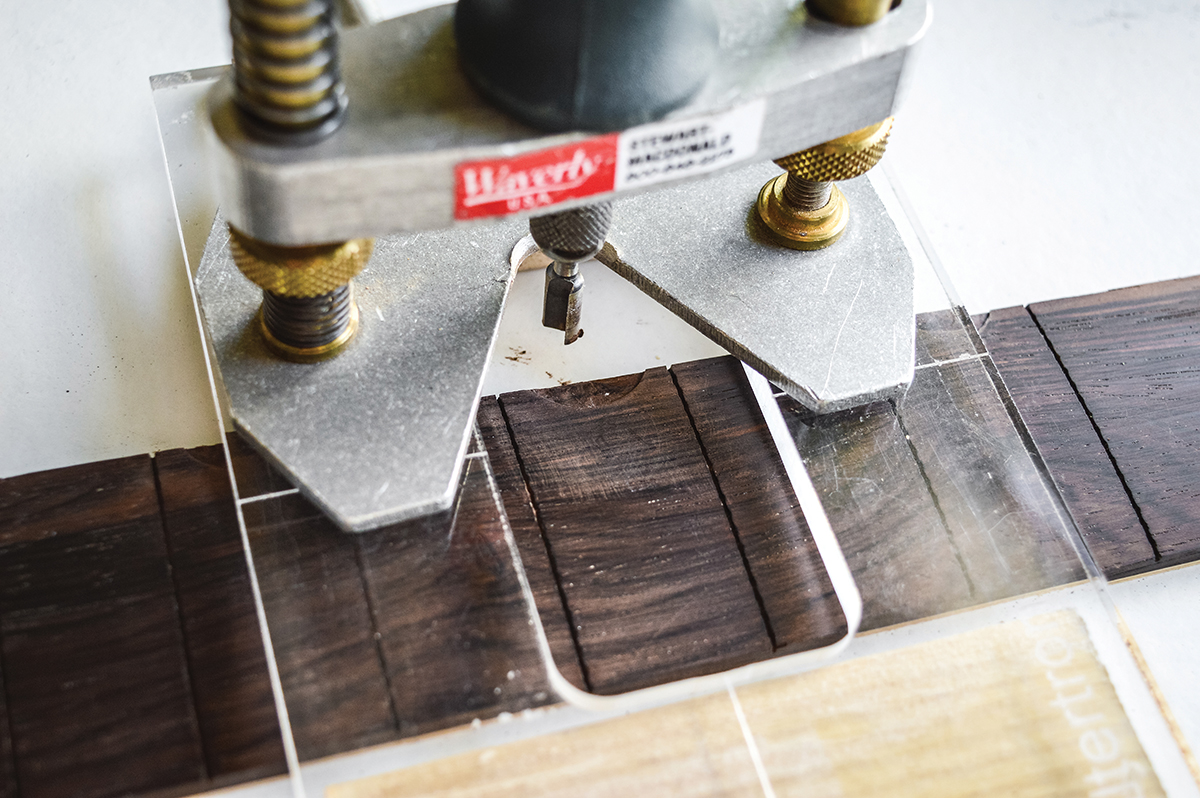
Sanding and trimming the ’zboard created some complications because the inlay routs had become much shallower and the original pearl thumbnails would hang over the edges. The neo-classical markers are an iconic Gretsch feature, so rather than trim them, I decided to re-rout the ’board to make them fit.
Re-radiusing the ’board and shaving the edge for binding meant the marker routs had to be re-cut. This was done by hand, using a Dremel on a router base
I placed each thumbnail onto the ’board and drew around the outlines with a pencil. This bit was scary, but I routed the ’board freehand using a Dremel in a Stewart-MacDonald router base. I used a Perspex Filter’Tron routing template as a platform for the router base and placed a piece of wood under each side, so the Perspex would bridge the ’board.
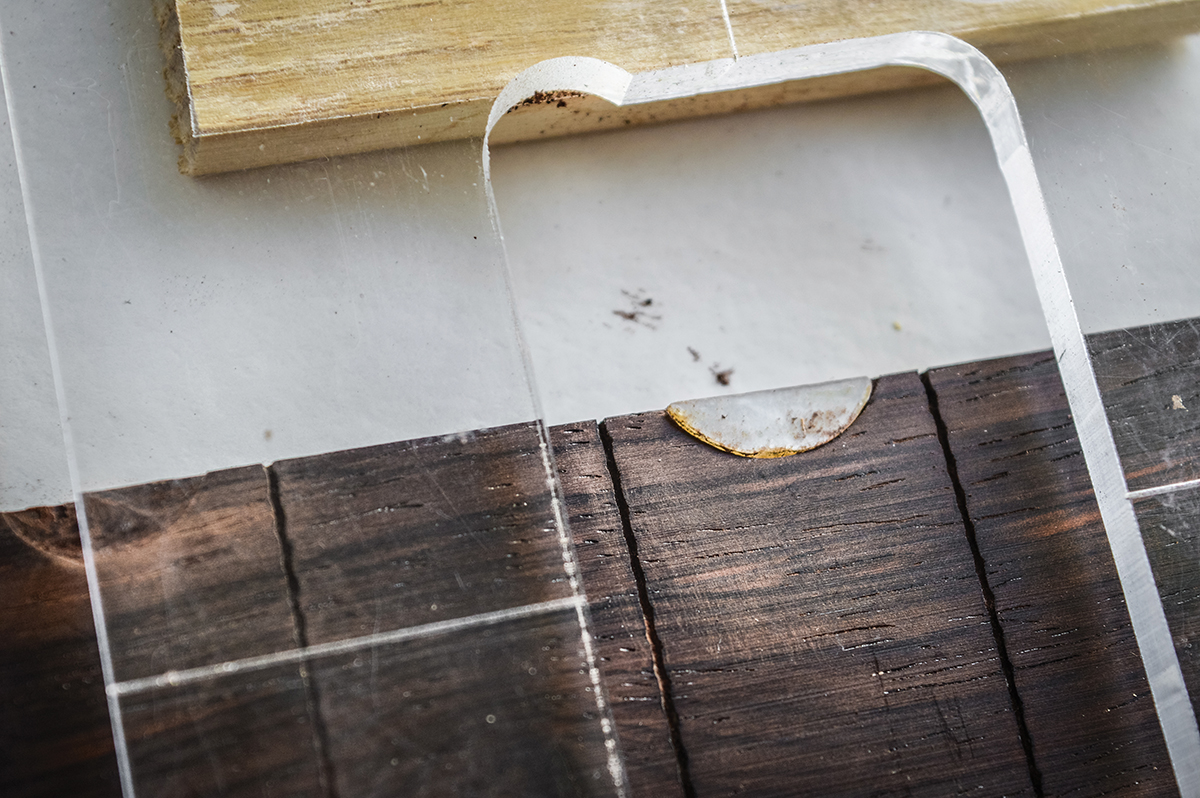
This marker is being test-fitted. All that gummy glue residue and sawdust will be cleaned off using isopropyl alcohol before it’s glued in position. You can see the rout isn’t quite deep enough for this marker
I also jacked up one side with a piece of veneer to compensate for the fingerboard radius and keep the rout depth consistent. Taking your time and taking great care with setting the router-bit height are the keys to doing this part successfully.
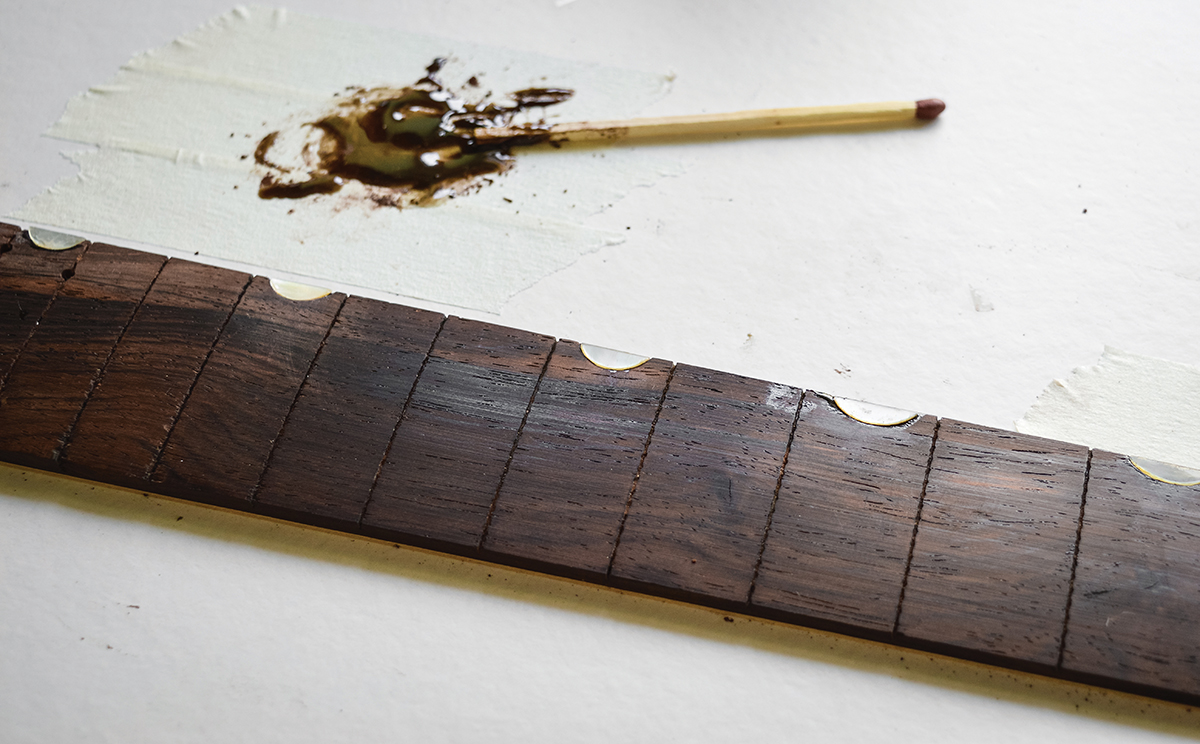
Once all the routs were done, I cleaned off any stick residue from the thumbnails, mixed a little of my saved rosewood dust into some Araldite epoxy glue and glued them in position. Ideally, all the markers will end up a fraction-of-a-millimetre proud of the ’board. Once the glue was set, I mixed more epoxy and rosewood dust to fill any gaps.

Eventually, I was able to put the fingerboard back into my radius-sanding jig to make everything level once again.
Slots
Allparts UK supplied some medium-jumbo fretwire, which I have previously used to re-fret old Gibsons. The tangs are somewhat wider and deeper than the wire Gretsch used, so I used my fret saw to prepare the existing slots for the new wire.
This has to be done before you fix the binding to the fingerboard for obvious reasons. If those reasons aren’t obvious to you, please don’t attempt a project like this. It’s also essential that the slots should be wide enough for the fret wire, because if they’re too narrow, you can end up introducing a back bow to the fingerboard and you may not be able to get it flat enough to glue back onto the neck.
Binding
The first bit of binding had to go onto the body end of the fingerboard. If you examine vintage Gretsches, you’ll see that the end of the neck extension is usually visible below the binding. To achieve this same look, I had to saw a binding’s width of material from the end of the fingerboard.
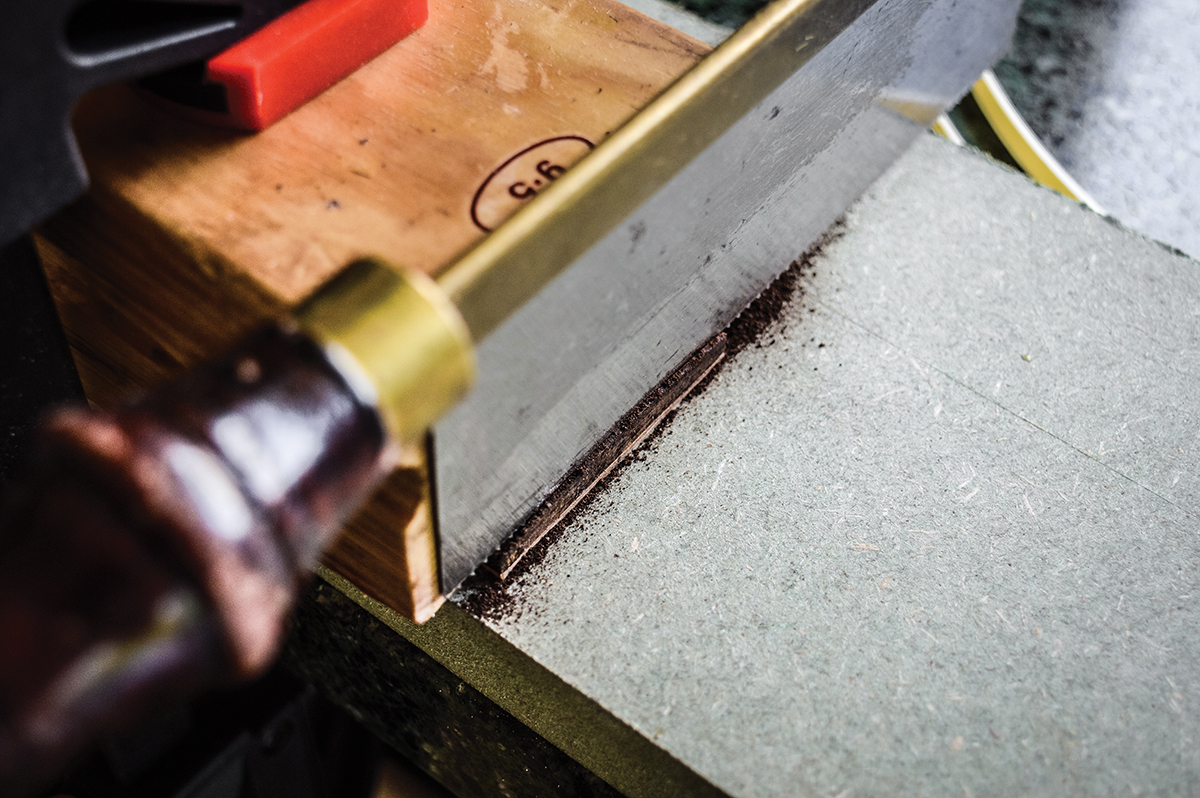
I used my radius block to mark the position of the cut and to guide the saw blade. Keeping the saw straight and square is crucial to getting a good result. Work carefully, because when you’re slicing off a 1.5mm sliver of wood, it will be more likely to snap than to cut. In fact, some of this ’board snapped off and I had to square up the end with a sanding block.
Various glues can be used to attach binding to wood, but I decided on Super Glue. For this application, you should get the medium- or thick-viscosity stuff and not the water-thin Super Glue you can buy in a corner shop – you want the glue to stay where you put it and not run absolutely everywhere. The Rothko & Frost binding glued up fast – so fast that it was pretty much fixed before I had even applied the masking tape to hold it in position.
It scrapes flush very easily, too. I used a fresh Stanley blade to level everything off, taking care to make it square with the fingerboard edges. Gretsch didn’t bother with mitre joints, so I opted for an original-style lap joint.
Thicker Super Glue makes it less likely that you’ll stick your fingers together, but you must take great care nevertheless. Wrapping your fingers in masking tape can help, but the best advice is to keep your fingers moving and don’t leave them too long in one place.
Before gluing the side binding, I ensured the fret slots were clean and clear of debris. It’s futile and risky to try and line the binding up with the edges. Instead, leave a slight overlap on the top and bottom of the fingerboard and trim the binding flush after the glue has set. It’s quick and easy, and you get neater results.
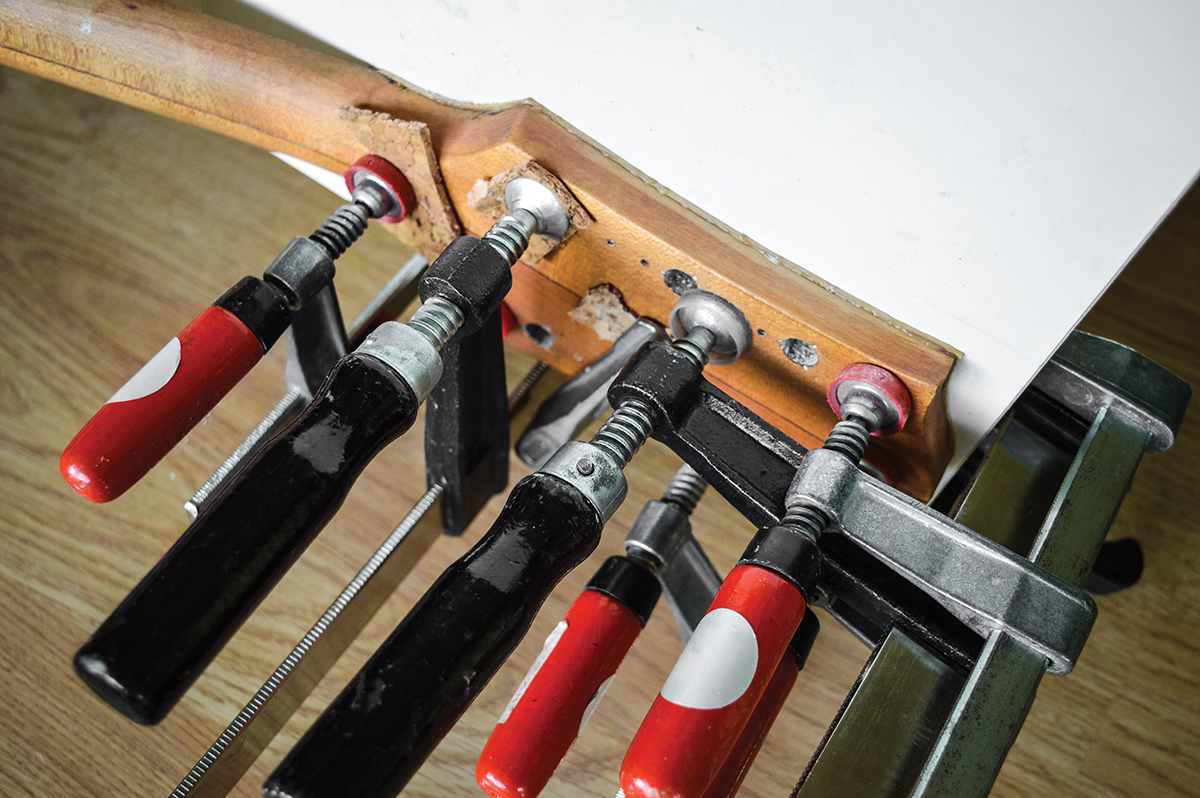
A clean and level surface is needed before the ’board can be glued back onto the neck. The headstock face was levelled in the same way
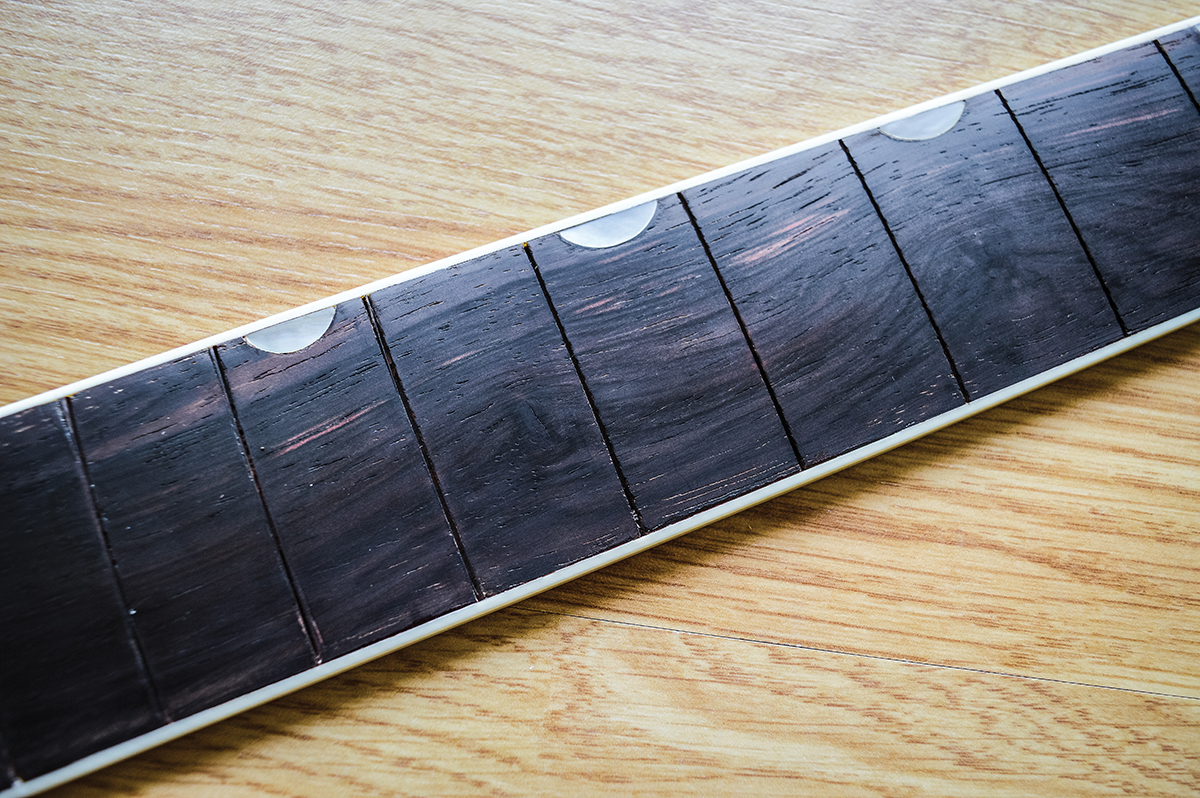
You can use a scraper or blade to remove the excess binding along the top edges of the fingerboard, but my advice would be to leave the binding slightly proud and finish the job by sanding the binding flush in the radius jig. You can use finer grades of paper, because the plastic sands easily and the 320 grit paper does leave sanding marks along the board.
Try 600 grit followed by 1,000 grit to smooth the board in the jig, and then you can finish up by hand rubbing the surface with ultra-fine micromesh. You should be able to see reflections in the wood at the end of it. If you’ve made it this far, you’ll be pleased to know the ’board is finally ready for frets.
Trueing for glue
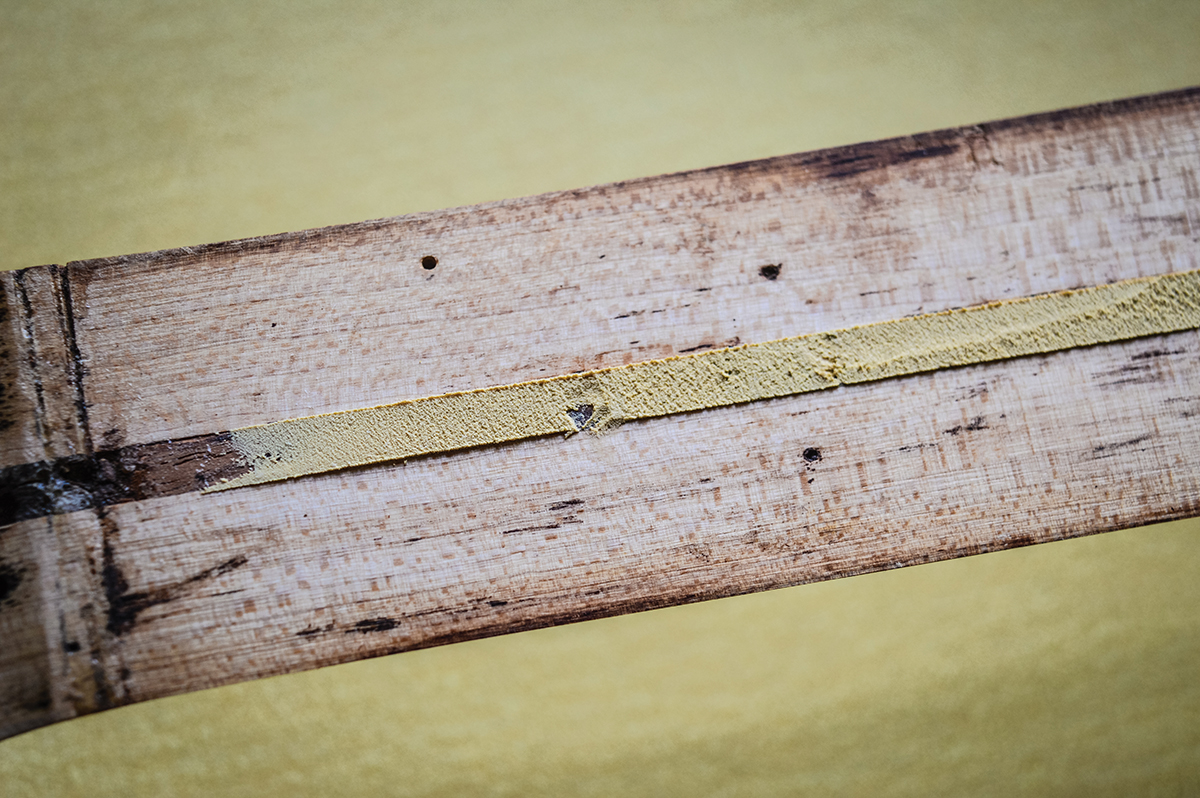
The headstock face and the top of the neck both had to be clean and level before the headstock overlay and fingerboard could be glued onto the neck. I started by filling gaps in the truss-rod skunk stripe, which had broken away when the fingerboard was removed. They were fairly shallow, but I wanted to eliminate any voids. Two-Pack Ronseal Wood Filler did the job.
Most kitchen work surfaces are very flat, so after checking mine, I taped some 240-grit 3M SandBlaster paper to the worktop surface and set about levelling the neck . It was fairly straight, but the tongue kicked up slightly. Levelling the neck also removed all traces of the original glue to leave clean wood, and this task had to be completed before the headstock overlay was glued on. Next, I levelled the headstock face in exactly the same way, to eliminate a fairly noticeable dip in the centre.
Headstock overlay
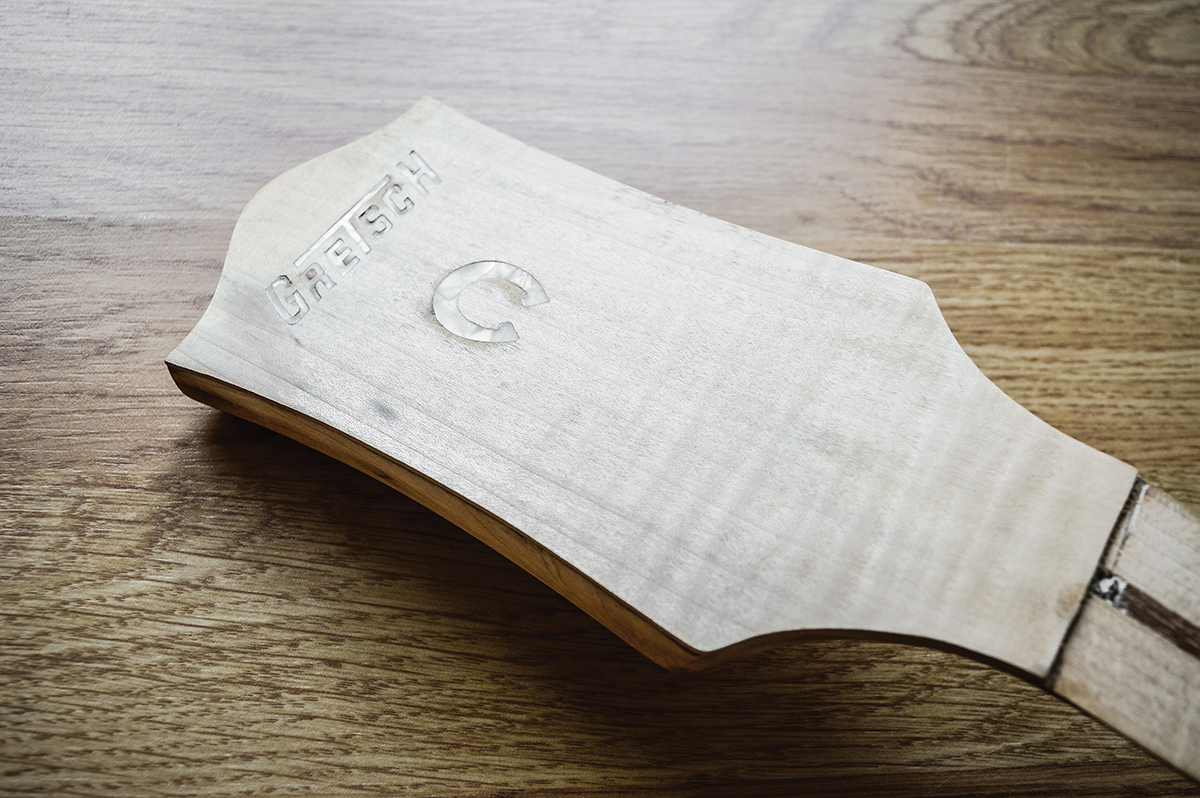
But before we get into that, there’s the headstock overlay to consider. You may recall that the original overlay was chipped and full of holes, and the original Gretsch logo had melted somewhat. Consequently, I wasn’t exactly heartbroken when the removal process caused it to disintegrate. However, I was left with the dilemma of how to replace it.
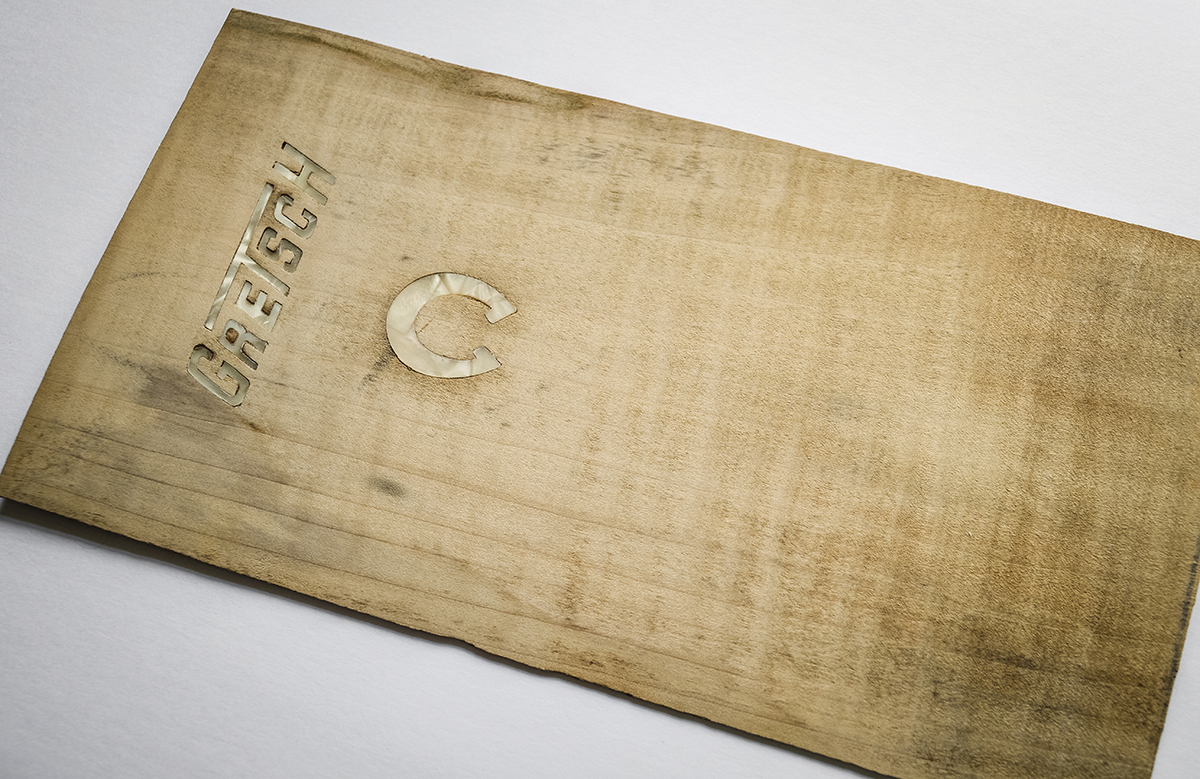
It’s easy enough to buy a maple headstock overlay, but I really couldn’t face the prospect of cutting out a horseshoe and all the logo letters from mother-of-toilet-seat. Occasionally, NOS Gretsch-factory headstock overlays do become available online, and happily, I found one for sale on The Gretsch Discussion Pages.
Even more excitingly, it was being sold by a very well-known Barcelona-based guitarist called Biel Ballester. Biel has completed a few stunning Gretsch-conversion projects of his own and when he’s not busy with his Biel Ballester Trio, he has been known to jam with Woody Allen.
Anyway, I figured the expense was worth it, considering I’d be getting an authentic Gretsch part and saving myself a few days of tedious work. The overlay duly arrived and I was delighted to find there was a fair bit of flame in the maple. Thanks, Biel!
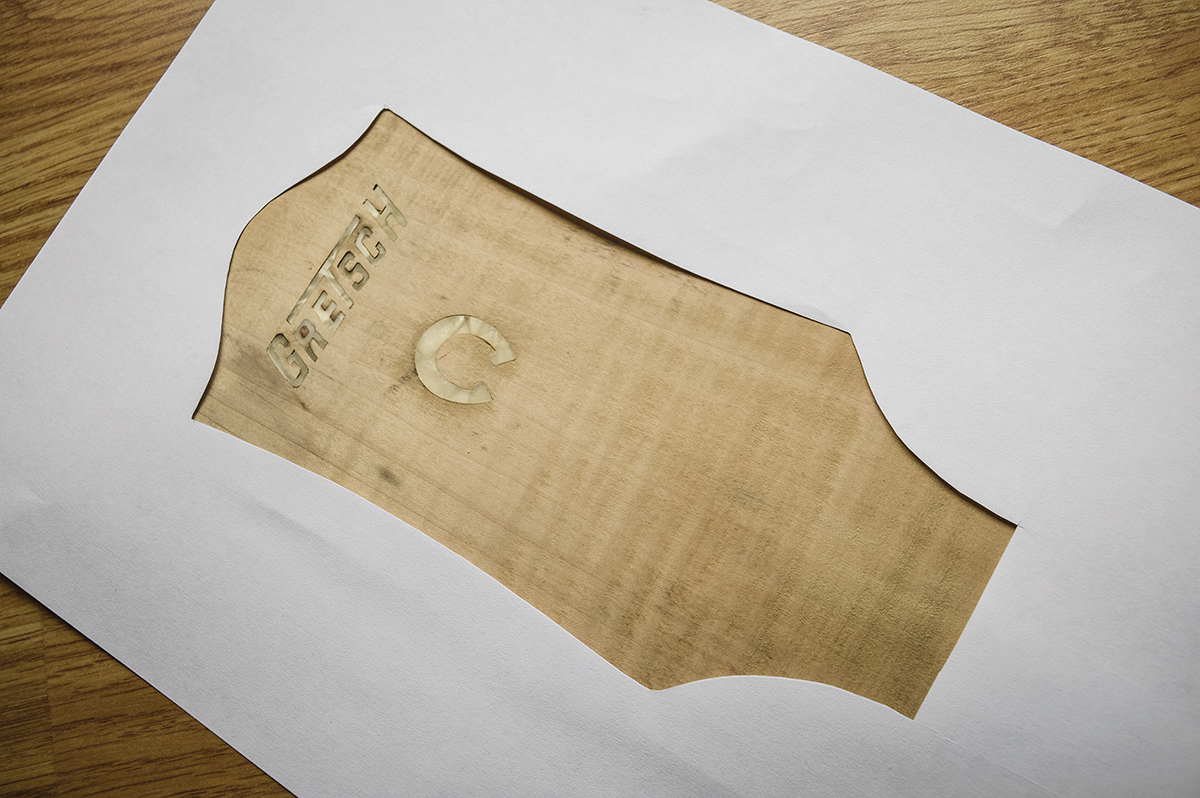
This is where it becomes apparent just how haphazard things were back in the Brooklyn factory. Look closely at most vintage Gretsches and you’ll see that nothing is really square or symmetrical. This headstock and overlay were no exception, but it’s all part of the quirky vintage Gretsch charm.
I drew the headstock outline onto a piece of A4, cut out the shape and placed it on top of the overlay. My buddy Daniel Nicholas out in Amsterdam had kindly sent me measurements taken from his own 1959 6120, so I knew that the distance from the top of the T-roof to the top of the headstock should be about 27mm. Having marked that point on the overlay, I jimmied the outline around until I liked the look and drew the headstock outline onto the overlay.
Cutting the overlay with a jeweller’s saw went quickly enough and I left a couple of extra millimetres for wiggle room. I used Cascamite glue, because there were gaps and glue residue on the overlay’s underside: Cascamite is known for its gap-filling properties and its ability to stick most things to anything. After 24 hours, I removed the clamps, scraped the edges flush with a fresh blade and breathed a sigh of relief.
Check out the other parts of this project here.