Related Tags
How to… Record Bass
Following on from our last tutorial on recording electric guitars, this time John Pickford turns his attention to the bass…

Getting a good bass sound is integral to the success of any piece of recorded music – whether it’s deep, dub bass in reggae or the bright, punchy slap tones of funk – and all manner of other genres. No matter what style you’re recording, the bass guitar should provide a solid foundation for your track and – along with other elements of the rhythm section – define its groove. There are several ways of recording bass, the most popular being DI – directly injecting the instrument to your recorder; there’s also mic’ing an amp/cab and, as many engineers like to do, combining a blend of DI and microphone signals
One thing to consider is whether the bass is to be recorded simultaneously with other elements of the track, such as drums and guitars, or performed as an overdub. If you’re recording other instruments in the same room as an amplified bass, it’s likely that there will be a certain amount of spill. This is fine as long as the leakage isn’t going to adversely affect any future processing during the mixing stage, and some bands thrive on creating a live groove in the studio. However, adopting the DI approach can both avoid spill and open up options later on in the recording process.
Some bass guitars have active pickups, meaning that their output is high enough to be plugged directly into your mixer or interface. However, most basses feature passive pick-ups, necessitating the use of a DI box to boost the low-level signal. Although bass recorded through a DI can sound tight, dry and clean, it can also lack some of the body and punch that you get from a great-sounding bass cab.
However, when recording a band live in the studio, using a bass DI not only avoids unwanted spill, it also allows a good drum take (for example) to be saved if the bassist makes a mistake. And if the bass part is played perfectly, but the sound isn’t quite right, the clean DI signal can later be fed through an amplifier and mic’d up; this technique is called re-amping. Nowadays, there are many outboard recording channels or channel strips that feature excellent DI inputs. Some of these are based upon vintage console designs, and most feature both EQ and dynamics control, enabling you to achieve superb results without the need for amplification.
Mic’ing the cab
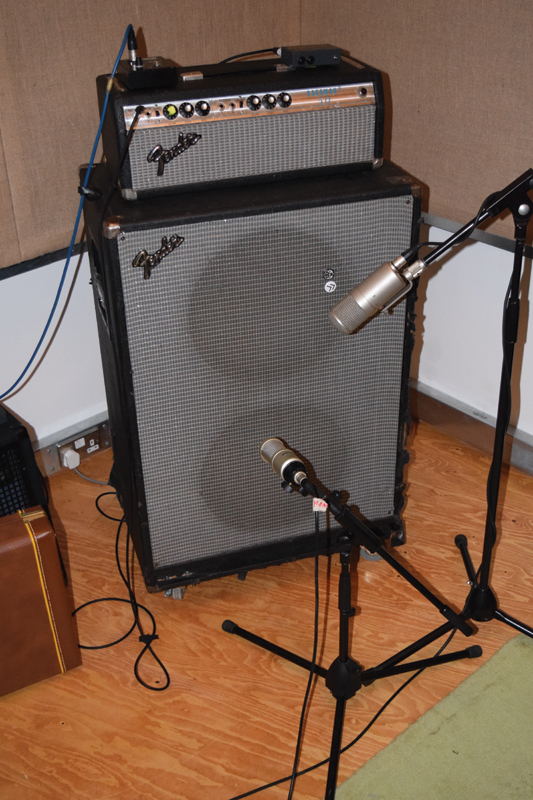
Often, though, to achieve the very best bass tones, only the sound of a mic’d-up bass cab will do. The sound of a good bass amplifier, particularly if it’s a valve model, is hard to emulate with DI techniques alone. Most engineers favour either dynamic mics with a strong low-end response, or a large-diaphragm condenser. Ribbon designs can sound great on bass, but are more delicate than other types and don’t like to be placed close to sources producing high SPLs.
Microphones designed for bass drums – such as the classic AKG D112 – usually work well on bass guitar, as they generally have a pronounced low-end boost that is flattering to bass signals, and can handle very high SPLs. Don’t worry if you don’t have one of these, though, as most general-purpose mics, such as the Shure SM57 will do a reasonably good job if positioned correctly – see the More On Mic Placement box below-right.
In later years, The Beatles’ engineer Geoff Emerick often recorded Paul McCartney’s bass as an overdub, using an AKG C12 set to figure 8 (bi-directional), placing the mic around four or five feet from the bass cab.
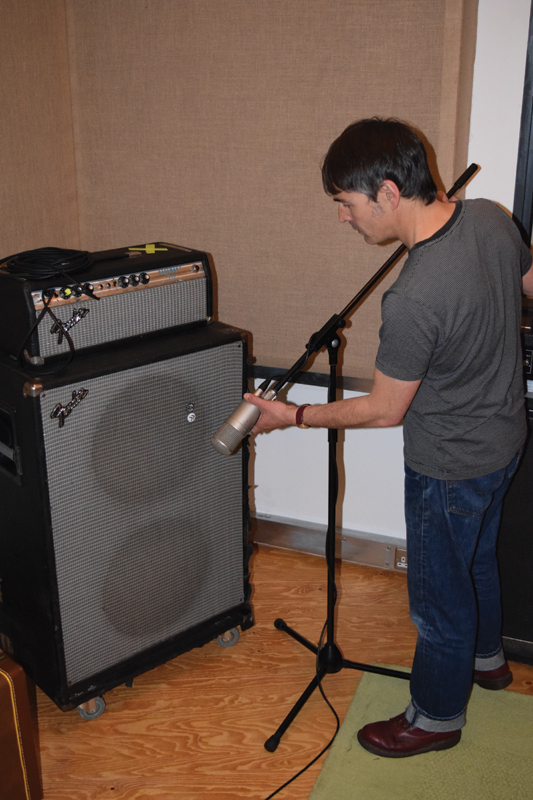
For most recording situations, however, moving the mic between 5 and 18 inches from the speaker should give you all the tonal options you could ever want – unless you’re after a particularly roomy sound. Whereabouts along the plane of the speaker the mic is aimed will also determine the final tone. Pointing the mic at the centre of the speaker cone will give you the punchiest sound, while moving along to the edge of the cone will result in smoother, warmer tones.
If you are using a mic with a cardioid polar pattern, bear in mind that the closer you place it, the more bottom-end will be heard, due to the proximity effect. This can be used to your advantage if you only have a vocal mic (such as a Shure SM58) at your disposal, as these mics tend to have a rolled-off low-end response.
More on mic placement
Unlike electric guitar amps, that can give good-sounding results with a mic almost touching the speaker cloth, bass cabs benefit from having a greater distance between the speaker and the mic. Around five inches is usually the minimum distance to achieve a decent tone, but longer distances can produce excellent results, too – if the recording situation permits.
Re-amping a direct bass signal
Recording bass via DI during a group tracking session can both help avoid excessive bleed onto other mics and allow greater flexibility when mixing. However, bass DI alone lacks the body and drive produced by a decent amplifier. Once the DI’d bass has been recorded, the signal can be sent to a bass amp/cab and re-recorded in isolation. You will then have two channels of clean bass with no spill from drums or other instruments.
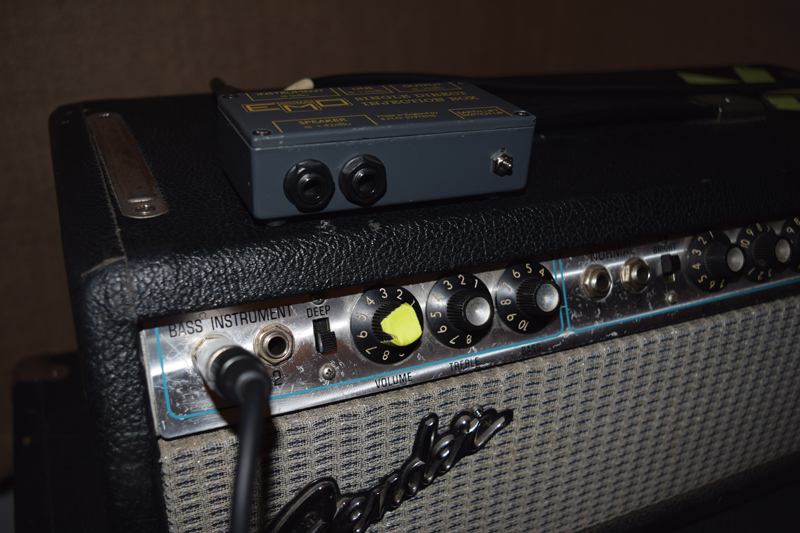
The best device to use is a dedicated re-amping box, which can be obtained reasonably inexpensively. These work like a DI box in reverse, matching the recorded DI bass signal to a level that is suitable for the amplifier. Indeed, a passive DI box can be used in reverse. However, a re-amping box will offer a more flexible and hassle-free approach to matching both impedance and signal levels.
Simply take the DI bass signal from your recorder and plug into the input of the re-amp box. Connect a microphone to the box and mic up the amp/cab to your satisfaction. The sound of the amplified bass can now be overdubbed onto a separate track. Of course, if you are using plug-in amplifier mods instead of the real thing, the DI sound can be treated in your DAW without the need for a re-amping box or bass amplifier.
Bass amp and di signals combined
Recording bass both direct and through a bass amp can produce some great results. You get the clean, clear and present sound of the instrument from the direct signal, combined with the warm low end and rich harmonics produced by the speaker cabinet – particularly if you’re recording using a valve amp. Be aware, though, that unless the bass guitar has active pickups, you’ll need to use a DI (direct injection) box to match impedances and boost the low-level signal from the instrument.
Plug the bass into the instrument (jack) input of the DI box and take a feed from the box into the input of the amp. Use the XLR output on the DI box to connect to your mixer or interface. Once the bass cabinet has been suitably mic’d, you will have two channels of bass. As the signal from the mic enters the recorder a couple of milliseconds later than the DI signal, the sound may become vague when combined, due to phase issues.

To solidify your bass sound, play both channels together and send the DI signal to a digital delay. Dial in the delay (around 2ms is usually about right) until the bass sound snaps into focus. A continuously variable delay is best for this job, so that you can hear precisely when the sound becomes solid and punchy. Alternatively, simply move the DI signal within your digital recorder so that the waveforms match and are not out of phase.
Compression techniques
Bass guitars have a wide dynamic range and it’s almost always necessary to use some compression. The amount required will depend on the style and technique of the player, but as a rule of thumb, some gentle compression at the recording stage, with a heavier squeeze during mixdown, is a sensible starting point. Try using a 4:1 ratio, and then if the bass part is still too wildly dynamic, try a higher ratio when mixing.
Some bass playing styles, such as slap-bass, feature an occasional very loud note that can be tamed by using a much higher ratio of 10:1 or more to limit the peaks. Using extremely fast attack and decay times is not a good idea when recording bass as the initial transients will be lost and the compressor will struggle with the complex waveforms of bass signals. Instead, set the attack time so that the plucking of the string can be heard – around 50ms should do it – and then set the release time to around 250ms or, if your compressor has an auto release setting, use that.
Before using a compressor, it’s worth making sure that the basic tone of the bass is correct as a compressor will emphasise the main tonal characteristic. Therefore, it’s a good idea to make any drastic EQ adjustments before compressing. If your bass sound needs fattening-up, a boost at around 80Hz often helps. However, experiment with upper-bass and low-mid frequencies (100Hz – 400Hz) to help the bass part bed-in with other elements of the mix such as the kick drum. As bass guitars don’t produce much in the way of usable high-frequency information, rolling-off the upper frequencies from around 5kHz will allow space for the treble elements of the track. Similarly, when mixing, the bass guitar will have more room to breathe if a high-pass-filter is applied to other instruments and voices that don’t require a lot of low-end energy.
Using effects with bass isn’t nearly as common as with electric guitars but can produce distinctive results. Reverbs and delays should be used with caution as they can smear the bass part and rob the part of punch and drive. Some distortion effects can give bass parts a gritty edge, however the extreme distortion caused by fuzzboxes can reduce the low-end impact of the sound. During the 80s, it was fashionable to use a chorus effect, often with fretless basses, which were in vogue during that era. Try a positioning a foam mute down at the bridge for a thumping 60s flavour.
So, there are several different approaches, and only your own personal circumstances and preferences can dictate which method works best for you. As always, take time to experiment – and trust your ears!