Related Tags
DIY Workshop: Squier Telecaster Upgrades
Lyndon Jones has a nice Squier partscaster for stage use but it could do with one or two little tweaks to make it perfect. Huw Price takes on the project and shows us how it’s done…

Toolbox:
● Screwdrivers
● Soldering iron
● Drill, various sized bits, homemade drill guide
● Step cutter
● Sandpaper
● Matchsticks, glue, masking tape, Stanley blade
Contacts
Mansons (bridge)
www.mansons.co.uk
Allparts (guard, switch, ferrules)
www.allparts.uk.com
In this workshop we’re detailing some practical upgrades for a gigging guitar. This ‘bitsa’ was assembled from various Squier parts. The body is fairly lightweight and the slim neck has a maple fingerboard, diecast tuners and medium jumbo frets. It sounds pretty lively unplugged, and the stock pickups are decent enough. So what’s the problem?
Owner Lyndon Williams gigs this guitar regularly and really enjoys the feel and looks, but he finds the tone too thin and underpowered for the classic rock repertoire of his band Highway Jones. So he requested through-body stringing to aim for more sustain, a beefier bridge pickup, and finally a pearl pickguard to perk up the looks.
Lyndon likes the Seymour Duncan JB Jr SJBJ-1 humbucker on his backup Stratocaster and he wanted something similar for his main squeeze. The closest Tele equivalent we could find in the Seymour Duncan catalogue was the Little ’59, so after checking out some online demos we decided to fit one. Lyndon also asked for a coil tap so he’d have the option to switch to single coil tones whenever he needed to.

1 – Sourcing The Parts: For this project we decided wherever possible to go for secondhand parts to keep the costs down. Lyndon’s main priority was replacing the stock top-loader bridge with one that allowed for through-body stringing. In an ideal world we might have gone for a traditional Tele bridge with compensated brass saddles; these are easy to source, but there’s a complicating factor: Lyndon has a preference for modern, open-sided Tele bridges. Some specialist guitar hardware manufacturers do supply open-sided bridges with three brass saddles, but they tend to be fairly expensive.
We decided to compromise and found an unused Squier bridge with through-body holes at Manson Guitar Shop in Exeter (www.mansons.co.uk). We hoped it would be a suitable replacement – and it also had the extra screw holes at the front of the bridgeplate, just like the one we were replacing. Research had also indicated that while Little ’59 pickups are too large for Mexican Tele bridges, they will fit into Squier bridges without much difficulty.
After trying the push/push switch on one of our guitars, Lyndon decided he’d prefer one to a push/pull. If you like to make quick changes while you’re playing, push/push switches are ideal because you only need to tap the top of the control knob, and you’re far less likely to drop your plectrum. We bought this item, along with the three-ply pearl pickguard and string ferrules, from Allparts UK (www.allparts.uk.com).
The pickup was the final piece of the jigsaw, and Lyndon located a secondhand example on eBay. Before he bought it we checked that there was plenty of cable length to work with, because some installers cut them quite short.

2 – Strip Down: The first job was to strip everything down. We removed the strings and separated the neck from the body. The pickguard was taken off then we stripped out all the electrics after making a wiring diagram. Before removing the bridge we used masking tape to mark out the original location, and then we removed the screws and lifted off the bridge.
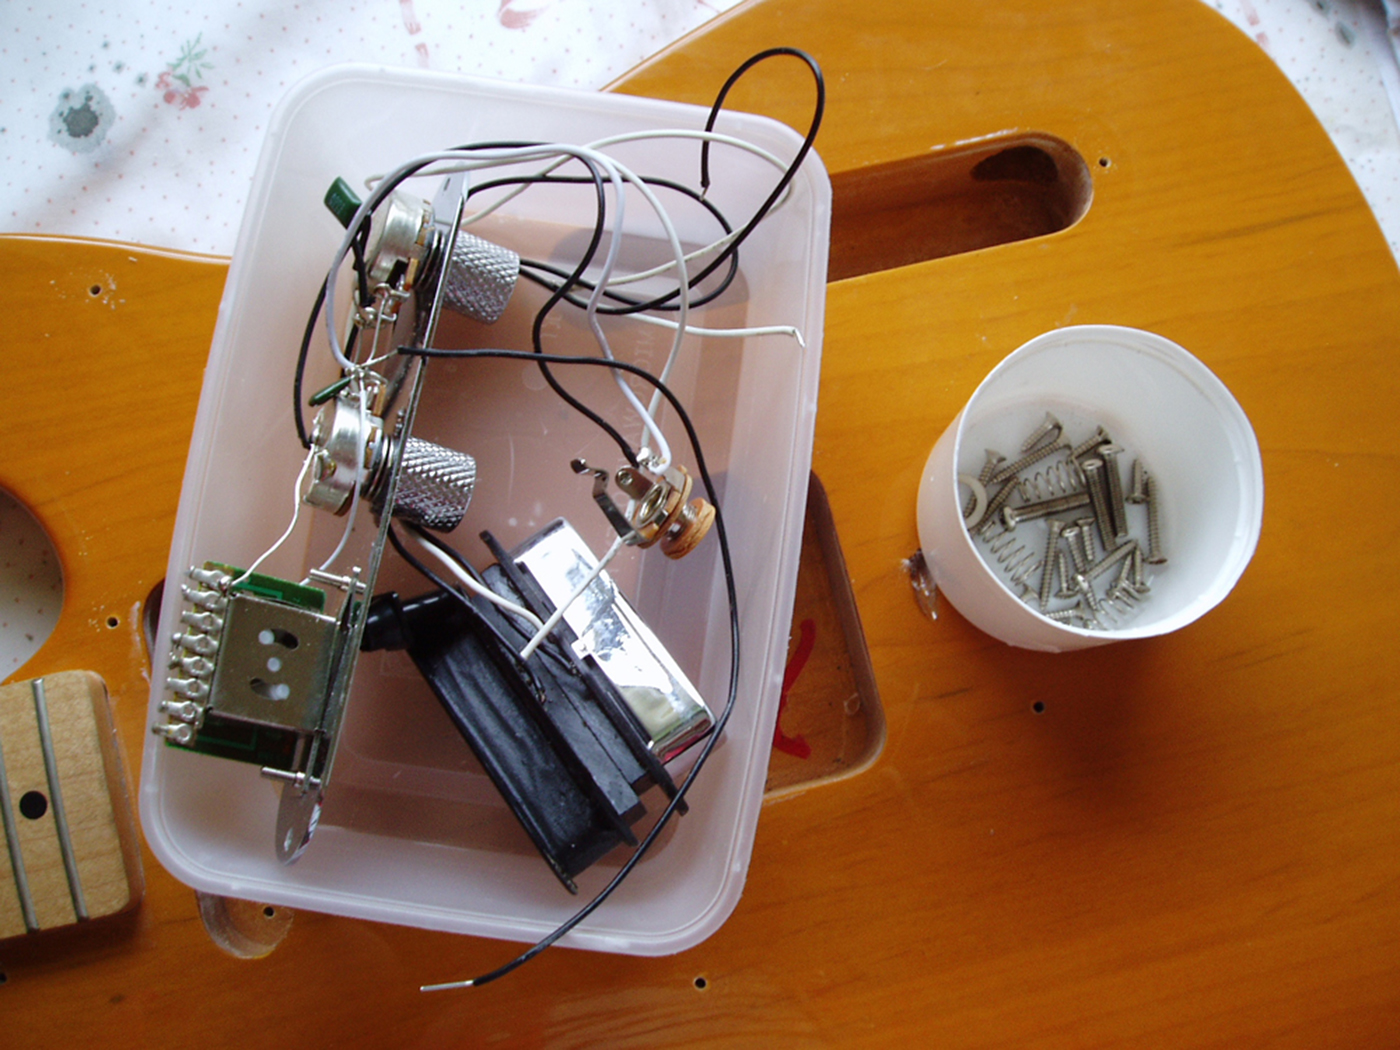
When you’re stripping a guitar it’s advisable to keep all the parts well organised. Chinese takeaway cartons are ideal for the hardware, and we placed all the screws, springs and nuts into a smaller receptacle. If you do lose a screw or spring, nine times out of 10 it will be stuck to one of the pickups – so it’s a good idea to separate the pickups for storage.

3 – New Bridge Location: Fitting a new bridge can bring up all kinds of problems. Inevitably, the screw holes didn’t quite line up, and the new bridge was slightly shorter in length. However, we were able to re-use the centre screw hole at the back of our bridge, so that provided a useful location point.
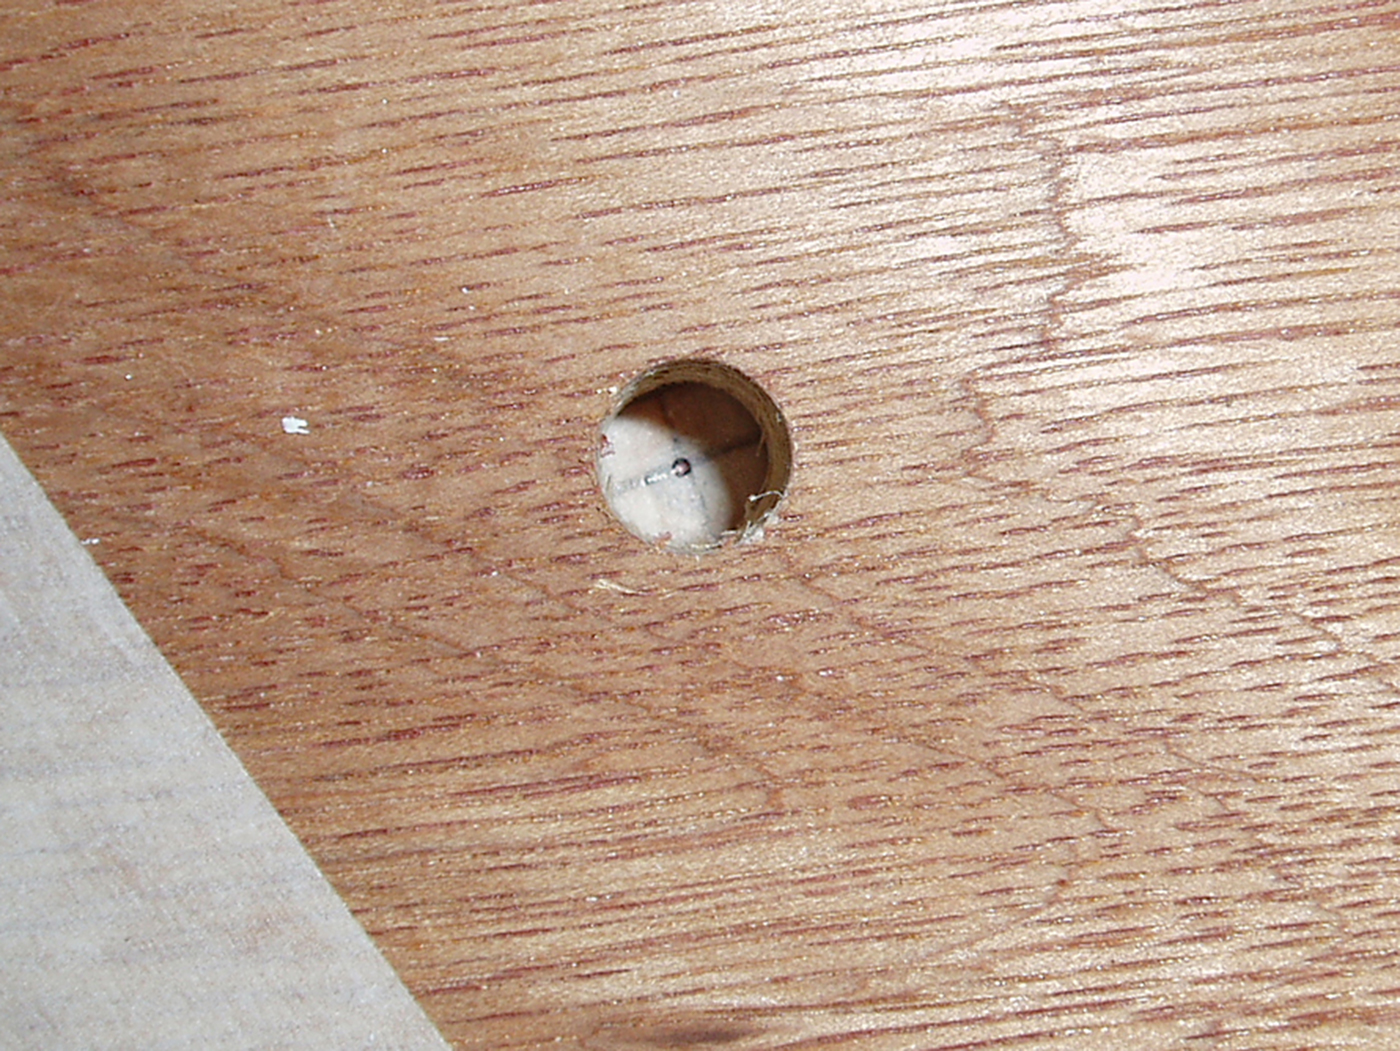
Matchsticks are ideal for plugging screw holes. We simply coated the ends of some matches with Titebond Original wood glue, gently tapped then into the screw holes and left them overnight. The following morning we snapped off the excess and shaved the top smooth with a Stanley knife blade.
A strip of masking tape was placed under the area of the string holes and the new bridge was held in place with that single screw at the back. Since the original screw holes were only a couple of millimetres out, it was easy to align the new bridge by eye and mark the position of the string holes with a fine-tipped pen.

4 – Fitting The String Ferrules: This was by far the trickiest part of our project. The difficulty with ferrules is getting them lined up straight with perfectly even spacing between them. You might think that using a quality press drill would be a guarantee of success, but drill bits always have a tendency to wander. Misaligned ferrule holes can be a sure-fire sign of an ill-prepared home build project, but it can happen to the big boys too. Check out some photographs of really early Telecasters… even Fender themselves struggled with it!
Simply drilling through the body from the marks we’d made on the top wasn’t an option because the holes on the back would all end up slightly skewed. Instead, we drilled the two outside string holes using a backing board of scrap wood to prevent chip-out when the drill bit cut through the rear of the body.
We used a 3mm drill bit and set the drill to its slowest setting to try to minimise wander. Without having access to a decent drill press, we used a drill guide that we bought from Axminster Tools. The drill clamps into the guide and it is securely held square to any drilling job. We didn’t press the drill too hard, and when we flipped the body over it turned out that the distance between the two holes was only slightly narrower than the 2 3/16″ we needed.
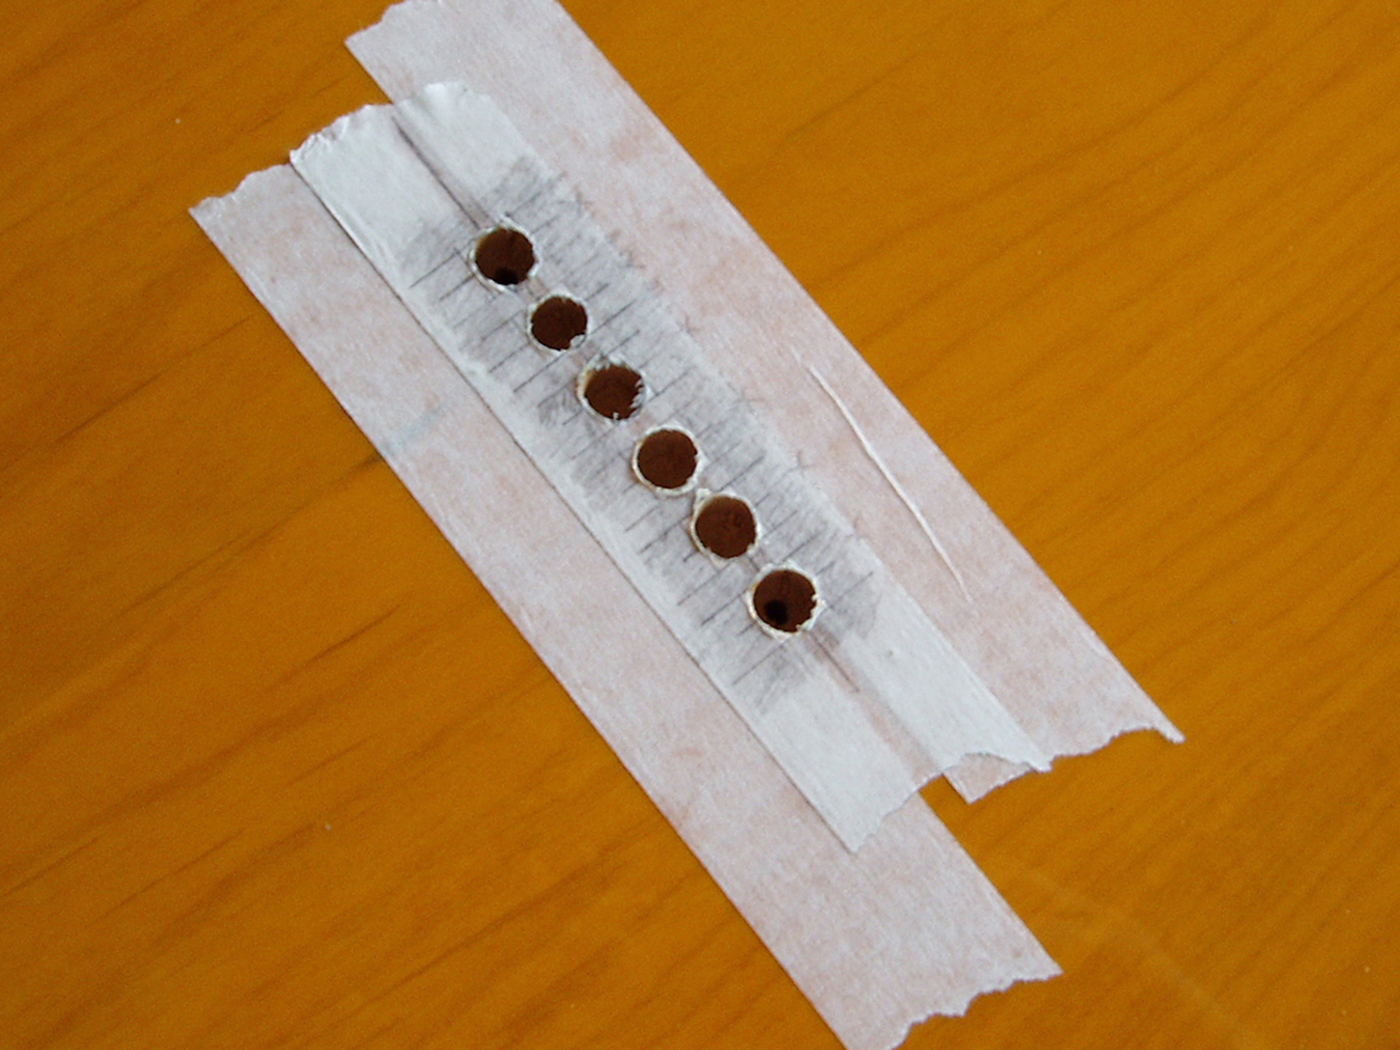
A strip of masking tape was placed over the holes and a guide line drawn straight along the centre line. The centre point for each ferrule was then marked with 7/16″ between each centre point. A 5/16″ drill bit was required to make the ferrule holes, so we marked out a 5/16″ square around each centre point and shaded the surrounding areas to make the drilling target easy to spot (see picture top left).

Rather than risk using a drill press, we used the drill guide to make a 5/16″ hole in a piece of 18mm plywood (second picture, left). This guide hole was very carefully aligned over each square, then clamped in position. A torch was needed to shine into the guide hole and alignment was re-checked after clamping (third picture, left). With the 5/16″ drill bit in the drill guide we proceeded to drill each ferrule hole. It wasn’t a fast process but we ended up with six perfectly-aligned holes. Take care when removing the masking tape because a brittle poly finish will flake off quite easily.
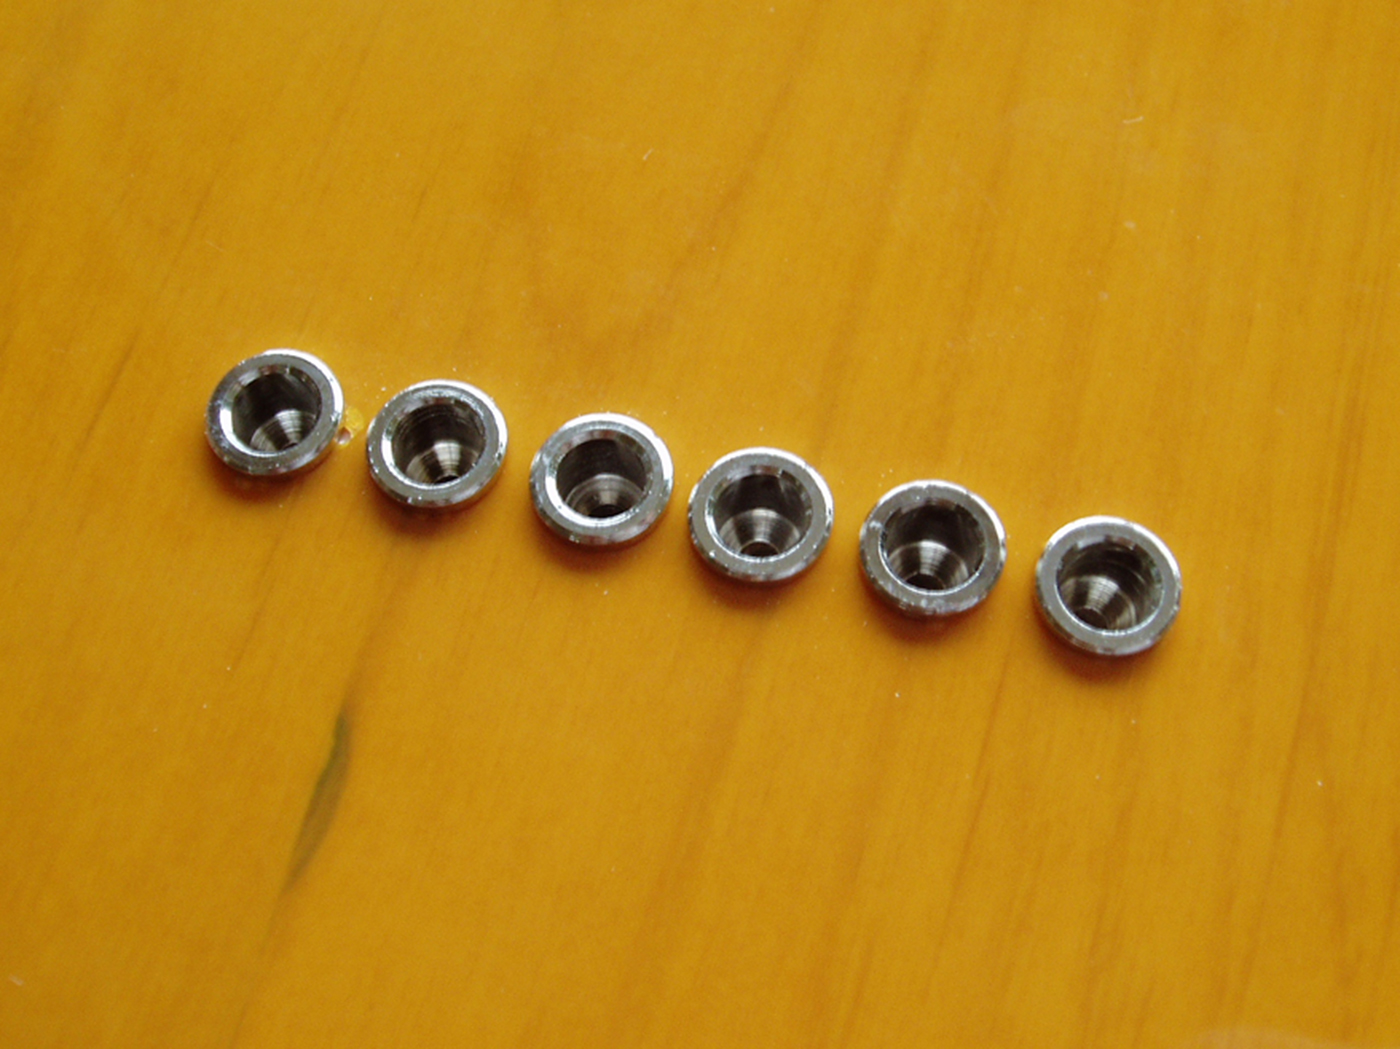
The ferrule holes were much wider than the string holes, so that allowed for some margin of error. Using the guide, we drilled the four remaining holes with the drill bit marked for a depth slightly less than the thickness of the body. Each hole came through almost dead centre, and we pushed the ferrules into position. Ferrules with a lip are suitable because any untidiness around the edges of the holes will be concealed.

5 – Installing The Pickups: Because the wire for both pickups pass through the bridge pickup rout, the pickups needed to be re-installed before we fitted the bridge. While you’re at it, don’t forget to re-install the ground wire, and check that you’ve got electrical continuity before you invest time in putting the strings back on. We screwed the neck pickup in position and the attached the back pickup to the new bridge, then the pickup wires were fed through to the control cavity.
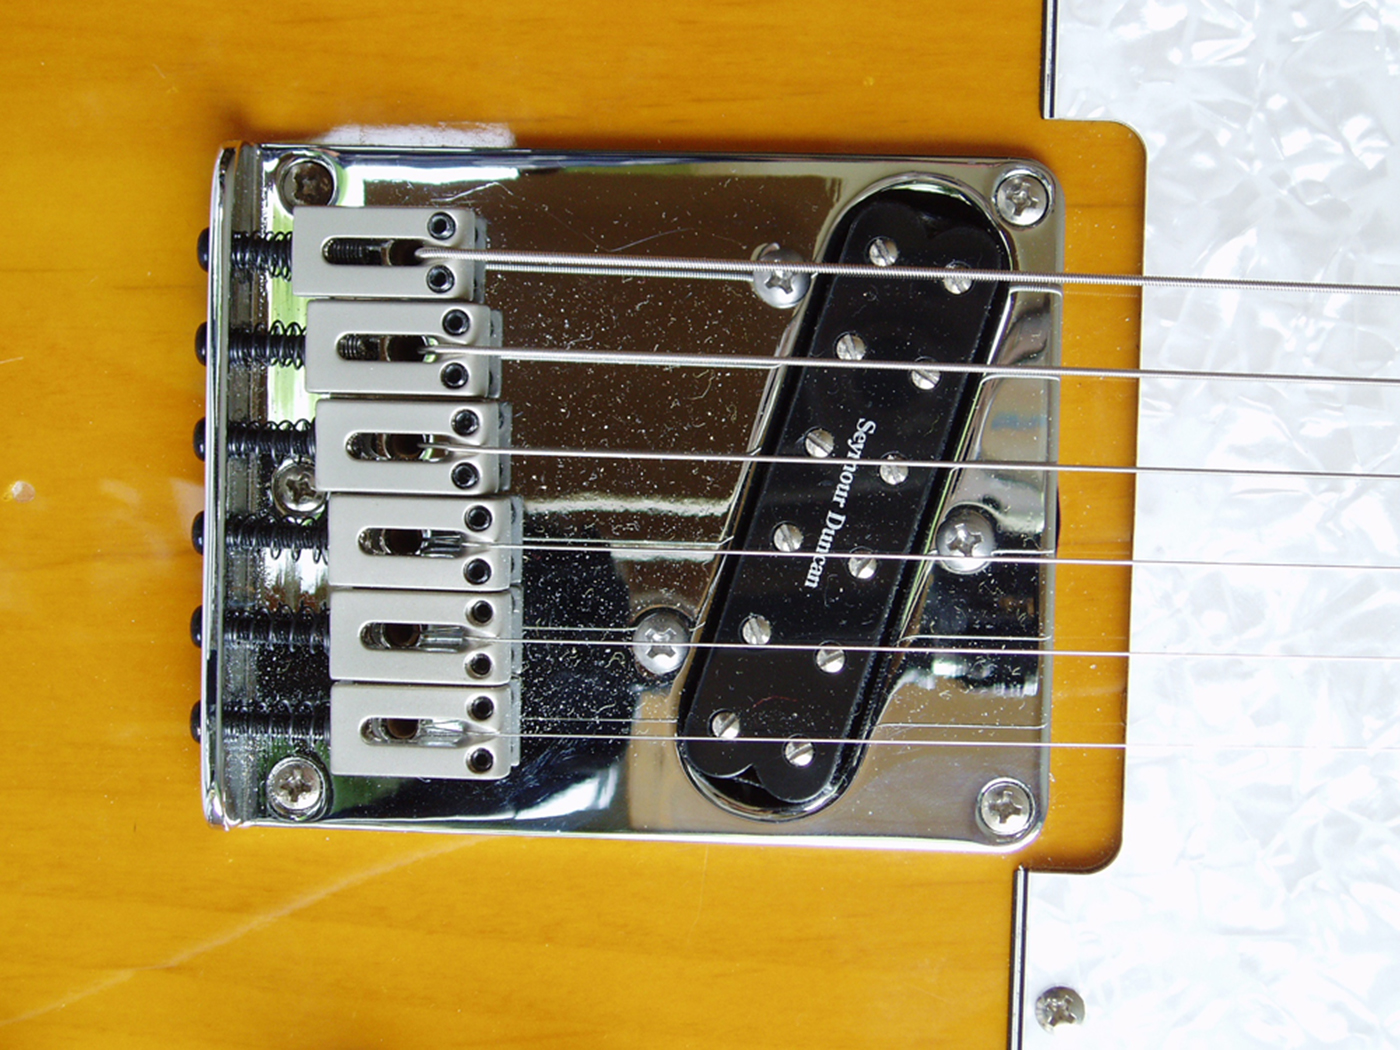
6 – Fitting The Bridge: We had left the masking tape on the top of the guitar to indicate the location of the original bridge. The new bridge was fixed on with the centre screw at the back and aligned by eye, using the original screw holes and the masking tape as a visual guide. We drilled pilot holes and installed the four corner screws in their new locations.
Measuring the distance from the back of the original bridge to the take-off point of each saddle allowed us to roughly position the new saddles, and after that it was finally time to re-attach the neck and string her up.

7 – Fitting The Push/Push Strips: Seymour Duncan deserve a lot of credit for providing so much technical information on their products. We simply located the pickup on the website, clicked on the link for wiring instructions, and found all the information we needed to hook up a coil-tap switch.
The diameter of the shafts of the original pots turned out to be slightly narrower than the shaft of the push/push switch pot, so we widened the tone control hole with a step cutter and hooked everything up according to the diagram.
As it turned out everything worked first time but the two pickups were out of phase, resulting in a thin and weak tone in the middle position. The answer is just to swap over the black and white wires of the neck pickup. Having done that, we screwed the control plate into position.
8 – The Pickguard: Telecaster pickguards usually come with either five (’50s style) or eight (’60s and onwards) screw holes, so make sure you order the correct one for your guitar. Our replacement guard needed a little bit of filing and sanding to get it to fit around the end of the neck, but all of the screws more or less lined up. They were certainly close enough that we didn’t need to fill and drill new ones.
9 – Setting Up And Final Adjustments: Countless books have been written about setting up guitars, but here’s a very rough guide to get you up and running. Generally we set up guitars with a small amount of neck relief. Tune all the strings to concert pitch, then try holding down the low E string at the first fret with your left hand and hold the same string down with the thumb of your right hand somewhere around the 16th fret. You should see a very small gap between the string and the seventh fret.
If there’s no gap, the truss rod may need to be turned anticlockwise. If the gap seems excessive, say 2mm or more, then try turning the trussrod clockwise by about a quarter turn until the gap reduces. Set the height of the top E string so you can bend it two or three semitones without string buzz or choke out. Then set the height of the low E string so that it sounds clean and buzz-free when you play it open and doesn’t sound hollow or out of tune as you play further up the neck.
Go online and Google radius gauges for guitar – they’re easy to find – and then print them off to figure out the radius of the fingerboard on your guitar. This one is 9.5″ but vintage-style Fenders tend to have a 7.25″ radius. Carefully cut out the radius gauge and use the one that’s closest to the radius of your guitar’s board to set the height of the B, G, D and A strings. Rest the outside edges of the gauge on the E strings and then raise the height of the other strings until they just touch the edge of the gauge. With the saddle heights set, adjust the intonation for each string and your guitar should play pretty well.

Verdict
The purpose of the project was to turn this Squier Telecaster into a beefier and more powerful rock guitar without compromising its versatility or tonal range. The most significant change came from swapping out the bridge pickup, and we found that the Seymour Duncan Little ’59 is a great-sounding unit that delivers a full-bodied rock tone while maintaining a crisp attack and excellent definition.
Most of the hard work went into the conversion to through-body stringing. Although this had a less profound effect than changing the pickup, we did notice a smoother and more full-bodied tone with some extra sustain. The low end also seemed to gain power, so it was really about more body and less twang. In the context of Lyndon’s guitar it was exactly the result we wanted – but hardcore Telecaster pickers may feel differently.