Related Tags
Guitar Technique for Beginners 1: Hands, fingers and strengthening exercises
Finger exercises, the ‘right’ ways to grasp a guitar neck, and other basic techniques new players shouldn’t gloss over.
Featured in this article

Sure, holding a guitar looks easy. Just grab the neck, plonk your fingers on the fretboard and you’re fire. Well, it isn’t as straightforward as that. Good posture and practice habits will significantly influence your playing in the long run, so it’s best to get things right from the get-go.
At the end of the lesson, you’ll know how to:
- Hold a guitar neck the ‘right’ way
- Position your fingers accurately
- Strengthen your fingers with basic left-hand exercises
- Play the minor pentatonic scale as a finger exercise
However, it’s important to point out that while the techniques mentioned in this lesson are widely accepted, they may not apply to you. If holding a guitar your way is more comfortable, trust your body and go with that.
Holding the neck
It’s probably the most common thing that beginners overlook. But hold a guitar neck ‘wrong,’ and you’ll fumble across the fretboard. Grasp it ‘right’ and the posture will help you hit clean notes and play rich, shimmering chords.
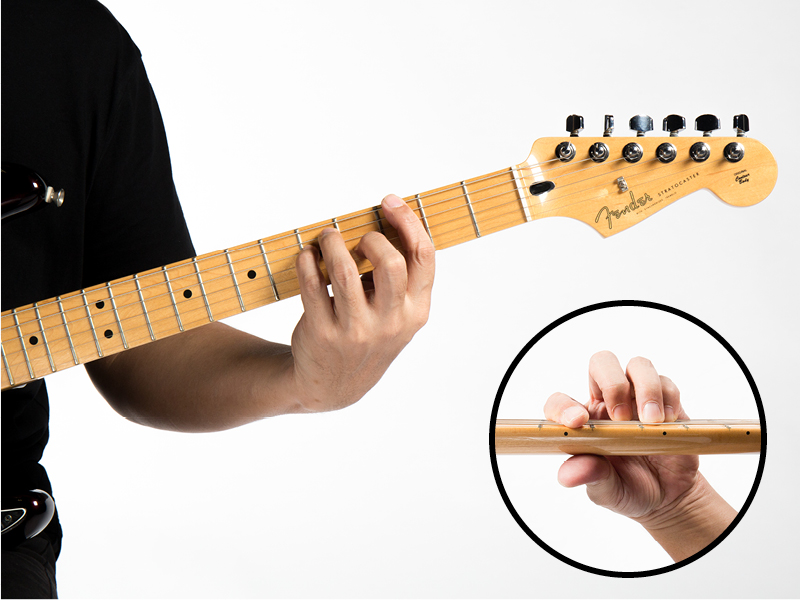
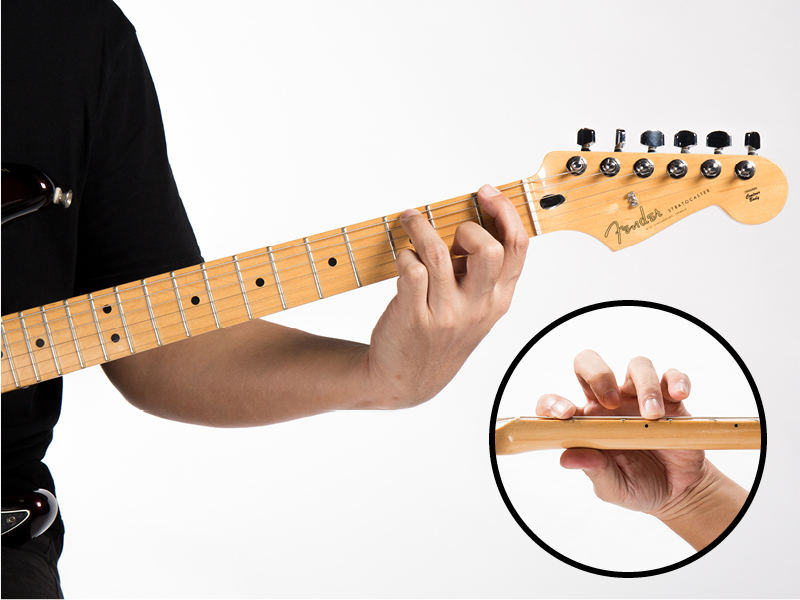
There are two main ways to hold a guitar neck. The first, pictured above, is with your thumb directly under the neck; this is de facto in classical guitar technique—try otherwise with a classically trained teacher and be prepared to receive a earful. And for good reason. The thumb-under-neck posture lets your fingers ‘bloom’ much more naturally, but it requires far more focus and strength.

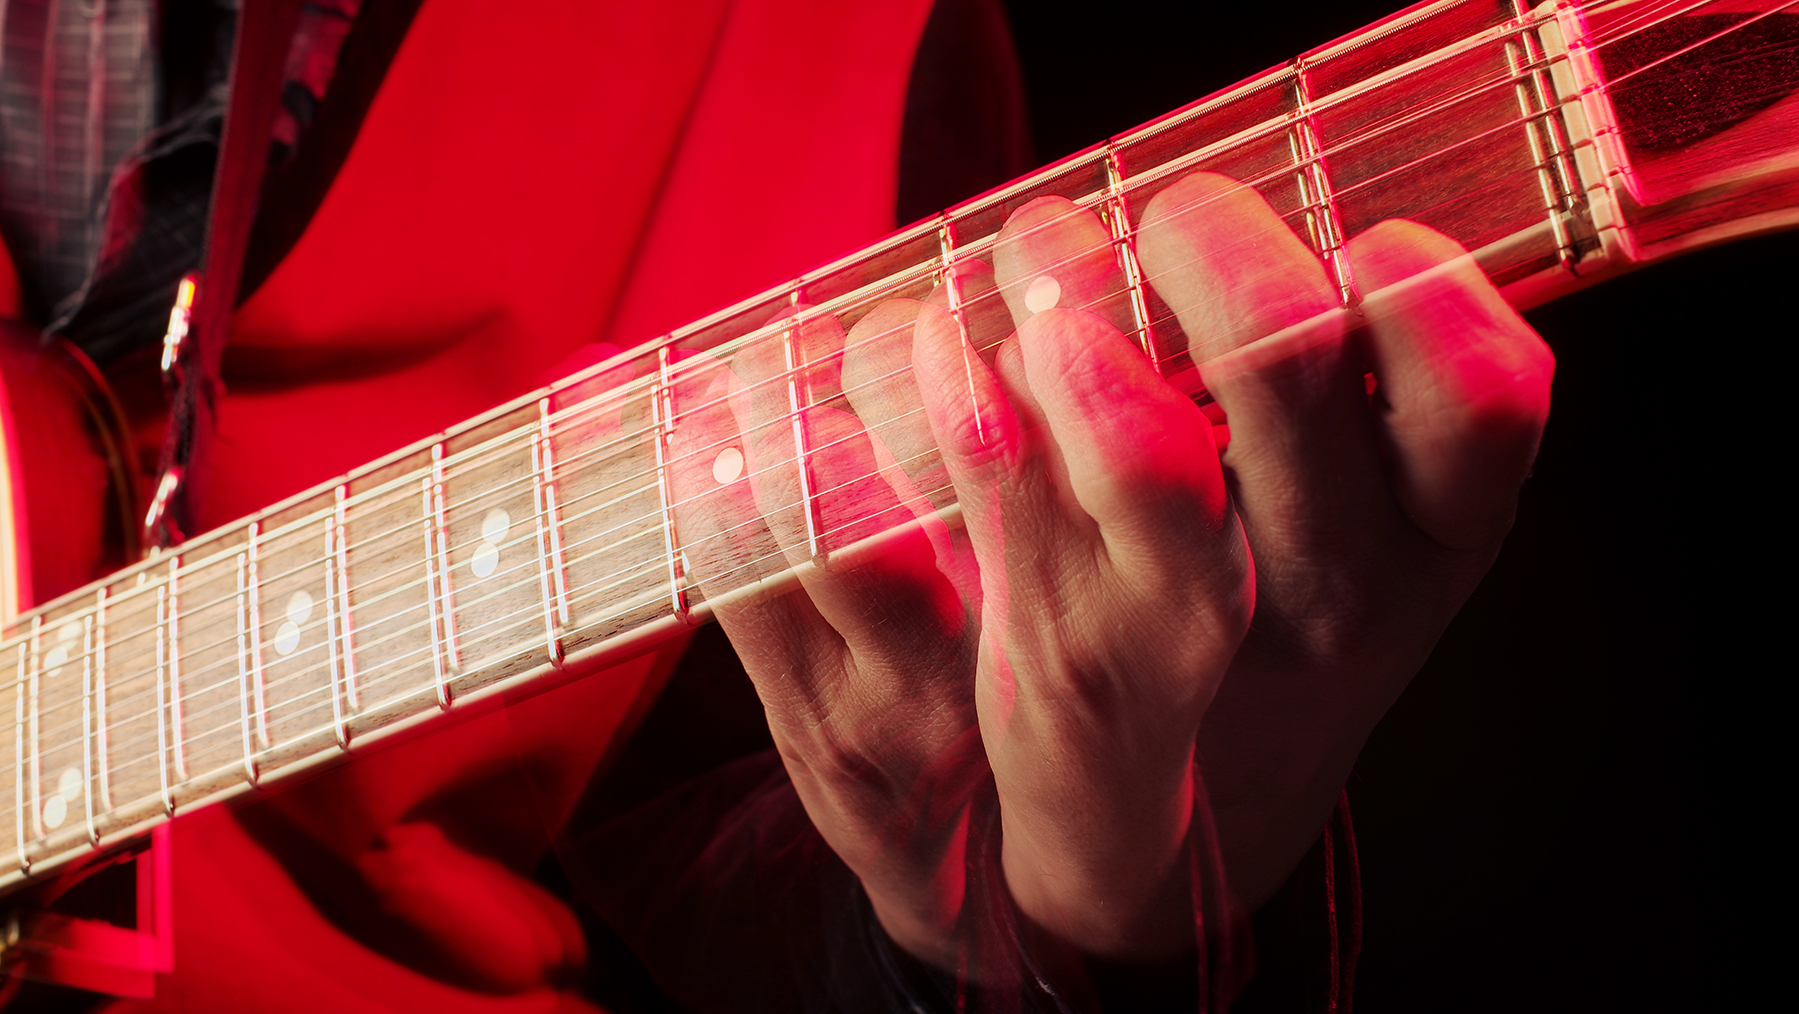
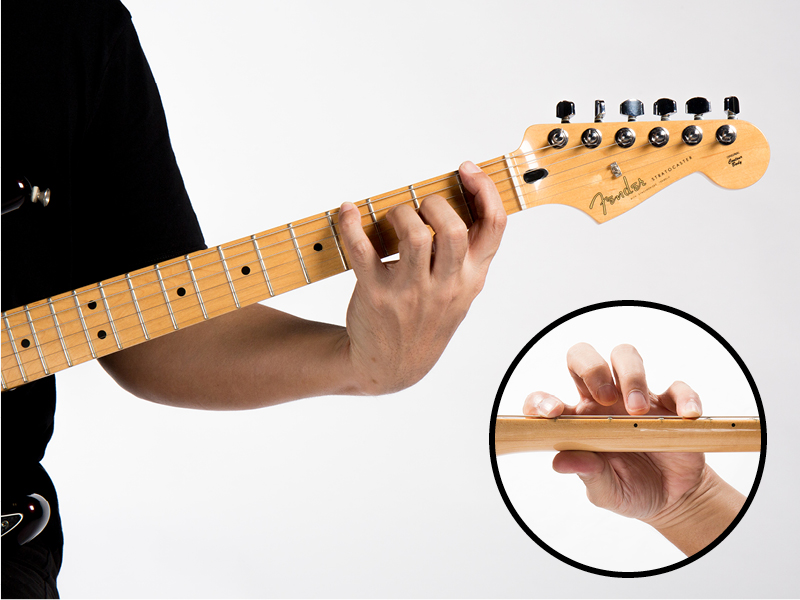
The other common method is with your thumb on the side of the neck, perpendicular to the fretboard. This requires less finger strength and is easier for beginners. It’s great for bending, vibratos, sliding, hammer-ons and all that fancy stuff, yet you can’t possibly barre a chord like this unless you’ve got ribbons for fingers.

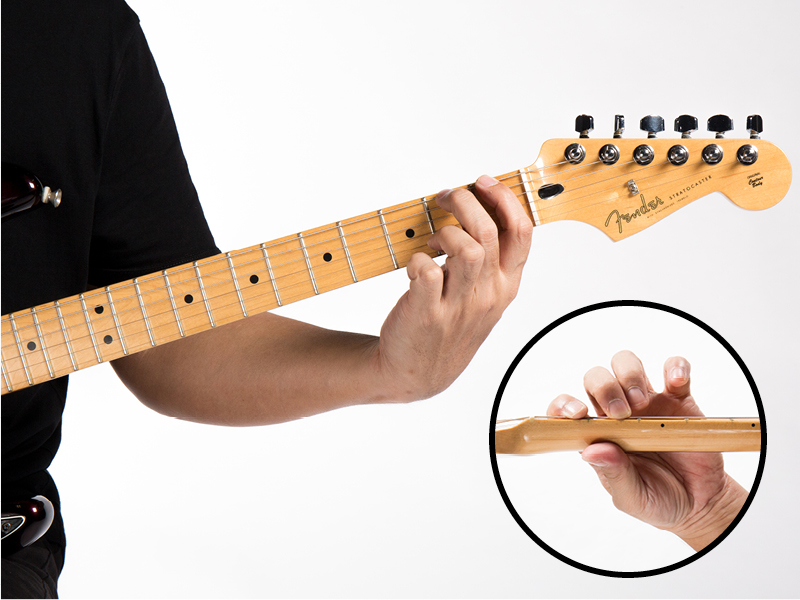
And here we have one, unfortunately very common, bad habit. When your thumb is on the side of the neck and parallel to it, you’ll have a much, much harder time hitting the frets. That’s because your fingers tend to be squashed together in this position.
Finger positions
Now that you’ve got that fundamental out of the way, the next step is to position your fingers in a way that allows for maximum mobility on the fretboard. Like so:

Fan your fingers across four frets, like in the example above. Use only the tips of your fingers—not the ‘fleshy’ bits!—nearest to your nails, and hold down the area that’s as close to the fret wire as possible. That’s where the callouses develop (right under the nail), and you’ll want to wear those like a badge of pride. Your digits should also be angled 90º relative to the fretboard. It’s not always easy to get exact, but the closer, the better.
This should be your ‘default’ finger position from which the exercises below should begin. If it feels uncomfortable, good. You want to build muscle strength of each individual finger, and, like hitting the gym, it ain’t gonna come without a little pain.
One thing to note, though. Notice that the position is harder to maintain the further up the fretboard you go. Accommodate for this by shifting the whole neck away from the front your shoulders. So if you begin with the neck aligned with your shoulder line, move it further away from the line—you’ll find that’s easier to reach the higher frets.
And before we go on to the exercises, one final thing many beginners overlook: Always trim the nails on your fretting hand!
Left-hand finger exercises
Each of these exercises is specifically designed to increase the strength of individual fingers. And by repeating these four exercises, you’ll gradually develop muscle memory around the fretboard, too.
While you don’t need an amp for these exercises, it helps to hear if you’ve fingered the note right—without the ‘buzz’ or ‘thud’ that arise out of inaccurate finger positions. We won’t touch on right-hand techniques here, so when the instructions call for playing a note, just strike it any way you please. We’ll combine right- and left-hand techniques in a later lesson.
Oh, and you’ll also want to practice to a metronome. Start with a slow tempo, say 60bpm, and work your way up.
Exercise 1
Many folks find it difficult to co-ordinate the movements between your ring and index fingers. But not to fear—the more you practice this exercise, the more the ‘partnership’ between those digits will blossom.
Start by positioning your fingers on the E string: Your index finger on the first fret and ring finger two frets higher. Feels natural, right? Now, raise your ring finger and strike the first note (the F), then follow through immediately with your ring finger on the third fret (the G); hit that note, too. Move one fret up and repeat the motion.
Once you’ve gone up three frets, reverse the movement: Play the first note with your ring finger, and then the second note, two frets down, with your index.
And when that cycle is complete, shift your starting position from the first fret to the second, and do it all over again until you’re on the higher frets. This trains your muscle memory. The more you repeat it, the more the distance between each fret becomes second nature, and soon you’ll be able to maneuver the fretboard without even looking at it.
Exercise 2
This exercise develops the co-ordination between your index finger and pinky. Begin with your fingers in the same position as they were in the first exercise. Hit the first note (the F) with your index finger, then hit the note on the fourth fret (the G♯) with your pinky. Then move up the fretboard by one fret and repeat until your index finger reaches the fourth fret.
After that, the exercise reverses, much like the one before. You’ll now lead with your pinky finger, followed by your index finger on the note four frets lower, before going down the fretboard.
Exercise 3
You guessed it: This one is exactly the same as the rest, except with your index and middle fingers.
But you’ll notice that all these exercises only train your fingers relative to your index finger. That’s where Exercise 4 comes in.
Exercise 4
The final exercise may just end up being your favorite—it’s the minor pentatonic scale. Yes, finally, something that actually sounds somewhat musical. This one is composed of the other three, and will train your index, ring and pinky fingers, all in one shot.
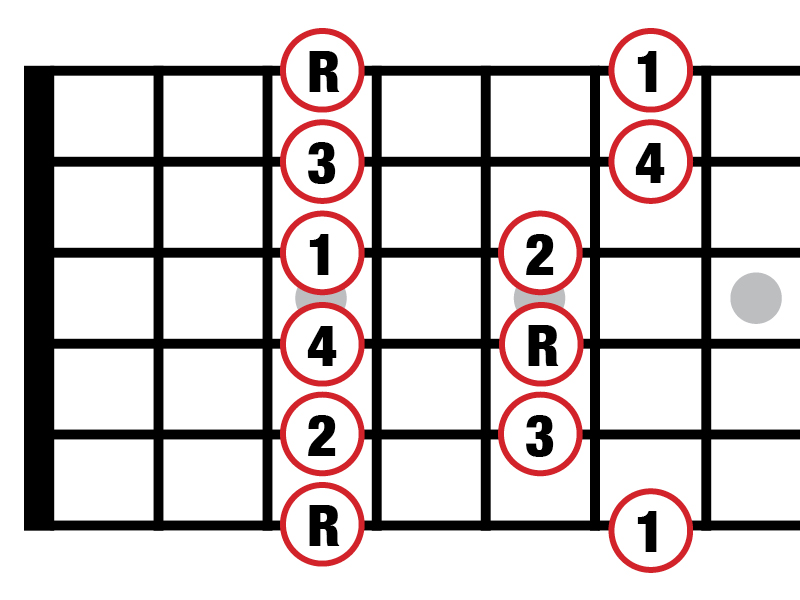
Here’s a diagram of the minor pentatonic scale. Notice the spacing of the notes? Yep, the entire scale can be played with just three fingers: index, ring and pinky. Which means you can combine the movements from Exercises 1 and 2, take them across strings rather than along them, and viola—you have a scale and a finger exercise rolled into one.
And have some fun with this exercise. Try out different sequences and combination of notes, but remember the goal here is to improve the strength of and co-ordination between your index finger and its neighbors.