Related Tags
16 Gretsch upgrades, mods and tone tips
Fixin’ to ride the Gretsch rodeo? We present modifications, upgrades and tone tips that will help you stay in the saddle…

1. Immobilise your bridge

Although many new models come with this problem solved at the factory, when there isn’t enough downward pressure on a traditional Gretsch bridge, it’s all too easy for it to be knocked out of position. This is a well-known issue with archtop guitars in general – although heavier gauge strings might help, you would be compromising playability to fix a mechanical issue.
Fortunately, there are various solutions of varying degrees of invasiveness. Start by ensuring the guitar is set-up exactly the way you like it and the intonation is as accurate as possible. Carefully mark the position of the bridge by placing masking tape around the base. Now you have a few options.
Get some double-sided sticky tape. Rather than soft fabric-style carpet tape, go for double-sided Sellotape that’s as thin as possible and will have minimal effect on vibration transfer. Apply the tape to the areas of the base that make contact with the body and trim the excess from the edges.
Line the bridge up carefully using your masking- tape markers and press the base down onto the body. You may need to renew the tape periodically, but many find this solution lasts for years. Some suggest that violin rosin and white glue work too, without damaging the finish.
The alternative is something you may ask your luthier to do for you because it involves drilling through the bridge into the top of the guitar. Pins or small screws can then be used to fix the bridge and most choose to countersink them to make the modification as invisible as possible.
2. Shim your pickups
You can achieve massive improvements in bass and treble balance, as well as overall tone, if you get the distances between the polepieces and strings just right. Unfortunately, vintage Gretsch pickups had no provision for height adjustment and many players have simply put up with things rather than explore the options.
Gretsch pickup guru TV Jones has been banging on about this for years and there’s a page on his website dedicated to pickup adjustments. His recommended starting point is a 3/16-inch gap between the polepieces and the two E strings.
Since Filter’Trons and HiLo’Trons are screwed directly onto the body, you have to put springy foam spacers under the pickups to push upwards. Some people use mouse-mat material. DeArmond-style pickups require specially cut spacers, but they’re easy to find online.
Set your polepieces as low as possible, adjust the overall pickup height, then fine-tune the polepieces if you feel the need. If you find your bridge Dynasonic too bright, spin it around 180 degrees to put the polepieces further from the bridge before you set the height.
3. Seat your archtop bridge properly
You may have it pinned or taped, but for a traditional archtop-style bridge to transfer string vibrations into the body with the greatest efficiency, the base must be matched as closely as possible to the arch of the top.
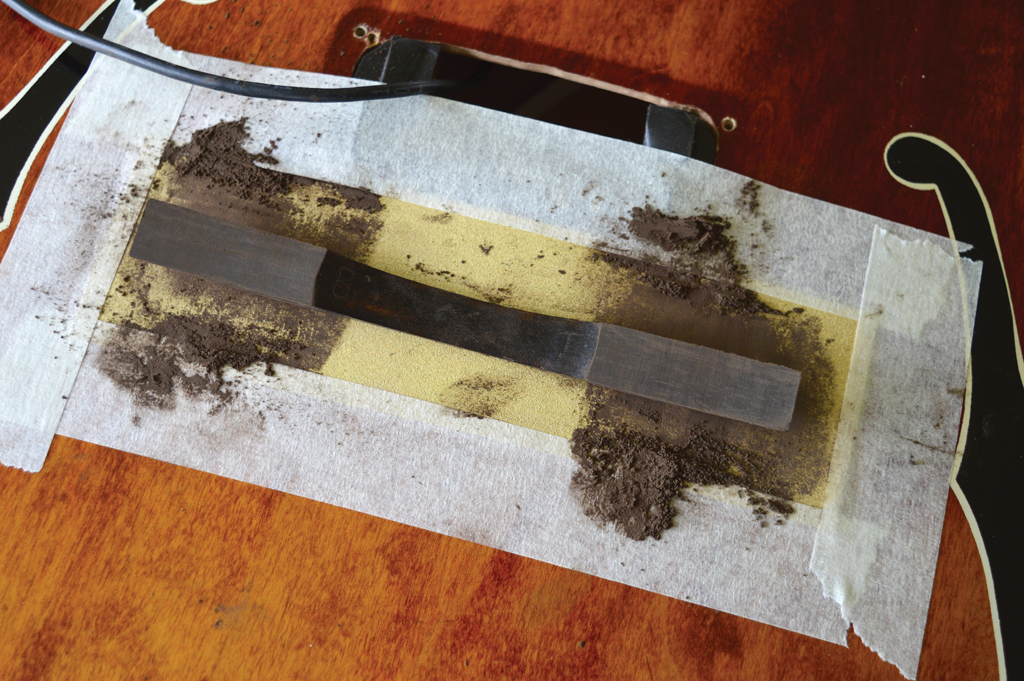
Take a thin piece of paper and see if you can slip it under your bridge base. If you can find a gap anywhere, there’s room for improvement, but fortunately, it’s an easy fix. Cut out a rectangle of 320-grit abrasive paper that’s about 5cm wide and about 3cm longer than the bridge base, then fix it to the top using masking tape.
The abrasive paper should be in the exact position of the bridge. Place the bridge base on top of the paper and move it back and forth very slightly following the direction of the strings. After a few movements, flip the bridge base over and you should be able to see areas of sanded and unsanded wood.
Continue a few strokes at a time, checking constantly, until all the wood shows evidence of contact with the abrasive. At that point, you’re done. Remove the paper, refit the bridge and string up. The gaps should be gone and you will probably hear an improvement in acoustic tone. If you’re happy with your bridge fit, mark the treble and bass sides with a pencil so the bridge will always be the right way around.
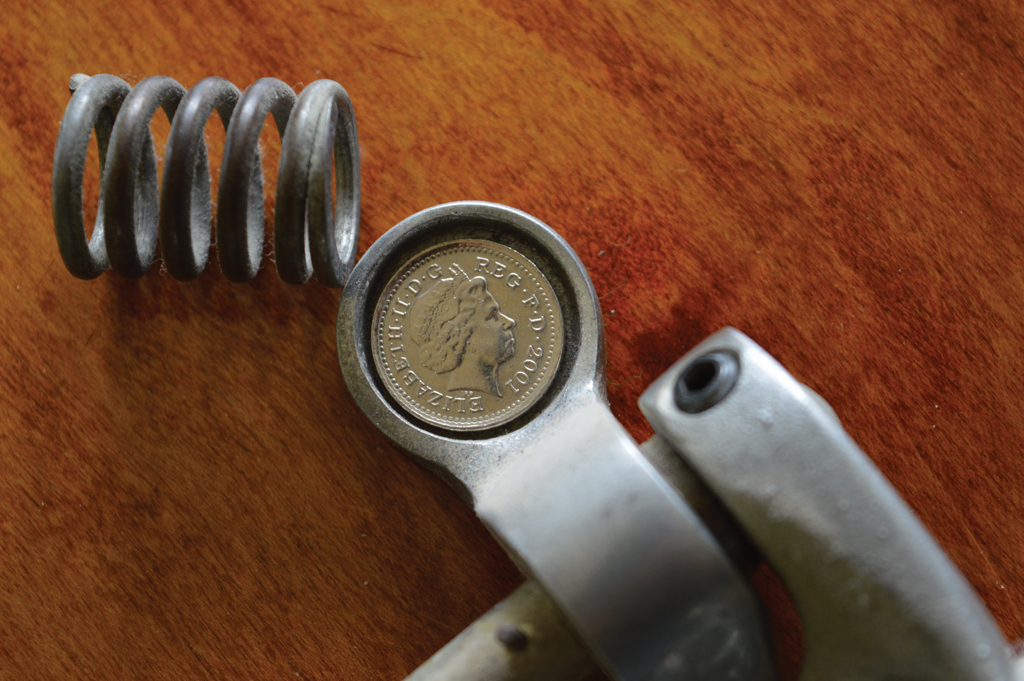
4. Keep your Bigsby arm tight
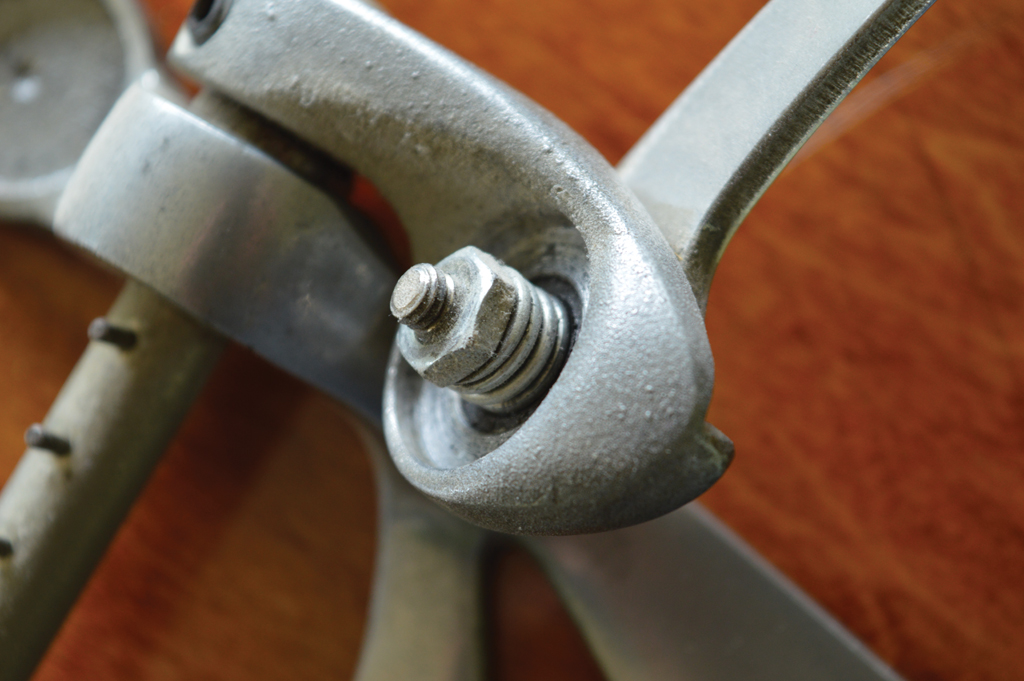
Many of us will have suffered the problem of our Bigsby arms working loose or eventually falling off. Once you’ve slackened off the strings, reattached the arm and strung back up a few times, you’ll probably be ready for a more permanent solution. The problem seems to be that moving the arm gradually loosens the retaining nut holding the arm onto the Bigsby assembly. Some swear by Nyloc nuts, but as always, opinions differ.
You may also find two thin nuts separated by a washer. That certainly applied to a ’63 Tennessean owned by a member of the team – and the arm would fall off about once a week. Famed UK guitar tech Brinsley Schwarz fixed it by tightening the nut and locking everything together with Super Glue, and it’s still holding over 20 years later.
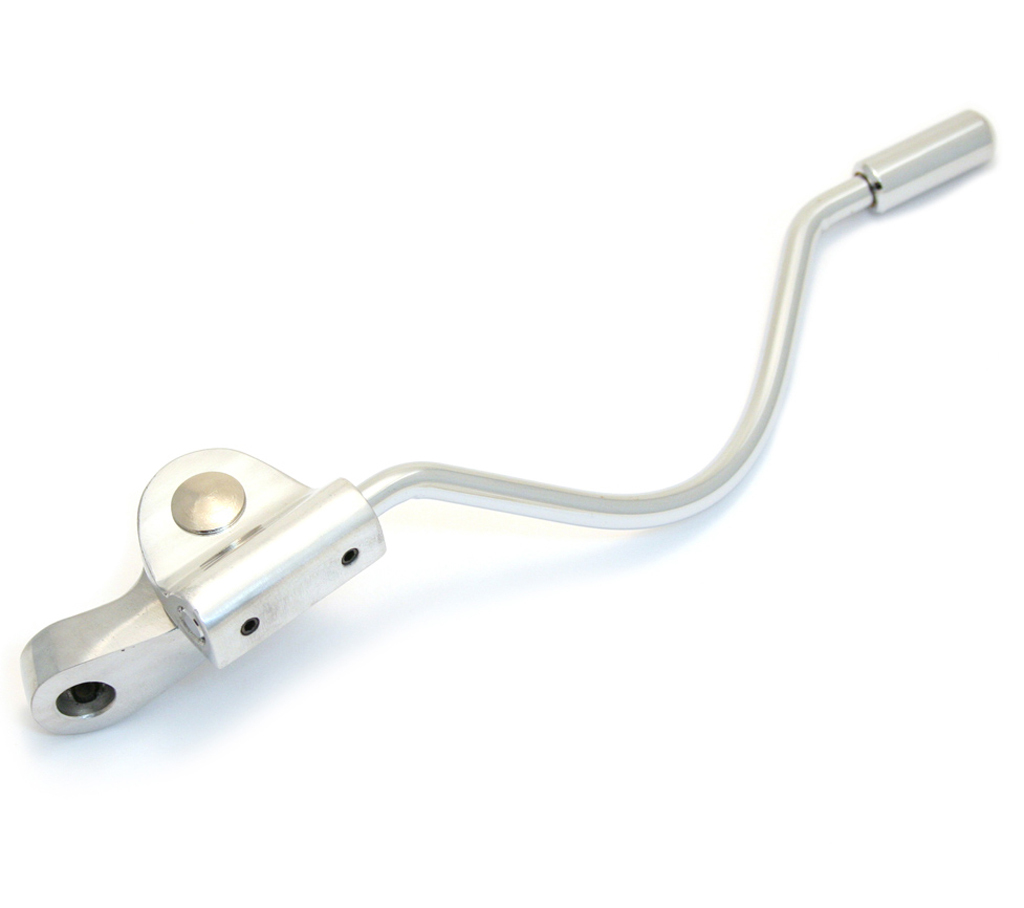
5. Experiment with different Bigsby arms
If the original springy vibrato figures prominently in your playing style, you may want to consider various options to make your Bigsby more comfortable, less intrusive or easier to use. The earliest Bigsbys had fixed arms, so they couldn’t be swivelled out of the way. Many players would find this obtrusive but others, such as Darrel Higham, like to know where the arm is at all times, so a fixed arm is ideal.
Then there’s the ‘Chet’ wire handle, with a bend that detours around the bridge. A bend in the arm allows it to swivel around as far as you want without fouling against the bridge, and you can see photos of Chet Atkins palming his wire arm while thumb-picking bass strings.
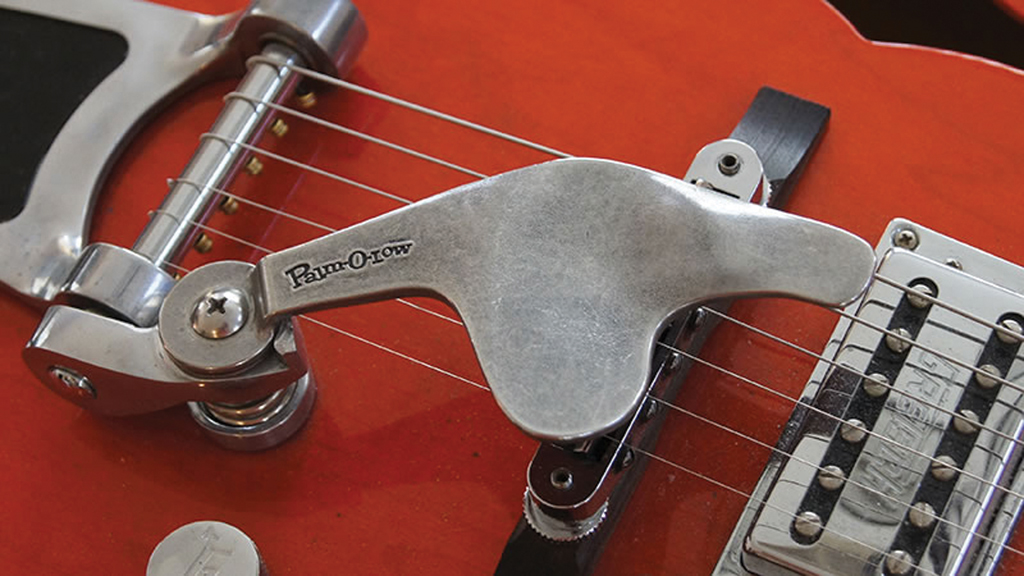
Gretsch introduced a different Bigbsy arm in 1956, and it’s nicknamed the ‘Duane Eddy arm’. It could be swivelled out of the way and turned back within reach when required. Early examples were aluminium, but this changed to stainless steel in 1958. You could also check out the ‘wide vintage’ and ‘Merle Travis’ handles. There’s a video on the Bigsby website all about ‘specialty’ handles and how to fit them. Those who want to use a Bigsby but dislike the long metal handles should check out the Palm-O-Low system.
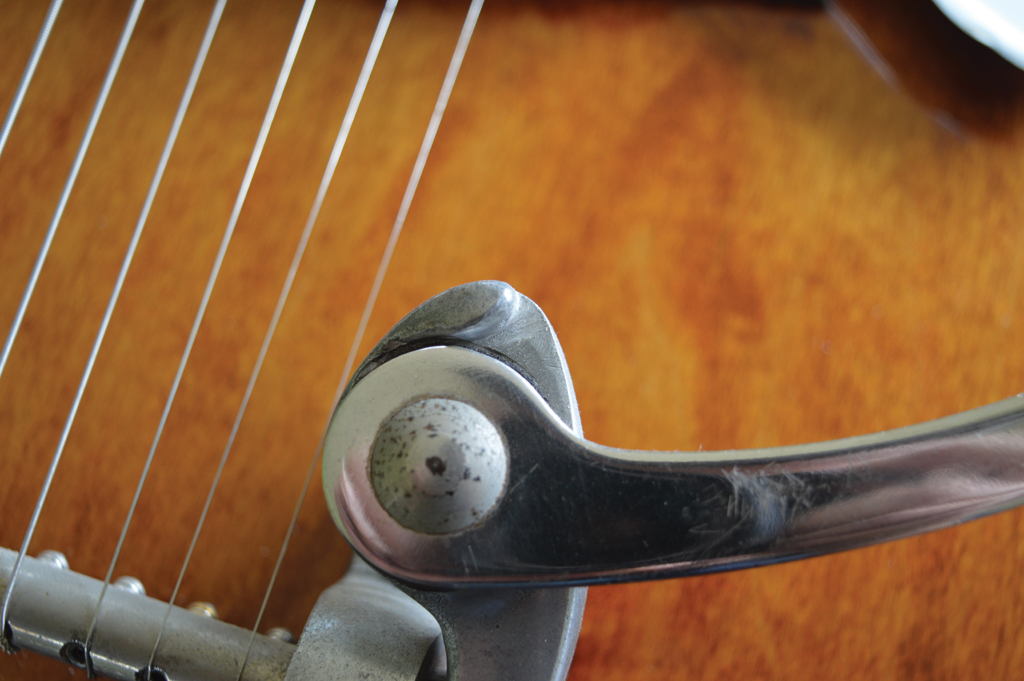
6. Or modify the existing Bigsby
Besides changing the arm as discussed earlier, there are a few other Bigsby upgrades and modifications to consider. The Bigsby on the Gretsch pictured here had a moulding that prevented the arm from coming past the high E, so I couldn’t operate the Bigsby while I was picking the strings. A couple of minutes with a hacksaw and a file removed the obstruction.
Some guitar owners find it tough to string Bigsbys, because it’s hard to get the ball end of the strings to stay hooked onto the pins. It’s possible to unscrew the pins, then drill the holes all the way through the bar. The strings can then go through and over the bar, much like top wrapping a Les Paul tailpiece.
If the arm is too close to the body, try putting a metal washer under the spring to raise the angle. If the bar is too high, on the other hand, you may find there’s a washer already in there that can be removed – or you can buy a shorter spring. Allparts UK stocks 22mm and 25mm springs. If you would prefer a softer and smoother feel, check out Reverend Guitars’ Soft Touch Spring.
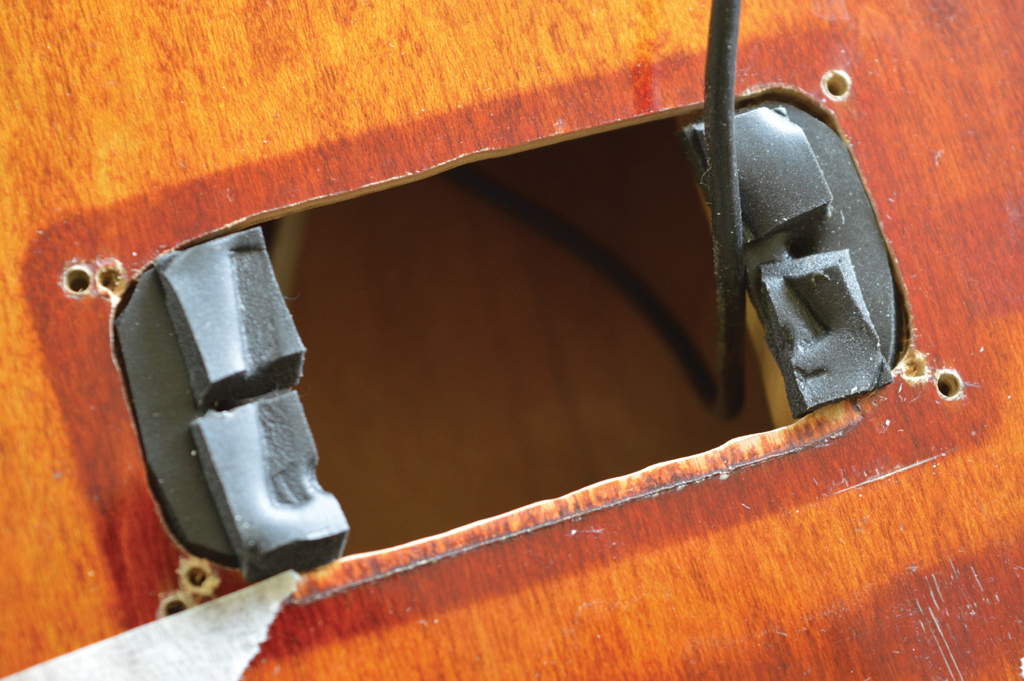
7. Kill DeArmond squeal
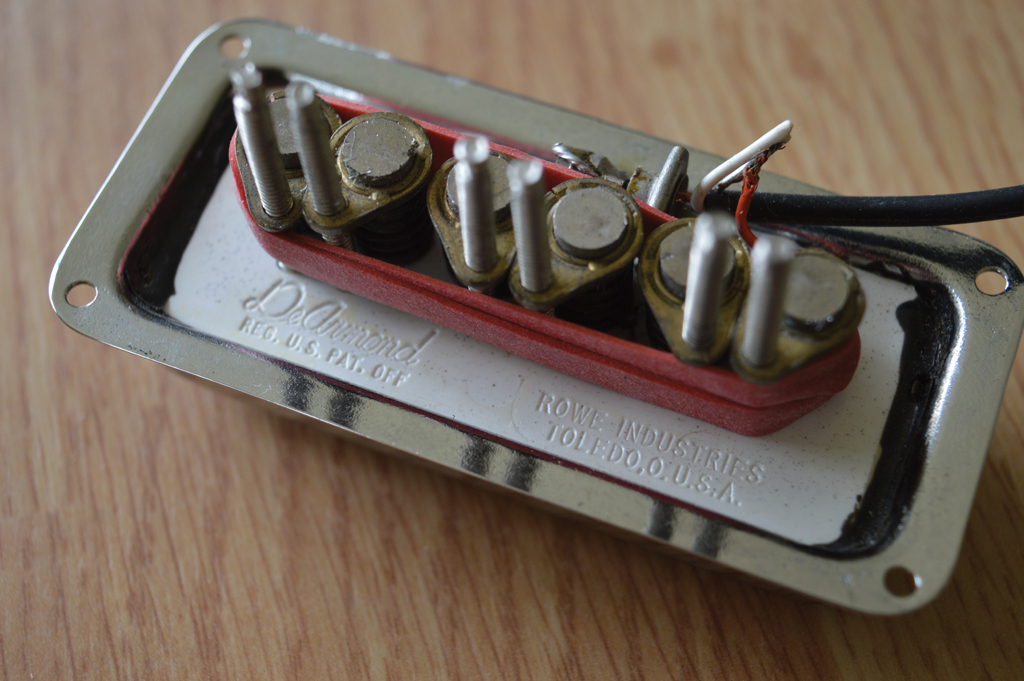
DeArmond Dynasonics are often described as being like ‘big-sounding Tele pickups’ and just like Telecaster pickups, they have a tendency to squeal. Played clean at low-to-medium volume levels, Dynasonics can be very well behaved, but high volume and high gain can push them into microphonic feedback.
Underneath the bobbin, you’ll find a complicated arrangement of screws, springs and retainers. Nothing is firmly fixed and soundwaves can certainly get everything moving all too easily. The key to killing the squeal is to stabilise the parts. You can get good results simply by wrapping strong elastic bands around the metal parts to bind everything tightly together. If you’re suffering, the elastic-band trick is cheap and most certainly worth trying.
8. Swap your pots
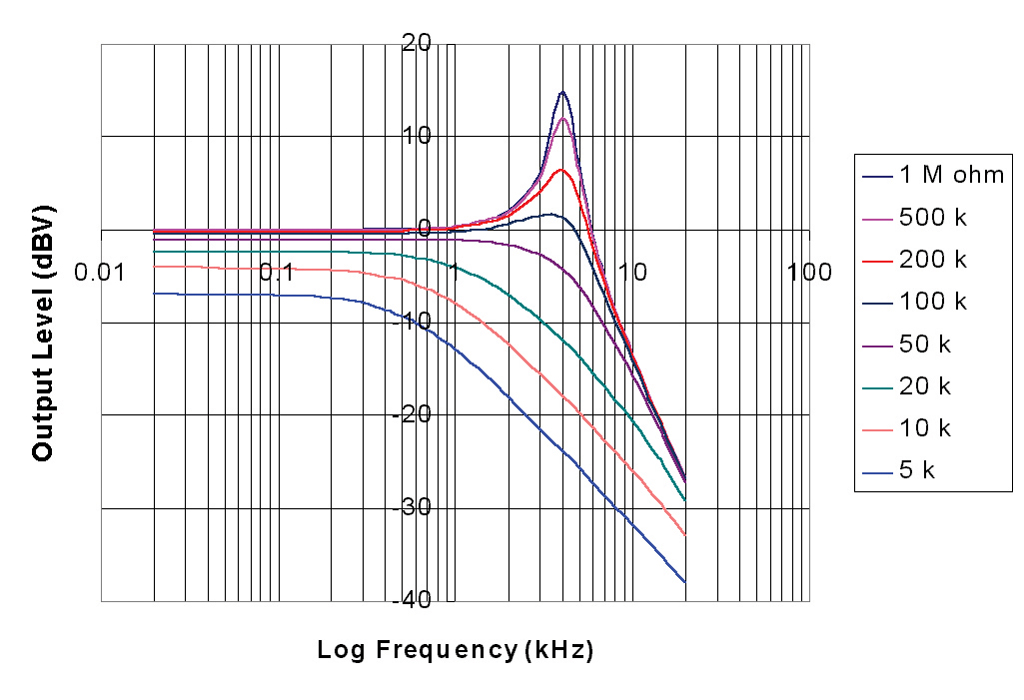
Higher-value volume potentiometers accentuate the resonance peak at the cut-off frequency, which makes a guitar sound brighter. If your guitar seems too dull or bright, try changing the control pots before shelling out for replacement pickups.
Not all potentiometers are created equal, which is pretty obvious really. What’s less obvious is the way you can select different values to tweak your tone. While you’re at it, you may be able to upgrade the quality of your control pots, especially if your reissue Gretsch is fitted with the 16mm type that was used in the 1990s.
Higher-value volume pots accentuate the resonance peak at the treble roll-off frequency, which players perceive as a brightening of the tone. Fender used 250k pots to de-emphasise the resonance peak, as its pickups and amps were naturally bright. In contrast, 50s Gretsches with Dynasonics had 1M pots, and by ’59, the company was matching Filter’Trons with 500ks.
If your Gretsch sounds dark and you want more clarity and twang, try changing the volume pot to a 1M audio taper. For a darker, smoother tone, try 500k or 250k. Gretsches with tone (mud) switches, disengage the tone circuit in the middle position so they sound brighter. You can simulate the effect using a no-load tone potentiometer.
9. Try ‘mud’ mods
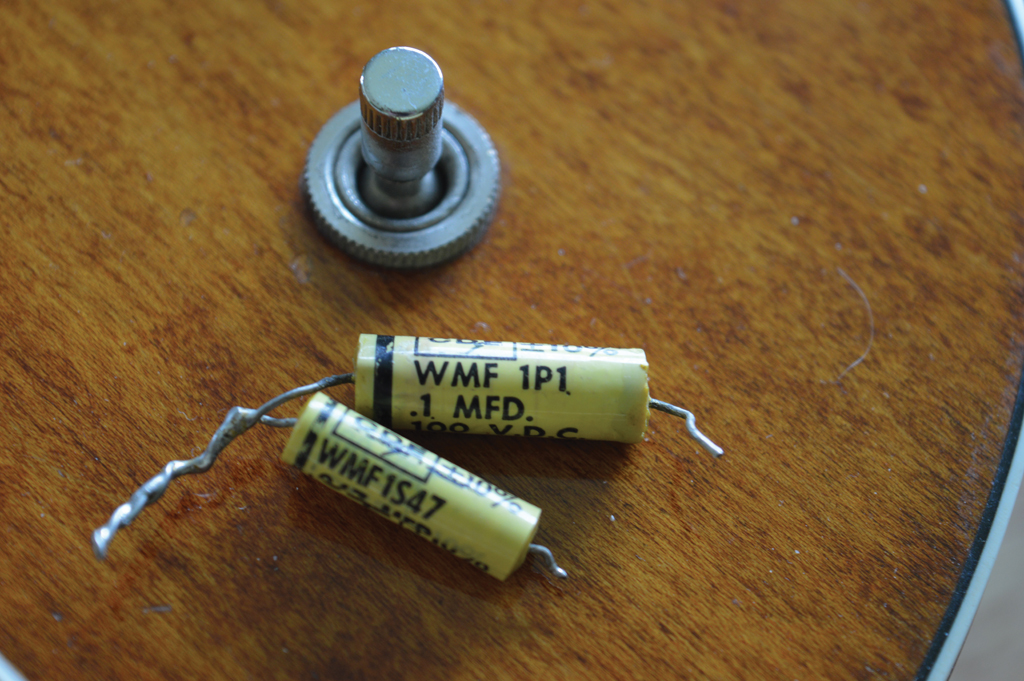
Gretsch’s attempt at tone control in the late-50s and 60s was the ‘mud switch’ – so called because both settings rolled off so much treble, the sound turned to mud. Two tone capacitors were connected to a three-way switch that was ‘off’ in the middle setting. Vintage capacitor values were 0.1uF and 0.047uF, which produced two degrees of roll-off – dull and duller.
Most Gretsch players simply ignore the mud switch, or at least try to avoid it, and Brian Setzer sometimes removes his entirely. In fact, one of the few name players who achieved anything vaguely useful from the mud switch was Stephen Stills. You can hear a great example on the solo of Wooden Ships.
After much persuasion, TV Jones talked Gretsch into changing the capacitor values to 0.012uF and 0.0039uF, which has finally turned the tone switch into the usable feature it should have been all along. The smaller cap skims off the twang, giving the Filter’Trons a Gibson PAF-style grind, and the bigger cap gets the neck pickup into clean jazz mode, or even ‘woman’ tone with added distortion. If it’s done right, you get three usable sounds from the same pickup at the flick of a switch – not unlike a Fender Esquire.
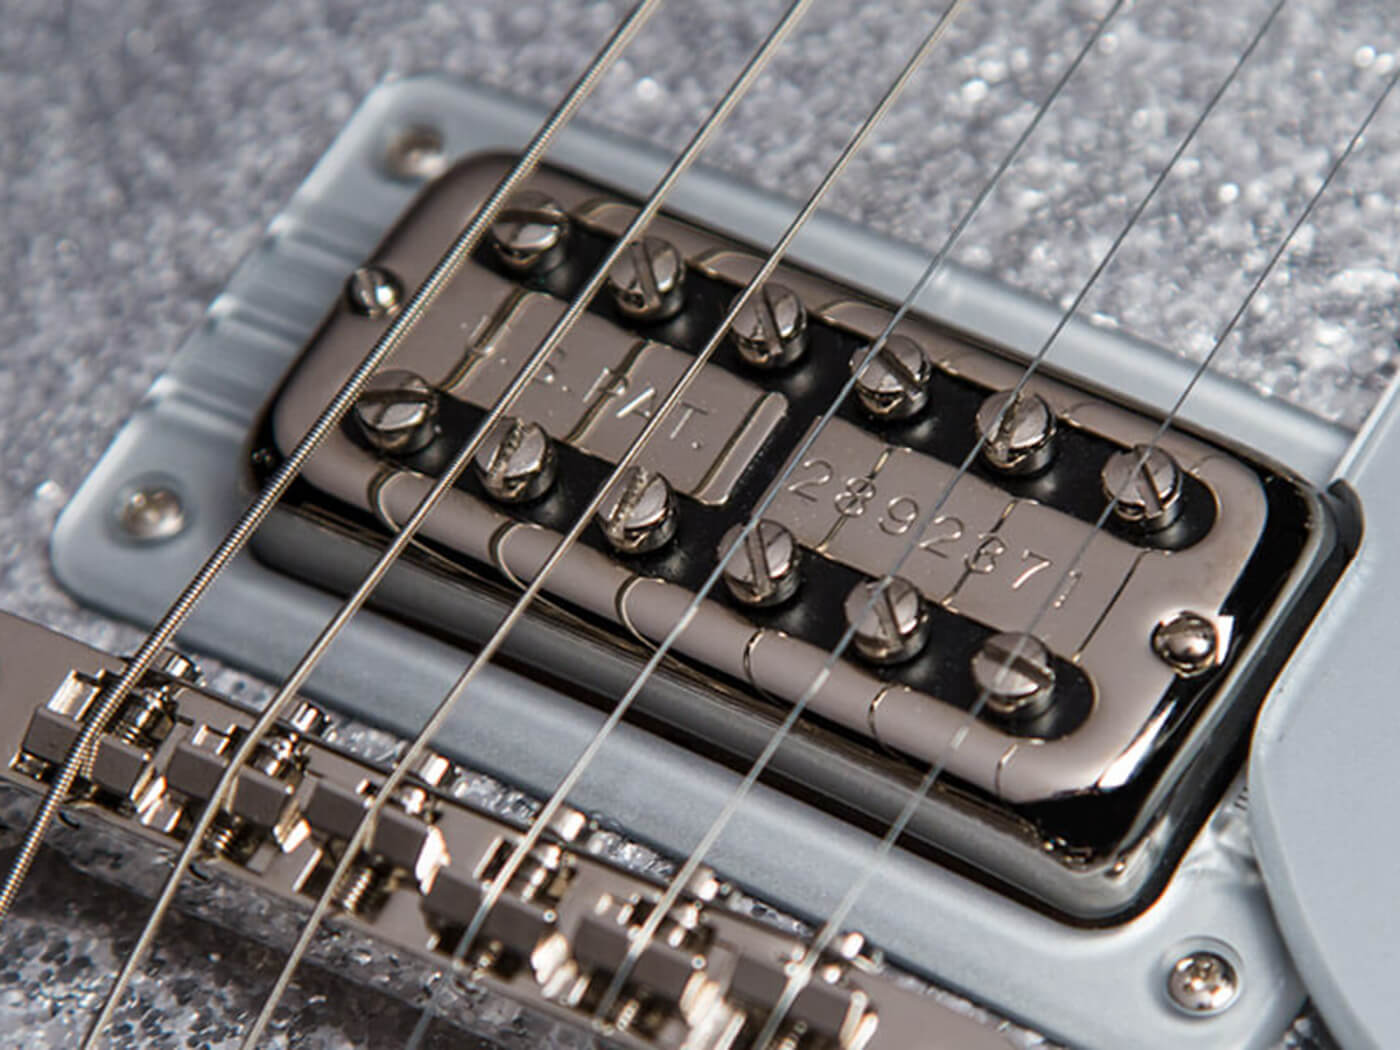
10. Install English Mount Filter’Trons

The original Filter’Tron pickups were designed to be screwed onto the guitar. There were holes at each end of the cover and no provision for height adjustment. This arrangement has made it hard to fit traditional Filter’Trons in Gretsches from the lower end of the product line, and guitars that were designed for Gibson-style humbuckers.
That’s why TV Jones introduced ‘English Mount’ Filter’Trons – named after the man who inspired the design, Mr Jim English. They come with PAF-style ears and surround rings that match M69 rings for Gibson-style guitars. For Electromatic 51 Series guitars, a more traditional Gretsch-style ring is available with the two extra holes for the suspension screws.
If you want to mount a more traditional-style Filter’Tron in this way, all is not lost. You can take a length of aluminium or Perspex that fits between the polepieces and tap it for four holes. Two accommodate the fixing screws that go through the pickup cover, and the others are used for the surround screws.
11. Convert your HiLo to Filter’Tron pickups
After mid-1960, upmarket Gretsches had Filter’Tron and Super’Tron humbuckers, while lower-priced models got HiLo single coils. Although many Gretsch players like the HiLo sound, given the choice, most would probably prefer to have Filter’Trons.
The build quality of the various Gretsch models was much of a muchness and pricing seemed to be based on pickups, binding and often ill-advised ‘special features’. Consequently, many proud Tennessean and Anniversary owners have since retrofitted Filter’Tron pickups.
Unfortunately, they’re not drop-in replacements and some routing into the top of the body is required, to accommodate the Filter’Tron’s taller casings. Filter’Tron router templates are available from TV Jones for $10, or you could rout the cavities free-hand, as Gretsch did. This mod may devalue a vintage instrument from a collector’s perspective, but its player appeal may be significantly enhanced.
12. Plug f-holes to reduce feedback

Like all big hollow-bodied guitars, Gretsches are prone to feedback. In an effort to combat this and increase sustain, Gretsch experimented with sound posts and trestle bracing. Models such as the Tennessean, Country Gentleman and double-cutaway 6120s had sealed tops with fake f-hole decals.
If you like to play loud, it’s unlikely you’ll ever persuade a hollow Gretsch to become entirely feedback-free, but you may be able to control the feedback to some extent by using f-hole plugs. Various companies make them, and no specialist knowledge or tooling is required to fit them.
They can also be removed at any time, so it’s worth checking out Doug’s Plugs and Victor Baker Guitars. If you’re in a tight spot, you can simply tape over the f-holes, but this is not an ideal solution because you may end up damaging the guitar’s finish.
13. Customise your pickguards
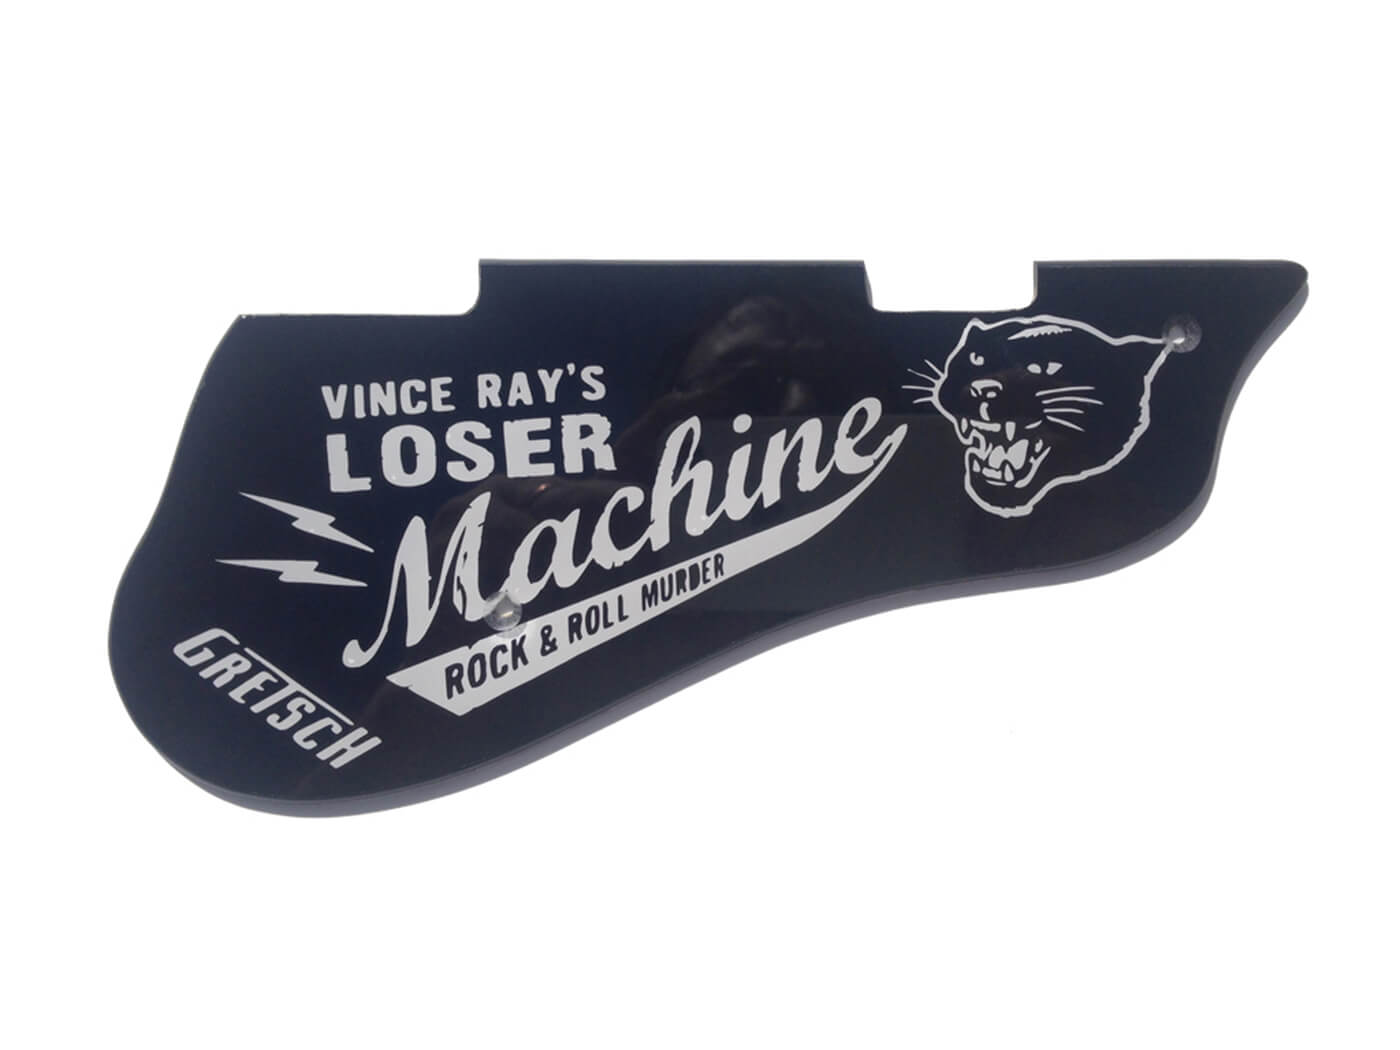
Loads of Gretsch fans are into customising their stuff. Whether it’s their car, their skin or their guitars, it’s all part of the hot-rod culture. One of the most popular Gretsch modifications is the customised pickguard.
Chet and Brian have had their names and logos on their pickguards, so why shouldn’t you? It’s also a cheap way of making an entry-level Gretsch look more upmarket. There’s a remarkably talented chap in the US called Paul Setzer, who can make just about any pickguard you can dream up.
Whether it’s a perfectly accurate repro pickguard for a vintage restoration, or a steer’s head, skull, viking longboat, or portrait of your pet dog, he can do it in any shape or colour you want.
14. Swap those tuners
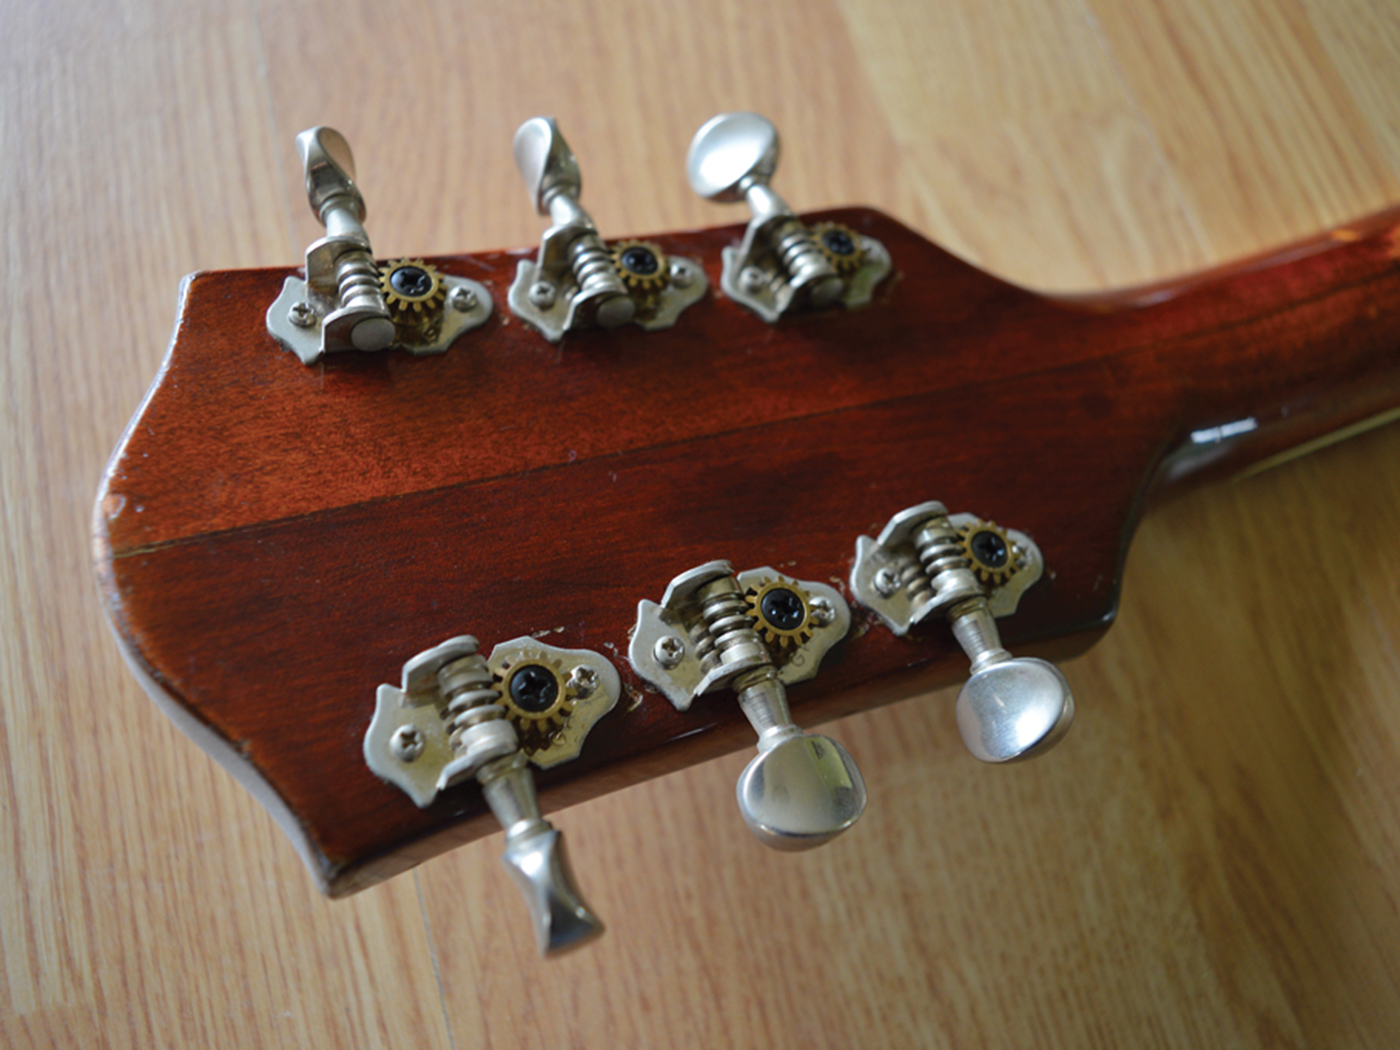
Despite long-standing rumours and occasional encouraging noises emanating from Gretsch, vintage-correct replicas of the Waverly tuners Gretsch used during the 50s and early 60s have yet to materialise. Unfortunately, the vintage Waverlys on many vintage Gretsches will have seen better days – and most Gretsch restorations end up with open-gear Grover Sta-Tites, Gotohs or modern Waverlys for the well heeled.
Brian Setzer is well known for his love of vintage Gretsch guitars, but as a professional performer, he has long taken a pragmatic approach to making his vintage instruments stageworthy. Setzer’s preference is for Sperzel tuners, and many Gretsch fans have realised they like the look and feel, too. Unfortunately, fitting die-cast tuners such as Sperzels and Grovers does require the widening of post holes.
Modern Gretsch guitars tend to come with high-quality open-gear or die-cast tuners. There’s rarely any good reason to change the former, because if you’re encountering tuning instability, the tuners are probably not the issue. Swapping out the die casts for a set of open gears requires conversion bushings. Fortunately, downsizing is an easy job, if you prefer the vintage look and a better overall balance.
15. Bring in a B-Blender
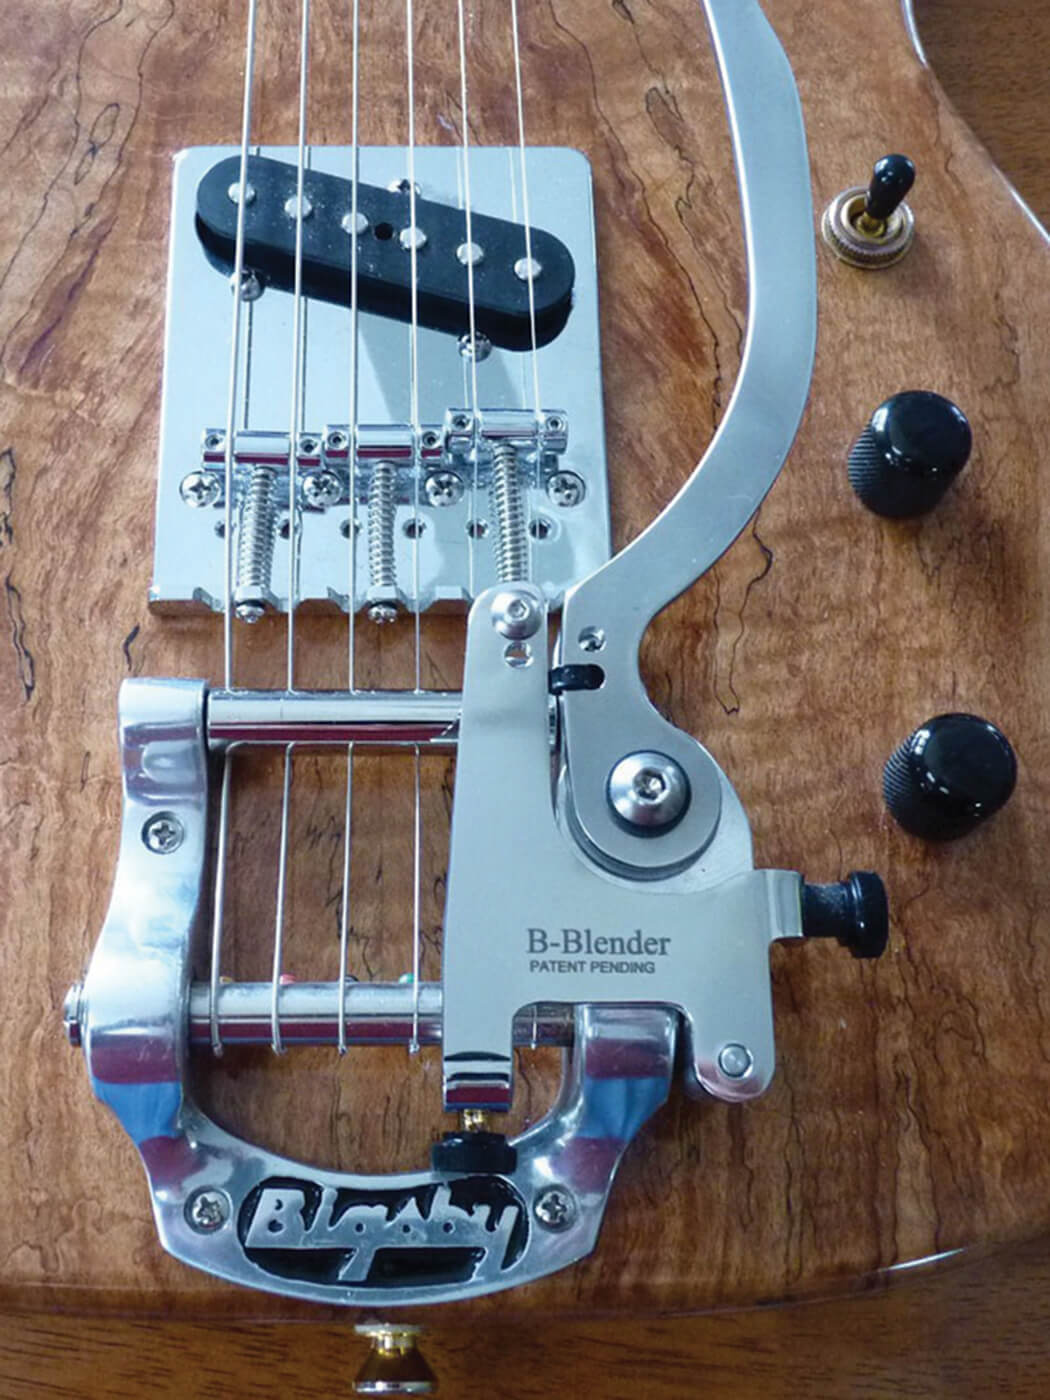
If you play a Gretsch guitar, there’s a good chance that you’ll be into country music, too. Telecaster players are well catered for when it comes to mechanical string-bending devices that can create pedal-steel effects, but until recently, Gretsch players were restricted to, at best, bending strings behind the bridge using their fingers.
Paul Pigat tipped us off about the B-Blender. It attaches to Bigsby-equipped guitars and enables mechanical B-string bending by pulling the replacement Bigsby arm towards the string – the Bigsby itself continues to operate normally. The B-Blender can be installed and uninstalled by the owner, and no extra holes need to be made in the guitar. Better still, the unit can also be adapted and used as a G-Bender.
16. String improvements
Gretsch pickups are pretty sensitive, and it’s worth experimenting with different types of strings to discover what works for you. It would be hard to improve on Malcolm Young’s rhythm tone for rock, and he’s known to favour Gibson pure-nickel roundwound strings.
Young’s are 12-gauge with a wound G, so they would be too heavy for most lead work, but if you can get by with 11s rather than 10s, it will really suit your Gretsch. Pure-nickel strings, such as Ernie Ball Rock ’N’ Rolls are worth trying for long-lasting brightness if you are able to get hold of them.
If you’re after Cliff Gallup and Scotty Moore-style 50s tone, you might want to think about trying flatwounds. Thomastik Jazz Swings are popular for their strong fundamental tone with controlled harmonic overtones, but some players prefer a plain G for bending.
Some enjoy strings that are halfway between flat and roundwound. GHS Brite Flats are micro-ground to have some of the feel and tone of flatwound strings with, as the name suggests, extra brightness.
Check out our guides for upgrading Les Pauls and Stratocasters, too.