Related Tags
DIY Workshop: How to relic a 1950s-style sunburst finish
After a break for lacquer curing, sun fading and tinted clear coats, it’s time to see how close we can get to the look of a vintage instrument.
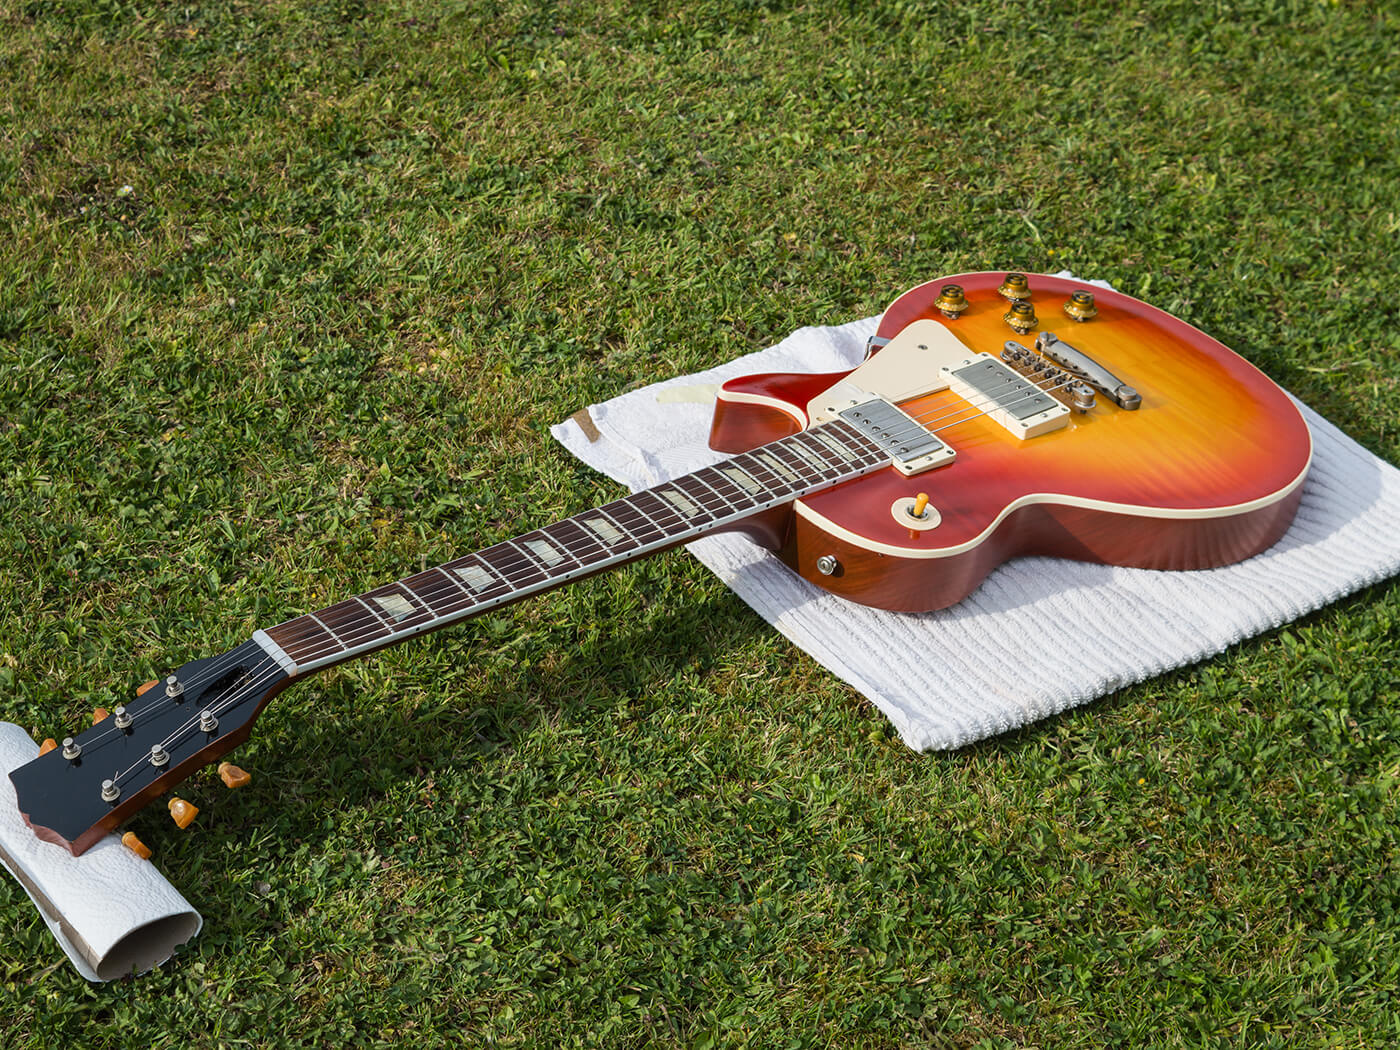
Last time you saw this guitar, I signed off on an uncertain note, with the outcome of this project largely dependant on the aniline dye fading under UV light. Inevitably, after about two months of blazing sunshine it clouded over and started raining just as I finished spraying, but as soon as the sunshine returned, the fully loaded Greco took up permanent residence in my garden.
After a single day in the sun the fading was noticeable, but the sunny spell was short-lived. Instead, I placed the guitar under a UV light with a tin foil ‘tent’ to keep things moving along on the dull days.
During the fading process, the red first loses its scarlet stridency and gradually the maple figuring becomes more apparent around the edges. The unappealing (to me) ‘clown burst’ look is almost gone after a few days. As the red retreats towards the edges, the colour tone shifts from red to orange/brown in the transition areas. At the same time, the shading coats begin to show through the red to give it a cooler and slightly blue tint.
Watching the fading happen is pretty thrilling because in bright sunshine, the look seems to improve almost by the hour. The hardest part is keeping a constant lookout for rain, but sunlight is definitely the best option – if the body is placed in front of a static UV light, you may end up with strongly defined ‘tan lines’ under the knobs and pickguard, which isn’t realistic.
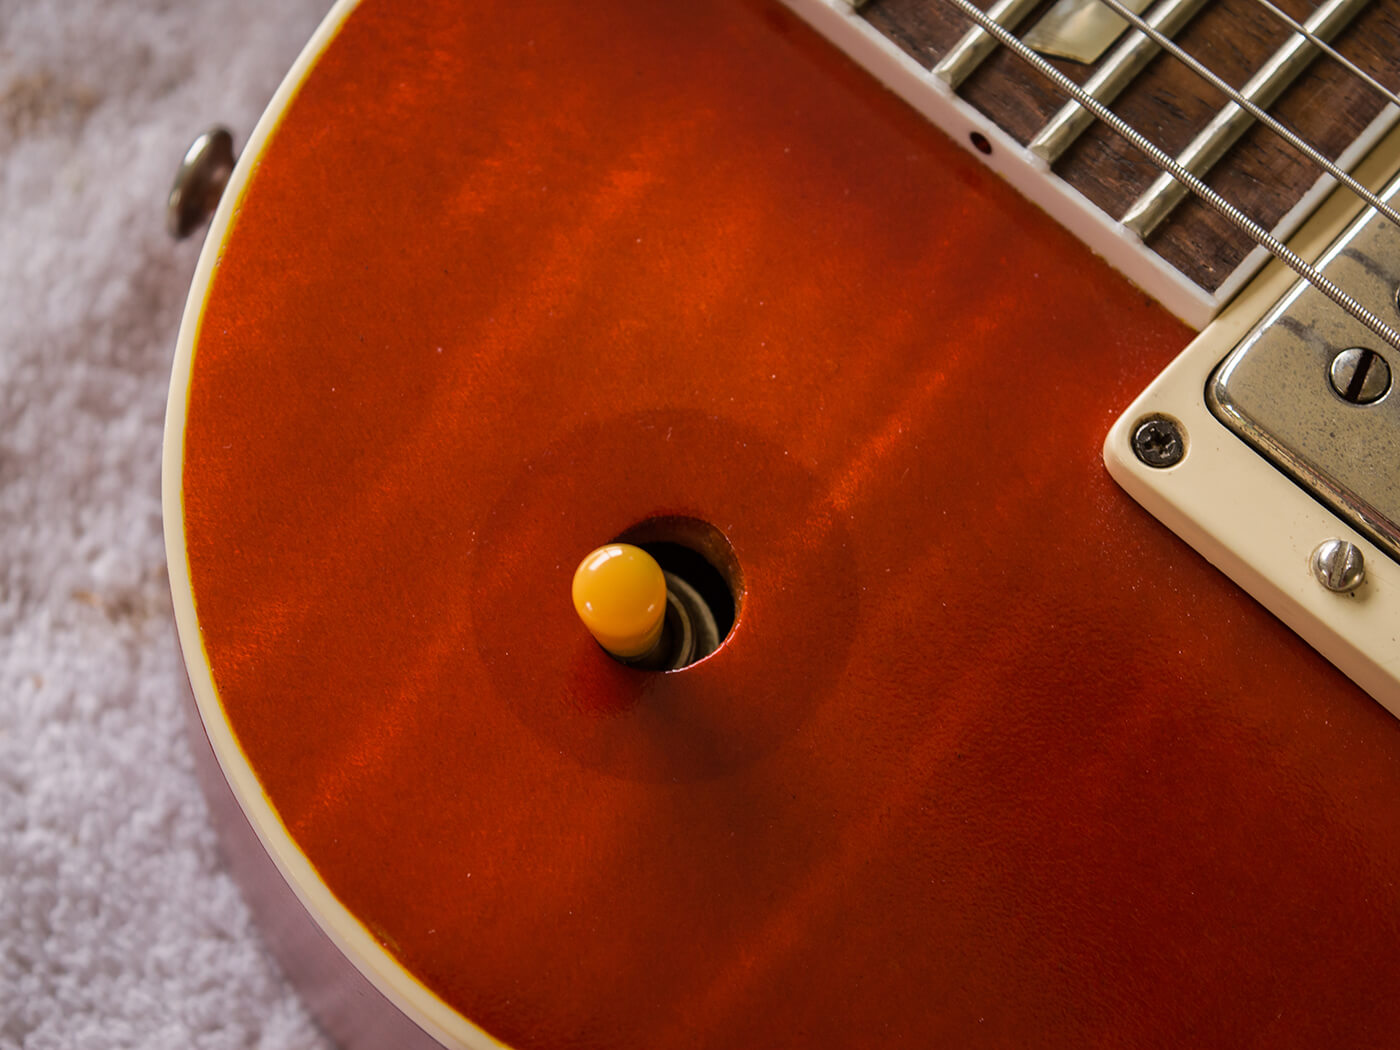
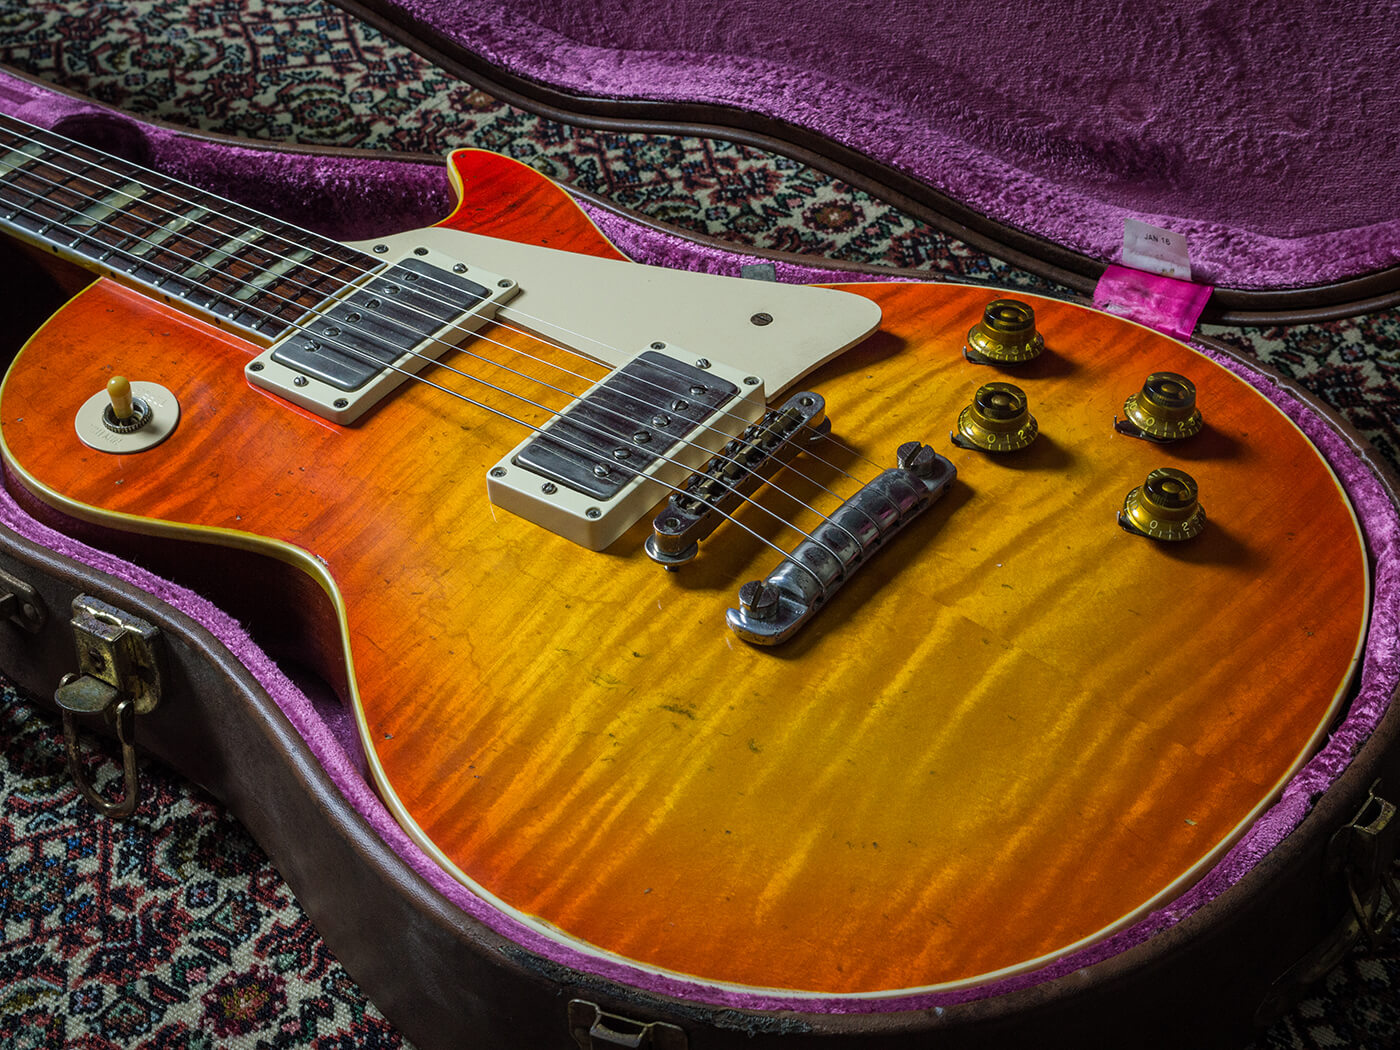
Sharply defined fade lines should be seen beneath the poker chip, neck pickup ring and pointers. The pickguard shading should only have sharp lines near the neck pickup, where it’s closest to the body.
I eventually call it quits on the sunbathing after about a week, by which time the burst has faded significantly and the yellow is slightly mellower. Comparing notes with Neil Ivison (ivisonguitars.com), who happens to refinishing his Les Paul at the same time as me, the fading might have gone quicker had I not sprayed the clear coats. To my eyes the colours are still a bit bright, but I’m banking on things toning down when tinted clear coats are applied.
Tint hint
Whether they were custom colours or sunbursts, vintage finishes generally had clear gloss top coats. While the colours underneath would often fade, the clear coats would yellow and darken. As a result, when shooting for a vintage look, you have to be mindful of these simultaneous fading and darkening processes.
The usual procedure is to spray tinted clear lacquer to simulate the effect of aged top coats. So far, I have shied away from that because spraying tinted coats over the yellow and red might shield the colours from the UV light to some extent, and slow the fading process. I also don’t want to spray tinted coats and then have them go too dark as I attempt to fade the burst.
Instead, I decide to spray the tinted clear coats after fading the sunburst, but there’s a twist. Rather than use clear lacquer that has been tinted with pigments, I age the lacquer before I spray it – a tip shared by Canadian luthier Fred Gabrsek of freddysfrets.com.
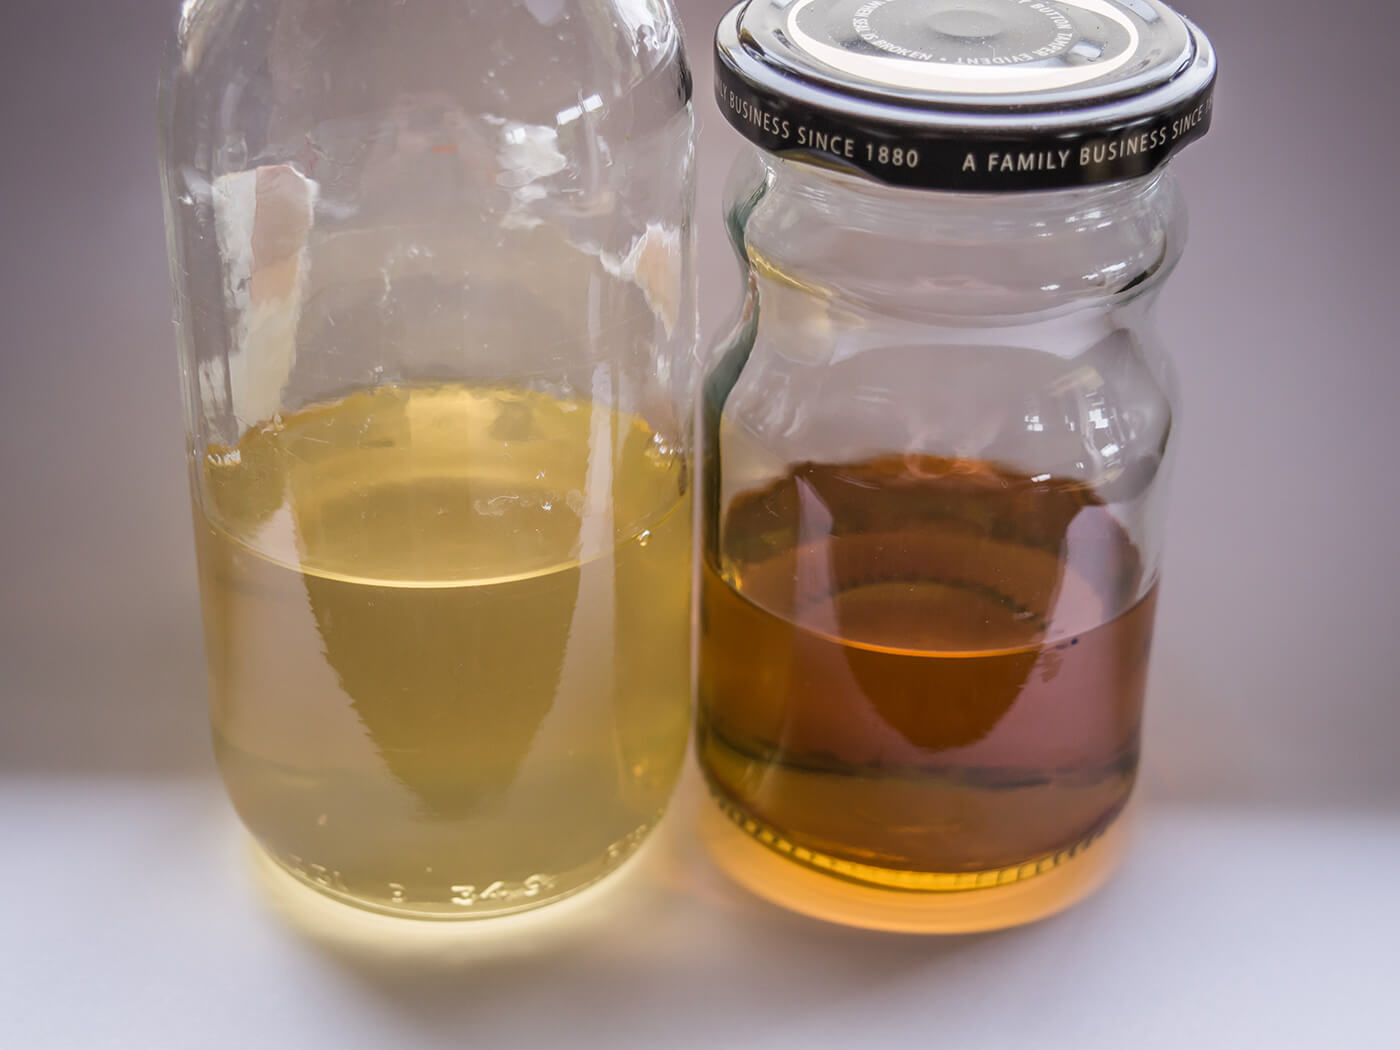
I was a little sceptical when I first poured some clear gloss nitrocellulose into a glass jam jar and put it outside in the sunlight, but it changes colour with remarkable speed. At first it darkens and takes on a slightly yellow appearance. After a week or so this turns to amber and after about a fortnight, it begins moving towards a strong brownish honey gold.
There’s nothing contrived or phoney about the colour because all the changes occur due to UV light. Eventually the changes slow to a standstill, which I establish by ageing a second batch of lacquer. Both are left in the sun side-by-side and the second batch soon catches up with the first. Therefore, I can be reasonably confident that the colour of the guitar after I’ve sprayed this lacquer will be stable because the top coats are as ‘aged’ as they can ever be.
First, I spray a couple more clear coats and level them with 320-grit paper. The sun-aged clear lacquer is then mixed with thinners in a 60:40 ratio and sprayed using the Preval kit that I used for the yellow when I sprayed the sunburst. I find that the Preval kit can be a bit spluttery when the lacquer container is full, but sprays more evenly when lacquer levels are lower.
It’s tempting to do all the tinted coats in quick succession because the guitar immediately looks so much better. But experience has taught me that the apparent depth and shade of the aged lacquer changes as it dries, and it should be examined in various light conditions.
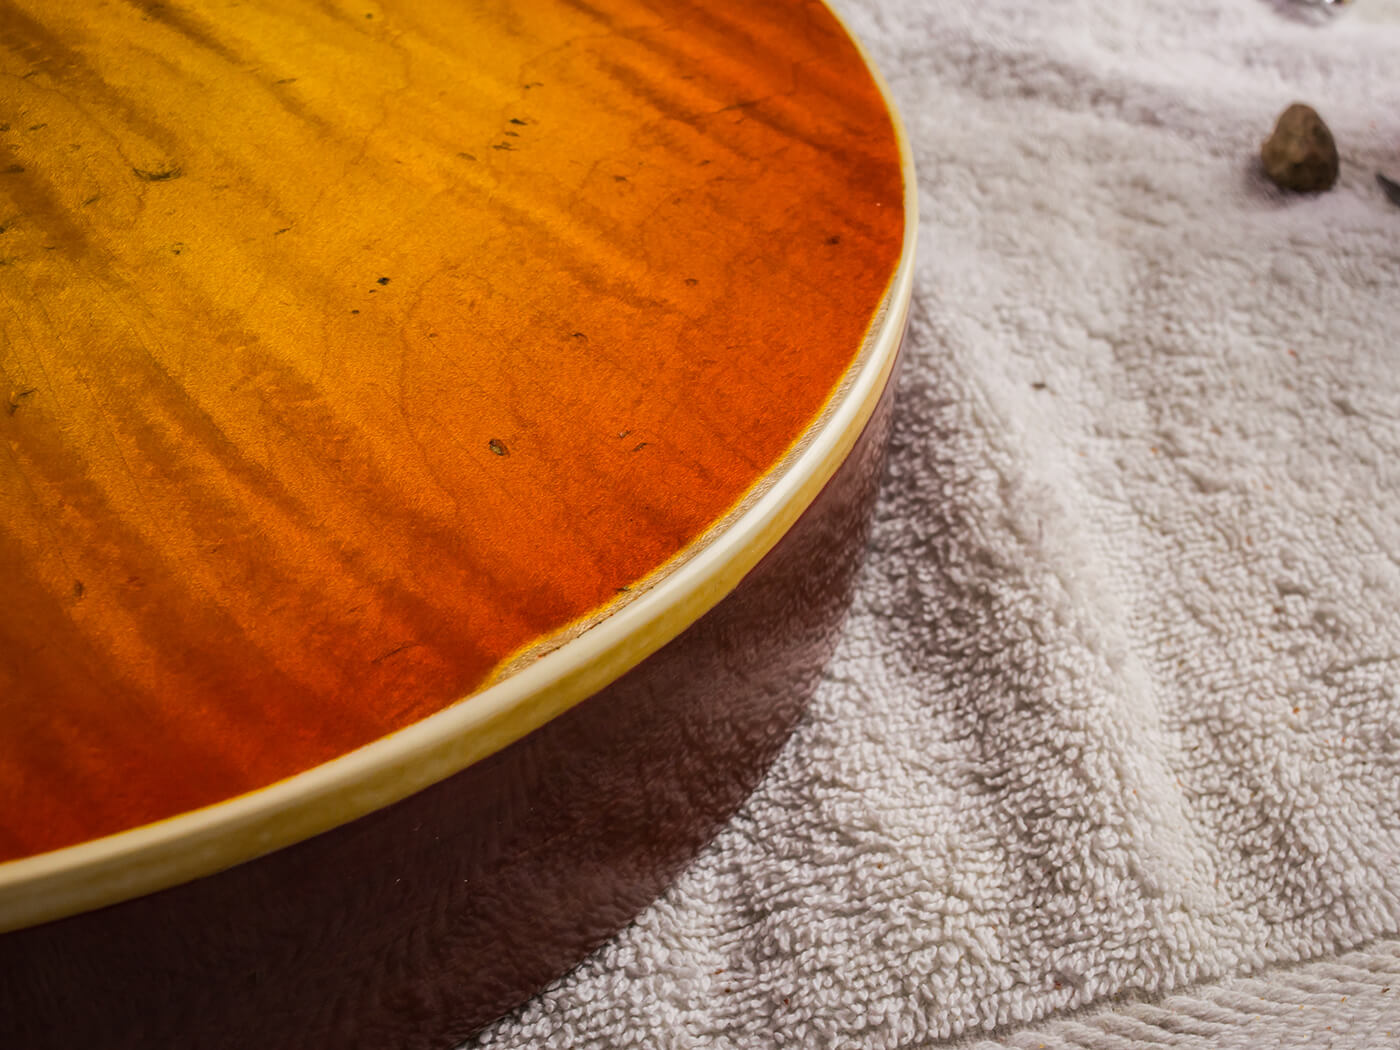
If possible, gauge your progress against other vintage guitars or high-quality photos of the real thing – and Guitar.com is a tremendous resource. Looking at the binding will give you the clearest idea of how things are progressing. Remember, you can always spray more tinted coats if necessary, but if you overdo it, you’re stuck.
The improvement in the overall shade is undeniable, but I realise I will need to spray a lot more sun-tinted lacquer before the binding looks right. So rather than make the lacquer too thick, I mix some Colortone Vintage Amber and Medium Brown stain into the remaining ‘aged’ lacquer and shade the binding using my airbrush. Afterwards, I spray two more coats of clear lacquer to give me something to cut back and polish, and I’m done with the spraying.
Finishing the finish
Completing the finishing process is something we’ve covered previously. In short, I sand the surface of the lacquer using wet and dry abrasive paper that I soak in water with a dash of washing up liquid. I work my way through 800, 1000 and 1500-grit paper, and then follow up with 4000, 6000 and 8000-grit Micro-Mesh.
Along with the dings, dents, scratches and lacquer checking, all the 1950s Les Pauls I’ve examined have high gloss finishes, so I complete the process by polishing with Meguiar’s ScratchX. I’m left with a very shiny and new looking guitar. Admittedly, that was never the end goal, but when doing an aged finish, I prefer to approximate a factory finish and work it back rather than stopping short on the conventional final stages.
Ice-ageing
With perfect serendipity, Neil Ivison sends me a photo of his newly acquired deep freezer, along with a message saying, “I think you’re the only person who’ll find this as exciting as me”. I’m not embarrassed to admit he’s right. As a solution to the lacquer-checking challenge, a return trip to Worcester is certainly more appealing than spending several hours with a craft knife attempting to be Tom Murphy.
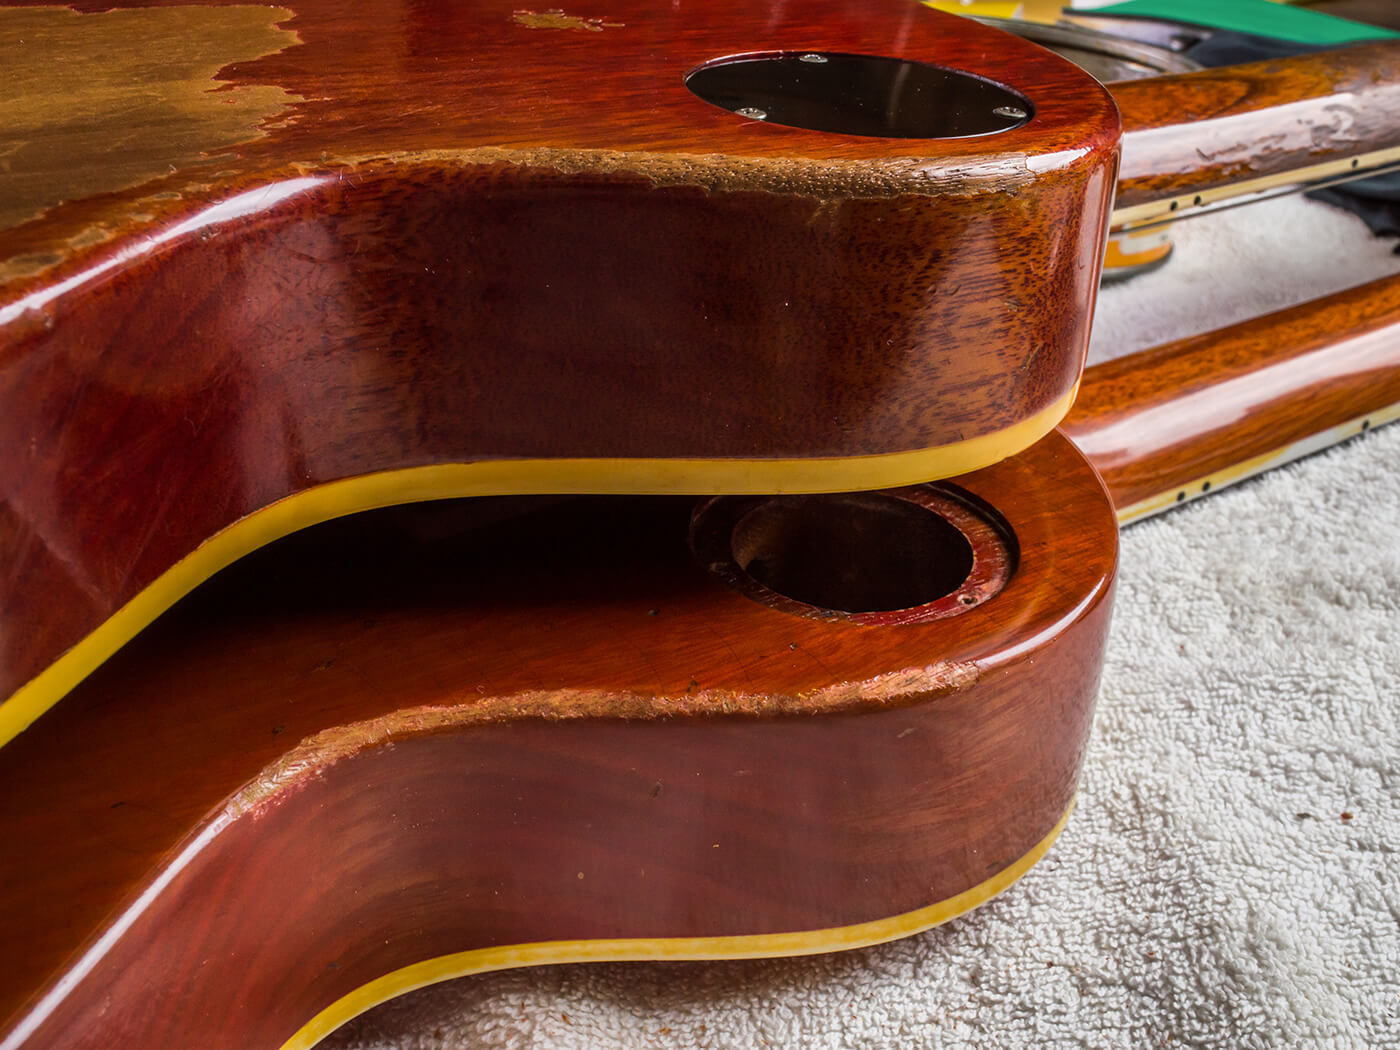
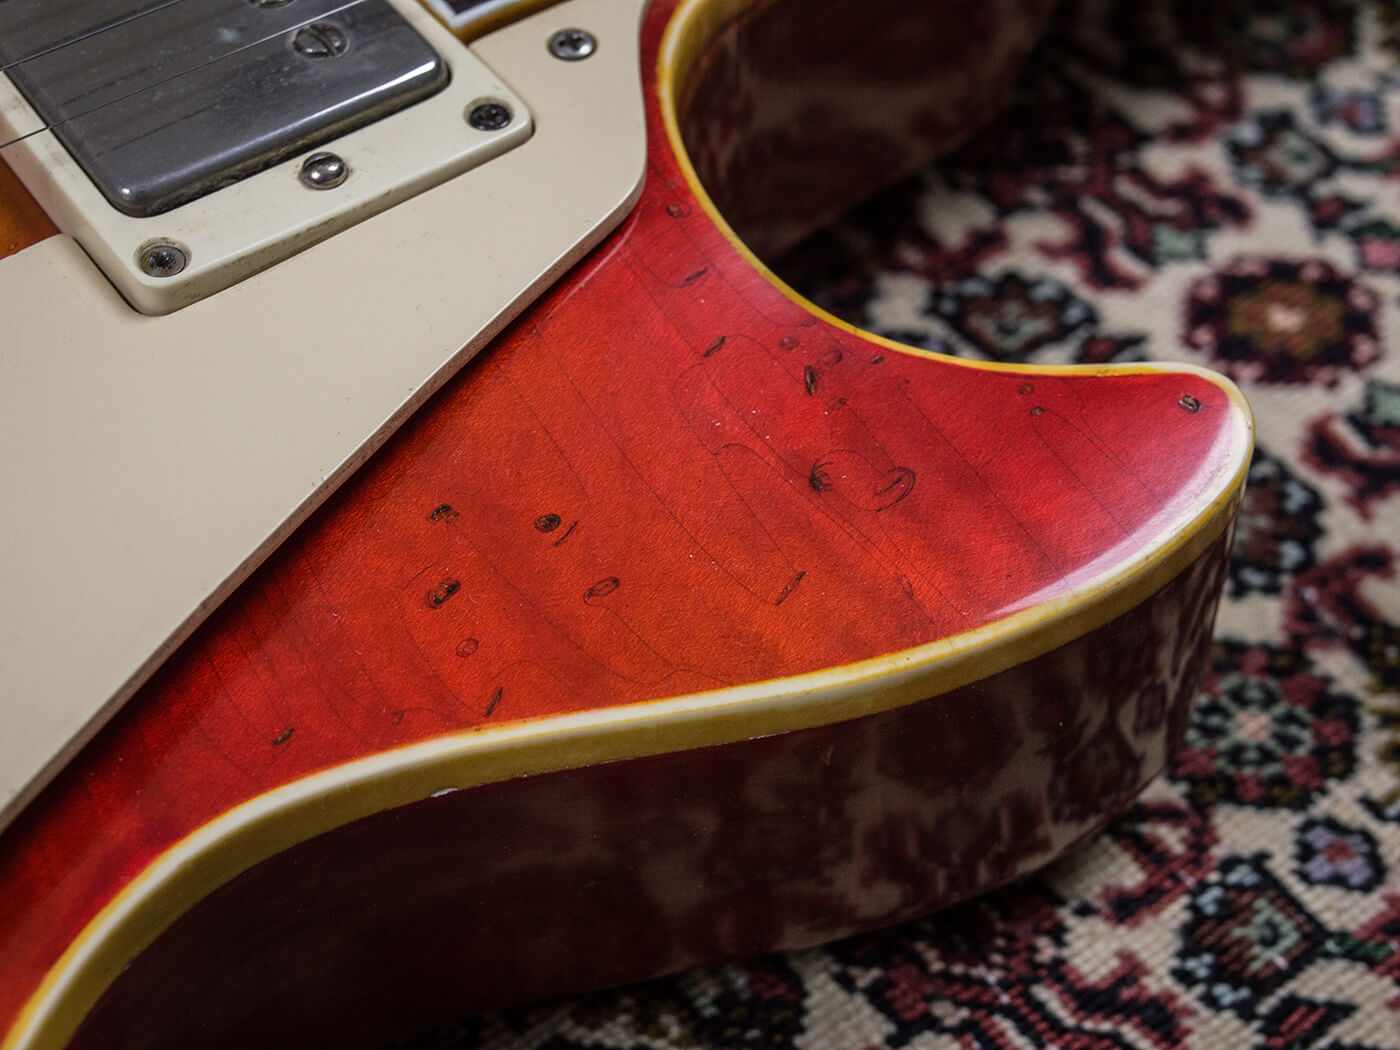
A visit is arranged, but first I have a few things to attend to. If you closely examine old guitars with lacquer checking, you’ll notice how the cracks form around the dents and dings. Whether you’re using inverted air duster canisters or a freezer, you should ‘damage’ your finish before inducing the checking to achieve convincing results.

It’s even better if you can borrow the real thing to guide the process, and my ever-generous friend Andrew Raymond of Vintage & Rare Guitars in Bath (vintageandrareguitars.com) obliges with his favourite, the Grainger Burst – a guitar Joe Bonamassa has played in concert. The Grainger has some areas with serious playing wear, but for the most part, small dents are evenly distributed all over the body. Relatively few have actually broken through the finish.
Guitar relic’ers use bunches of keys for a reason – they work very well. But rather than randomly dropping them onto the guitar from a great height, I exercise caution and vary the height between about 10-20cm. This induces the tiny dents I was looking for, along with the occasional larger dent and shallow chip. I also do this with the hardware and plastics in situ, so that there are no dents in areas that would ordinarily be shielded.

At this point, guitars tend to look pretty awful – basically like new guitars with a load of inappropriate and incongruous damage. But remember that this is a process and things will look worse before they look ‘better’. I take the guitar up to Neil, where it spends a night in his freezer, and the following day he sends me photos of the results.
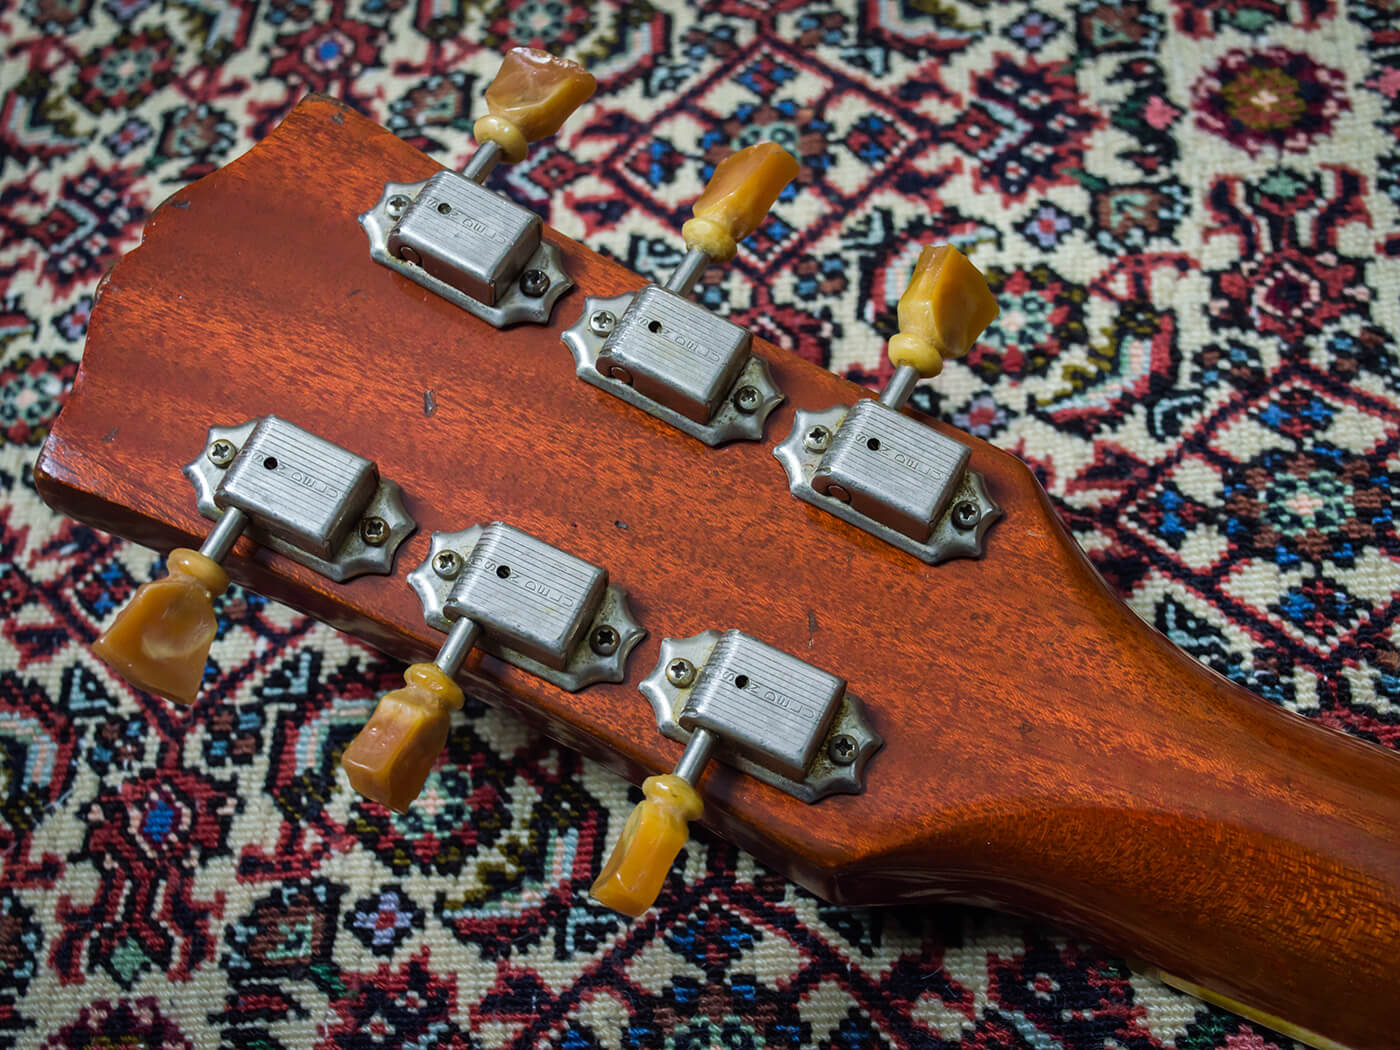
We’re both absolutely delighted because lateral checking lines have formed on the body, exactly as we had hoped. Neil suggests a second night in the freezer to try and get the neck and headstock to crack a bit more, but I decide against it. The body checking looks so authentic, I don’t want to risk overdoing it and if the neck and headstock need a bit more checking, I can do that with a blade.

Dark arts
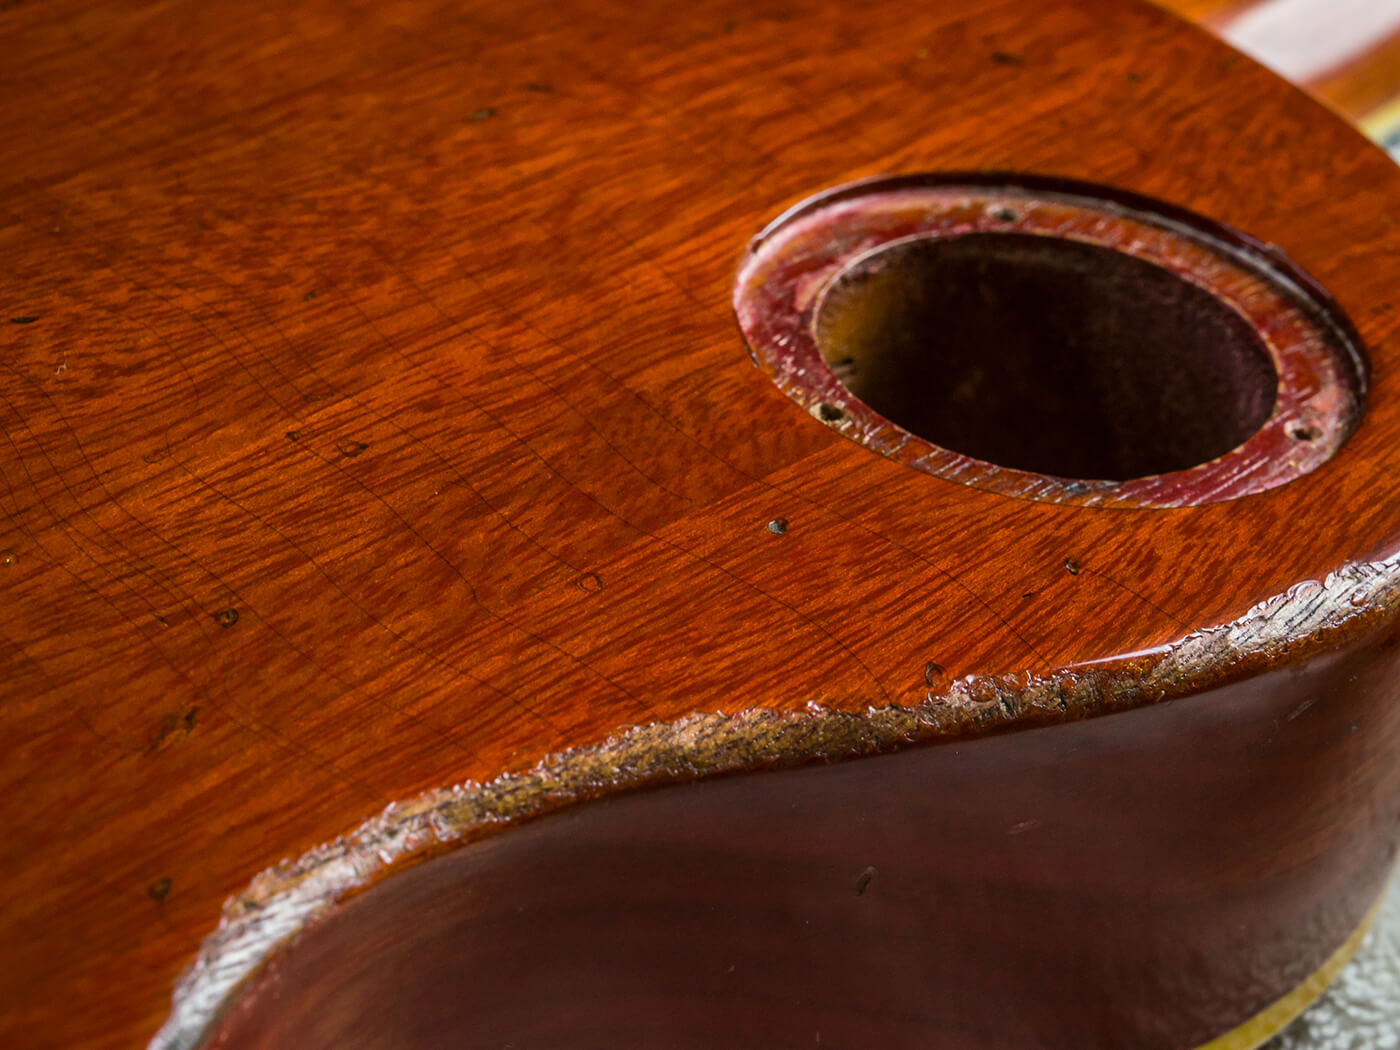
Despite my excitement about the checking, this still looks like a peculiarly damaged new guitar. Something is needed to bring everything together and for me, that ‘something’ tends to be Colron stains (colron.co.uk) – specifically Jacobean Oak and Antique Pine. They’re from back in the days when Colron stains were naphtha-based, but they’re now water-based, and nowhere near as effective for our guitar-relic’ing needs. These days you may be better off with Rustins equivalents (rustins.ltd).
The stains wick into the dents and checking lines, but should be used judiciously because the checking lines don’t look realistic when they’re too obvious. With this guitar, they’re only visible when the light hits them at certain angles – just like the figuring in the maple veneer.
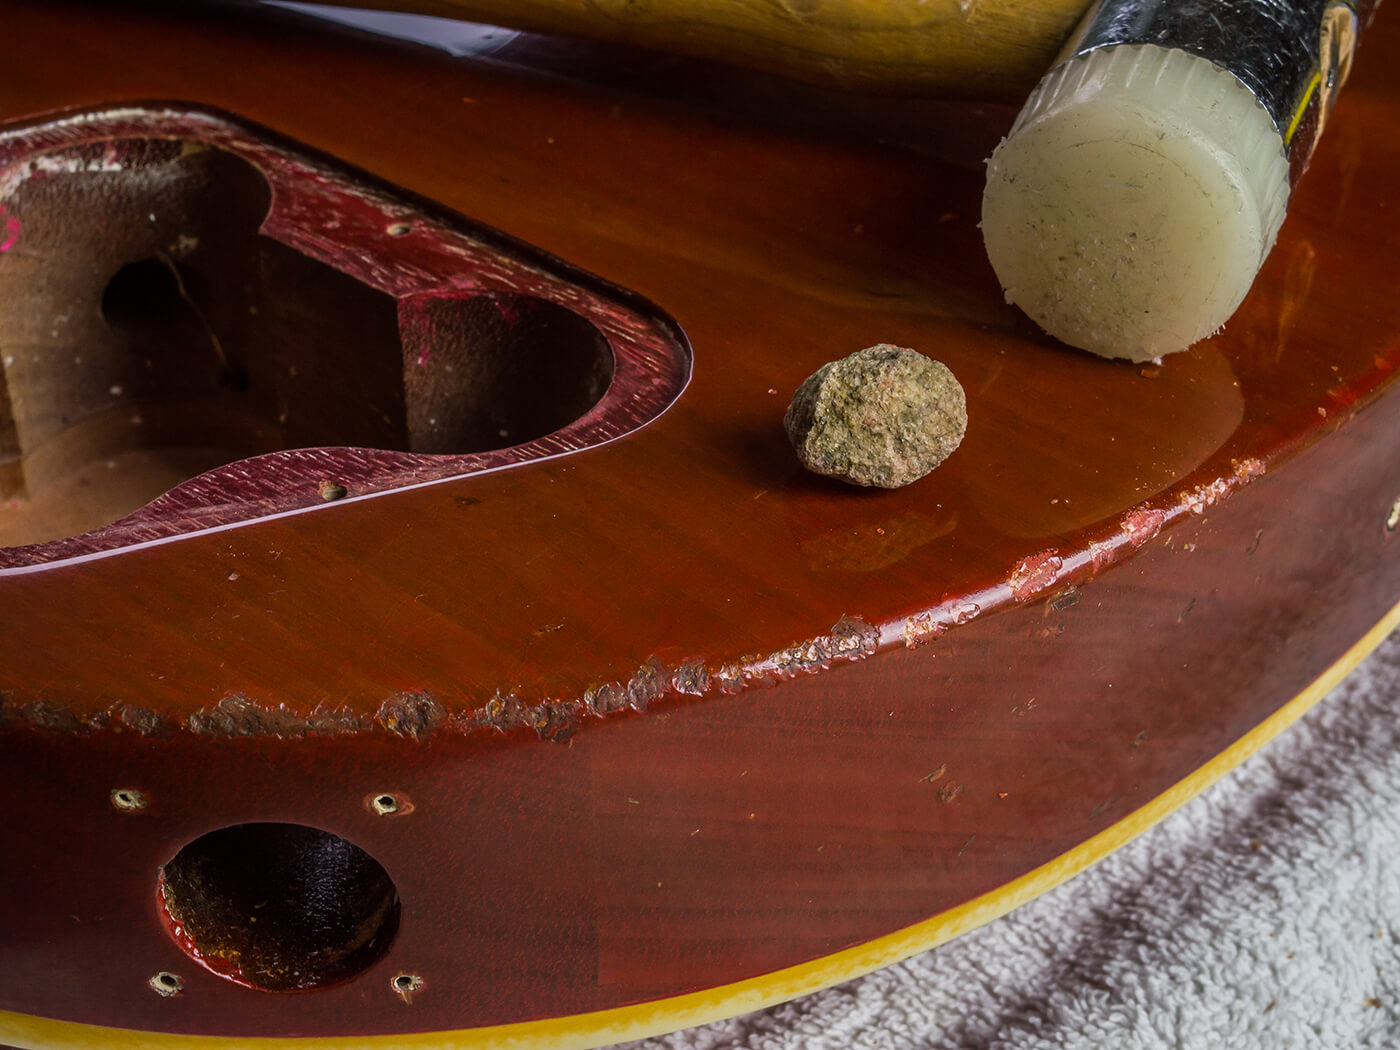
To inflict some ‘damage’ around the rear edges of the body, I use a small stone and a mallet. Placing the stone against the body, I only need to tap the stone lightly to crack the finish. I can then use my thumbnail or a dental scraper to flake away the finish. I follow up with stain and light brown Liberon antique furniture wax (liberon.co.uk) to give the exposed mahogany an oxidised and buffed appearance. It helps to have the Grainger Burst on hand as a visual reference.
Playwear on the upper bout is simulated by scraping the lacquer along the binding line with a curved craft blade. I round over the corner of the binding in that area too, and them sand and buff out the scraper marks to create a smooth transiting from lacquer to exposed wood. Antique Pine stain and wax polish are used to complete the job.
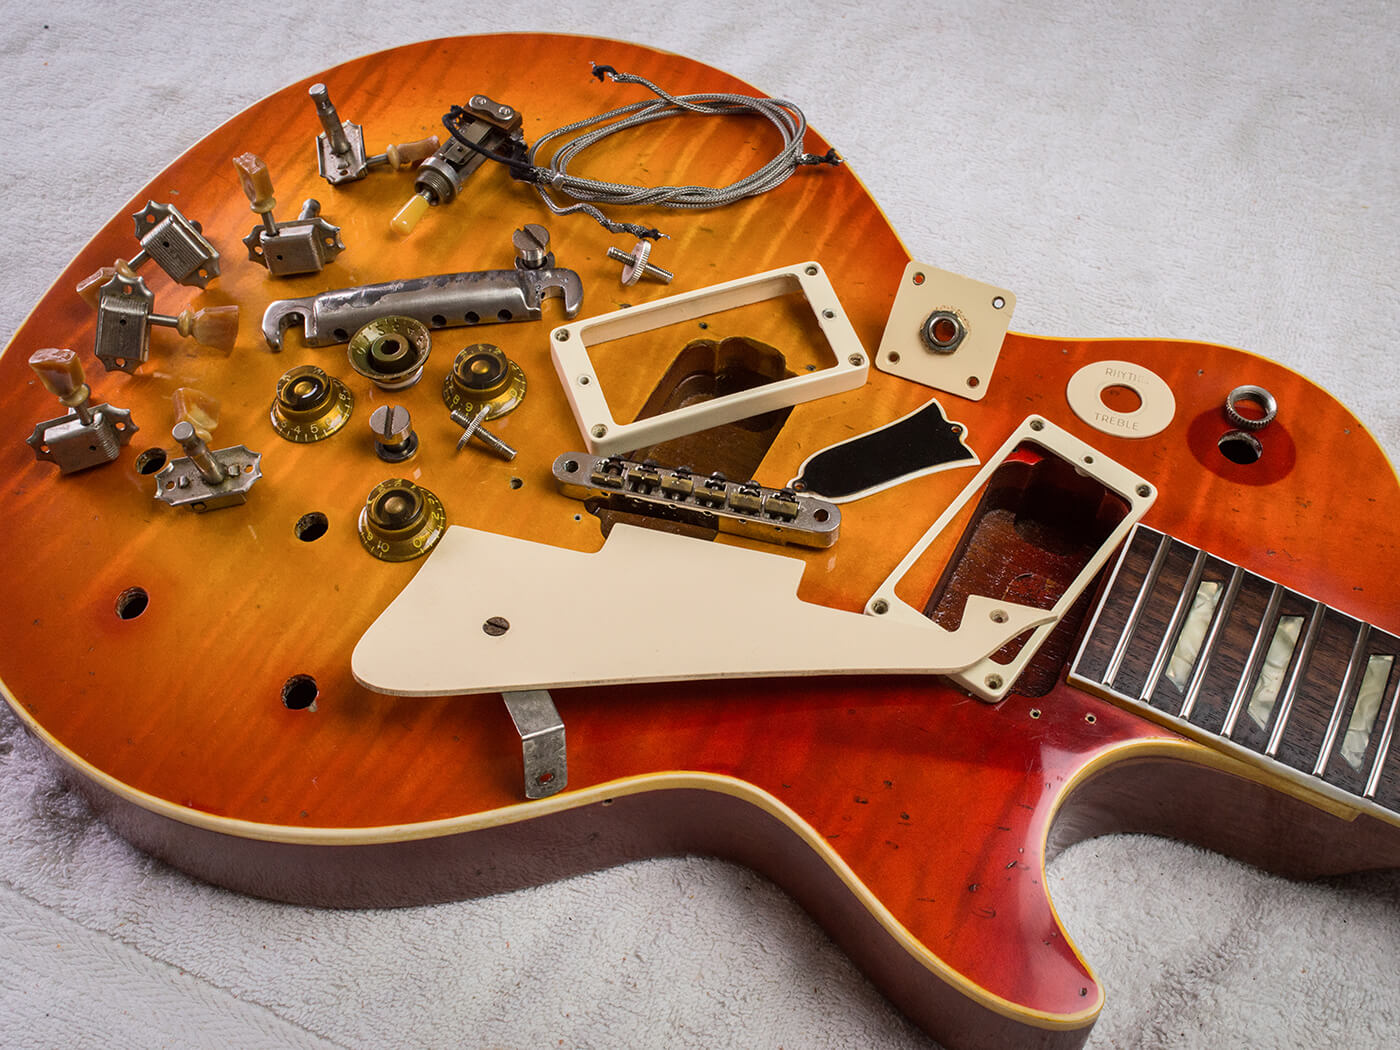
It’s actually quite a long process, but eventually I’m ready to reassemble the guitar. With all the parts back on the body, I gently knock back the gloss in selected areas using some 4000-grit Micro-Mesh. The finish will continue to age naturally and I may decide to do a bit more relic’ing at some point, but for now I’m just going to enjoy playing this guitar again.
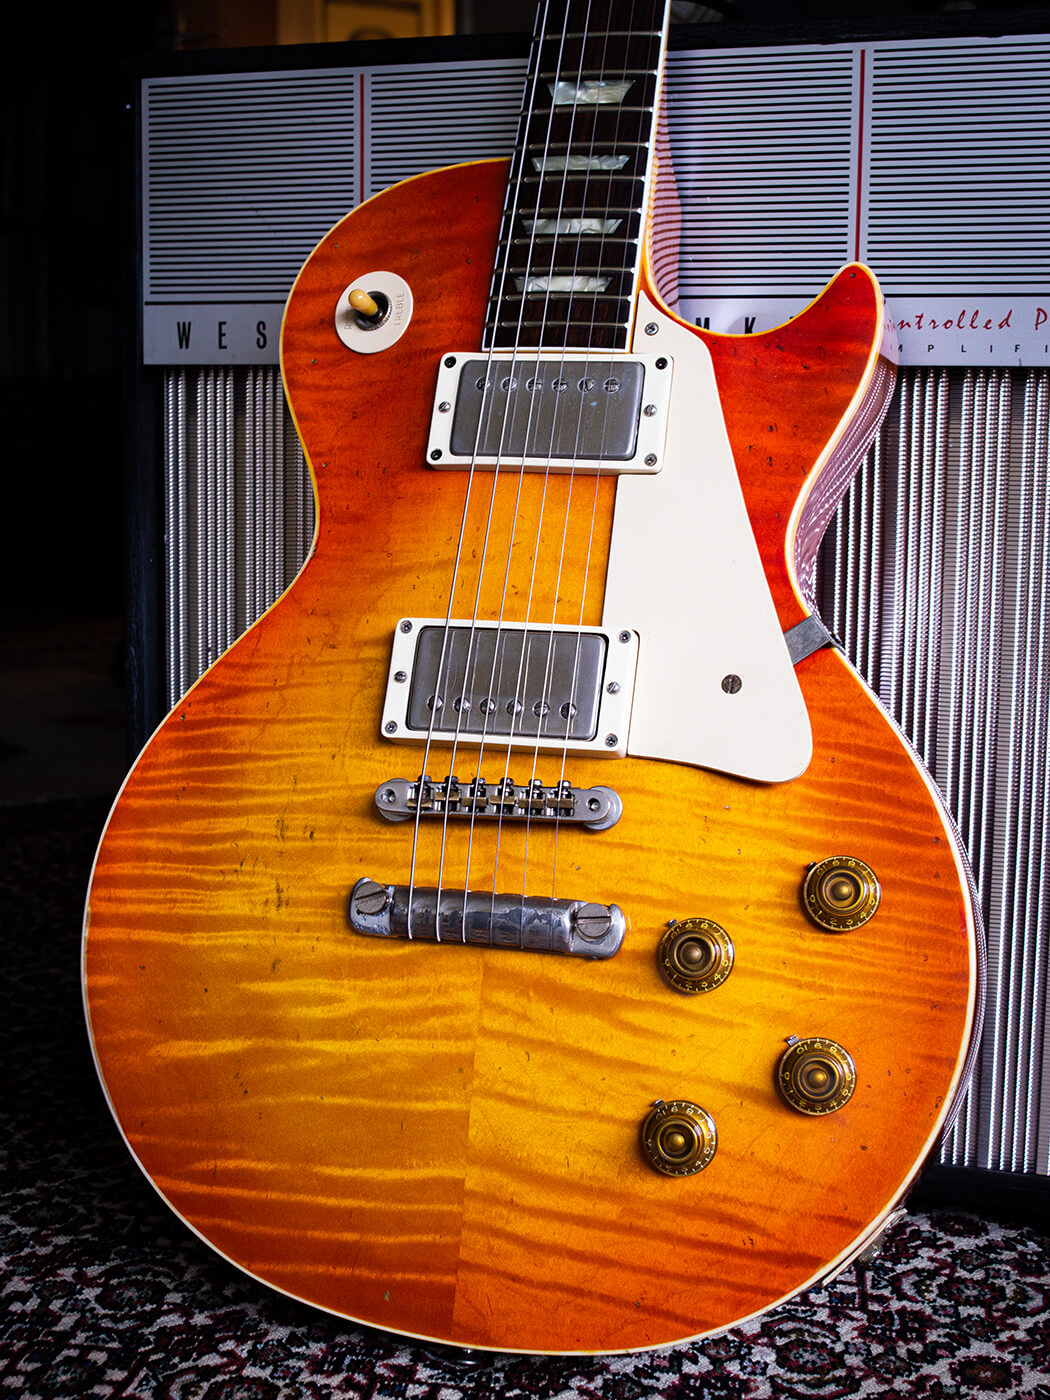
This is my first serious attempt at replicating a late 1950s-style sunburst finish and I am pleased with the outcome. In the process I’ve tried various new things, including unfamiliar spraying equipment and mixing my own colours and tints. The final colour maybe isn’t quite what I wanted, but lots of genuine Bursts do have this sort of look.
I also believe the best way to learn new skills is to try things for yourself, and I now have a better understanding of how the various parameters can be manipulated to determine the outcome. I’ll go a bit less intense with the yellow and slightly heavier with the blue/brown tint coats next time, to get cooler and darker look for the shading. I also think Neil might have been right about that second night in the freezer but hey, I have a shed, and winter is coming.
For more DIY workshops and guides, click here