Related Tags
DIY Workshop: Greco to Les Paul Goldtop conversion (Part Four)
Our Greco conversion project continues with work to be done on the neck and body. Huw Price discovers that luthiery sometimes sucks…
With fretting, binding and body veneering all needing to be done in this instalment of our conversion of an old Greco single-cut electric into a 50s-style Goldtop, we’ve got an awful lot to get through! With that in mind, let’s dispense with the preamble and get straight into it…
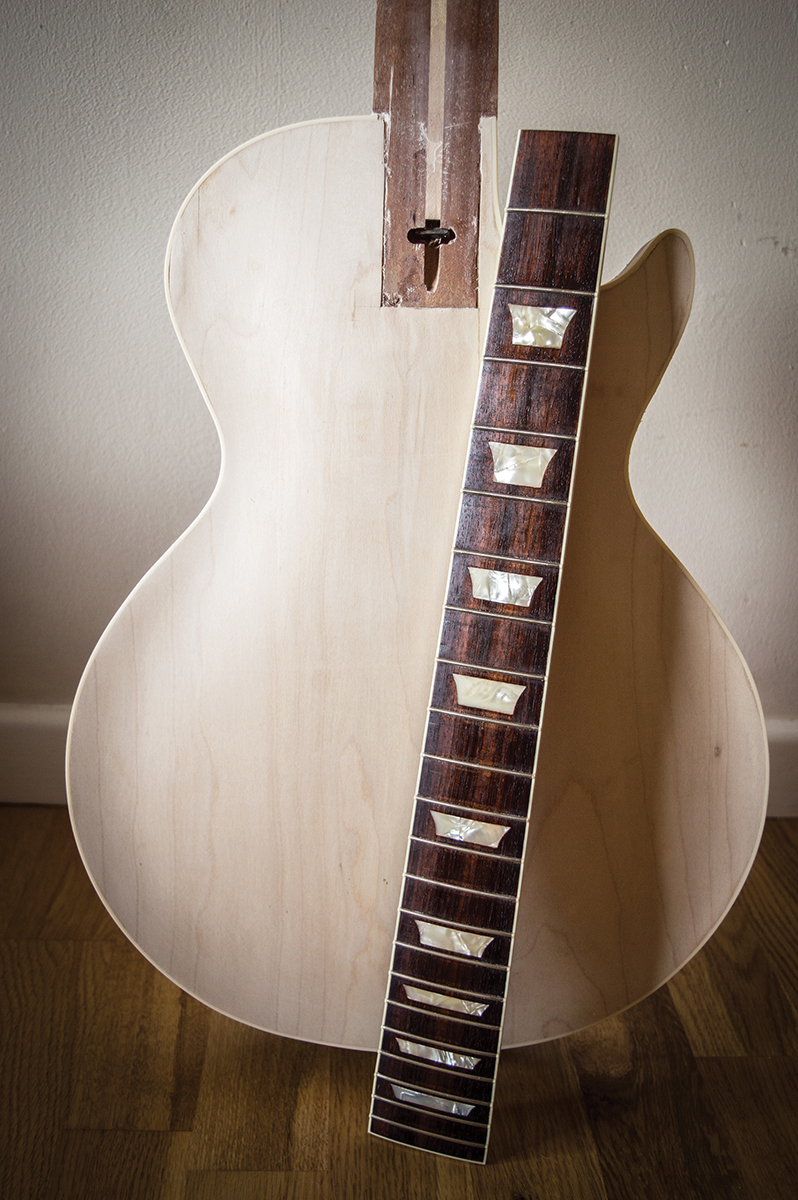
’Board Off
I’ve two reasons for removing the fingerboard. I have always planned to veneer the top of the body to ensure that the plugged post holes and humbucker plugs never show through the paintwork. Otherwise, these modifications will eventually reveal themselves once the lacquer has cured and starts to shrink back. Applying a veneer over the guitar’s top is one way to ensure that this never happens.

The first frets go in with a little persuasion from a B&Q nylon-headed mallet
Although it is possible to veneer around the fingerboard, things could get messy and had the original binding survived the paint stripping process, I’d be left with the problem of transitioning from the veneer level to the binding level to reveal it. That’s something I’m not even prepared to contemplate.
My main motivation however, is to increase the neck depth. The neck on this Greco is too skinny for my taste and a fair bit slimmer than the 1954 Goldtop we measured for reference. Using a micrometer, I measure 20.95mm, 22.64mm and 25.42mm at the 1st, 7th and 12th frets respectively. Compare this with the 54’s measurements of 23.06mm, 23.97mm and 25.92mm, and it just won’t do.
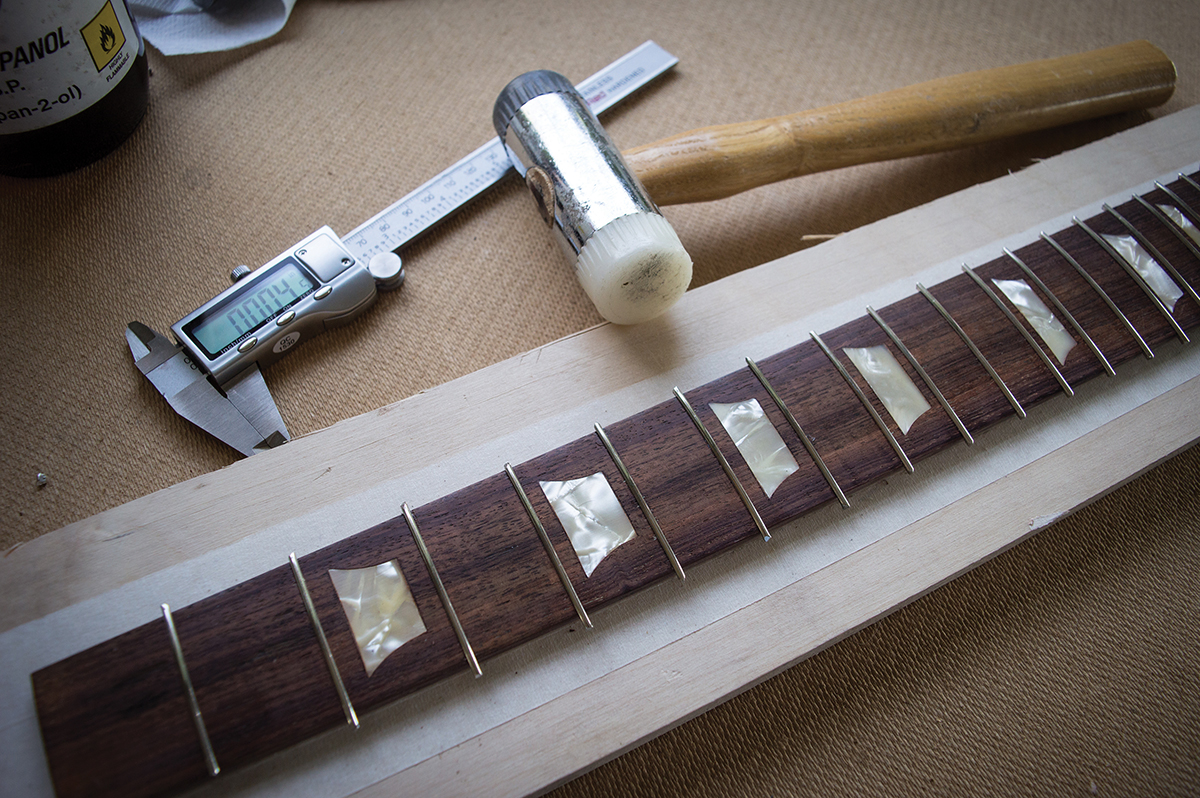
Before seating, the frets are wiped with isopropyl alcohol to remove oil from the surface
The 12th fret reading is actually a bit misleading, because it merely indicates that the heel carve shapes are a bit different – this is why we provide a 9th fret depth reading instead when we review acoustic guitars. Based on the first and seventh fret measurements, I’m looking for an extra 1.5mm or so.
Regular readers may recall how I back veneered my Gretsch Anniversary conversion fingerboard when I was building my 6120 conversion. Then it was more about restoring the fingerboard depth having removed so much material when sanding through all the dents and divots.
I won’t dwell on the process of ’board removal, back veneering and edge trimming here because you can read about it on theguitarmagazine.com in parts two and three of our Gretsch Workshop. Suffice to say, the process here is the same, however it takes a little longer when modern glues have been used rather than hot hide glue.
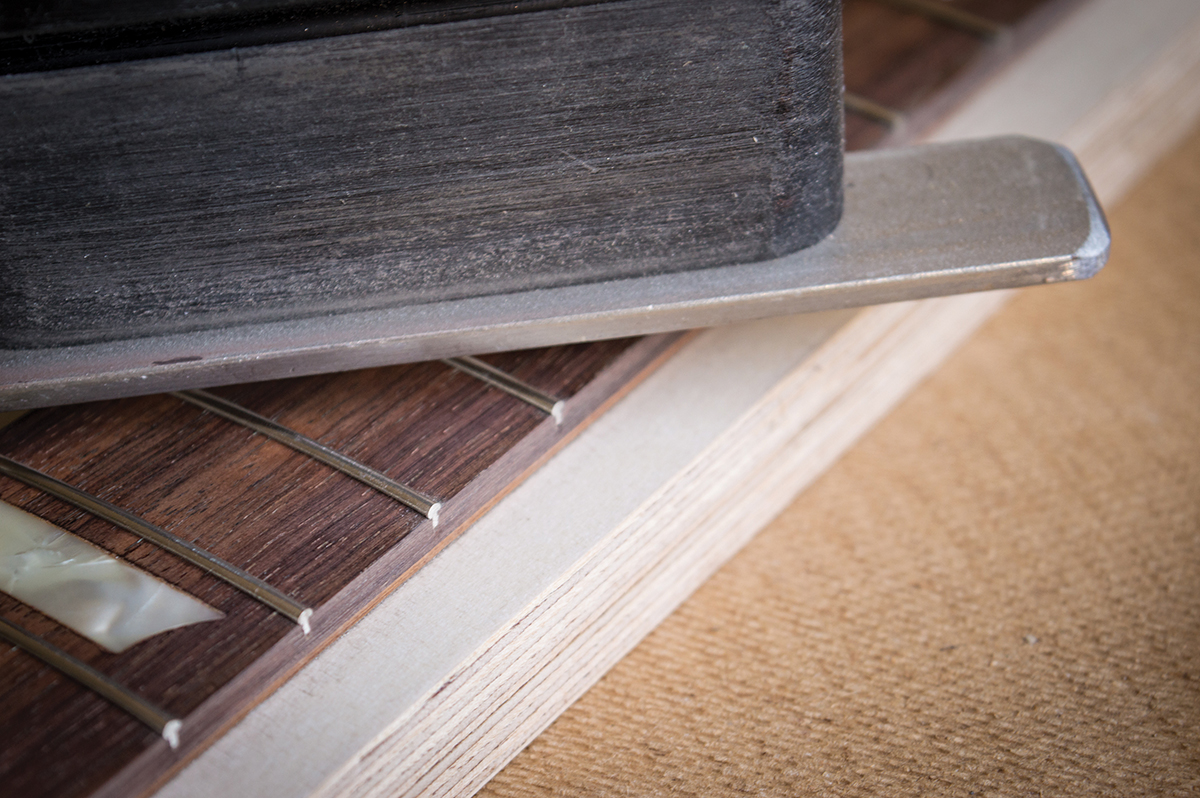
After trimming with flush cut nippers, the fret ends are ground flush with the fingerboard
Fret Hot
I have to make a decision about the frets. Although the original fretwire on the guitar is only about 50 per cent worn and perfectly serviceable, the frets do need levelling and crowning. I also fancy fret nibs, and it seems crazy to do so when the guitar may need re-fretting in just a few years.
So, it’s re-fret time but that means I have to make another decision – do I go with early or late 50s-style wire? Most Gibson players seem to prefer the latter, with its wider crowns measuring around 0.1 inches. However, a mid-1950s Goldtop would have left the factory with skinnier wire measuring around 0.07 inches wide. Having spent my formative years playing Fenders, I’m quite partial to the slim stuff, so early 50s wire wins out.
Superglue grabs fast, but we tape the binding and hold it tight in a workbench vice for several minutes
Firstly, I have to take out the Greco frets, and although I might once have prized them out with chisel blades, I can only stress how much quicker, safer and easier this process is with a £20 bespoke fret removal tool. The frets aren’t glued in, and they all come out fairly cleanly.
Chips in the rosewood are inevitable, so I suggest pressing them back down with a craft knife blade and wicking in some superglue before moving on to the next fret. The Greco ’board is actually in pretty decent shape, so I settle for a light sanding with 320 grit abrasive paper taped to a 12-inch radius block. I sand until the marks from the original frets and any superglue repairs have disappeared.
Throughout this process, the ’board is fixed to a flat surface with double-sided tape. Try applying masking tape to the underside of the board and the flat surface before applying the double-sided tape because it makes detaching the fingerboard easier and less risky when you’re done with the installation.
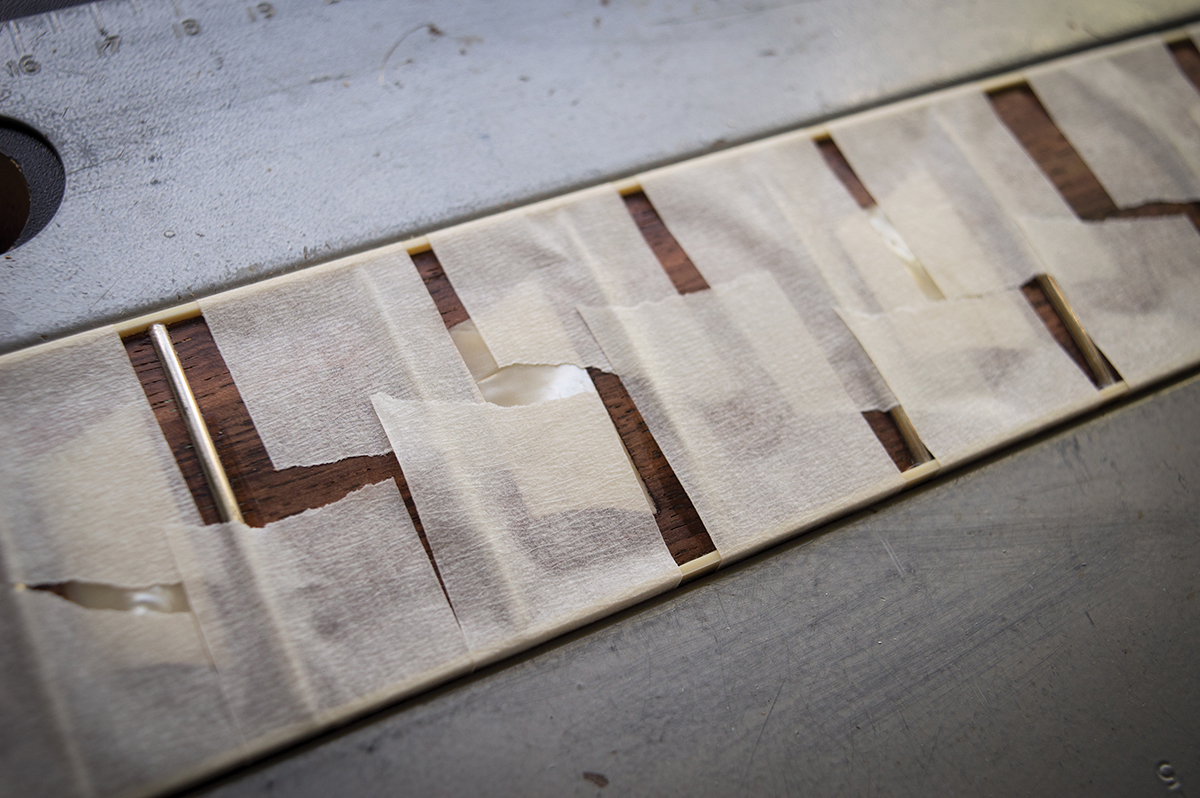
The first fret nib is done… only 43 left to do!
Before fretting, I run a veneer blade saw through the fret slots to loosen all the rosewood dust compacted inside, then I pass a vacuum cleaner hose across the top. Once all the dust is removed, I wipe the board thoroughly with white spirit and leave it to dry off.
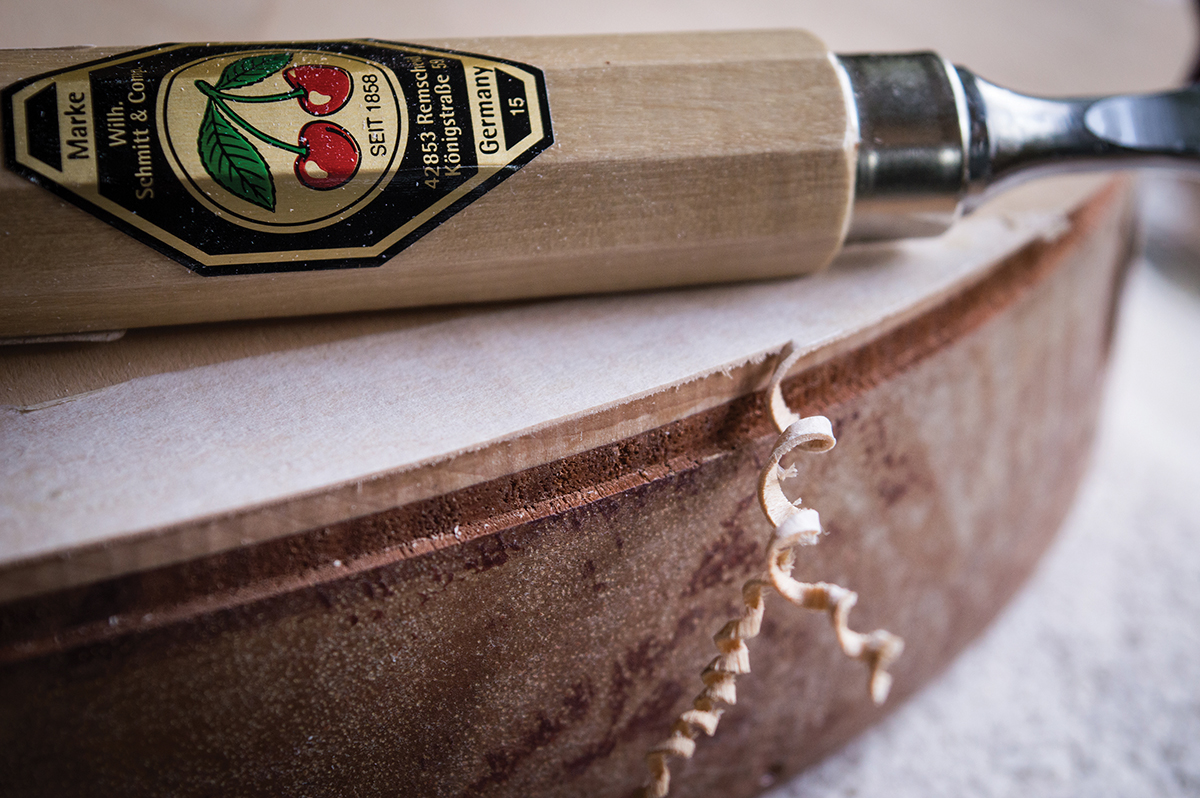
We’ve also covered fretting in Workshop before, so I won’t dwell on it here. I pre-bend them with a home-made fret bender and then tap them in with a nylon head mallet from B&Q. The nylon is hard enough to drive the frets in, but softer than the metal so it doesn’t leave marks in the fretwire.
The veneer is cut out to clear the neck tenon and the flimsy pieces are strengthened with binding tape
His Nibs
I shied away from doing fret nibs when I restored the Gretsch, partly because the narrow fingerboard made me prioritise usable playing area rather than vintage-correct cosmetics. The Greco ’board is wider, so that’s not really an issue, and I fancy having a go for the first time.
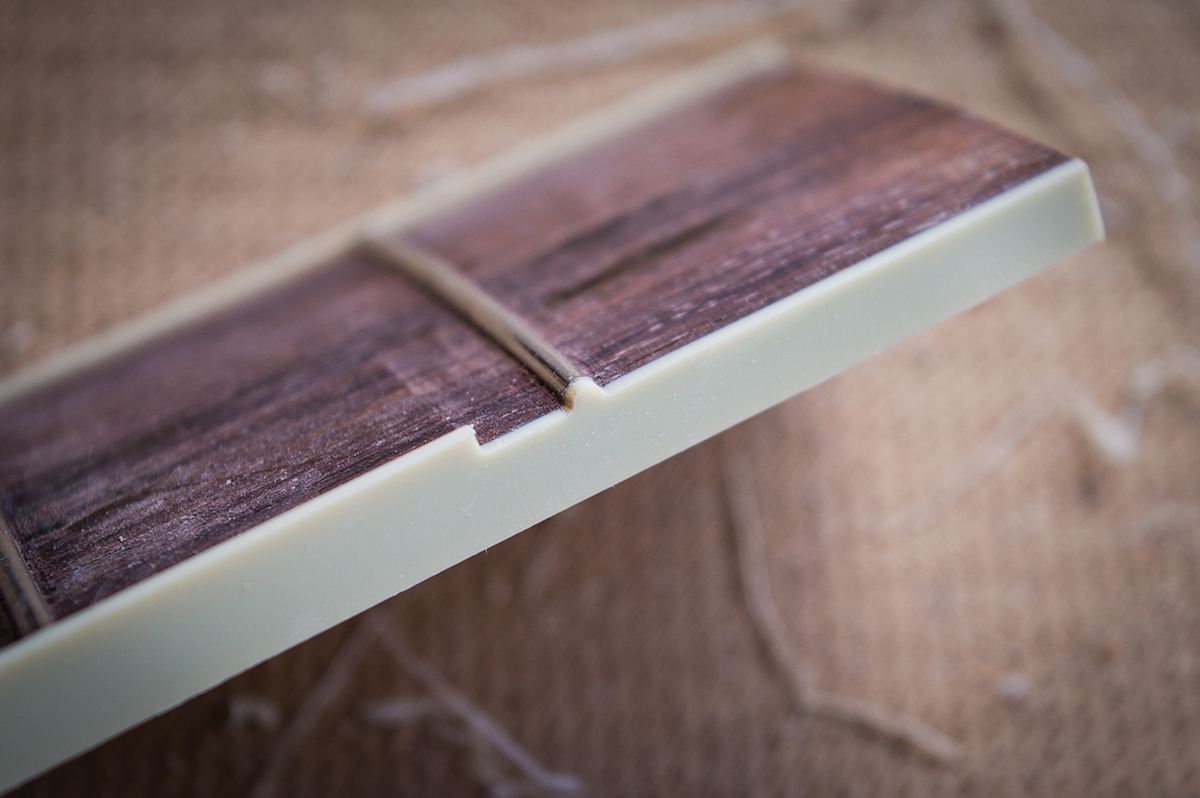
With all the frets seated, I use Crimson Guitars fret nippers to cut them flush with the board and follow up with my fret edge file set at a right angle. The idea is to get the frets completely flush to the board edge so the fingerboard binding can adhere to a flat surface. Water thin superglue is then applied to ends of all the fret slots and allowed to wick in before any excess is wiped and sanded off.
With a little heat and patience, the body binding comes off quickly and cleanly
There’s no great secret to fingerboard binding. You hold the board upright in a vice or mini workbench, run thick superglue along the edge of the board and fret ends, then carefully place the pre-cut binding over the board and tape it down. Don’t be tempted to try lining the binding up along the underside edge because the superglue grabs fast. Instead aim for an overhang on both sides.
First, I scrape and sand the underside of the board to bring the biding level with the wood. I would advise using a scraper or Stanley knife blade to remove most of the excess binding before following up with a decent sanding block. This ensures the binding and underside of the board are perfectly level and will minimise the chances of gaps showing once the board is glued back onto the neck.
Having always imagined creating binding nibs to be an onerous task, I find myself enjoying it immensely. Some people use flush trimming router bits to do the donkey work but I go old school and do the whole job with a file and a scraper blade.
Titebond Cold Press veneer glue is applied liberally across the top to be spread evenly with a paint brush
I start by filing a notch all the way down to the board on each on side of a fret, leaving a millimetre or so of clearance, and then twist the file upright so the non-cutting edge is against the board so I can work my way up to the fret. The file quickly removes the excess binding between fret notches and I true up the surface of the board and binding with the scraper. The entire job takes little more than an hour, but I’ll wait until the board is glued back on before bevelling the edges.
In The Bag
Watching my mate Patrick Alexander apply veneer to the front plate of my Gretsch 6120 conversion was mind-blowing and this Greco needs the same treatment. Rather than trouble Patrick again, I start researching bag presses and air compressors, only to discover that getting kitted up will cost around £350.
Then, one evening I find myself watching TV in a Paris hotel room and an advert appears for vacuum storage bags. You can put towels and bedding in the bag and then suck out all the air with a vacuum cleaner to reduce bulk.
Back home I discover I can buy something similar at Dunelm and two 100cm by 80cm bags cost me £6. With a piece of scrap veneer on the top of the guitar, I place it in the bag, suck out the air and voila – it works! I leave it overnight and in the morning, it’s still working.
Loosely held in position with masking tape, the guitar is placed in a vacuum bag and the air inside is sucked out
With some maple veneer from Dave Dyke Luthier Supplies that’s sufficiently wide to cover the front of the body with a single piece, I place the body over the veneer. With a pencil held flat against the side of the guitar’s body, I trace the body outline onto the veneer, which ensures the veneer will be slightly oversized all around. This leaves some margin for error and also allows for the edges to be pulled inwards as the veneer conforms to the carved top.
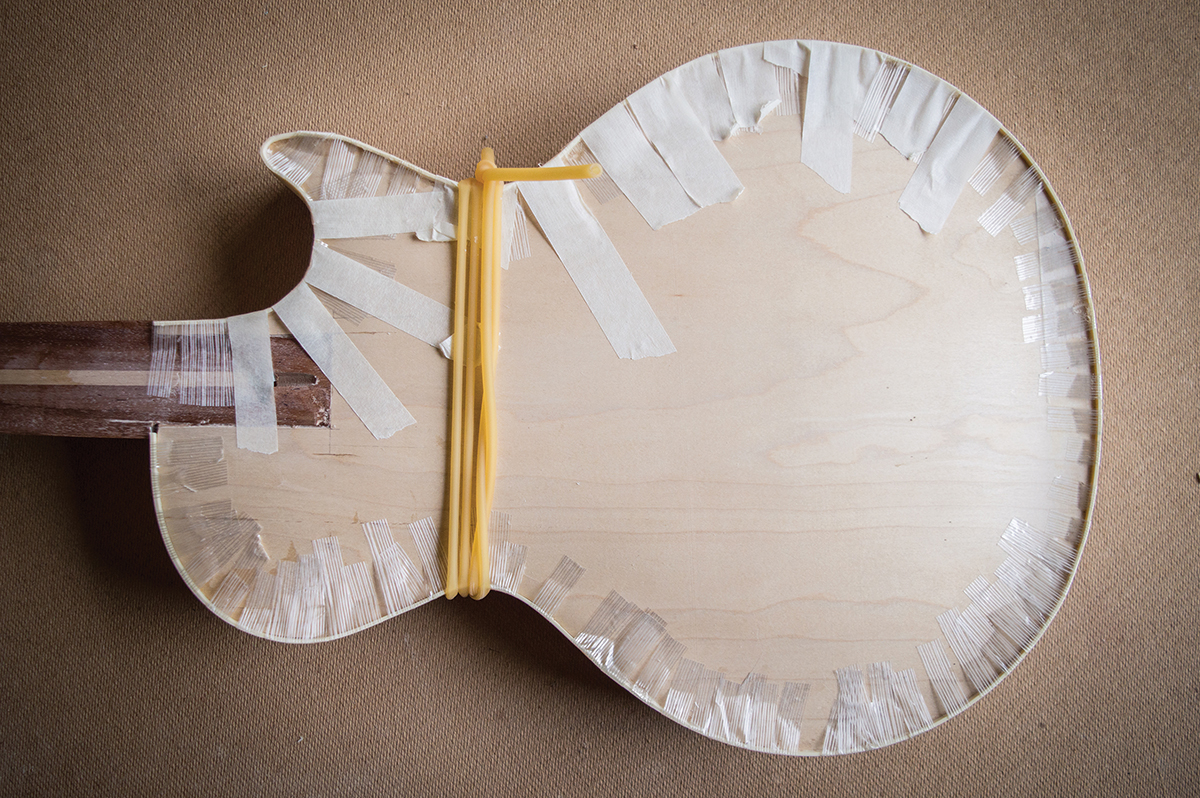
Typically, veneer will have some splits in it, so they must be securely taped together before gluing it to the body. I use Rothko & Frost binding tape because it sticks well and doesn’t stretch. With a sharp craft knife I cut around the body line and place the veneer over the body. I then tape it in position with masking tape and cut out an opening so that no veneer will end up glued to the neck tenon. The delicate edges, where the veneer may split along the grain line, are reinforced with masking tape at the cutaway horn, the upper bout and both lower bouts.
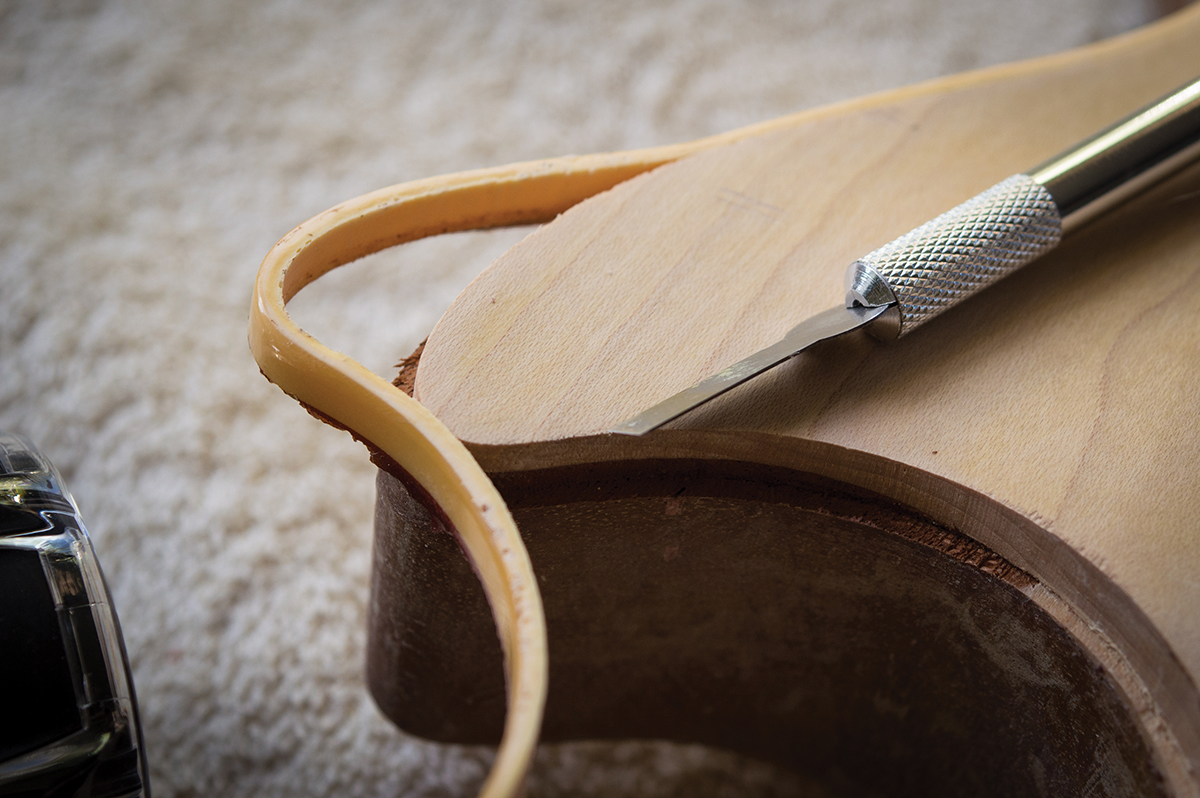
A sharp chisel makes light work of trimming the veneer flush with the routing channel
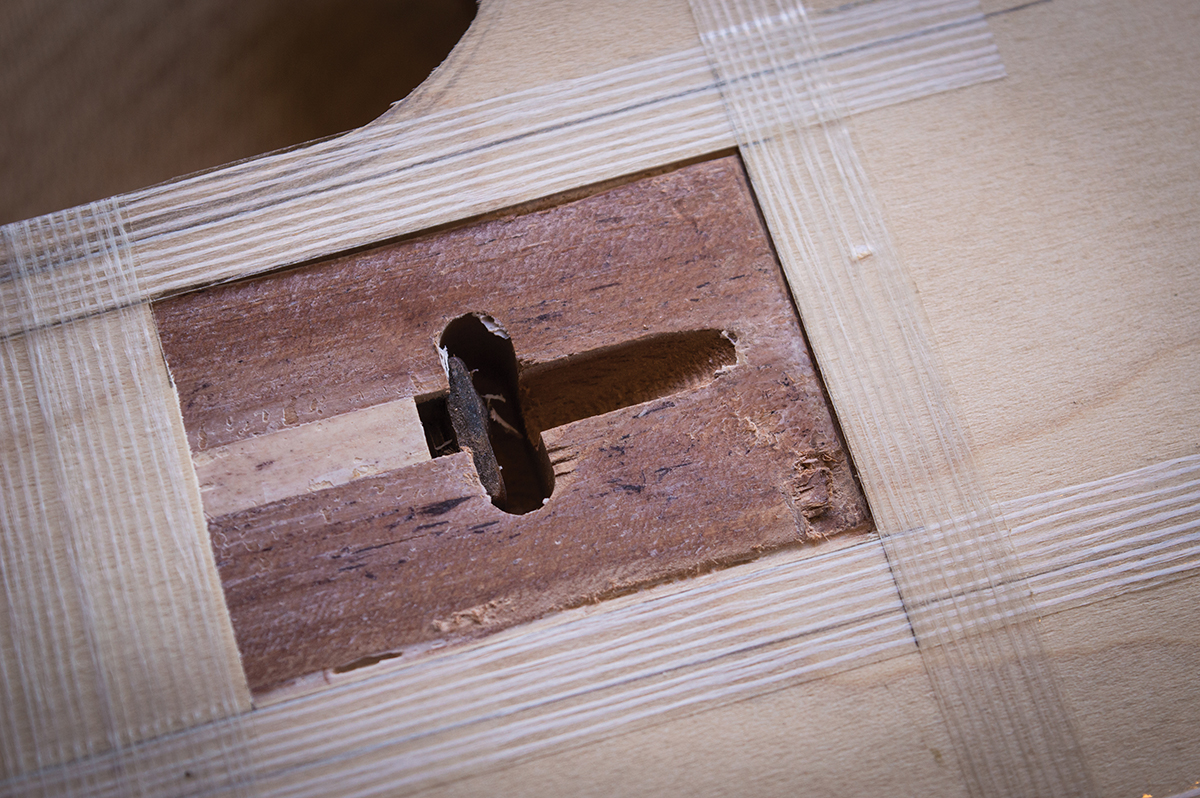
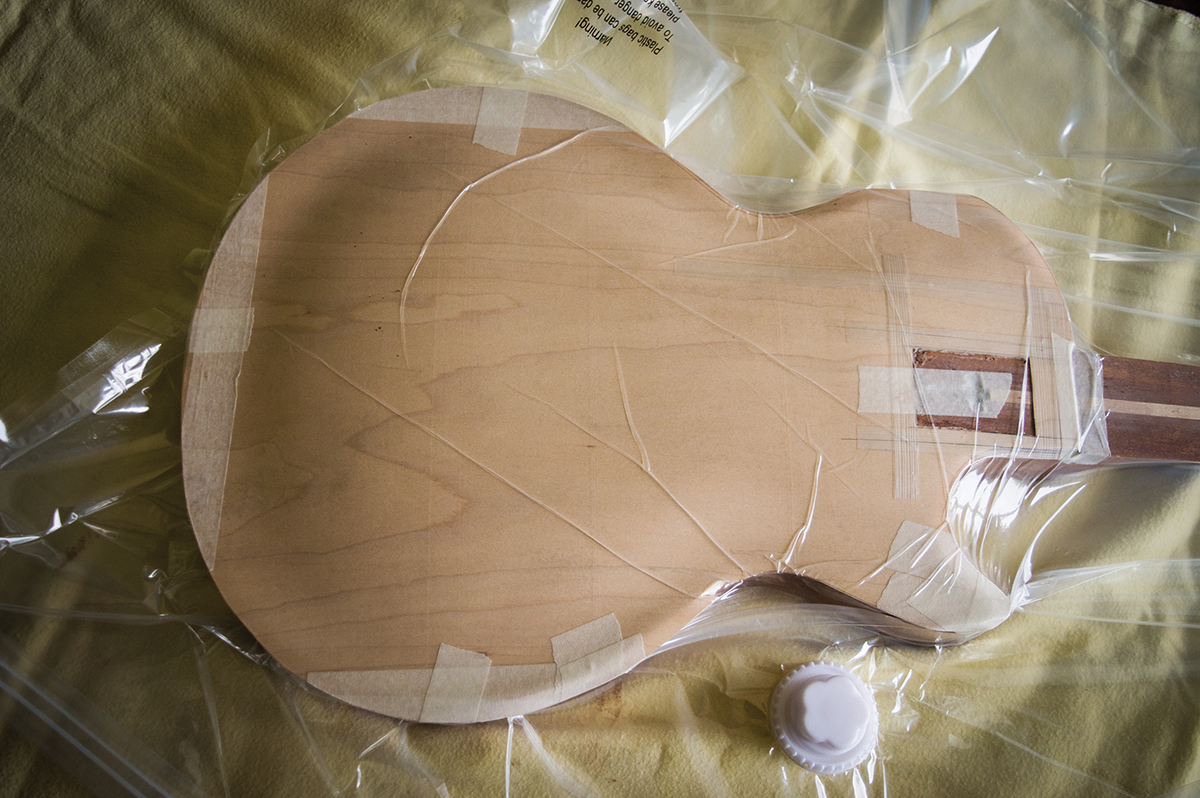
The Greco tenon sits proud of the body and the factory glued mahogany wedges onto the body each side of the tenon to close up the gaps that would have been visible under the fingerboard. I carefully chisel off the wedges and any remaining glue because the 0.6mm veneer has sufficient thickness to perform the same function. I also remove the body binding by heating it with a hairdryer and coaxing it off with a craft knife.
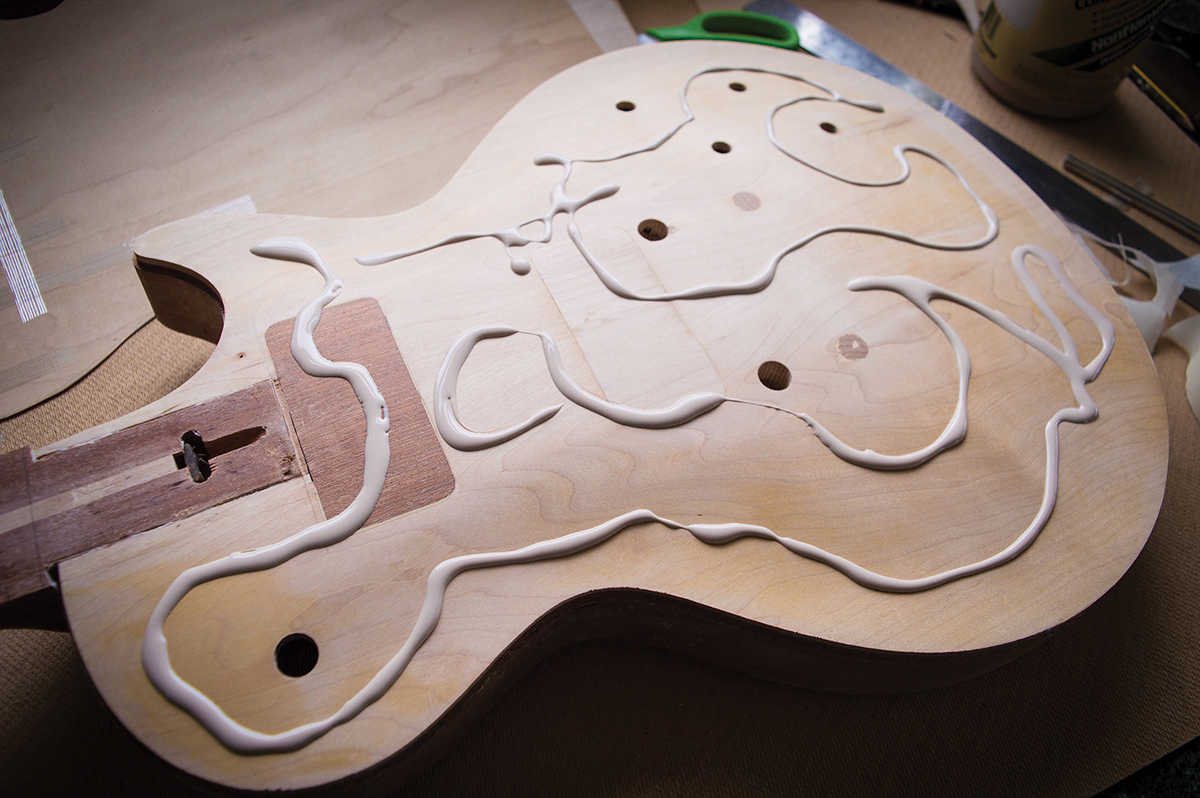
After carefully removing all dust and detritus from the body, I apply Titebond Cold Press veneer glue to the body and spread it evenly with an old paintbrush. It’s essential to ensure that every millimetre of the surface is covered and glue thickness is as even as possible.
Working quickly, I place the veneer over the body, tape it in position with loosely applied pieces of masking tape and put it inside the vacuum bag. Half the air is sucked out and the veneer conforms to the top curve. At this point I pause and apply a roller to the veneer, working from the body centre to the outside edges.
With binding tape, masking tape and rubber tubing holding it in place, the glued binding is set aside for 24 hours
This ensures that no air bubbles are trapped between the veneer and the body. Once I feel reasonably confident, I suck any remaining air from the bag, screw the cap onto the valve and walk away. After an anxious two-hour wait, I remove the guitar from the bag and I’m relieved to find it has stuck down well.
On The Edge
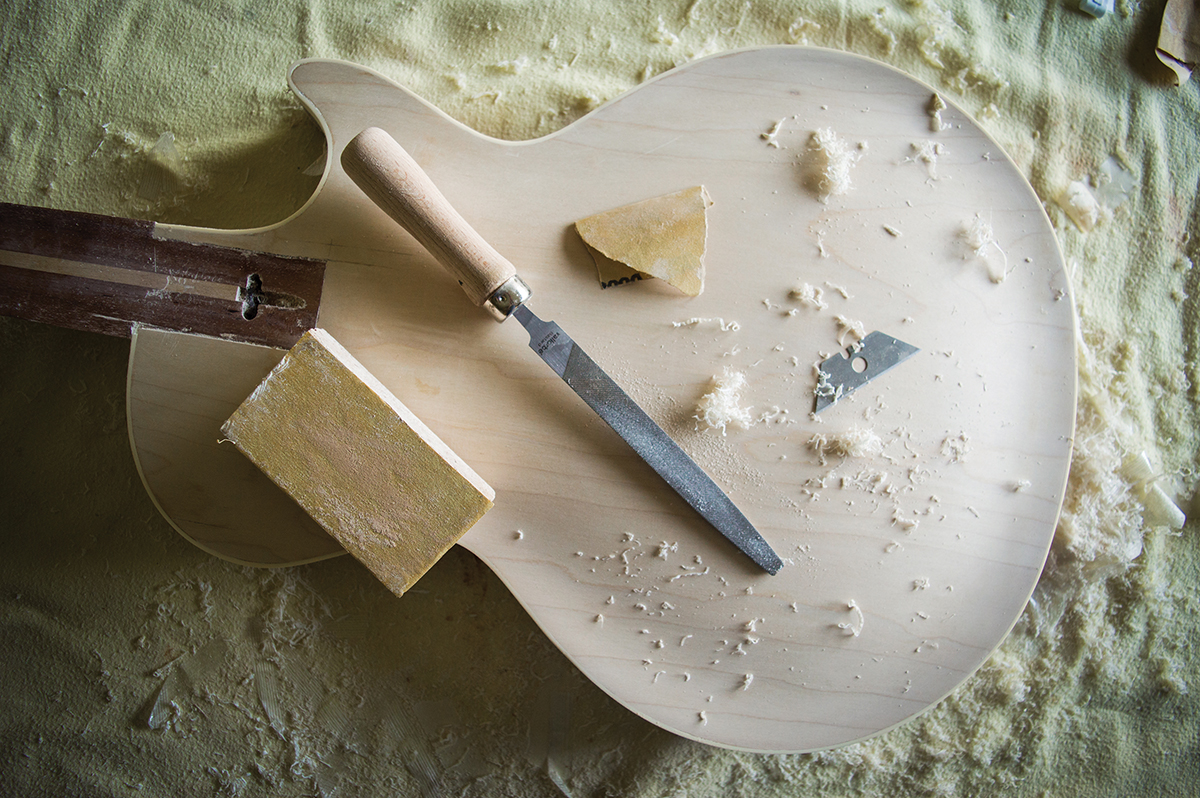
Before doing the body binding, the veneer overhang must be trimmed away. It’s often said that bad workmen blame their tools, but I have always found that I get better results when I have really good ones at my disposal. Accordingly, I treat myself to a gorgeous Wilhelm Schmitt Kirschen chisel and it makes light work of squaring the veneer to the edge of the binding channel. With all the excess removed, I smooth the edge with a sanding block and it’s body binding time.
ABS plastic needs a fair amount of heat to bend, but use too much and you’ll melt it. I find hairdryers to be insufficient, but a paint stripper gun works fine – so long as you’re careful. I pre-bend all the binding and tape it to the body to cool down before applying the glue.
After much filing, scraping and sanding the binding job turns out looking pretty good
I use Weld 16 binding adhesive, because it melts the plastic onto the body and has good gap filling ability. I can advise that too much glue is just about enough, things do get messy and it’s advisable to get your binding tape pre-cut into suitable lengths and lined up before you start.
After a particularly unenjoyable hour the body is bound, taped up and set aside for a day. I carefully remove all the tape, scrape and sand the binding flush with the top and at last, the body is ready for the neck to be glued back on. But that will have to wait until next time!