Related Tags
DIY Workshop: Greco to Les Paul Goldtop conversion (Part Eight)
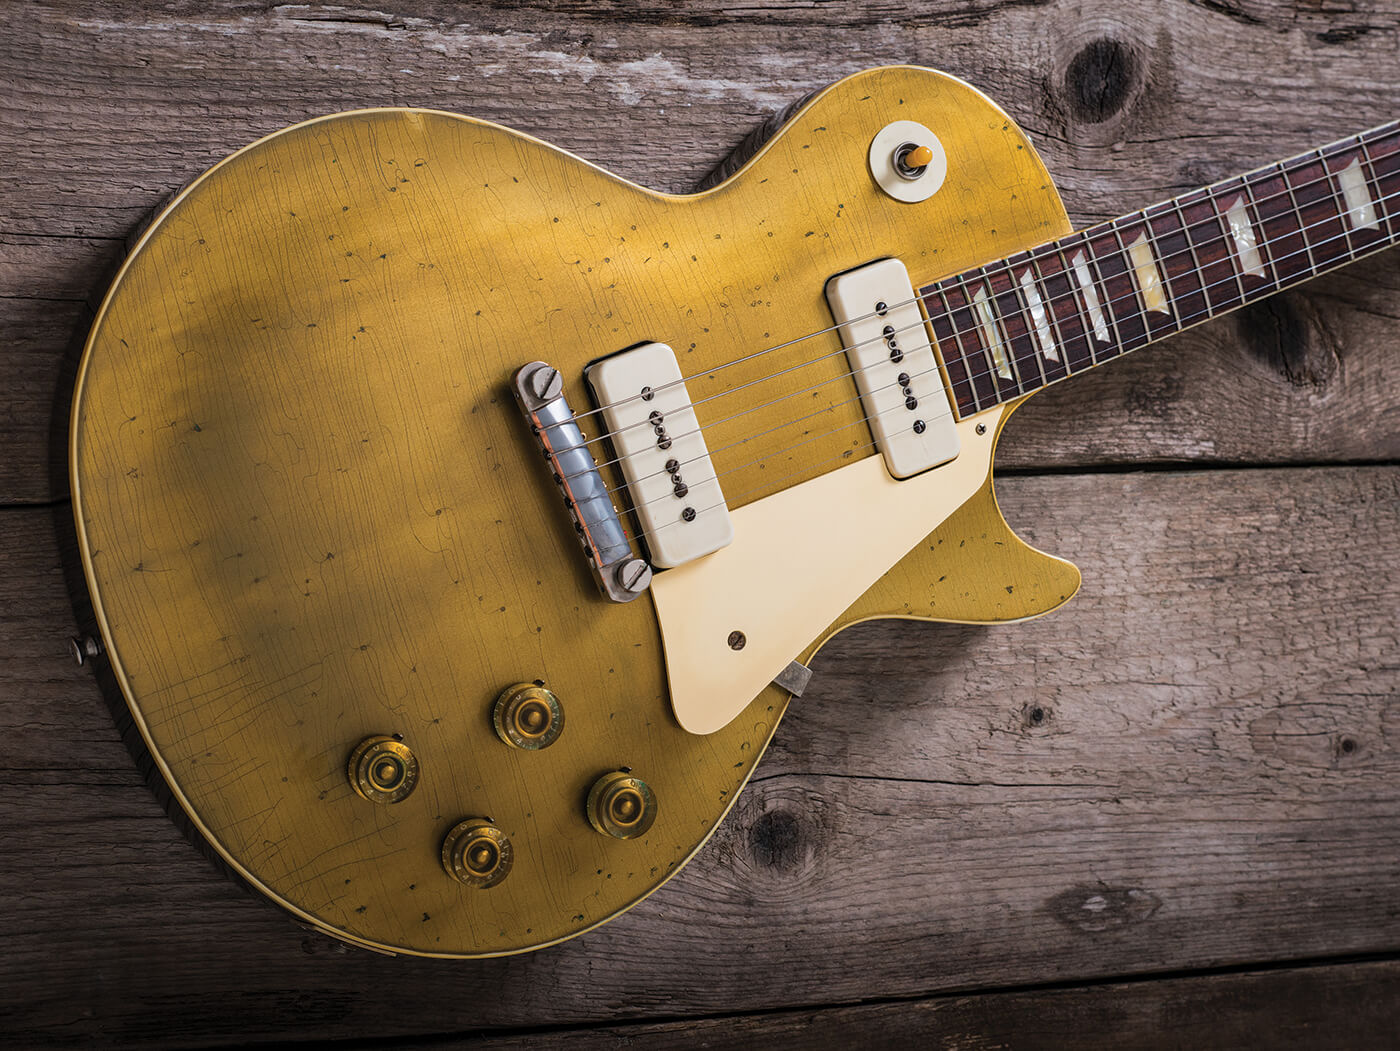
Find out how to simulate lacquer checking and to convincingly age metal and plastic Les Paul parts, as our Greco Goldtop conversion project reaches its conclusion.
Although relic’ing most Gibson and Fender-style guitars is a relatively straightforward procedure, I approached ageing the Greco’s finish with some trepidation. No clear consensus seems to exist on how to correctly relic a Goldtop Les Paul and I suspect that’s because producing authentic-looking results is a challenging process.
When you look at original examples, you can see massive variation in the extent of the lacquer checking, the colour of the gold and the amount of greening. Furthermore, when there is pronounced lacquer checking, it runs laterally, rather than following the grain along the body’s length.
In the past, I’ve managed to produce results that I’m happy with by using inverted air dusters, and I’m able to control the look and intensity of the checking to some extent. But I’ve also learned that, using this method, I have very little – if any – control over the direction of the lacquer cracks. Where some degree of randomness is appropriate, that’s fine, and using a borrowed ’54 Les Paul as a reference, the compressed-air method is going to be okay for the back and sides. But it’s not what I need for the top.
I toyed with the idea of finding someone with a big enough deep freezer to induce checking in a more gradual and natural way; but on realising that several freezing and thawing cycles may be needed, I decided against it. What’s more, I’m not entirely confident that the Titebond glue that I used to veneer the top with has the ability to withstand this sort of treatment. This leaves me with only one option… razorblade checking.
Check yourself
This’s the way that Gibson Custom does it, and it means that I can control the look and direction of the checking lines. The downside is that I’ve never made any serious attempt to use this technique in the past, so I need to practise. To do this, I sourced a large piece of thin maple online and sprayed it with Goldtop lacquer, followed by tinted and clear gloss coats – just like the body.
A couple of months later, when the lacquer has fully cured, I divide the piece into quarters and put one piece through a few freeze-and-thaw cycles to see what happens. As it turns out, the answer is nothing at all, so I’m back to the blades.
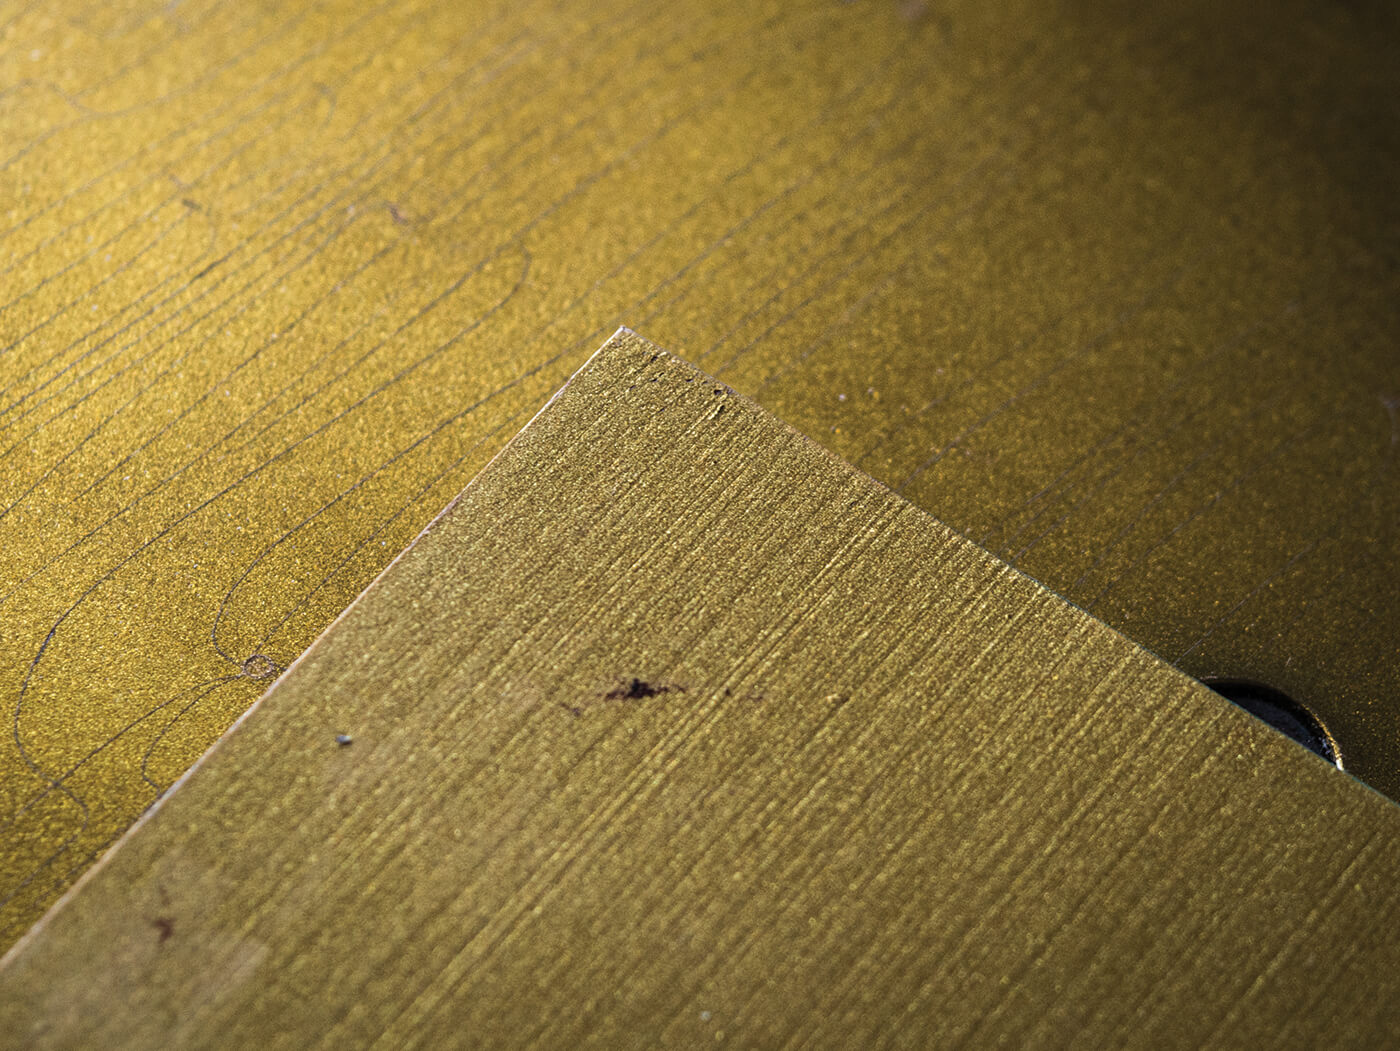
I use a craft knife rather than a razor, and very little pressure is needed. Press too hard and there’s a danger of cutting through to the wood – and if the blade isn’t sharp enough, you may end up with chipping rather than fine ‘checking’ lines. I always induce a few dents and dings before using air dusters for checking, because the crack lines tend to form around the damaged areas as they would on a vintage instrument, so I decide to do the same here. I also practise the curves and lines that characterise Goldtop checking patterns.
On close examination of vintage Les Pauls, it’s also apparent that various types of checking tend to be present on originals. Some lines are deep and wide and look dark – often with some verdigris. Following similar patterns, there will also be finer checking lines that are lighter and less obvious. Then you may see a third type of hairline crack that actually goes with the wood grain to bridge the lateral cracks. It’s all very complex and it’s going to be a big challenge to get this looking right.
Going green
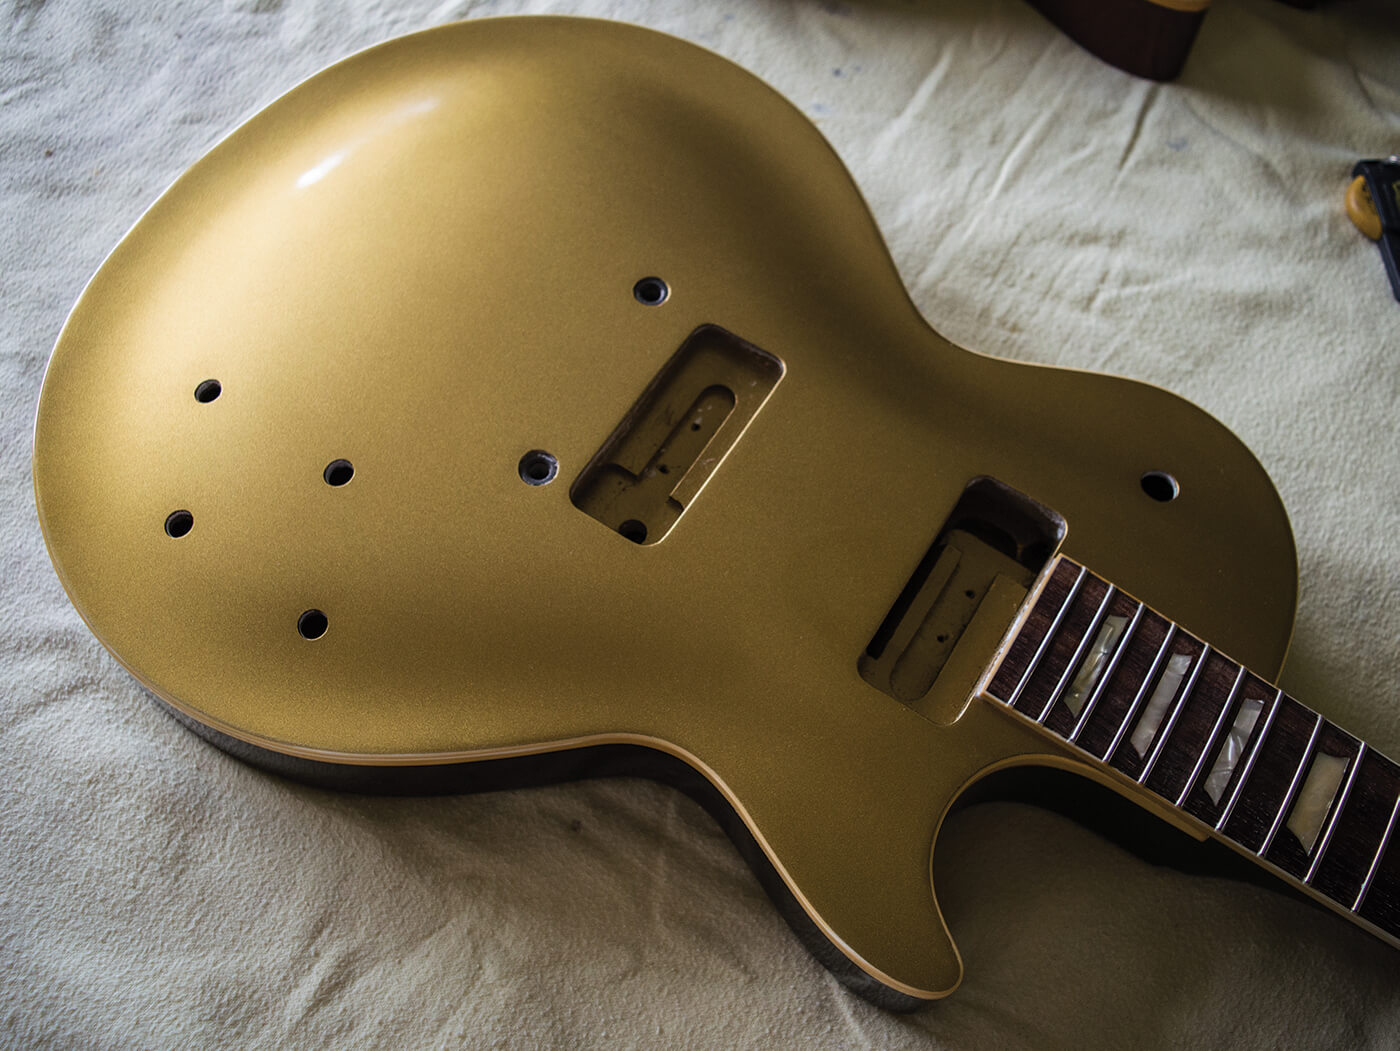
My other reason for making Goldtop test pieces is to try and figure out if there’s a way to make the Goldtop lacquer darker and greener. It’s actually pretty convincing for a later-50s look already, but the ’54 we have on loan has a darker shade.
When relic’ing, I have always found it helpful to consider the factors that cause guitar finishes and parts to age naturally. Some, but not all, Goldtops acquire a greenish hue – Joe Bonamassa once pointed out that it’s a clear tell that a vintage Goldtop has spent much of its life in the swampy Southern States, rather than the colder North or drier West of America.
Thinking it through, I figure that prolonged exposure to moisture, along with the constituent parts of salty sweat, have to figure significantly in the process of making the bronze particles in the gold finish oxidise. I decide to mix up a solution of salt and vinegar to test the theory on one of my scrap pieces.
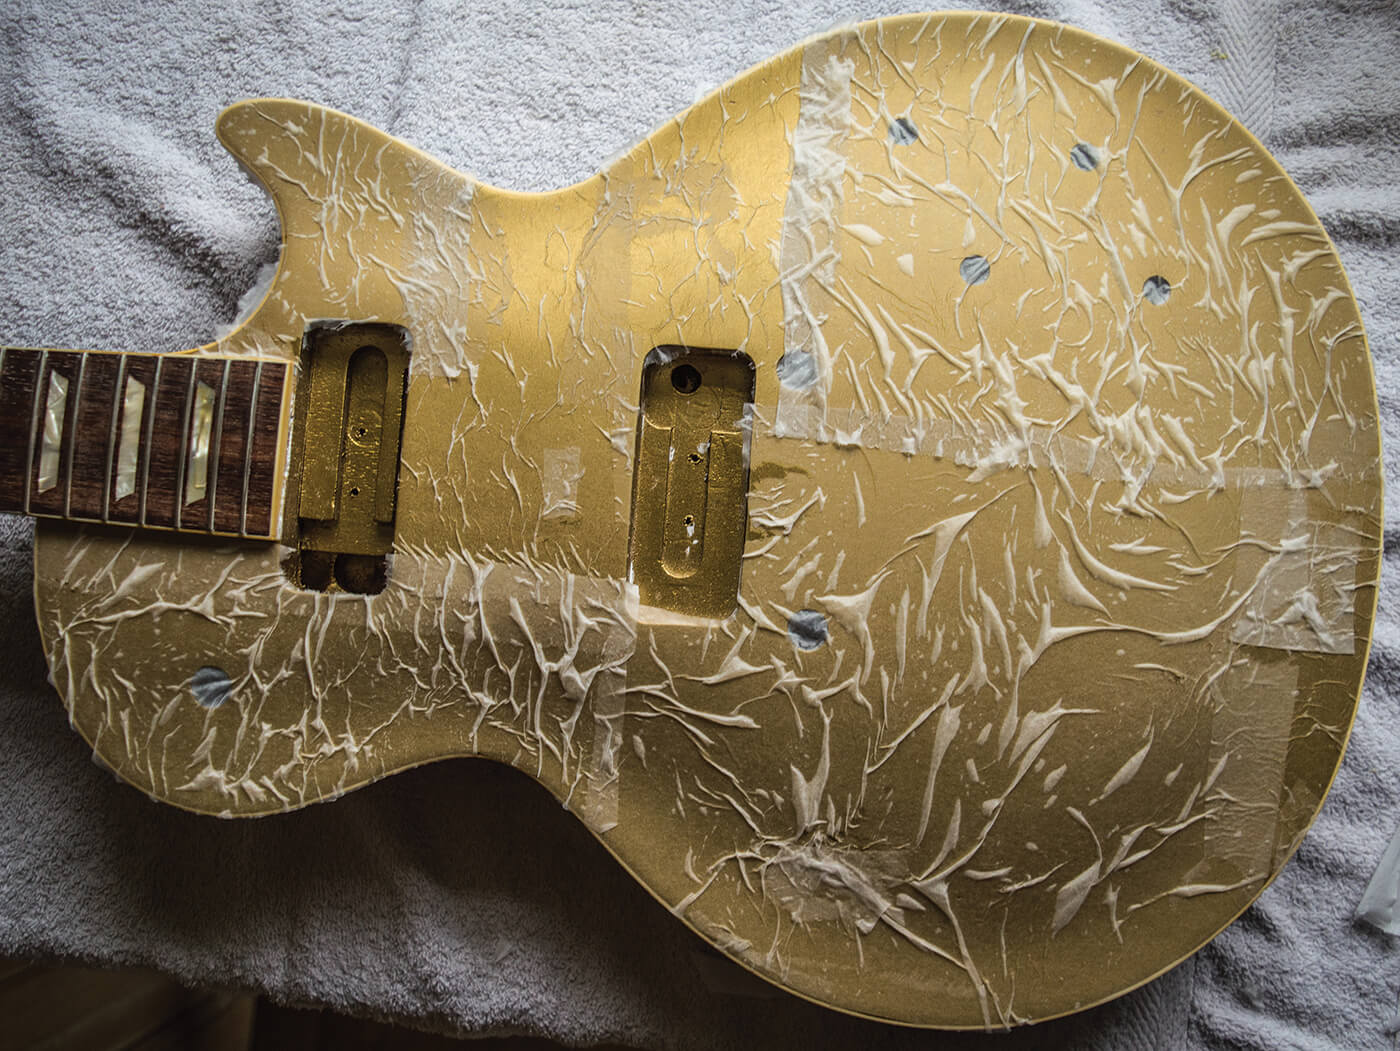
Clearly wiping the solution onto the gold lacquer and hoping for the best isn’t likely to work, because it will dry off too quickly. Instead, I cover the piece with a single layer of tissue paper and dab the solution on top.
The tissue paper allows the liquid to spread out evenly and prevents pooling, and I finish up by wrapping the test piece with cling film to hold the moisture inside. It’s set aside for 12 hours and when it’s unwrapped, I’m thrilled to find that the gold lacquer has become darker and greener. Rather than dry it off immediately, I leave the piece to dry slowly, and over the following week the colour deepens and my checking-practice lines are pleasingly accentuated.
My only concern about doing this to the actual guitar is whether the salty vinegar solution will cause the veneer glue bond to break apart. If that happens, I will be obliged almost to start again. There’s no point in risking it, so I glue a scrap piece of maple veneer onto a backing board, blast it with a few coats of lacquer and subject it to the salt-and-vinegar treatment. 12 hours later, the veneer has survived intact and I’m good to go.
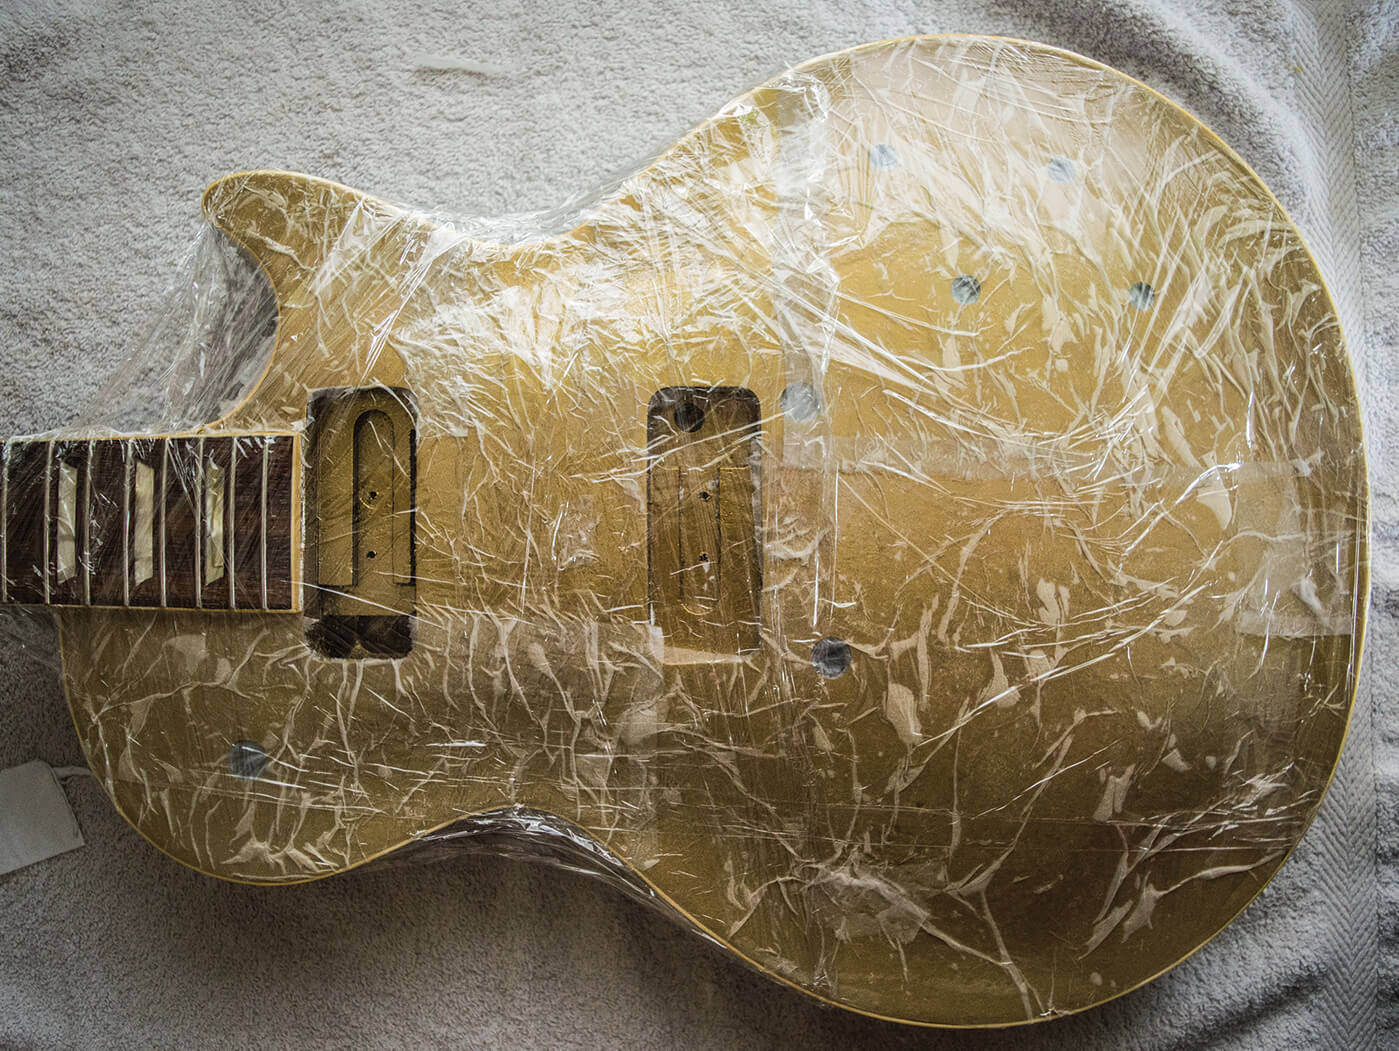
As before, I cover the front of the guitar in tissue paper, mix up the saltiest vinegar solution I can and distribute it across the face. The tissue ensures that the liquid doesn’t run off the curves and it clings fast to the lacquer. Again, I leave it for about 12 hours, inspecting the guitar every so often to ensure that the veneer isn’t lifting.
Besides a bit of lifting around the neck-pickup volume-pot hole and a couple of new cracks next to the bridge-post bushings, the veneer comes through the process unscathed and the guitar already looks a lot older.
For me, this is easily the most satisfying moment of the project so far. The colour change isn’t too even, and it’s noticeably darker around the binding edges, but I couldn’t have hoped for better. The random nature of the results is rather like forced lacquer checking, where a body you’ve beaten up can go from looking a bit rough, to elegantly aged, in a matter of minutes.
Now, if you investigate the chemical makeup of sweat, you might reasonably conclude that even more authentic results could be possible if you are prepared to urinate on your guitar. As a DIY relic enthusiast, I am prepared to tolerate my guitar smelling like a fish-and-chip shop for a few weeks, but bodily fluids are where I draw the line. However, if anybody does feel inclined to try this approach, we expect to hear from you.
Cracking on
The checking lines that were already cut have been highlighted by the vinegar solution, but I decide to treat the top with some green-tinted T-Cut paintwork restorer. This further accentuates the lines and various dents, and leaves a greenish residue that I like.

Next, I set about adding more lateral checking lines, putting very little pressure on the blade because I want these lines to be finer and shallower. Ideally, they should only be visible when they catch the light from certain angles. As before, it’s slow and painstaking work and I probably spend two whole days doing the razorblade checking.
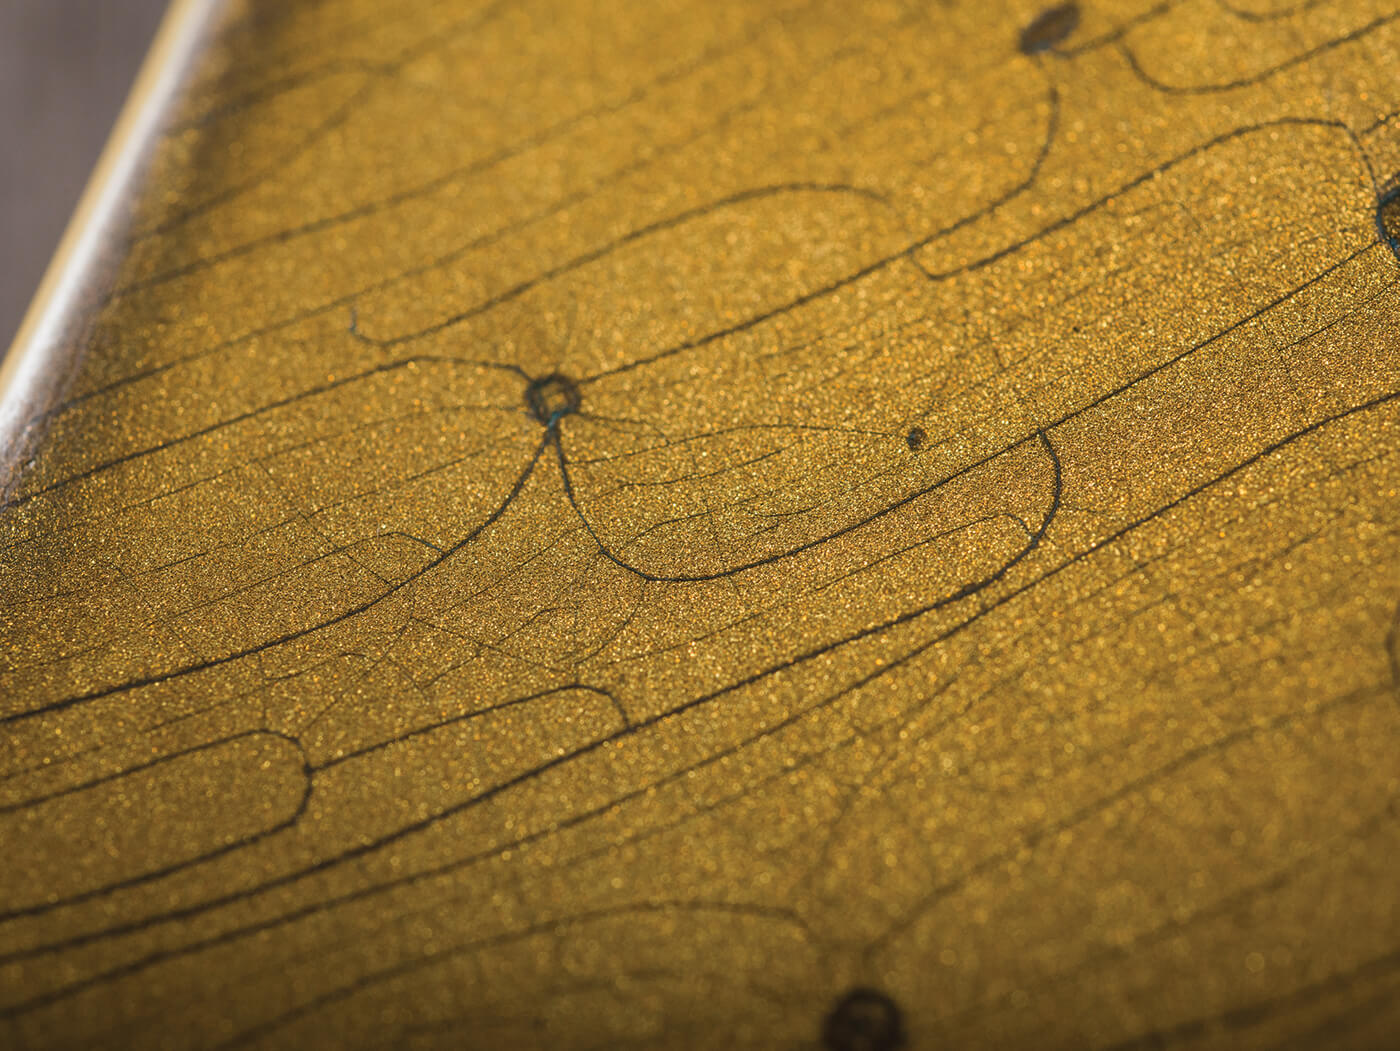
Once I’m done, I give the top a very quick blast with an inverted air duster to induce smaller checking lines that run between the lateral checking lines. For a first attempt, I’m reasonably pleased with the results, but using a blade to create complex checking patterns certainly does take practice.

Using a real ’54 for reference, the back-and-side checking is closer to the way vintage Fender finishes tend to check. Although I use a blade on the rear of the headstock, the rest is done with a can of compressed air. I also add more dents and chip away at the edges, before finishing up with some black boot polish.
Plastic fantastic
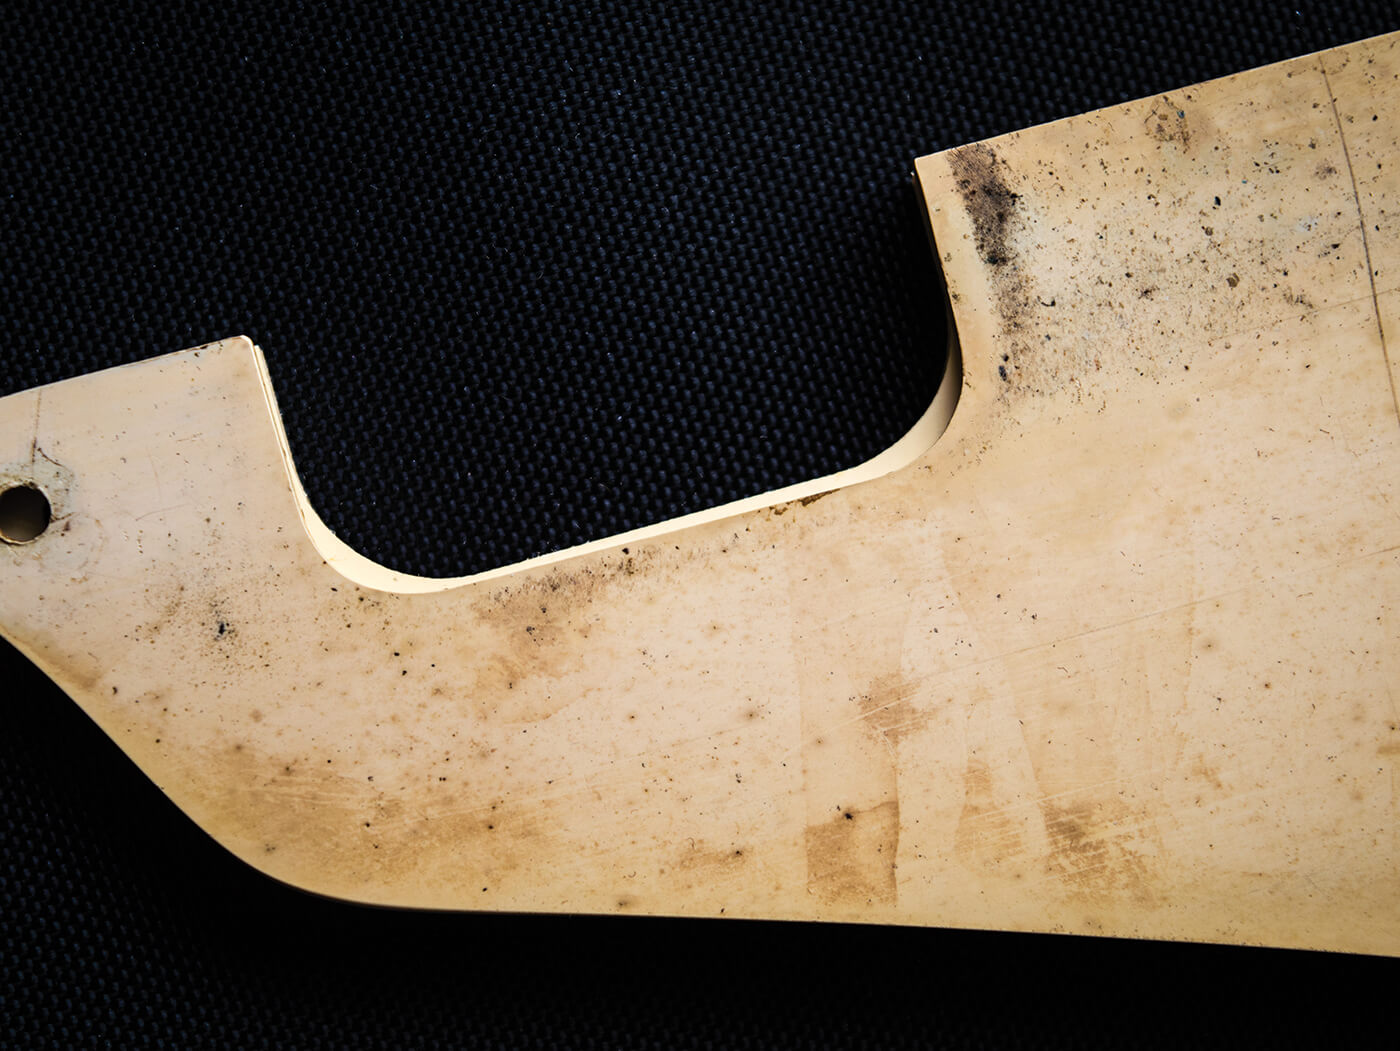
Rather than invest in expensive relic parts, I decided to buy a P-90 pickguard from Crazyparts in Germany and source a set of bone-white P-90 covers from an eBay seller. All together, they cost me less than £20, but they do need some work.
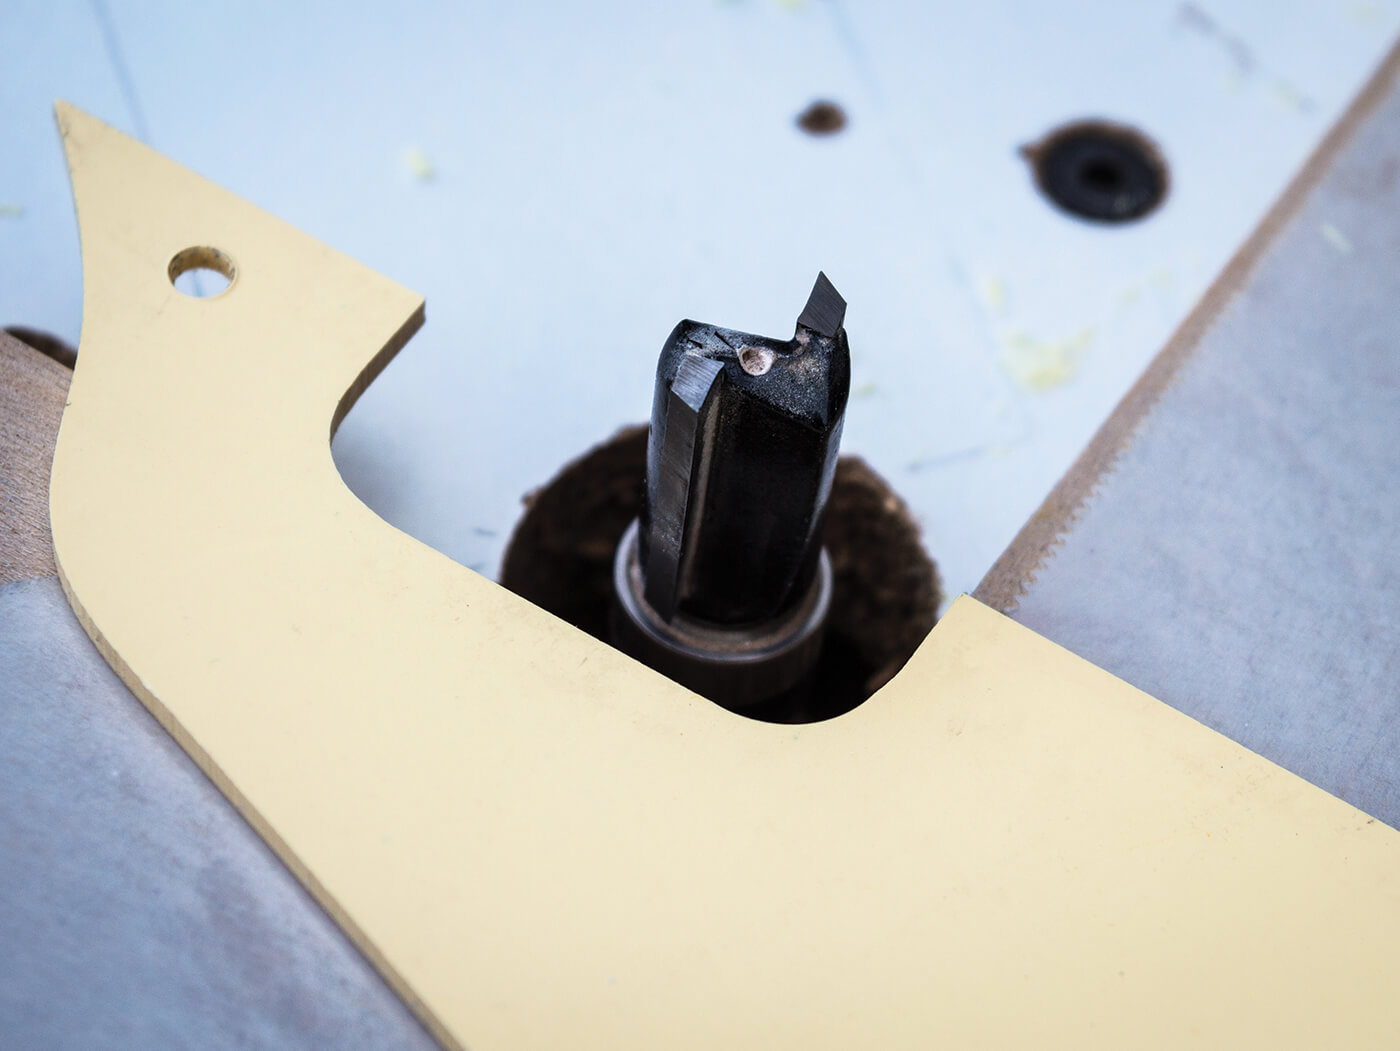
The pickguard colour is pretty good as a starting point, but it’s obvious that the pickup cover cutouts aren’t quite the right shape. The corners were probably done with a metric-sized router bit, but Gibson probably used a half-inch bit. Since I own a half-inch bit, I decide to recut the corners on my router table.
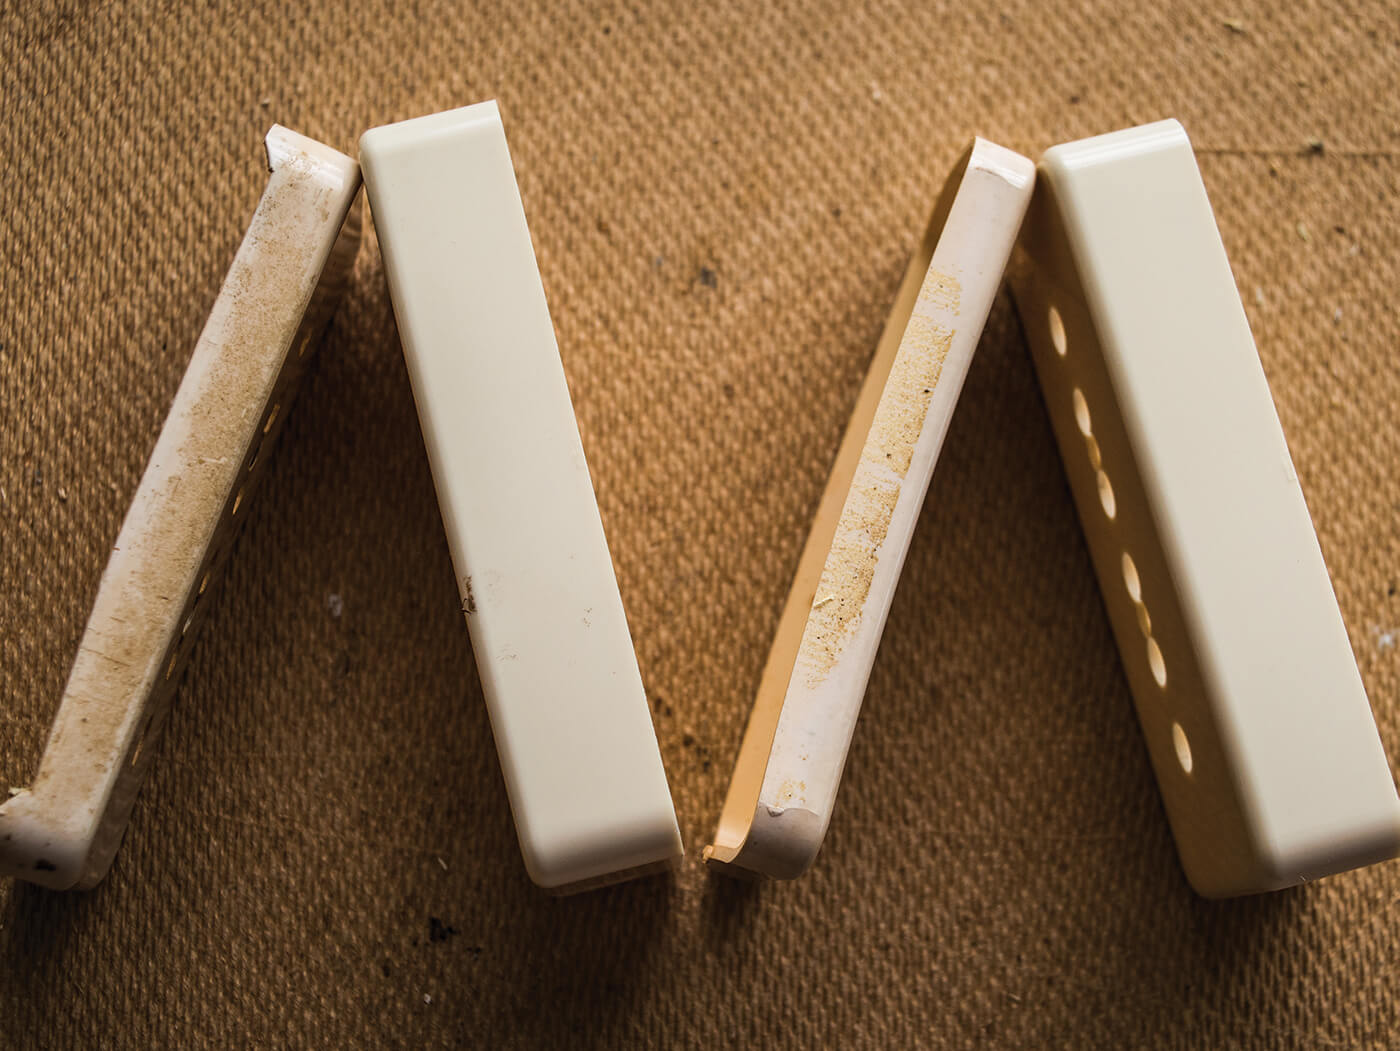
It’s a similar story with the pickup covers, because they are way too tall and the corners are too square. Back in the day, Gibson would also notch out the sides of the bridge-pickup covers. Having measured and marked out the required heights, I cut the bottoms off the covers with a small hand saw, and then clean up the edges with sandpaper. The corners are rounded over with a file and then sanded and buffed smooth.
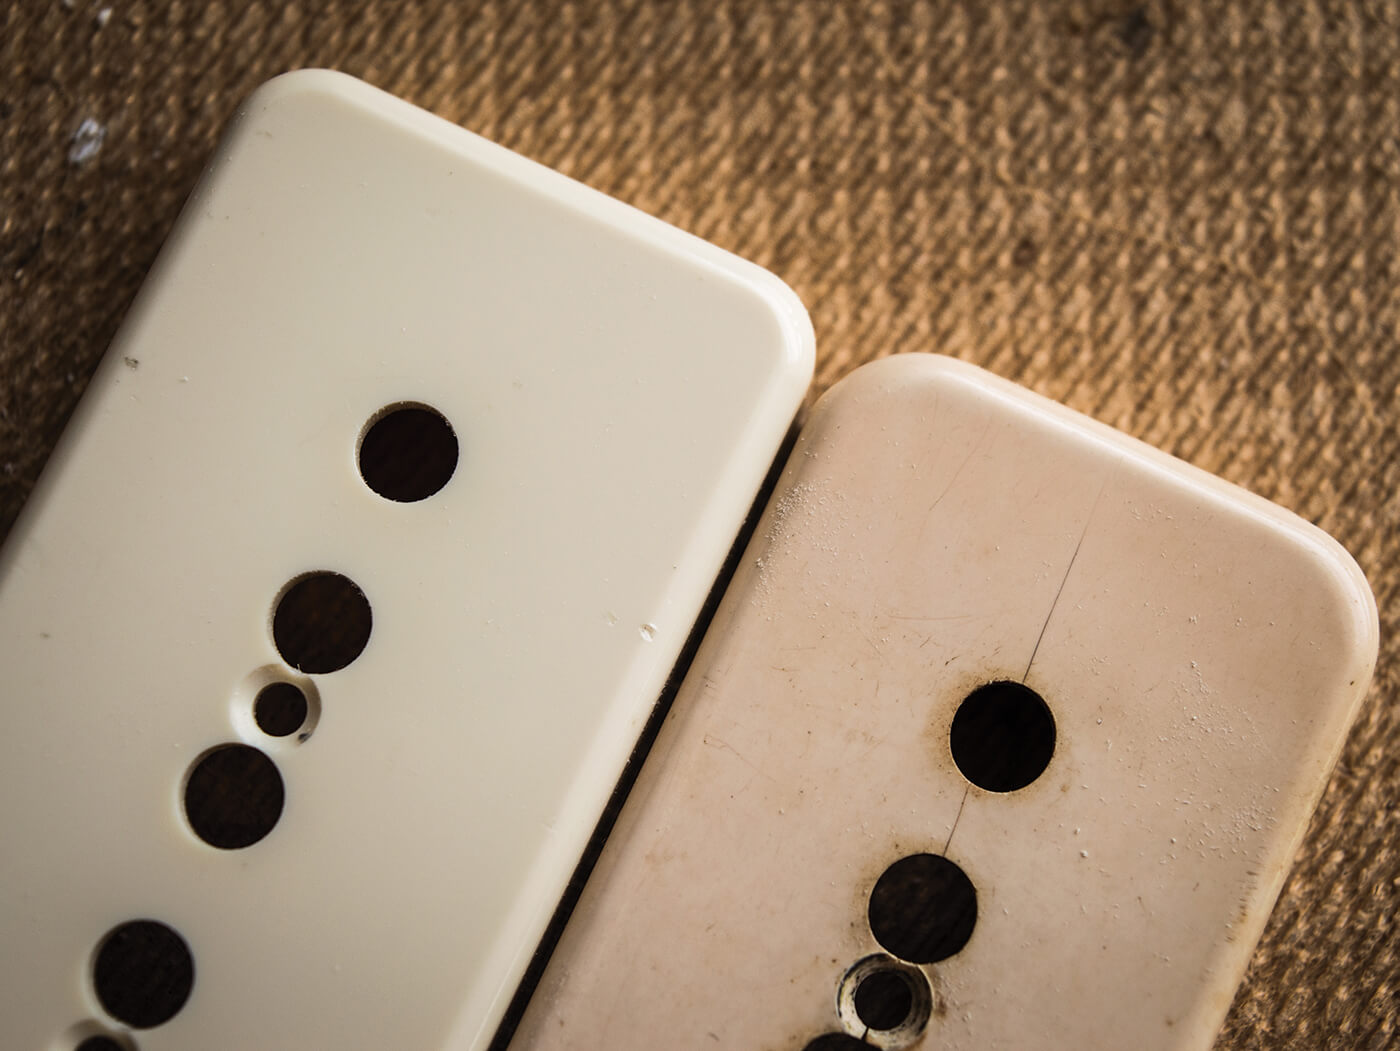
Close examination of an original bridge-pickup cover suggests that Gibson notched them out using nippers. I use my Crimson fret nippers and the resulting marks look much like those on the vintage cover. Both the pickup covers and the pickguard are sanded with 800-grit paper followed by 1,500 and 2,000-grit, then 4,000, 6,000 and 8,000-grit Micro-Mesh. This turns glossy surfaces into a dull sheen and makes the plastic more receptive to staining.
I start with a 50/50 solution of water and acetone and mix brown and vintage amber ColorTone stains, depending on the shade I’m trying to achieve. I also use it on the buttons of a set of Kluson tuners that are destined for this guitar. Two or three applications are usually needed to achieve the desired look, and I dab a dark-brown, oil-based grain filler around the polepiece screw holes in the covers and along the edges of the pickguard.
Dishwasher safe
While filing and sanding my repro wrapover bridge, I discover a layer of copper between the aluminium and the nickel-plated surface. Vintage Gibson bridges don’t have that layer, so I don’t want it, either. I seek the expert advice of metal-plating professionals, and I discover that to apply nickel plating without the copper requires a technique called electroless plating. It’s quite specialised and turns out to be prohibitively expensive.
Instead, I use a buffing wheel on a Dremel with chrome polish to buff my way through the exposed copper and surviving nickel plate to expose the aluminium. At the end of the process, I’m left with a very shiny aluminium bridge that looks fine, but is wrong for this guitar. That evening, I throw it into the dishwasher and it emerges the following morning looking more appropriately weathered.
Getting hold of a nickel-plated Les Paul pickguard bracket with the correct dimensions proves difficult, but I find a chrome-plated one in my parts bin. Of course the chrome looks wrong, so I let it sit in hydrochloric-acid fumes for a few hours and I’m more than happy with the result.
All the nickel screws and knob pointers are knocked back with PCB etchant and washed under running water. Before starting out, I wipe them down thoroughly with rubbing alcohol to remove any greasy fingerprints and the results are almost instantaneous.
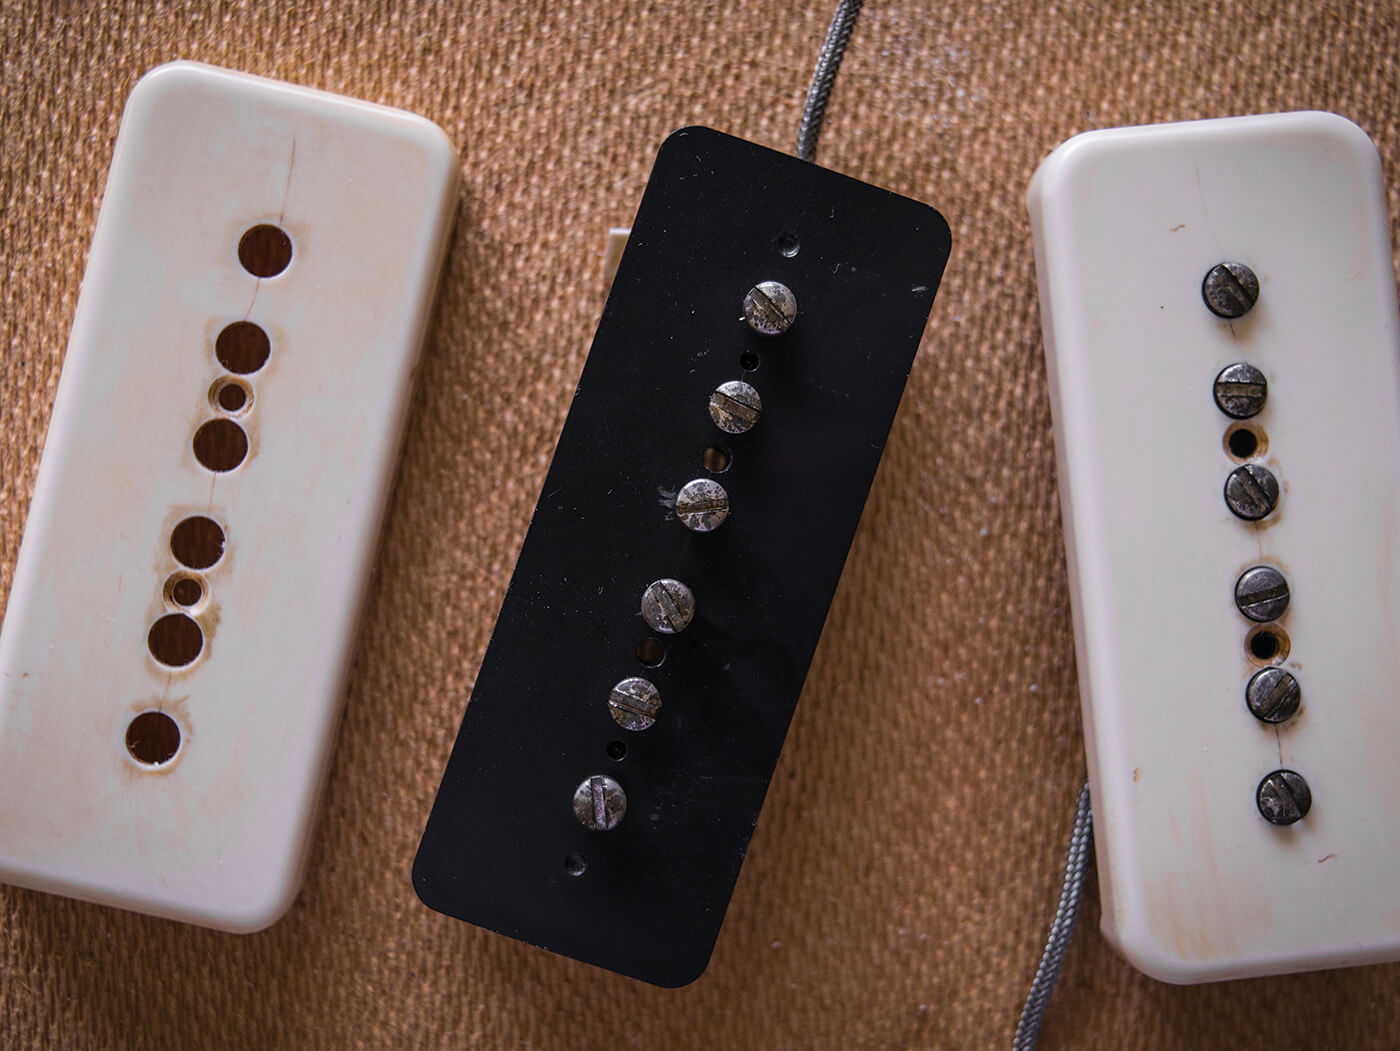
I chose a Tyson Tone 53-Wraptail P-90 set for this project and since the only parts that will be visible are the pole screws, relic’ing can be confined to those. This time, I go with the electronic method, using a 9V battery and salt water. With a steel screw on the positive and the pole screws connected to the negative, the results are almost instantaneous as the shiny plating turns black. I’m careful to relic only the screw heads and once they’ve dried, I coat them with WD-40.
All together now
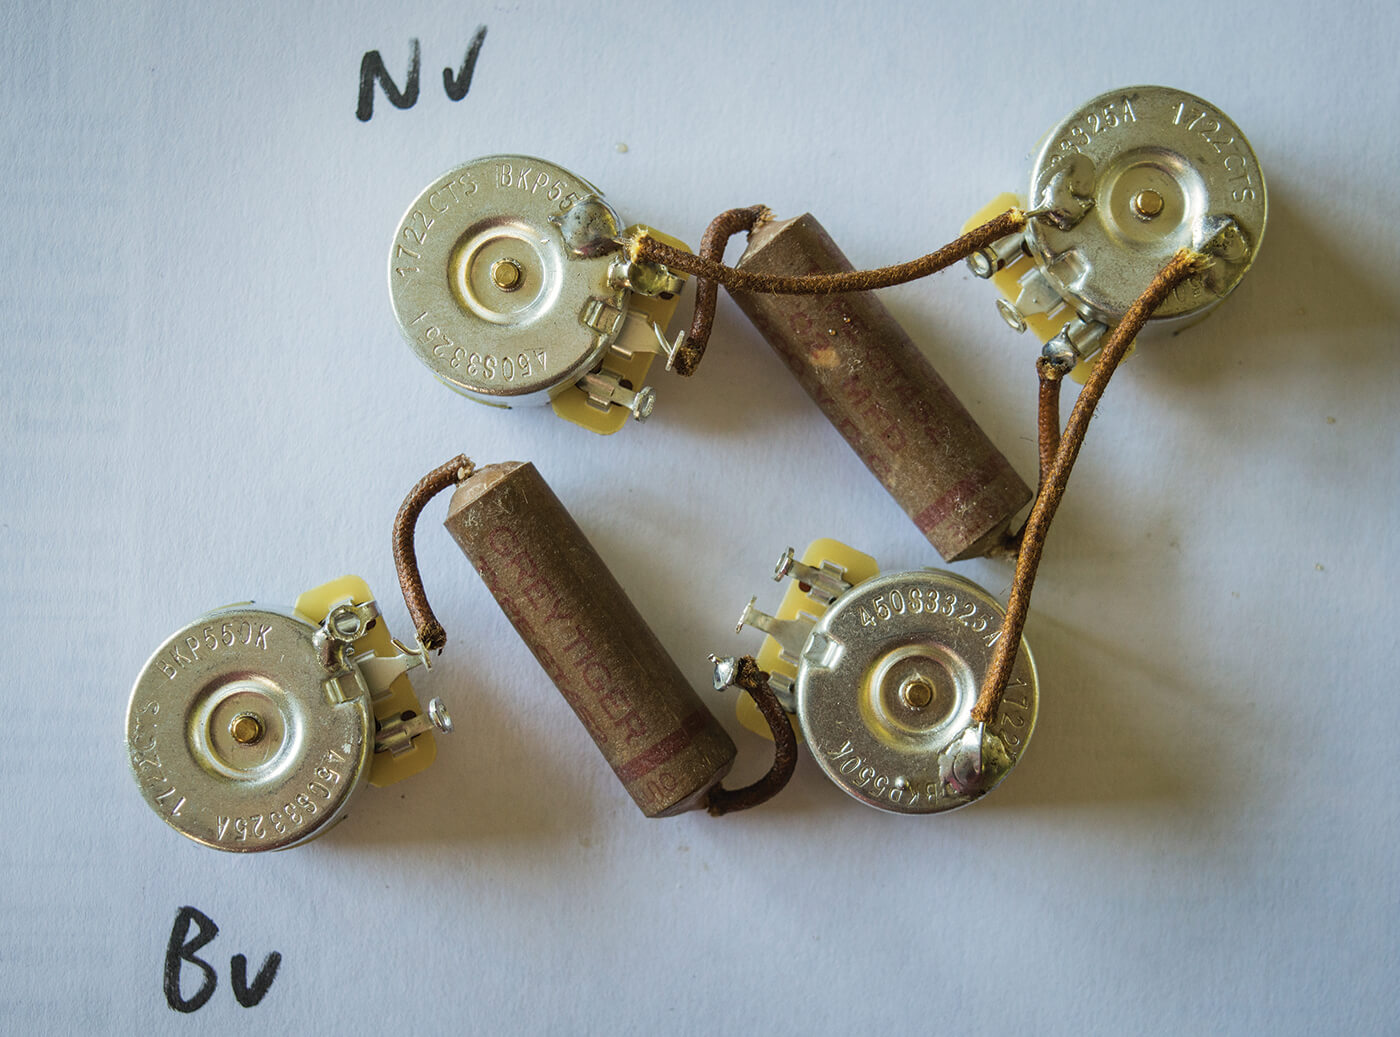
Since I had this guitar up and running before I sprayed it, putting it back together is straightforward – besides making a new 50s-style nylon nut, which is a tough job. Having tested a bunch of potentiometers – including the recently introduced Vintage Inspired pots – nothing beats Bare Knuckle 550Ks when it comes to matching vintage values and taper.
They also have a free, but not too loose, feel that makes adjustments quick and accurate. The way the controls respond is fundamental to the vintage Gibson experience. If you’re prepared to contemplate spending £250 on a top-notch set of vintage replica pickups, why would you balk at £7 per pot? Although they don’t look like the old Centralabs Gibson used, they certainly sound like them, especially when wired to mimic the way that Gibson wired Les Paul controls in the mid 1950s.
Final thoughts
At the end of any project, I always feel that there are things I could have done better. If I ever do another Goldtop, I’ll use a little more tinted clear lacquer and press a little harder on the first round of razorblade checking. Other than that, I’m pretty pleased with the way this one turned out. The Tyson Tone P-90s sound fantastic and going the extra mile to increase the neck depth and alter the neck profile was certainly worth the effort. As great as Burst-style Les Pauls can be, P-90-loaded Lesters have their own special qualities. This one may not be the real deal, but it’s probably as close as I’ll ever get, and it certainly does the business.