Related Tags
DIY Workshop: How to re-carve a neck profile
Maybe you have a guitar that you love but the neck isn’t quite right for you. Rather than change the guitar, consider changing the neck profile instead.
All images: Huw Price
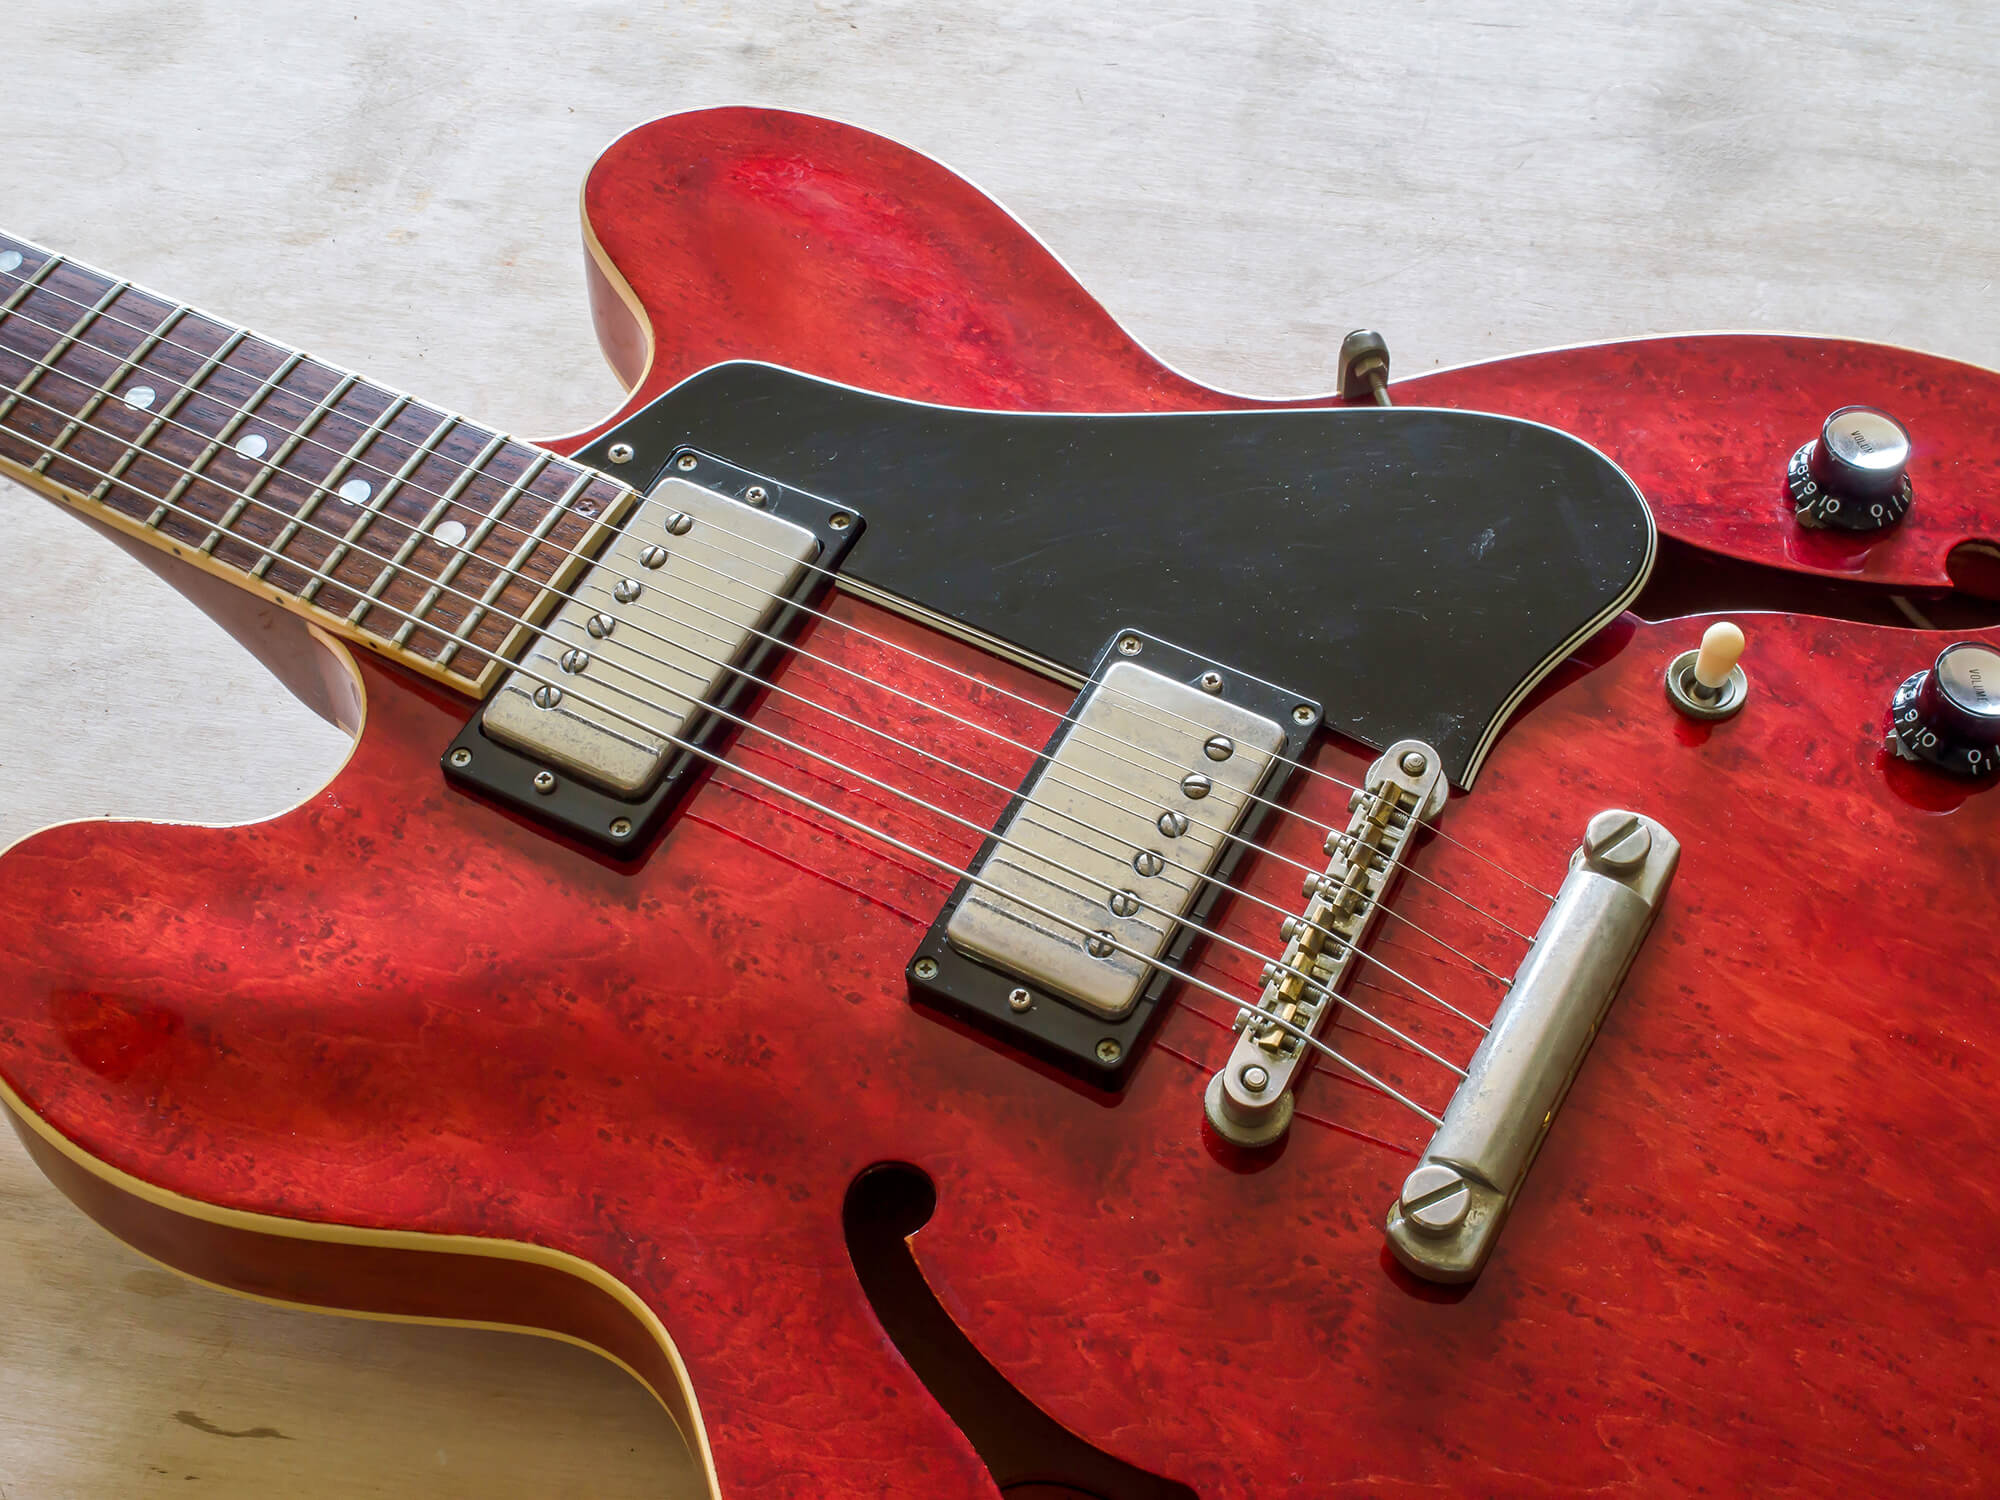
The subject of this instalment of DIY Workshop is a 1981 Tokai ES-100R in excellent condition that sounds fantastic and plays very nicely. So what’s the catch? The owner is finding the neck profile hard to cope with and rather than ditch the guitar altogether, we’ve decided that I’ll re-profile the neck.
The Tokai seems to have been modelled after a 1958 ES-335, with its rounded ears, elongated pickguard and substantial neck. Although it’s not especially deep, the flat-sided U profile makes it feel formidable. This guitar is a shoulder shave away from perfection, so I’m stripping off the neck finish and re-shaping it.
Depth gauge
Since the Tokai is an unknown quantity, there’s no way to gauge how deeply the truss rod is set into the neck. If it’s set very deep, any attempt to reduce the neck depth dramatically may expose it, turning a neck finessing project into a neck replacement project.
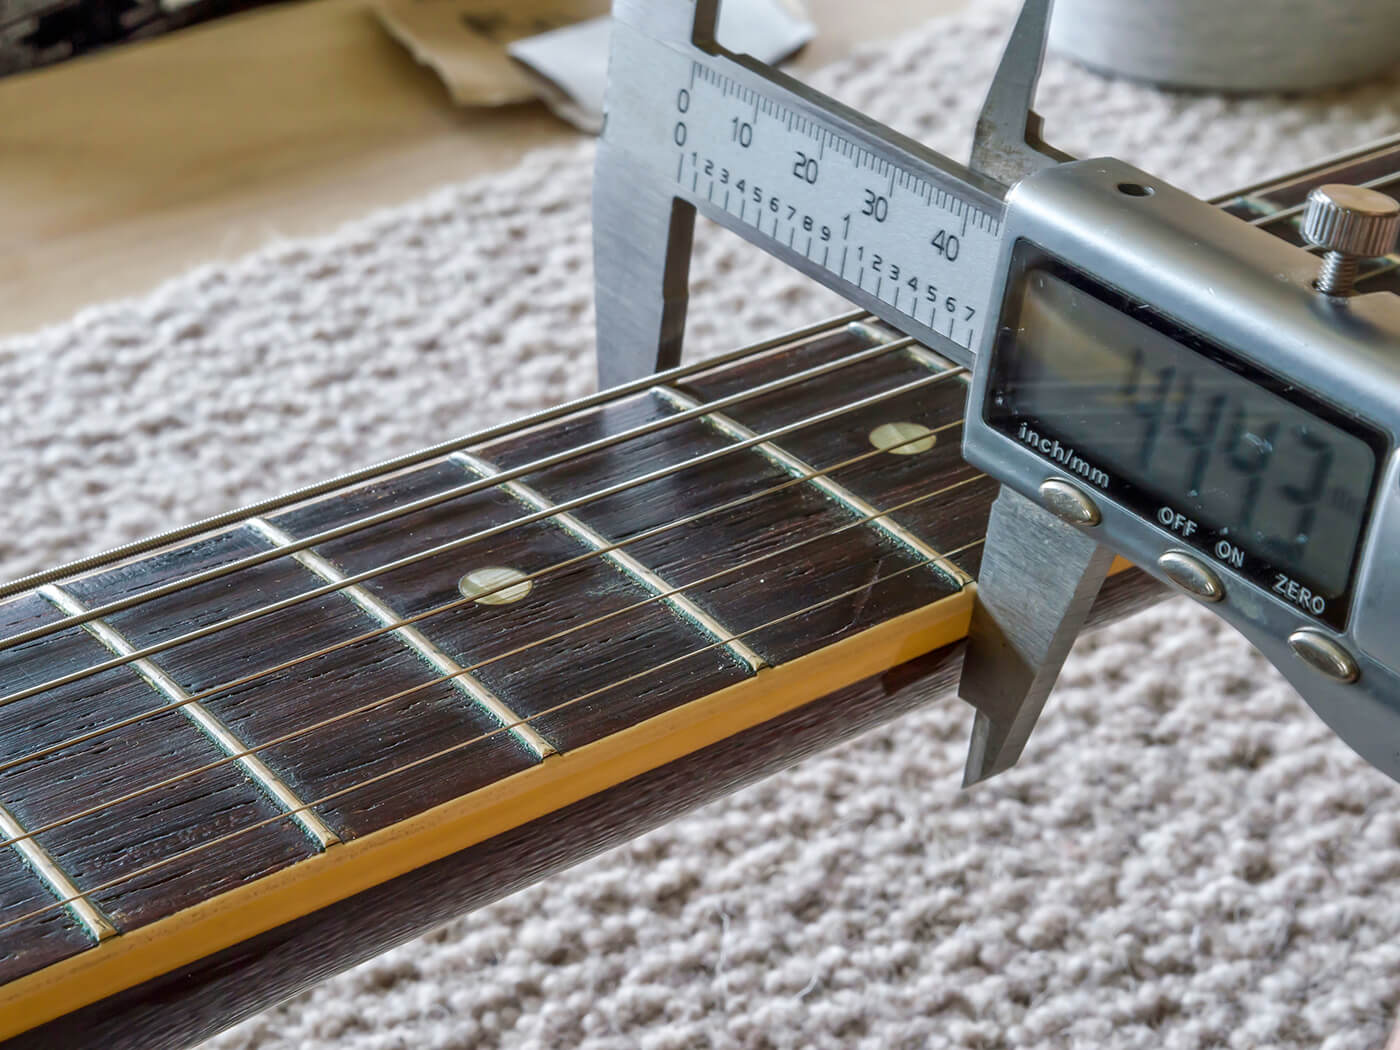
A super-skinny early 1960s style profile is therefore too risky. Instead, I need to measure the Tokai’s neck depth so I can compare its profile with necks of a similar depth. I use digital callipers with a spacer so I can leave the strings in place. My spacer is a Switchcraft switch nut, which is precisely 5mm deep. I re-zero the callipers to allow for the spacer’s thickness, then place the spacer between the D and G strings and take readings for neck depth at the first, seventh and 12th frets.
Making templates
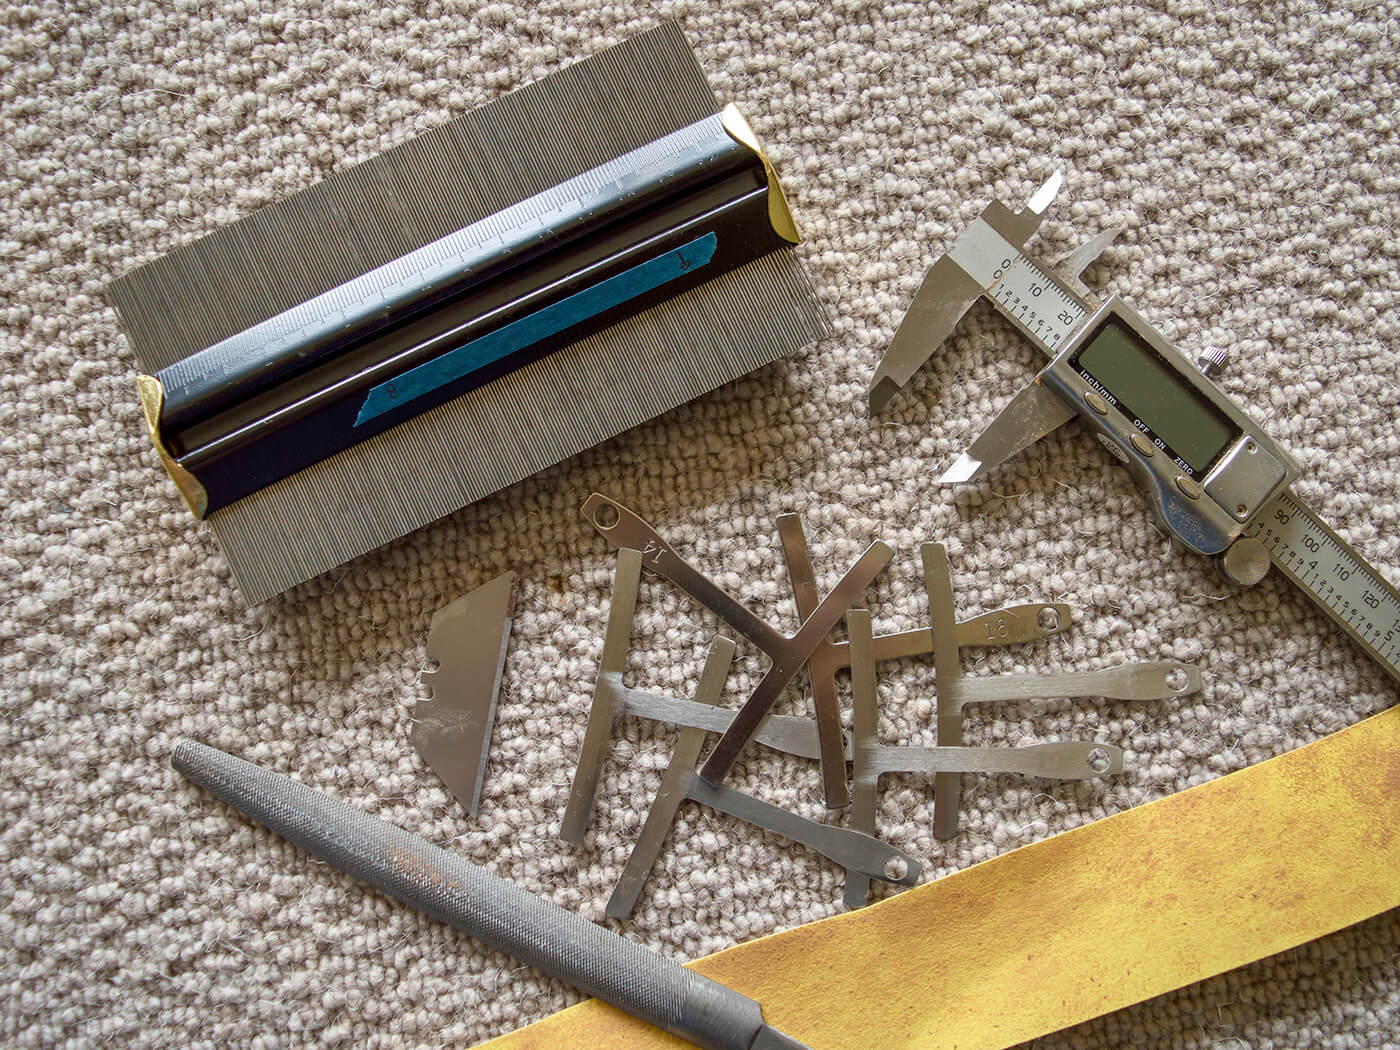
To make a profile template from any guitar neck requires measuring callipers, a set of radius gauges and a profile gauge. You’ll be surprised how cheaply you can buy these – almost certainly less than £30/$40 for the whole lot. You’ll also need a pencil, a ruler and some paper.
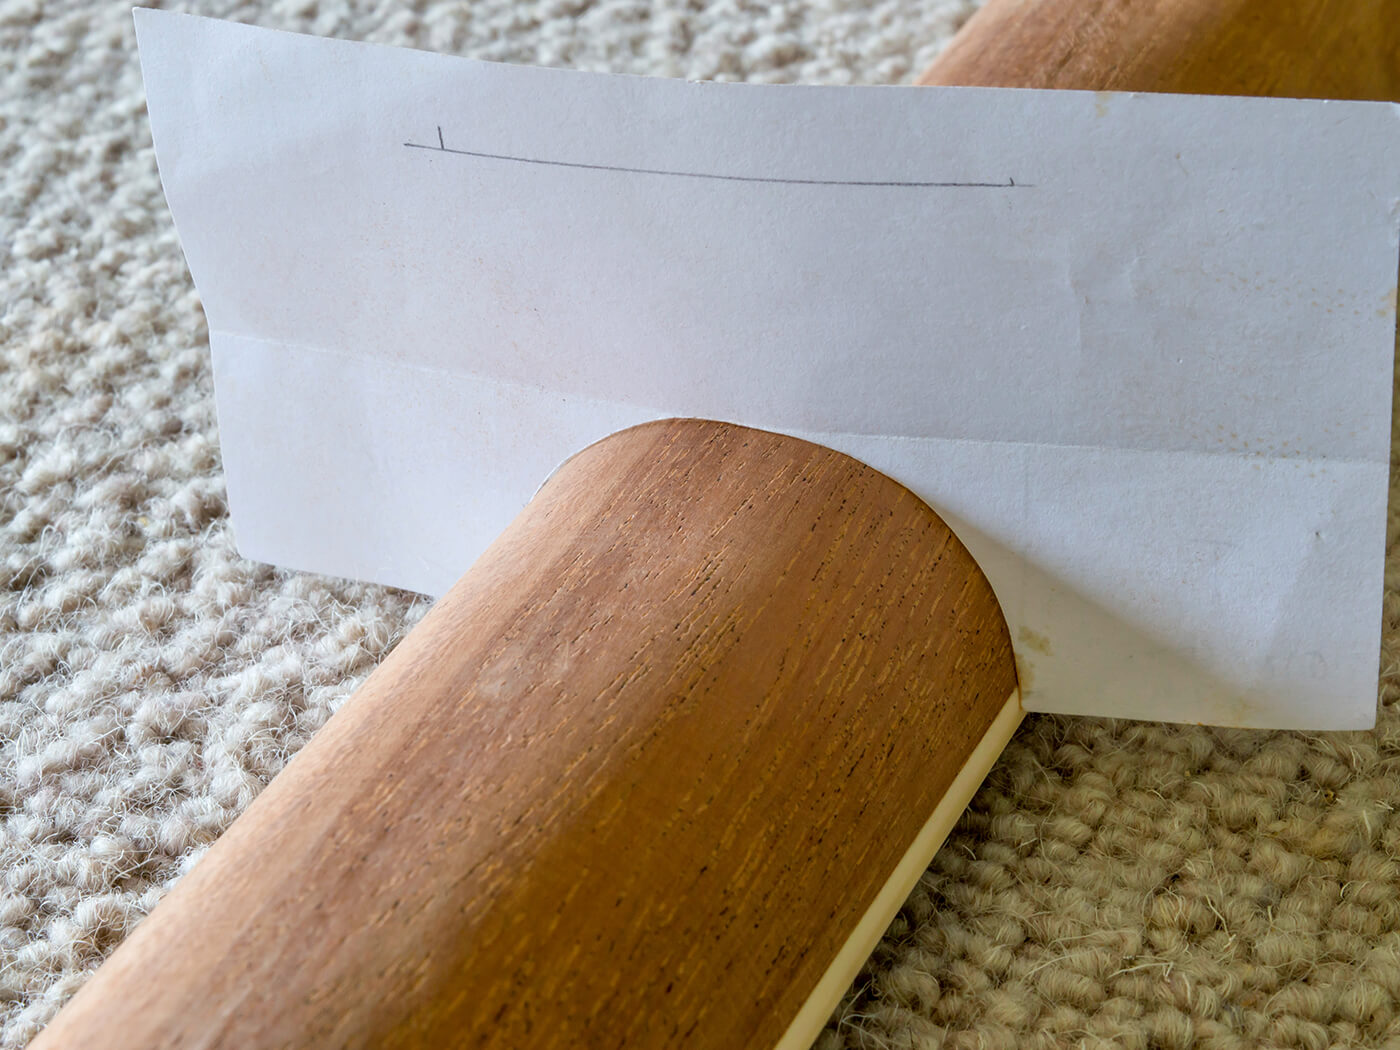
I draw an upright line onto the paper and a second line at right angles towards the top of the upright. Starting with fret one, I use the callipers to measure the fretboard width at that point, and then transfer that measurement onto the perpendicular line, with the upright line dead centre.
Having determined the fretboard radius using my gauges, I place the appropriate gauge onto the paper, line it up with the width marks and draw the fretboard curve onto the paper to join the width marks together. Measuring from the top of the curve, I mark the neck depth onto the upright line using the measurements I took earlier.
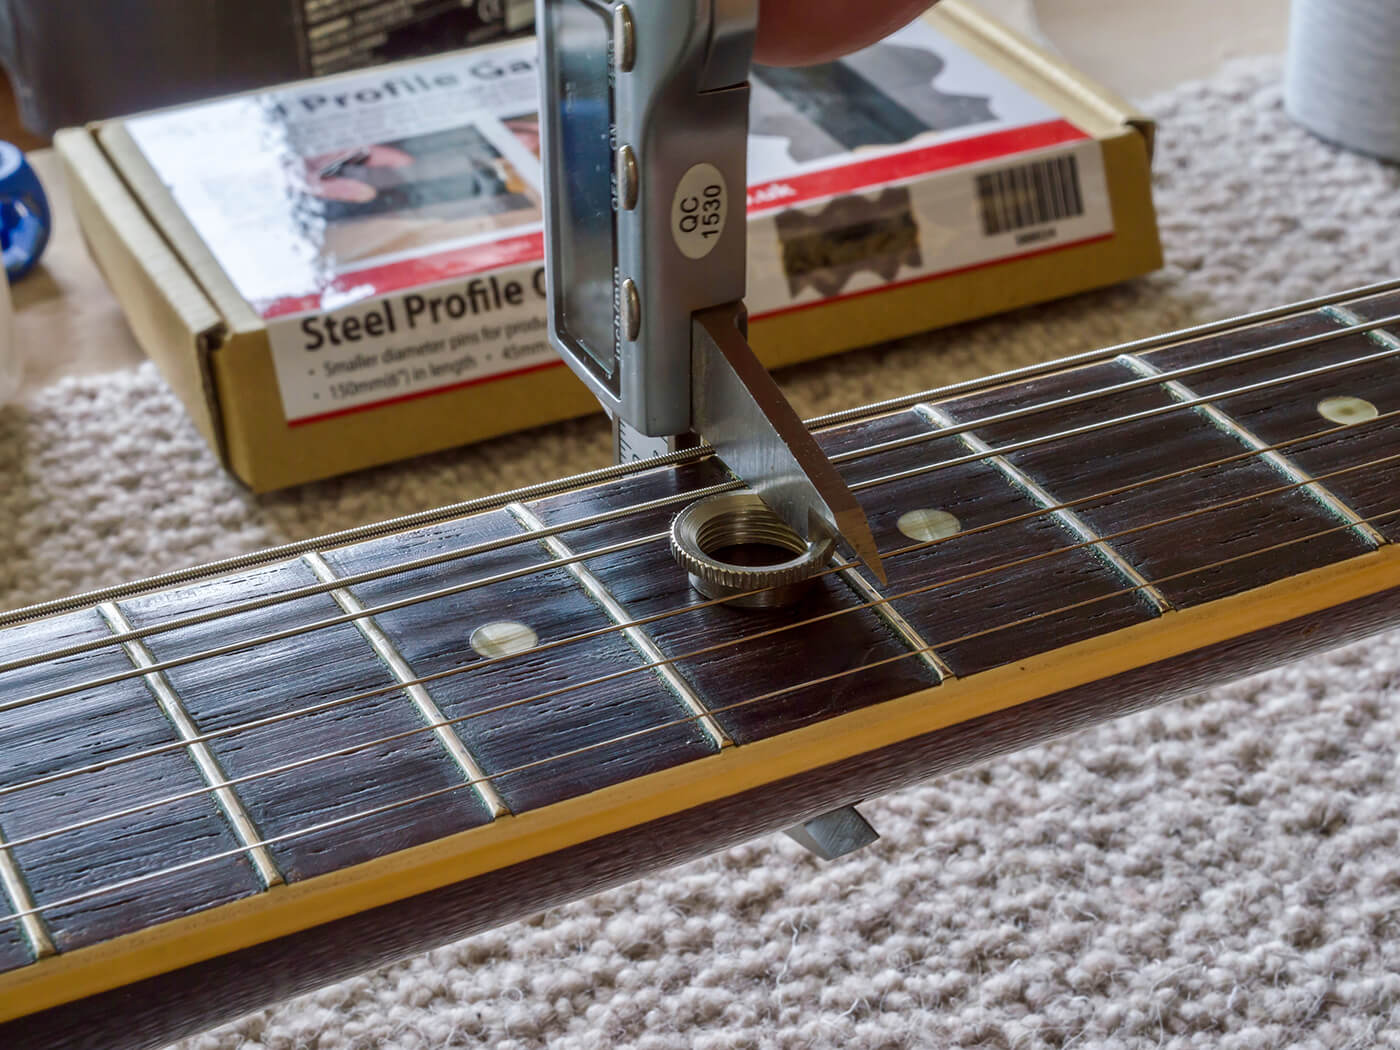
Using the profile gauge is the fun part, but first I apply some very low tack masking tape to the back of the neck to protect the finish from the gauge’s metal pins. It also highlights the area I’m measuring as I press the gauge down onto the neck.
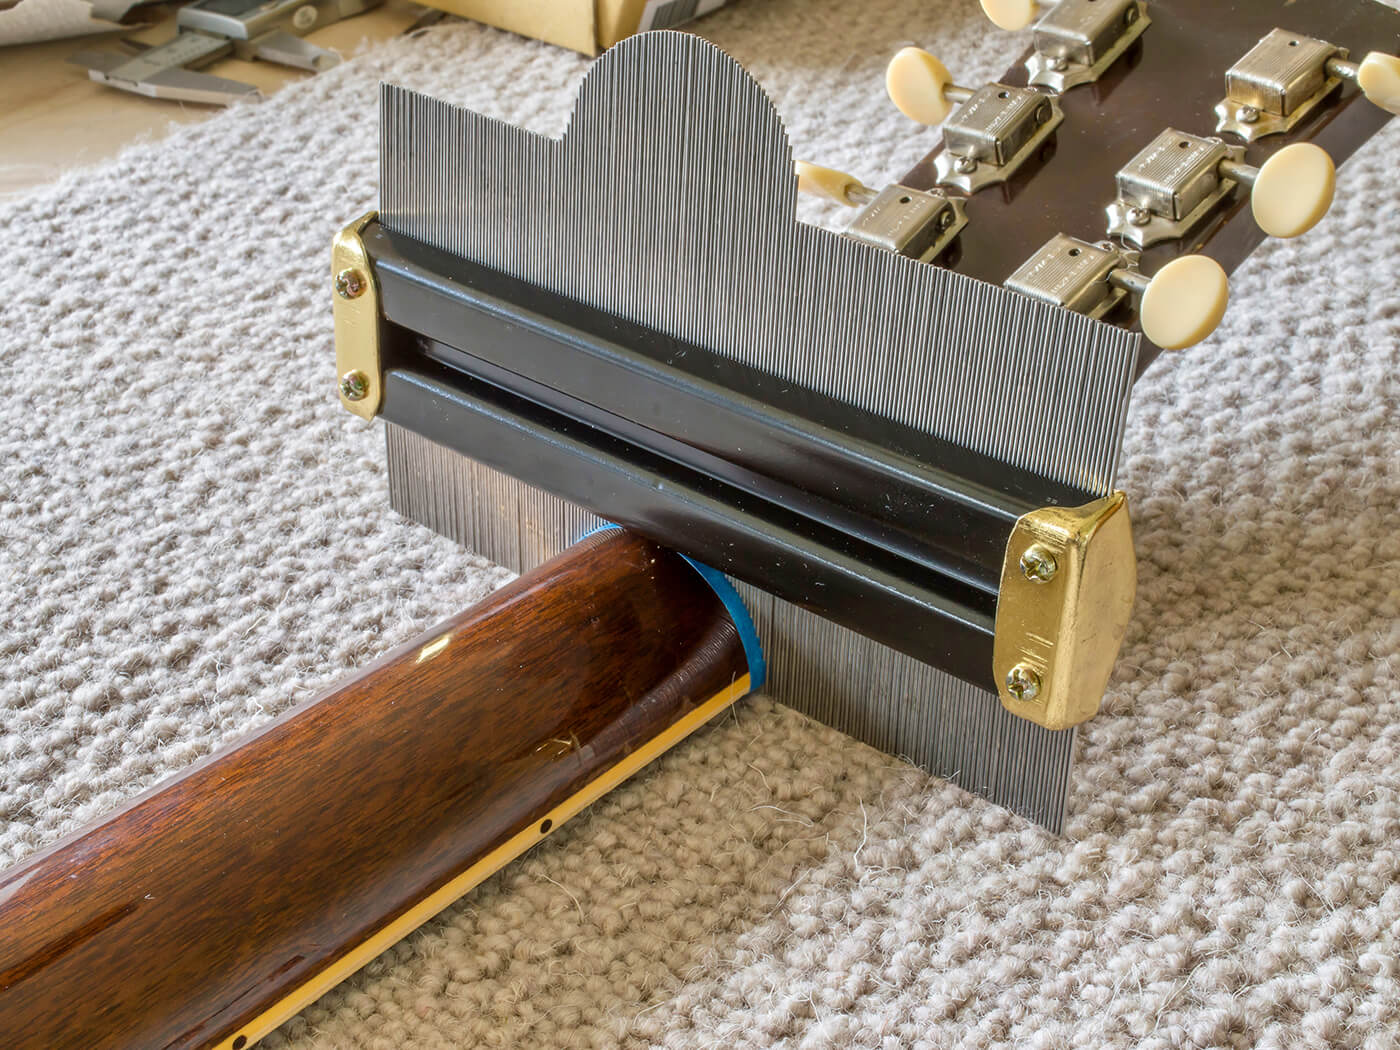
The fine pins conform to the curve of the neck and when lifted off, you can see its exact shape. Placing the gauge onto the paper, I align the bottom of the curve with the depth mark and use a pencil to transfer the profile from the gauge to the paper.
Using a craft knife, I cut across the perpendicular line and then cut along the profile line. The 1st fret template is done and I repeat the process for the seventh and 12th frets.

Finish fun
By wiping a small area with acetone and kitchen paper, I’m able to establish that Tokai sprayed this guitar with nitrocellulose lacquer. The finish dissolves onto the paper, but I’m left with a clear base coat that is impervious to acetone and industrial-strength stripper.

I don’t know what this stuff is, but I’ve encountered it many times before – often on guitars that supposedly have nitro finishes. I suspect it’s a high-build coating that sands flat fairly easily and allows manufacturers to get away with using minimal qualities of expensive nitrocellulose.
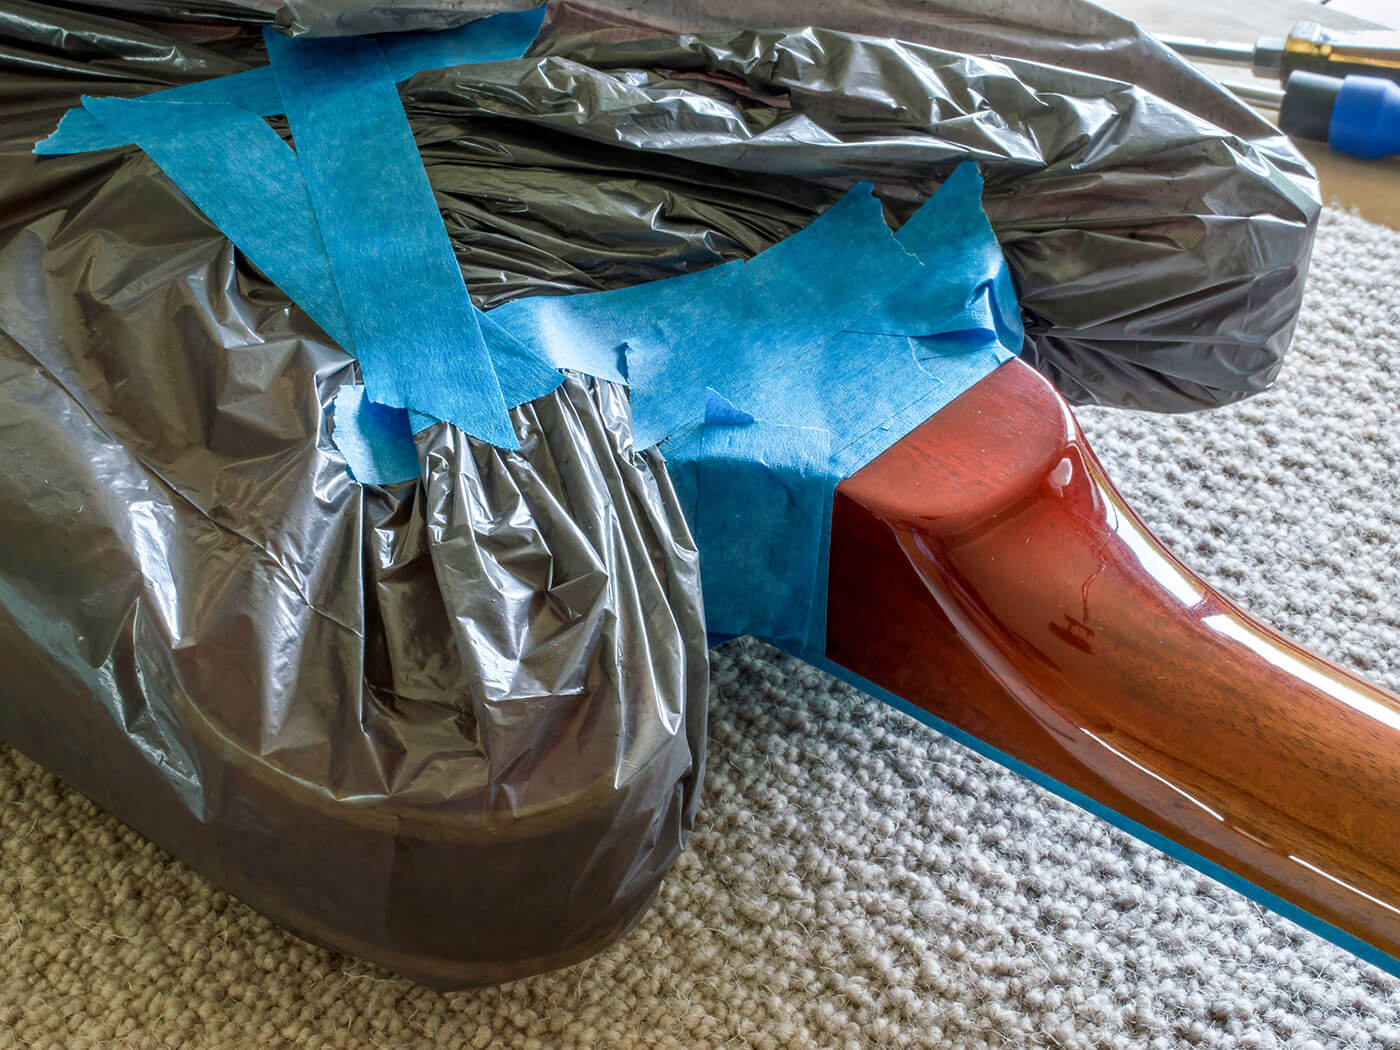
After protecting the body and headstock, I wipe the nitro off the back of the neck. Rather than use a heat gun on the base coat, I scrape it off the playing area using utility knife blades.
Re-profiling
I begin by drawing a guide line along the centre of the neck and use a rasp to reduce the depth to match the dimensions of an early 1960 Burst I previously took templates from. This leaves a flat area along the neck that I work back into the curve.
Offering up the templates to the neck, it’s easy to see where wood needs to be removed. The areas with excess wood touch the templates and prevent them from sitting flat on the neck. I make pencil marks in the areas where I need to remove wood and reshaping begins.
You can use scrapers or a spoke shave to do this, but I prefer using a fine-toothed rasp and utility knife blades. I find a rasp removes material quite easily, but not too quickly. Working along the pencil lines, I refer back to the templates regularly to check my progress.
Having addressed high spots in one area, you may find that the templates drop down to reveal other high spots. It’s a process of continual refinement and best done slowly. Periodically, you should also stop and check how the neck feels in your hand.

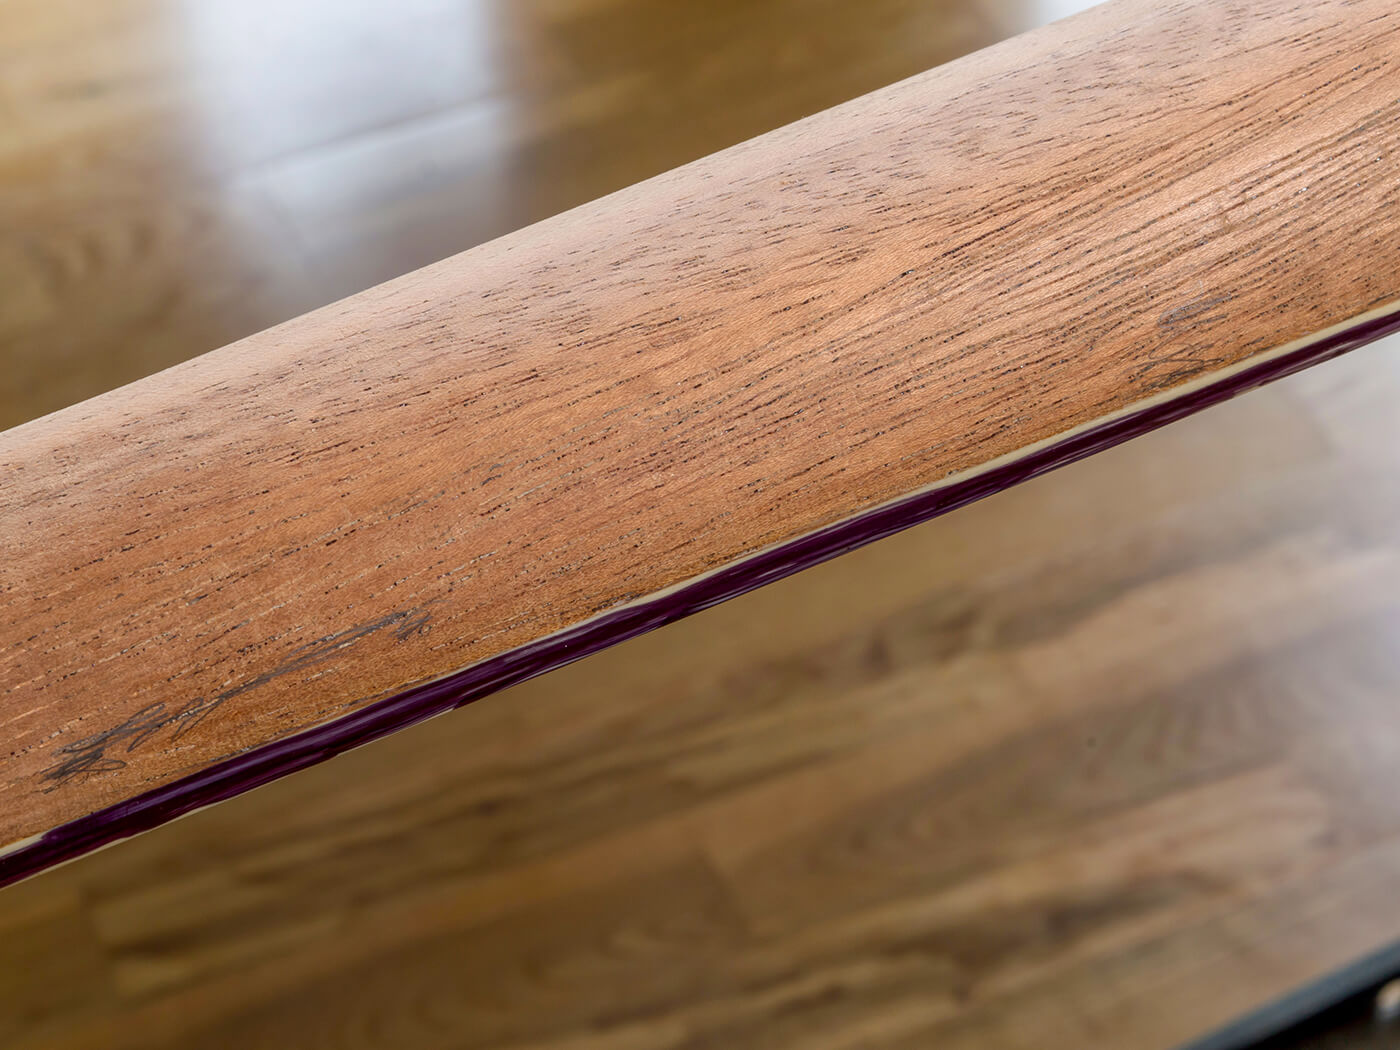
The neck curve starts from the bottom of the fretboard binding but, for a 1950s feel, it should begin at the top edge. After masking off the wood, I draw over the binding with a Sharpie. The idea is to scrape away the bottom area of the binding to eliminate the square sides. Once I’m left with a thin and uniform black line along the top edge, I know I’m done.
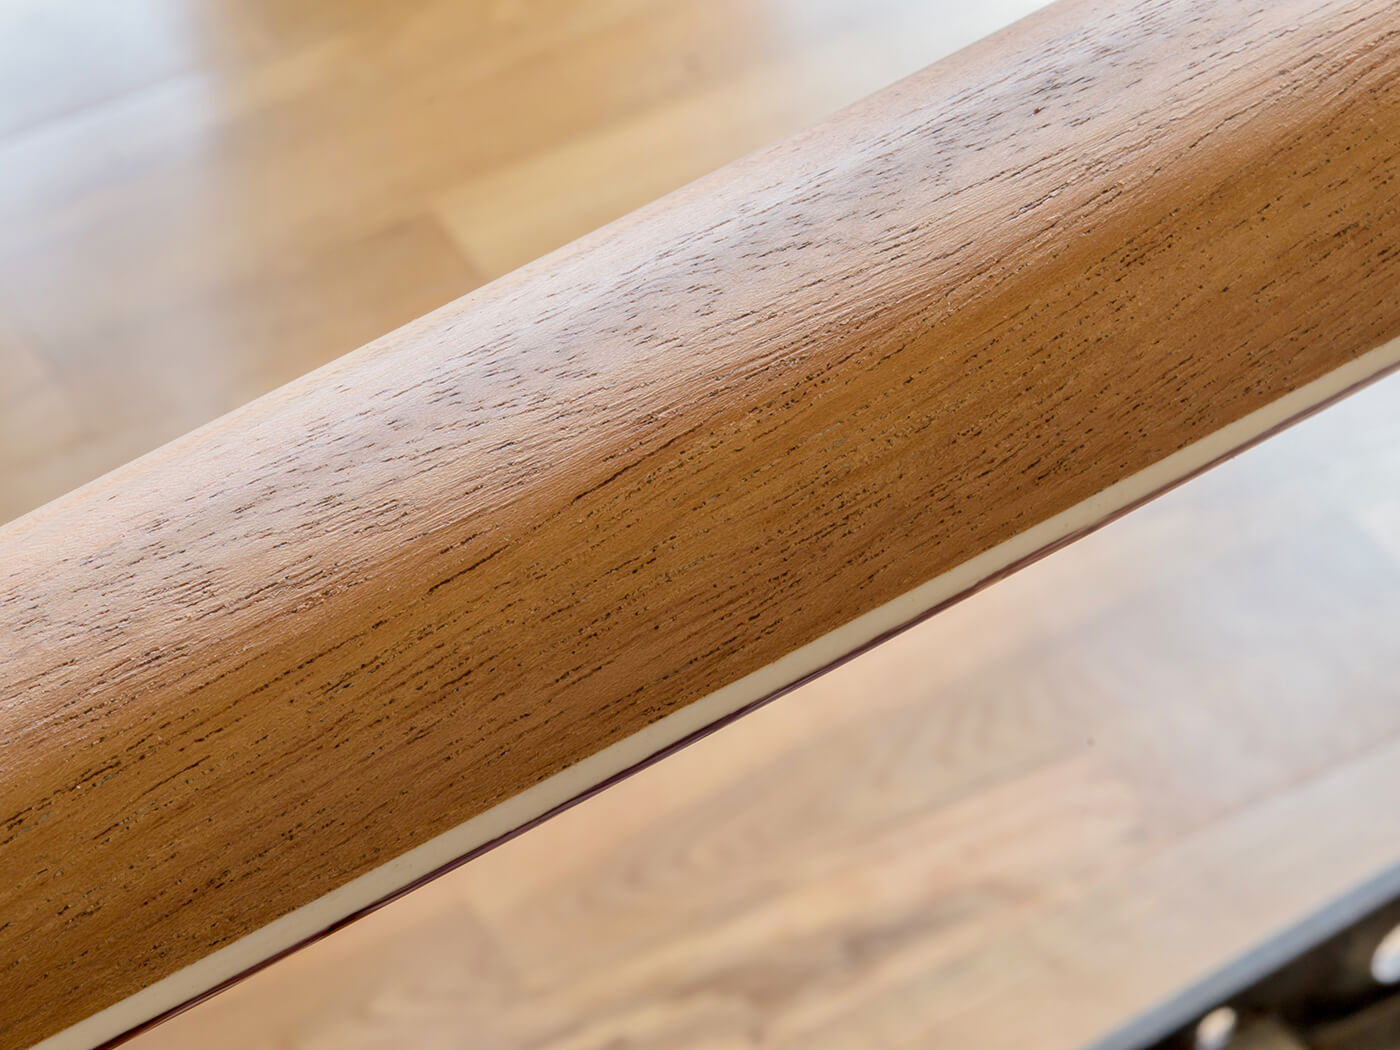
After reshaping, necks can bit a bit bumpy. Sanding lengthways isn’t the best way to achieve a perfectly rounded feel; to bring them to a smooth curve, I place a long strip of 180-grit sandpaper across the neck and sand across the grain, like an old-fashioned shoe-shiner.
Once it feels smooth, I switch to 240-grit and then 320-grit and sand lengthways. Once I’m happy, the owner comes over to sign-off on the refined profile. The neck now feels far more like it was carved in late 1959 than 1958 and it’s much nicer to play as a result. I still need to finish stripping the heel and headstock before I can refinish the neck, but the toughest part is done.
For more on Huw’s work, visit huwpriceguitar.com.