Related Tags
How to set up your guitar with TRAIN
Setting up your own instrument can be a daunting task, but with this simple and easily memorable method, you can take the hassle out of getting your guitar in fine fettle.

Image: Getty Images
There’s something special about picking up a guitar or bass that feels like home. Notes flow easily, and we find ourselves effortlessly bending to pitch and fretting notes evenly. There’s a balance between low action and the absence of buzz or ringing or rattling. Learning what you like in a guitar’s setup is simple, but identifying the source of issues isn’t always easy.
The TRAIN system is a five-step system that’s used to diagnose common issues like buzzing frets, high action, choked notes and inconsistent fretting, and fix just about every setup related issue before professional repairs may be required.
We’ll work through what all of these words mean as we go, but the acronym TRAIN stands for Tune, (neck) Relief, Action, Intonation and Noodle! It’s also important to note that tiny adjustments are usually the safest way to set up a guitar, with regular checks between each turn of an allen key or screwdriver before another turn is made.
TRAIN isn’t only a crafty way to remember the steps, but it’s also the order that you should make these checks and adjustments in. A guitar with a lot of relief in the neck will have both high action and patchy intonation, so there’s no point adjusting action and intonation if adjusting the relief will undo your other adjustments anyway.
For all steps, return to the start of TRAIN to double check before moving on. You’ll have to remember this tip yourself, as TRTRATRAITRAIN isn’t quite so catchy. To start, make sure your guitar is in tune!
Tune
Tune is a bit of an all-encompassing step as it’s really important to make sure you’re taking measurements and checking the playability of the setup while the strings, neck, nut and bridge are under tension when strings are tuned to pitch. Another important aspect of checking your setup is to hold the guitar in the playing position where possible, as this is where the guitar will be most of the time while being played.
Having the guitar resting on a bench might only throw the tension out a little bit, but with a lot of moving parts on a guitar, this can quickly be exacerbated if everything is a little bit out. So tune your guitar and take measurements in playing position.
Relief
The next step is to check the neck relief, as a properly adjusted neck will fix a lot of issues, and an incorrectly set one will create problems down the line. Neck relief refers to much concave or convex the neck has, thanks to the truss rod that runs along a channel under the fretboard of most modern guitars.
Different strings and tunings give or take tension on the neck, so the truss rod allows us to combat the tension by being tightened or loosened. You can check neck relief by fretting the first fret of the guitar or bass, and then fretting the fret that aligns with the neck making contact with the body, e.g. for a Les Paul this would be approx. the 17th fret, for a dreadnought this would be the 14th fret etc.
Between your fingers, usually around the 8-9th fret, there should be a little gap, a bit smaller than a bank card or so. If there’s more than that, you’ve got too much relief i.e. the strings are pulling the neck too far towards the bridge, and if the strings touch the 8-9th fret, the truss rod is doing too much to counteract the string’s tension.
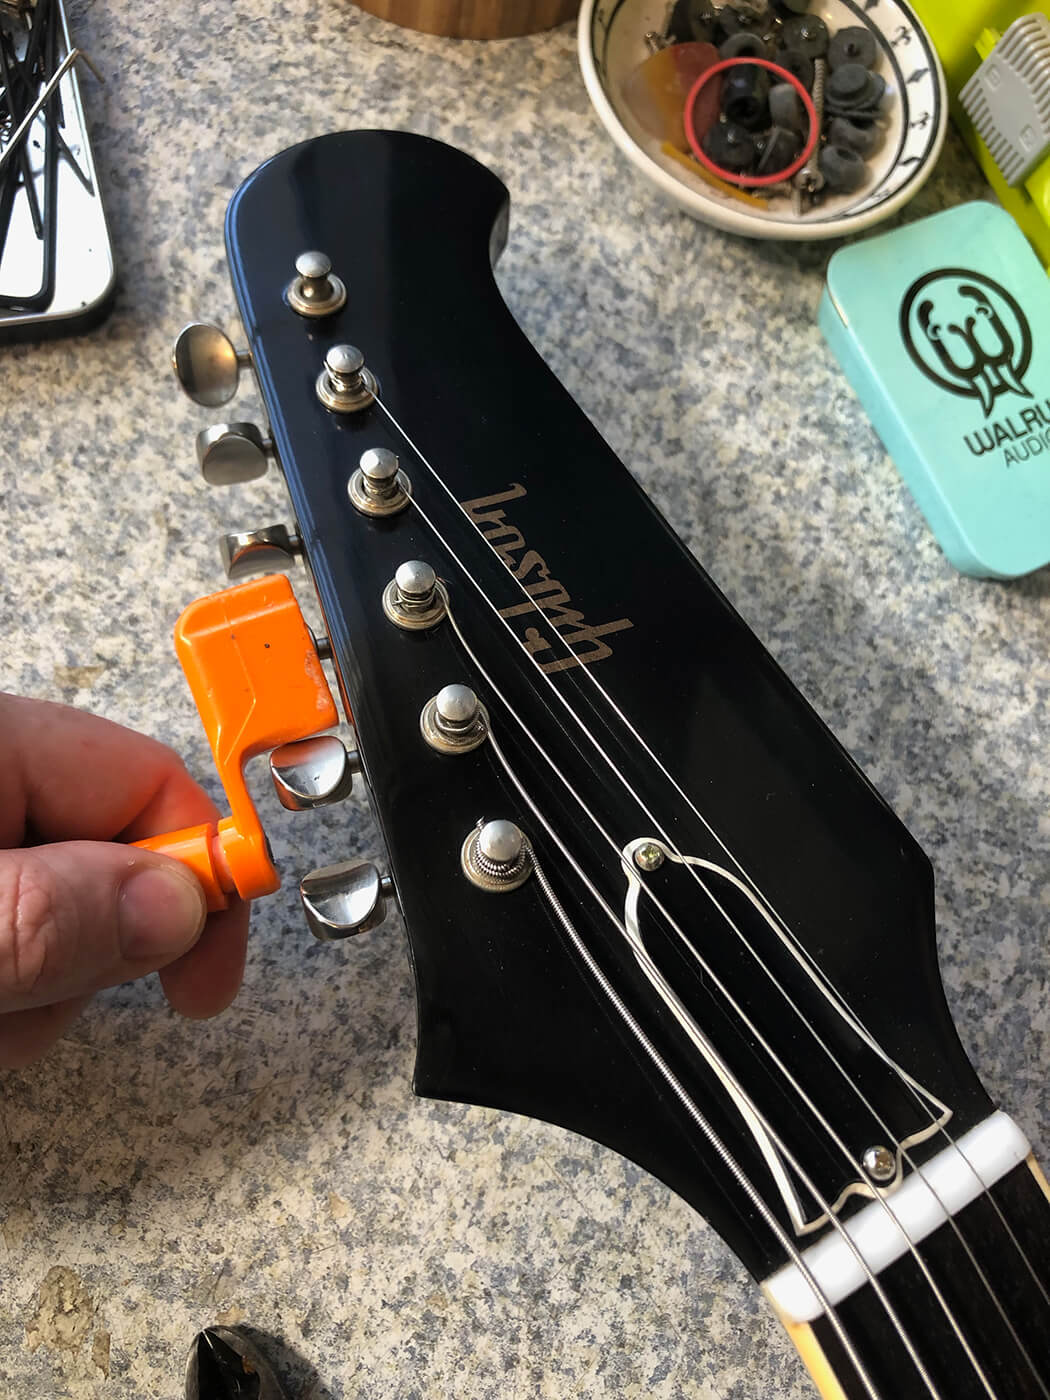
Most guitars have truss rods adjustable by either an allen key or a wrench, and are often included with your guitar. The truss rod can be adjusted above the nut (underneath the cover) or below the last fret depending on the make and model of your guitar, and lefty loosey (less tension) righty tighty (more tension) applies here—your right and left being dependent on which end you access the truss rod from.
If it’s at the nut, look directly down the neck from the nut and turn right to tighten or left to loosen. Small adjustments, i.e. a quarter turn at most between measuring is ideal here. It’s difficult to break a neck but not impossible, so take your time!
Action
The action is adjusted at the bridge, and refers to the heights of the strings off the fretboard, and from the factory most electric guitars will be set to have the strings sitting approximately 1.5-1.8mm above the 12th fret. Acoustic guitars and basses need a little more room for bigger strings, so from the factory these can be set from 1.5mm up to 2.5 or 3mm depending on the maker.
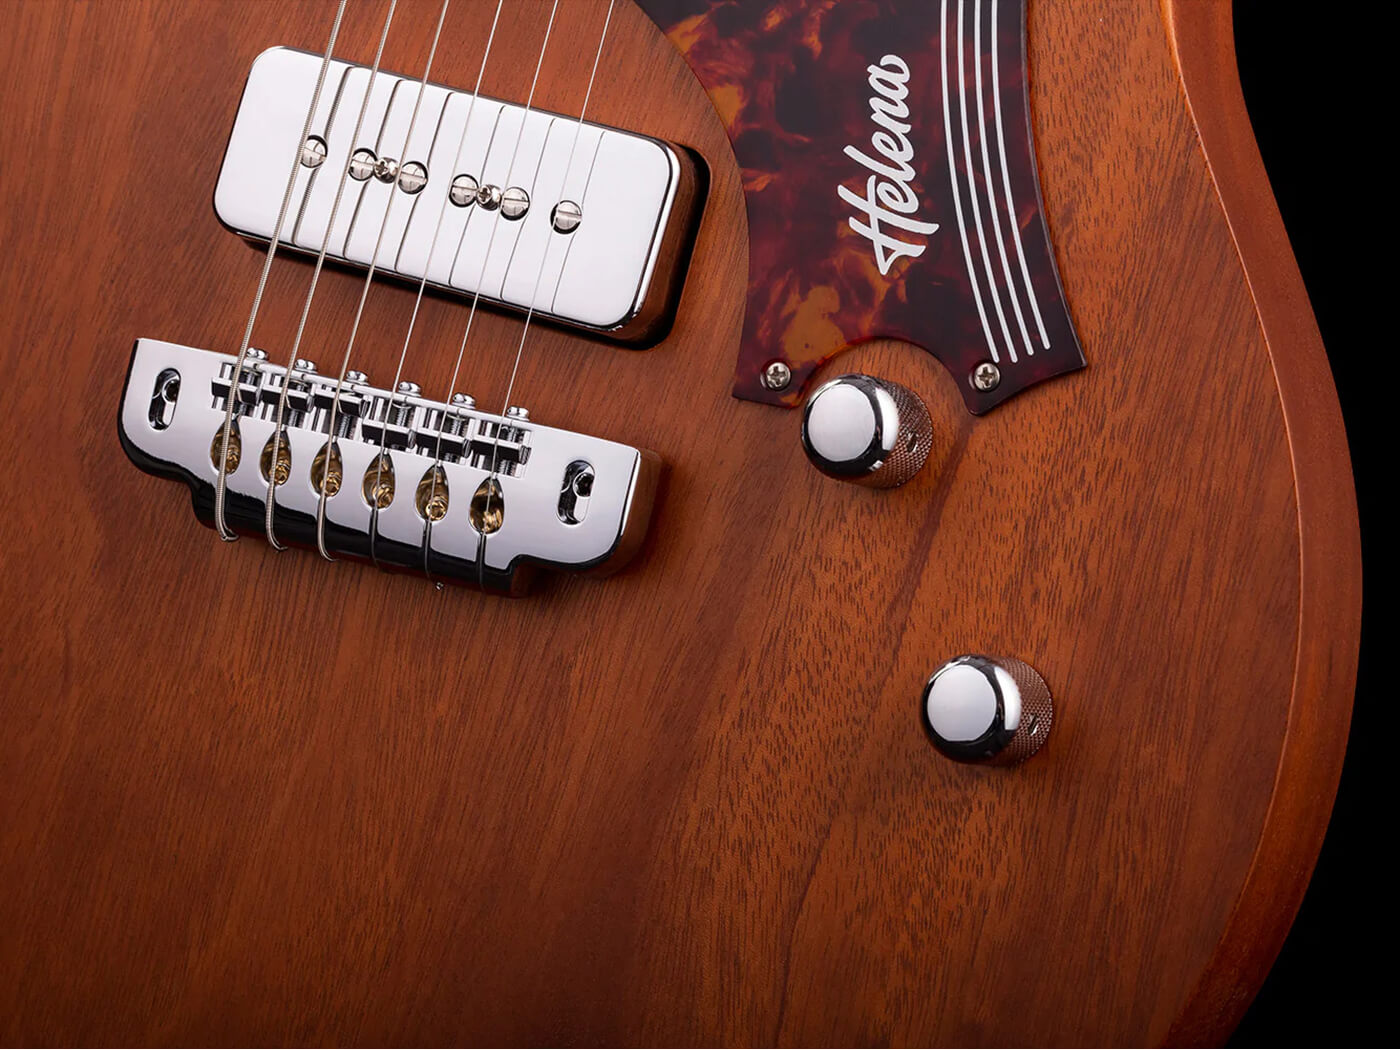
An electric guitar bridge can be screwed up or down via pole pieces either side to preference, while some guitars have individual saddles that can be adjusted, and be sure to be taking measurements at the 12th fret with the guitar in playing position and making small adjustments as you go. Acoustics often have a bone, plastic or Tusq bridge that will need to be filed or sanded down to lower, but be wary of screws either side of the bridge on an acoustic. These can sometimes appear to be bridge screws but are actually holding a pickup in place!
Intonation
After double checking your tuning, relief and action, we’re ready to check intonation. The intonation refers to how in tune the instrument is at different octaves. For example, while an open string might be in tune, a note fretted at the 12th fret (an octave up) may not be perfectly in tune. The length of the string – the distance between the nut and the saddle, moves the naturally occurring octaves so they line up with the frets on the fretboard.
Check the intonation by playing an octave at the 12th fret (which should be perfectly in tune) and then fretting the 12th fret and adjust the saddle backwards or forwards until the fretted note is perfectly in tune as well. The longer the distance between the nut and saddle, the longer the octave becomes and the further away from correct intonation you are.
So with that rule, to lower the pitch (i.e. if your 12th fret is sharp) you want to lengthen the distance from the nut to the saddle, and shorten if the fretted note at the 12th fret is flat.

Noodle!
To wrap up, noodle on your freshly set up guitar and trust your judgement. If something feels wrong to you, it usually is. Play all over the neck with both big sweeping chords and fiddly leads in multiple octaves. There shouldn’t be any incessant buzz, though the sound of strings hitting frets isn’t uncommon.
No notes should be choking out, and overall the guitar should feel comfortable to play without struggling to fret. Chords should sound in tune at different octaves, and moving parts shouldn’t be rattling or moving too much.
For more guides, click here.