Related Tags
Guitar DIY Tips: A guide to routine maintenance
A guide to all the jobs that’ll keep your guitar on the road and in fine fettle.
1. Truss-rod adjustment
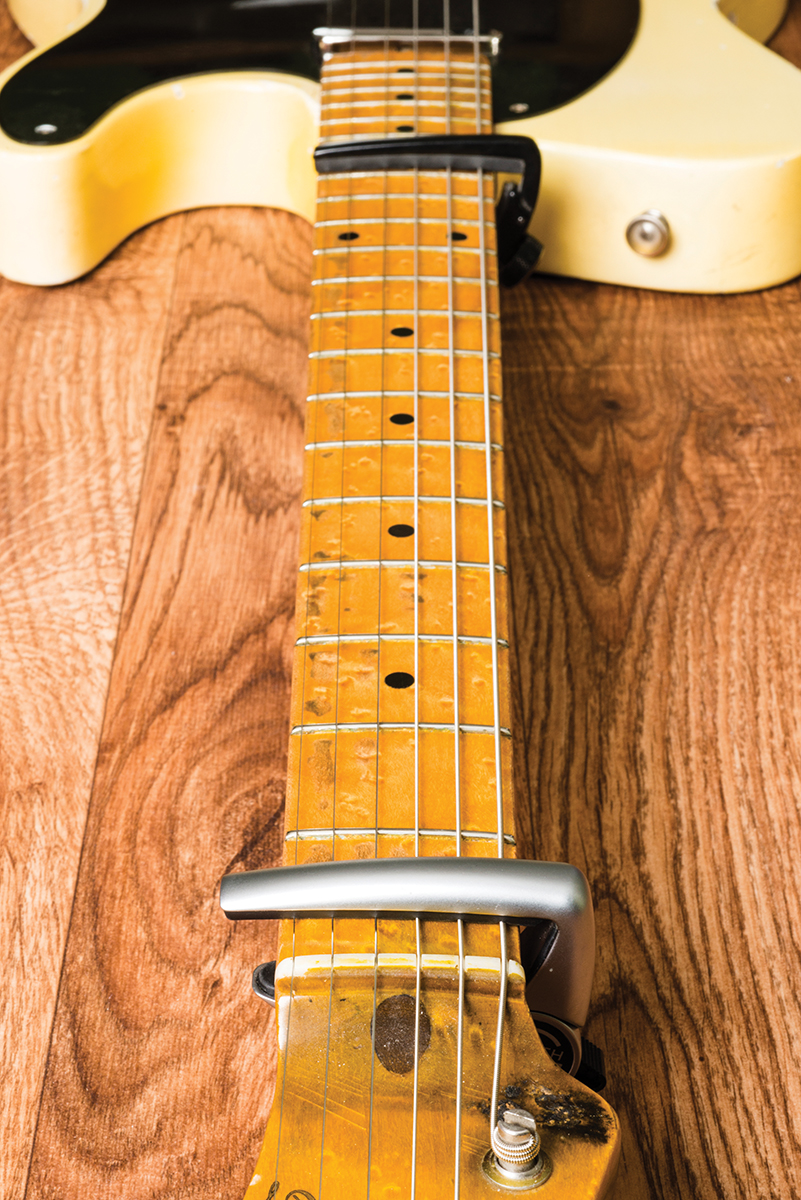
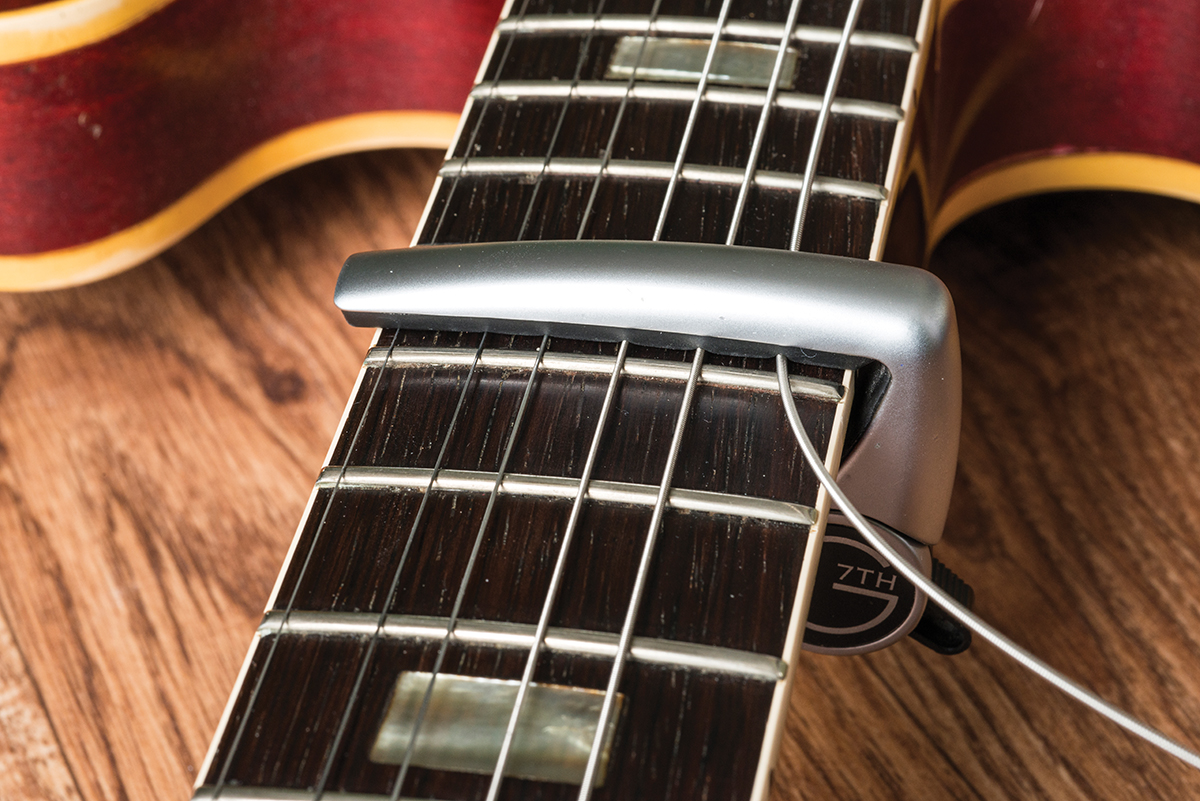
You can use capos to provide a helping hand. With the strings tuned to concert pitch, place capos on frets one and 15, then check the gap between the top of fret seven and the bottom of the strings
There are times when a guitar that has been playing well for as long as you can remember suddenly feels ‘a bit off’. Maybe the action feels a tad higher than it was, or maybe it feels lower and you can’t get notes to ring cleanly. Or perhaps you’ve noticed that the intonation isn’t quite as sweet as once it was.
Guitars are made from wood, and wood has a tendency to move around, depending on how hot, cold or humid conditions might be. This is most apparent when necks move, and since the middle of the last century, most guitar manufacturers have built truss rods into their necks to allow for subtle adjustments. Truss-rod tweaking may also be necessary if you decide to change string gauge.

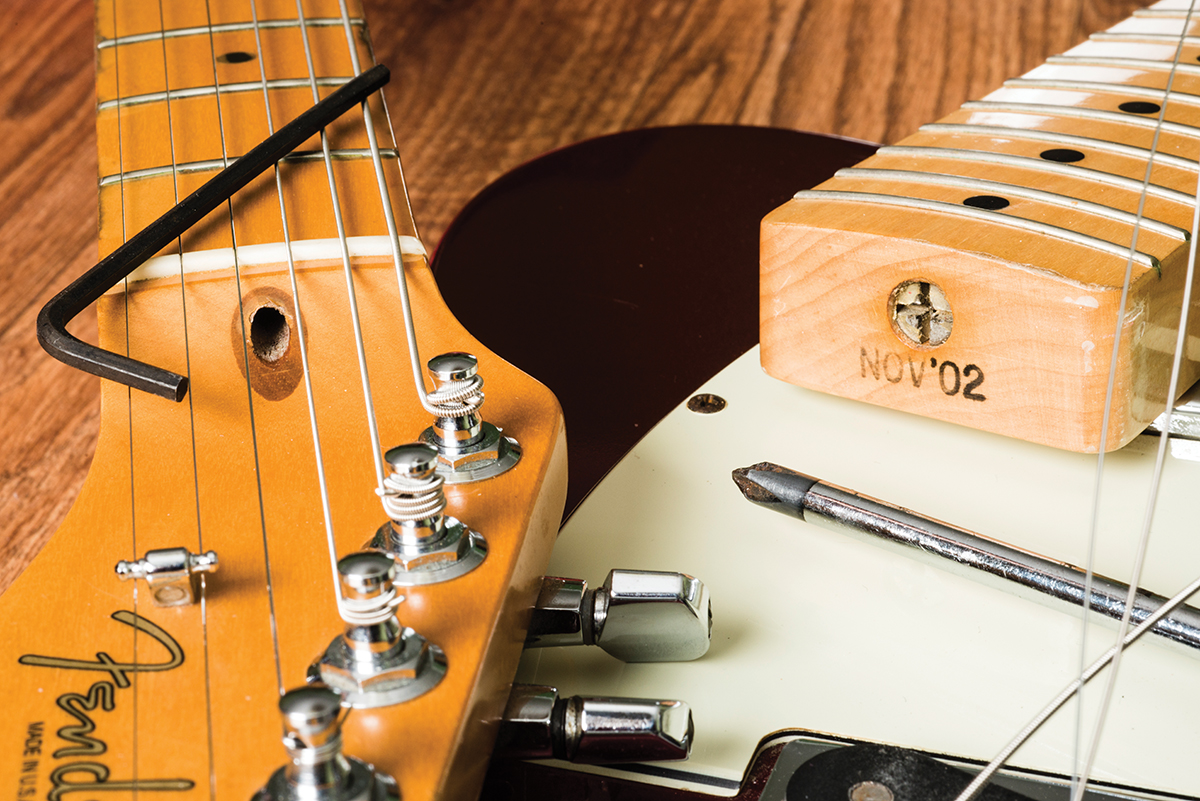
Truss-rod access can be found at the headstock and heel ends of necks. The USA Fender on the left is adjusted using an Allen key and the reissue on the right requires a screwdriver
Most necks have a small degree of up bow, and you can gauge this ‘relief’ quite easily. Ensure the strings are all tuned to concert pitch and fret one string at the first and 14th frets simultaneously. You should be able to see a small gap between the top of the fifth or sixth fret and the bottom of the string.
If the gap is larger than a millimetre or so, the neck may have too much relief and the action may feel as though it’s too high. Conversely, a very small gap – or no gap at all – could mean there’s not enough relief, and you may get buzzes, rattles or dead spots.
On vintage Fender-style guitars and many acoustics, truss rod access is usually at the body end of the neck. With acoustics, you can usually reach in through the soundhole, but with electrics, you generally have to slacken the strings and pop off the neck.
Later Fender-style guitars, and pretty much all models based on a Gibson or Gretsch design, have the truss-rod access behind the nut at the headstock end. This allows you to tweak a truss rod while the neck is under tension. You can assess the results by playing the guitar.
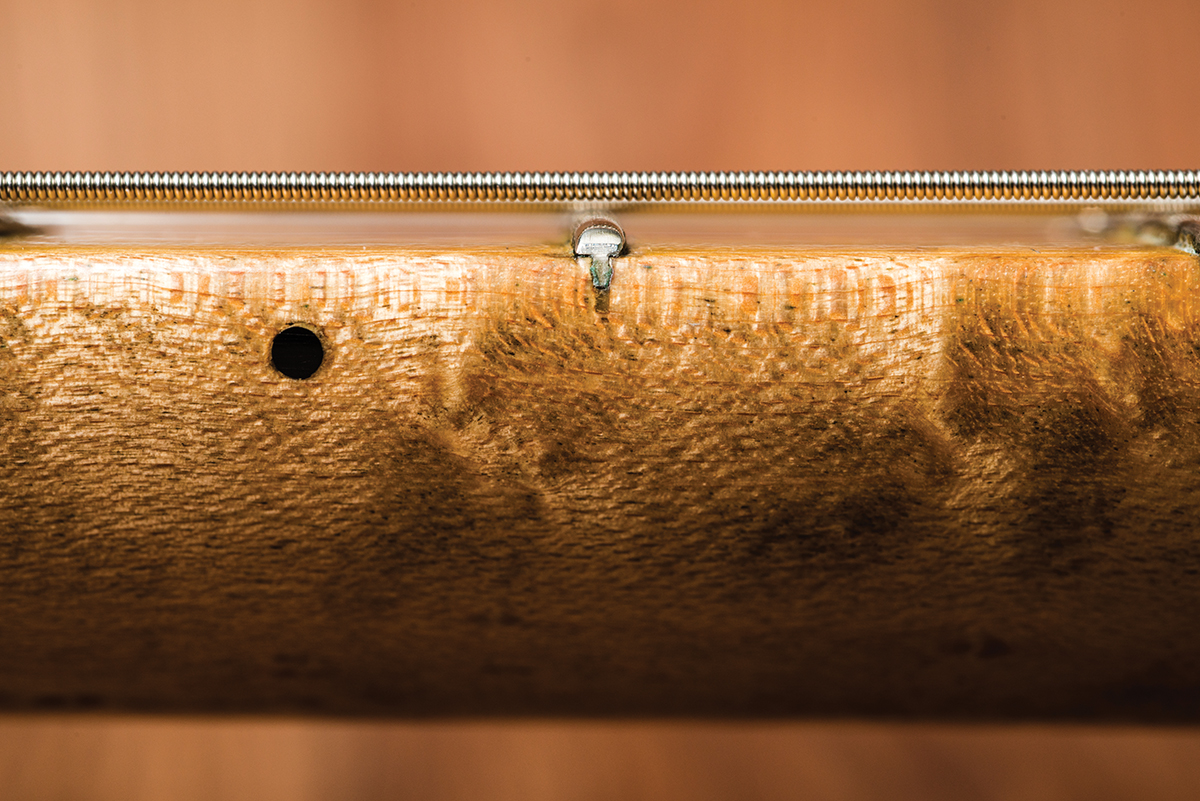
This is the gap between the seventh fret and the string. The gap is big, therefore this neck has a lot of relief
Depending on the type of guitar, adjusting the truss rod may require the use of a large crosshead screwdriver, a socket wrench or an Allen key. Occasionally, manufacturers supply the necessary tool inside the case.
If your neck has a severe up bow or back bow, truss-rod adjustment is not the answer, and you should entrust the work to a qualified guitar tech. However, minor corrections are well within the scope of the amateur, so long as you remember to move the truss rod only a quarter of a turn at a time.
To increase the relief, turn the truss rod anti-clockwise; and to decrease relief, turn it clockwise. Putting capos over the first and
15th frets (12th on acoustics) will allow you to gauge your progress.
If you can get to grips with truss-rod adjustment, you’ll be able to keep your guitar playing at its best, and you may save yourself the cost of unnecessary setups.
2. Replacing a pickup
If your pickup is broken, changing it qualifies as maintenance. But most of us change pickups in search of improved tone or completely different sounds. Here, we’ll deal with like-for-like replacements, using pickups that have the same dimensions and fixing mechanisms.
To get started, you’ll have to remove the strings and gain access to the wiring. Depending on the type of guitar, pickup wires will be soldered to the volume control or the selector switch. You’ll have to trace the wires to figure out what goes where.
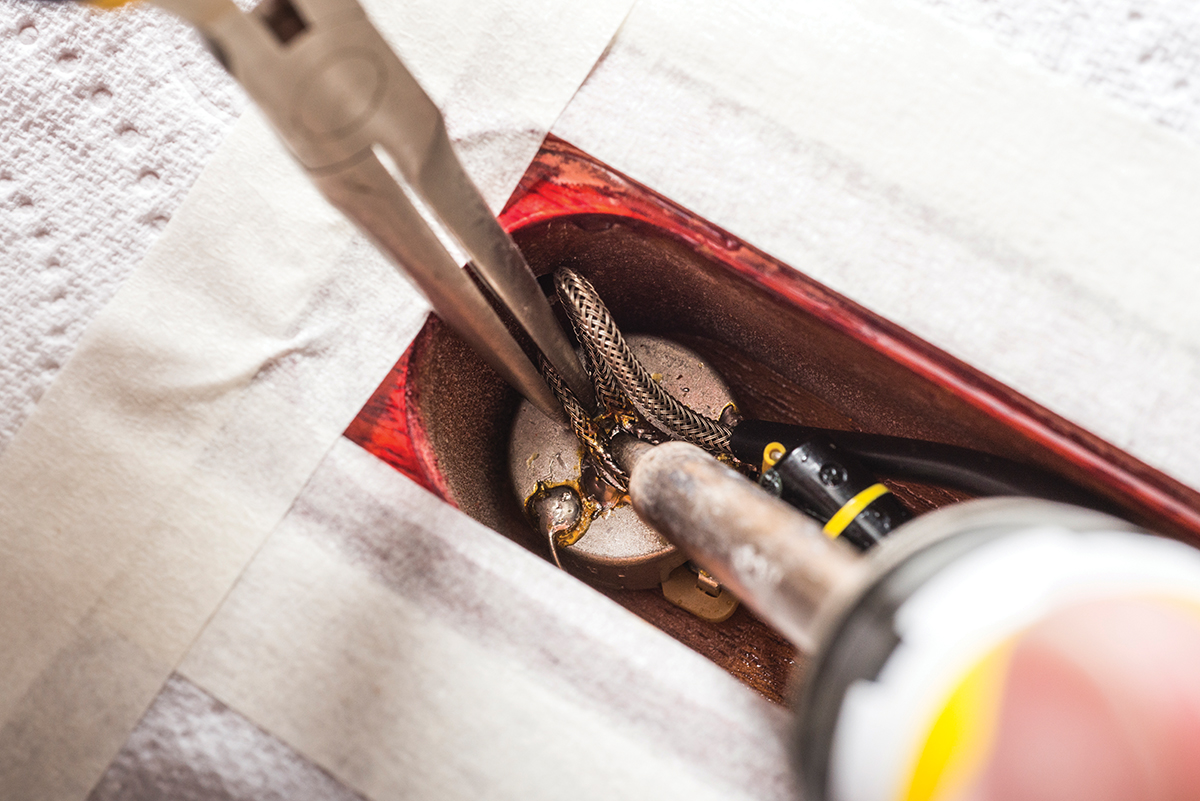
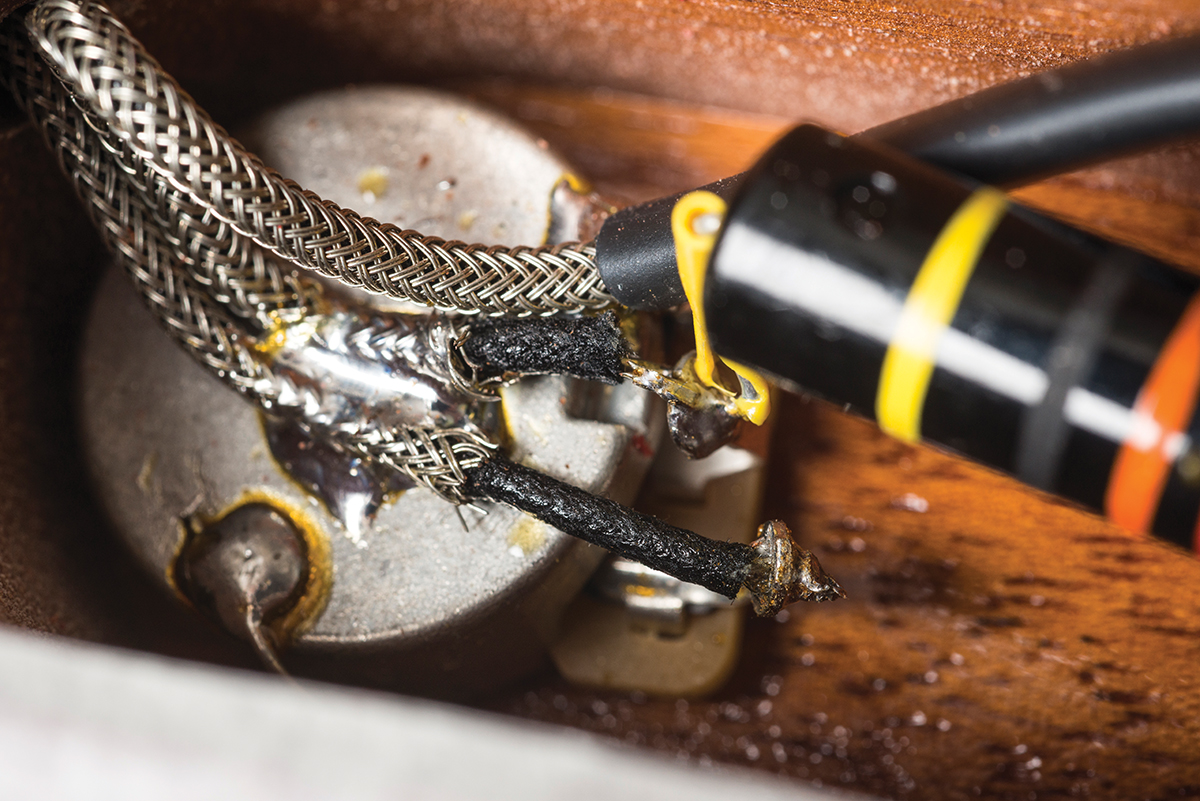
The pickup’s shield wire is soldered to the volume pot casing and the core wire is soldered to the outer lug
Draw a diagram or take a photo with your ’phone to ensure that everything is put back in the right place. This is particularly important with coil-tapped pickups that may have multi-strand cables connected to toggle or push/pull switches. It’s usually best to de-solder the pickups before separating them from the guitar itself.
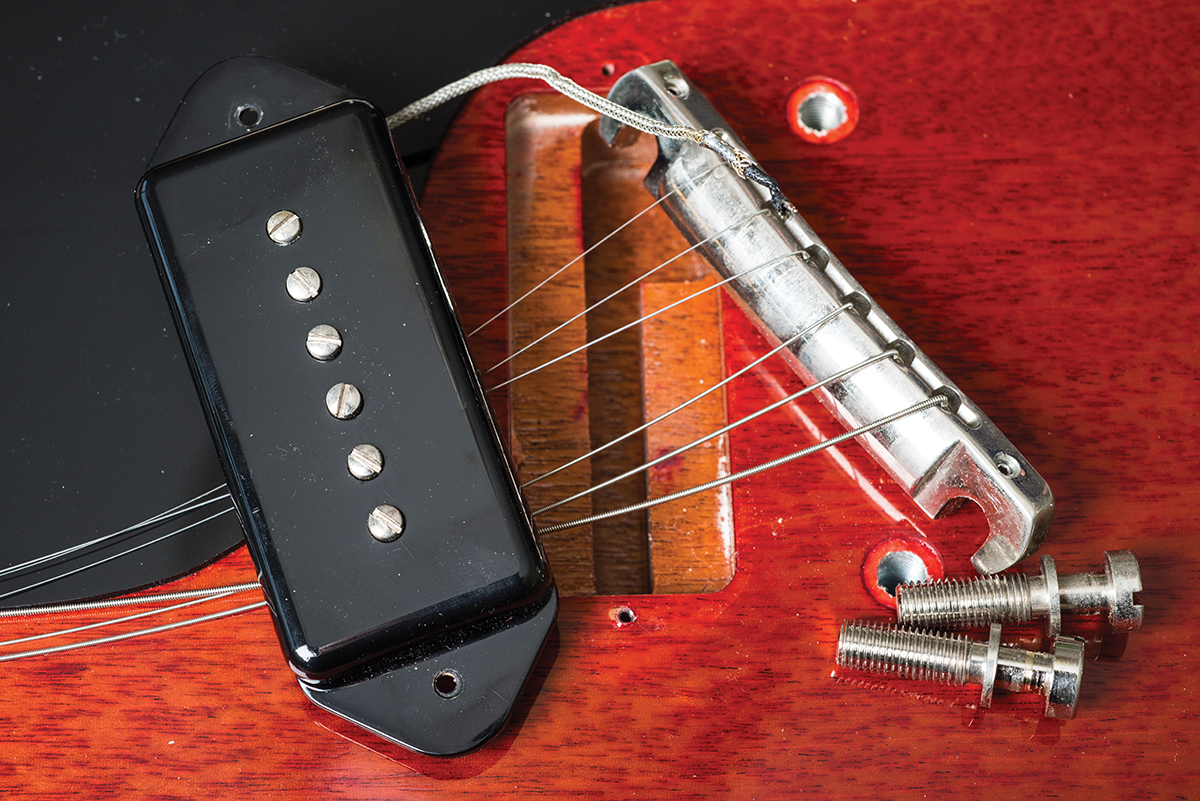
To remove the P-90 from this Les Paul Junior, the strings had to be moved to one side. Rather than remove the strings, we slackened them off, placed a capo at the first fret and popped off the bridge
Humbucking pickups tend to be suspended from plastic surround rings; you need to remove the four screws holding the ring to the body before removing the pickup-height adjustment screws. Strat pickups are suspended from the pickguard and Tele neck pickups are often screwed into the body. Tele bridge pickups are the most fiddly, because they dangle from the bridge plate, so the bridge has to be taken off before the pickup can be removed.
Here’s the new pickup soldered onto the volume pot. We moved the tone capacitor to the volume control’s centre lug while we were at it, to make the wiring vintage-correct
Keep any screws, springs and tubular spacers safe, because you may need to reuse them. You can now mount the new pickups onto the guitar, scratchplate or bridge then resolder the connections.
It’s advisable to test if the wiring is correct before you restring the guitar. Just plug in the guitar with the amp volume set low and tap the polepieces with a screwdriver. Once you’ve established that the controls and the switch are working properly, you can go ahead and restring and reassemble the guitar.
That’s not quite the end of the process, however, because setting the pickup height – or, more accurately, the proximity of the pickup to the strings – is absolutely critical to getting the best from any set of pickups.
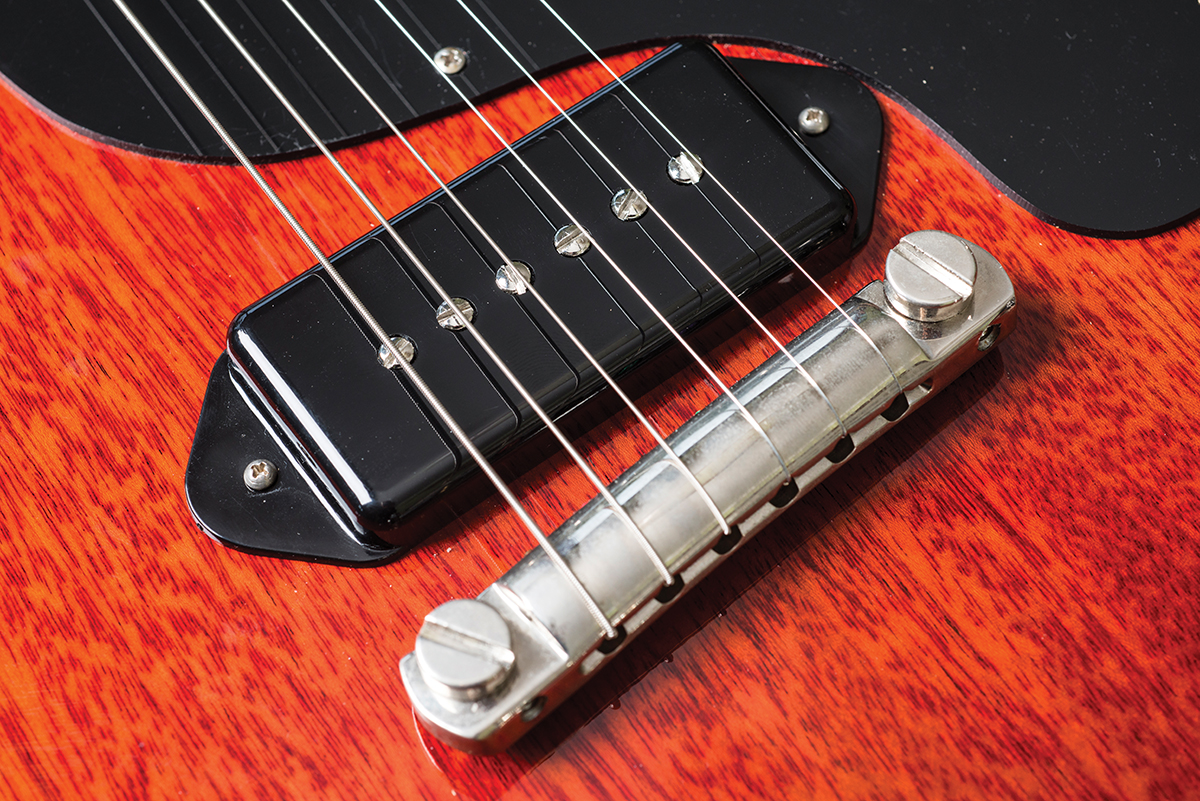
Here’s the Monty’s P-90 mounted on the guitar with the bridge and strings reinstated
Up close to the strings, a pickup will sound bright, loud and aggressive. Setting it further away may achieve a sweeter, clearer and more dynamic tone, but setting a pickup too low can result in a lifeless and dull response. Remember, you can also adjust the bass and treble balance by tilting a pickup at either end.
Try starting with the bridge pickup and, once you’re happy, move to the neck. Attempt to match the volume levels between the two pickups before fine-tuning the neck’s bass and treble response. If you have a middle pickup, too, try to achieve even levels across all three pickups.
3. Nut replacement
We should first point out that we’re not discussing how to cut, carve and slot a nut from a bone blank. That requires some serious luthier chops as well as specialist tools. Instead, we’re talking about drop-in replacements from suppliers such as Allparts UK (allparts.uk.com), that are pre-slotted and will require only minimal adjustments in order to fit correctly.
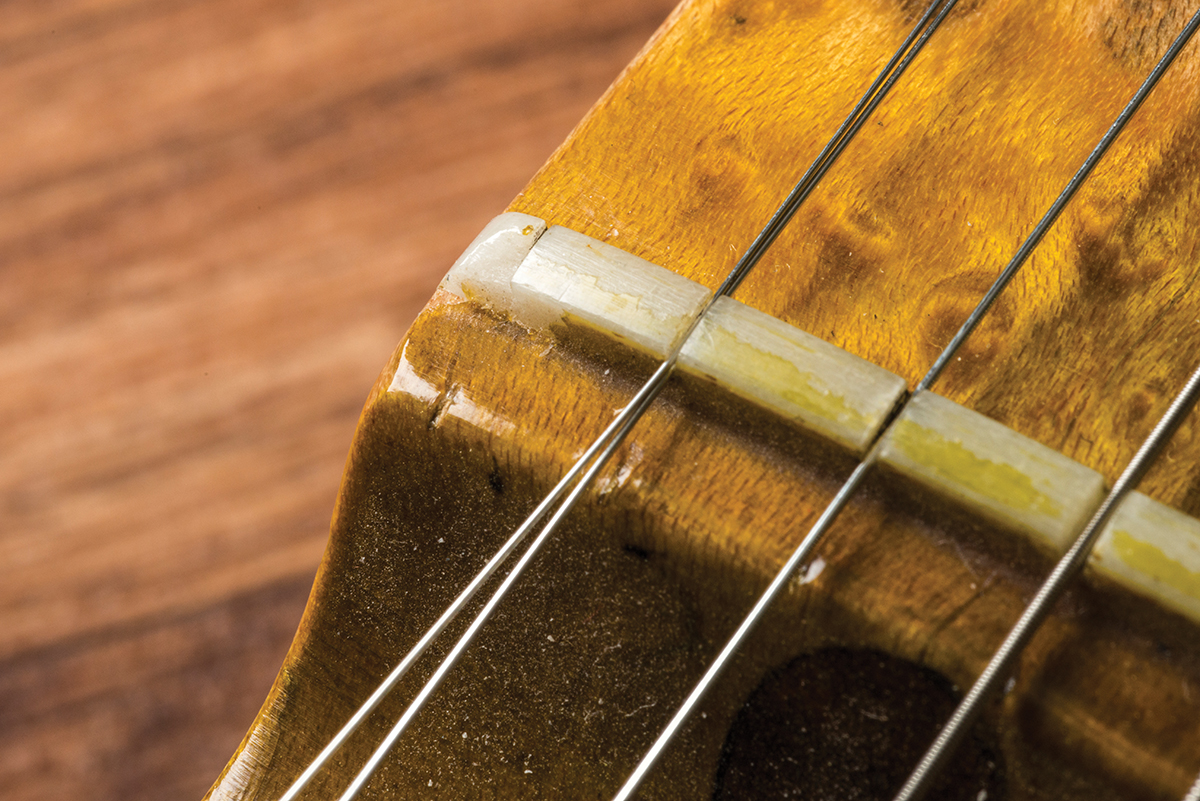
This nut is chipped at the back of the first string (top-E) slot. It works okay, but if the chip was at the front, the nut would need replacing
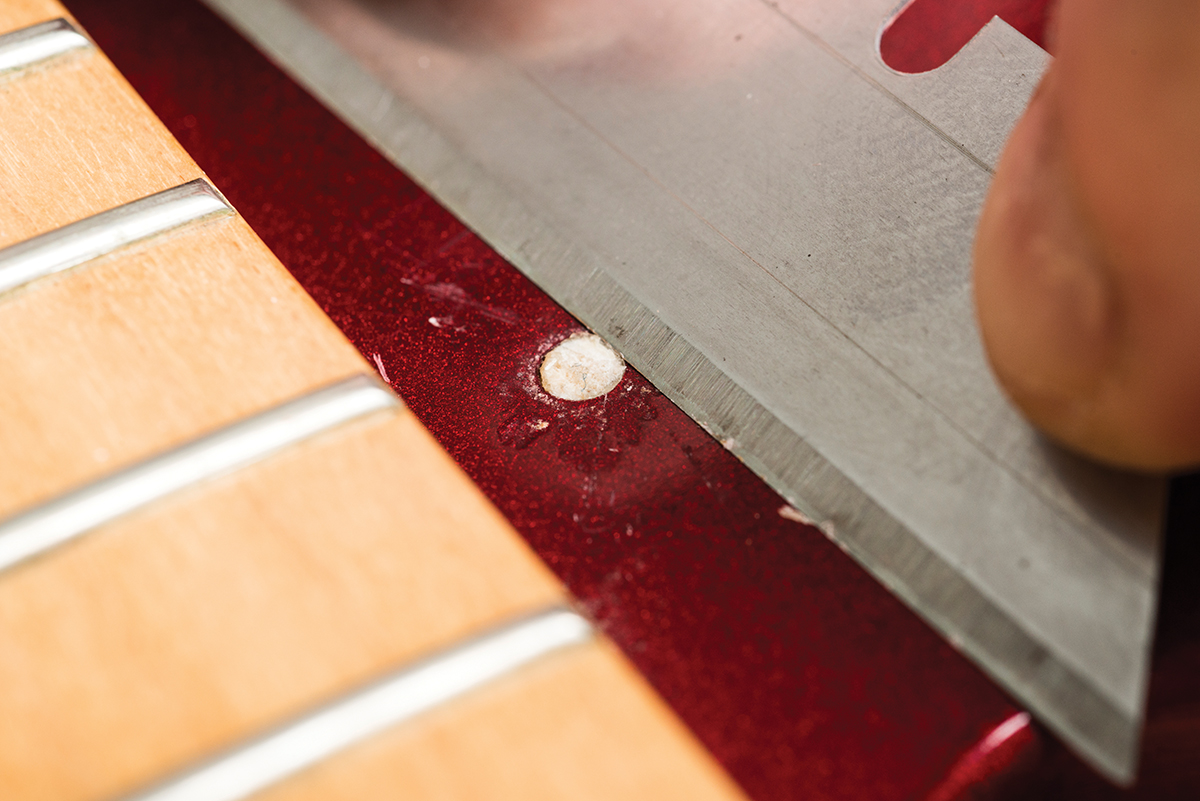
Many factories fit nuts prior to the finishing stage, so the sides of the nut will be covered in lacquer or paint. You’ll have to score the finish around the edges of the nut very carefully, to ensure you don’t remove chunks of finish along with the nut.
Nuts are usually glued in place, so you must proceed with care. After removing the strings, place a wooden block against one of the long edges of the nut and tap the block lightly with a mallet. Move the block to the other edge and tap it again, using very little force.
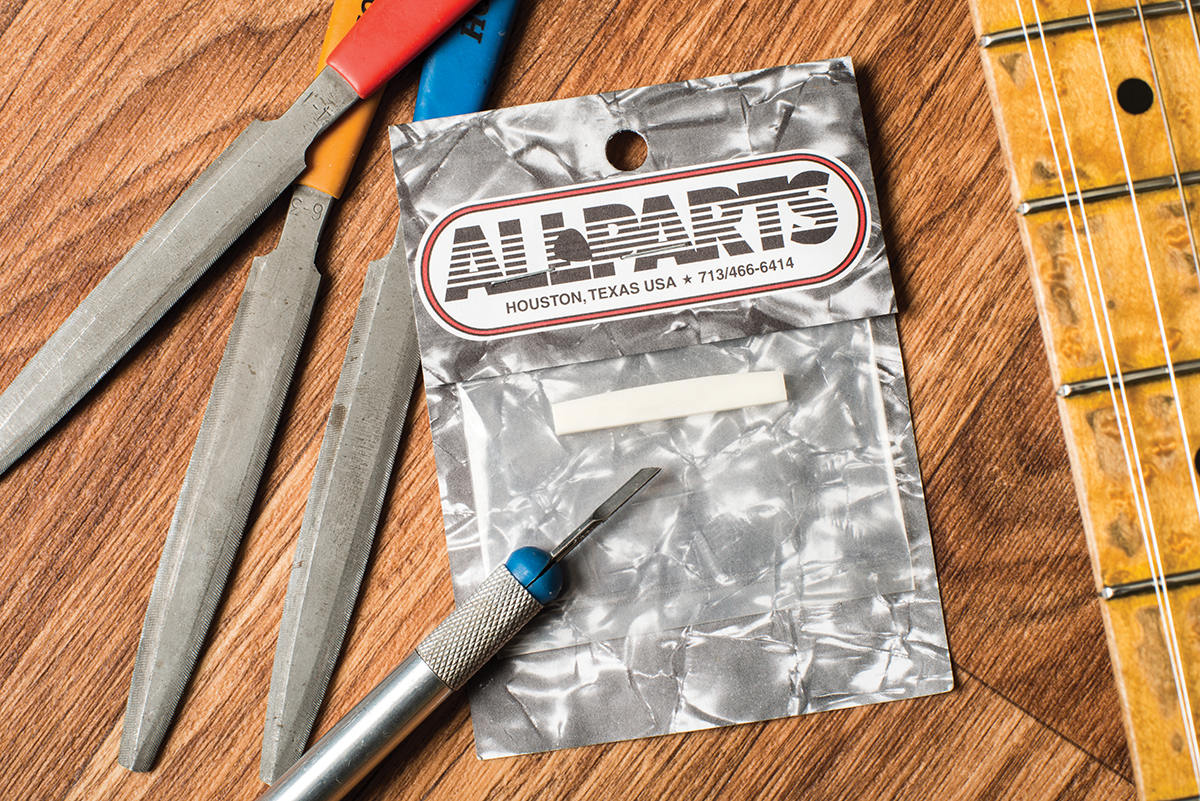
You can buy bone and Graph Tech nut blanks from Allparts UK. The craft knife is for scoring the finish prior to nut removal. Unless you’re planning to cut loads of nuts, a set of nut files might be prohibitively expensive
The idea is to rock the nut back and forth in its slot sufficiently to break any glue joints. Eventually, it should begin to move and you may be able to get a narrow flathead screwdriver under one end to prise the nut out from its slot.
If you’re working on a Fender-style neck, you will need to check whether you need to order a replacement nut with a flat or curved bottom. Pre-cut nuts are supplied very slightly oversized, so you will have to adjust the thickness before they’ll drop into the slot. The ends will also have to be trimmed to prevent them from overhanging the edges of the neck.
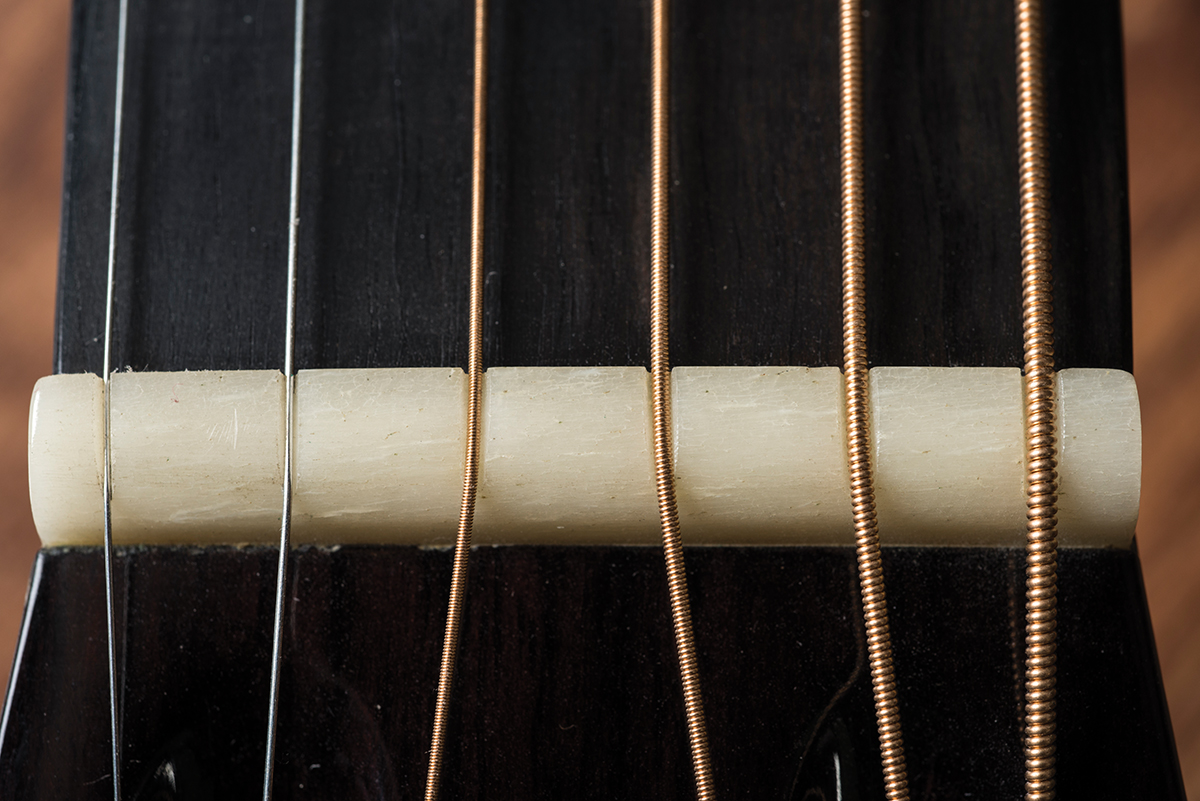
Notice how the upper part of the wound strings sits above the nut slots
Try fixing some 800 or 1000 grit abrasive paper onto a kitchen work surface with masking tape around its edges. You can use this to adjust the nut until it fits snugly into its slot. Assuming that it’s pre-slotted, you can adjust the height of the slots by sanding the bottom of the nut.
Be sure to work very slowly and try not to remove too much material at one time. If you have to remove material from the bottom of a curved nut, simply tape some abrasive paper over the fingerboard and move the nut base back and forth lengthways across the abrasive to maintain the desired radius.
Be very careful, because if you drop the nut too far down into the slot, the open strings will buzz against the first fret. Slightly too high is better than slightly too low here. Once you’re happy, place two small dabs of Super Glue on the underside of the nut and seat it in the slot. The key is to work slowly and accept that replacing a nut can be a long procedure.
4. Eliminating nut pings
There’s no denying that tuners wear out, but countless vintage guitars have been fitted with Schallers and Grovers that they never really needed. Machineheads are often blamed for unstable tuning when the real cause is friction in the nut slots.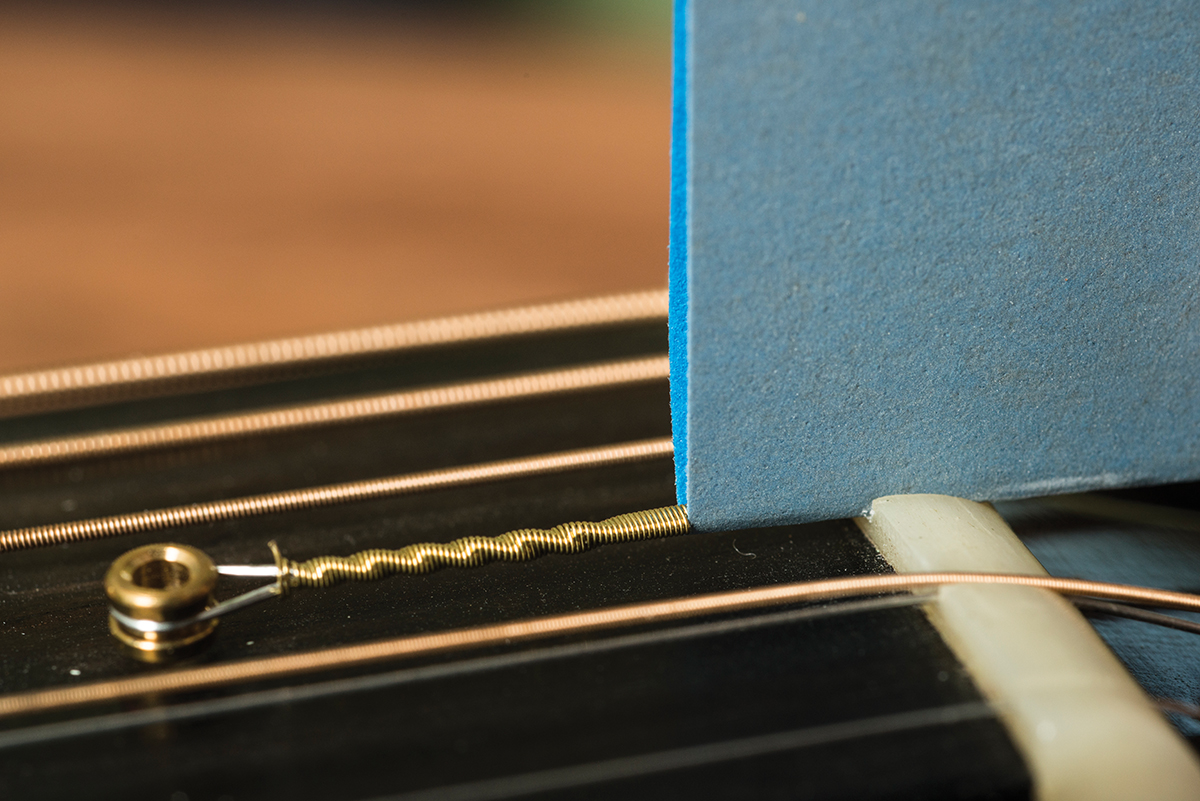
If you haven’t got fret files, wrap some 1000 grit or finer Wet And Dry abrasive paper around the string and use it to smooth the slot
Have you ever played a guitar that makes pinging and clicking noises when you tune up? Or maybe you can feel the string slipping between grooves in the nut slot when you bend it. Listen closely when it happens and most likely, the noises will be emanating from the nut.
Luthiers use special nut files to smooth and finesse nut slots, and most hobbyists will consider a set of nut files too expensive. Instead, take a small piece of 800 or 1,000 grit Wet And Dry abrasive paper, wrap it around the string and push it into the offending slot.
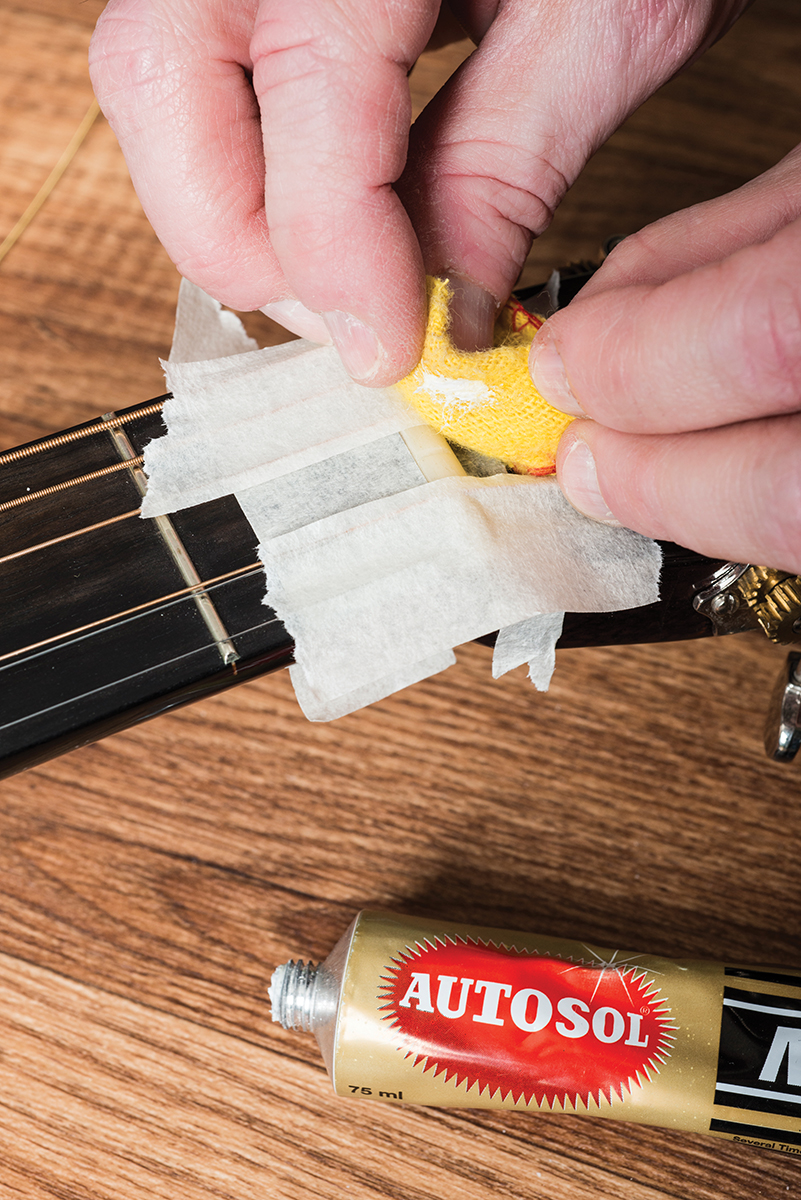
Having masked off the fingerboard and headstock, the nut slots are then polished with Autosol chrome cleaner
The idea is to smooth the surfaces of the slot and not to deepen it. Work the paper back and forth a few times, then pop the string back in to test your progress. Don’t rush this – just be patient and keep checking.
If you manage to improve the slot, try following up with some still finer micromesh. You can even mask off the neck on both sides of the nut and finish off the slot using chrome polish.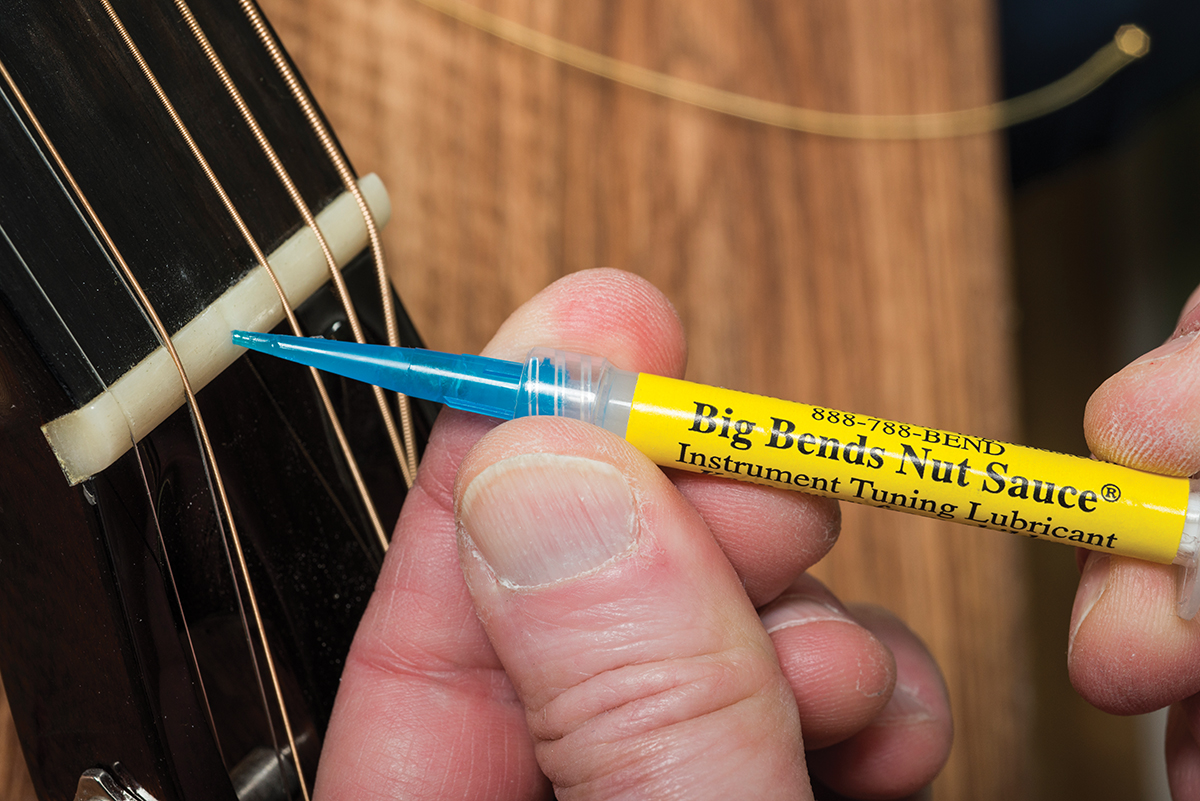
After smoothing and polishing, you can add some lubricant to the slot. Big Bends Nut Sauce is a popular brand and it soaks into bone to keep it slippery
To further reduce friction, try introducing some lubricant into the slot. Some people use graphite from a soft pencil, while others prefer to use Vaseline. You can also buy specialist guitar lubricants such as Big Bends Nut Sauce or Guitar Grease.
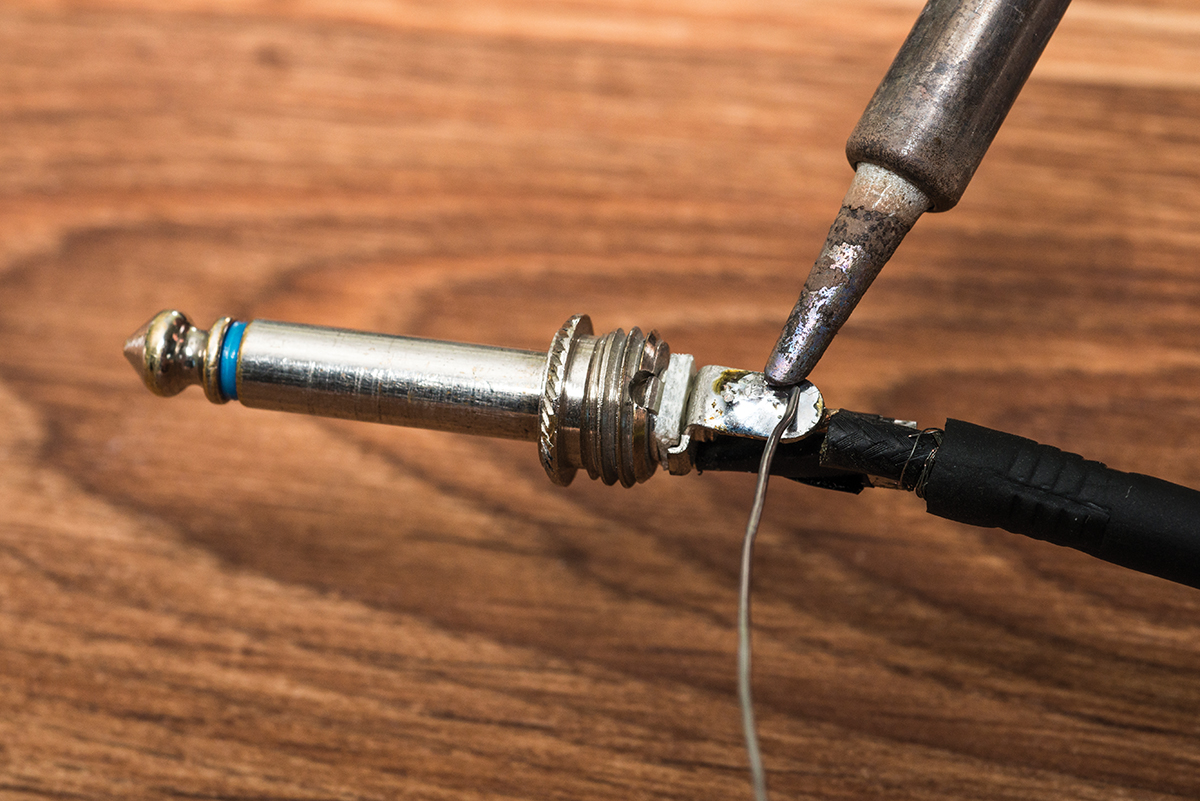
5. Output-socket replacement
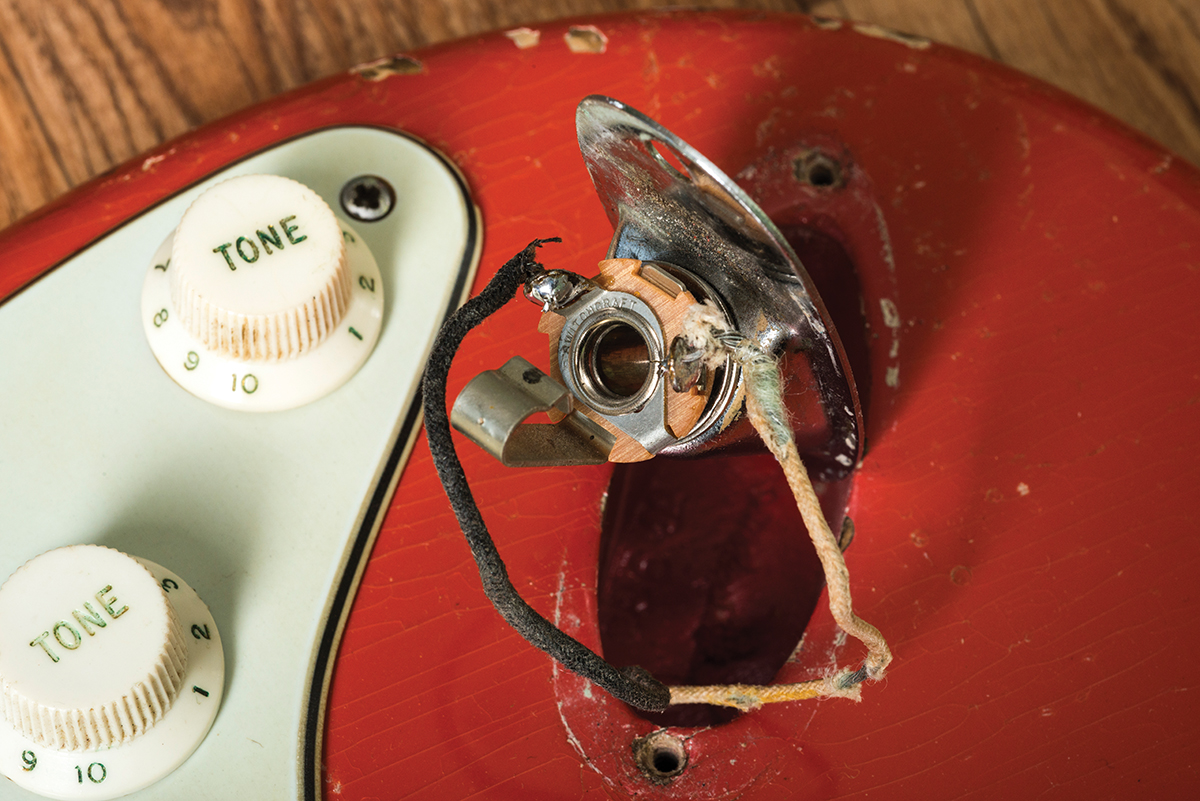
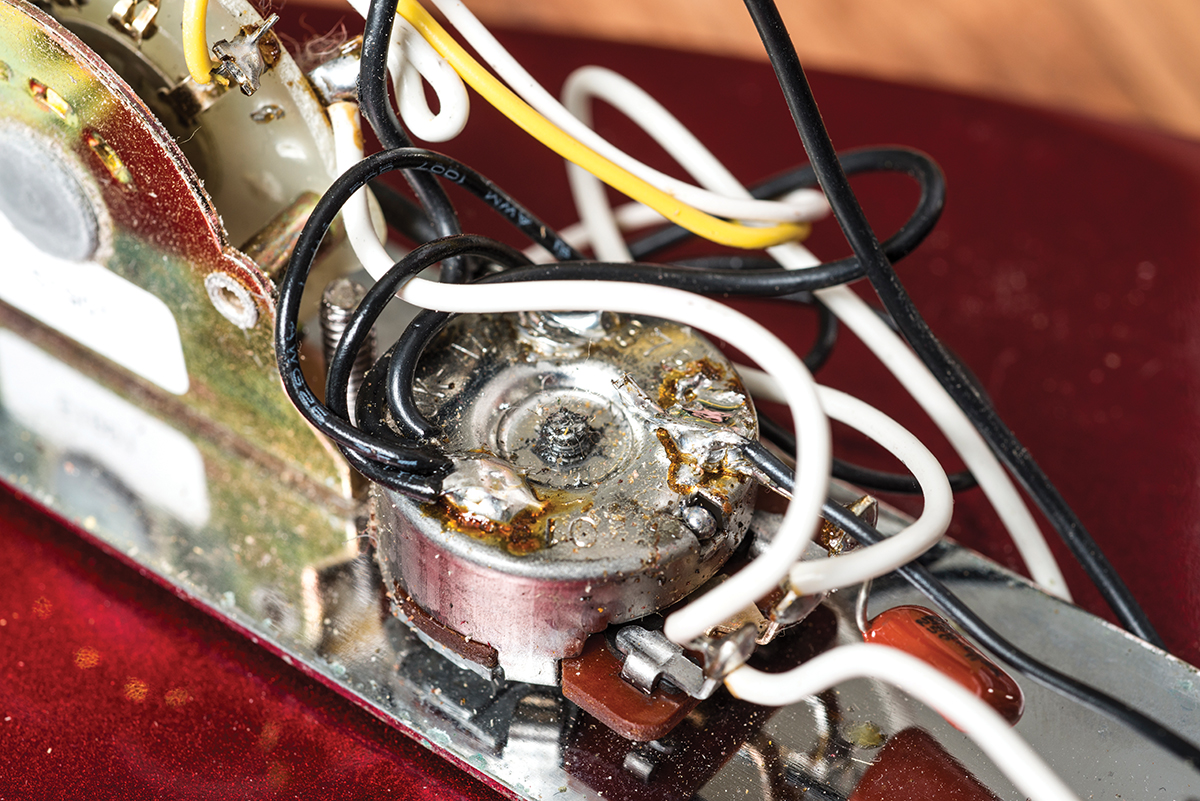
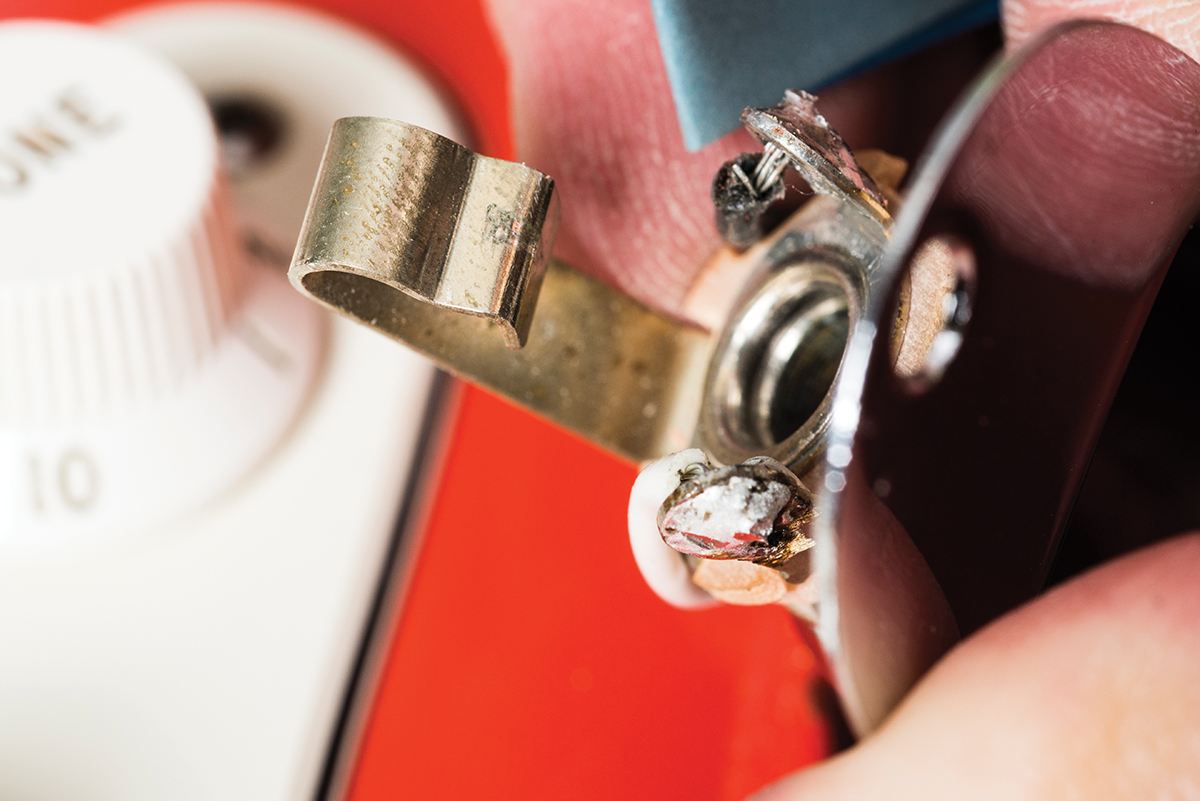
This traditional jack socket has two solder tags. The black wire is soldered to the sleeve and you can see that it’s connected to the centre of the socket. The white wire is soldered to the tip tag, and that corresponds to the protruding section
Guitar parts eventually wear out, especially mechanical parts that take a lot of use and abuse. Output sockets are a case in point and most of us will have experienced issues with our signal cutting out. Try wiggling two or more cables in the output socket.
If the signal cuts in and out with each cable, you can be pretty sure the output socket is at fault.Assuming you’re not dealing with an original part on a vintage instrument, the sure-fire fix is to install a new output socket.
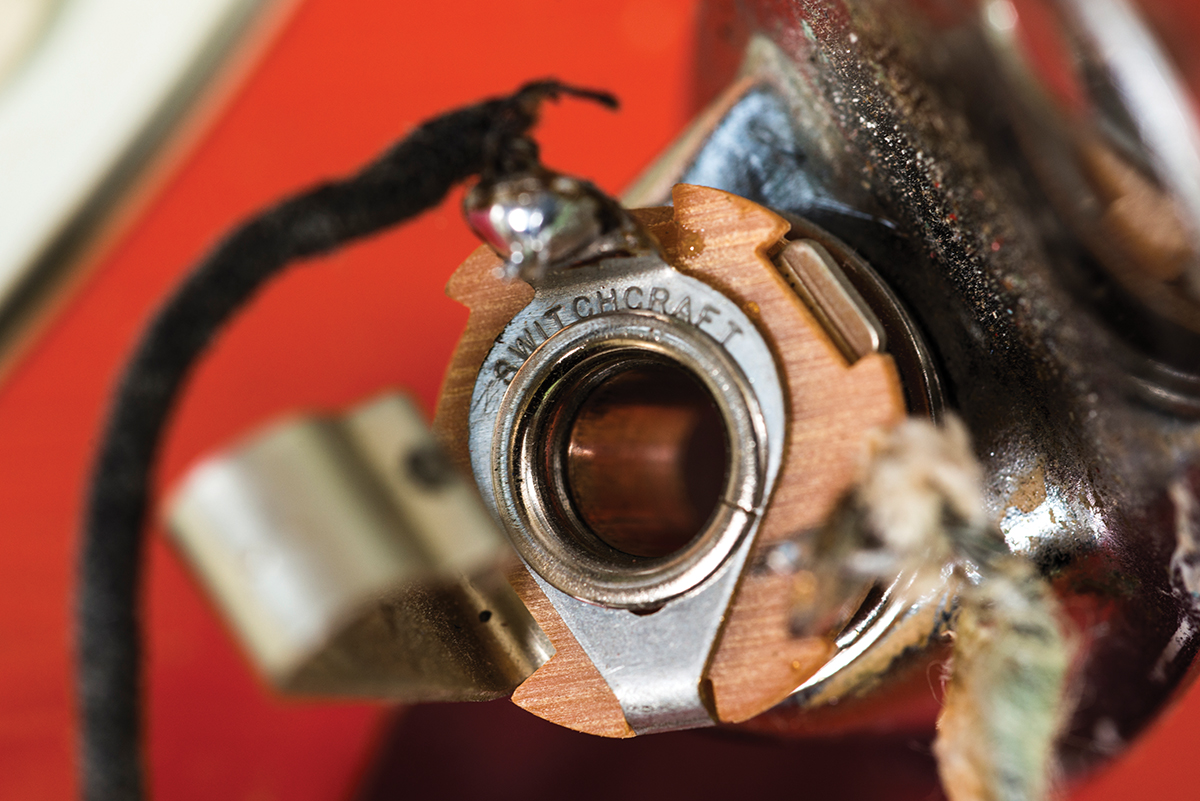
Switchcraft is a popular and reliable brand for jack sockets. You can get these from Allparts UK
In most cases, there will be just two connections. However, you may find a third wire if the bridge or trem spring claw is grounded at the jack socket, or if it’s a switching jack for active pickup systems.
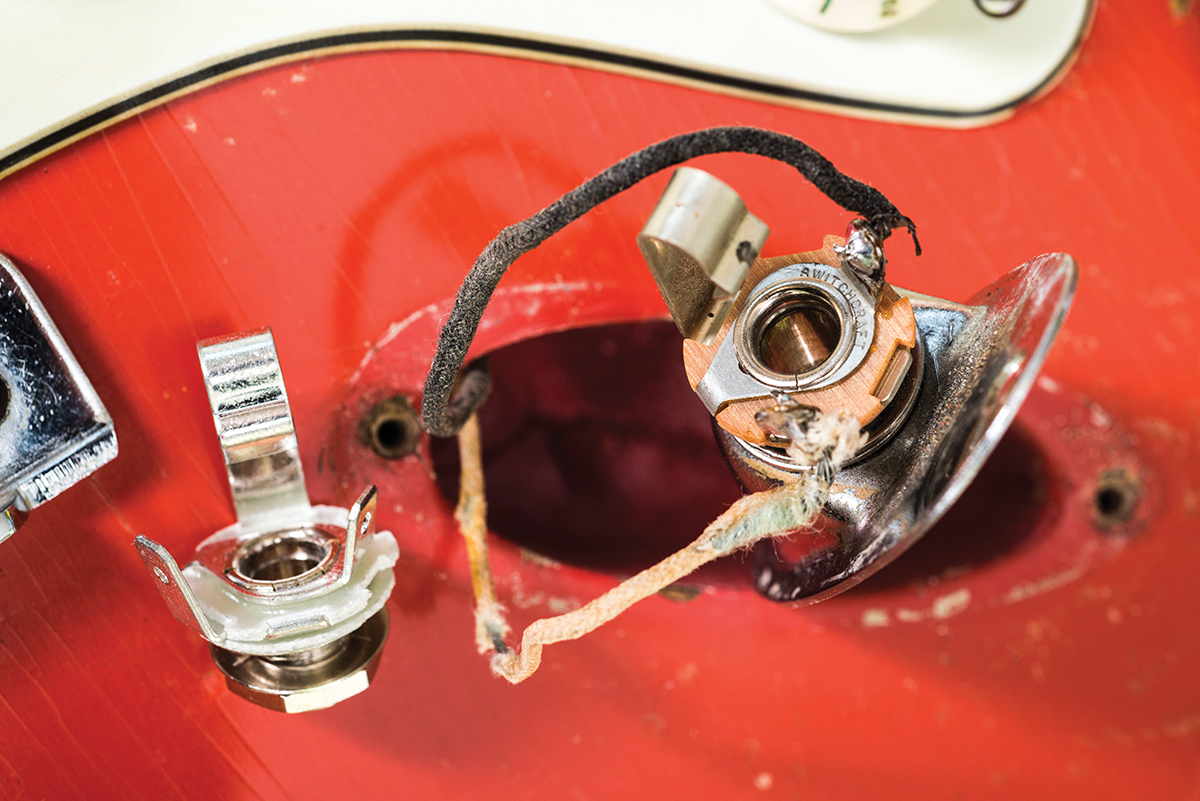
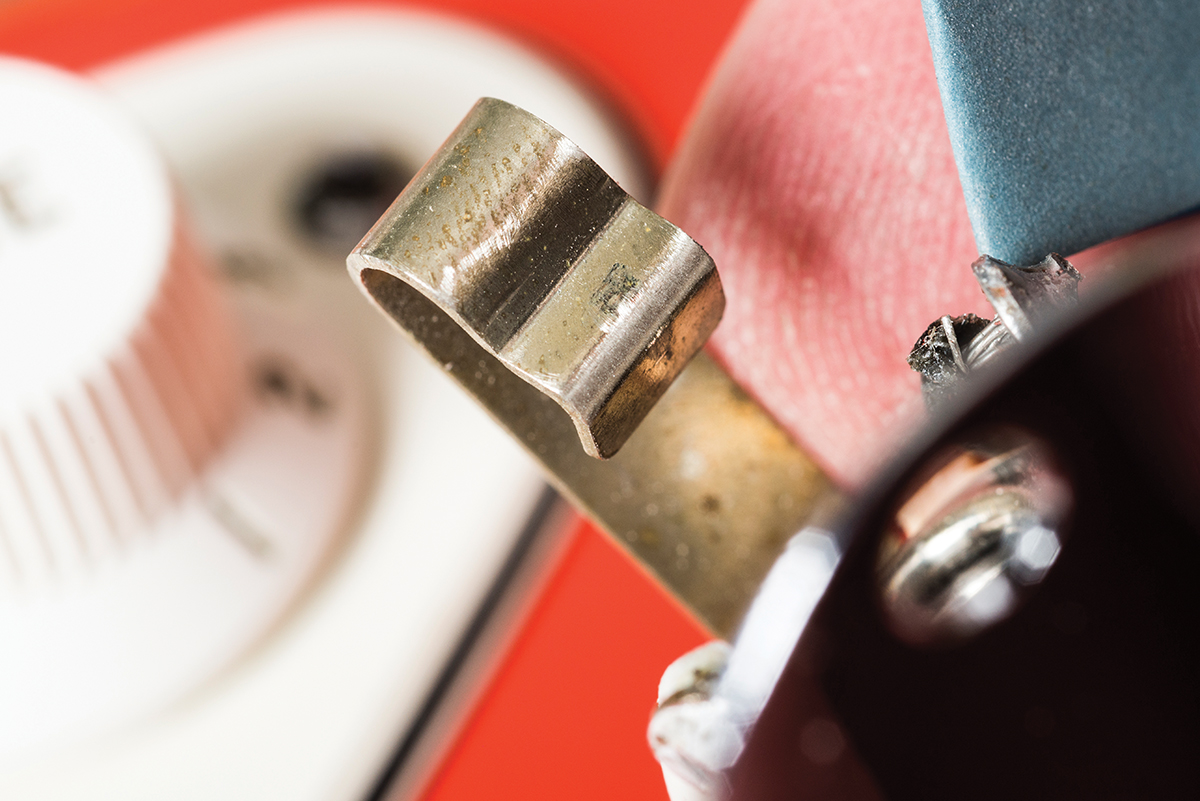
A new jack socket waiting to be installed
Replacing an output socket is pretty straightforward with Strats or Les Paul-type guitars because it’s easy to gain access to the socket. Semi-acoustics present problems because you will probably have to pull the socket, and all the controls, out through an f-hole.
As for vintage-style Tele jack cups, you’d probably be best advised to leave those to a professional.
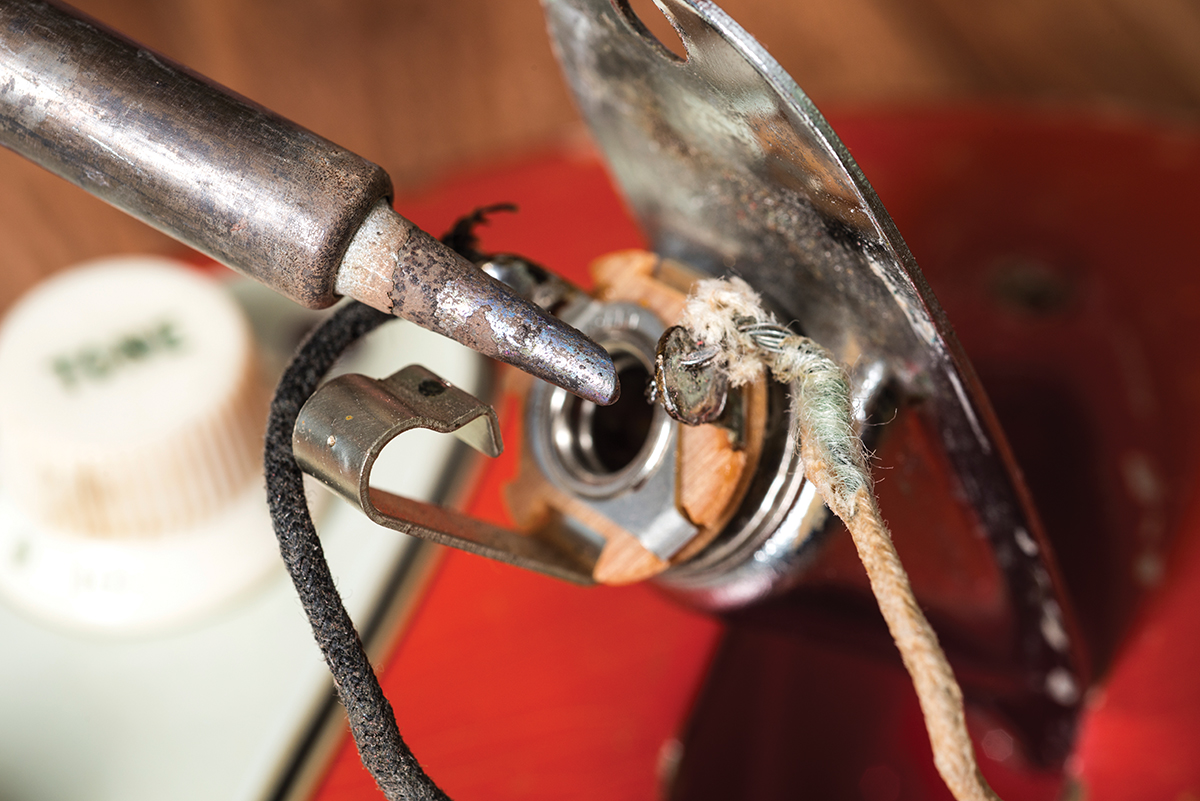
The wires are de-soldered from the jack’s solder lugs. This process will be reversed then the new socket is fitted
Assuming that you can get at the socket, make a note of which connection is positive and which is negative. The negative (or ground) will usually be black. Heat a joint with a soldering iron and pull the wire away as soon as the solder melts.
Then do the same with the other wire. Unscrew the nut holding the socket in position and remove it, then fix the new socket to the plate, or cup and solder the wires onto the new socket.
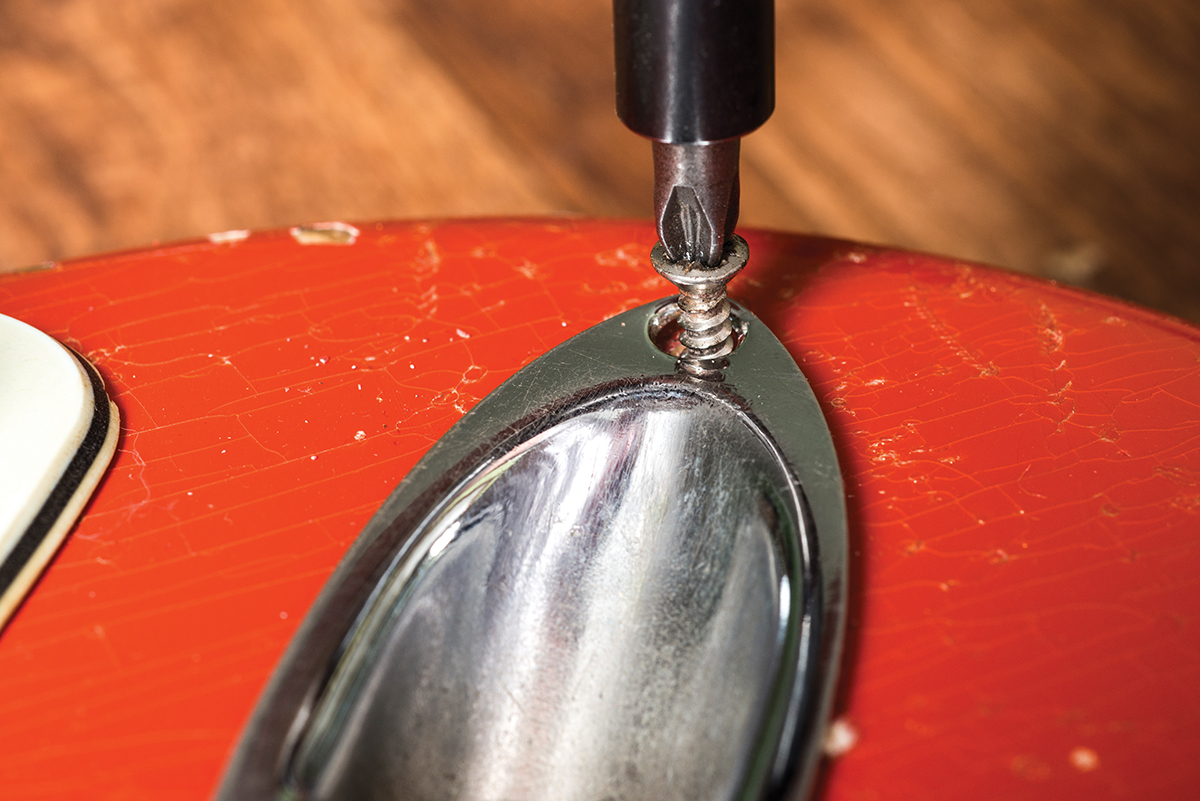
With the changeover complete, the jack cup is screwed back onto the Stratocaster body
Ensure the wires do not move as the molten solder is setting and never try to speed up the cooling process by blowing on a solder joint.
6. Replacing a potentiometer
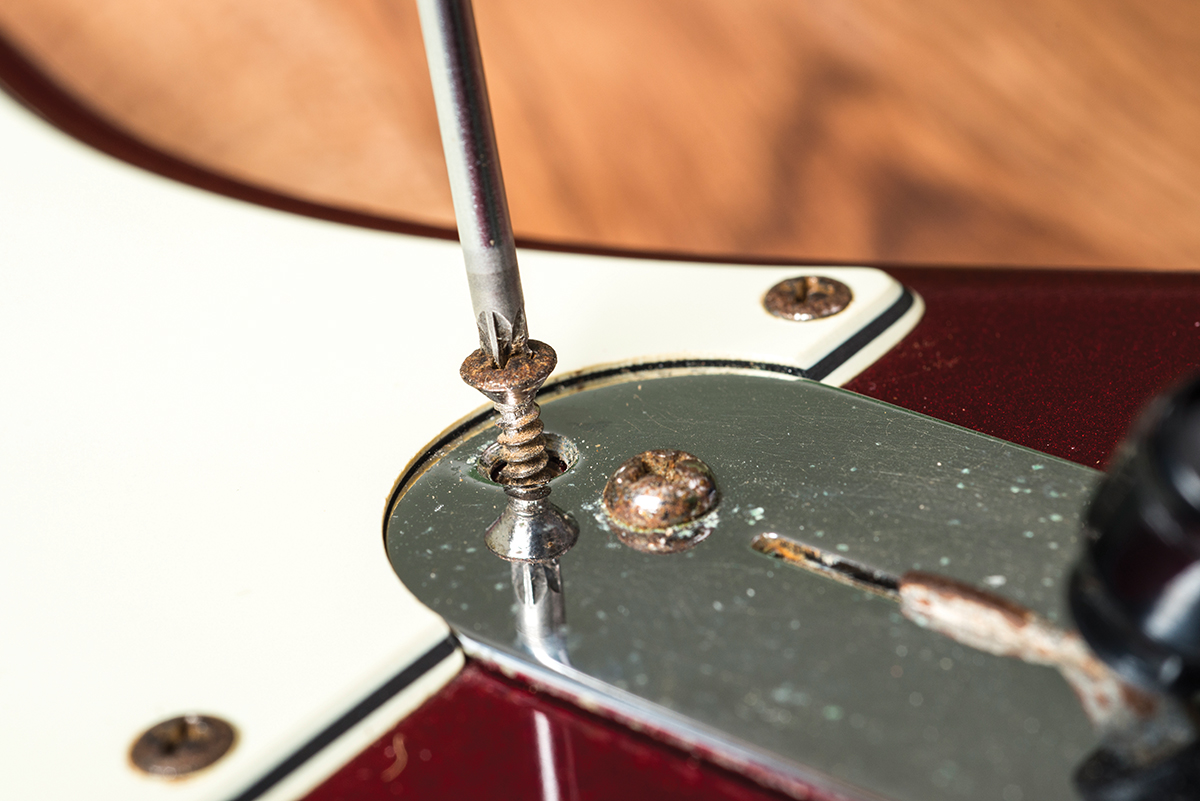
You can reach the electronics on a Tele without removing the strings. They’re mounted under a control plate held on by a screw at each end
Squirting cleaner into a potentiometer usually cures noise problems, but sometimes, pots are beyond saving. As well as being noisy, they can develop dead spots or even seize up completely. Even if your controls are working properly, you may want to experiment with different potentiometer values or tapers to fine-tune your tone or achieve a specific response.
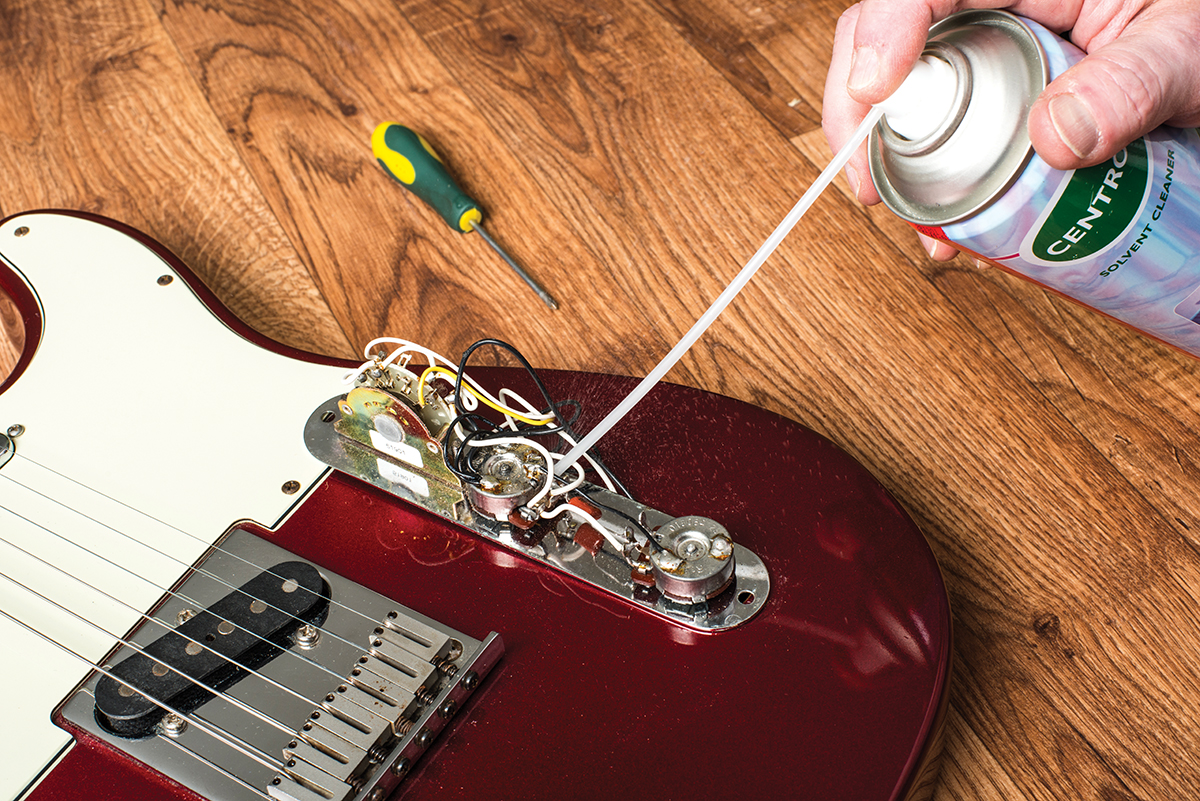
The extension tube helps direct the contact cleaner to exactly where you need it
Control pots can usually be found under pickguards or control cover plates. Identify the potentiometer you wish to change and make a note of the existing connections. You can do this by drawing a diagram or taking a snapshot using a digital camera or your phone.
Before you disconnect the potentiometer, draw a wiring diagram or take a photo. This will give you something to refer to when reconnecting the wires
Remove the control knob and take a hot soldering iron to the first solder tag on the pot. As soon as the solder has melted, pull the wire away from the pot using a pair of needle pliers.
You can use your fingers instead, but sooner or later, you’ll burn them. Repeat the process until the potentiometer is disconnected completely from the circuit. Using larger pliers, unscrew the nut holding the potentiometer onto the body or the pickguard and remove the pot.
A new pot ready to be installed. Recessed grub screws secure Tele knobs to pot shafts, so we need solid shaft pots
Fix the new potentiometer in position and solder the wires onto the solder tags, ensuring that the original connections are maintained. You may opt to wrap the exposed ends of the wires around the tags to achieve a secure mechanical fixing before soldering the joint. Once you’re done, reassemble, tune up and you should be good to go.

Single-gang potentiometers have three solder tags. It’s also common practice to solder screed and ground wires to the pot casing
7. Stringing a Bigsby
Our esteemed editor Chris once described this process as a job for an octopus, but stringing up a Bigsby-equipped guitar needn’t be as tricky as that description suggests.
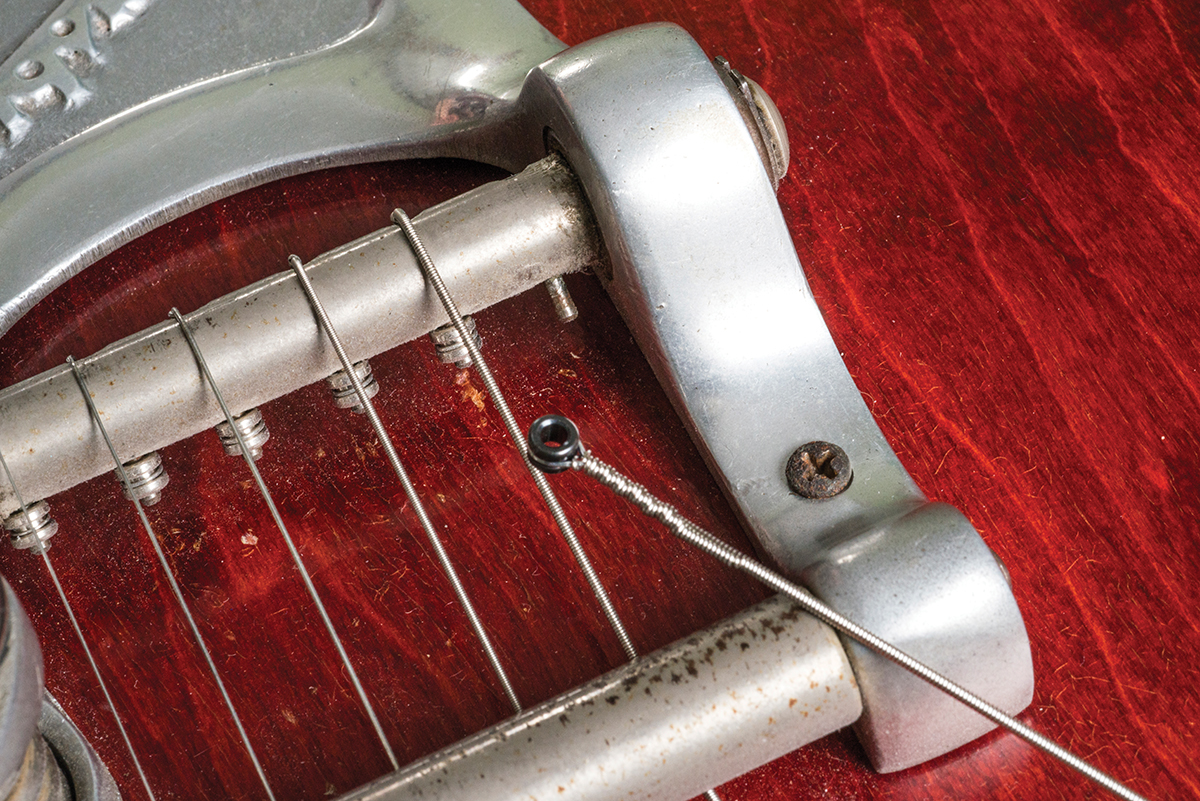
With traditional Bigsby vibrato tailpieces, you must secure the ball ends of the strings onto pins that protrude from the roller bar
There seem to be two main issues that people find troublesome – getting strings to hook onto the roller-bar pins and preventing them from falling off the pins when they’re threaded through the tuner posts to betuned up.
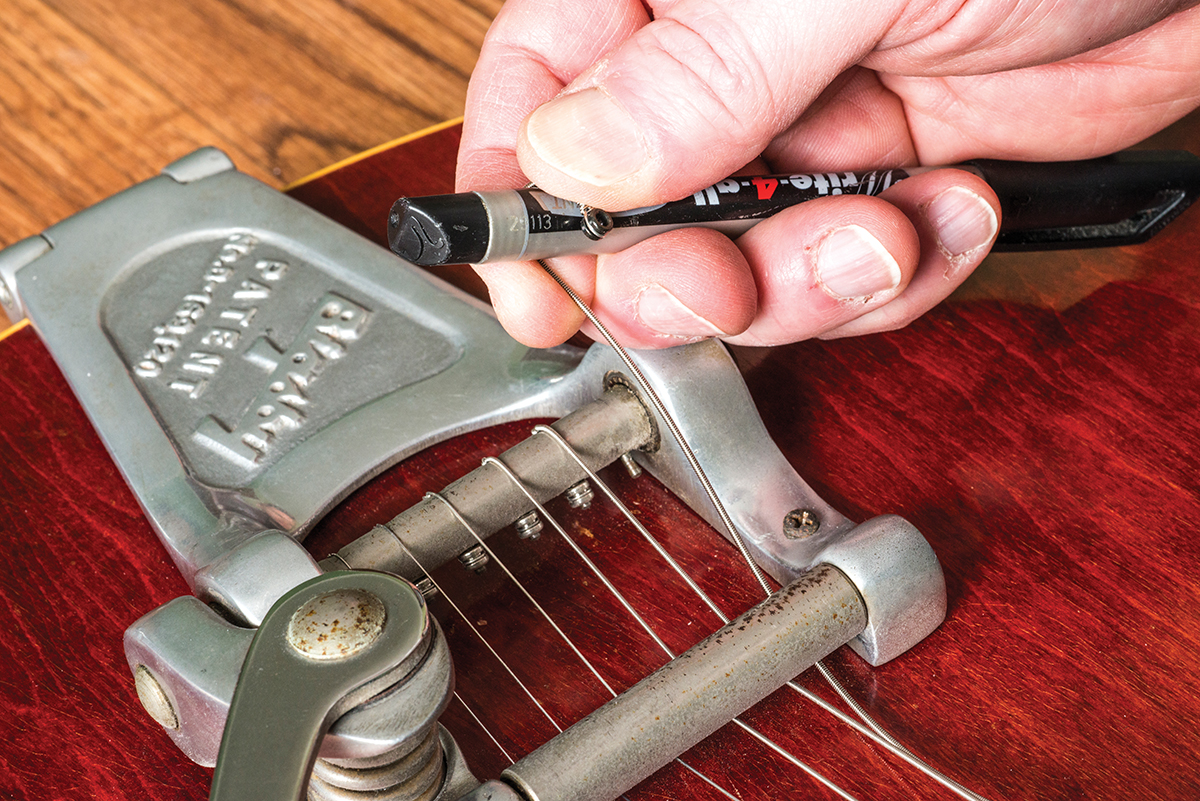
Wrap the string’s ball end around a pen, pencil or even your finger to create a hook
Start by wrapping the ball end of the string around a pen, pencil or even your finger, to create a loop. Once the string is bent, it should hold its shape and will be easier to hook onto the pin. If your Bigsby has a tension bar at the front, pass the string under the bar before hooking it on.
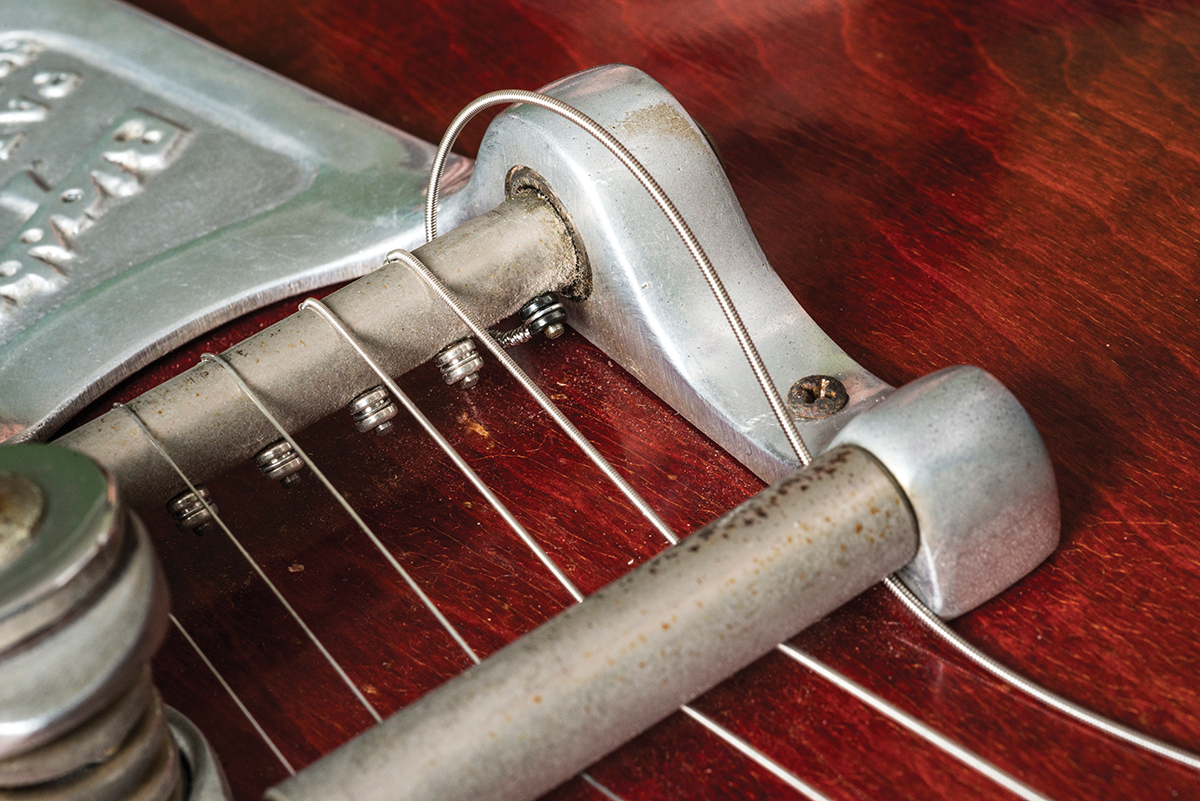
If your Bigsby has a front tension bar, push the string under the bar before you hook it onto the pin
Hold the ball end of the string onto the pin with one hand, then pull the string tight with your other hand.
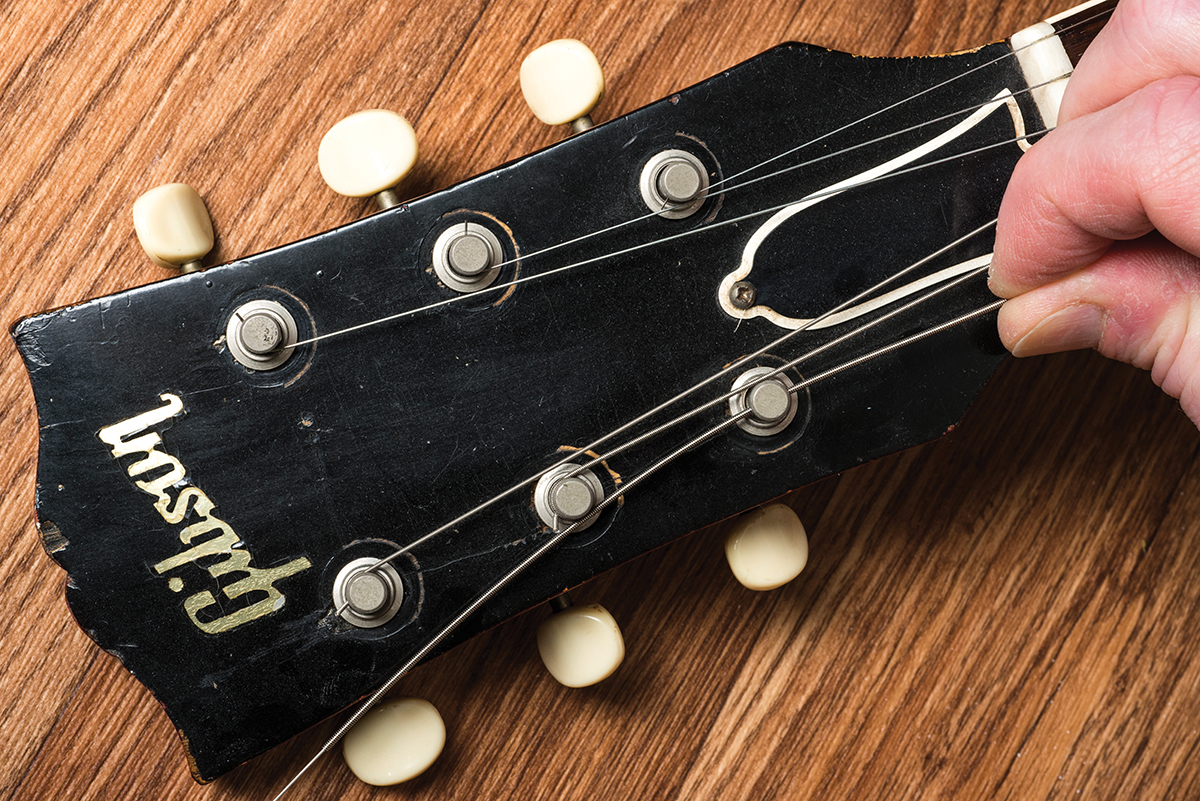
With the capo holding the string, you can thread the string through the tuner post
While maintaining the tension, let go of the string’s ball end, using a capo to clamp the string in position. This is where a ‘one-handed’ capo such as a G7th proves invaluable.
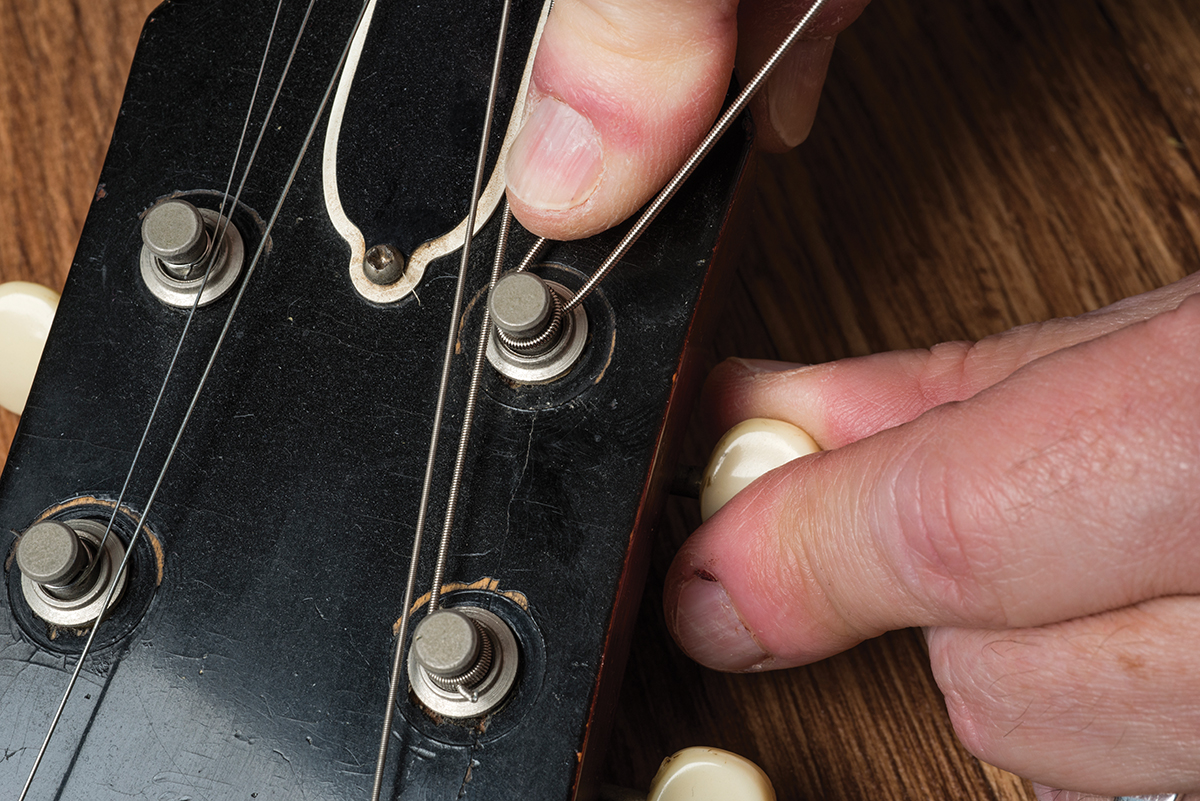
Pull the string tight with one hand and hold it there with a capo
Both hands will now be free to thread the string through the tuner and make the first few wraps around the post.
Now you can make a couple of wraps around the tuner post before using the tuner to bring up the tension. Remove the capo and you’re ready to fit the next string
Use the tuner to tension the string before releasing the capo. Simply repeat the process for the other five strings.
8. Repairing a jack lead
Even the most reliable of guitar cables will one day let us down. But before you throw that cable away and buy a new one, it’s worth trying to fix it. This is about as easy as electronic maintenance gets.
Firstly, check over the jack plugs for damage because they can fall apart. If everything looks okay, choose the continuity setting on your multimeter – it’s the one that goes ‘beep’ when you touch the test wires together.
Guitar cables have an insulated centre core wire that connects to the tip of a jack plug. The centre core is wrapped in a layer of wires that’s called the screen, or shield. That screen is connected to the sleeve of the jack plug. The multimeter is used to test which connection has failed, and to do this, you touch the meter’s test leads to the jack tips – one on each plug. Do the same for the two sleeves; the one that’s broken won’t beep – but it could be both that are at fault.
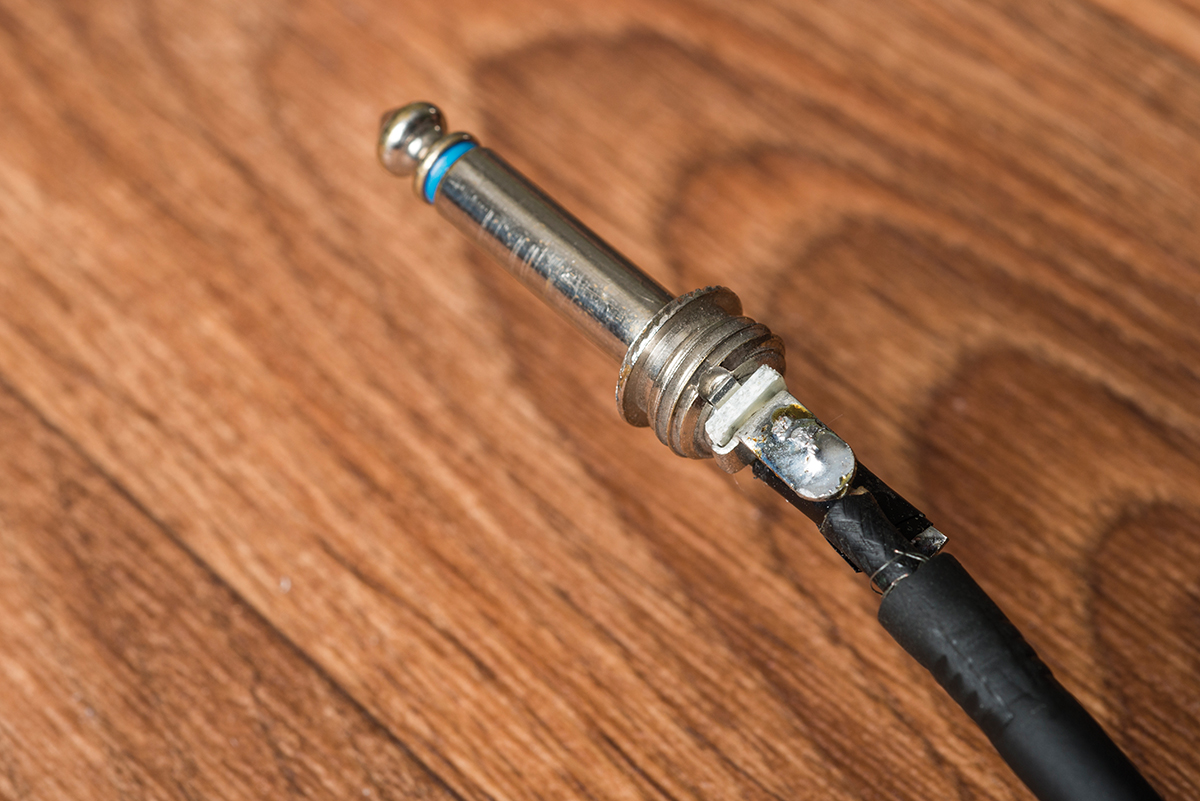
Like a jack socket, this mono jack plug has two connections – positive and negative. This is the positive
Unscrew the outer body of each jack plug and look at the solder joints. There will be two joints for each plug, and you will probably find one or more joints that have failed. If you’re unsure, repeat the multimeter test, this time touching the test leads onto the solder joints rather than the jack plugs.
If you can’t achieve continuity by touching the solder joints, it’s most likely that there’s a break somewhere along the length of the cable. In practical terms, that probably means it’s new cable time. However, if you can find a dodgy joint, it’s time to heat up the soldering iron and repair it.
Allow the jack plug to cool down after you’ve finished soldering, or you’ll burn your fingers
If you have a vice to hold the plug, it’s preferable to use it. Heat from the iron will transfer through the plug and it will become too hot to handle. If you don’t have a vice, instead use some sticky tape to hold the end of the cable, and wedge the cable up to keep the jack above your work surface.
Flow fresh solder onto the exposed wires and the area of the plug where you’ll be making the joint. Using a screwdriver or long-nose pliers, press the wires over the solder joint and touch the wires with the soldering iron. As soon as the solder flows together, remove the iron and hold the wire in position as the joint cools.
Once its cool enough to handle, simply screw the body of the jack plug back on, test one more time for continuity and that cable should be good for a few more years.
9. Curing choke out
You’ve probably experienced this: it’s the climax of your solo, you hit that high note and start to bend up to finish with your carefully honed vibrato and then, suddenly, the note just fizzles out and dies on you. It’s called ‘choke out’ and it’s a drag.
Almost every guitar has a fingerboard with a radius, and the radius varies from guitar to guitar. For instance, vintage Fenders had a 7.25-inch radius, whereas modern ones tend to be 9.5 inches. Gibsons have traditionally had a 12-inch radius, while vintage Gretsches had several different radii – often on the same fingerboard.
If your first and second (top E and B) strings are too low, they will choke out when you bend the strings, and the easiest fix is to raise the string height. On Fender-style guitars, such as this Tele, you can adjust the string heights individually – and a radius gauge can help you to maintain an even curve
Look at your bridge or bridge saddles and you should be able to see that the string heights are set to create a curve that more or less matches the fingerboard radius. The first (high E) will be the lowest string on the curve and, as you bend it upwards, the section of string between the fretted note and the bridge will get ever closer to the top of the frets.
If the string height is set too low, the string will actually touch the higher frets when you bend it up, and that’s what causes ‘choke out’. Assuming the frets are level and neck relief is properly adjusted (see tip number one) the only solution is to raise the string height at the bridge.
Wrap over bridges usually have large bolts at each end, and you’ll need a large flathead screwdriver to adjust the bridge height. Take care because the plating flakes off easily. Try wrapping some masking tape or insulation tape over the screwdriver to prevent metal-to-metal contact. If you find that a lot of force is needed to turn the bolts, slacken the strings to make the adjustment then tune back up to check your progress.
To adjust Strat and Tele saddles, you will need an Allen key, although some Tele saddles require a mini screwdriver. Tune-o-matic bridges are usually set using thumb wheels and, again, you may need to slacken the strings before you can get them to move.
Whichever bridge you’re dealing with, the idea is to set the first (high E) string so that you can bend it at least a whole tone before it begins to choke out.
With 7.25-inch radius fingerboards, you will usually be obliged to set the action relatively high. Even if you prefer a low action, the geometry of the guitar partly determines how low you can go.
10. Setting string radius
This one really applies only to guitars with saddles that allow for individual string height adjustment. With wrapovers and tune-o-matics, you’re stuck with what you have.
Assuming you have followed the guidelines in tip number nine for setting the saddle height of the first (high E) string, do the same with the sixth (low E) string. This time, you’re looking for a saddle height that allows the sixth string to play cleanly all along the neck.
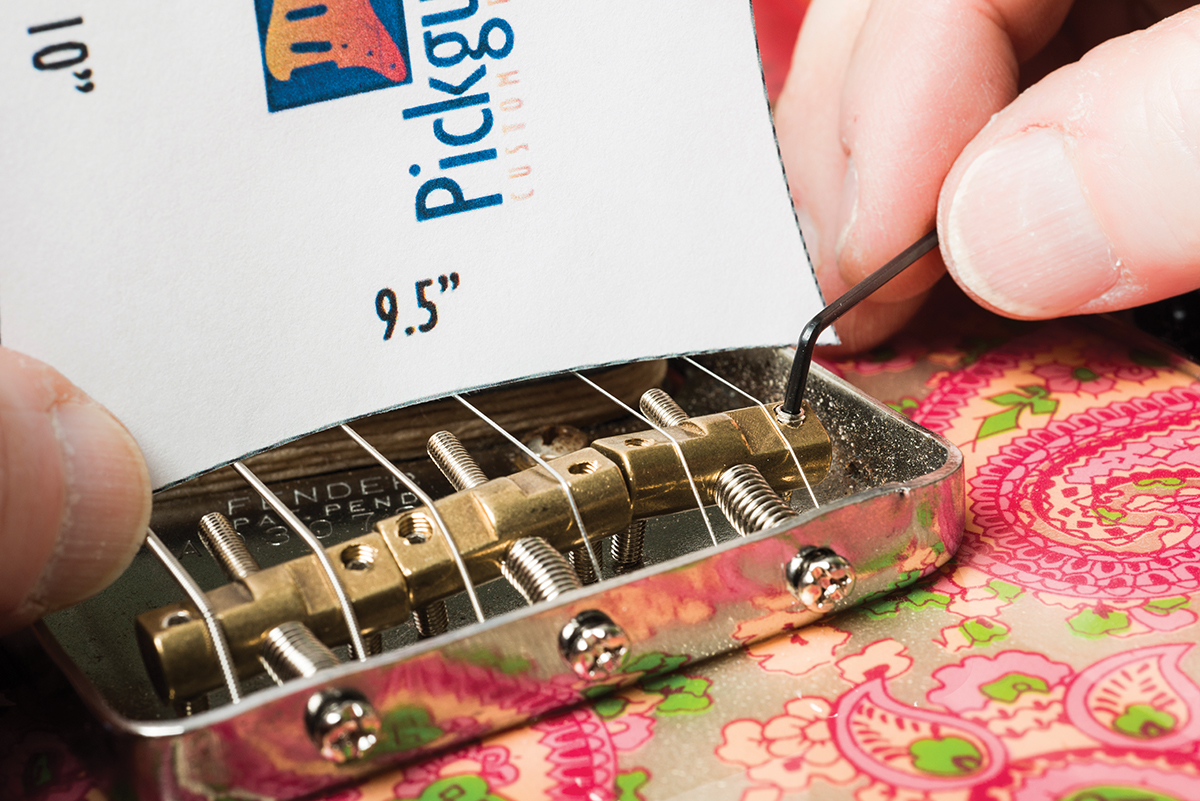
Next, you’ll need a radius gauge – and you can find free ones online. Simply search for ‘Pickguardian radius gauges’, follow the link to the PDF, print it, then carefully cut out the gauges with sharp scissors.
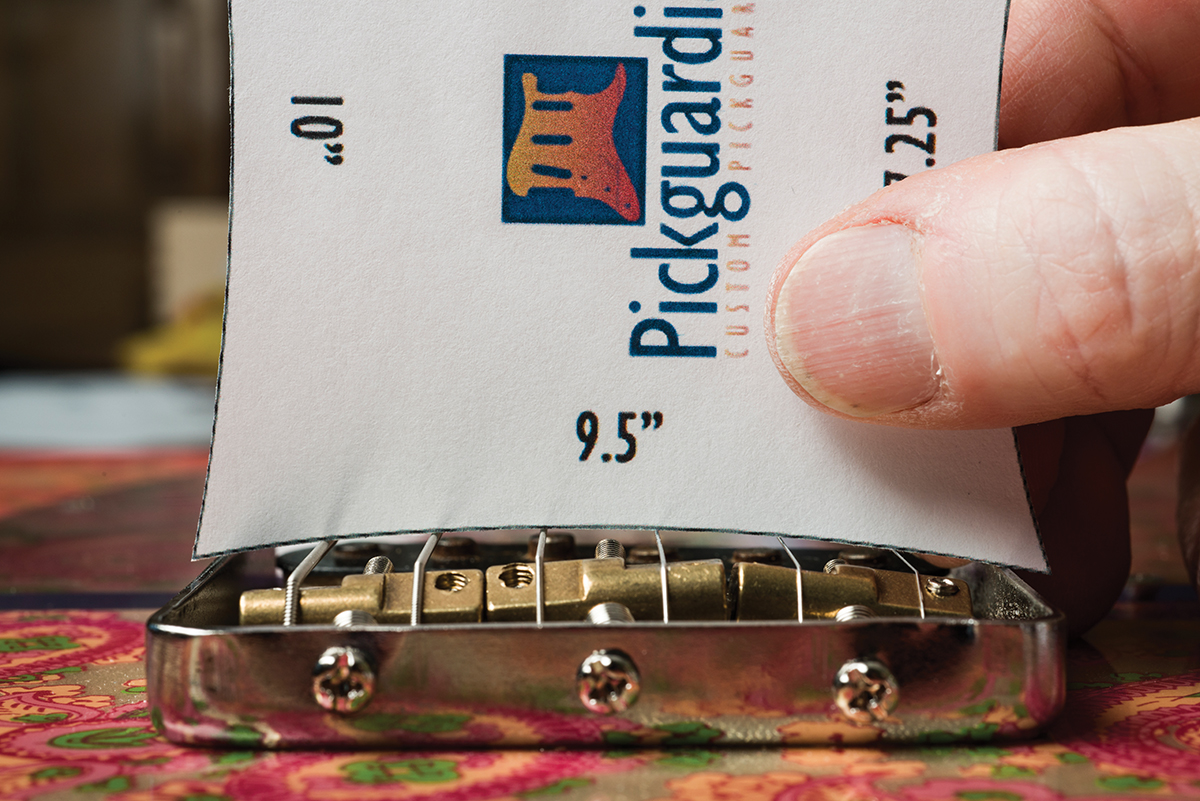
Rest the gauge on the two E strings and bring up each of the other strings to just touch the underside of the gauge
As a rule of thumb, you should match the radius of the strings to the radius of the fingerboard. If you’re uncertain what radius you’re dealing with, simply slacken the strings, pull them off to the sides of the ’board and use your gauges to figure out the radius of the ’board.
String the guitar back up and tune it, then place the chosen radius gauge over the strings close to the bridge saddles. The idea is to sit the gauge on the two E strings, then raise each of the other saddles one by one, to just touch the underside of the gauge. To do this, you may need to drop the height of the other string (A, D, G and B) saddles before you start.
Many professionals use metal gauges that slip under the strings, but the top method is close enough for our purposes. In reality, you can set the strings to a radius that’s slightly flatter than the ’board’s. After all, the strings are at least 0.25 inches above the board at the bridge, so you could set the strings to a 7.5-inch radius to match a 7.25-inch board or 9.75 inches to match a 9.5-inch board.
The gauge will give you a very good starting point. From there, you can make small adjustments based on how the guitar feels to play. Ultimately, that’s always the best way to dial in a great setup.
11. Basic intonation adjustment
Have you ever noticed that notes and chords played down the cowboy end of the neck sound in tune, but things sound increasingly out of tune as you move higher up the neck? If so, your guitar’s intonation probably needs adjustment.
Perfect pitch is a curse that afflicts very few of us, so for the most part, we can achieve perfectly acceptable intonation by following a very simple procedure. Best of all, there are plenty of super-accurate ‘strobe tuner’ ’phone apps that can achieve much better results than old-fashioned guitar tuners.

Strobe tuner apps are cheap, convenient and accurate. This E string is 0.3 of a cent flat. That will never do
Before intonating your guitar, you should ensure that the neck relief and action is properly set – see tips one, nine and 10 for details. If the guitar has a vibrato bridge, you also need to adjust the spring tension to taste. Once you’re ready, carefully tune all the open strings to concert pitch – making several passes if necessary.
Starting with the first (top E), play the open string, then fret the string at the 12th fret; play it again and check your tuner. If the fretted octave note is sharp, you need to increase the scale length, which means moving the saddle further away from the nut. If the octave note is flat, you need to decrease the scale length so that the saddle is moved towards the nut.
Unless the guitar is wildly out, the adjustment range is unlikely to exceed a few millimetres. Each time you adjust a saddle, remember to reune the open string before rechecking the intonation. If you are finding it hard to increase the scale length, try slackening the string before attempting to move the saddle.
If you’re using a strobe tuner app, it should be set to ‘cents’. You will notice that it’s super-sensitive, and the pitch of the fretted note will vary depending on how hard it’s being pressed. Just try to apply the sort of pressure that’s typical of your playing style.
With the top E done, you can work your way across the other strings. Be aware that pickup magnetism can pull the wound strings flat as you move up the neck, so consider dropping their height when you are performing this procedure. This is a typical Fender trait.
Also, use a screwdriver with a shaft that’s long enough to reach the saddle screws straight-on. If the handle forces you to come in at an angle, it’s easy to slip off the screw head and damage the finish. Those of you distressing guitars should feel free to use the shortest and most inappropriate screwdrivers you can find.
12. Cleaning output jacks, pots and switches
There’s a bit of a knack to cleaning switches and control potentiometers. Firstly, you must ensure that the contact cleaner gets to the spots where it’s needed, so don’t lose the extension tube that plugs into the aerosol nozzle.
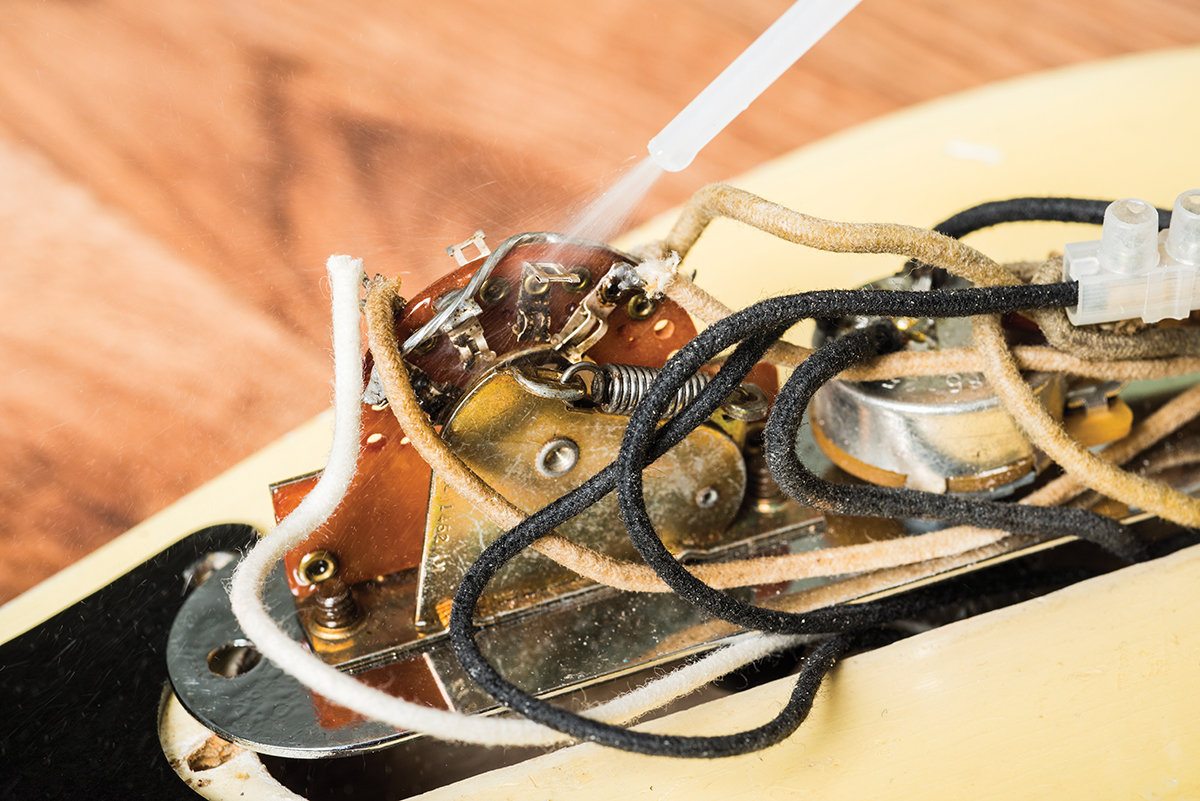
,b>Aim the contact cleaner’s extension tube at the switch contacts then, after spraying, work the switch back and forth rapidly several times
If you’re cleaning a pot, try to get the end of the tube firing into the open slot of the casing behind the solder tags. Sometimes, this just isn’t possible when the potentiometer is soldered onto a circuit board. Try squirting into one of the perforations in the pot casing instead.
This old jack socket has oxide build-up on the tip connector
If the pot is inside a semi-acoustic, buy yourself a ‘pot cleaning cap’ to direct the cleaner through the knob shaft and down into the casing.
Things are generally easier to get at with open-frame Fender-style switches.Once the switch cleaner has been applied, work the pot or switch back and forth vigorously. Repeat the process and, while you’re at it, do it again. The idea is to dislodge dirt or oxidisation and re-establish clean contact between the conductive surfaces.
A quick rub with 1000 grit paper exposes clean and shiny metal
Gibson-style toggle switches and jack sockets require a slightly different approach. Here, there are no moving parts, just contact points. Try spraying some contact cleaner onto some 800 or 1000 grit abrasive and draw it across the contact points to expose clean metal. Remember, it’s invariably cheaper and easier to repair a part than it is to replace it.
13. Cleaning and conditioning fingerboards
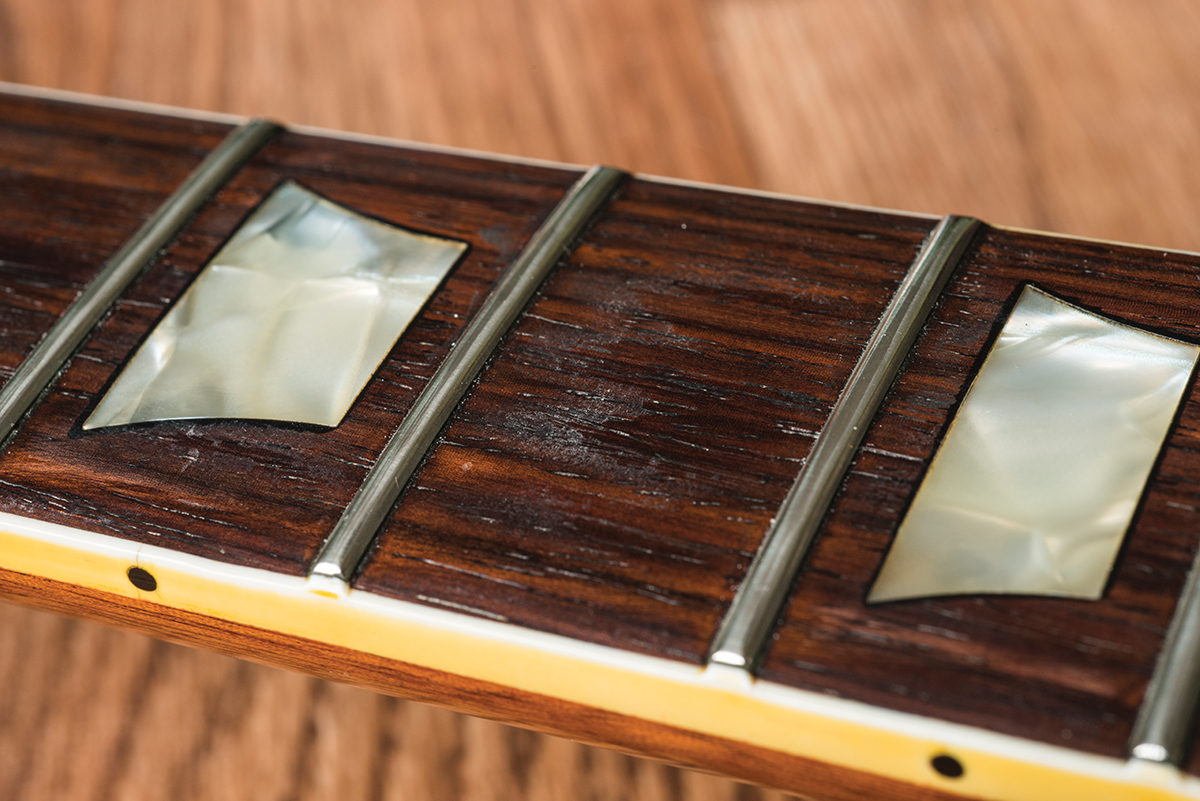
This fingerboard isn’t too bad, but you can see dirt beginning to build up
This applies only to guitars with bare-wood fingerboards. Finish usually protects maple ’boards, but rosewood and ebony fingerboards soon gunge up with dirt, finger grease, dead skin, food residue, blood and the general detritus of any guitar player’s life.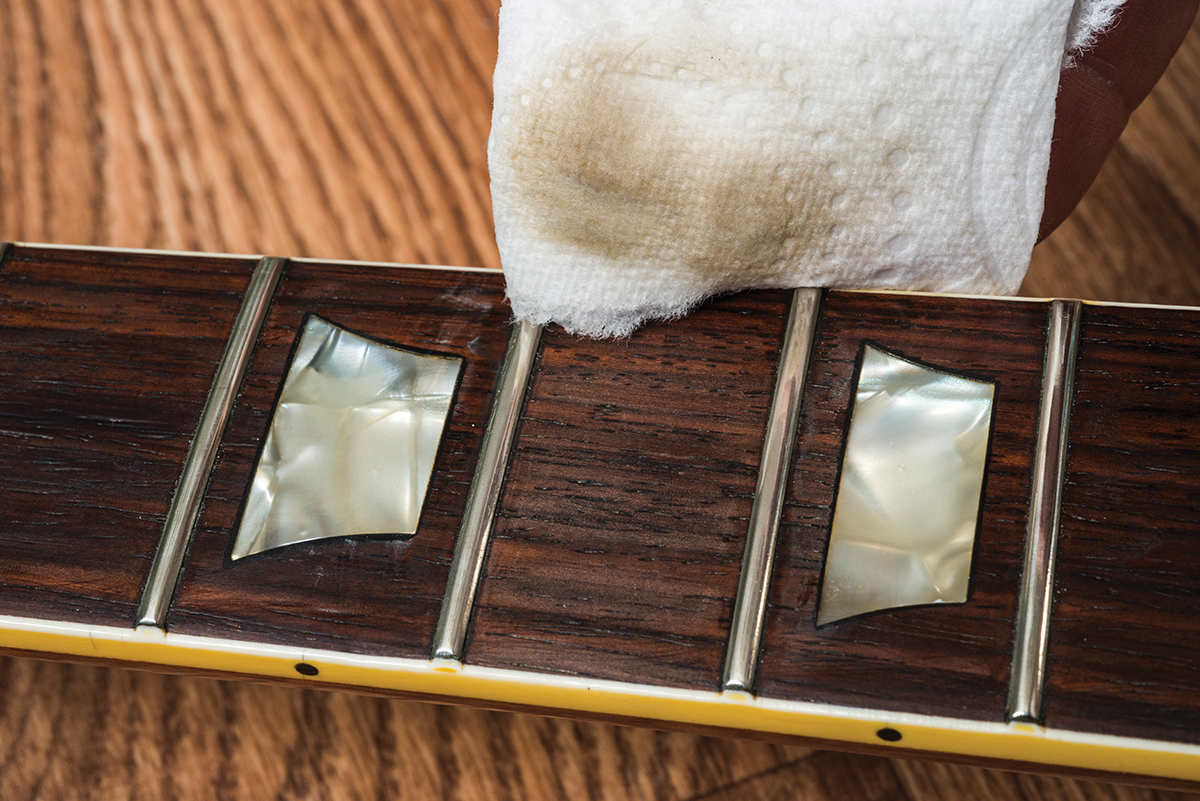
A naphtha-soaked piece of kitchen paper gently lifts the dirt off the fingerboard but leaves the wood looking a bit dry
In this era of relics, many find the cruddy look appealing. However, if you prefer to live without the urge to wash your hands every time you play, a simple clean-up procedure will improve the feel of your guitar. You’ll also find that the crud doesn’t get into your string windings, so they’ll last longer – and a clean fingerboard feels faster and slicker to play.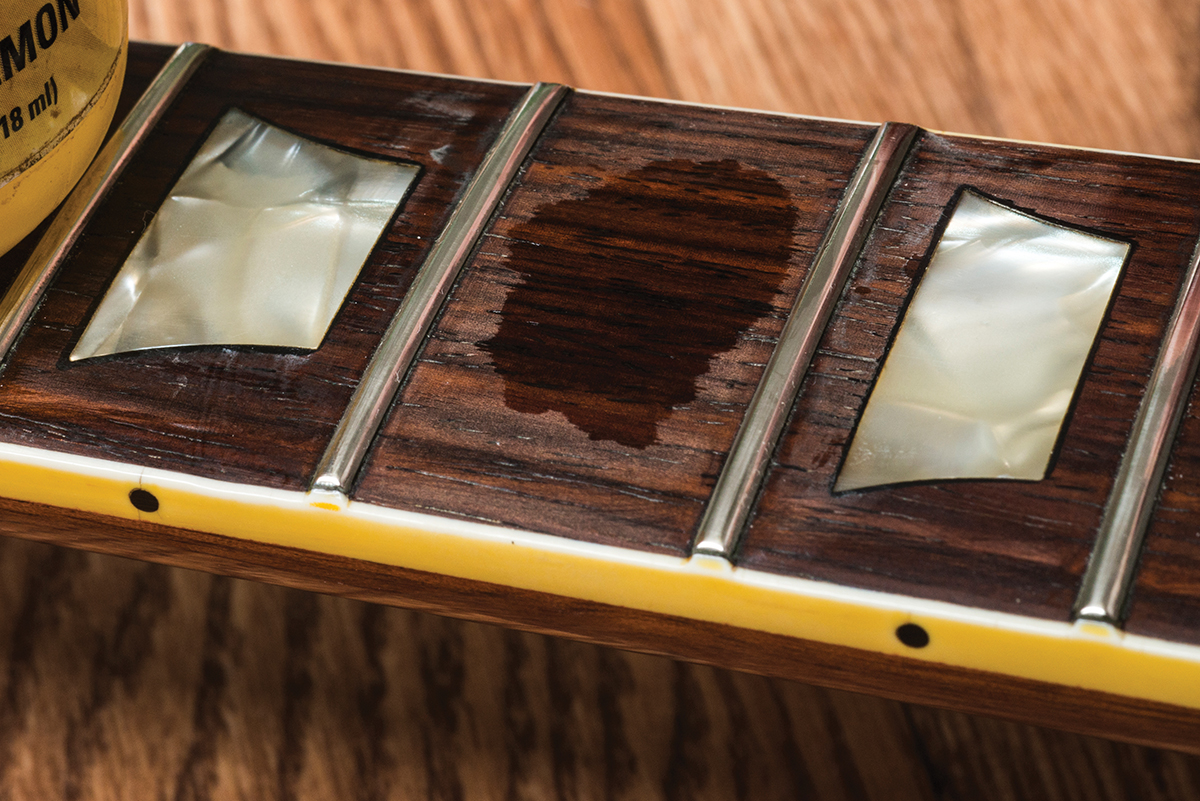
Apply a dab of fingerboard conditioner or lemon oil to the ’board
Lighter fluid is a liquid known as naphtha, and it’s a very gentle and effective guitar cleaner. After removing your strings, squirt some naphtha onto a folded piece of kitchen paper and begin rubbing the ’board. You’ll soon see the dirt coming off onto the paper, and every so often you should change to a fresh area of paper.
Work on one fret at a time and eventually you’ll get all that dirt off. If the ’board appears dry and dull, try applying some fingerboard conditioner or lemon oil.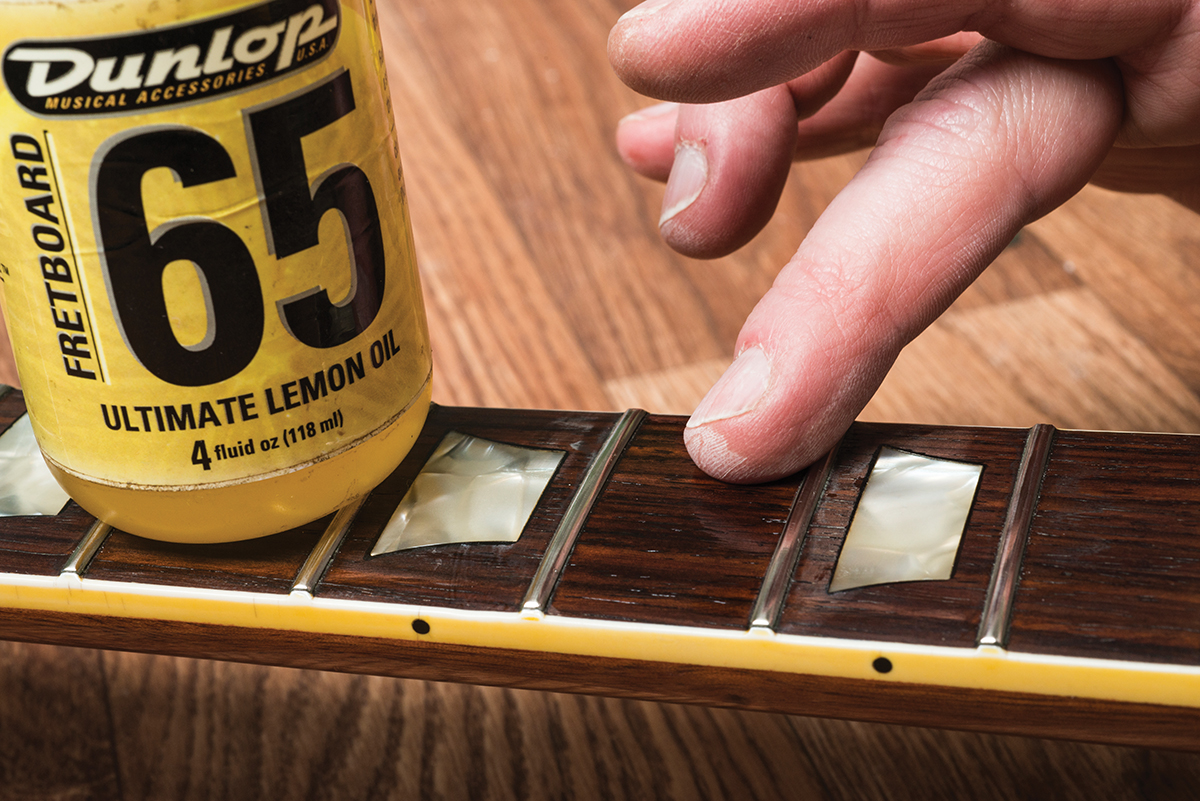
Spread out the oil with your finger, working it up to the edges of the frets, and allow it to soak in
Allow it to soak in for 10 minutes or so, wipe off any excess with a paper towel and buff up the ’board with a clean cotton cloth before re-stringing. This is something you might consider doing once or twice a year, depending on how much the guitar is being played.
14. Plugging and re-drilling loose screw holes
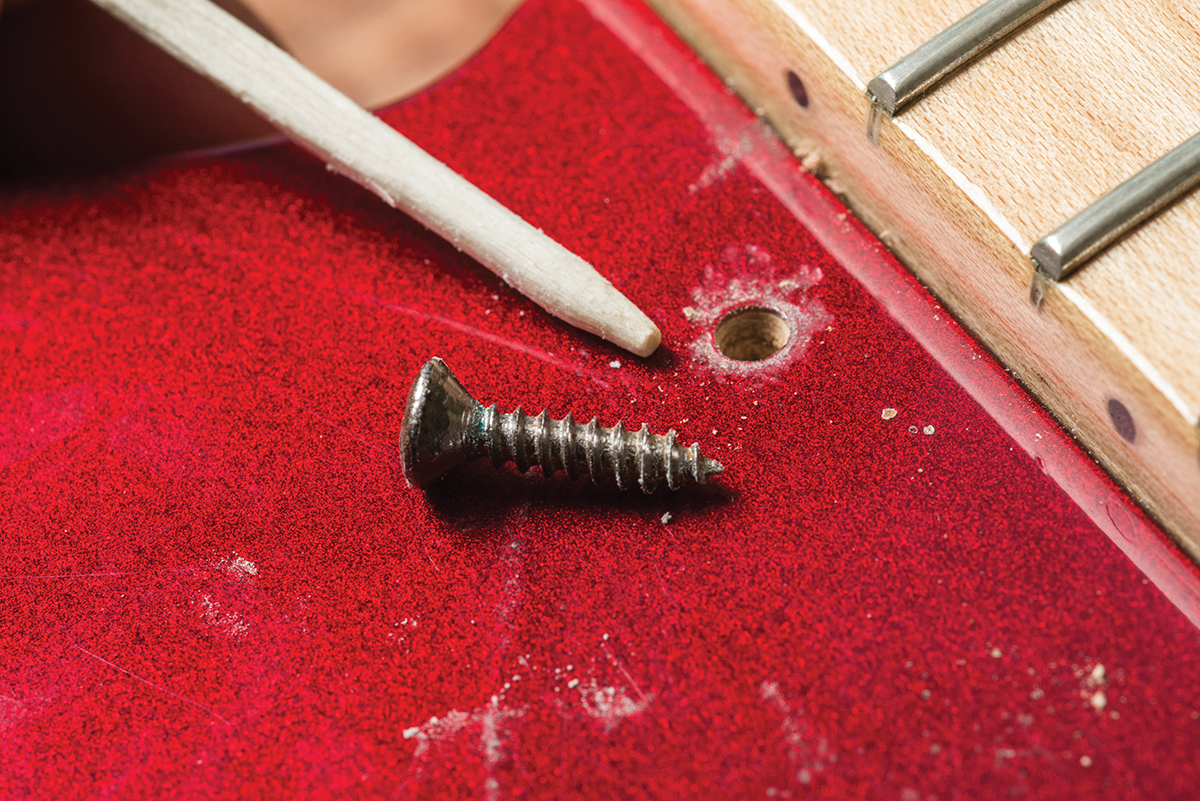
Use a sharp blade and sandpaper to whittle the end of a matchstick and shape it like the screw
Over time, you may find that strap button and pickguard screws have a tendency to become loose. Changing to a bigger screw isn’t an option, so you need to plug and retap the screw hole.
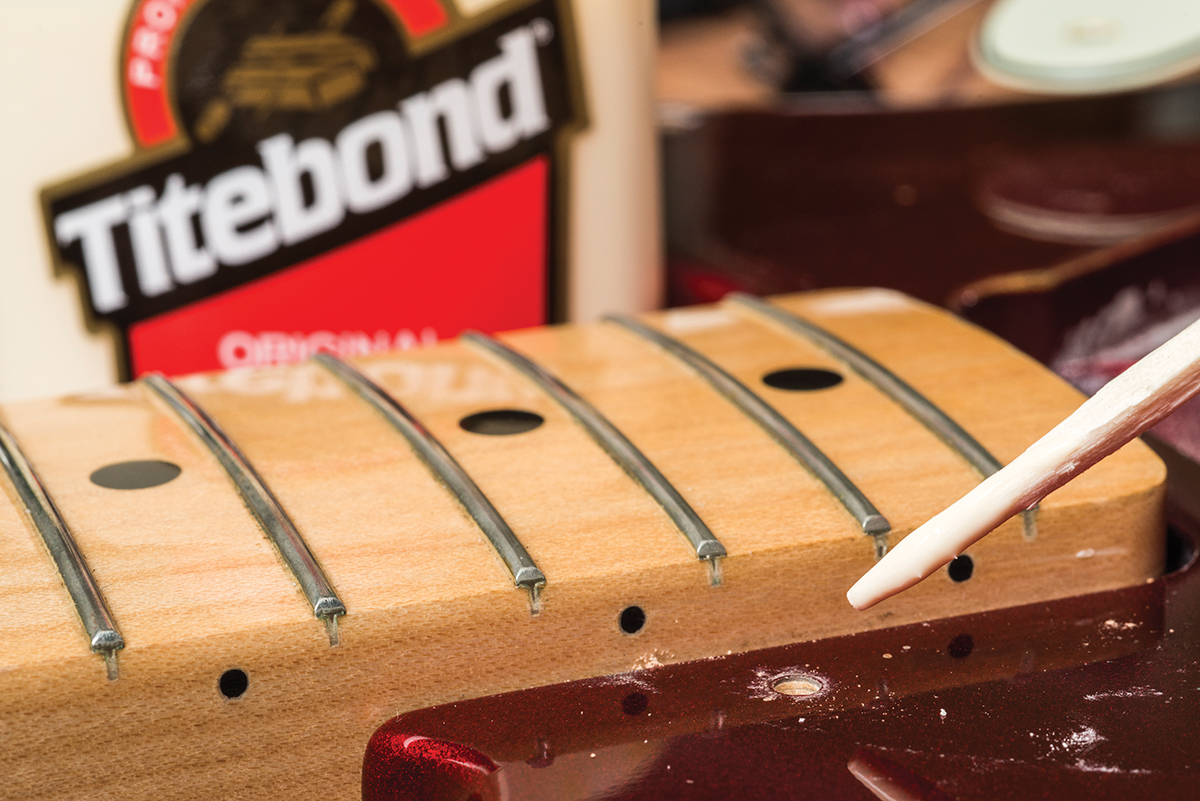
Cover the end of the matchstick in Titebond Original and push it into the screw hole
For small pickguard screws, you can use match sticks. One reader recently suggested barbecue skewers because the wood is slightly harder. Using a sharp blade and sandpaper, try whittling away the square corners of the matchstick to create a diameter and taper that matches the screw.

Wipe off the excess glue and allow around 30 minutes’ setting time
Cover the end of the screw with a strong wood glue such as Titebond Original and push it firmly into the empty screw hole. Wipe off any glue squeeze-out and allow 30 minutes or so for the glue to set.
Carefully trim the stick flush with the surface
Taking great care not to damage the finish, slice off the stick so it’s flush with the body then drill a pilot hole that’s slightly smaller than the diameter of the screw.
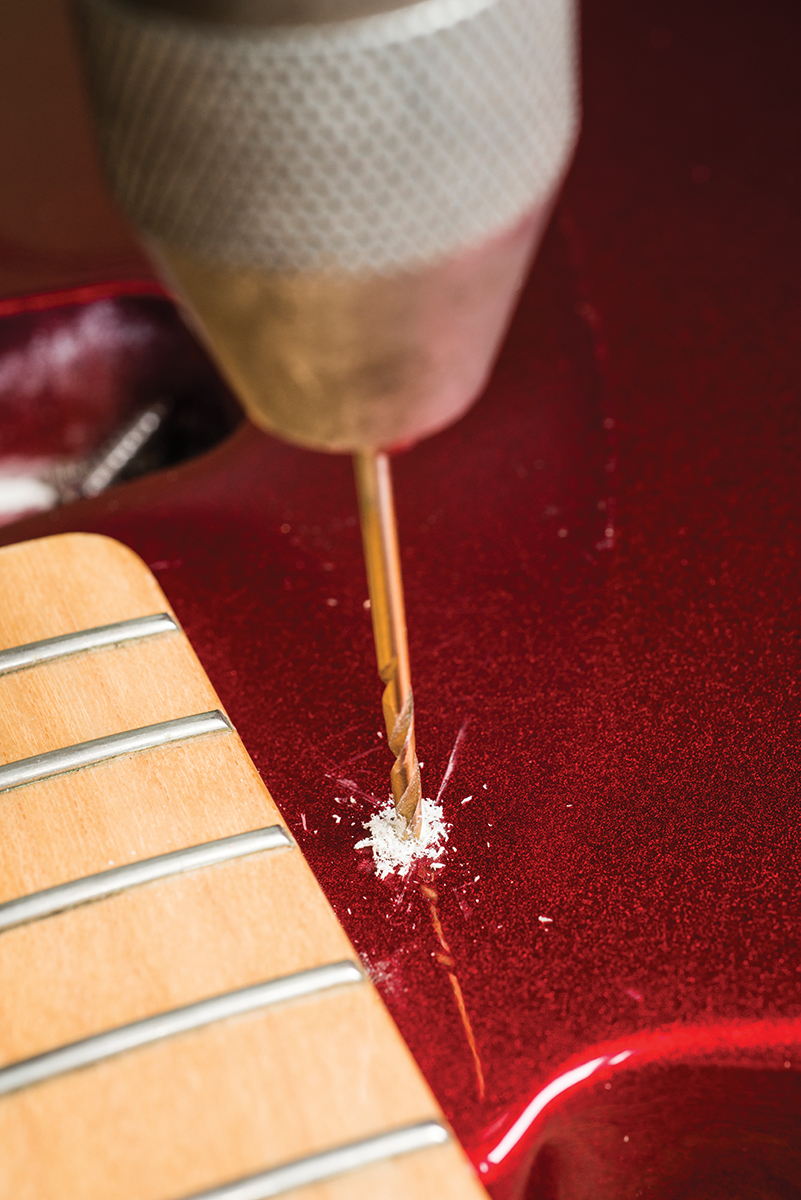
Using a drill bit with a diameter slightly smaller than the screw’s, drill a pilot hole
You will then be able to tap the screw way into the plugged hole and you should end up with a tight and secure fit.
You should find that the screw will now tighten up properly and hold its tightness
15. Tightening die-cast tuners
Over time and with regular use. most die-cast tuners begin to feel a bit loose and sloppy. This vagary can make small tuning adjustments tricky to perform. Fortunately, however, there’s an easy fix.
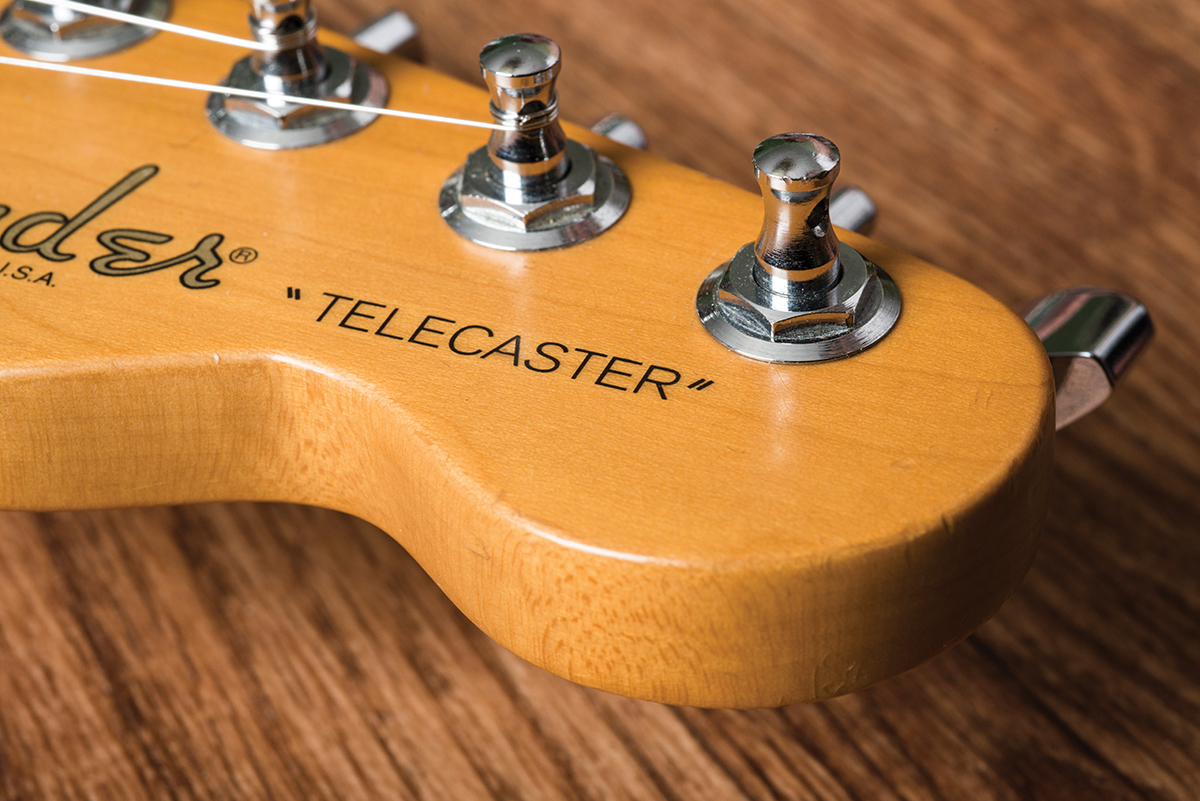
The screw-down bushings sometimes work loose, which can result in vibration noise as well as wobbly tuner posts
Most die-cast tuners have a nut-style bushing and washer, and the bushing is screwed down to clasp the tuner onto the headstock. With all of your strings removed, find the correct-sized socket from a socket set and tighten all the bushings.
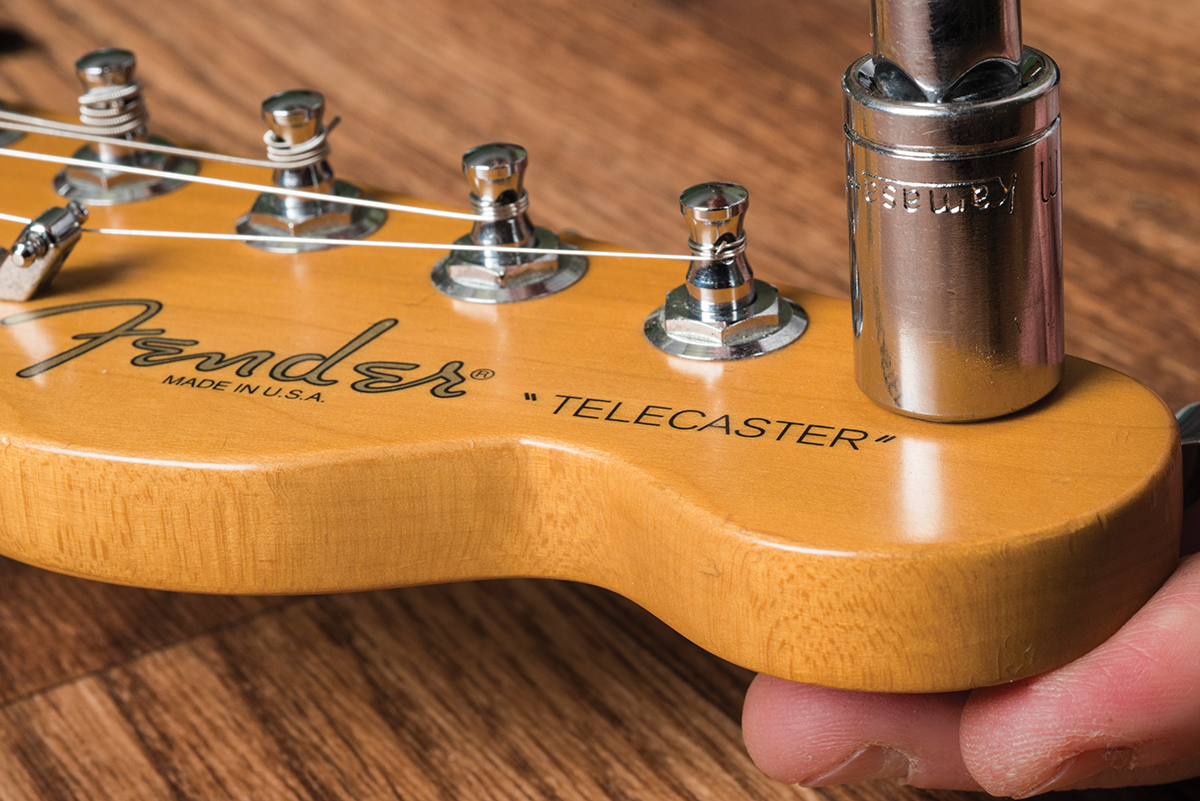
The safest way to tighten the bushing is to use the correct-sized socket
You can use pliers, but if you damage the tuner or slip off and scratch your headstock, don’t say we didn’t warn you.
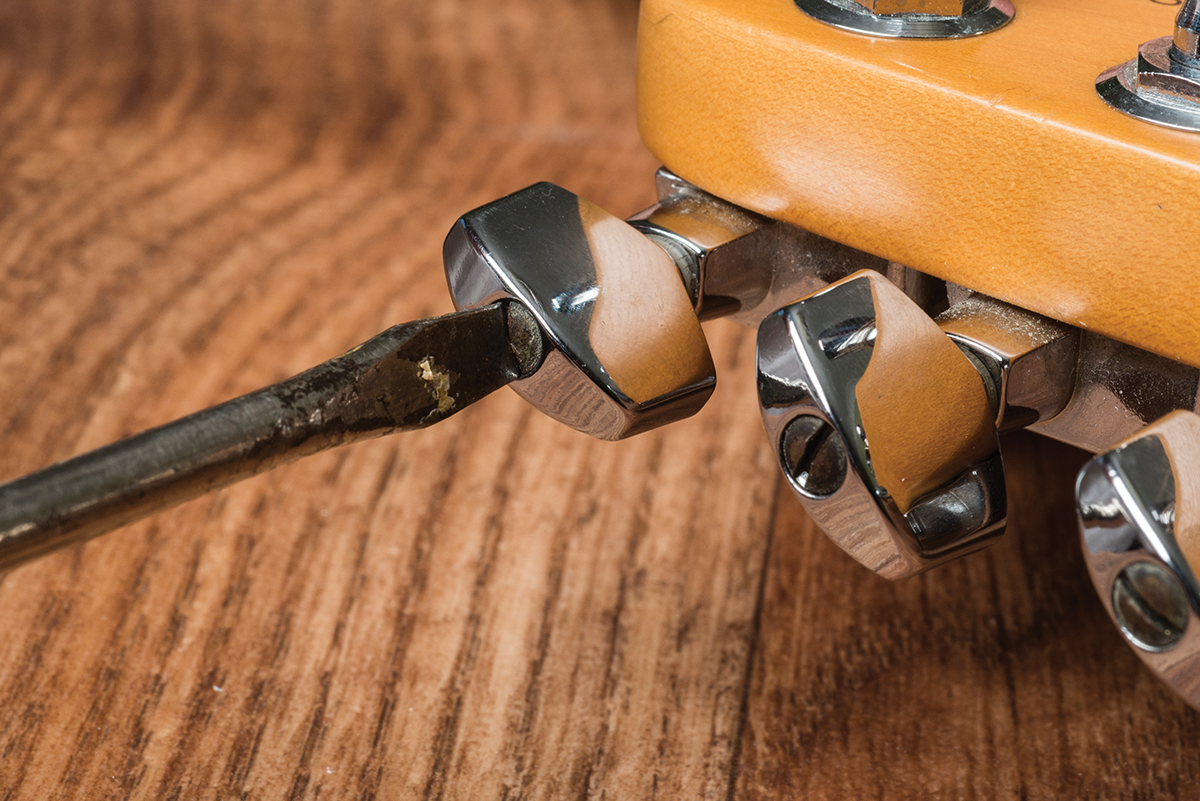
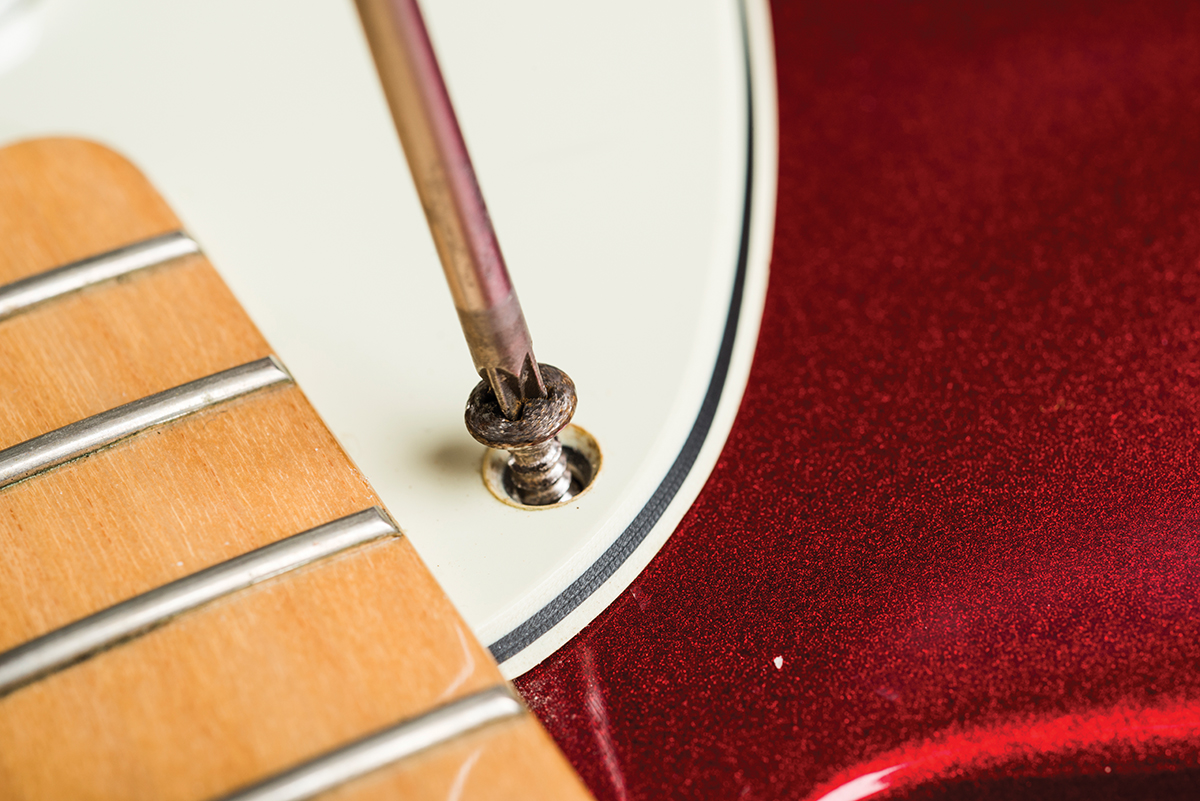
Use a screwdriver to tighten the button screw. This will improve the feel of the tuner but if you over-tighten, the tuner will be too stiff to move
Next, find a screwdriver that fits tightly into the screw that holds the tuner button onto the shaft. Hold the button with one hand to prevent it from turning and tighten the screw. Remember, it doesn’t have to be tightened fully – just enough to eliminate the sloppy feel. Work your way along all the button screws and you’re done.
16. Straightening a skewed bolt-on neck
These days, guitar builders pride themselves on ultra-tight neck joints, but back in the day, neck pockets tended to be a little more ‘roomy’. That’s why all those old Fenders sounded a bit pants… or maybe not.
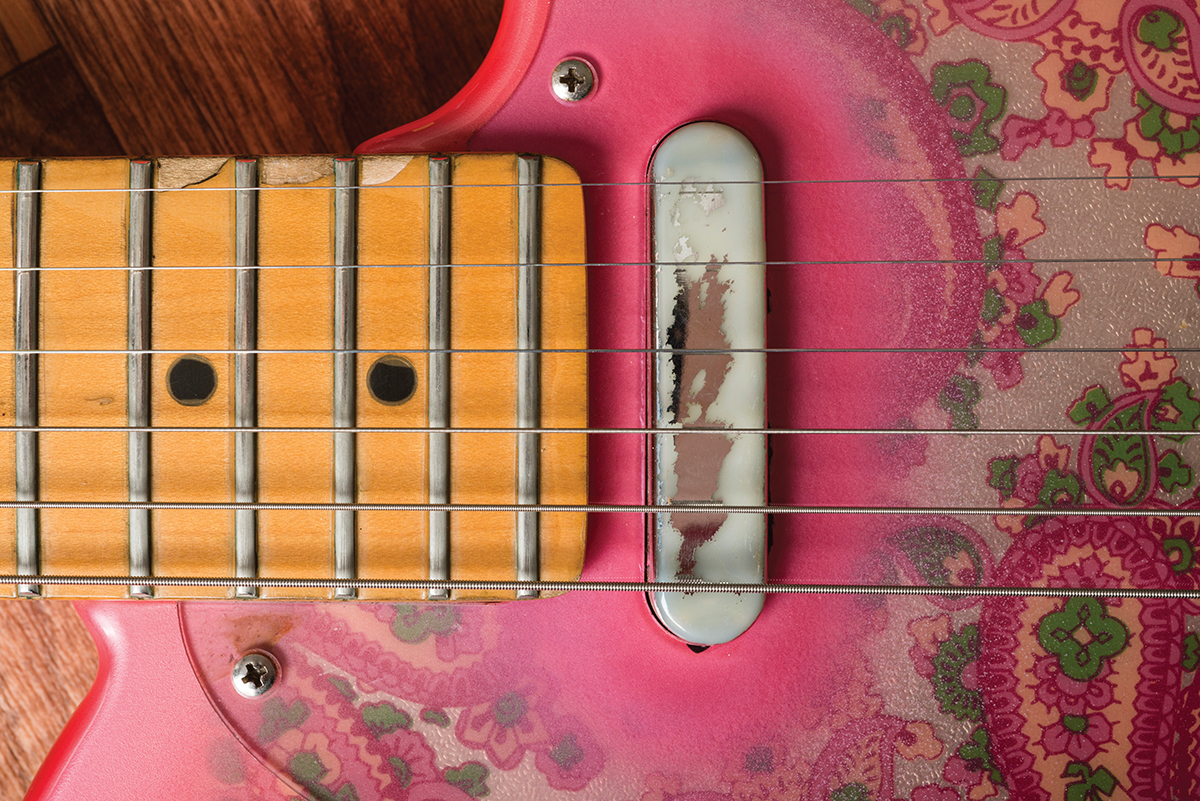
The skewed neck is quite obvious on this Paisley Telecaster – the low E is too close to the edge of the fingerboard
Anyway, what can’t be denied is that tight neck pockets make it harder for bolt-on necks to move about. Even with the neck screws fully tightened, it’s all too easy for a neck to shift in its pocket, and that can bring either of the E strings perilously close to the edges of the ’board. In addition to making your guitar play out of tune, over-enthusiastic finger vibrato can prove disastrous.
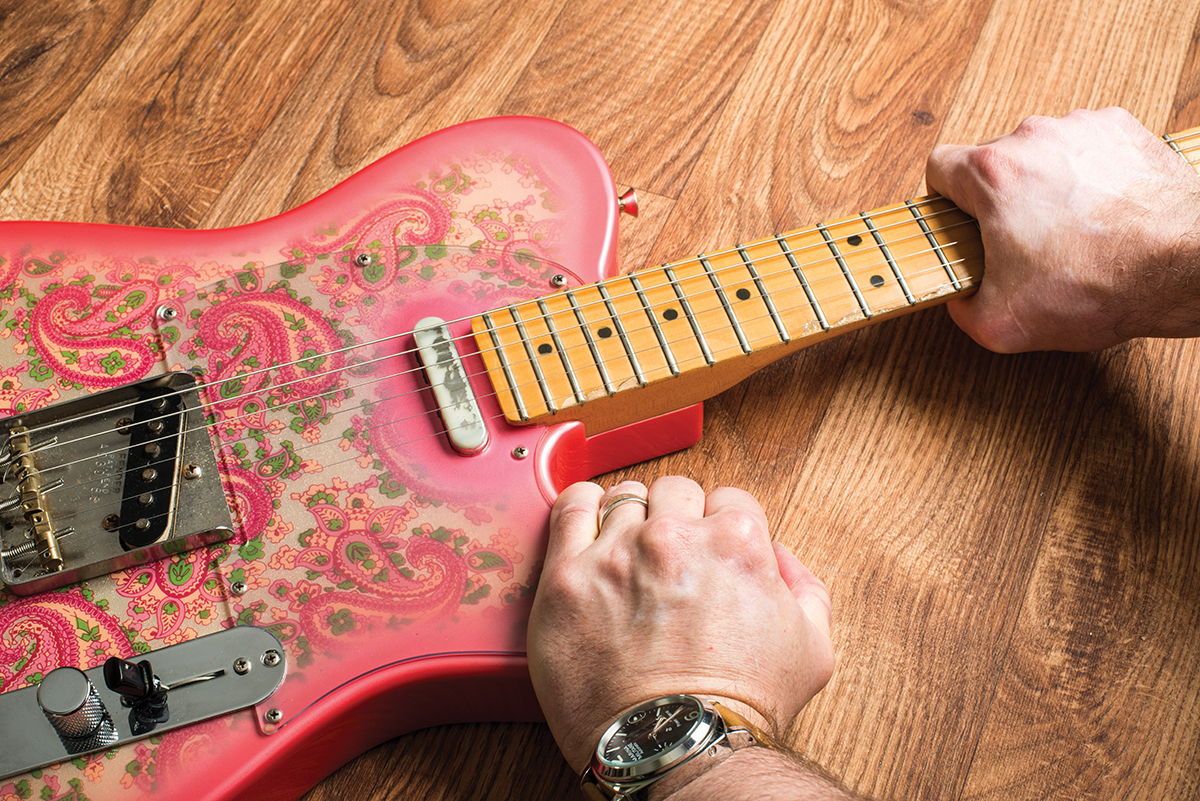
After slackening the strings and the neck screws, grasp the body and the neck to pull the neck straight
Take a look at the end of your neck square-on. The distances between the edges of the fingerboard and the two E strings should be identical. If the gaps differ, your neck probably needs some chiropractic treatment.
Slacken off the strings, but make sure there’s just enough tension to hold them taught. Unscrew each of the neckplate screws by a whole turn, then grasp the body while you pull the neck straight with your other hand.

Tighten-up the neck screws then retune the guitar. The gaps between the fingerboard edges and the E strings are now identical
Check the neck visually once again, and you can tap the sides of the neck with the palm of your hand to make small adjustments. Once you’re satisfied the neck is square to the body, re-tighten all four neck screws, tune up and you should be good to go.