Related Tags
How to get better at guitar using the CAGED system (Part 1)
In the first of a new series, we examine how this simple and common system for learning the guitar contains hidden depths that could be the key to unlocking your potential as a musician.

Image: visualspace / Getty
If you’ve learned guitar in any formal way, you’ve probably encountered the CAGED system – a means to visualising a fretboard using five basic open chord shapes (C, A, G, D, E) that’s often taught to beginner guitarists to help them navigate their way around without getting too heavily into theory.
Now, the CAGED system is a source of some debate in the guitar community – you won’t have to look far on forums or YouTube to find people criticising CAGED as being inferior to other means of learning, often in contrast to the three-note-per-string system. You may have feelings one way or another, but over the last five years I’ve really come to realise the potential of the CAGED system, both as a player and a teacher, as I think it has the potential to connect chords, scales and arpeggios in a better way than 3NPS.
Two show you what I mean, I’ve planned this series of lessons, in which I’ll demonstrate and discuss some of my favourite ways of using the CAGED system to expand your knowledge of how the guitar fretboard is connected. Expect to see topics such as: triads, pentatonic scales, intervals, 7th chords and extended chords, arpeggios, modes of the major scale, melodic and harmonic minor scales and the diminished scale. Let’s dig in with the first part!
CAGED basics
Let’s start with the basics. If you’re reading this chances are you already know how to play the open C, A, G, E and D chords on a six string guitar in standard tuning. If not, make sure to learn these shapes before you move on.
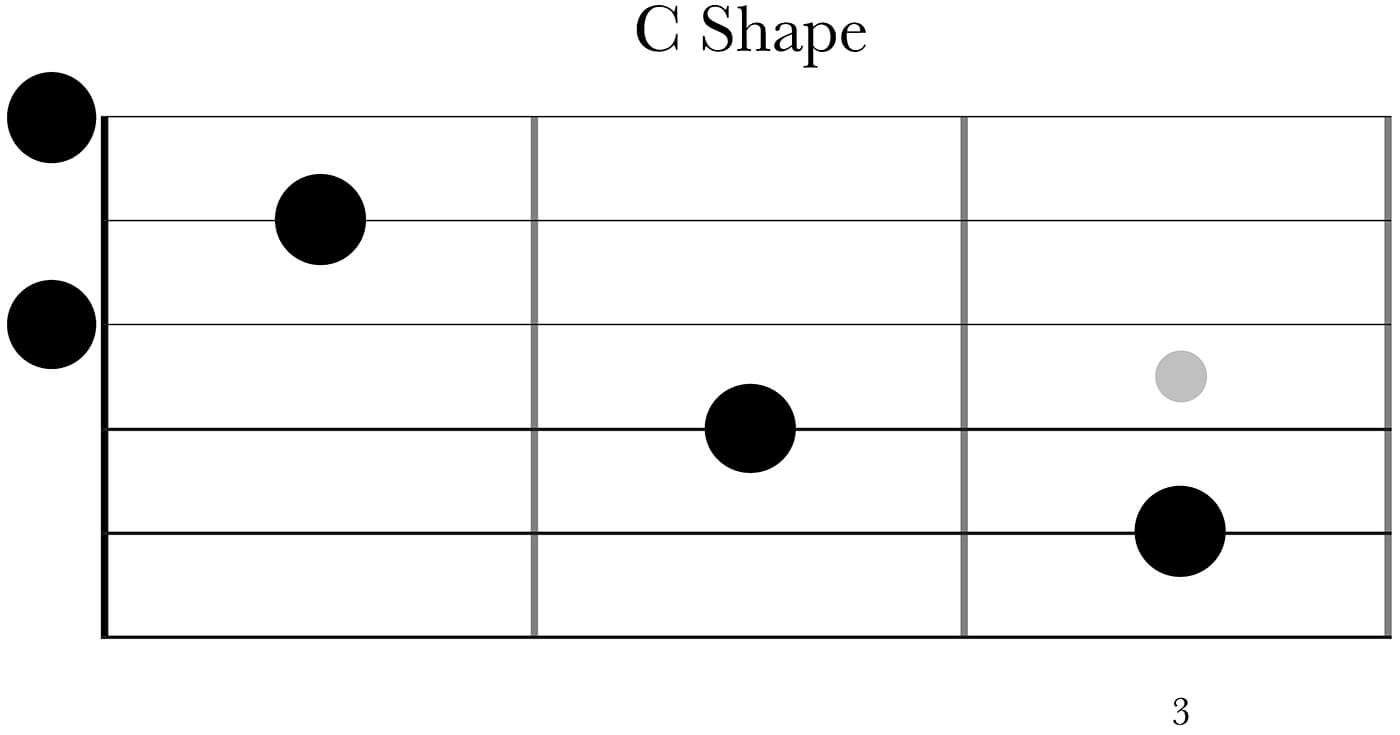
All of these chords are major triads, that means a three-note with a major quality to it. “Three notes? But there are more than three notes in these chords!” you may cry. Well, let’s look at that first shape, based on our open C chord. In order, from the A string up to the high E string, these notes are called C, E, G, C, E. The C and E notes are doubled up so there’s actually only three notes right?
In the case of this C triad the C note is our root, the E is our major third and the G is our fifth. This is built off of the C major scale: C, D, E, F, G, A, B, C. A major triad is always built off of the first, third and fifth degree of a major scale. We’ll dive deeper into scales and intervals in the near future, but for now it’s important that you understand how you construct a major triad like this.
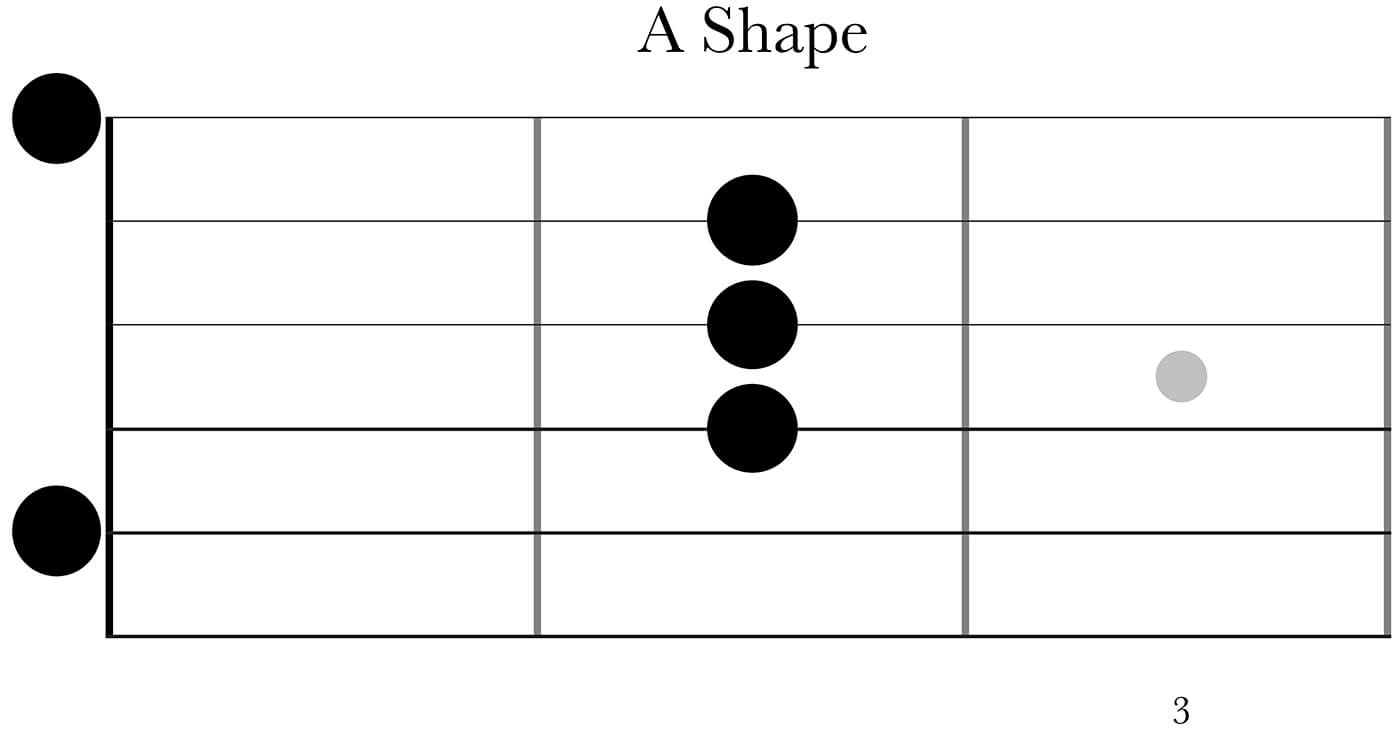
For our next chord shape, A, the order of the notes come in a slightly different way. In order, from the A string up to the high E string, these notes are called A, E, A, C♯, E. This means it’s the root (A) and the fifth (E) that are doubled up (compared to the C shape where it’s the root and third) and the major third is played only in the higher octave instead of in both octaves. To my ears it gives the A shape a bit more of an open sound compared to the C shape, which can get a bit muddy when you play the low root note and third so close to each other.
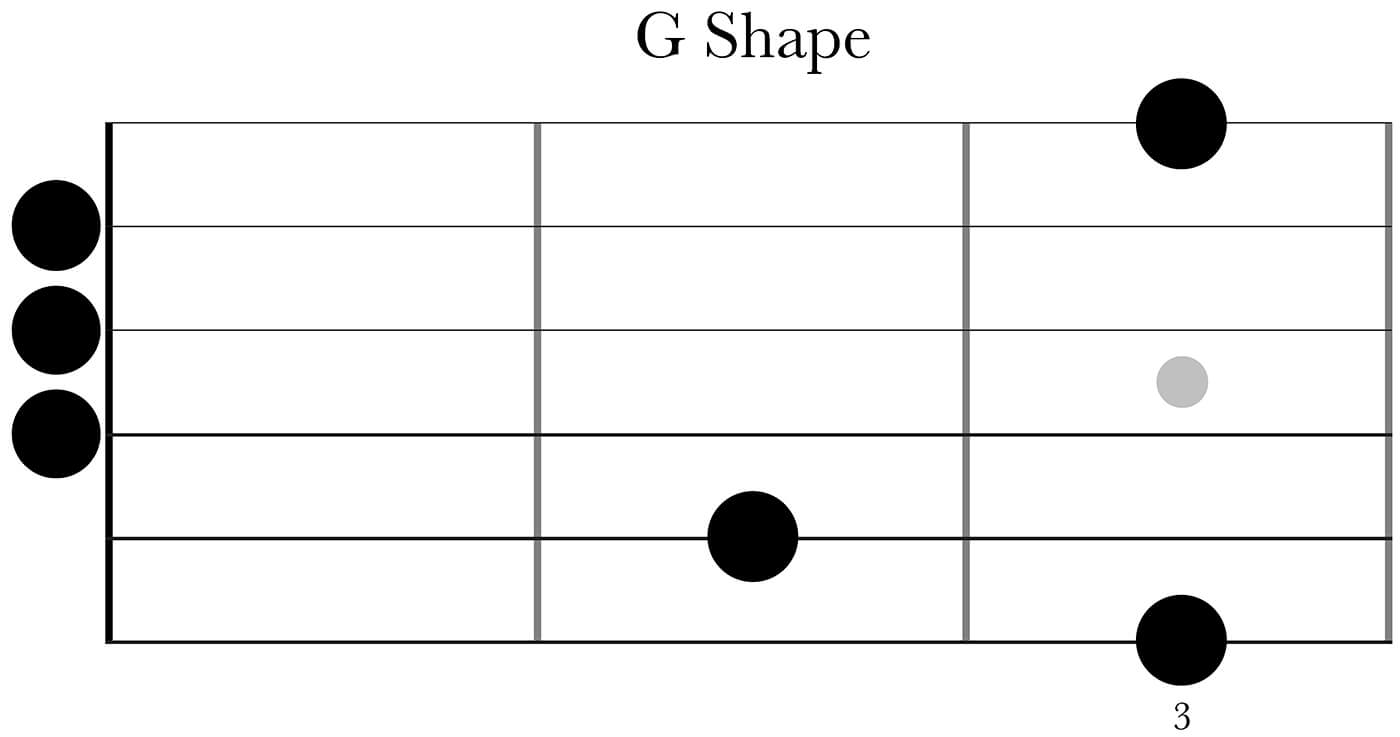
Moving on to the G shape the notes come in the following order: G, B, D, G, B, G. This is the same sequence of intervals as in the C shape, but with an added root note on top. Knowing that the C and G shapes have more similarities to each other than to the A shape can help you in many ways when learning, memorizing and visualizing chords, scales, arpeggios, intervals and more.
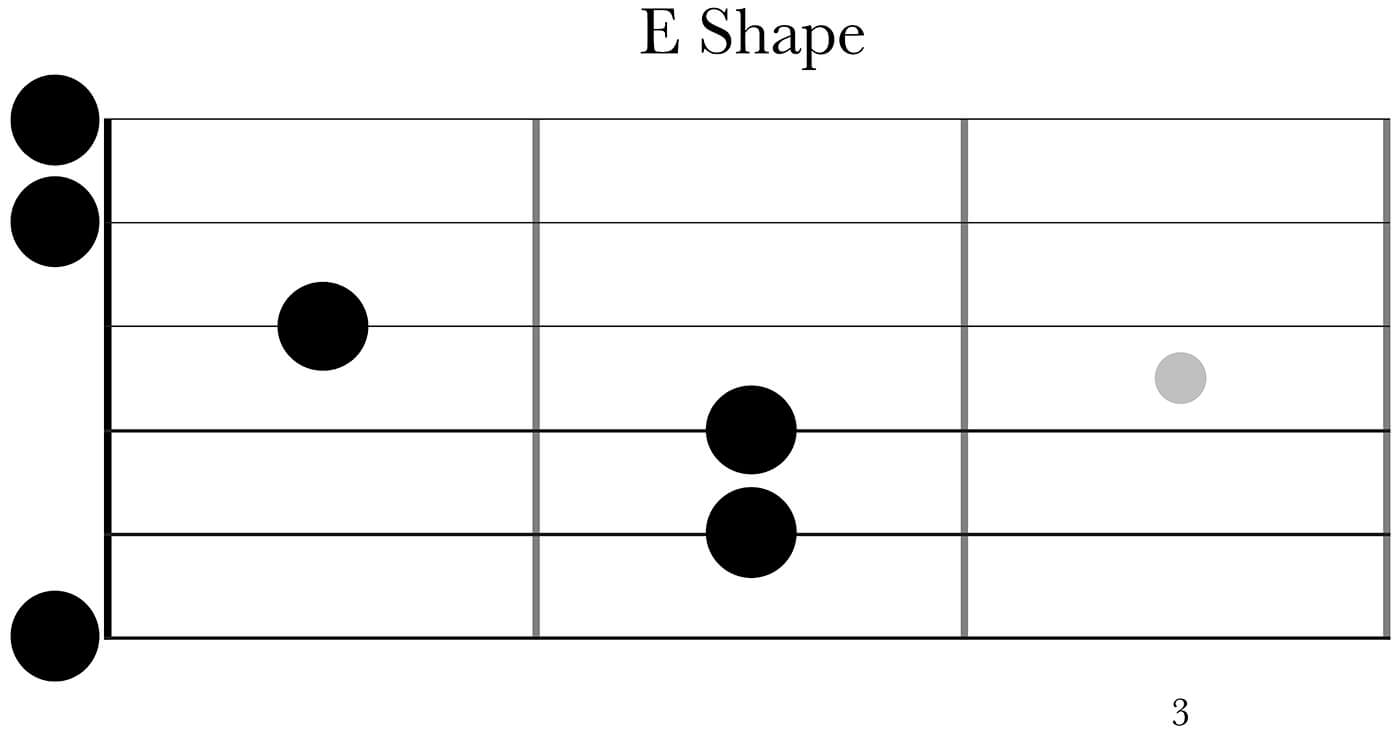
Our next shape, E, has the following notes: E, B, E, G♯, B, E. This is the same sequence of intervals as in the A shape, but with an added root note on top. This means the A and E shapes are connected to each other in the same ways as the C and G shape.
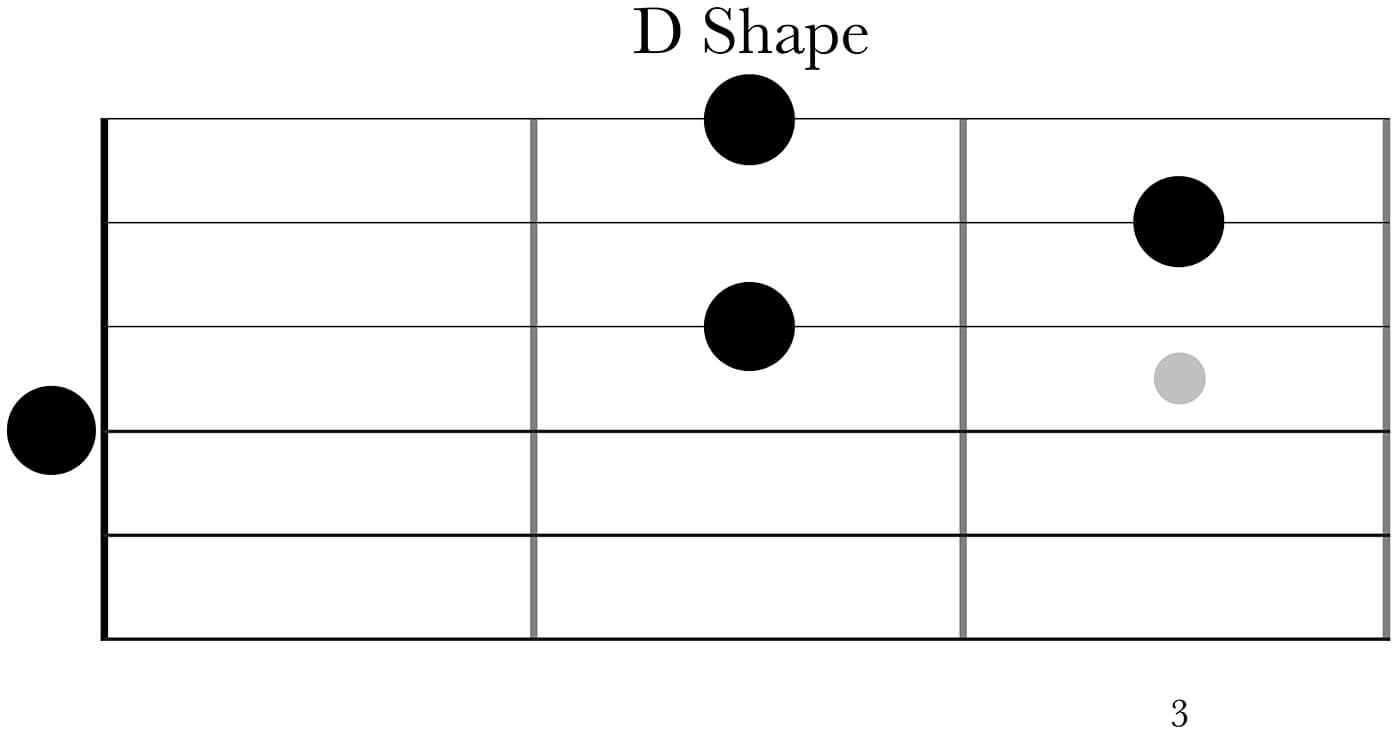
The final shape, D, consists of the following notes: D, A, D, F♯. This is the only shape with only 4 strings but is similar to the A and E shapes in that it skips the third in the lower octave and adds it above the higher root note instead.
To summarize this so far, and to learn how to think of these shapes based on the intervals they’re built from rather than note names, check this out:
C shape: R M3 5 R M3
A shape: R 5 R M3 5
G shape: R M3 5 R M3 R
E shape: R 5 R M3 5 R
D shape: R 5 R M3
R=Root, M3=Major third, 5=Fifth
Join the dots
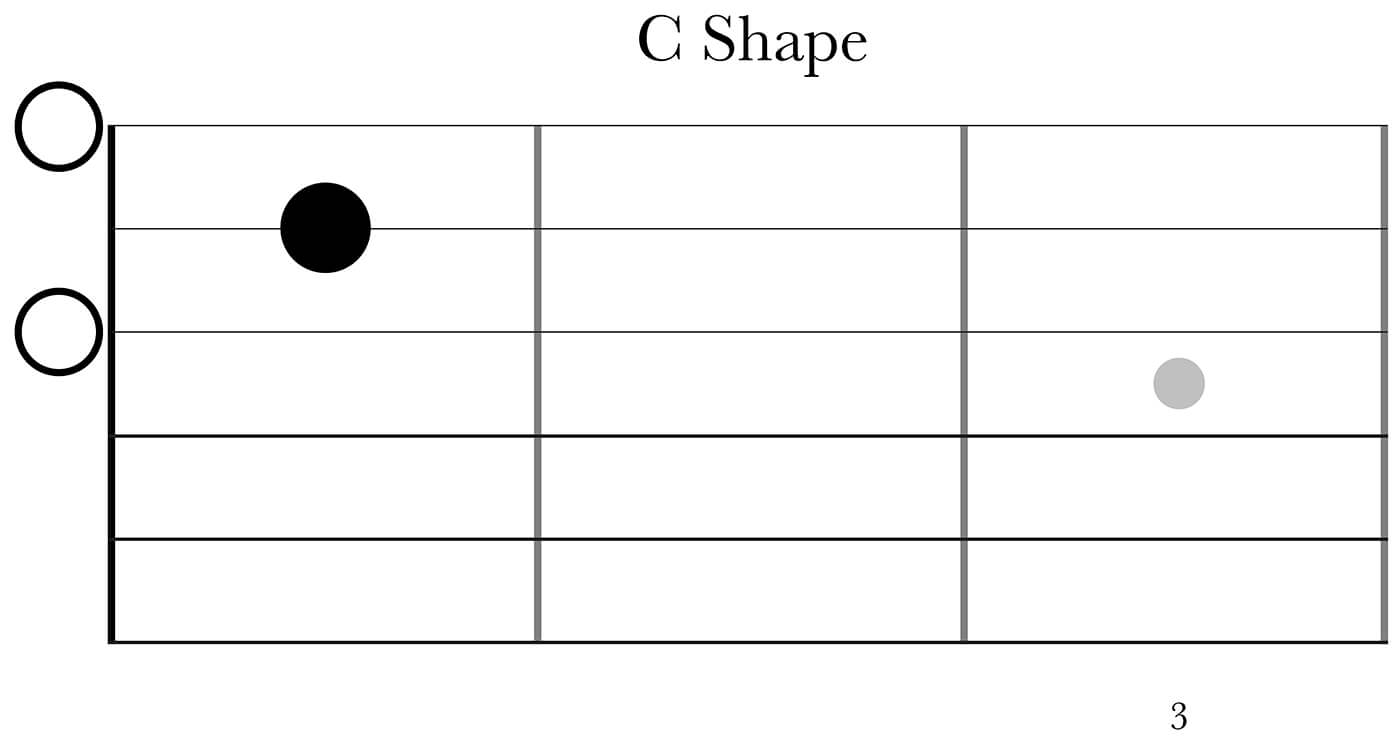
Now it’s time to look at how we can connect these shapes across the fretboard. Let’s start with the C shape and divide this into the bass note and the upper structure of the chord like this. Bass note is solid, upper structure is hollow.

Then we keep the bass note (but change from our ring finger to our index finger) and finger an A shape from there. The bass note stays while the upper structure moves. The solid red line shows the note that stays and the dotted red lines shows the notes that moves.

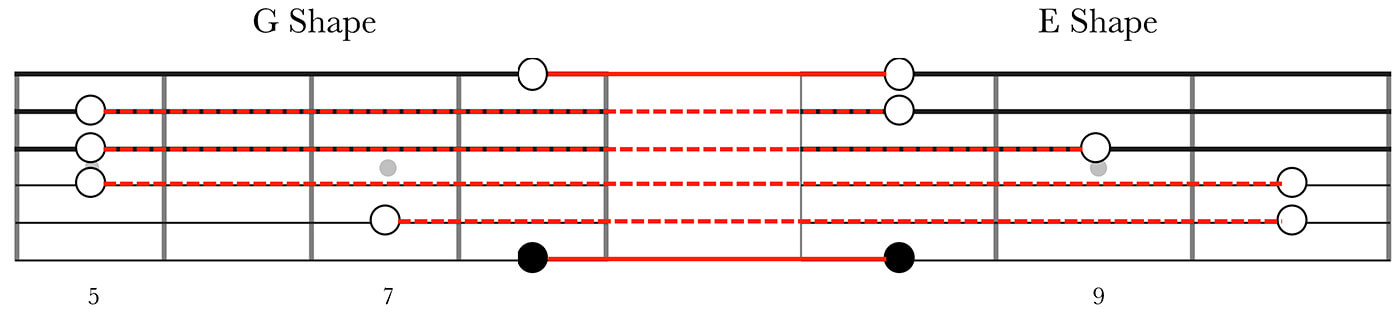
Now, let’s keep (most of) the upper structure of the A shape but barre it with our index finger on the D, G and B string. Add the bass note on the low E string and we have the G shape . It’ll look even more like the open G shape if you add the A and high E string as well, but I honestly rarely play it like this. No matter what, it’s still a G shape.

Aiming for the next shape, we’ll keep our bass note on the low E string (again, change position so you’re using your index finger) and play an E shaped barre chord from there.
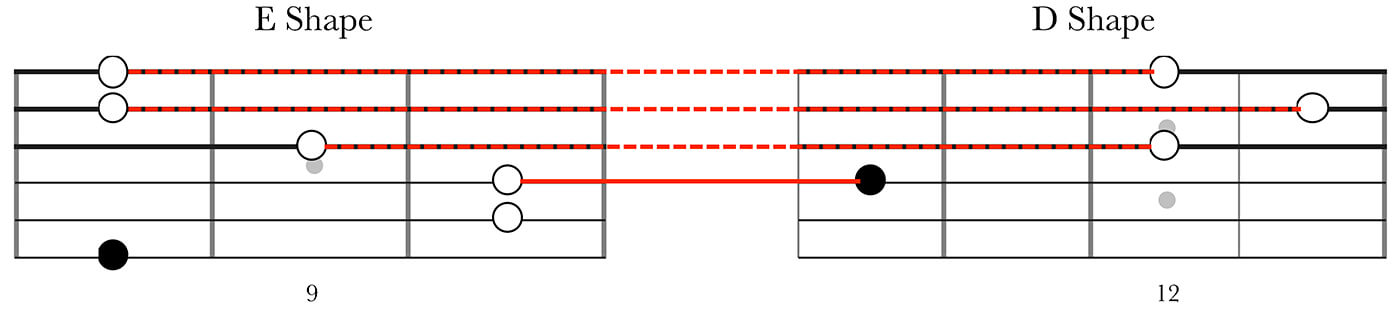
Transitioning from our E to D shape we keep the root note on the D string (the octave of the bass note in the E shape) and then move the upper structure into a D shape.
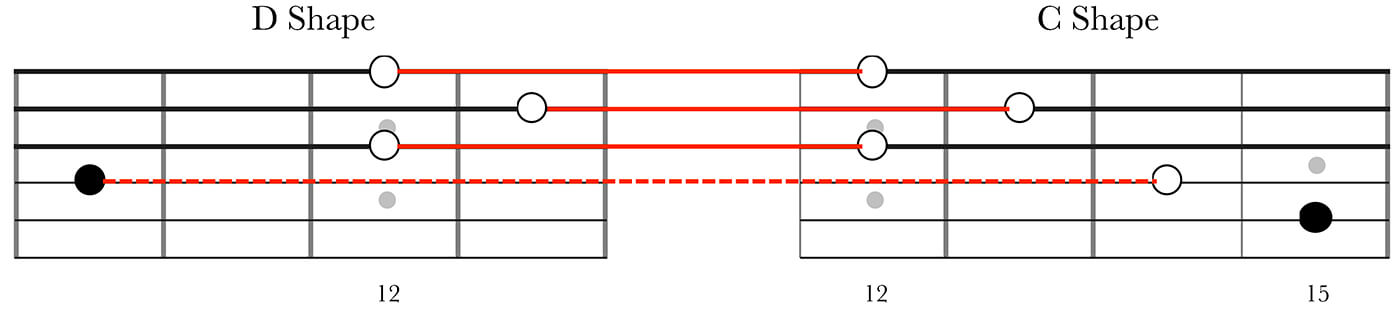
Last, but not least, to get back to our C shape we keep the upper structure of the D shape and move the bass note to the A string (add the D string for the full C shape).
Minor threat
Of course, music is about much more than major chords, but armed with what we now know about the structure of these chords, we should be able to identify the major third in each one and turn them into minor triads. To do this, we just need to flatten the major thirds to minor thirds.
As you’re probably already aware of, it’s very common to play open Am, Em and Dm minor chords whereas it’s way less common to play open Cm and Gm chords. So, flattening the third in those barred C and G shapes might feel a bit awkward and tricky, but that’s also a great time to realize you don’t have to play all five or six strings – you can still visualize a three- or four-string voicing as being within the C and G shapes.
To be honest, I feel like it can get quite muddy to play the low root note and minor third on two wound strings (as in the C and G shapes) since they’re so close in pitch – the intonation can be tricky as well. Knowing these shapes, however, come in very handy in a later lesson when we’re gonna discuss how to use the CAGED system when playing arpeggios.
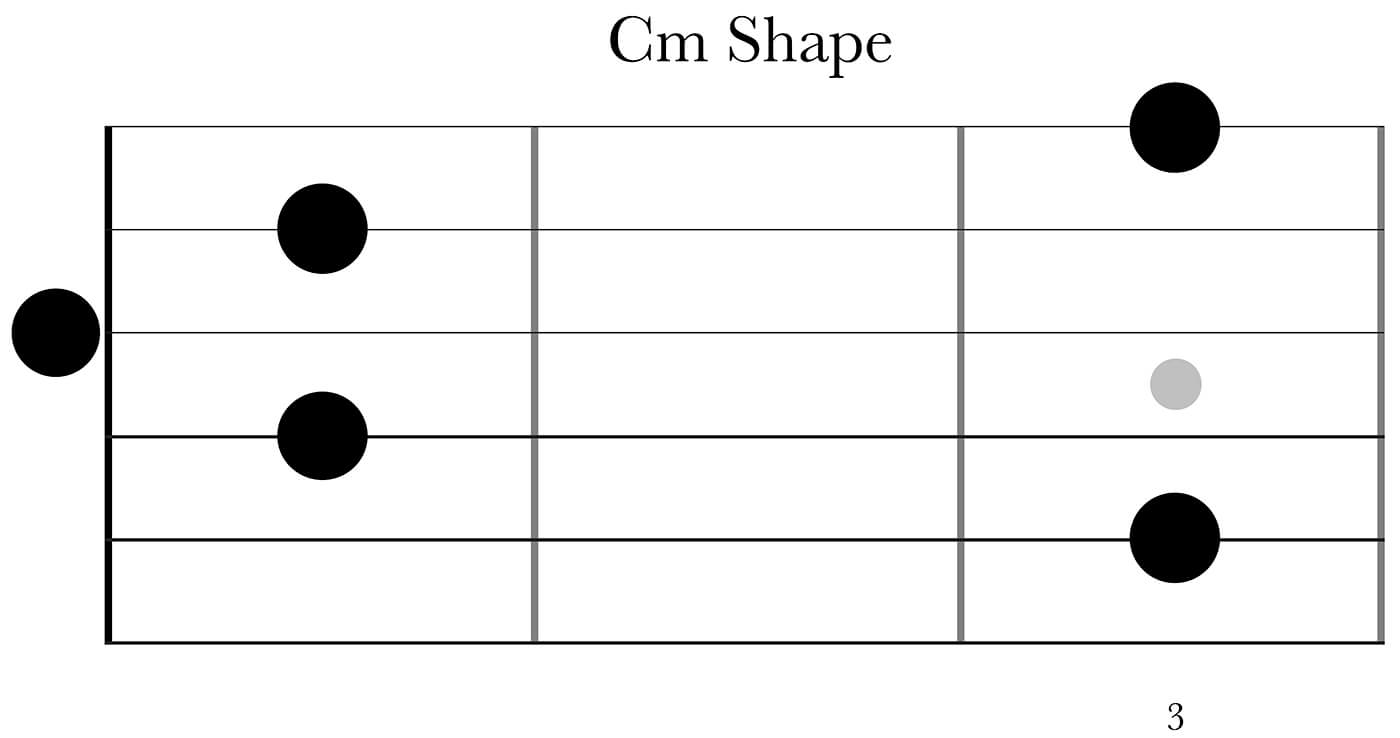
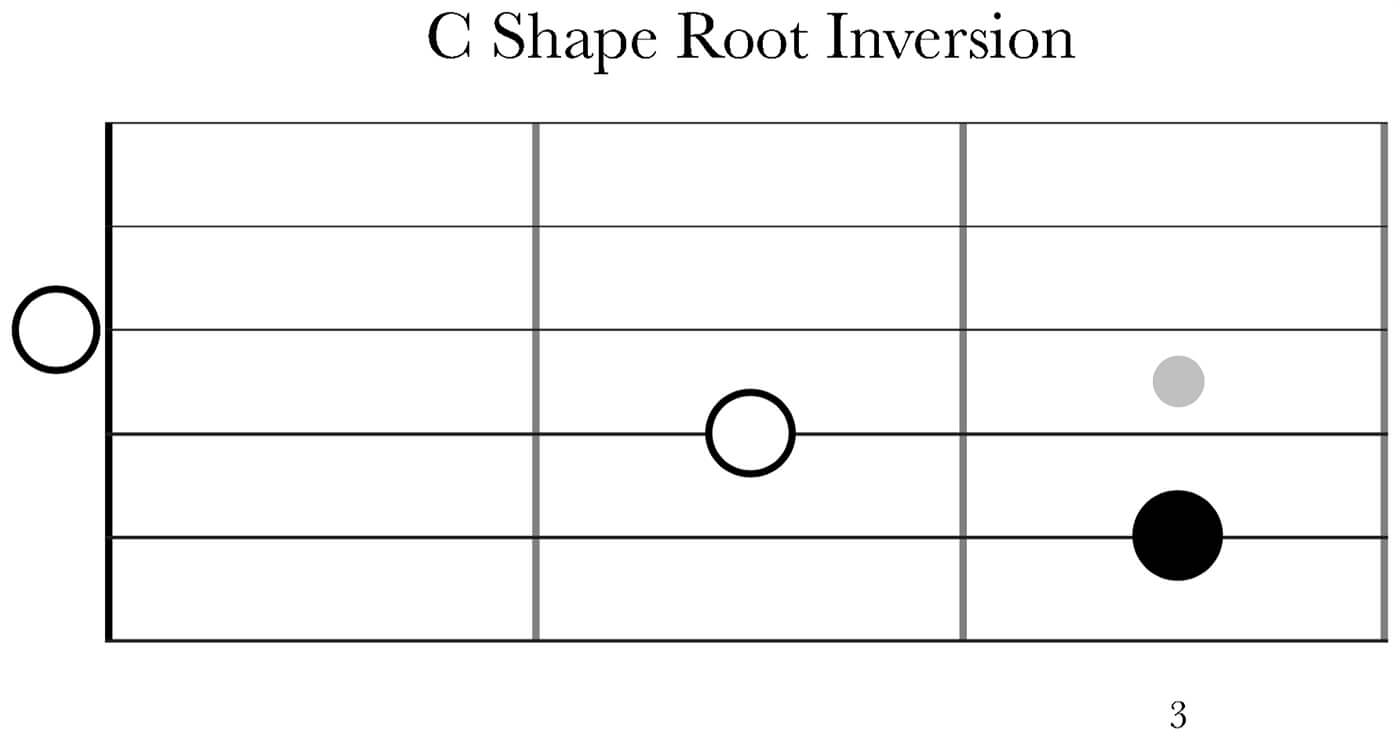
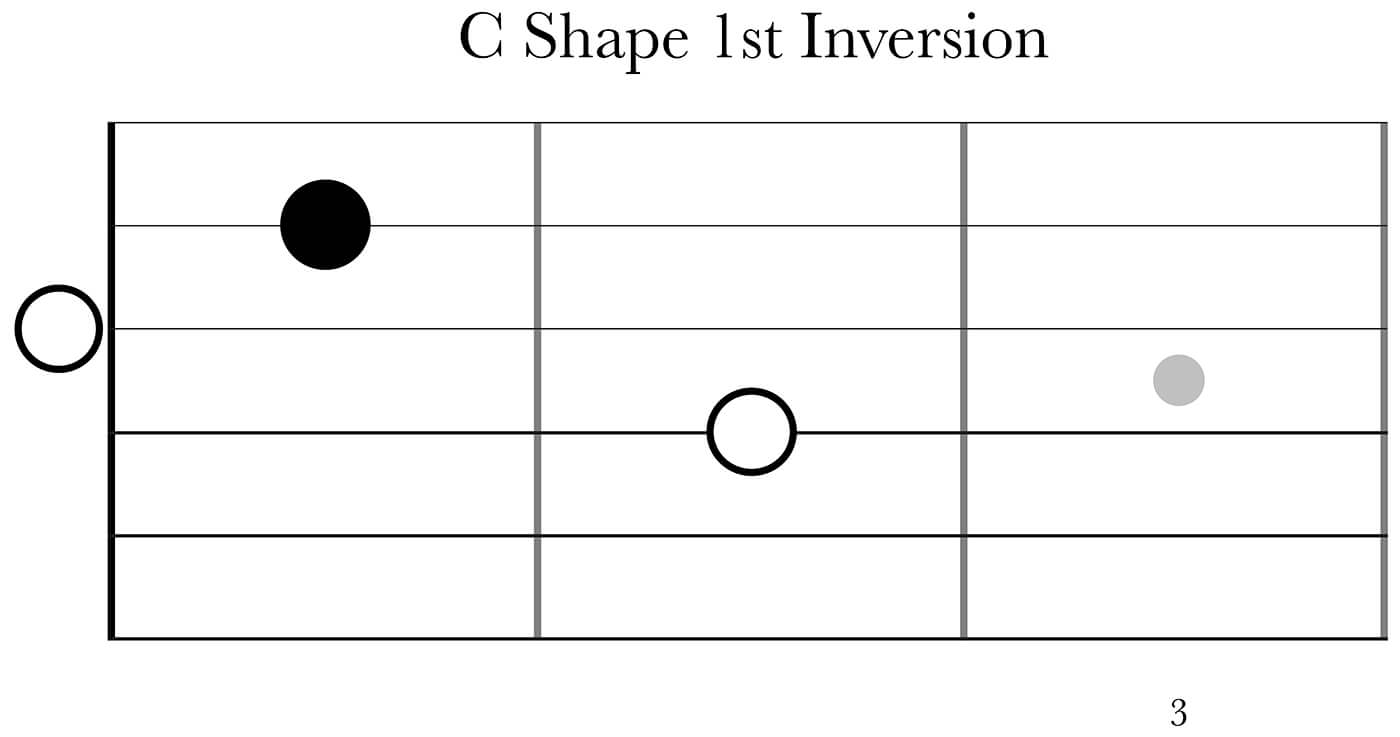
In my opinion, the biggest benefit of the CAGED system is when you learn to see different ‘layers’ of harmonic information within these shapes or ‘boxes’. Now let’s avoid a couple of strings and find a few really usable three-string-voicings within the C shape. These are all on adjacent string sets, spans less than an octave in range and are therefore called closed voiced triads.
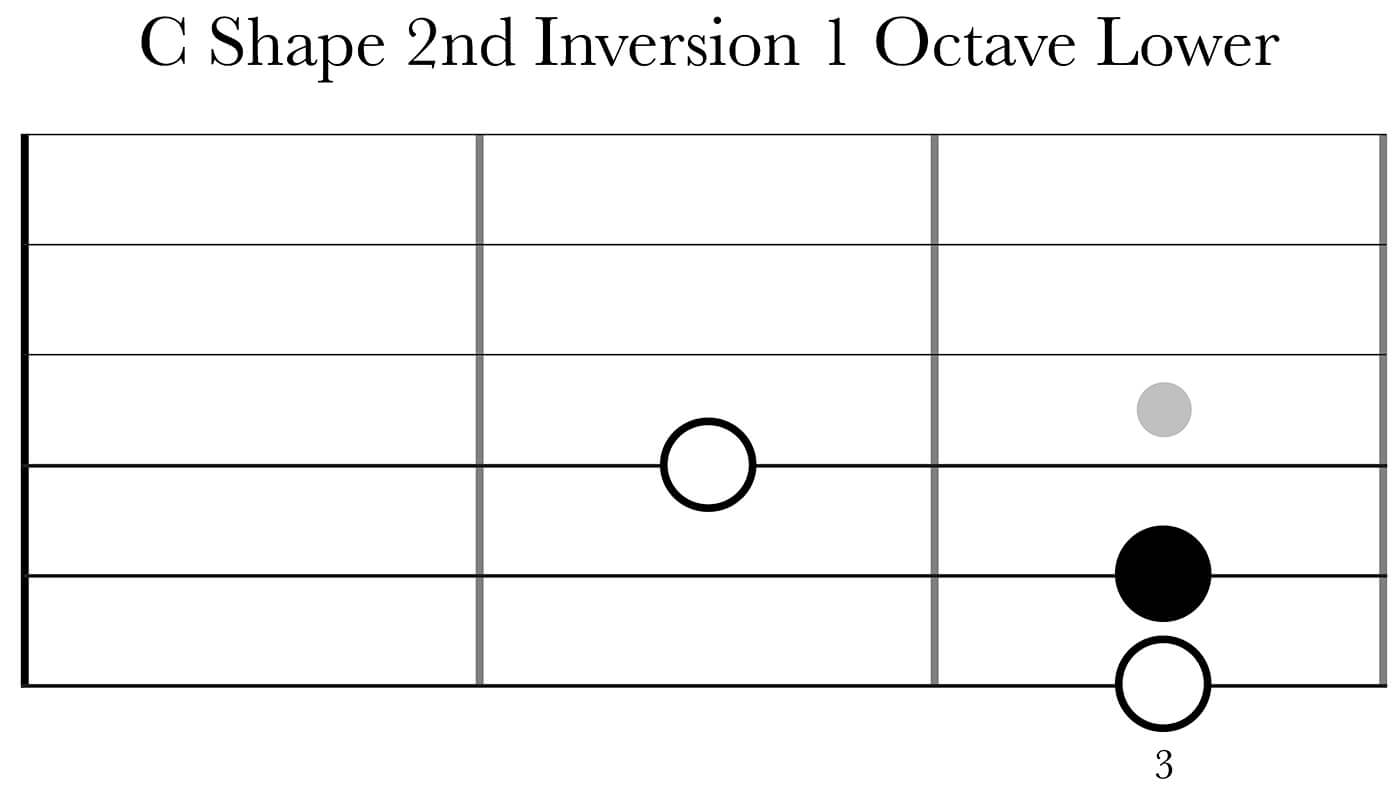
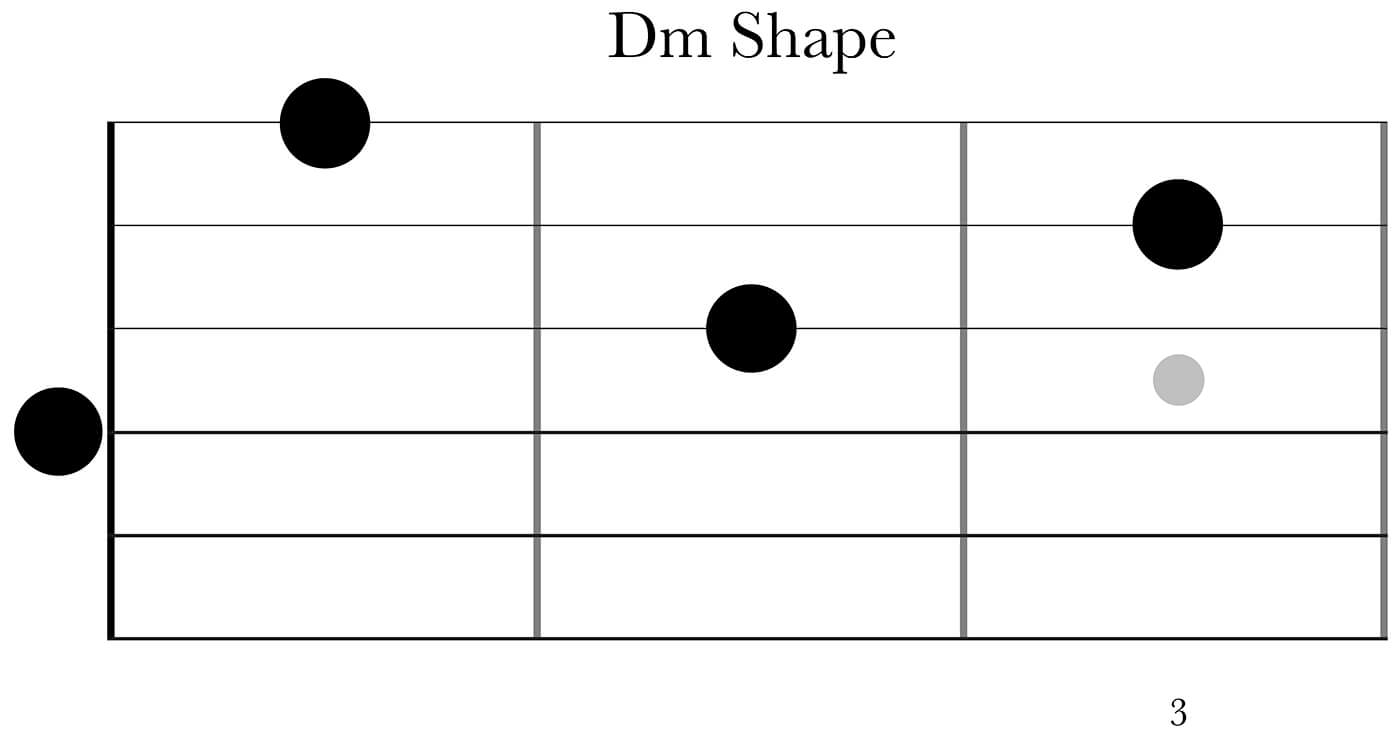
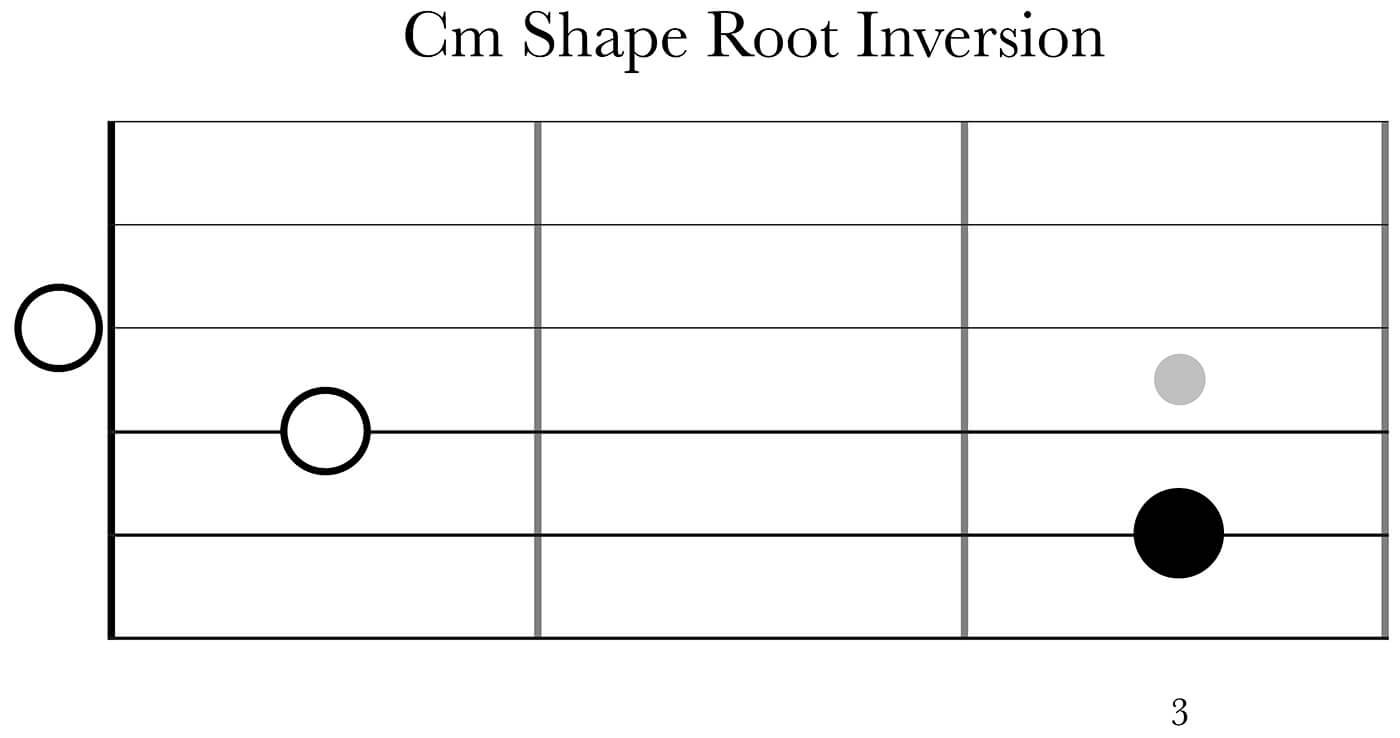
Let’s try the same with the C minor shape as well, since it’s one of the more odd ones, here’s your starting point:
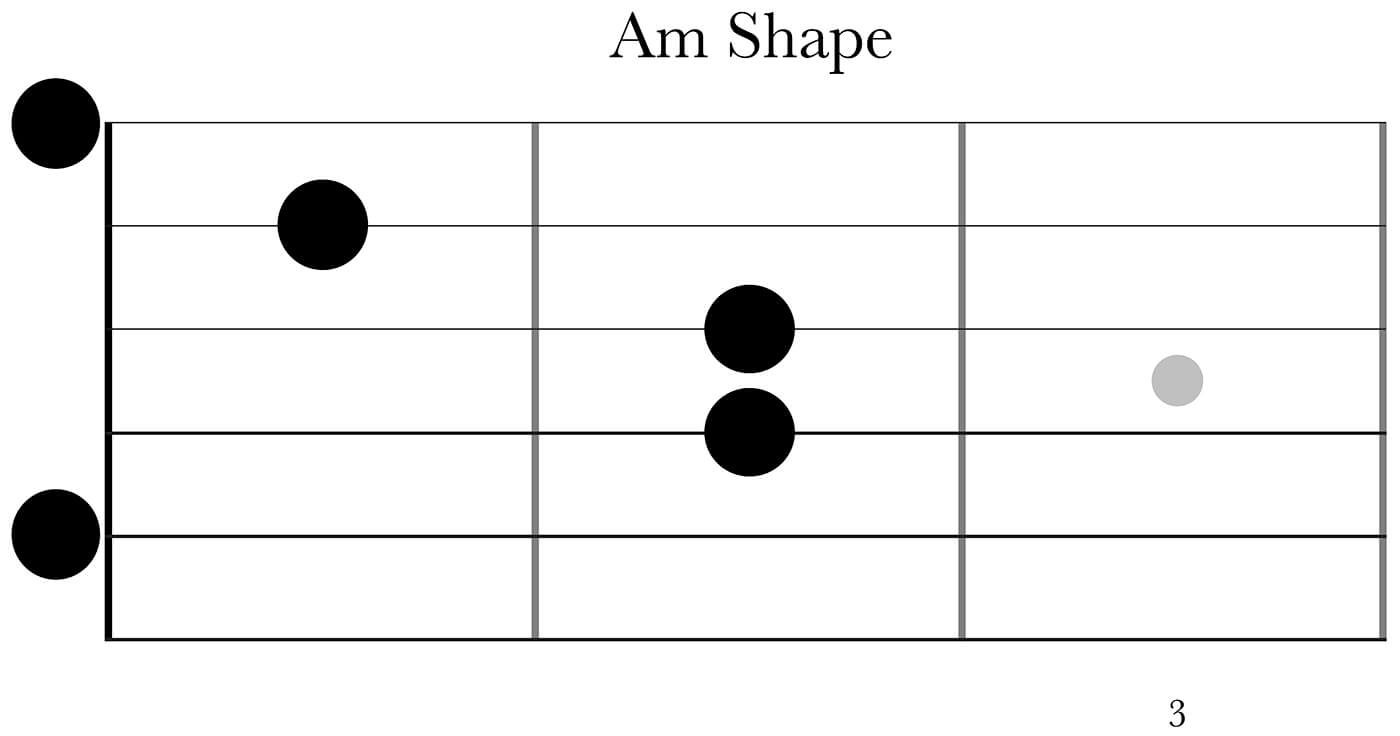
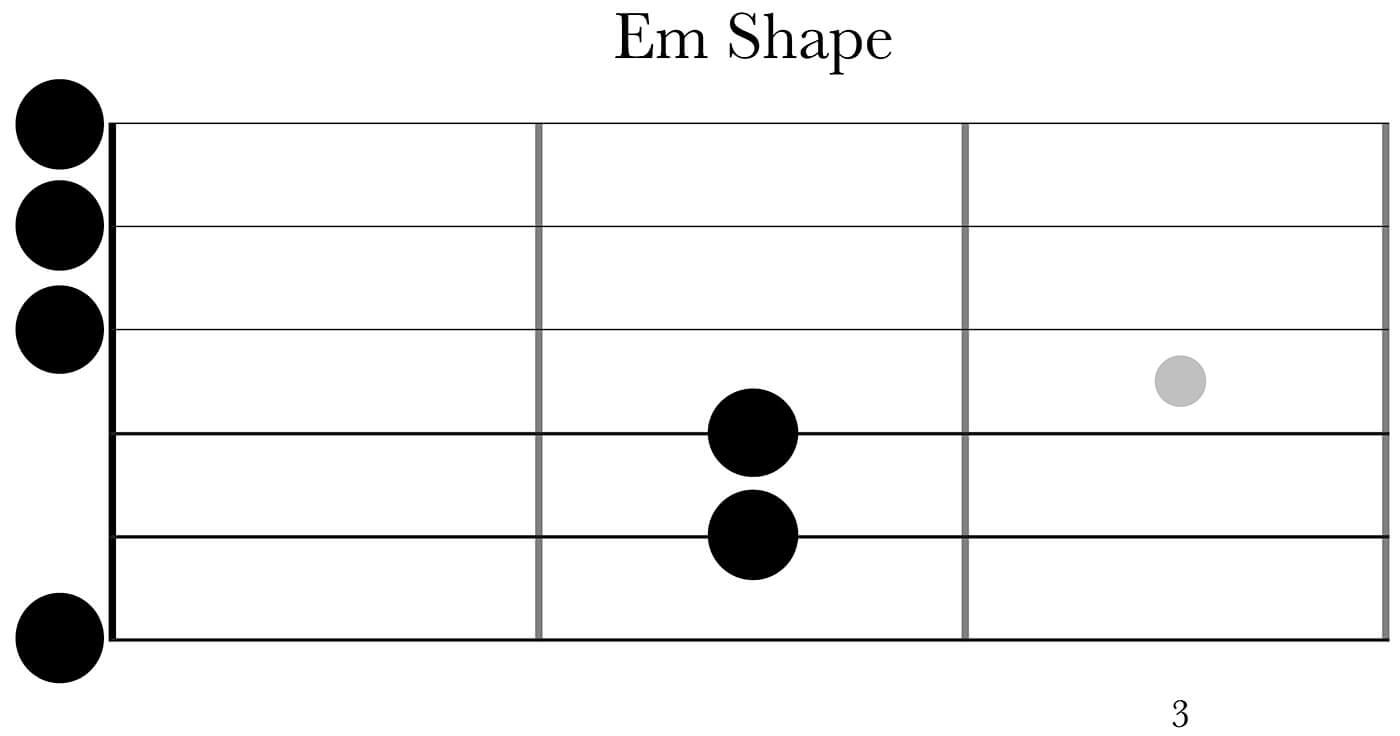
To get the most out of this, you have to learn some of these things for yourself, so now go ahead and do the same with the A, G, E and D shape both in major and minor.
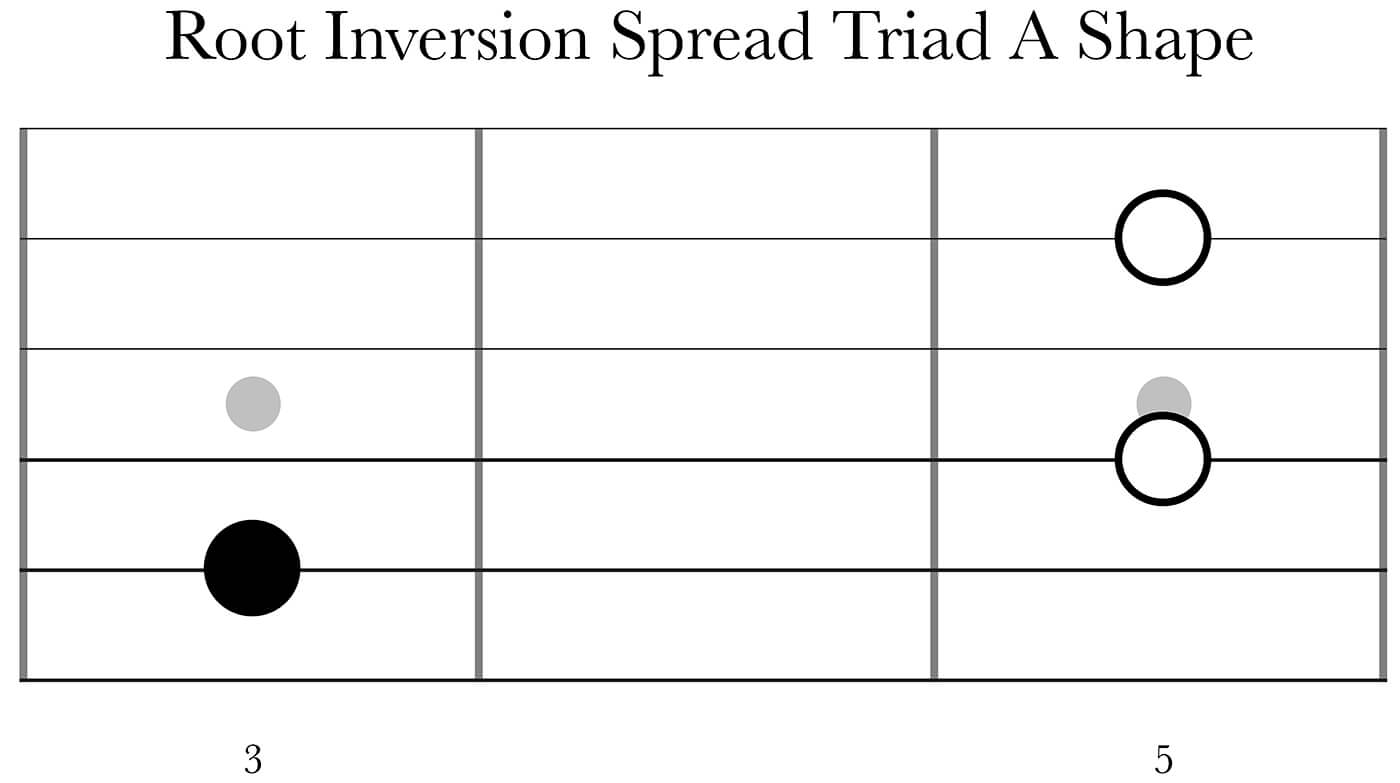
Instead of playing the triad within an octave, we can spread it out by taking the middle note and move it an octave up or down. This is called open/spread voiced triads and Eric Johnson is a guitarist well known for his use of these sounds. Let’s try this within the A shape.
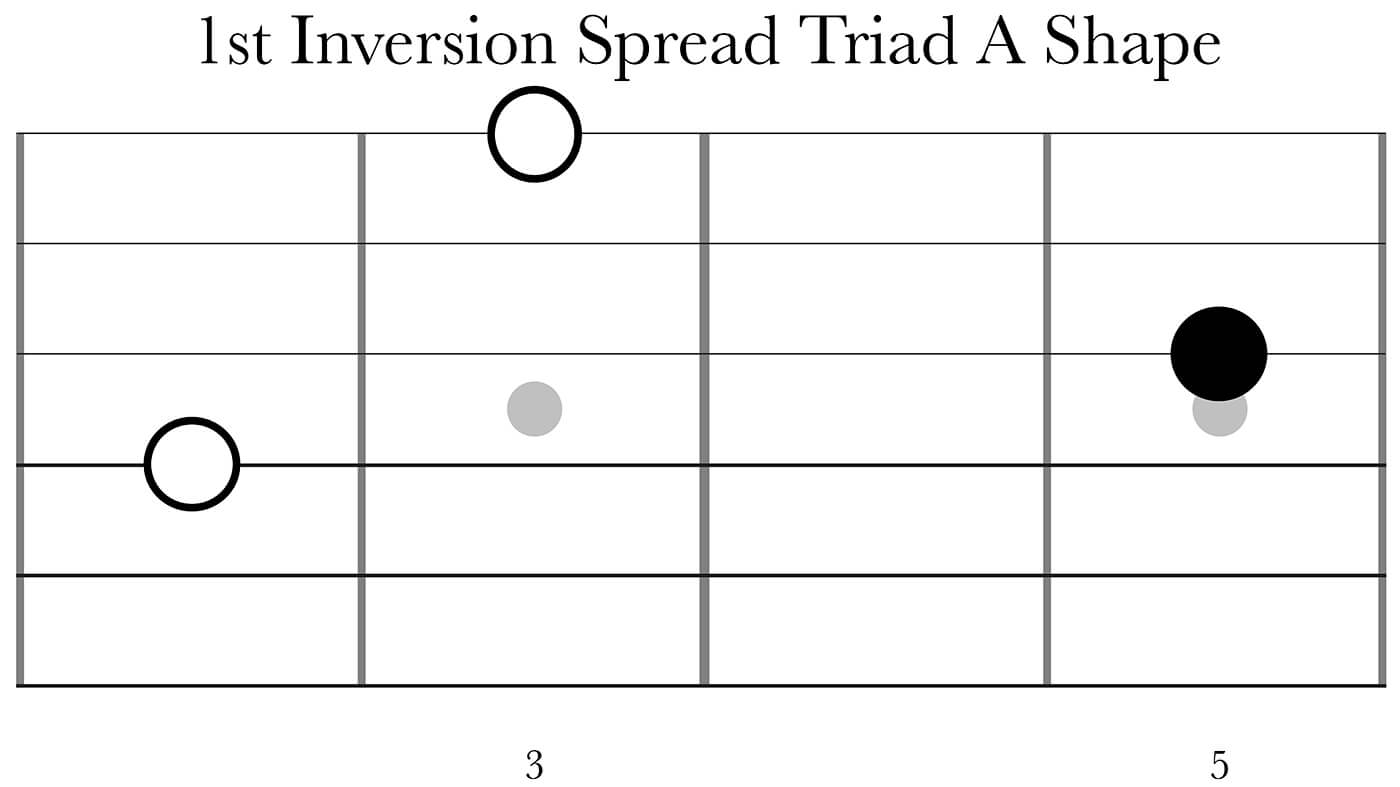

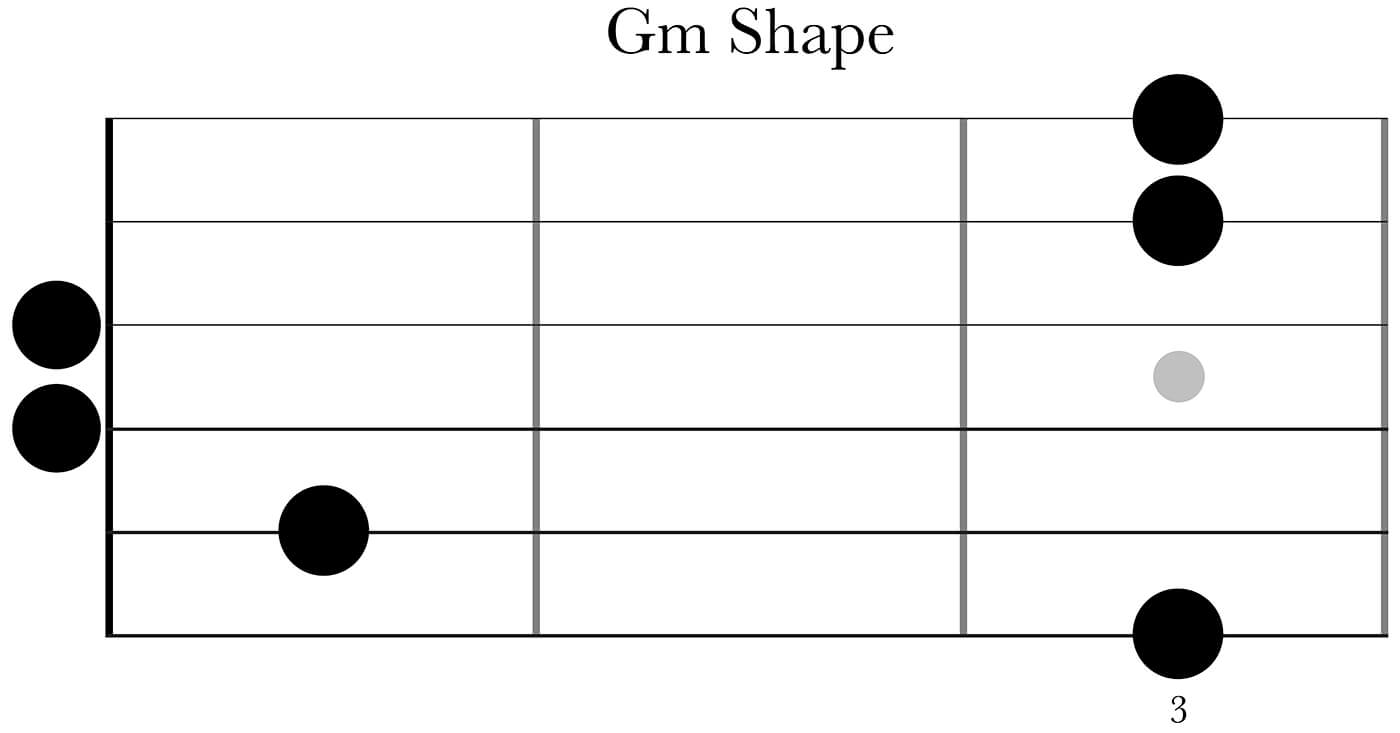
Let’s also apply it for the G shape but in minor.
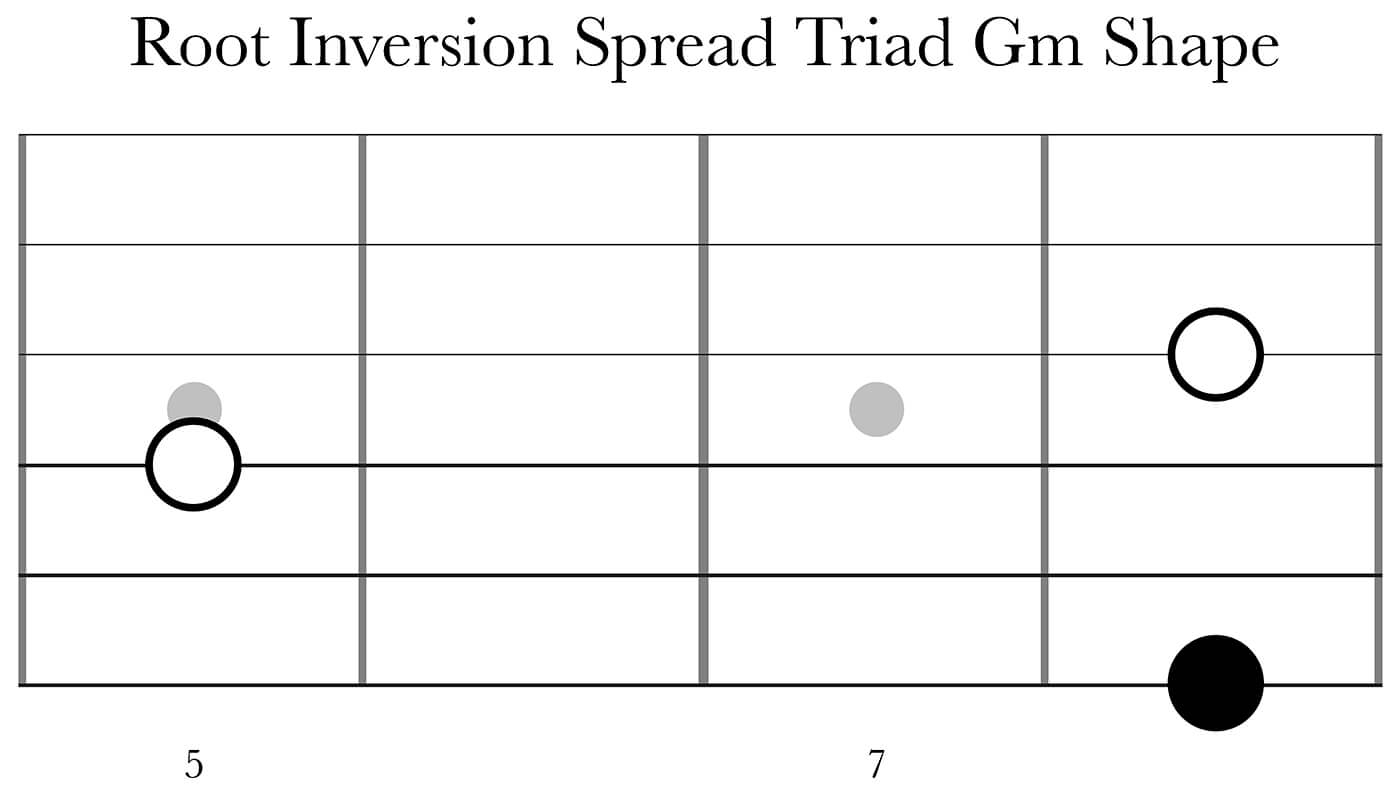
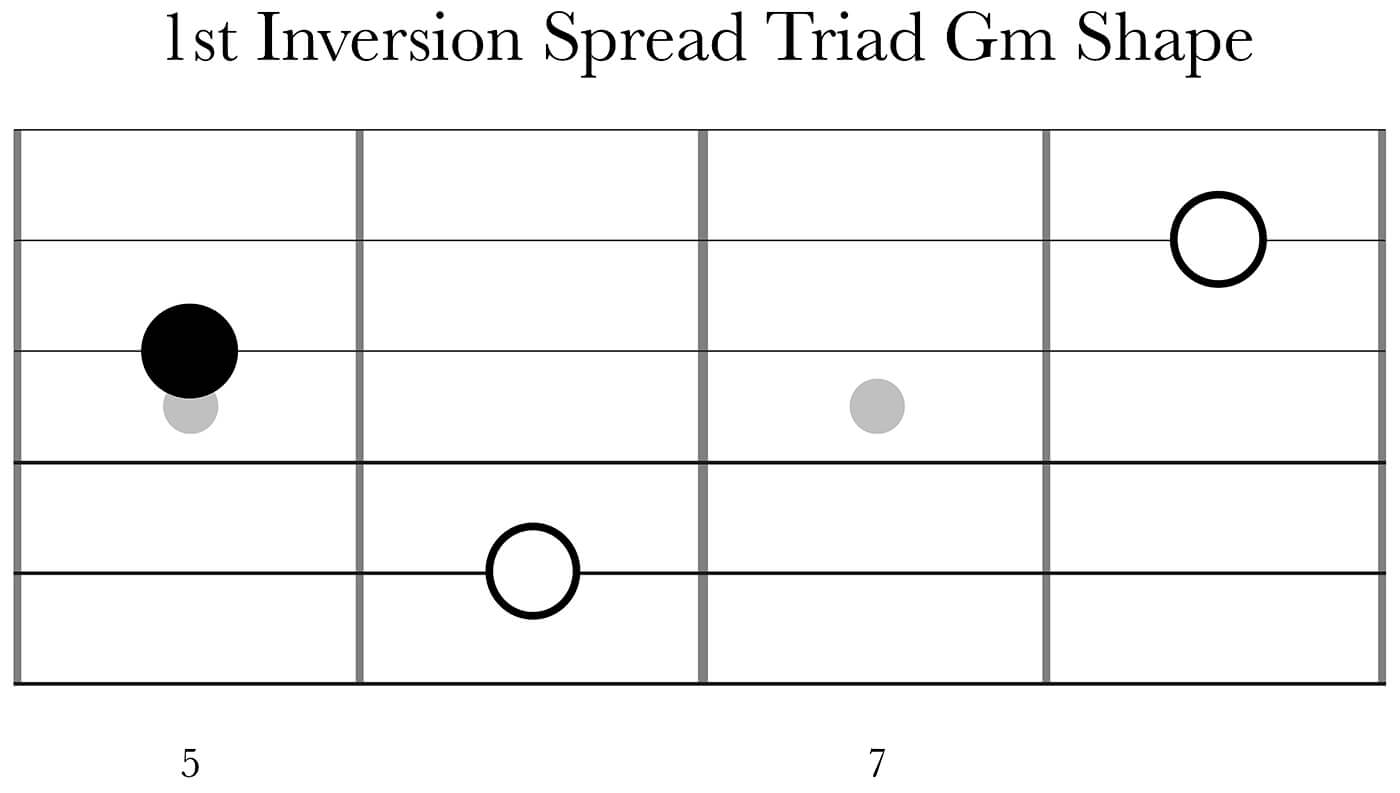
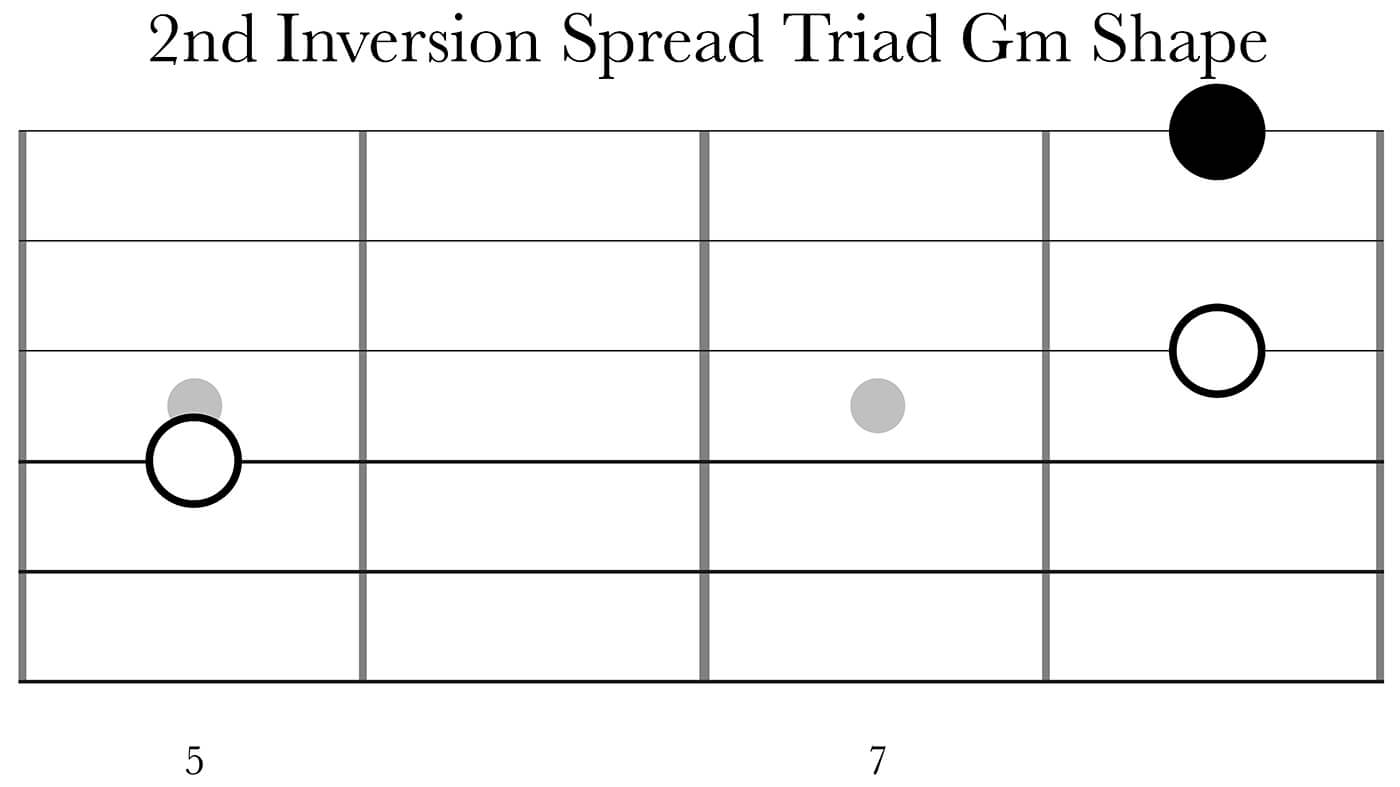
Now do this for both major and minor in all CAGED shapes.
Go, Joe
As a final exercise, let’s take an example from an actual song. Jimi Hendrix’s Hey Joe includes the following chords: C, G, D, A, E. Should be quite perfect for practicing the CAGED stuff since it’s the same chords, even if in a different order. If you wanna play this same progression but in a different part of the fretboard, choose your starting point, let’s go with the E shape with the root on the 8th fret. Now let’s count the distance from the C (our chord) to the E (our shape) in ‘CAGED’ – E is three steps later in the sequence, right? Now just do the same with the rest of the chords.
C G D A E (Original chord progression, in open position)E C G D A (The shapes we’re using based on the new starting position on the 8th fret)
You’ll obviously have to find the correct root note but they’re all between the 7th and 10th fret.
I hope this was a good introduction and that you realized some of the benefits with the CAGED system.
In the next part we’ll see how these chord shapes can be tied together with that other fundamental of learning guitar, the pentatonic scale – but always with the CAGED system in mind.
Learn from your favourite guitar players here.