Related Tags
DIY Workshop: How to upgrade the bridge on your Telecaster-style guitar
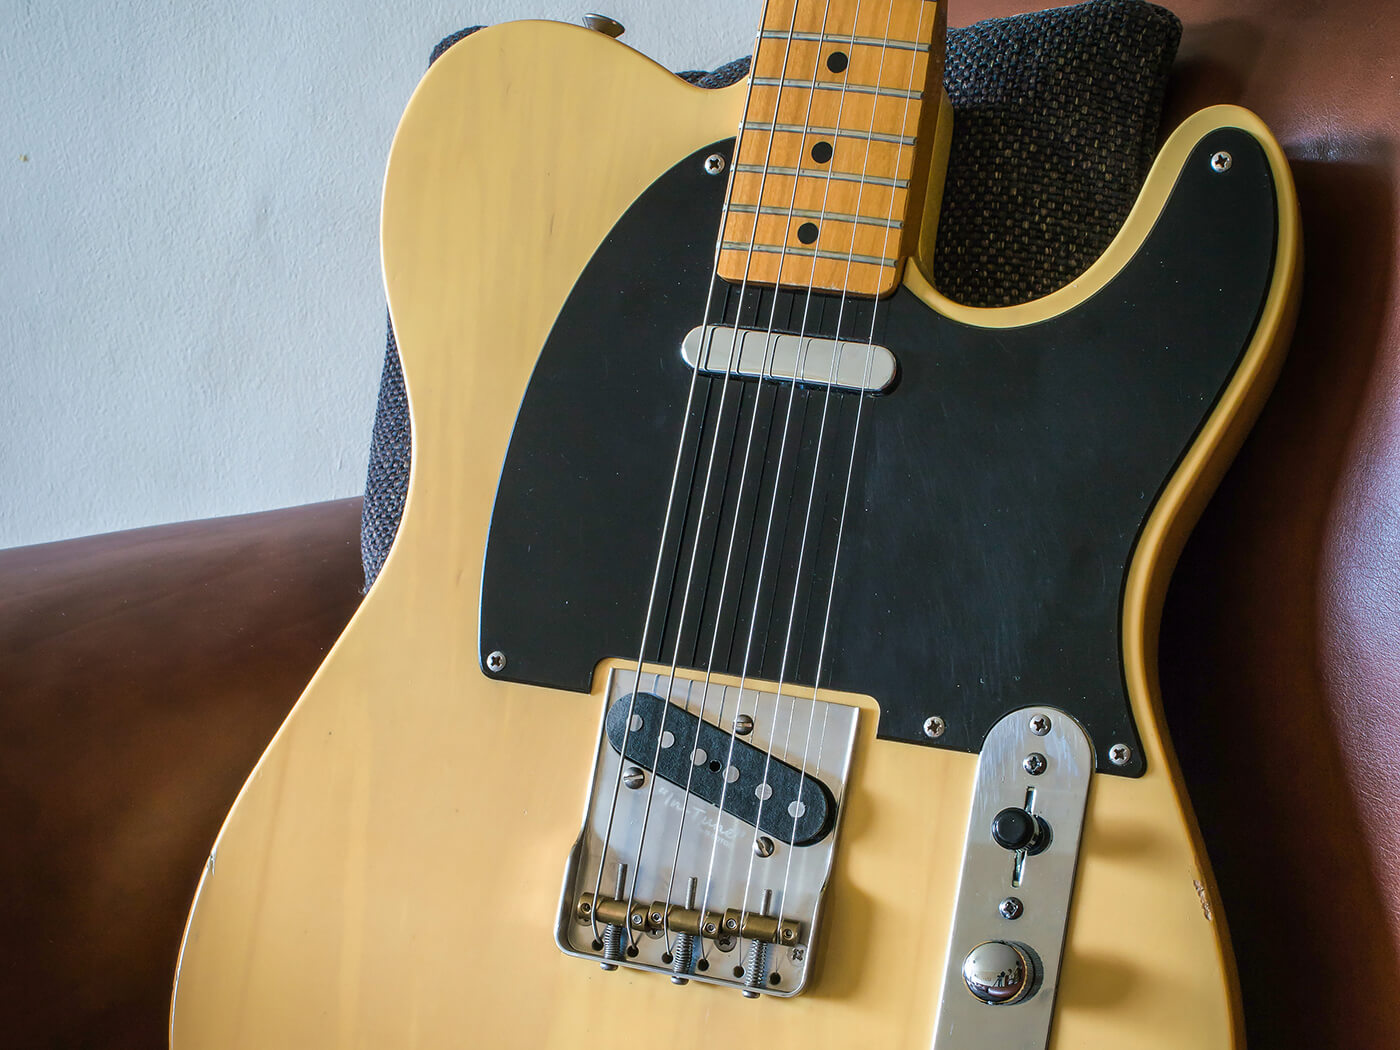
It’s no American classic, but this 1984 Tokai Breezysound is a couple of upgrades away from looking and sounding the part. We show you how to swap the bridge and sort out the controls.
All images: Huw Price
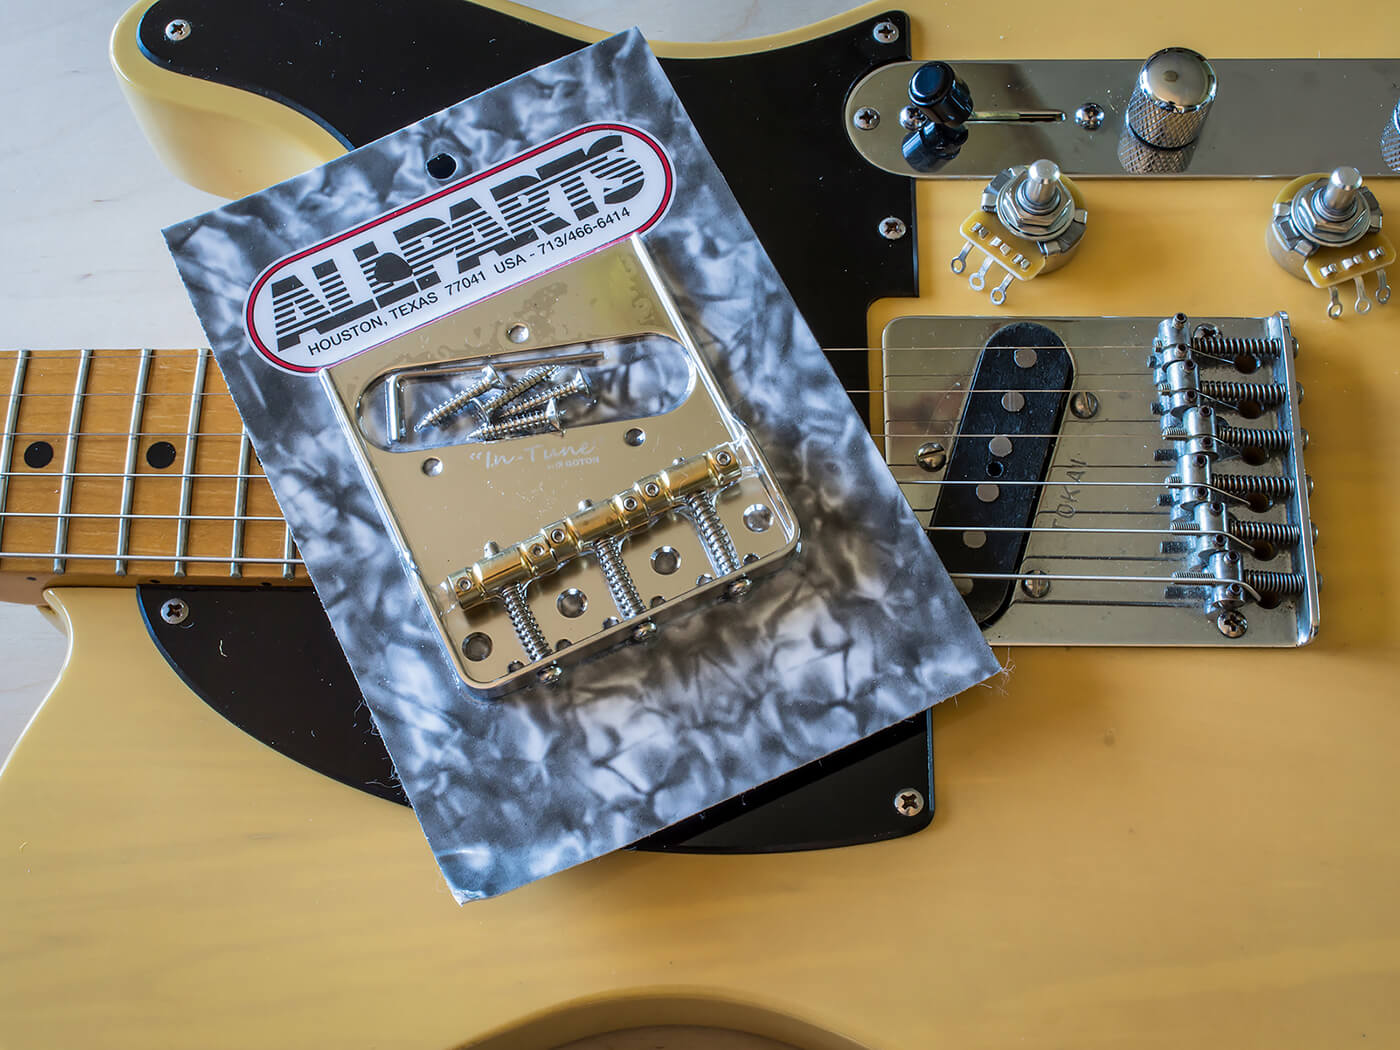
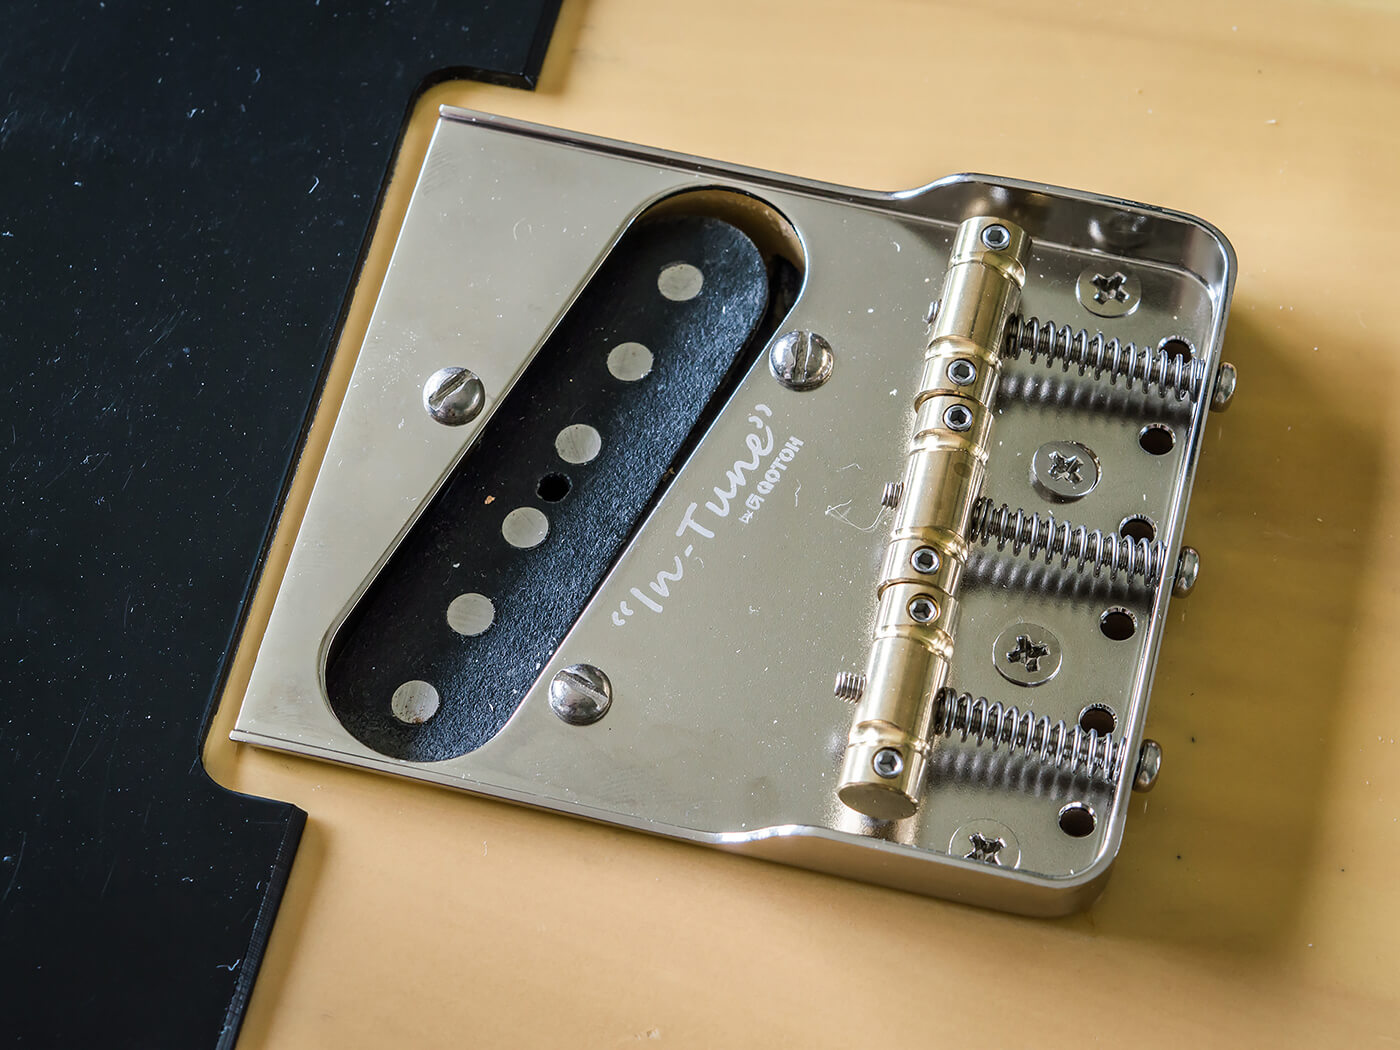
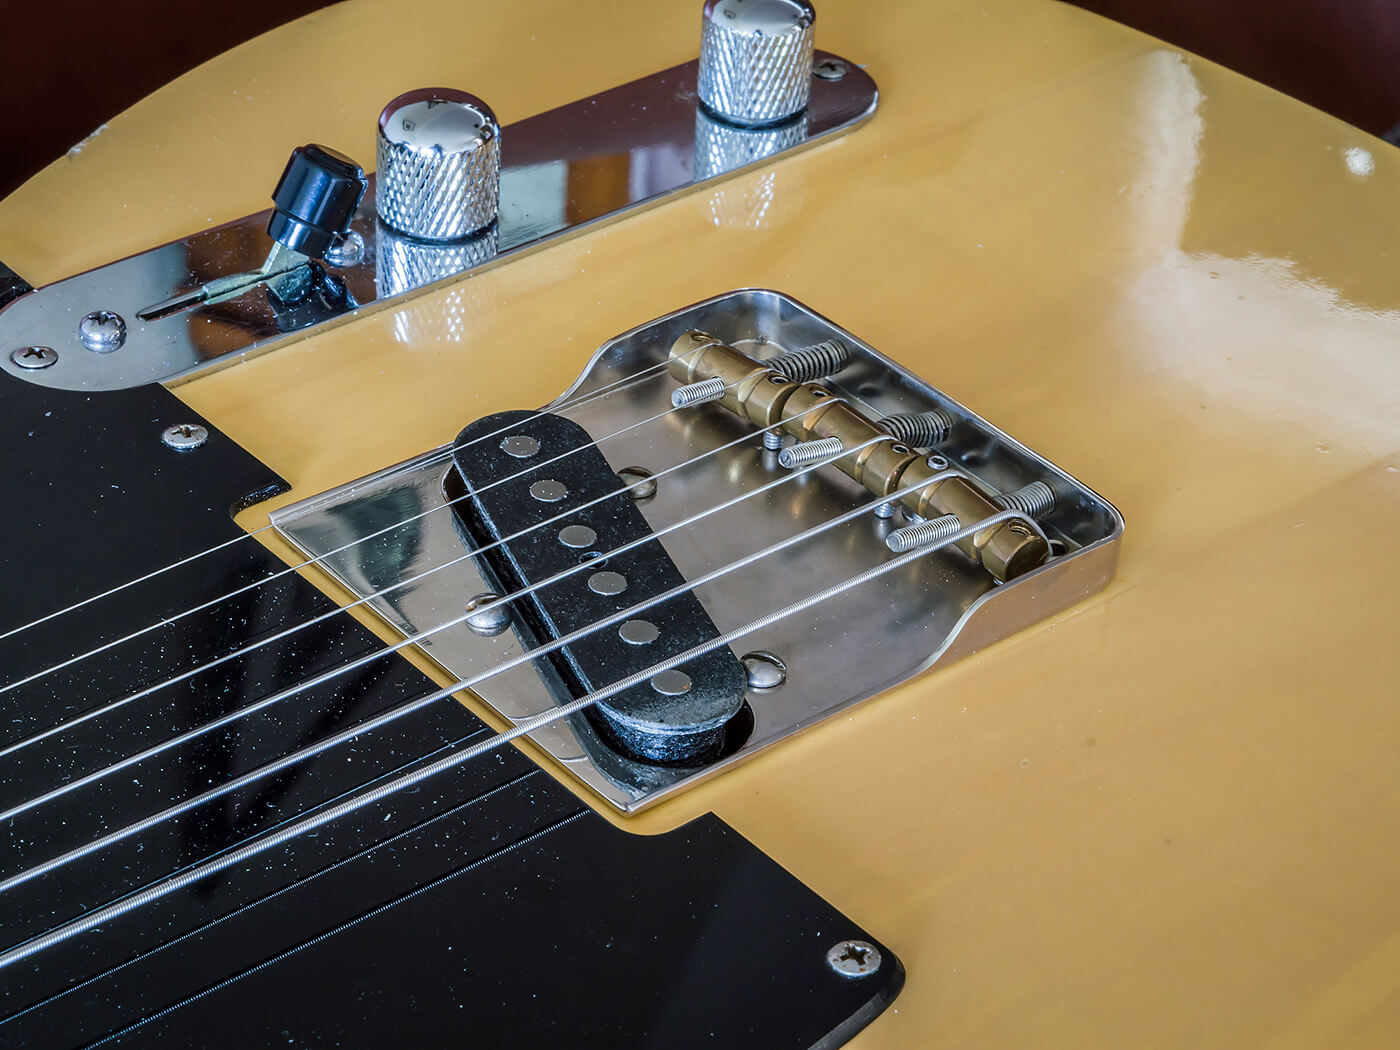
By the early 1980s, the top Japanese manufacturers were doing a fine job of replicating vintage American guitars of the golden era. This Tokai is a case in point – if you can overlook the six-saddle bridge. This guitar’s owner can’t, so we’re installing a Gotoh In-Tune bridge with three compensated brass saddles instead.
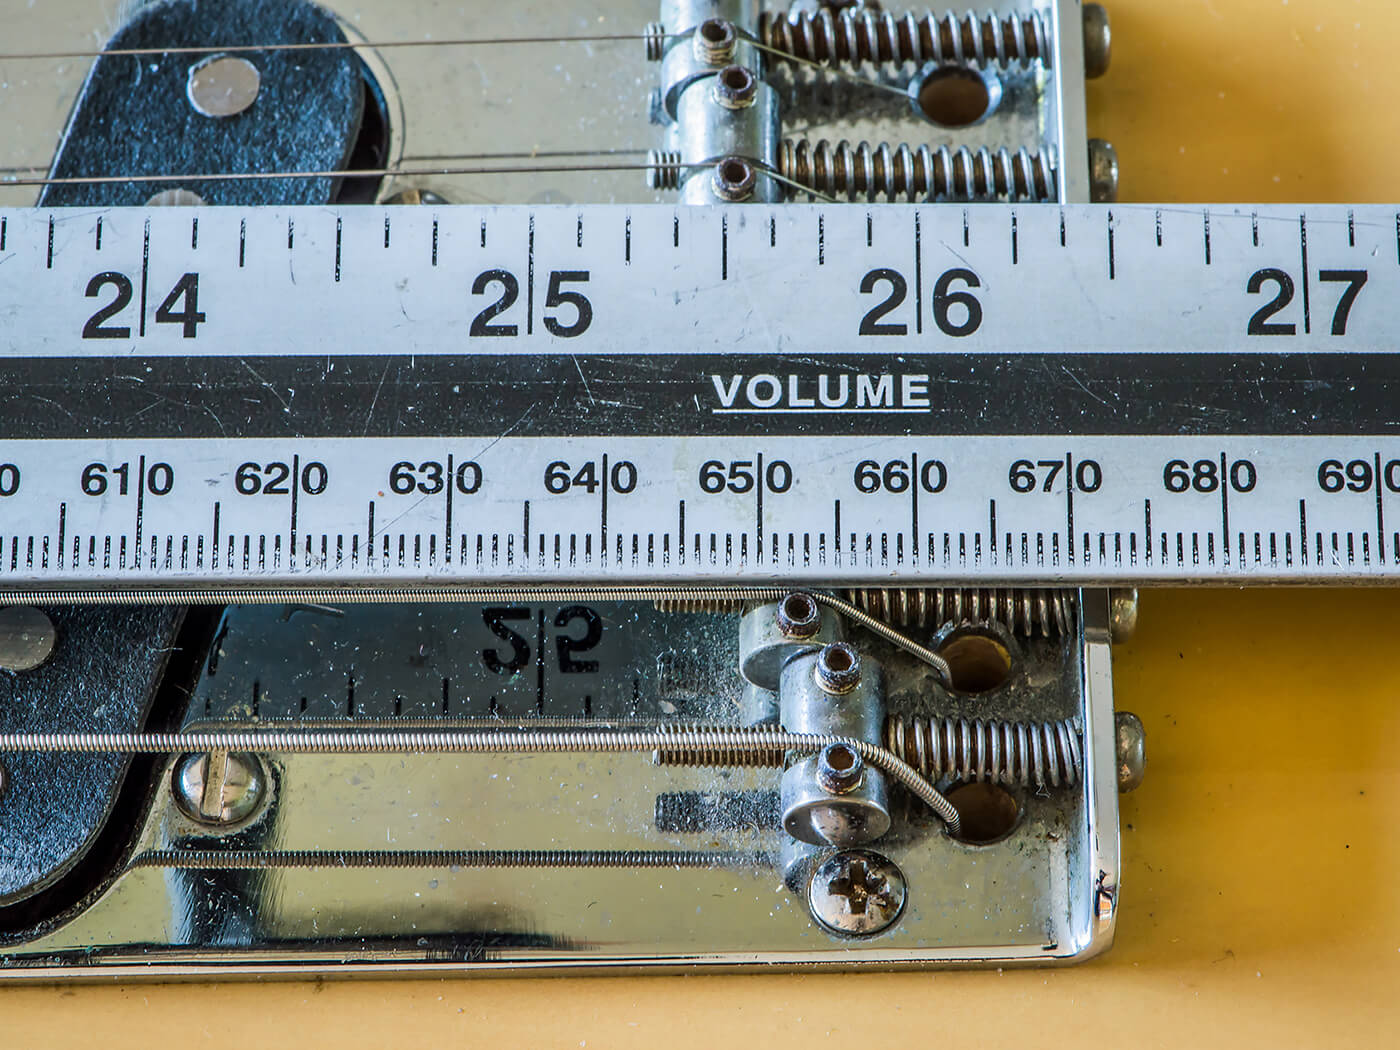
Before doing so, I need to establish that everything is working. I don’t want to mount a relatively expensive aftermarket part on a guitar unless it’s going to play properly. Fortunately, everything is in good shape, and I check the intonation so I can measure the distances between the nut and each of the saddles.
There are two reasons for doing this. I want to ensure that the new bridge saddles can be set to the same position when the bridge screw and string holes are lined up, and having a fairly accurate gauge of the approximate saddle positions will give me a head start when I’m setting the guitar up after the bridge installation.
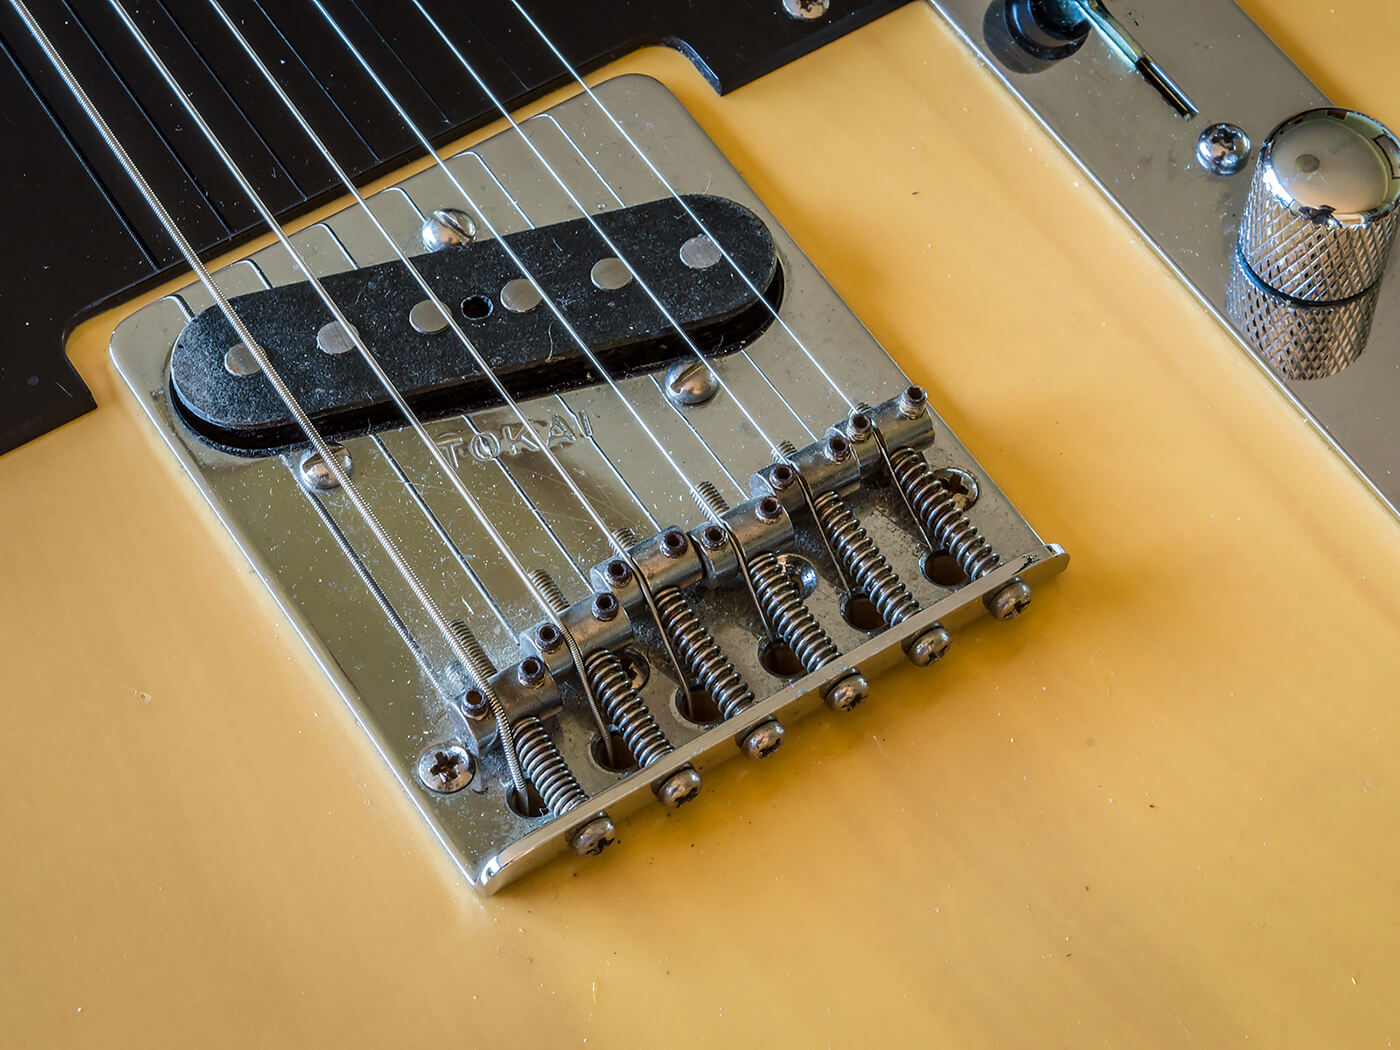
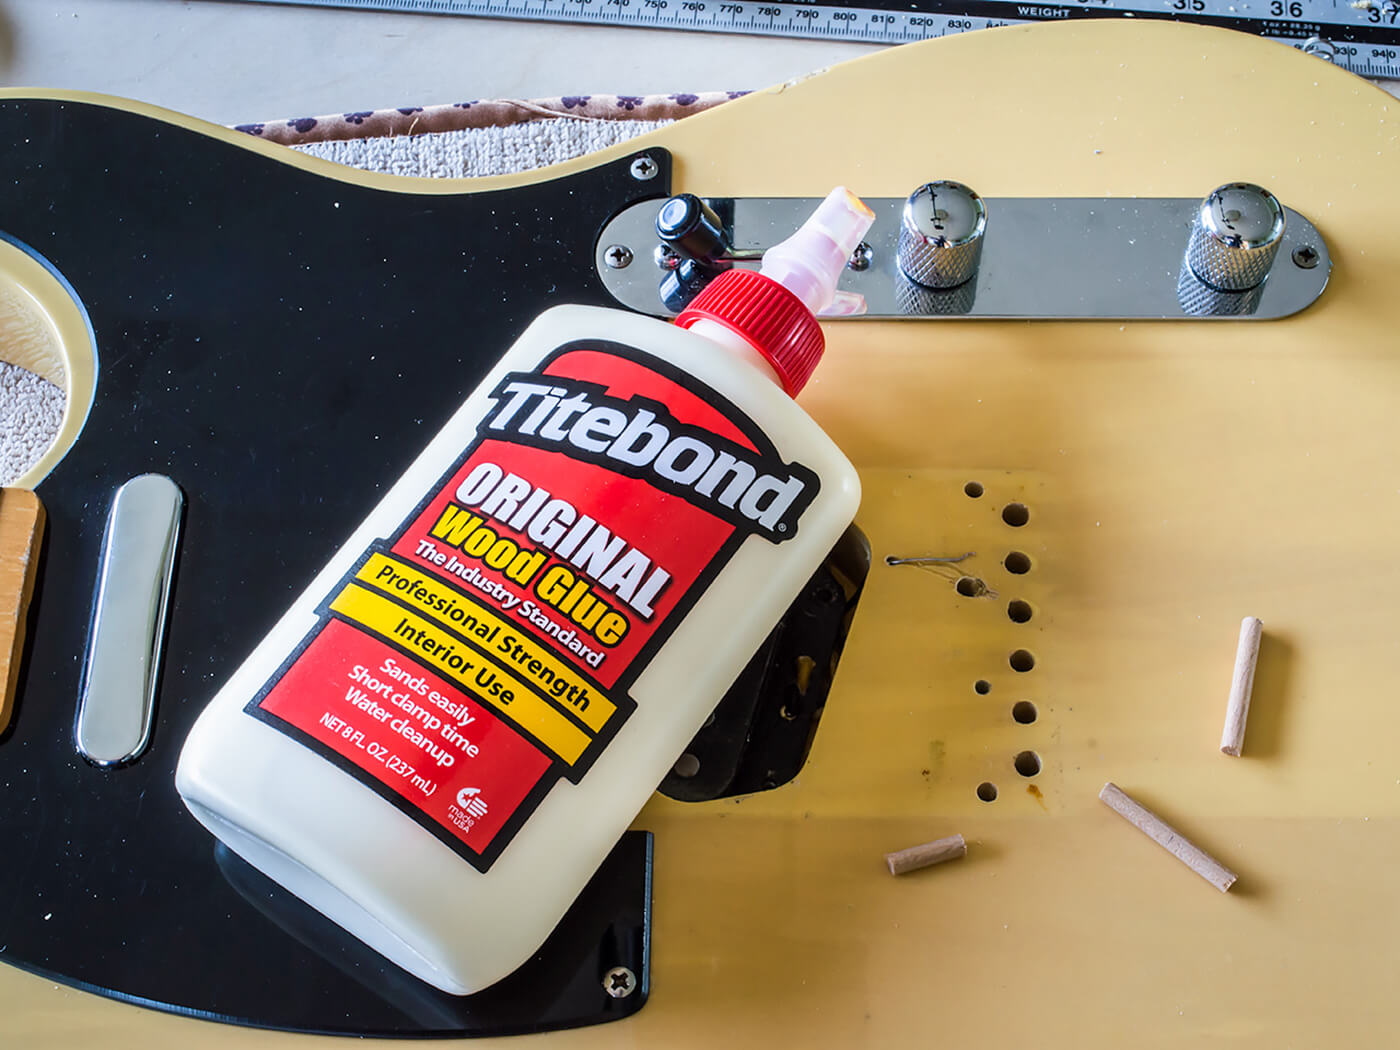
I remove all the strings and the three screws securing the bridge. There should be four, but I’ll explain that later. Lifting the bridge, I make a very pleasing discovery – a set of Fender Custom Shop pickups were installed by a previous owner.
According to its current custodian, guitarist Will Havard, they weren’t mentioned when this guitar was advertised for sale secondhand. As a result a planned pickup upgrade may not be happening after all. The bridge can be replaced without extracting the bridge pickup, so I remove the three screws, allow it to drop into the cavity and then lift off the bridge.
On the hole
One reason for choosing a Gotoh bridge is that Japanese guitars and hardware tend to be made to metric measurements rather than Imperial. US-spec parts often don’t fit old Japanese guitars, so you should be careful if you’re shopping for repro parts to get a more vintage look.
Here, there’s good and bad news. The space between the string and screw holes is pretty much identical to the Tokai bridge, but only two of the screw holes line up exactly. The outer holes are a few millimetres out.
It would be possible to bodge it and have those two screws go in at a slight angle, but I’d prefer not to. Instead, I’m going to plug the holes and re-drill them so the screws can go in straight.
Plug ugly
The existing screw holes are 3mm in diameter, so I’m drilling them out to 4mm. Ideally, I’d use a press drill, but the mine doesn’t have enough clearance for the drill bit to reach to the centre of the body. But it’s ok to hand-drill these holes because the existing holes will guide the bit.
Before drilling I insert a smaller drill bit into the holes so I can gauge the depth. This tells me I need to mark my 4mm bit for a 30mm depth. Both outer holes are drilled out cleanly and I avoid damaging the finish by keeping the drill speed low.
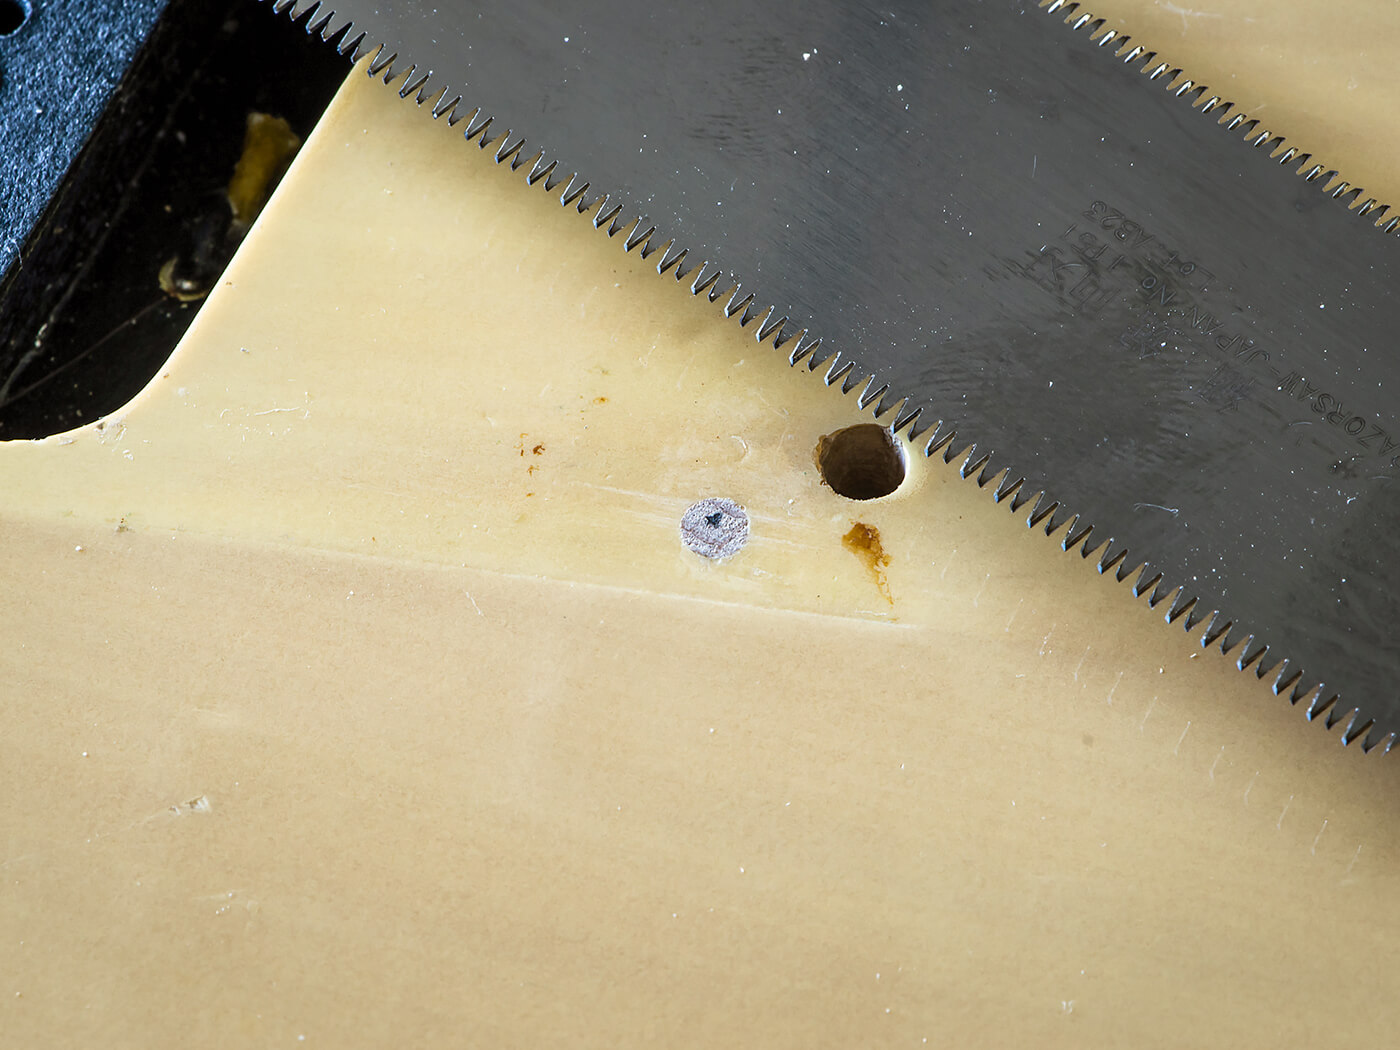
But when I try drilling the hole where the screw was missing, I make an unwelcome discovery. The drill bit suddenly veers off at an angle because half of the screw is still deep inside the hole.
I use some 4mm birch dowel for the plugs. After cutting them to length, I use a small paintbrush to get Titebond Original glue into the holes, wipe a bit more onto the dowels and tap them in.
After an hour, I use a flushcut saw to remove the excess, then tidy things up with a chisel. The bridge is roughly positioned, carefully aligned with the pickguard and temporarily secured using the one original screw hole. I then mark the centre of each bridge screw hole onto the plugs.
New pilot holes are made using an electric drill mounted in a drill guide. Drill guides are readily available accessories that allow a regular electric drill to be used like a drill press for perfectly perpendicular holes.
The new bridge is mounted on the body to check its alignment. There’s nothing I can do about the snapped bridge screw without major surgery, so I get the new screw about half way in then gently tap it more upright with a small hammer to lever the broken screw to one side. The new screw ends up at a slight angle, but I’ve seen worse and it will do the job.
Age related
The brief is to age the new bridge parts so they’ll blend in with the original hardware. The saddles are brass but all the other parts are nickel-plated, so they require different processes.
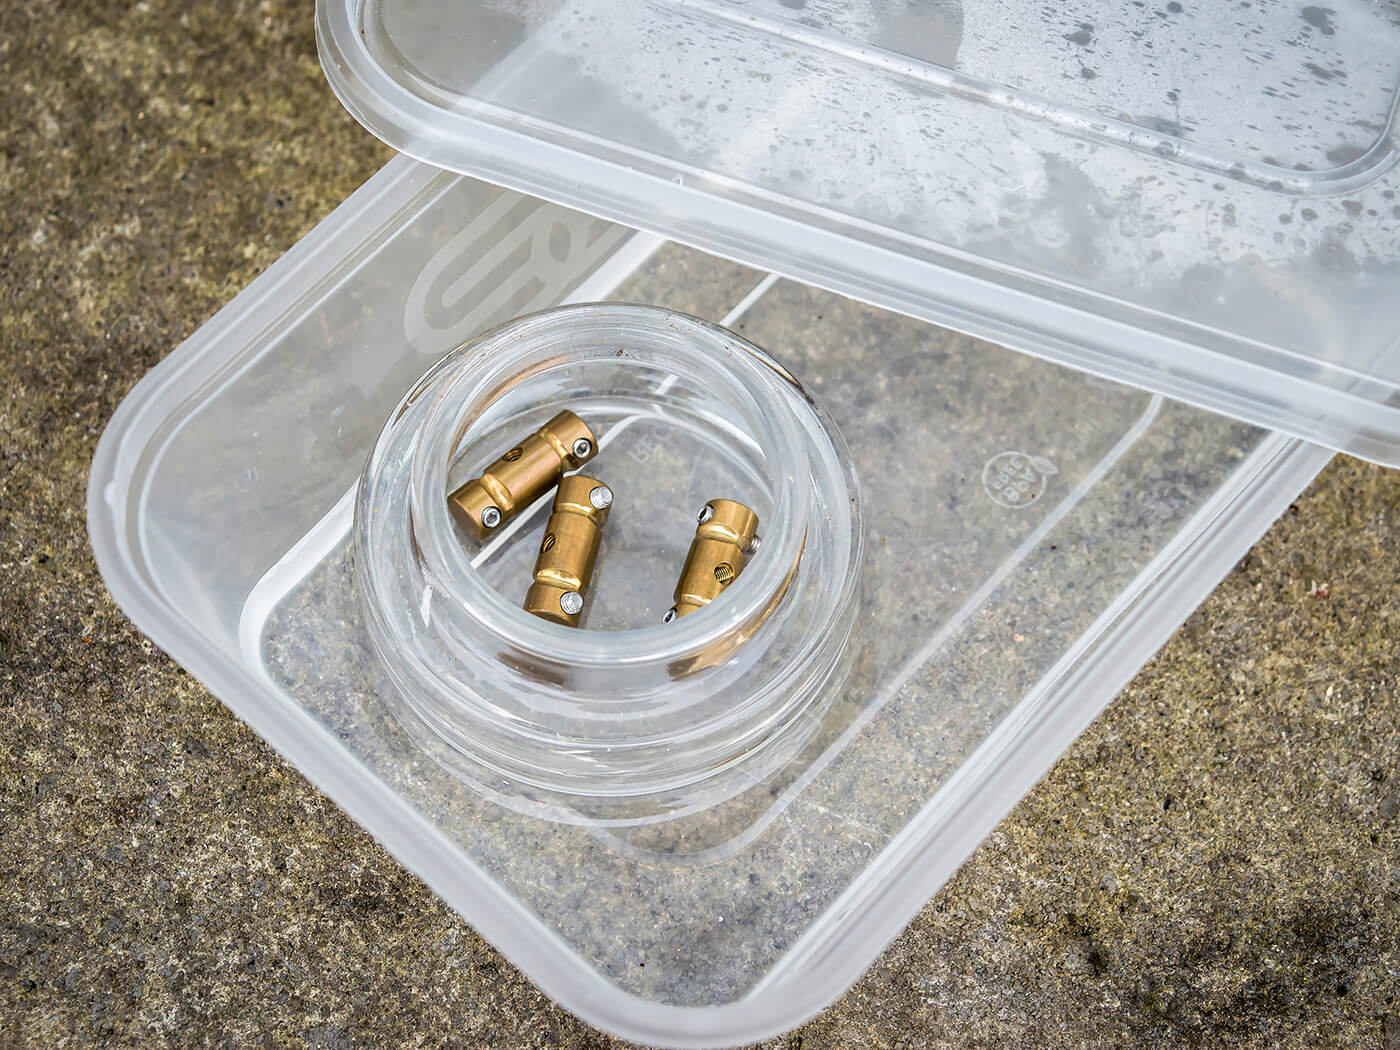
For the brass, I pour about 10mm of ammonia into a plastic takeaway container, place the saddles into a small glass vessel and then place that into the ammonia. The lid is fixed onto the takeaway container and the saddles sit in the ammonia fumes until I’m happy with the colour. It takes about three hours – be sure to wear a mask and goggles if you try this.
Donning latex gloves, I de-grease the bridge using isopropyl alcohol and place it into PCB etchant solution (ferric chloride) diluted 50/50 with water. I leave it in for about five seconds and then rinse the bridge in water. I do the same with all the screws and springs. The object is merely to knock off the shiny newness rather than make it look 70 years old.
Finishing up
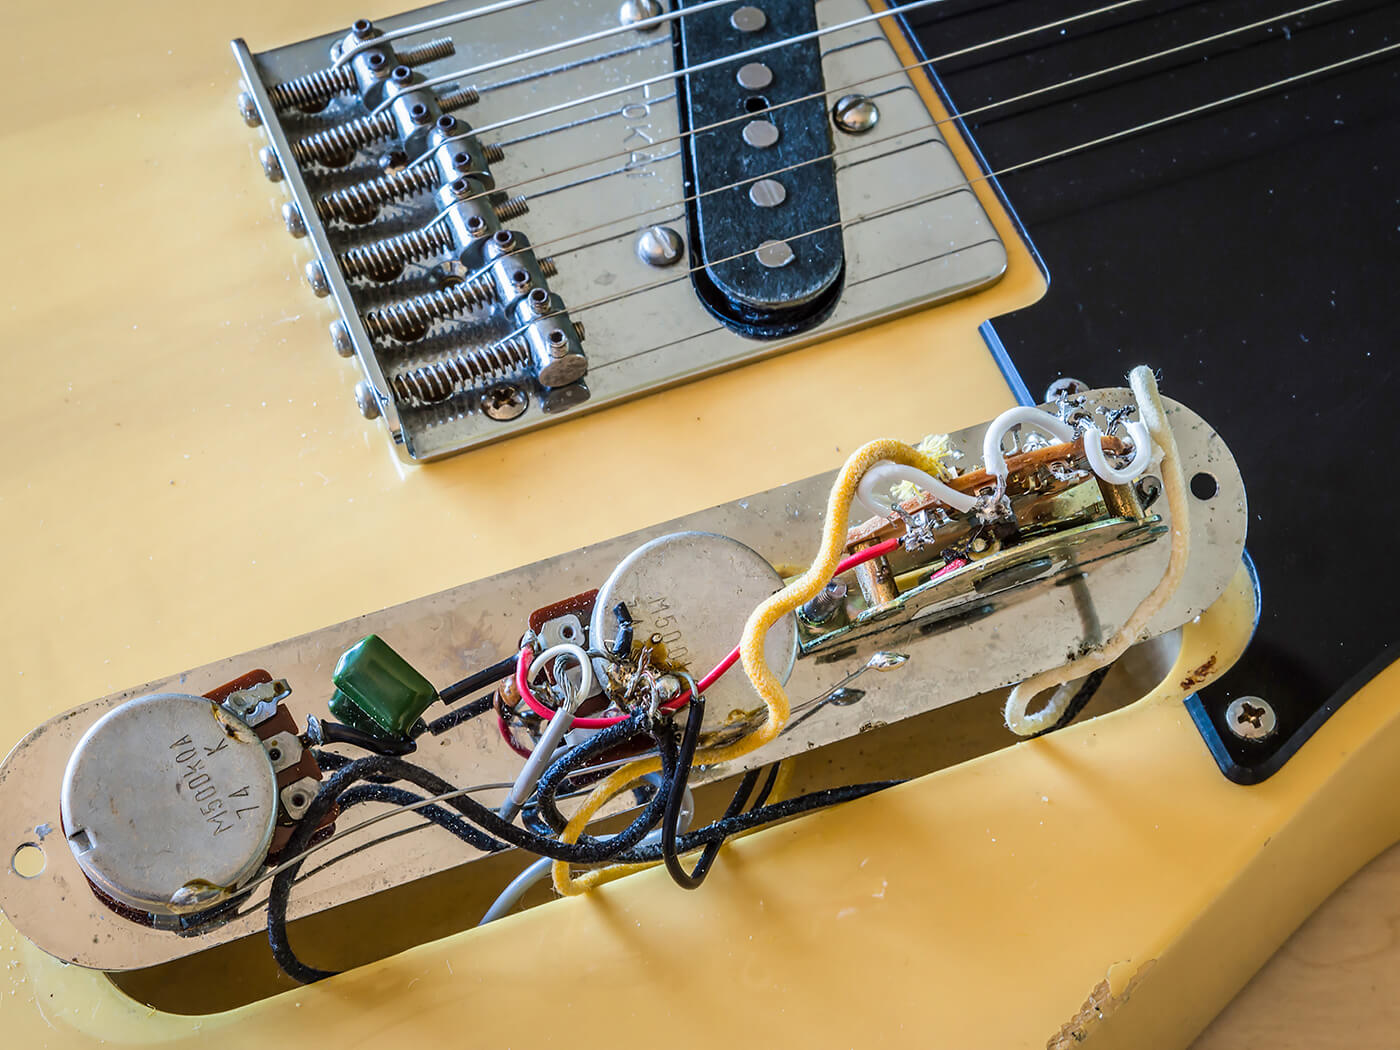
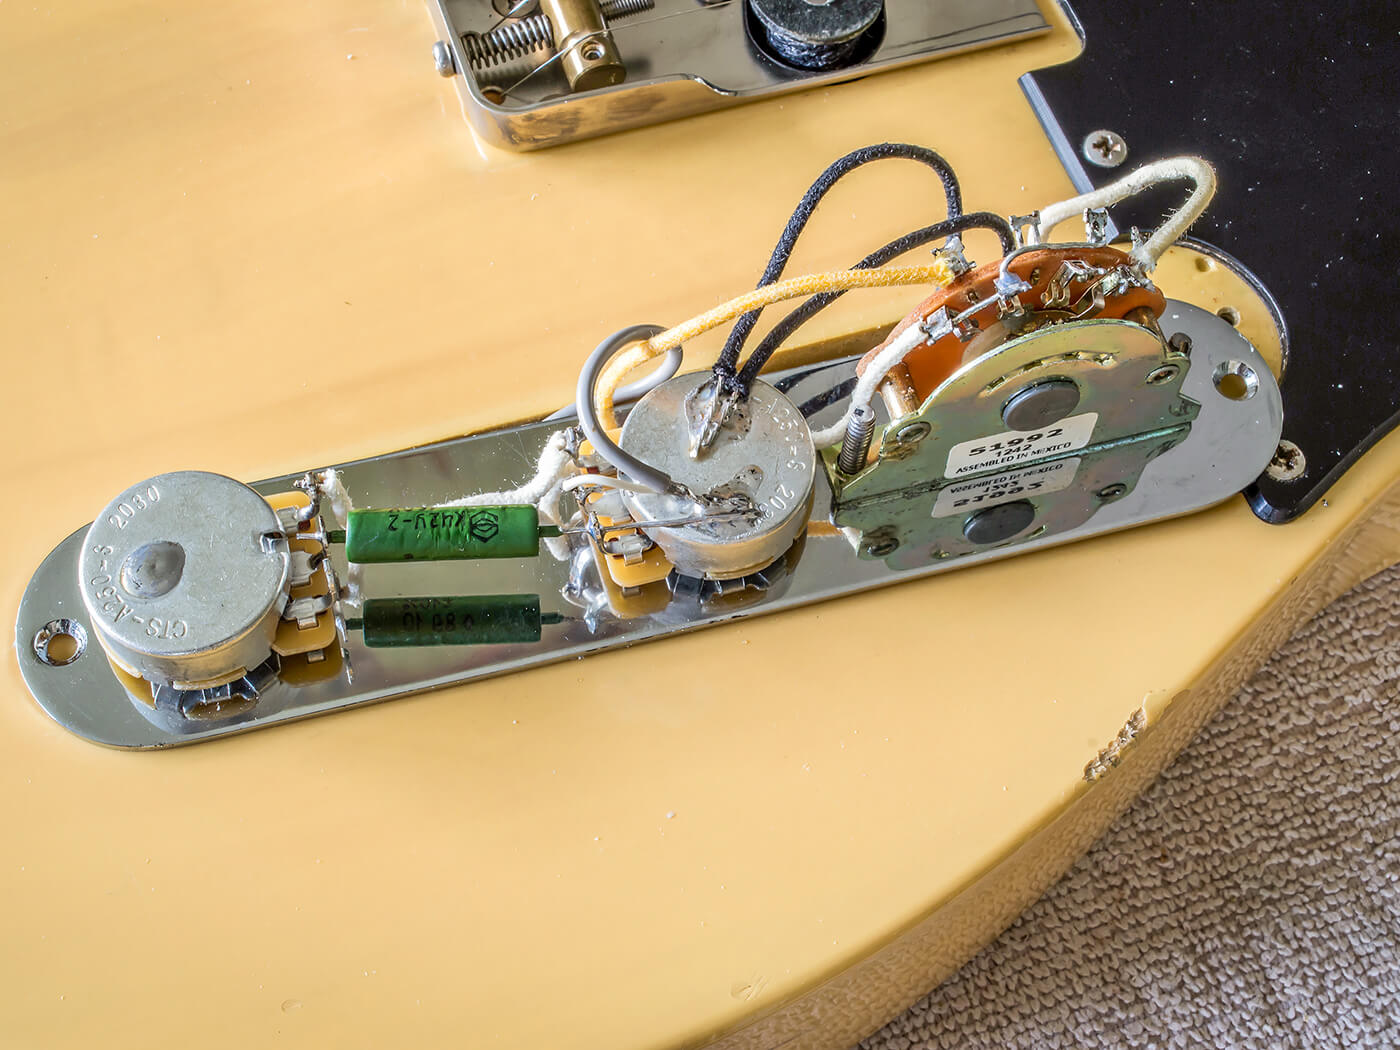
I use vintage-style surgical tubing rather than the original springs to mount the bridge pickup and position the saddles as per my earlier measurements, so the intonation needs little adjustment once the action is set. I also replace the factory 500k potentiometer with CTS 250k pots and install a paper-in-oil tone capacitor.
The guitar looks better and it certainly sounds better, so the project is complete. This Gotoh bridge is highly recommended and the process described here applies to any T-style guitar that needs more vintage vibe. These early Tokai Breezysounds really are a bit of a steal.
For more DIY workshops and guides, click here.