Related Tags
DIY Workshop: How to fix snapped or broken screws
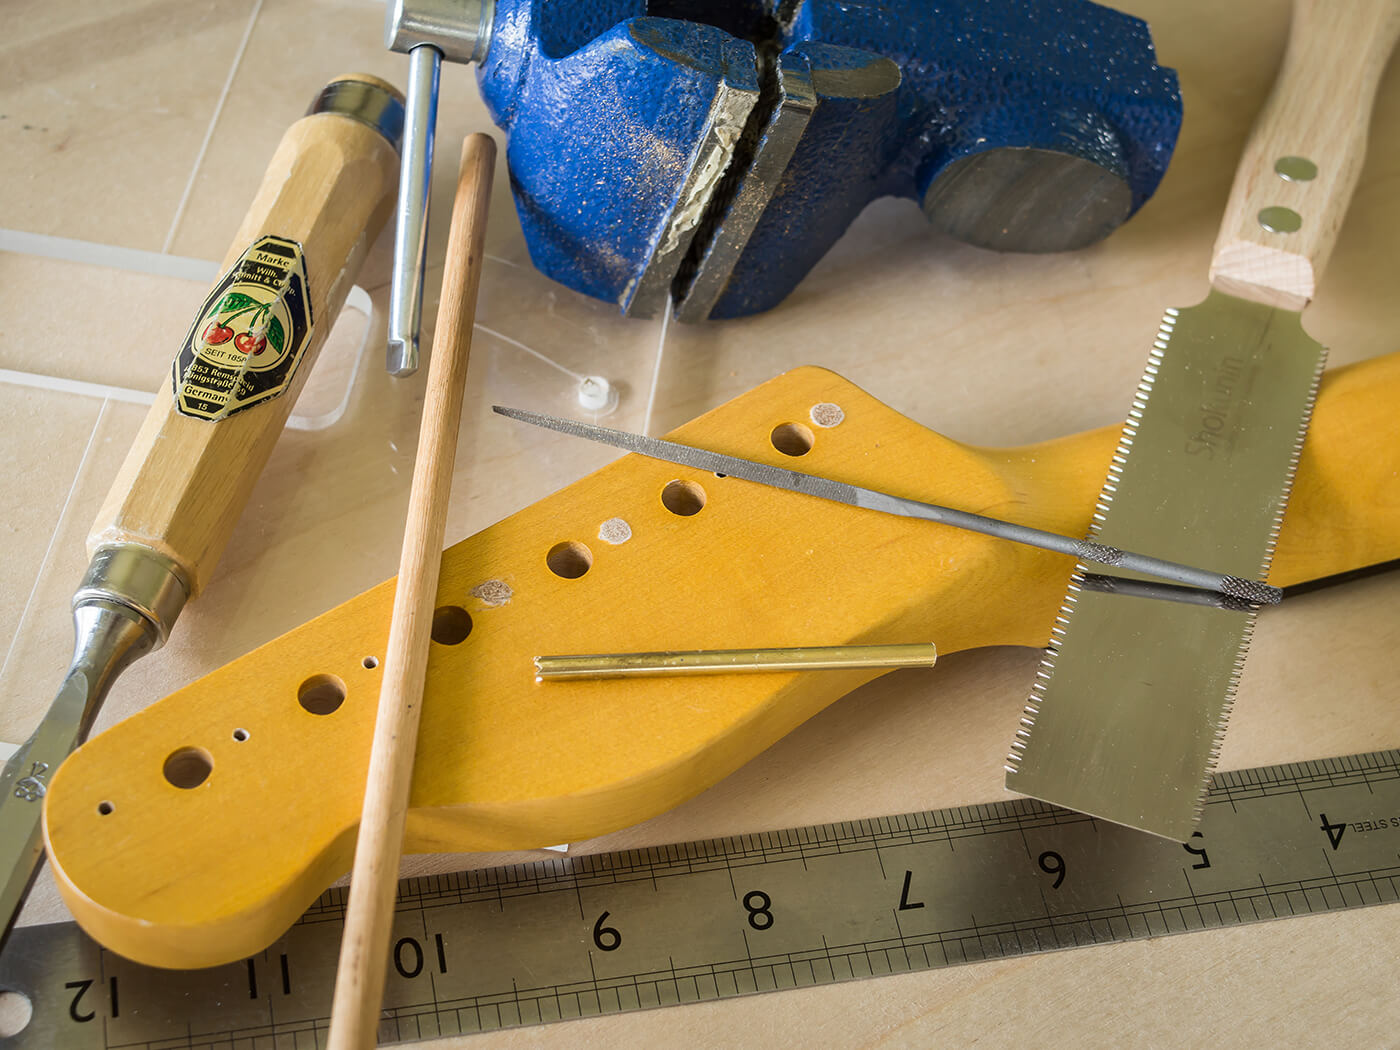
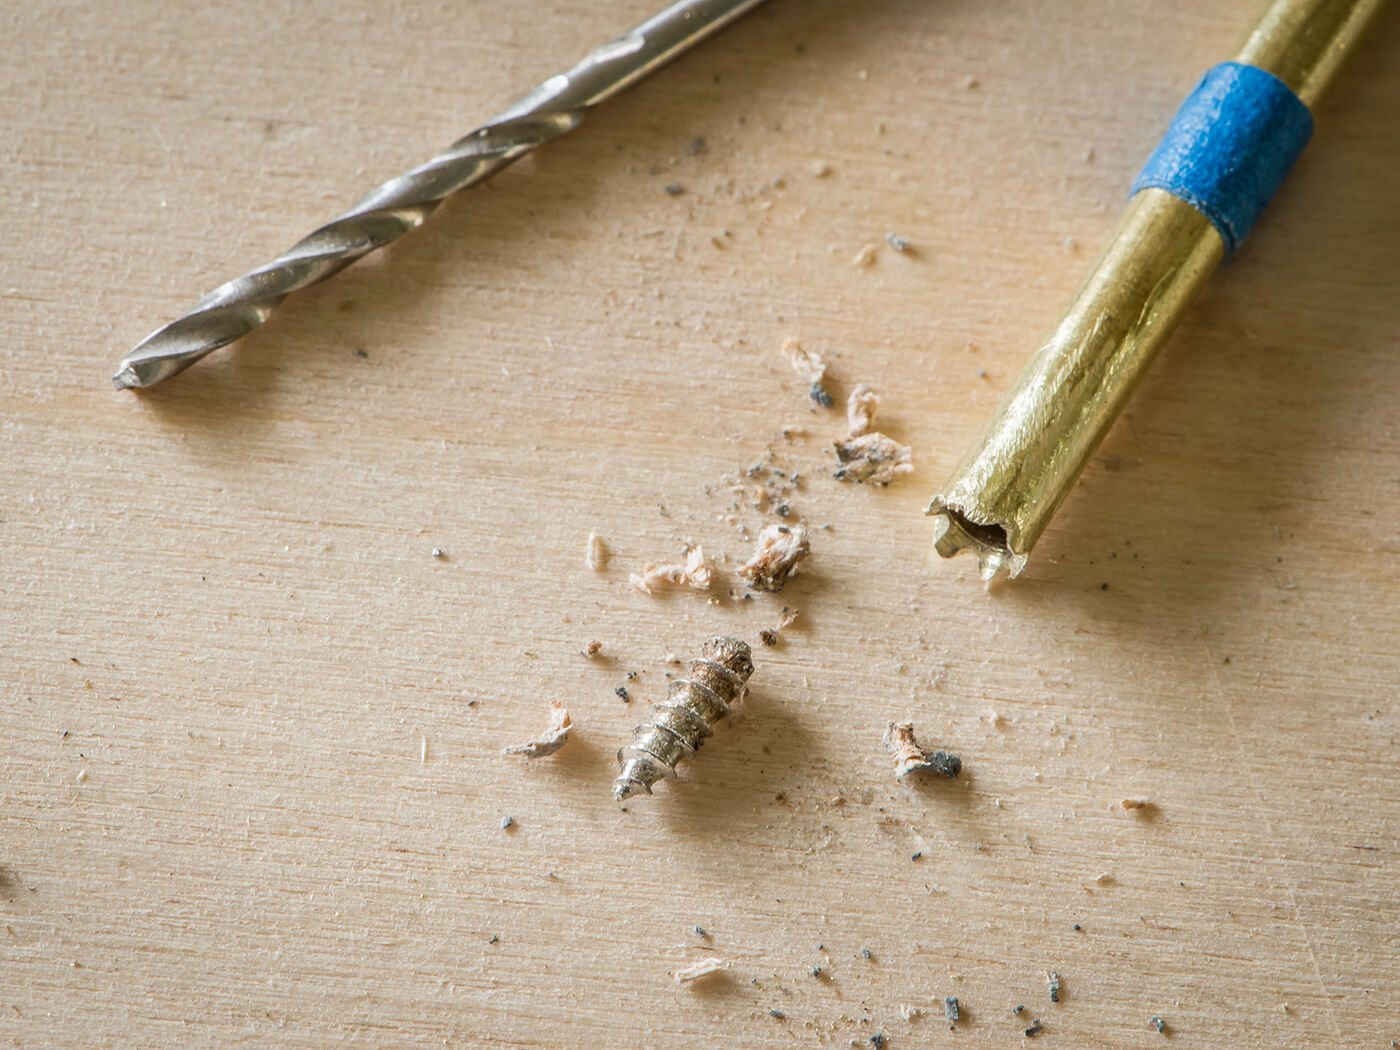
Three of the screws snapped while the tuners were being installed on this brand new neck. Will it turn out to be a costly mistake or a simple fix?
All images: Huw Price
We’ve all seen used guitars with wonky tuner installations, off-centre bridges and bridge screws at awkward angles. If you remove the parts you’ll often find that they’re off kilter because a screw head has snapped off, leaving the threaded section stuck in the wood.
Some of us may have experienced screw heads snapping off when trying to force a screw into wood when a pilot hole is too narrow. Here I’m going to be showing you how to make a very simple tool that will allow you to extract broken screws with minimal damage to the surrounding wood.
To make your own screw extractor you need a length of hollow metal tubing. The basic idea is to fabricate a drill bit with a hole running through the centre so you can drill a hole around the broken screw and simply lift it out. There will be a fairly wide hole left in the wood, but that can be plugged, levelled and re-drilled.
On the tube
When choosing a metal tube, you must ensure that the inside diameter is large enough to fit over the snapped screw. The diameter of the hole left in the wood after the screw has been extracted will be equal to the outer diameter of the metal tube. If you want to keep this as small as possible, make sure that the walls of the tube aren’t too thick.
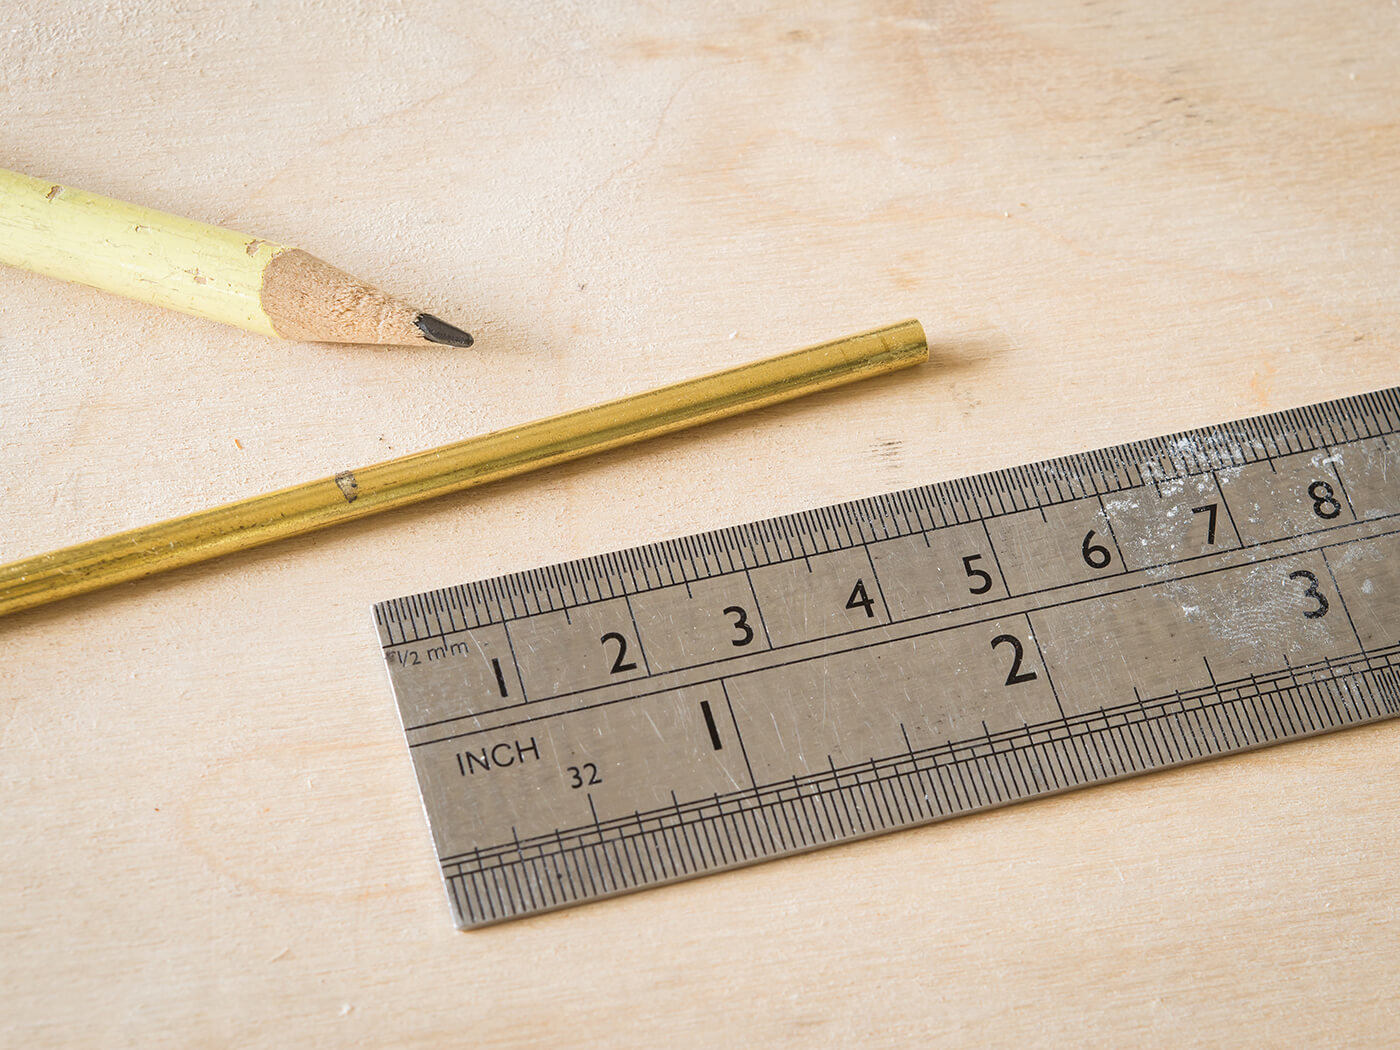
Having checked my local engineering supplies shop and a metal merchants, I end up finding exactly what I need in B&Q. For this project I’ll be extracting three snapped screws from a Telecaster-style headstock. The screws are about 2.5mm at their widest point so I’m using a length of brass tube with an internal diameter of 3mm and an external diameter of 4mm.
Cutting teeth
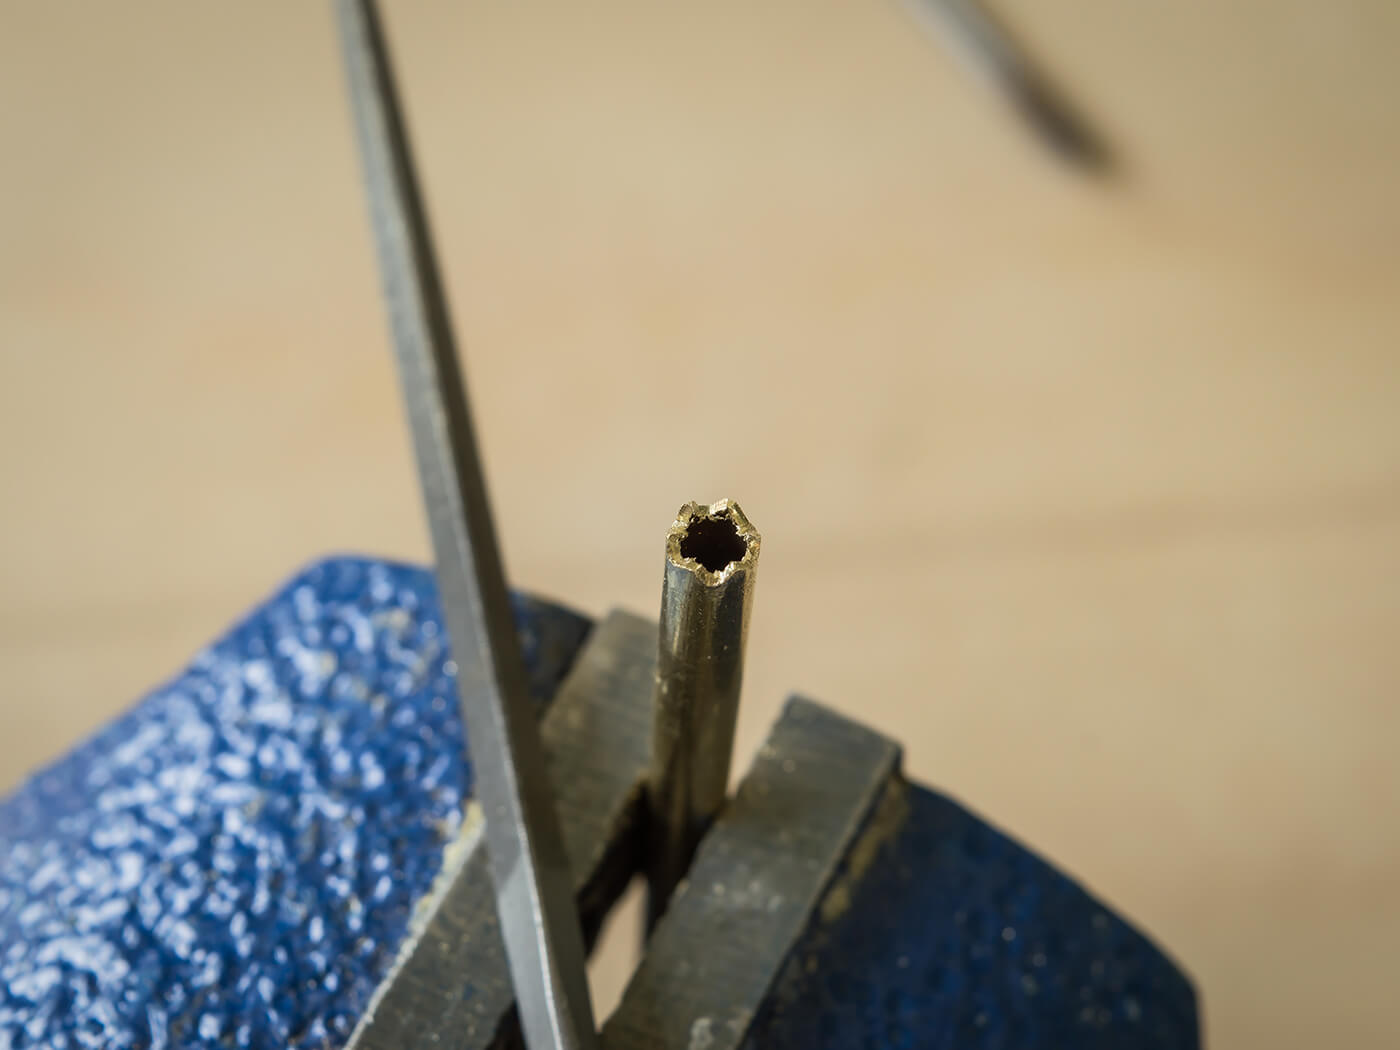
Brass is a soft metal, so I’m not expecting this tool to last a lifetime. I’m going to be filing cutting teeth onto the end to turn a short length of tubing into a mini hole-cutting saw. Working with brass rather than steel makes that process a lot easier.
I begin by cutting off a 40mm length and cleaning off any burr with a flat needle file. To make the teeth, I place a triangular file across the centre line at one end and create two V shaped cuts. Altering the file’s angle, I repeat this process twice more to end up with six cutting teeth. After a quick de-burr, I’m ready to see if it will cut into wood. The screw extractor slides around before the teeth grab. And then it cuts into a piece of solid oak with surprising ease.
Slip sliding away
Even regular drill bits can slide about before a hole gets started, so I need a way to guide the screw extractor. An effective method with this sort of tool is to drill a hole through a piece of clear acrylic that’s exactly the same diameter as the tubing.
Having clear acrylic makes it easy to align the guide over the centre of the damaged screw hole, and it should be clamped in position. After a successful trial run on a scrap piece of wood, I’m ready to tackle the headstock.
Reversing the damage
Screws go in clockwise and come out anticlockwise, so it makes sense to run the drill in reverse. The teeth will cut in both directions and the last thing I want is to force the screw deeper inside. Before starting, I measure the thickness of the headstock and the acrylic. From this I can calculate the maximum depth that I’m able to drill and place masking tape on the tube to ensure I don’t cut through the front of the headstock.
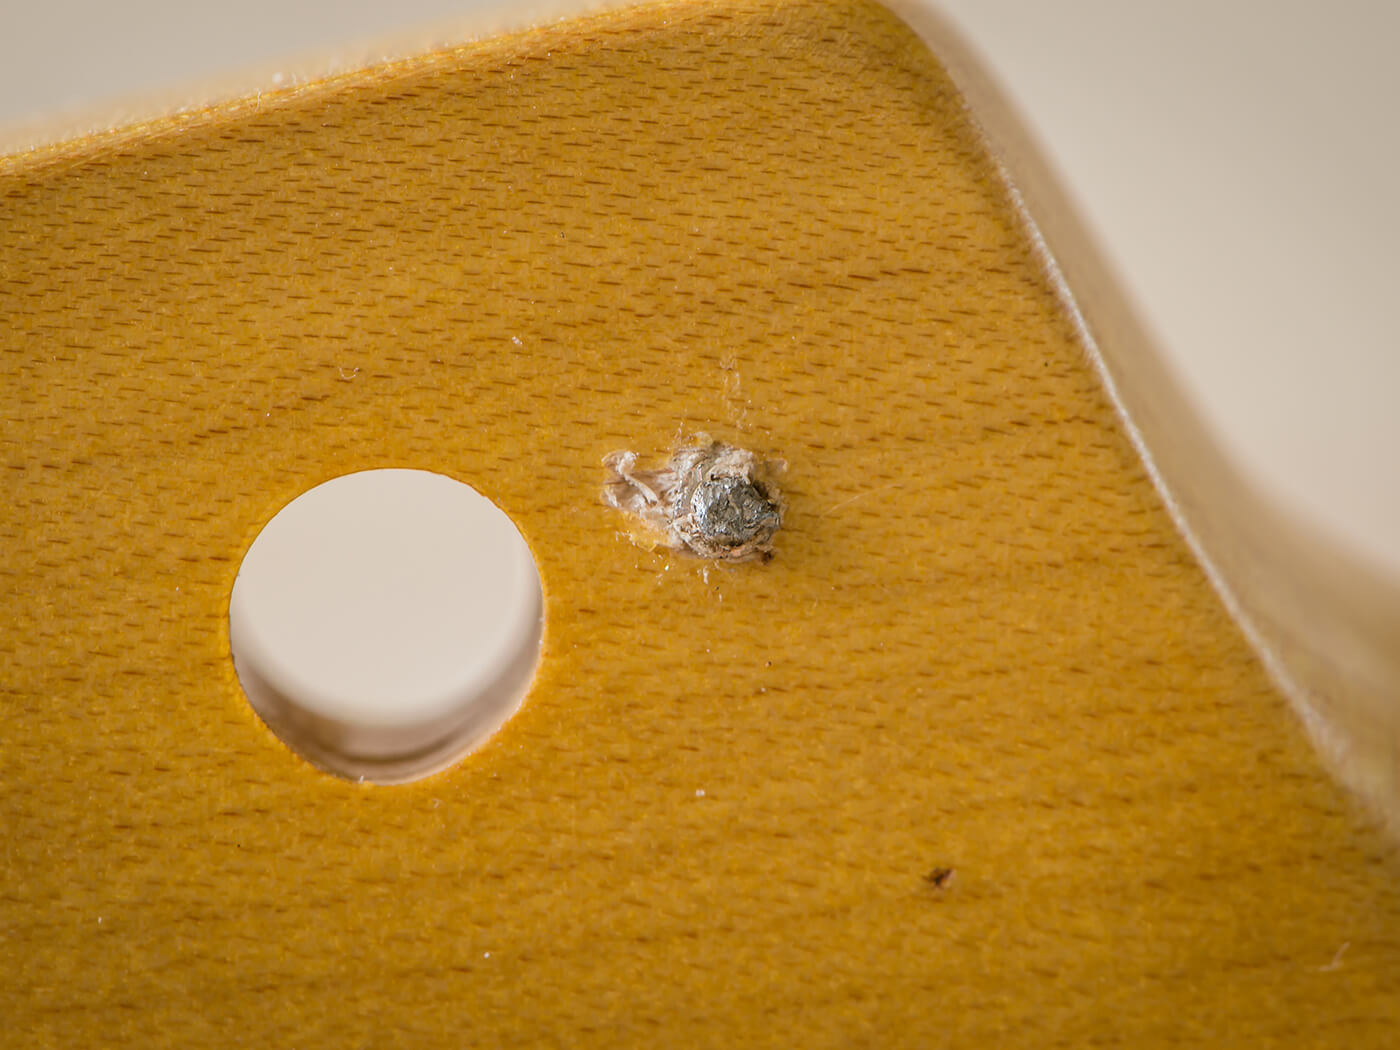
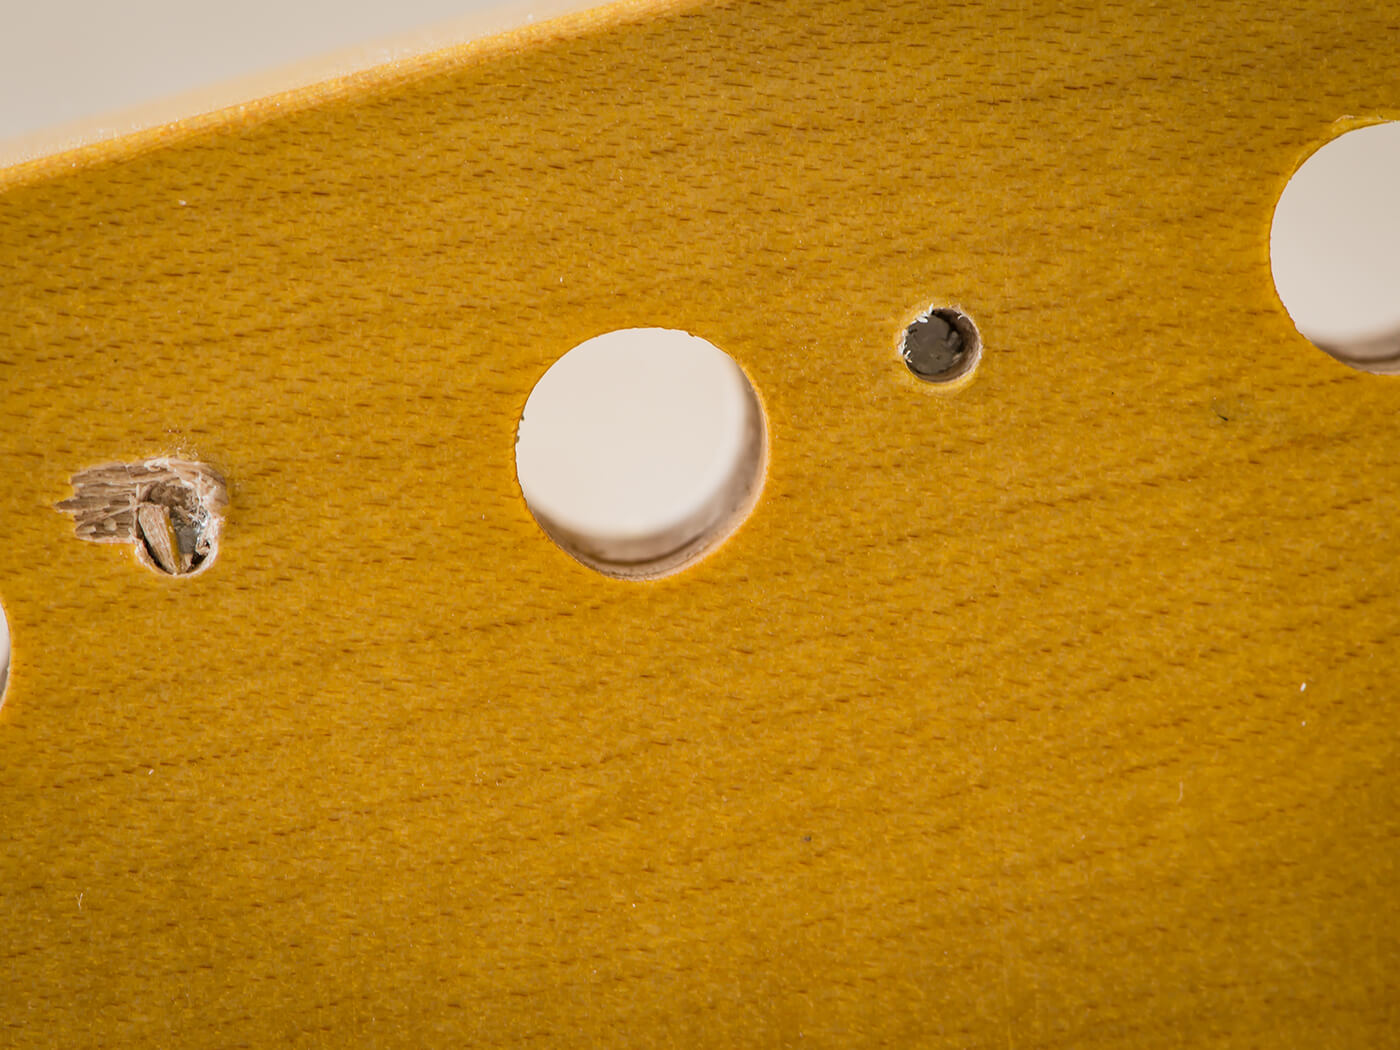
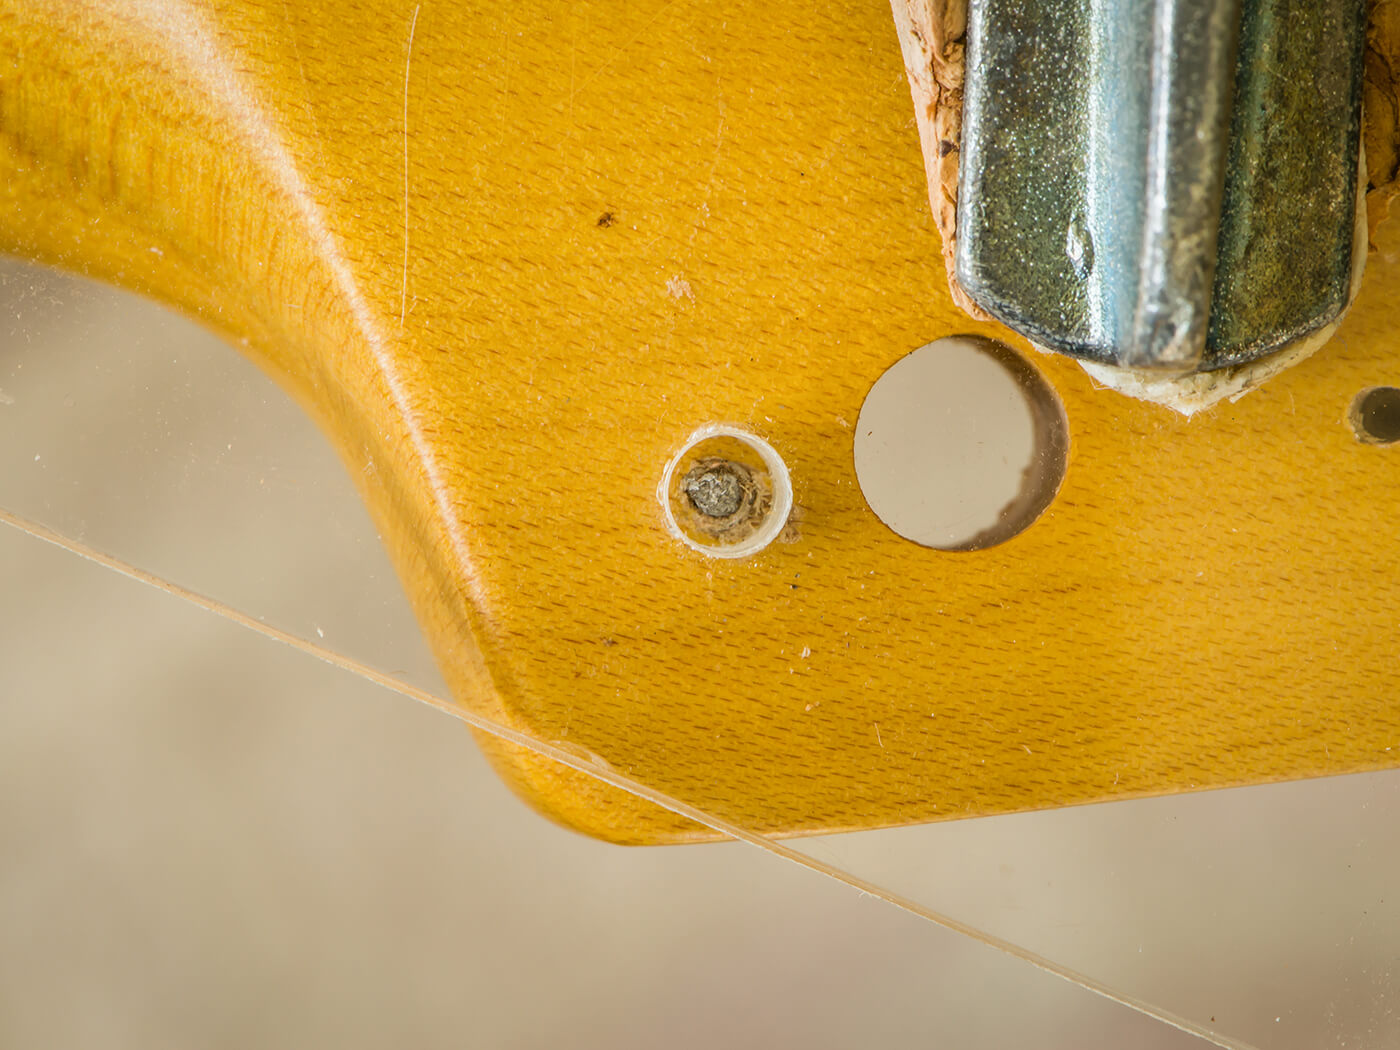
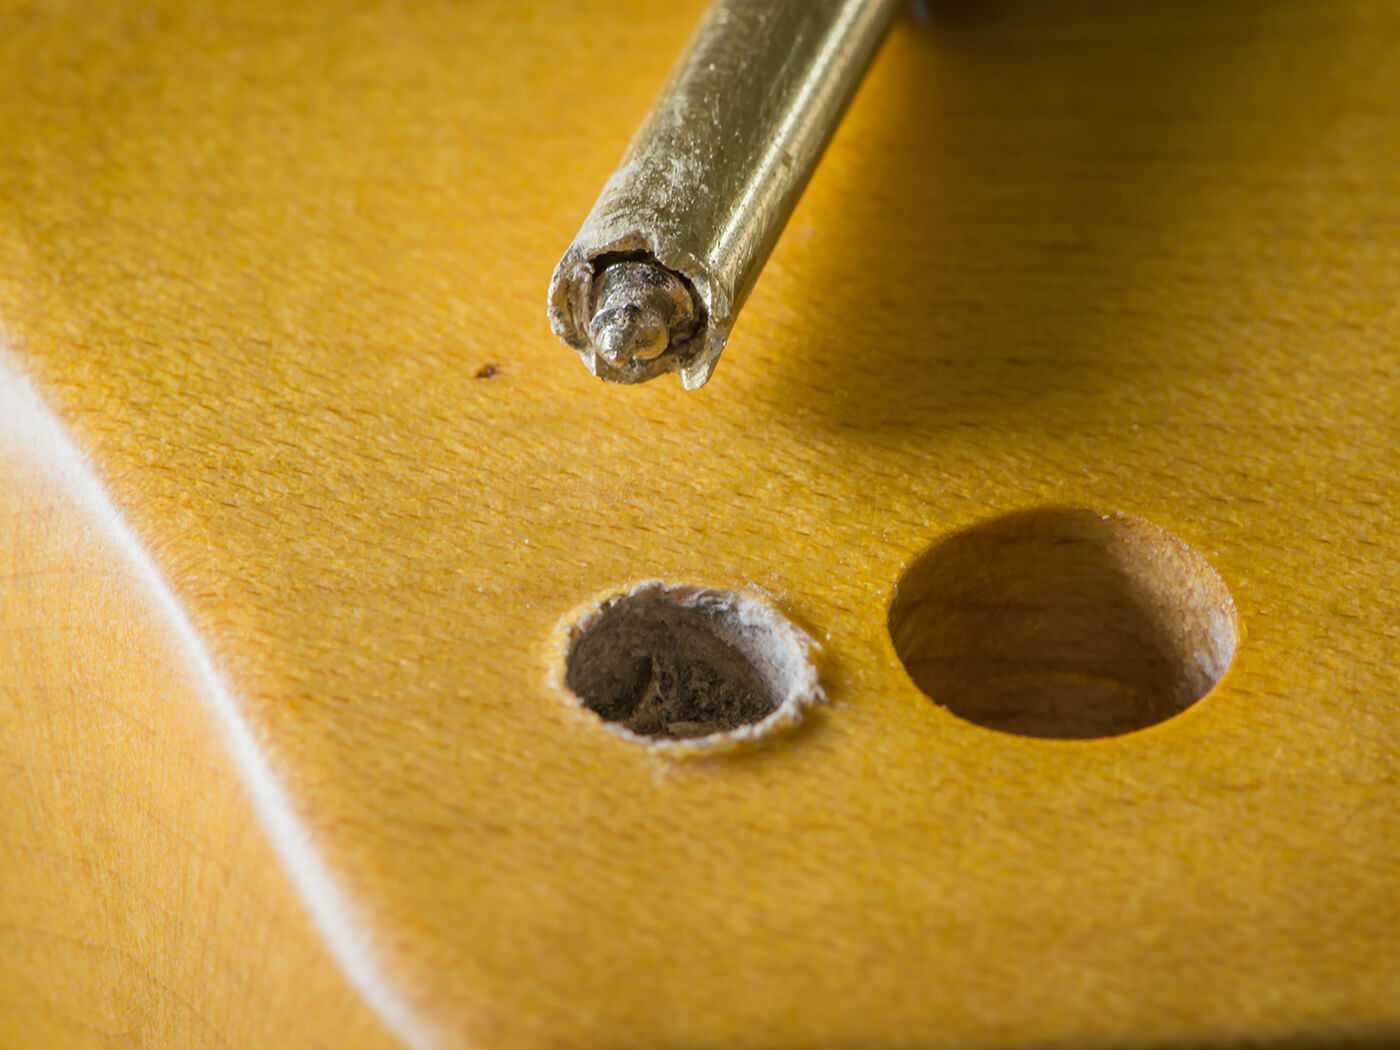
The first screw eventually comes out, but extracting the brass tube is tricky because the steel screw causes the cutting teeth to flare outwards. The screw is wedged inside the tube as I lift it out. Tapping a drill bit through from the other end of the tube clears out the screw and wood debris.
I’d strongly suggest sourcing steel tubing, but if you’re forced to use a softer metal, you’ll find it easier if the teeth aren’t filed too deep. Doing is often the best way to learn, and by the time I get to the third screw, the process has become a lot smoother.
Finishing up
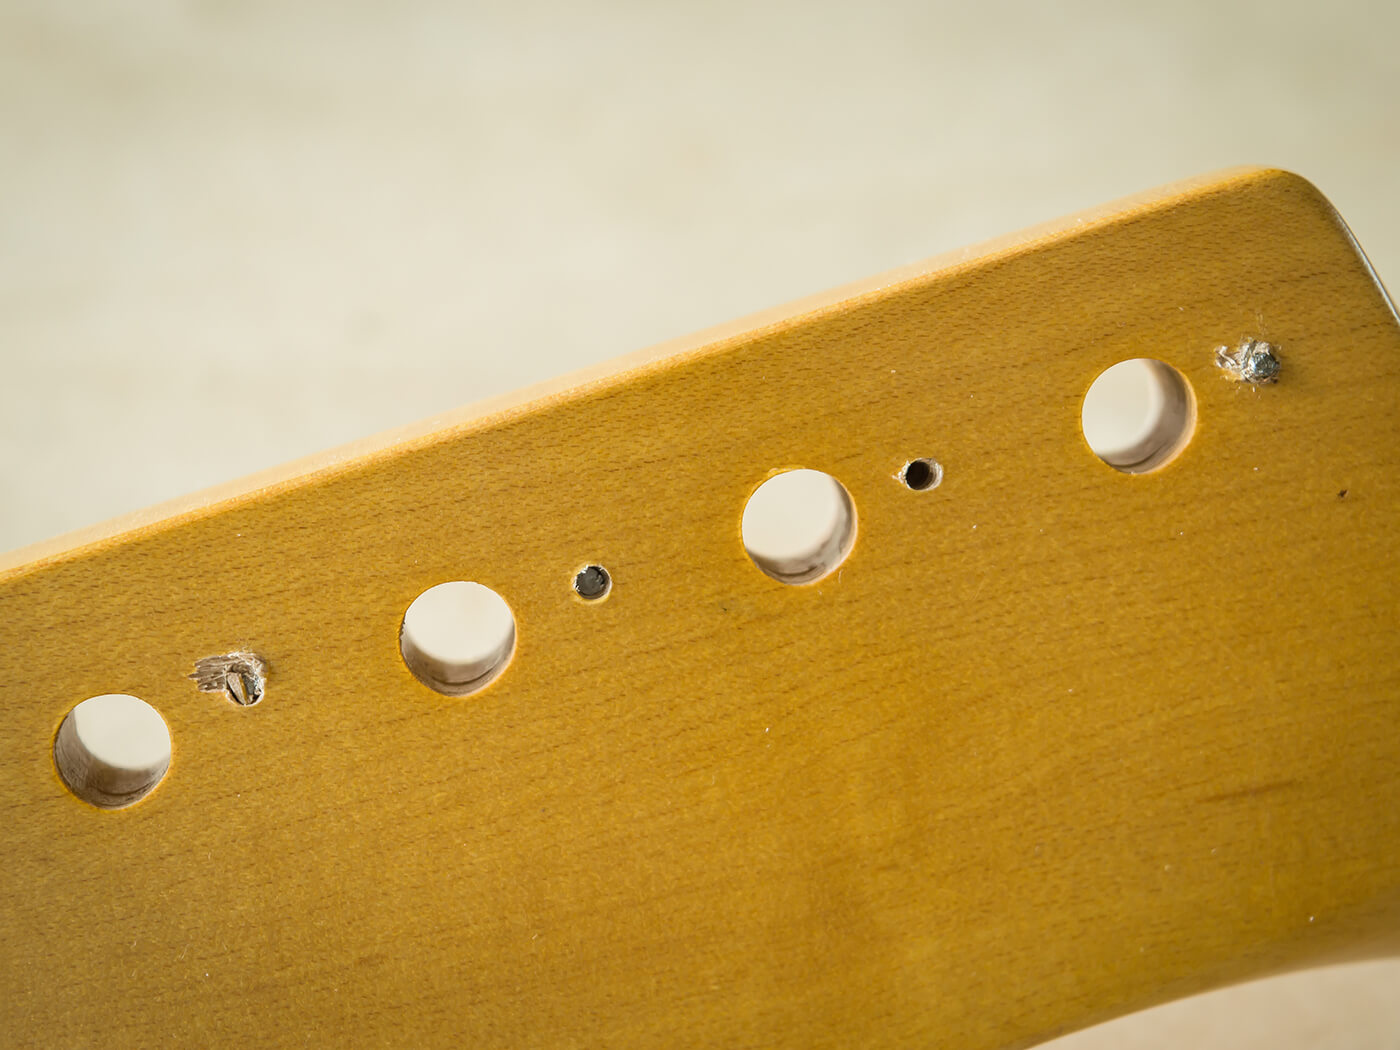
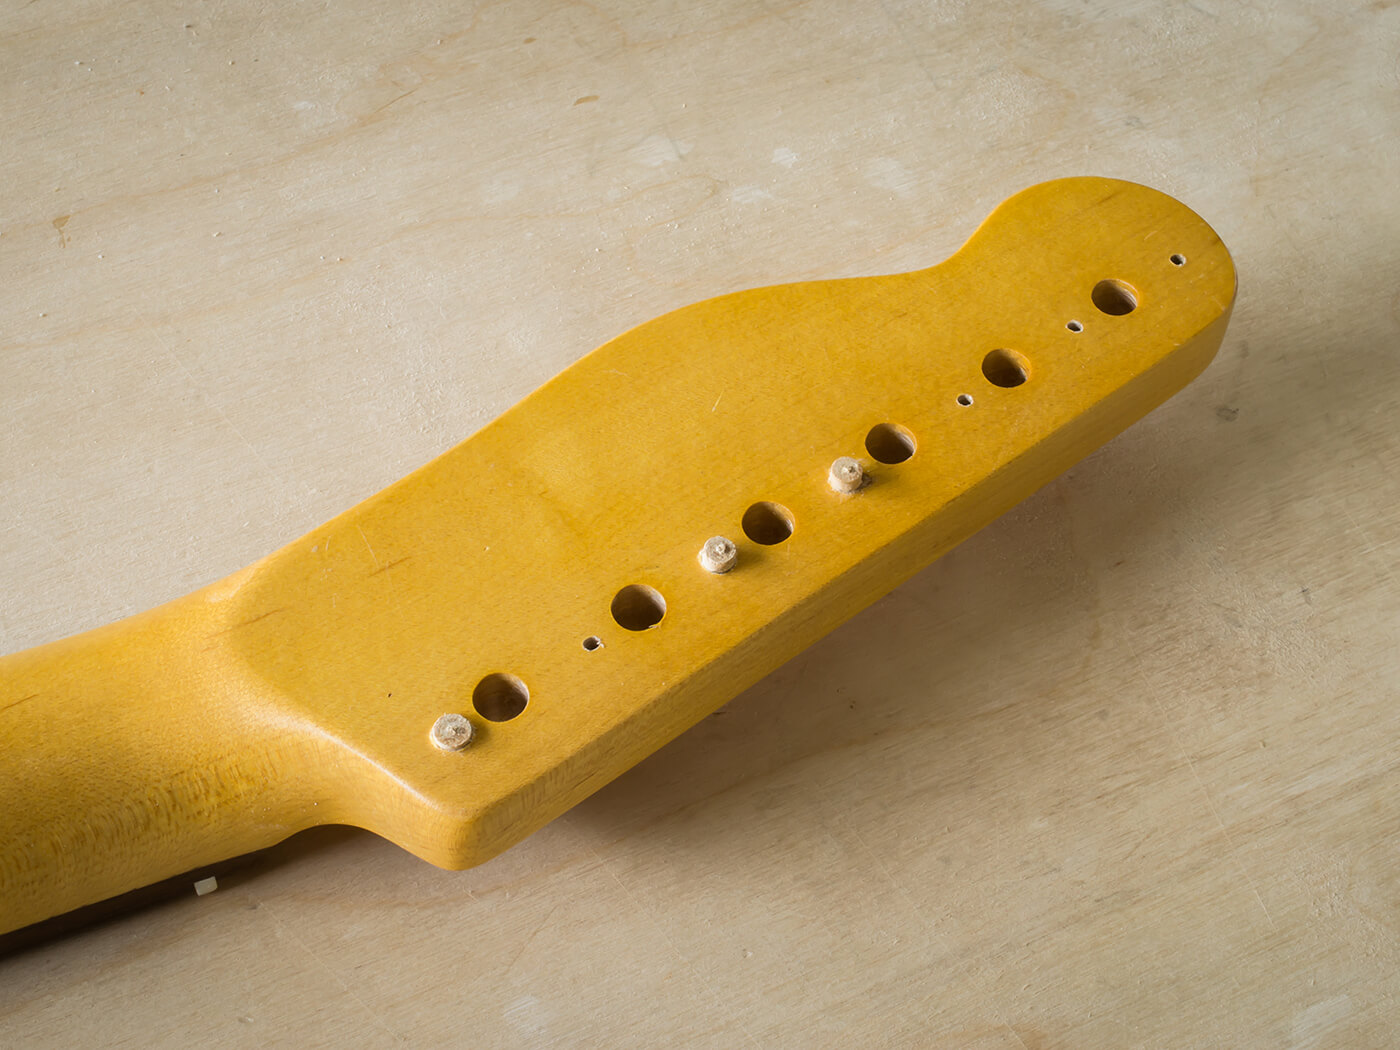
It’s fortunate that all evidence of this mishap will end up hidden under the tuners, but the holes have to be plugged because the tuners need fixing screws. The screw extraction has left me with one 5mm hole and two 4mm holes in the back of the headstock, so I need some doweling.
Maple would be ideal, but I’ve noticed that some suppliers are running low on stock these days. Instead I use some 6mm beech dowel, which I sand down to the required diameters using my hand drill and a sanding block.
The dowels are tapped in after first applying some Titebond Original glue, and I allow a few hours for the glue to set. I trim the excess with a flush cut saw, but you could instead use a very sharp chisel and a lot of care.
With a set of tuners placed onto the headstock, I straighten them up using a ruler and mark the positions for the new screw holes. Hopefully the owner will install the tuners using narrower screws or wider pilot holes, and there won’t be any further mishaps.
Snapping screws is not uncommon and it’s an easy mistake to make. If you ever find yourself having to exert a lot of energy to drive a screw in, it’s best to remover the screw and drill the pilot hole a bit wider. But if the worst happens, you should now be able to fix it.

Specialist screw-extraction tools are available, but they’re a lot easier to get hold of in the US than in the UK. StewMac lists a screw extractor, but it will cost you $33 plus shipping and duty. A one-metre length of brass tubing cost me £5.25 and the tool took about five minutes to make.

Although the brass tube is really too soft, it does the job. Next, I’ll be making a larger version to extract a snapped bridge post from a 1972 SG – a nightmare job that suddenly looks a lot less daunting.
For more on Huw’s work, visit huwpriceguitar.com.