Chord Clinic: How to play chords like Eagles
Throughout their long and incredibly successful career, Eagles have shifted a staggering 150 million albums… and you don’t do that without knowing a fair thing about how to write a compelling chord progression.

Image: Rob Verhorst / Getty Images
Though saddled with the ‘country rock’ tag from the start, Eagles’ music was never one-dimensional and their ability to grab a chord sequence by its cowboy boots and drag it across the border to pop/rock is beyond dispute. In this lesson, we take a look at a piano-inspired four-bar sequence and find different ways to voice the chords on the guitar.
Figure 1: Melodic Intro
We’ve chosen voicings for these chords that allow melody notes to be added on the top string. For example, in the first chord, the fourth finger can be released from the fifth string and sounded on the top string at the 10th fret. In the second chord, it can be released from the top string so that you can again sound the 10th fret, which will be held down by the barre. For the C major chord, the top two notes can be your melody, while finger four can be released on the C minor sixth chord and the note G at the third fret sounded.
For the best effect, try playing these chords fingerstyle, using your thumb on the lowest note and the first three fingers of your picking hand (index, middle and ring) to play the rest of the notes.
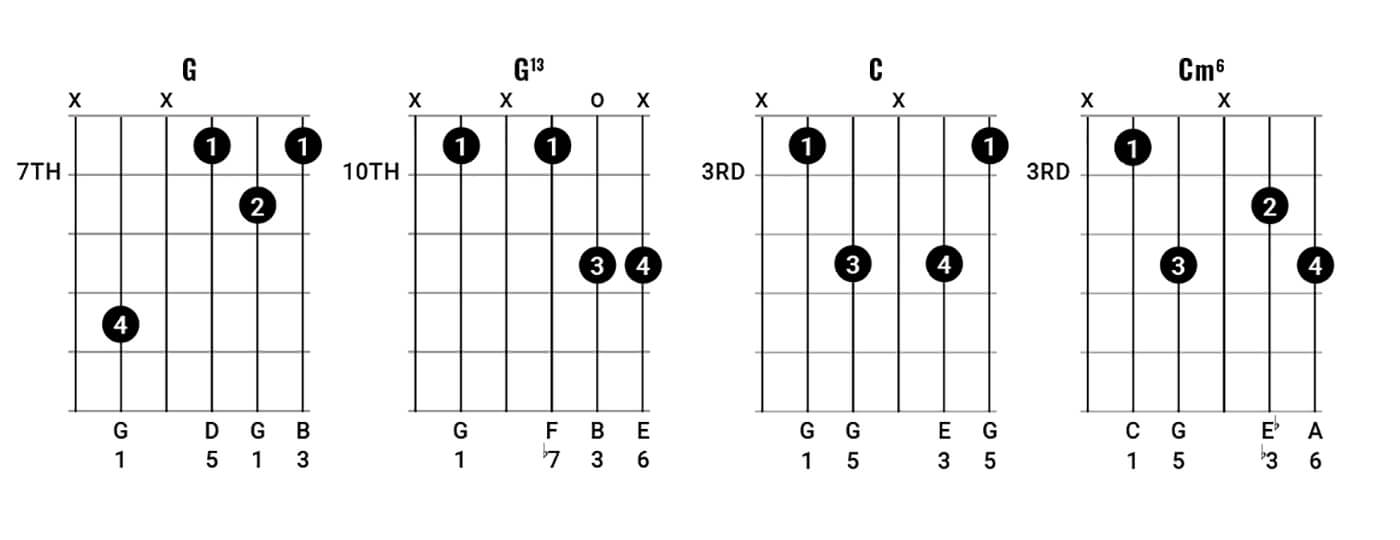
Figure 2: Melody With Low Voicings
It’s definitely easier to play chords and add melody notes when you have the higher voicings from Figure 1. Nevertheless, here we carry on in the same way, and adding notes to shapes which are based on those good ol’ open string cowboy chords.
Finger four can be added on the B string to play the note D over the G major chord, and then alternate between the top two notes of the E minor seven chord. On the A9 chord, drop finger three on the second fret of the G string to add the note A and then play the D major chord straight and let it ring – with a meaningful pause.
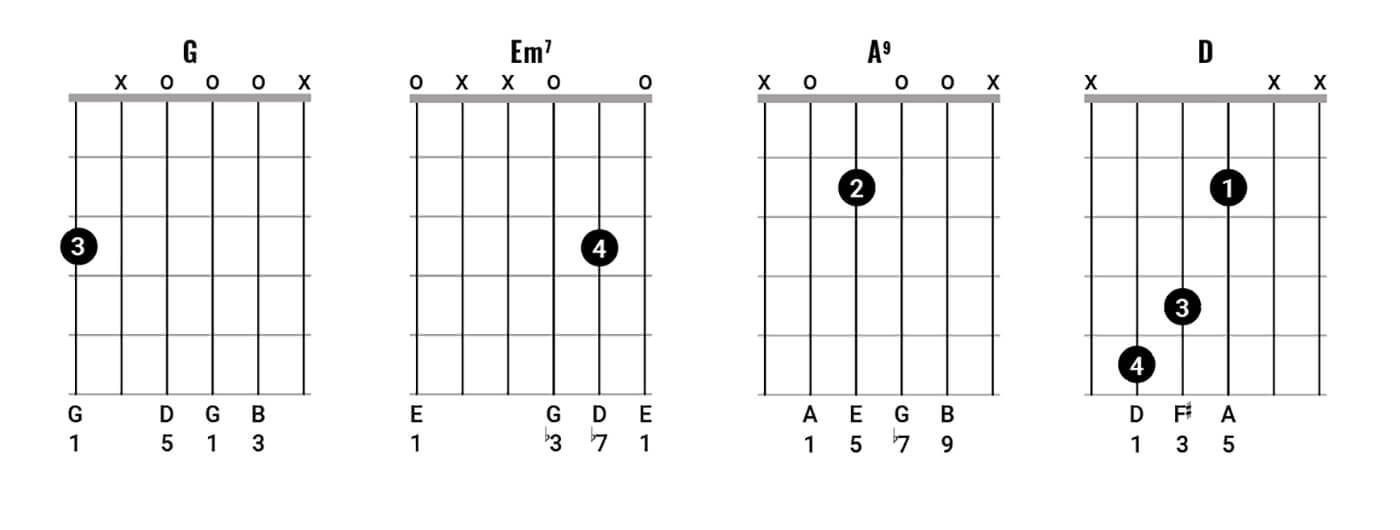
Figure 3: Vocal Backing
Here, we go through the same four-bar sequence as in figures one and two, but without any melodic decoration. Just play each chord twice, once per beat. The idea behind this simpler approach is to imagine you are accompanying a vocalist, feeding in expressive harmony but staying out of the way melodically.
Notice how smoothly the G major chord leads to the G9, with the top two notes descending two frets. Similarly, C to C minor sixth has some neat voice leading. That’s not to say that large leaps are unacceptable – check out the jumps from E minor through A9 to D major.
Some of these moves will be tricky for your fretting hand. You can make things easier by holding on to notes which are common between two chords – fingers one and three between C and C minor sixth for example. Always try to move your fingers smoothly and efficiently between chord shapes; practice any difficult moves back and forth and they will come eventually.
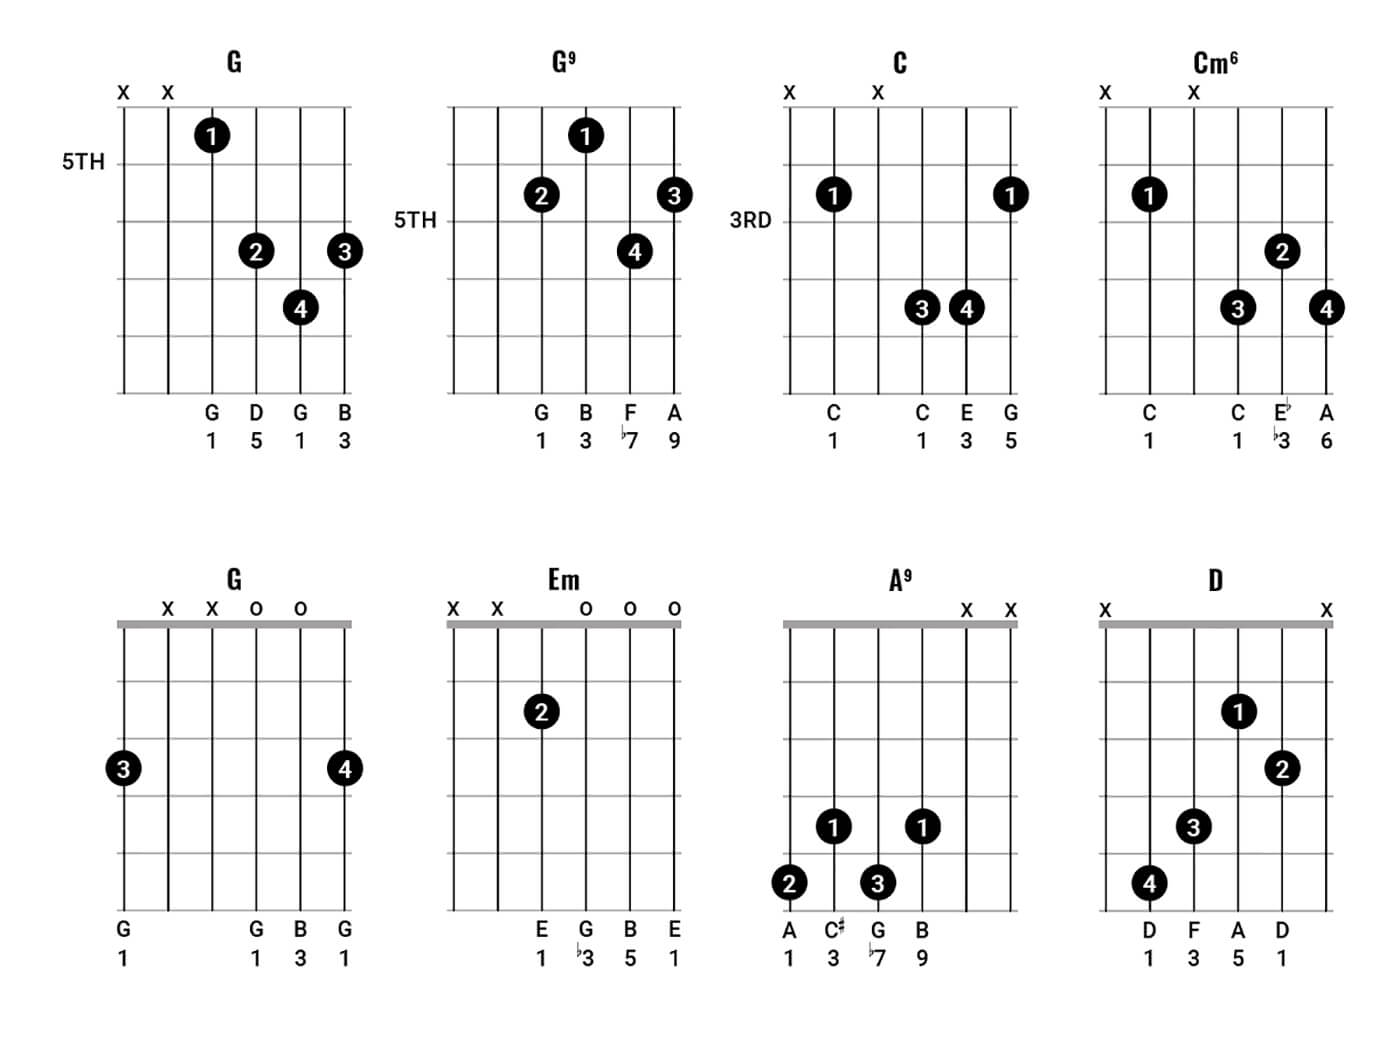
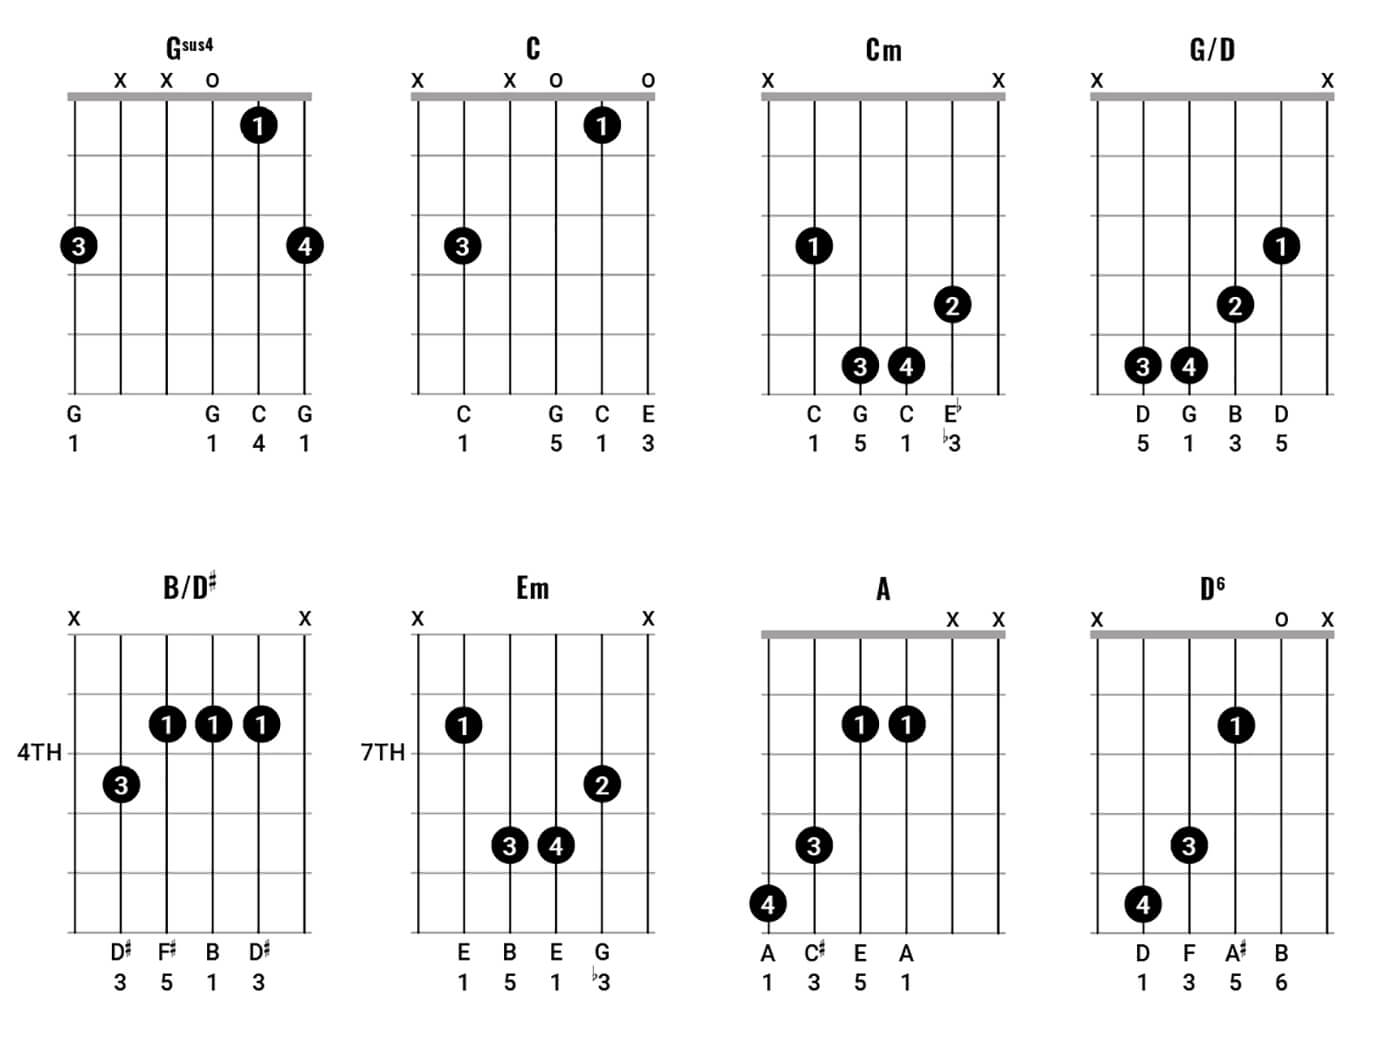
Figure 4: No Limits
We can imagine this chord sequence being used as a rising climax for a song, still based on the same four-bar chord sequence, but with some stronger voicings and an interesting twist between the G major and E minor chords.
Begin with the open G major shape from figure 3, (the fifth shape) and then move on to the Gsus4 chord, which acts as a less flowery, less jazzy, more ‘country’ substitute for the G13 and G9 chords we have seen in the earlier examples.
Continue on to the C and C minor chords, and then play G/D and B/D♯ for one beat each before arriving on E minor. Notice how the chromatic bassline seems to intensify our arrival on the E minor chord.
To end the sequence we have a low voicing of A major and an expressive D6 chord, which should lead on to a G major chord of your choosing – we recommend the open string shape from figure 3 or the first chord from figure 2. Alternatively, head back to figure 1 and repeat the intro.
If you’ve enjoyed getting to grips with these sequences try playing all the G major chords one after another checking out how the notes are voiced on the guitar. Then do the same for the extended G chords (G13, G9 etc), the C major, Cm6 chords and so on.
For more guitar lessons, click here.