Related Tags
DIY Workshop: How to wire (or rewire) a single-pickup electric guitar
Whether you’re undertaking your own DIY build or want to give your existing single-pickup guitar an overhaul, it’s time to get your iron out.
Single-pickup guitars are some of the most unapologetically fun instruments you can play, but they’re also some of the simplest and most straightforward to upgrade, fix and indeed build.
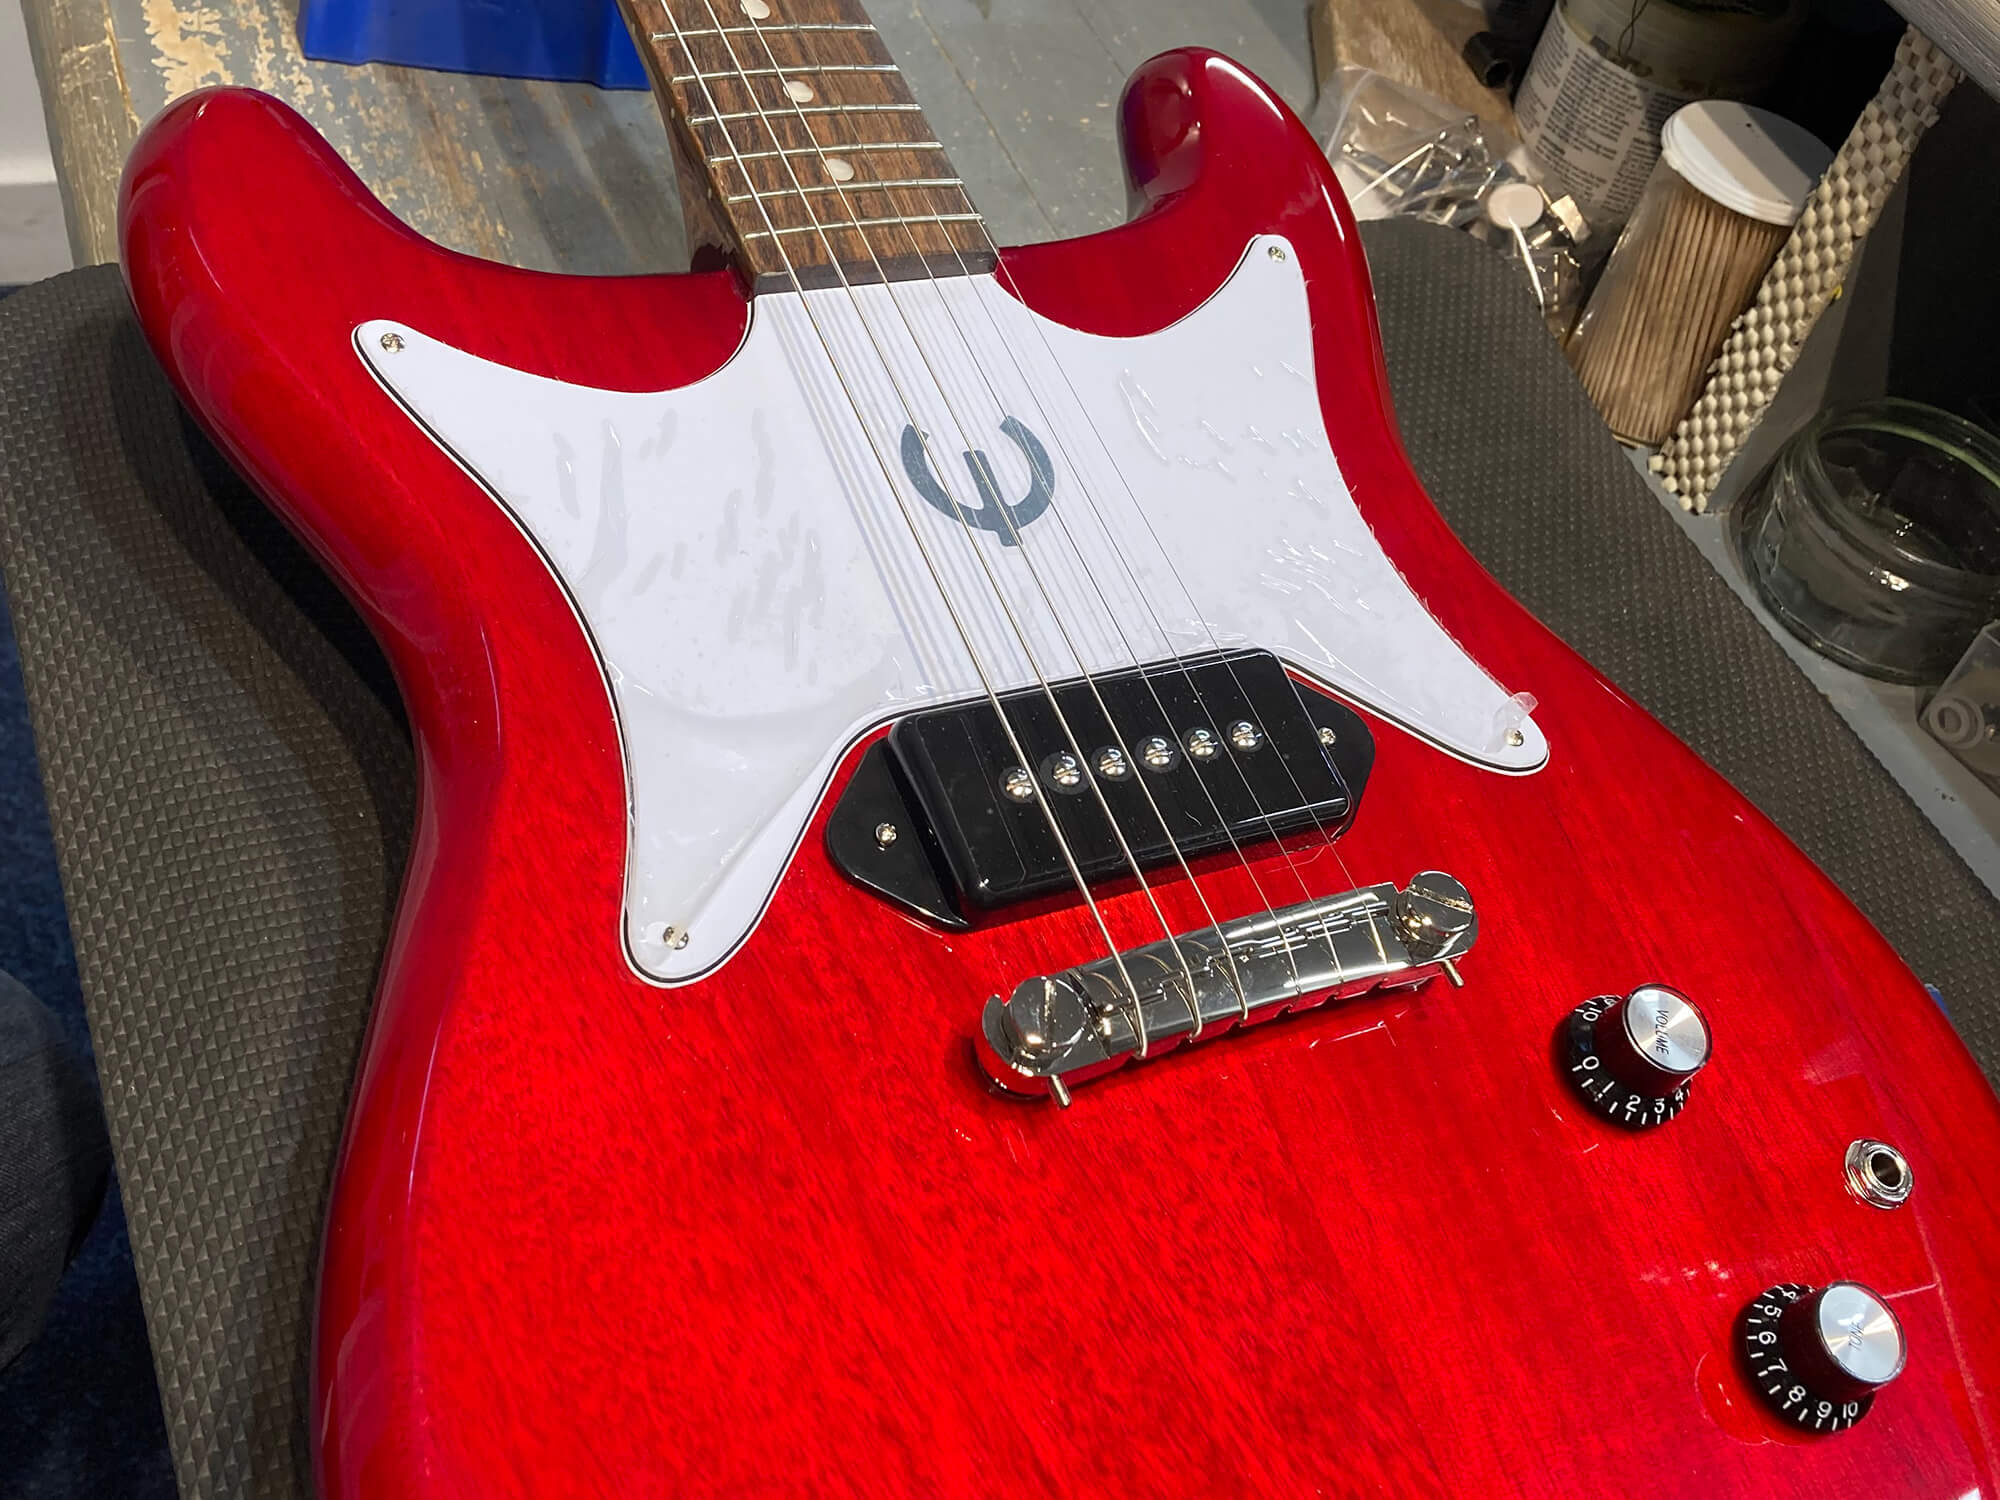
For this guide I’m using an off-the-shelf Epiphone Coronet Reissue that I’m overhauling for Reef guitarist Jesse Wood, and eventually this guitar will have a total top to bottom overhaul, fret dress and everything else to get it ready for the rigours of touring night after night.
We’re going to start off with replacing the wiring however, and that’s where you can apply what we’re going to do to your own single-pickup instrument, or indeed if you’re building one from scratch, this will work just as well.
Step 1 – Set the scene
For an existing guitar rewiring job, the first step is to open the back control cavity up and check on which wires go where, take a photo on your phone, or if you’re feeling technical, get a pen and pencil and draw the circuit and where everything goes.
With this guitar, I’m dealing with a Gibson-style, single P-90 with one volume control and one tone control. Much like the unsung electric guitar heroes, the Les Paul Juniors of the world.
Step 2 – Remove the existing wiring
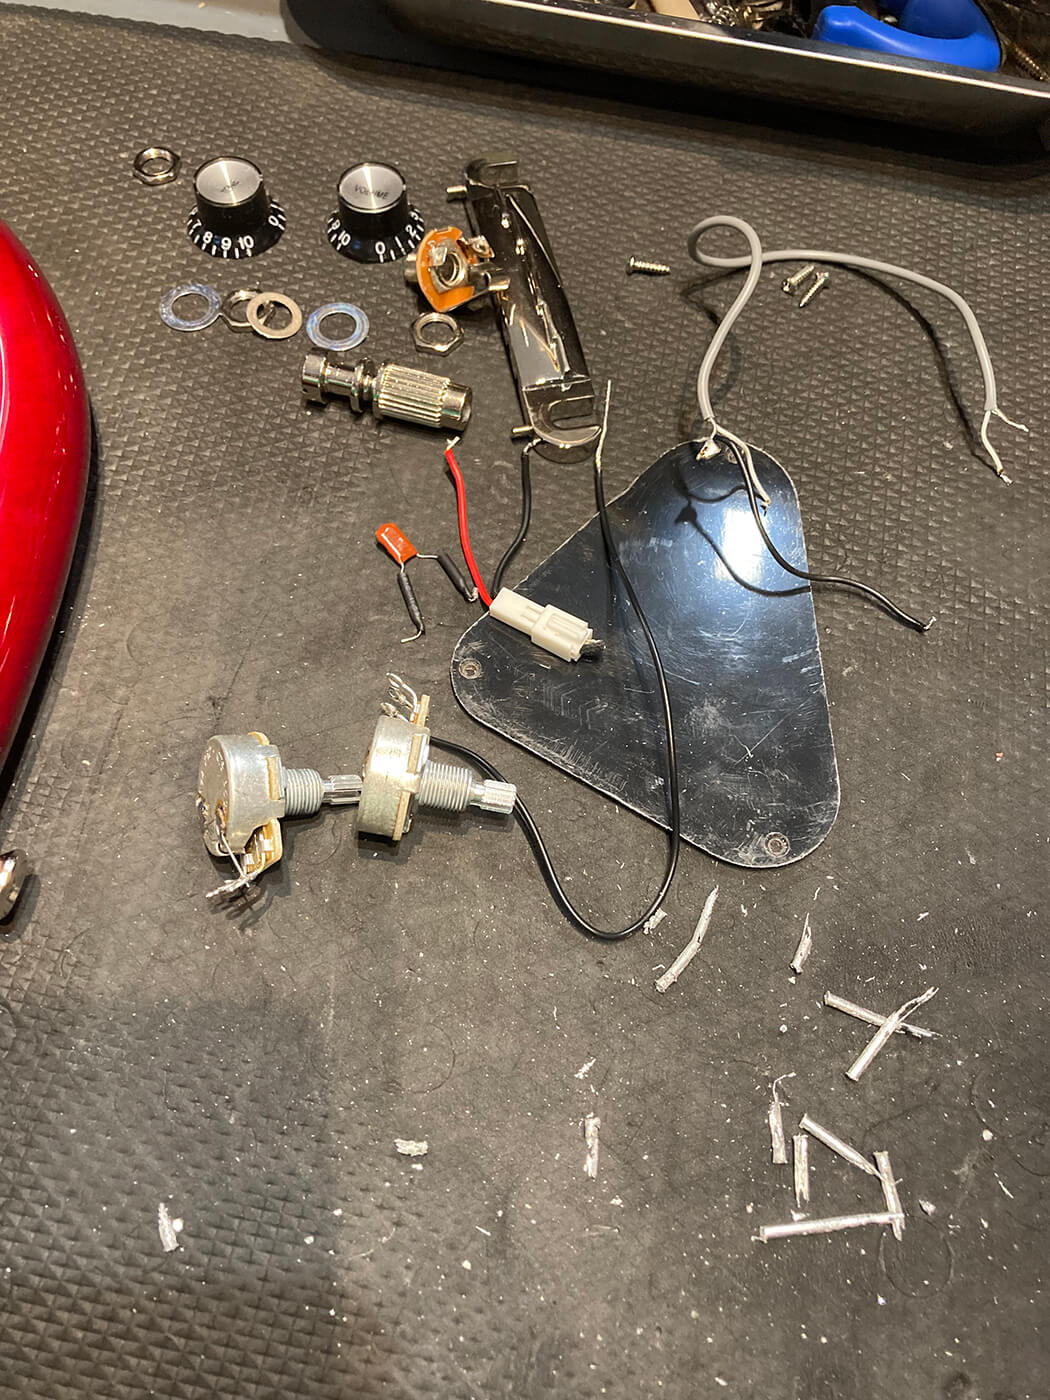
You’ll notice I have removed all of the wiring here and I’m going to replace it with a better quality capacitor, solder and wire. There’s nothing really wrong with the Epiphone’s stock wiring, indeed they’ve improved it in various ways recently, but as this guitar is meant to be a road warrior, we need to make sure everything is the best it can be.
You’ll notice with the solder that it takes a little longer to melt than usual, that’s because it is lead free and ROHS compliant. This also makes it legal to get it into your hands, so be grateful. A small amount of fresh solder on the existing joint can make the process a bit quicker here.
Once the solder has melted, use a solder sucker (invest in a good one of these if you don’t already have one) once the majority of the solder is removed, let the components cool down.
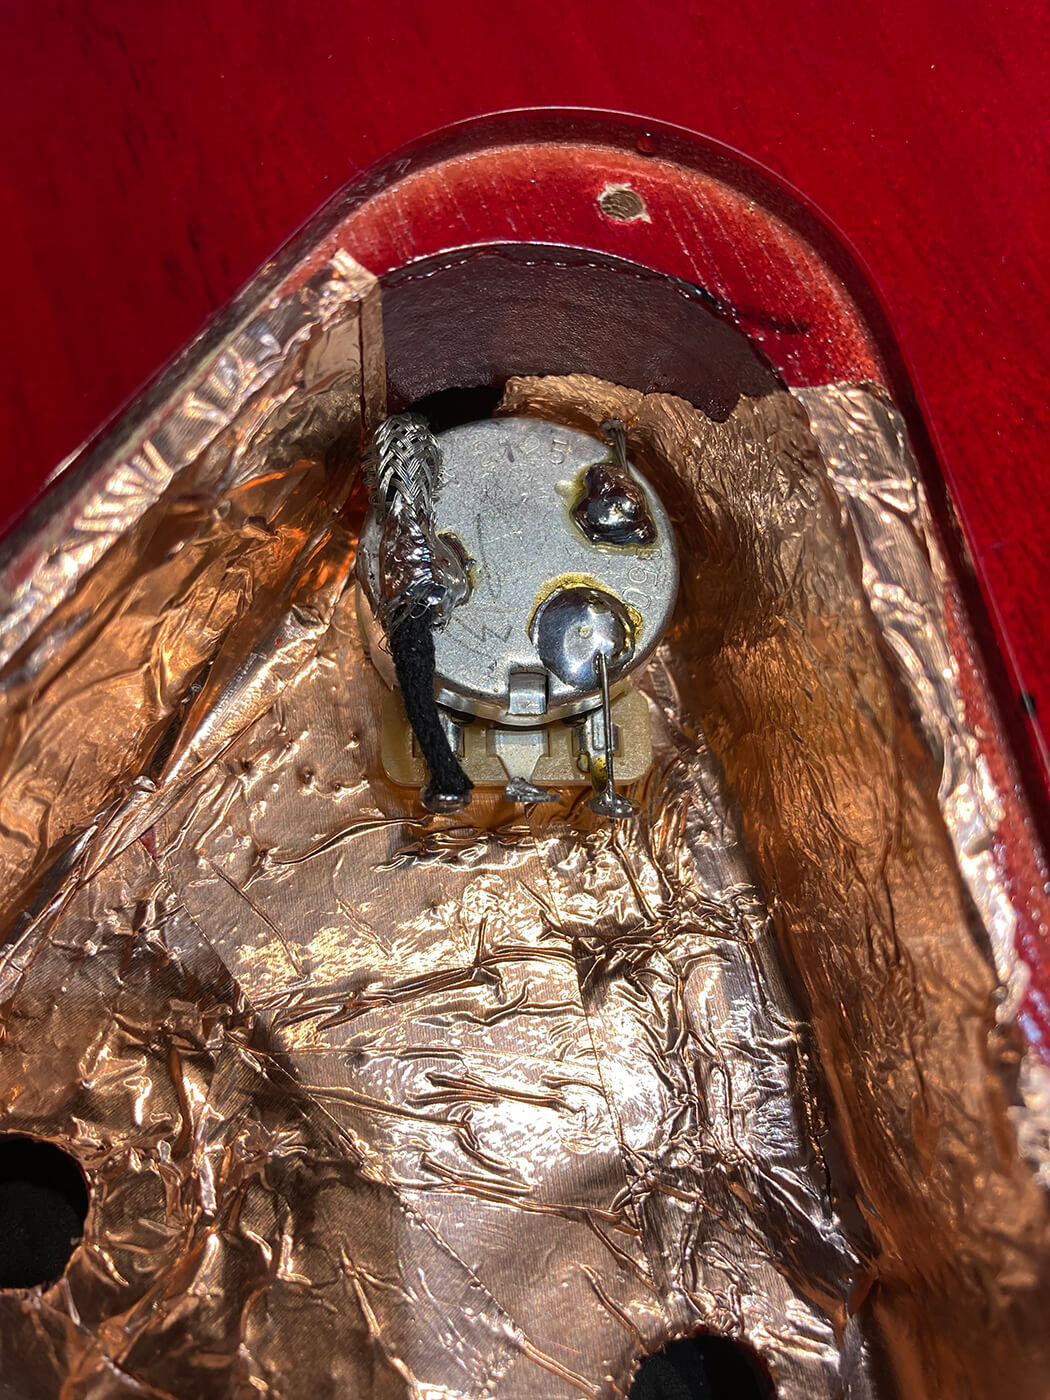
Step 3 – Raise the shields
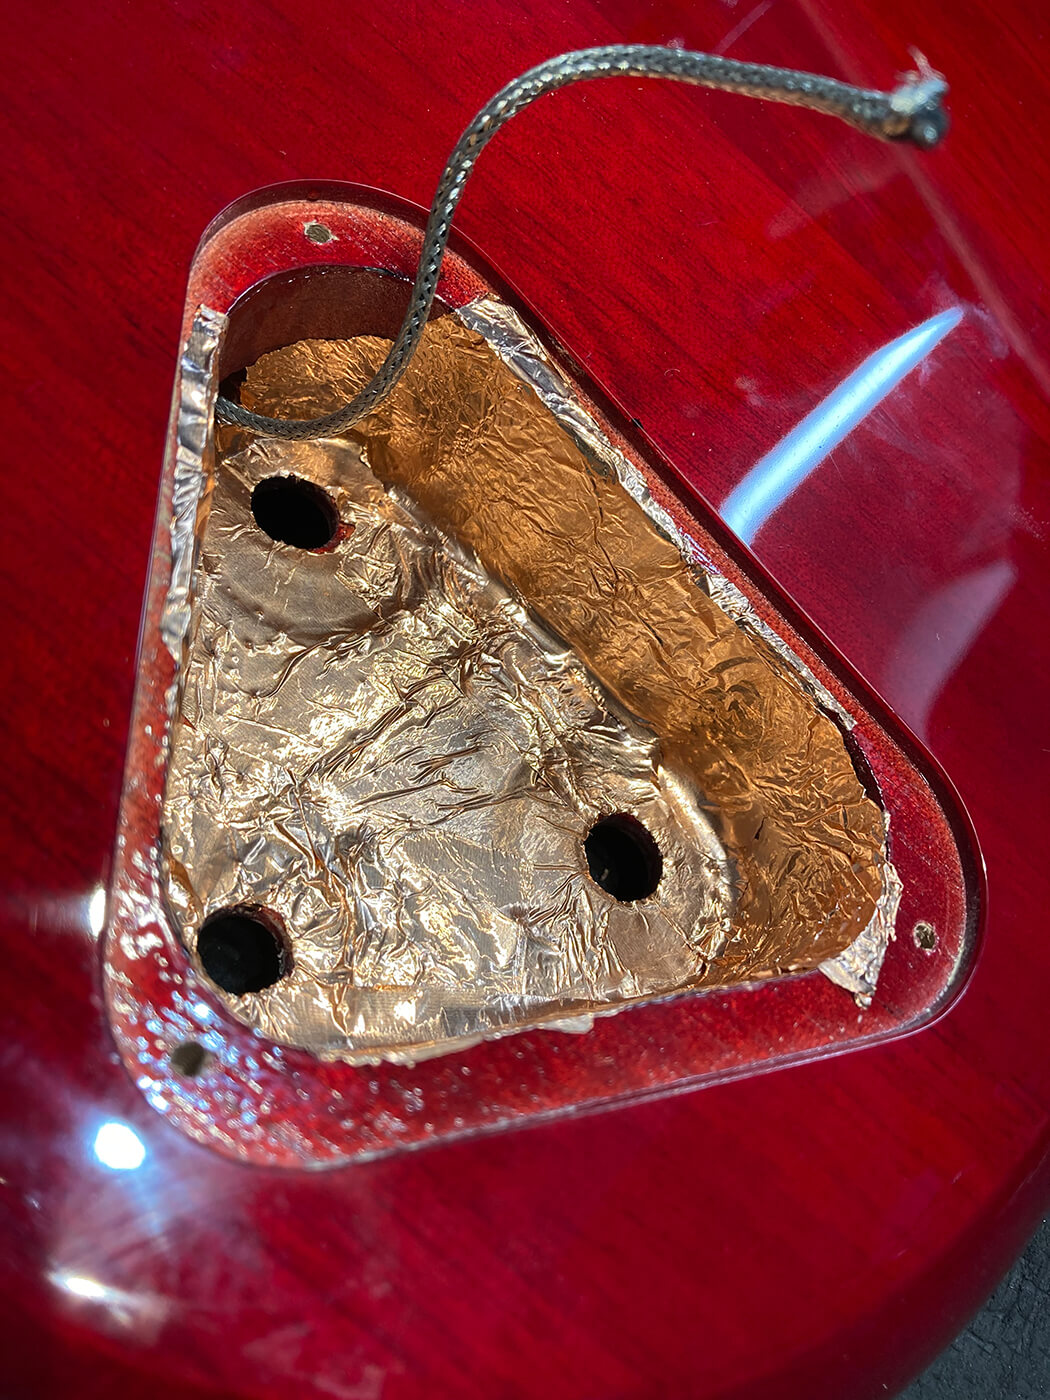
So with all the components ripped out and the whole guitar getting overhauled, I decided to shield the internal cavity as single-coil guitars can be a noisy affair when you add in the lighting rigs are concerned. Using copper tape, the guitar is now shielded and ready to take its new wiring.
Step 4 – Retrace your steps
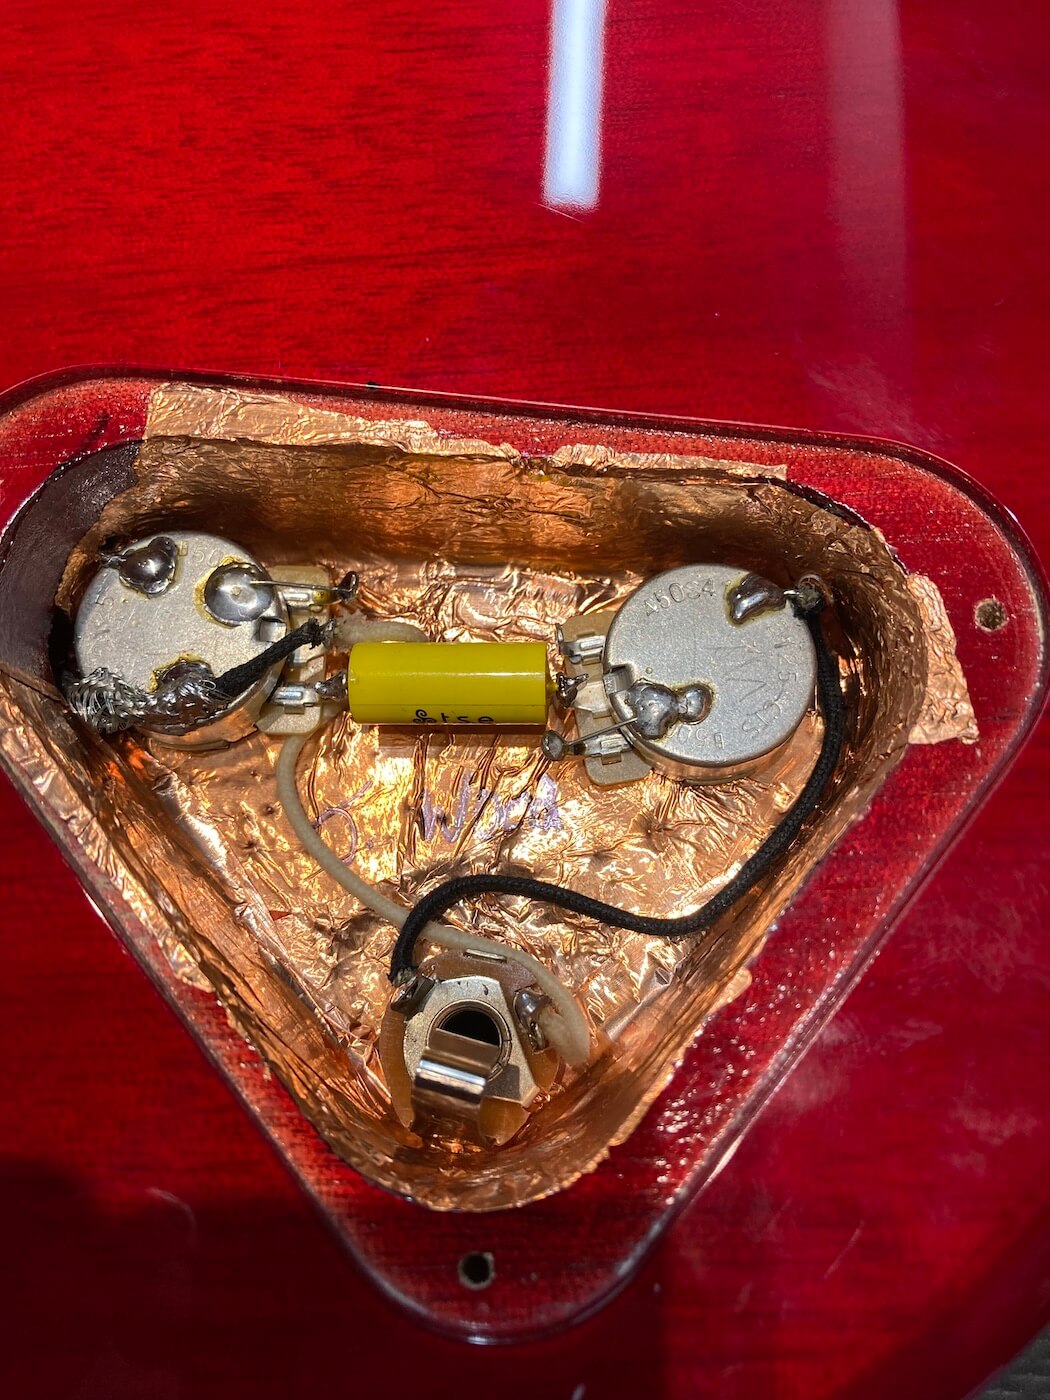
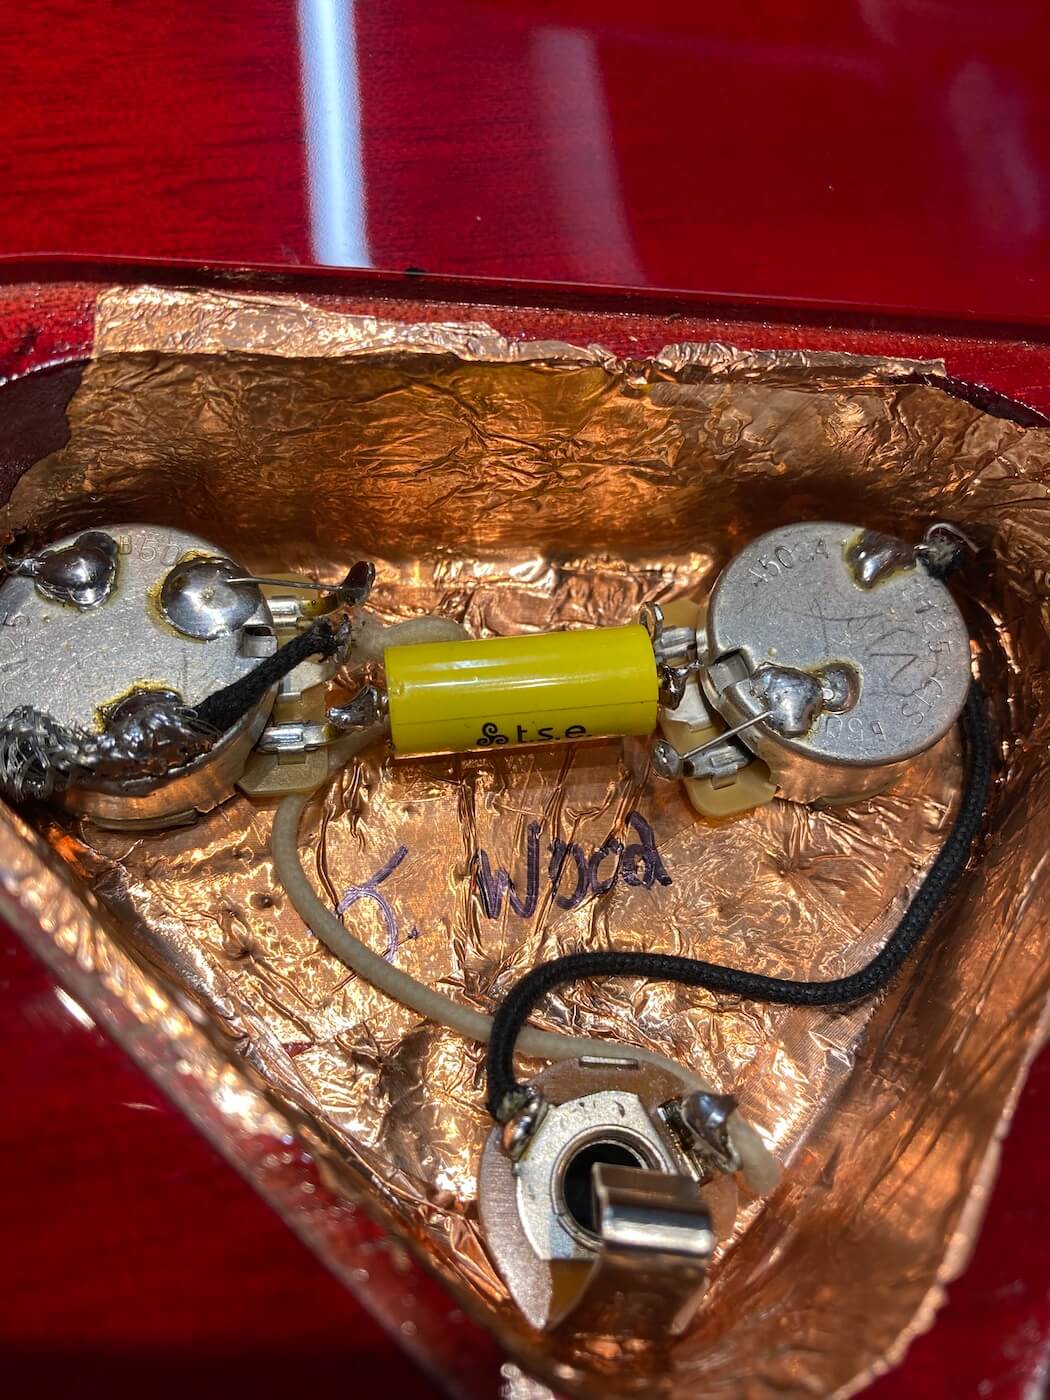
The Epi’s circuit is fairly primitive so it’s fairly easy to recreate, the best way to do this is to mount the components in the same formation on an old egg box – this is especially useful if you’re unsure of your hand being steady, as it means you won’t risk burning the finish of your guitar.
Step 5 – Make the Earth move
With this guitar, the pickup was cut loose from its plug, trimmed and rewired to the volume pot as per original spec of these guitars. The pickup Epiphone used for this guitar is a hot P-90 which measures a slightly higher output than my 87’ Gibson Les Paul DC Junior.
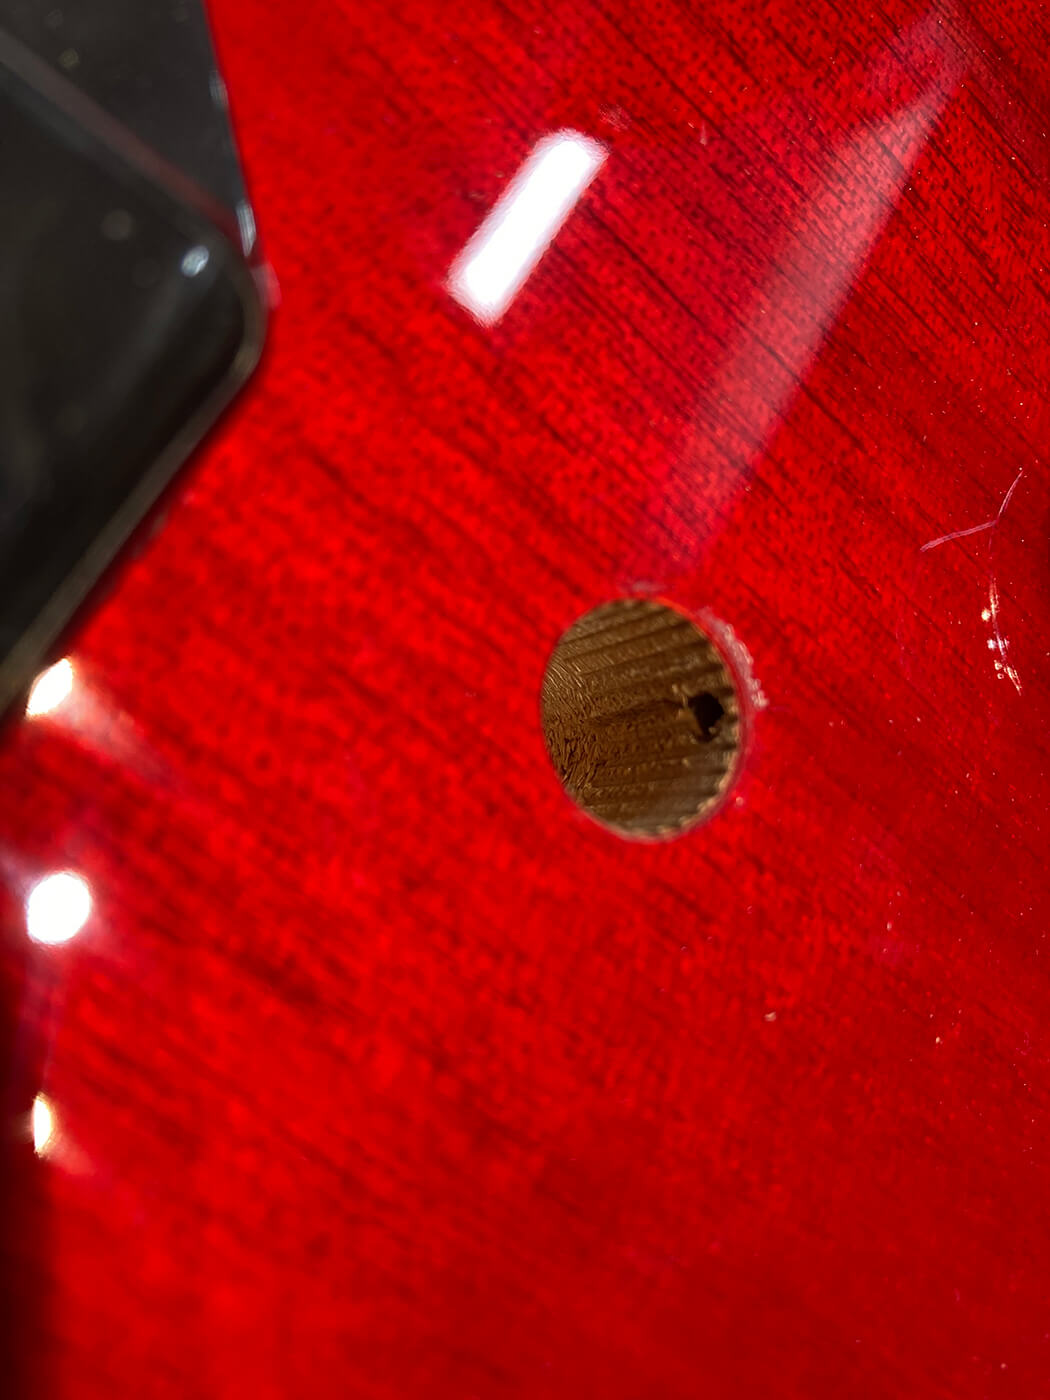
I also removed the earth from the bridge post by pulling it out and adding a thicker, cloth covered wire in its place, I gently tapped the bridge post back in. If you’re going to do this, ensure that the wire inside the earth hole, is splayed allowing more contact to the tailpiece stud.
Once the plug is removed, the pickup is earthed via the braided sleeve of the wire, the cloth one is extended and pulled back to allow the live wire to connect with the 1st tab of the volume pot, this tab takes two wires, the second being the live connection of the input jack.
Step 6 – Pump up the volume
The volume pot has the last tab soldered to itself as does the tone on the first tab. The capacitor is going to be soldered to the last tab of the volume pot and the middle tab of the tone. Connecting the two so that they work together with the same pickup. I used an upgraded paper in oil 220nf capacitor for this guitar which in my opinion, makes a world of difference in a cheaper guitar.
With the volume pot being closest to the bridge post earth, the wire threaded through is soldered to the top of the pot. The volume pot acts as a good place to solder the earth wires from the pickup and the bridge post.
Step 7 – Jack it in
From the input jack, I’ve run one white cloth vintage wire from the same tab that the live pickup wire is wired to and gently pushed it into the hole on the tab whilst maintaining a steady hand.
Taking an earth wire from the earth tab on the input jack (the tab that is connected to the same part of the jack that touches the cable) I’ve soldered that to the top of the tone pot.
Once all these joints are solid with no loose connections, please check the photos or your earlier drawings and refer to them – if you notice a discrepancy, better to correct it now than when you’ve put the guitar back together…
Step 8 – Testing!
Plugging the guitar in, check that the volume and tone pots are working by touching the magnet with a small metal implement. If you hear the sound come through your amp, you’re on your way to single P-90 enjoyment.
If you have further issues, check your joints and refer to the photos in this article or the photos that you took of the circuit as it was originally. By doing this method, you will always have a plan to fall back on should the result of your soldering fail you.
Step 10 – If In Doubt, Ask A Pro
Electronics isn’t the easiest thing for everyone to get their head around, and so if you’ve followed these steps and are still getting no joy, it might be time to call a pro. The temptation will be to get angry and smashy, but in the long run it’s much better (and cheaper!) to take it to a reputable guitar shop who can fix or if not advise on what the best options are!
Good luck!
For more guides, click here.