Follow Mike on Instagram @puisheen.
Related Tags
When you purchase through affiliate links on Guitar.com, you may contribute to our site through commissions. Learn more
Tech Talk: How to fit a Mastery Bridge to a Jaguar with a mute
Want to upgrade the bridge on your vintage-style Jag but maintain a functional mute? Let us be your guide…
When you purchase through affiliate links on Guitar.com, you may contribute to our site through commissions. Learn more
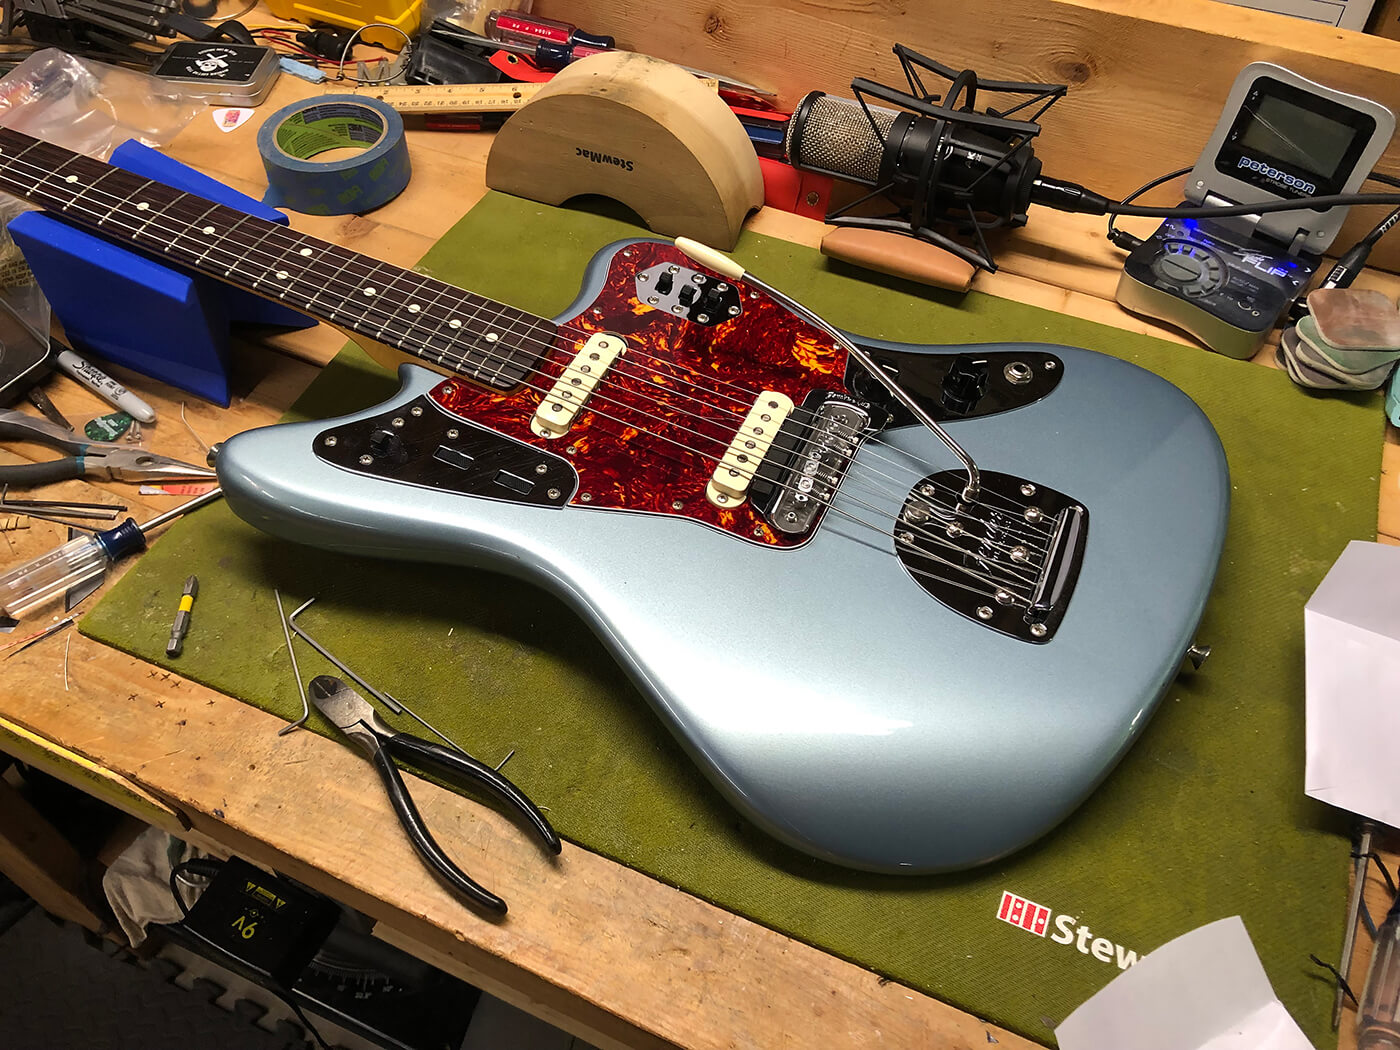
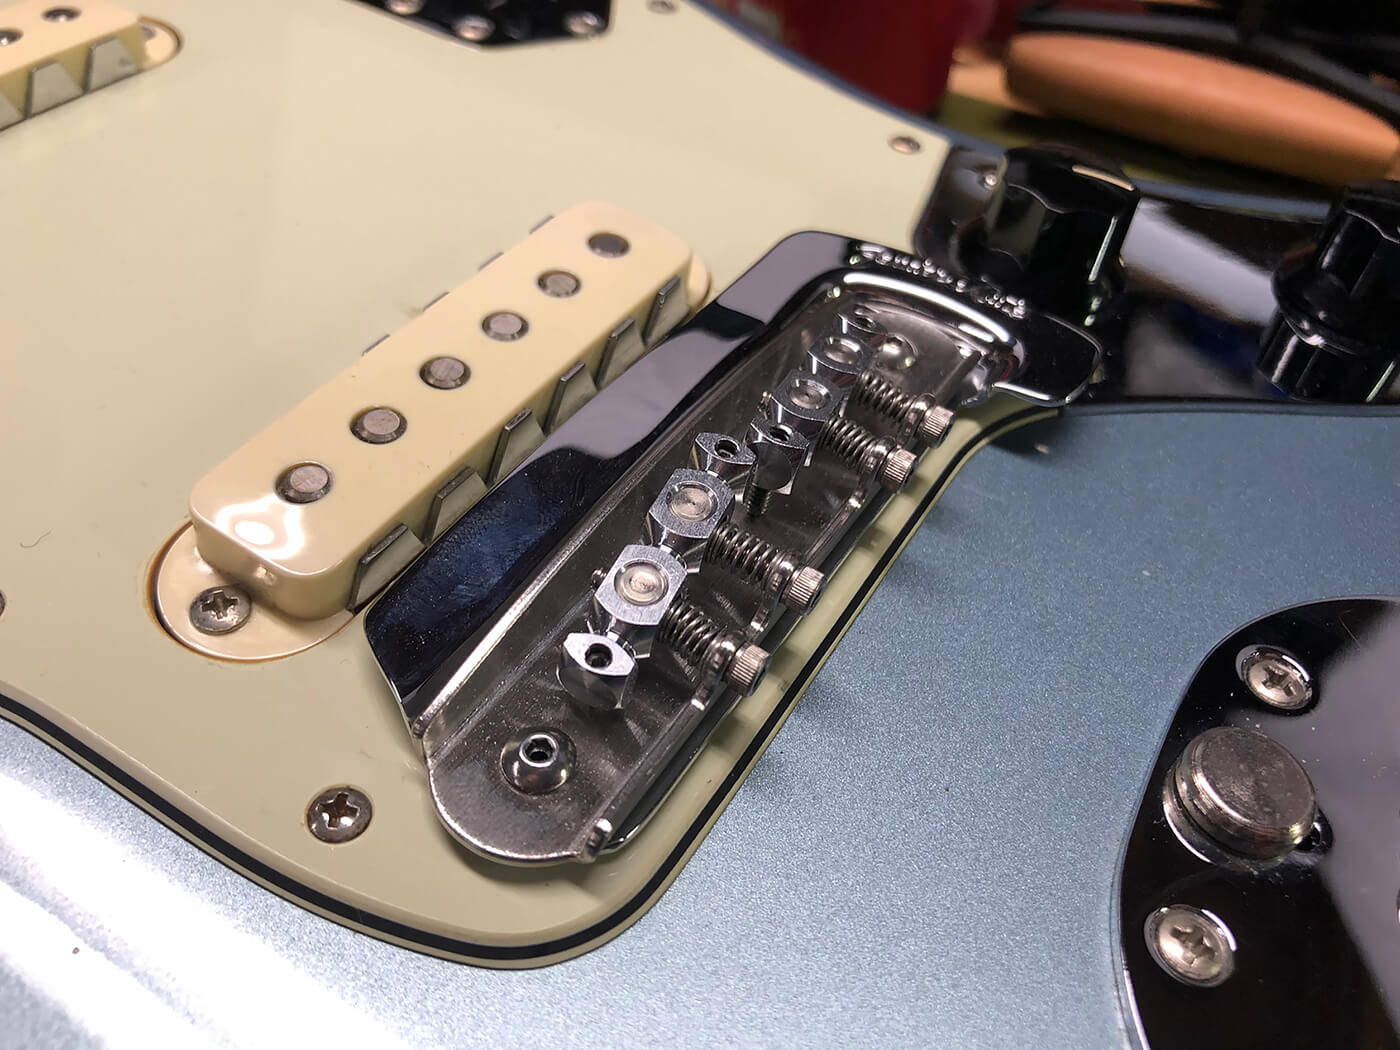
We’re starting off strong in 2021 with a job involving a Fender AVRI Jaguar and a Mastery Bridge. Normally installing a Mastery is a relatively simple procedure: you open up the tin and pop into the existing body inserts. However, for the owner of this great Jaguar, it was a little more complicated than that.
Jaguars and Jazzmasters look similar, but in reality they’re very different beasts. Sure, they share vaguely the same body shape, use the same bridge and vibrato, but dissimilar scale lengths – 25.5 inches on the Jazzmaster, 24 inches for the Jaguar – and pickups that are unique to each model are features that add up to quite the gulf in terms of sound and utility.
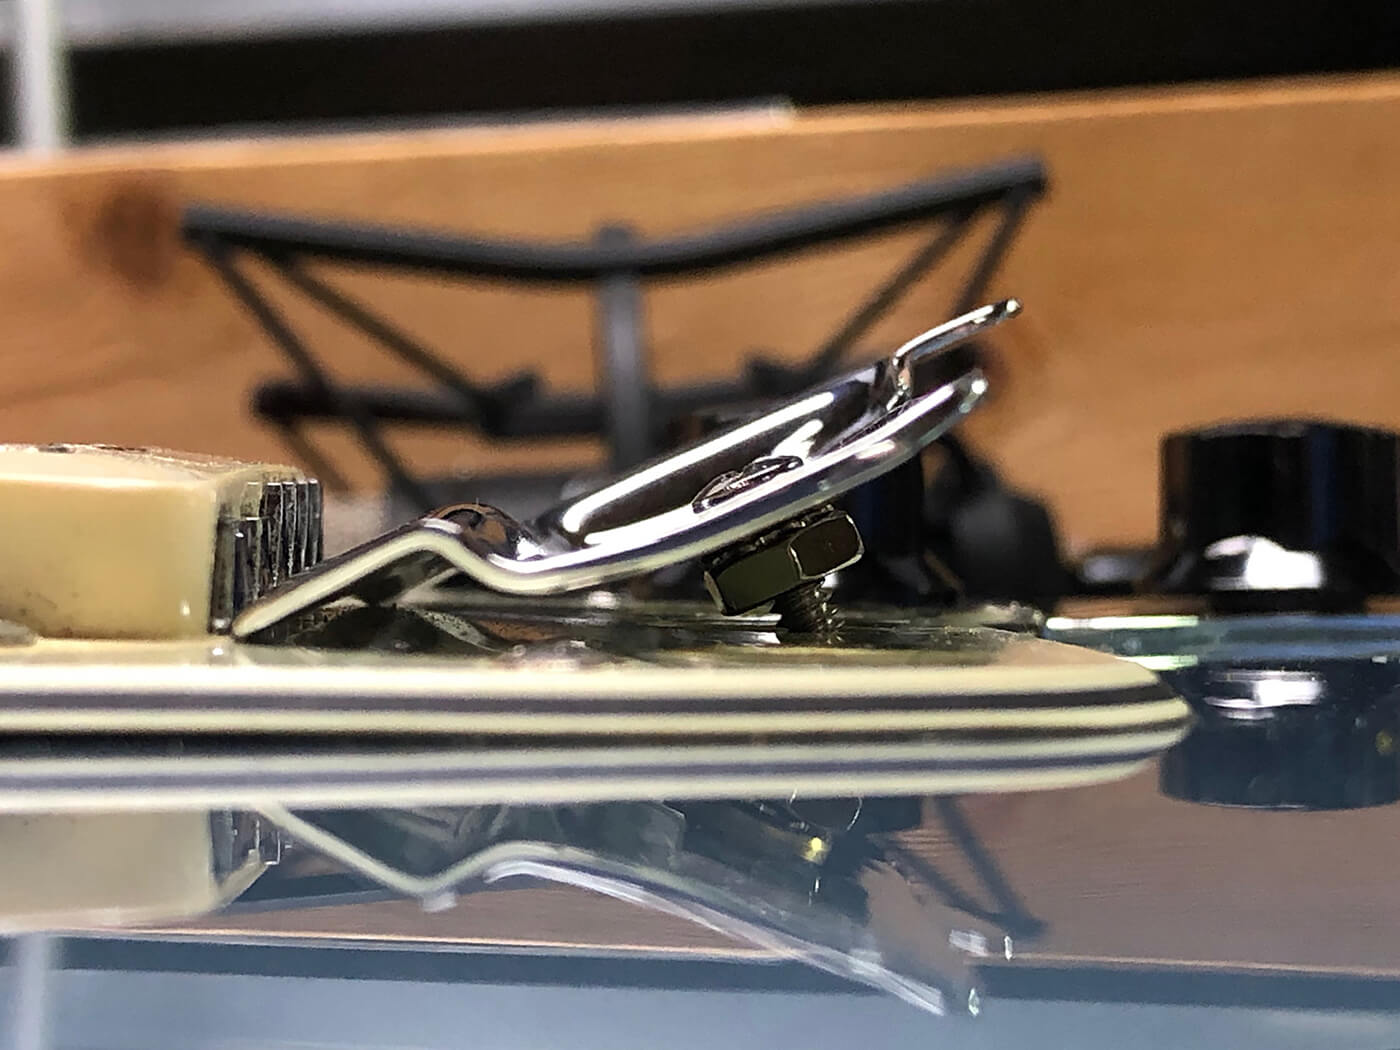
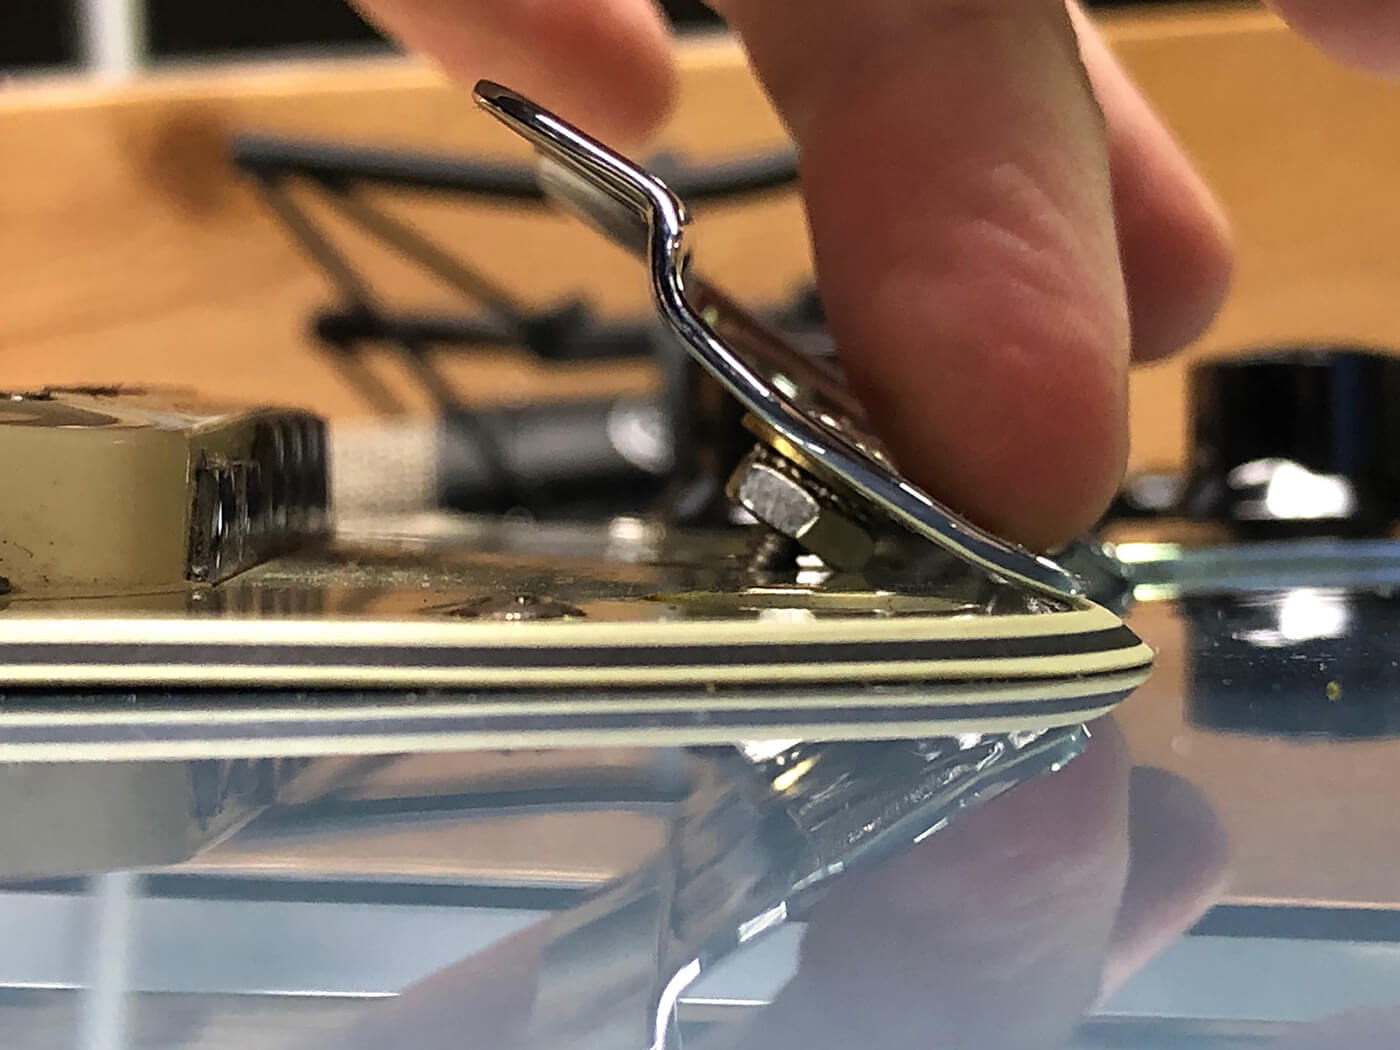
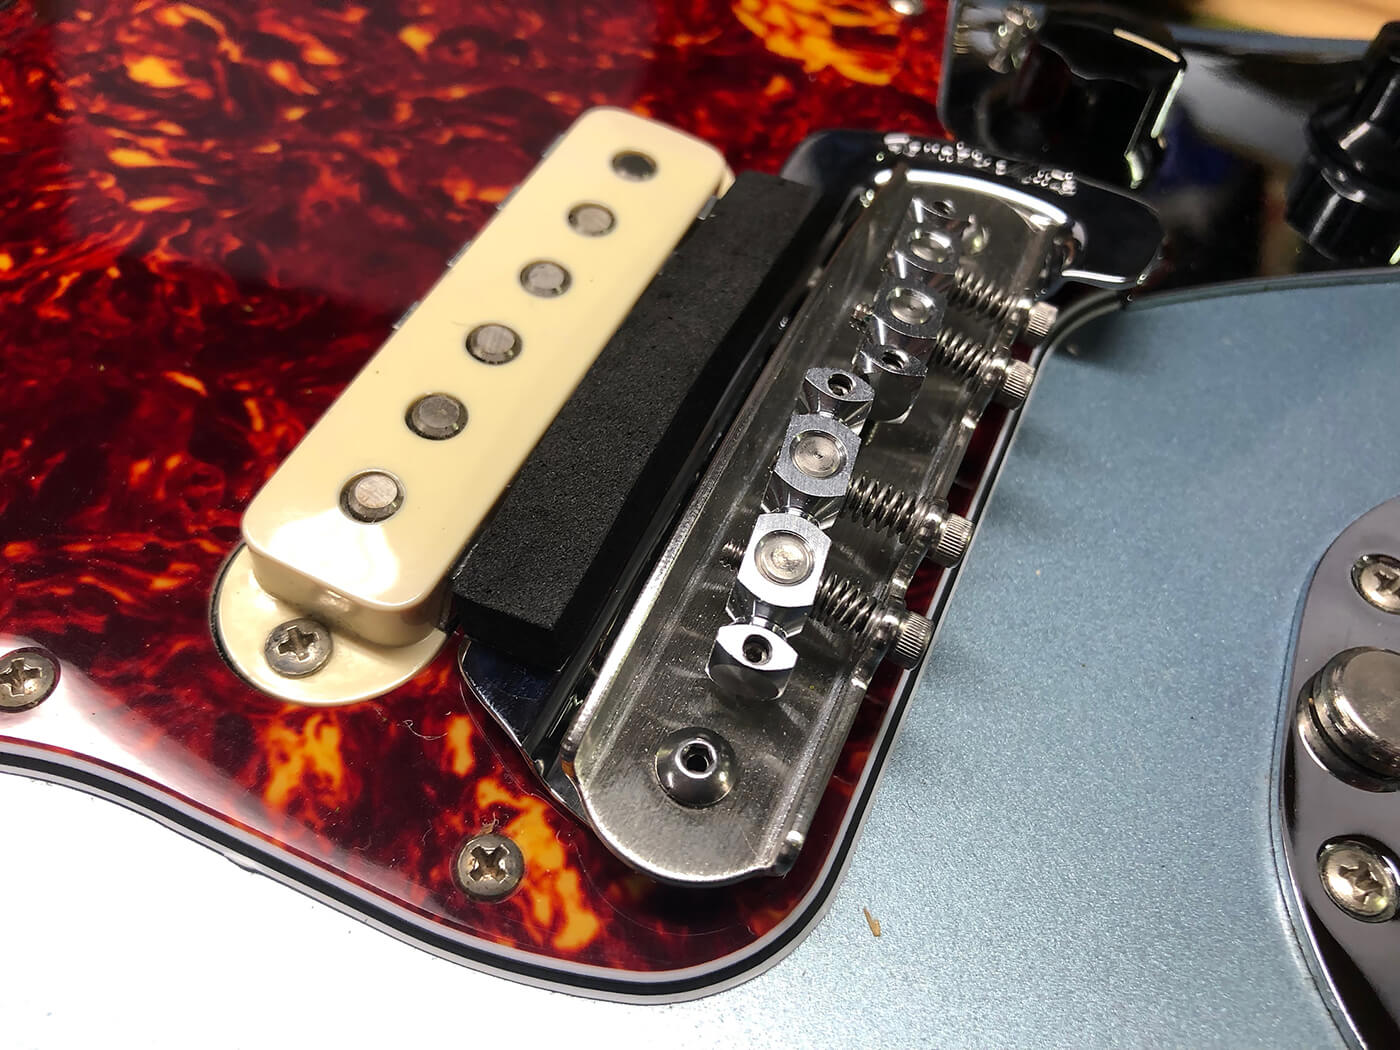
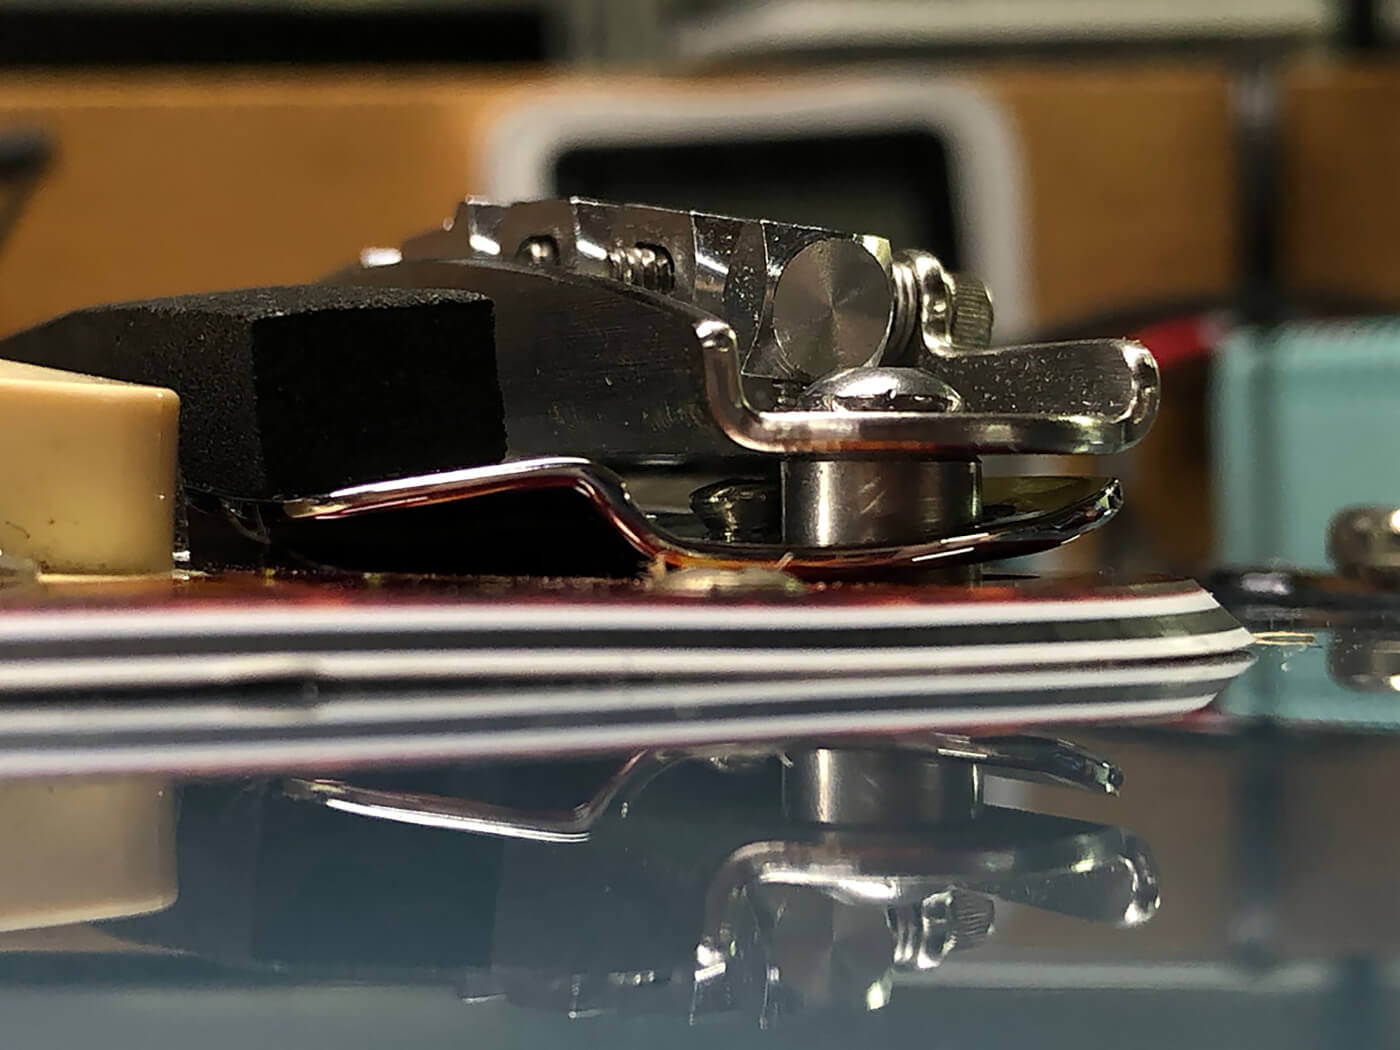
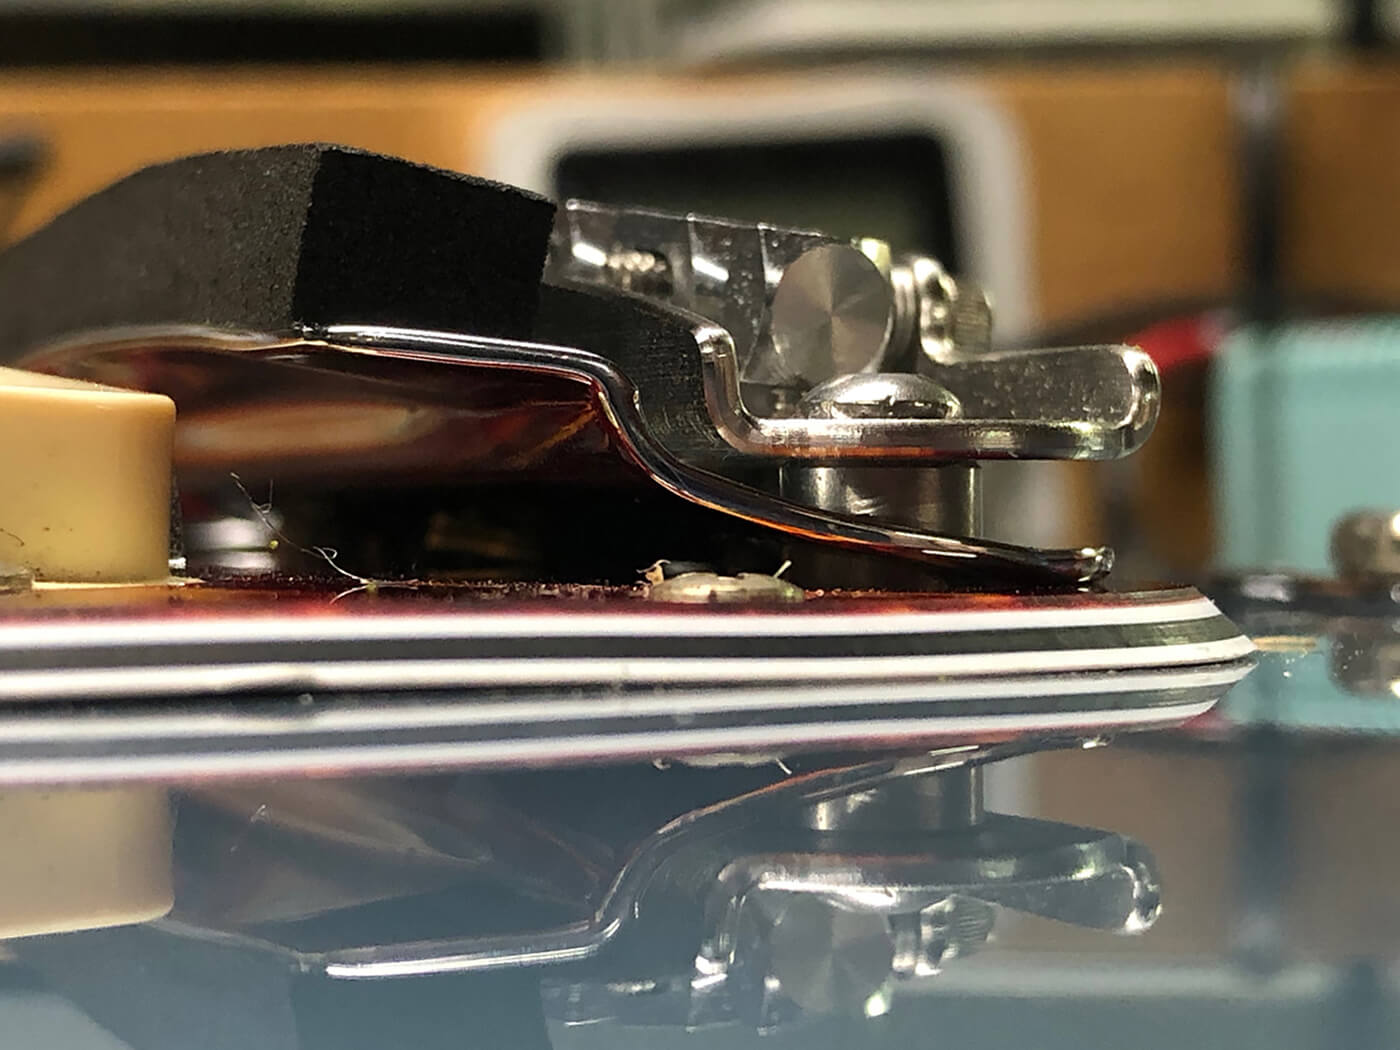
One other noteworthy deviation with the Jaguar is the addition of the Fender Mute, a device I’ve praised time and time again over the years. It’s a mechanical solution to string muting – basically a spring-loaded plunger in the body that presses up against a centre post mounted to the mute plate itself, causing the plate to pivot and pushing a strip of foam into the path of the strings.
This limits how much the strings can vibrate, leaving your picking hand free to strum as energetically as you like without requiring it to remain anchored in the bridge position. When set up correctly, it gives the guitar a sound not unlike that of an electric banjo: all attack and no sustain. It sounds amazing into spring reverb and other ambient effects, but admittedly the majority of players never quite found a use for the quirky contraption, which is why we see many of them removed and tucked in cases, or left in place like vestigial guitar organs, there for the look, but rarely employed.

Most customers request that the mute is removed when installing a Mastery, largely because the holes in the mute plate are too small for the new bridge posts, but the owner of this ’62 reissue Jag wanted to retain the look and functionality, and I was all too happy to accommodate.

Know the drill
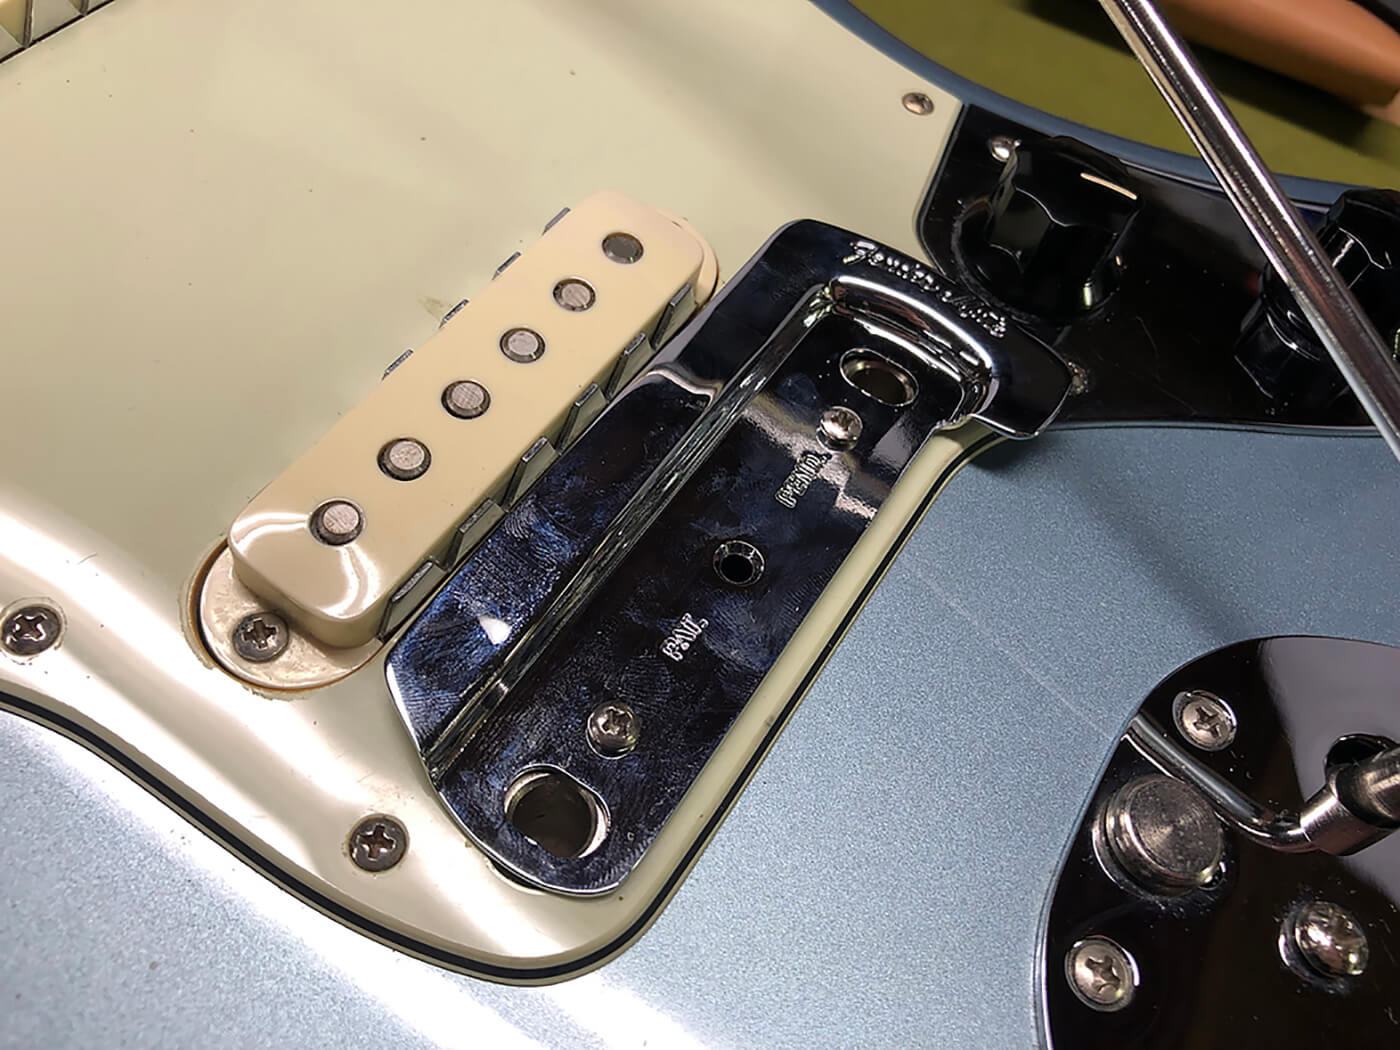
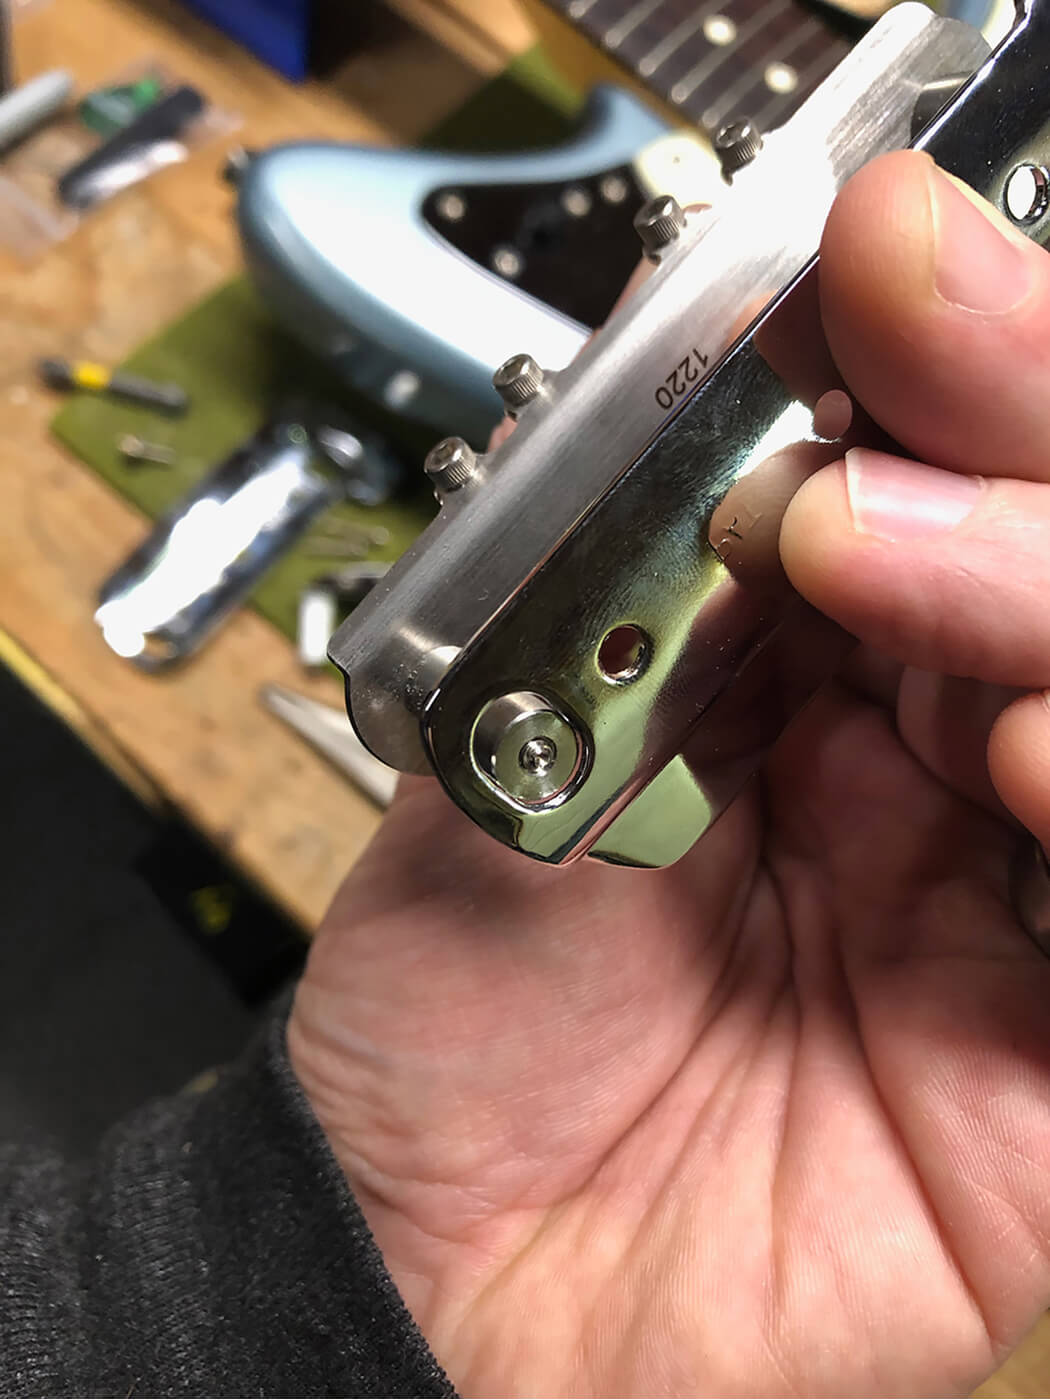
As I mentioned previously, the posts of the Mastery bridge have a larger diameter than those of the stock bridge, which enables it to ‘lock in’ with the body inserts. This keeps it from rocking back and forth, and also has the added benefit of increased resonance and sustain. The downside is, those posts are much too big to pass through the mute plate cutouts.
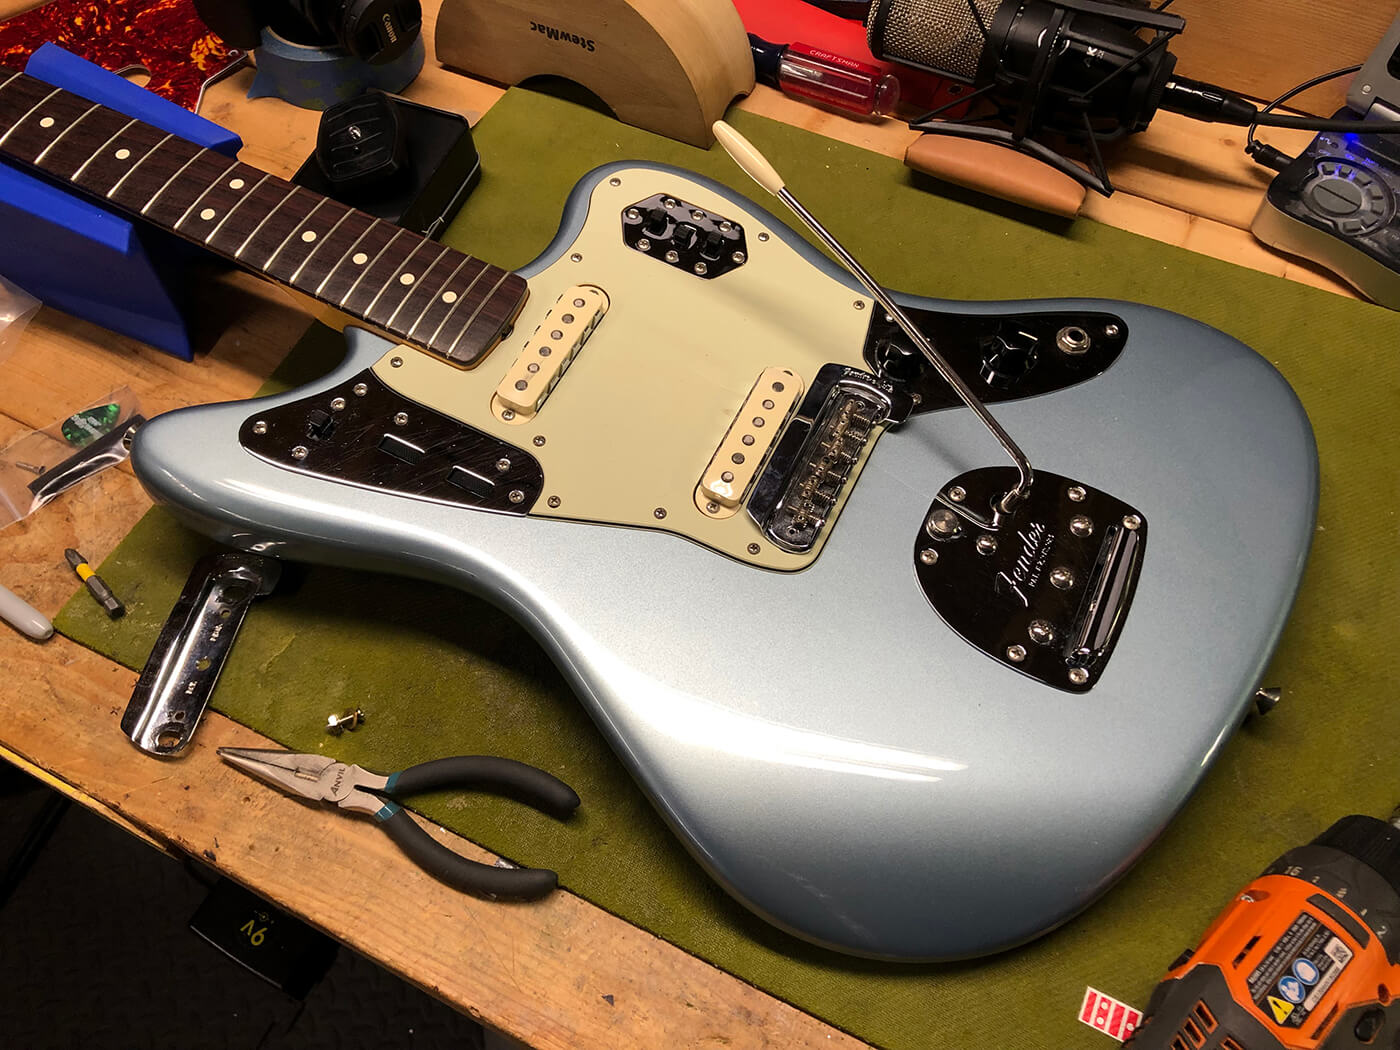
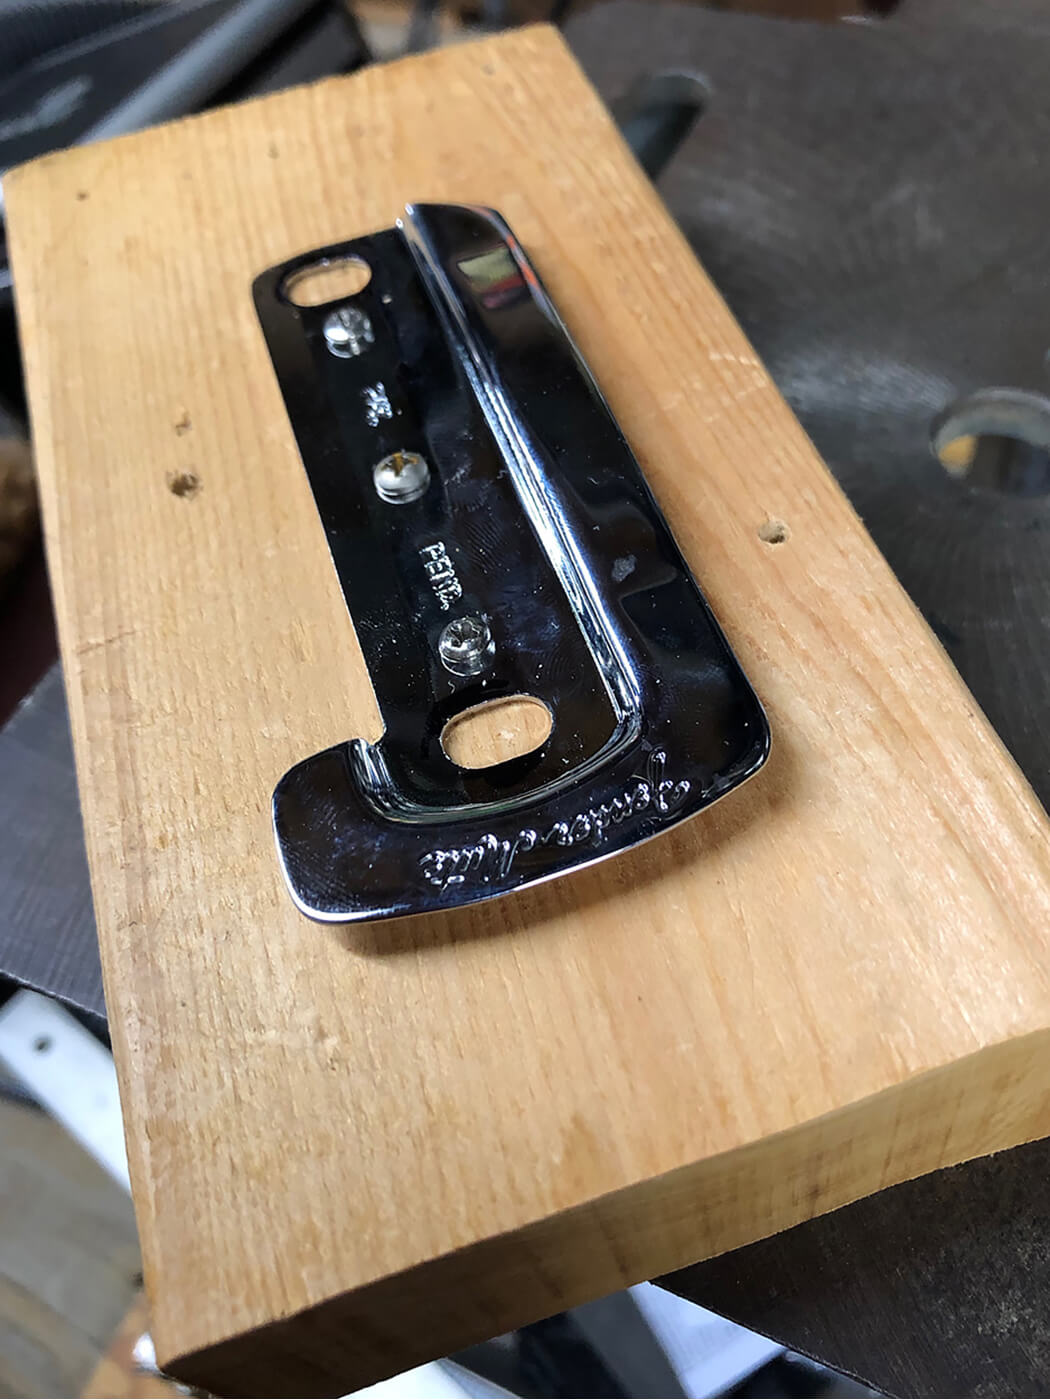
Thankfully, widening those holes is a relatively easy procedure. First, I removed the original plate from the body, which is mounted to it only by two screws located under the bridge. The owner of the guitar provided a brand new mute plate for the job so the original can remain in factory condition. I set aside the old one, and prepped the new instead.

I planned on using a drill press, but when working with a press and small parts it’s helpful to use an oversized wood block as a base, which makes it far easier to hold and control as you drill away. I simply drilled three small holes for the mounting screws and went about my business.
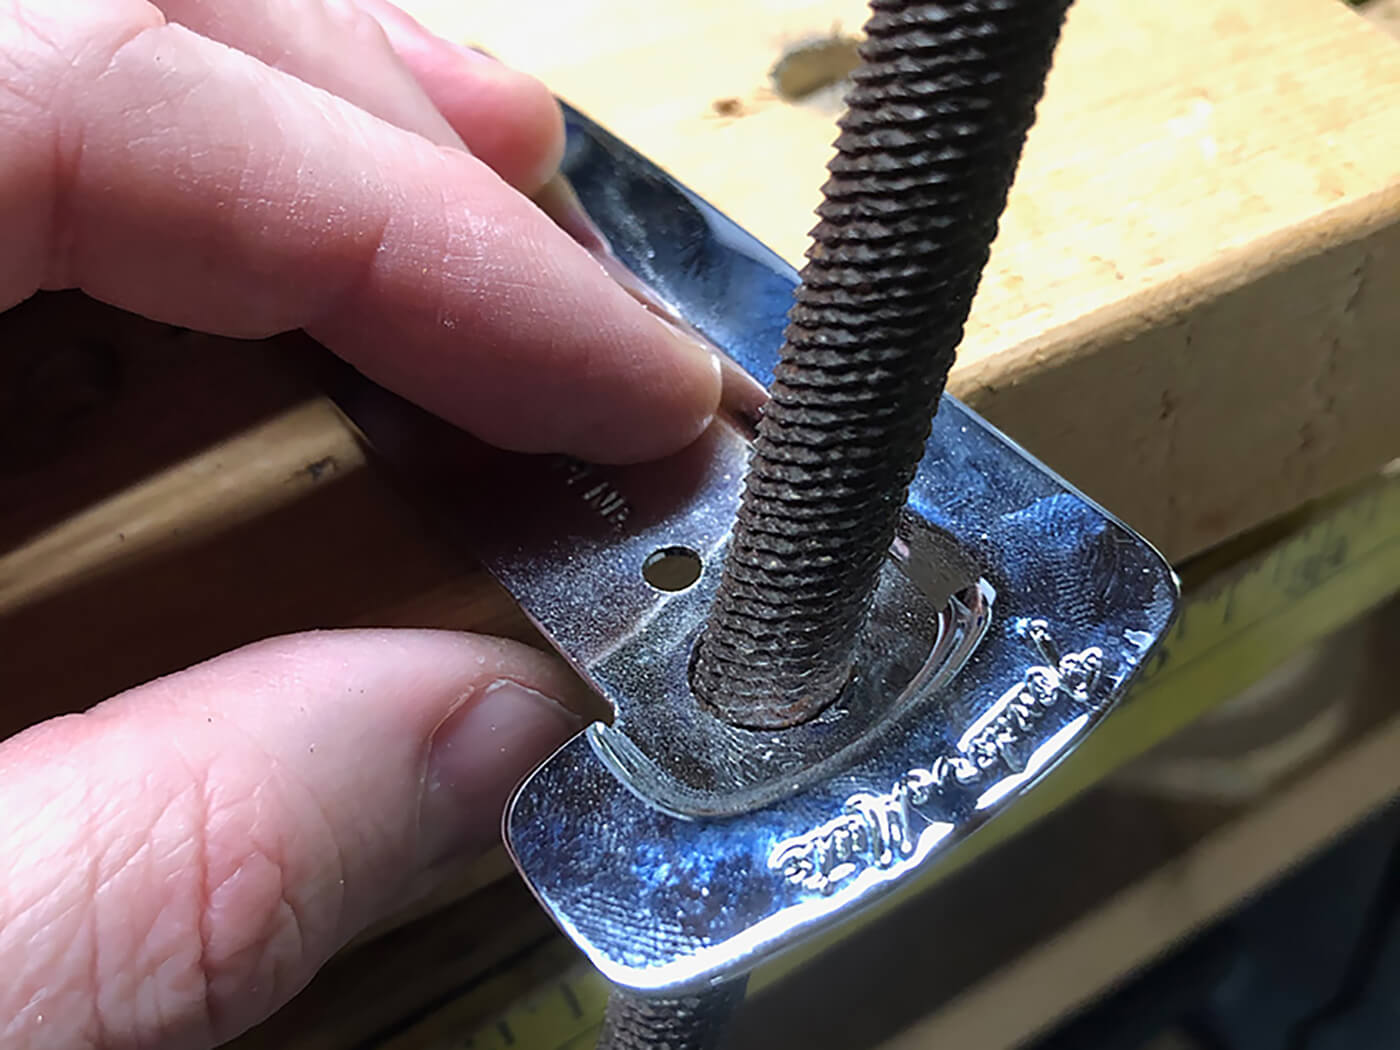
When altering an existing hole in a metal part, I recommend using a step drill bit – it’s a conical bit that looks a bit like a Lego Christmas tree, as if numerous round bits of metal of increasing diameter were laid atop one another. I’ve used these bits to drill holes in pedal enclosures, add controls to metal pickguards, and a number of other jobs as well. I believe I was aiming for 3/8” at this point in the process. I neglected to take a picture of this part of the job because hey, safety first. Just imagine I’m slowly drilling step by step.

Now that I’ve sized those holes appropriately, I went over them with a large file to finalise the shape. I wanted the holes to be somewhat oblong to allow the plate to pivot freely. It’s also a good idea to remove burrs and sharp edges, which I did with a much smaller file after the fact.
After some test fitting, we’ve got a mute plate that readily accepts the Mastery. All that was left was to string it up and set the mute to its correct height. The key is to get it low enough on the body that there’s ample clearance between it and the bridge, but high enough that it still moves back and forth, catching in both the ‘engaged’ and ‘disengaged’ positions.
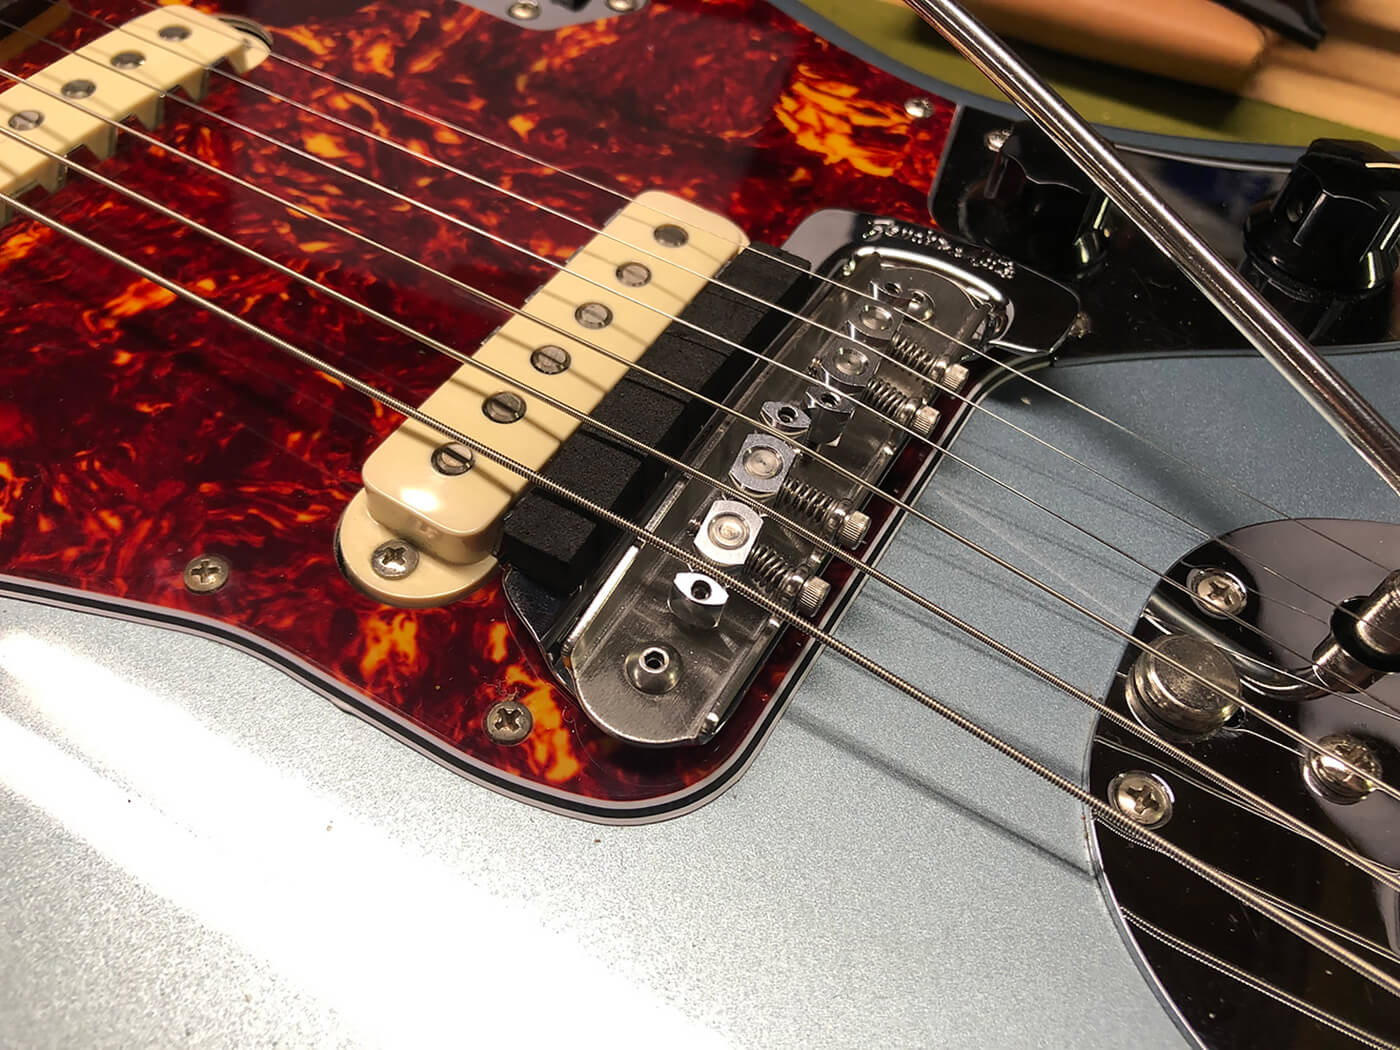
When I was finally happy with the operation of the mute plate, I installed the Mastery bridge, strung up the guitar, and finished the setup. It’s really a best of both worlds scenario: you get the cool look of the mute plate as well as the possibility of using it, plus the dependability of one of the best bridges around. I call that a win.