Related Tags
DIY Workshop: How to build a speaker cabinet (Part Two)
The woodwork is mostly complete, but a lot of work still needs to be done before our DIY combo cabinet looks the part. Time to tackle the tweed.
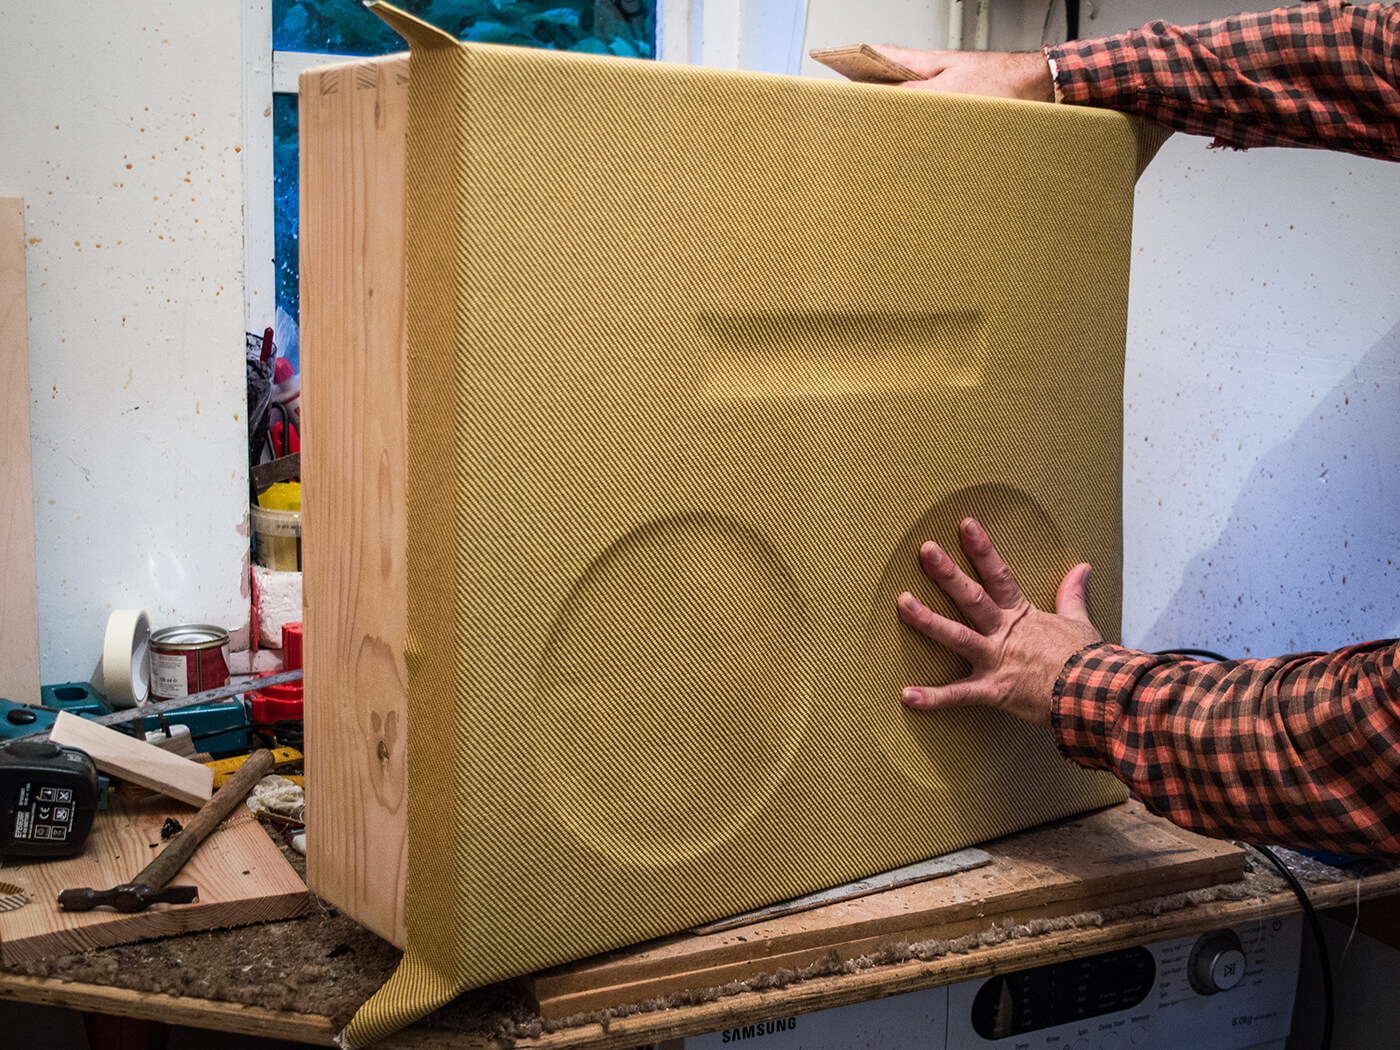
The baffle is covered and Rory folds the corners together and presses the tweed into the edges of the cutouts.
At the end of Part One, we signed off with the speaker baffle finished, but loosely screwed into the routed rebates in the cabinet panels. It’s time to make things more permanent and for this, I mix up another quantity of Cascamite glue.
Cascamite doesn’t stick plastic or metal and doesn’t require a huge amount of clamping force. There’s also a nice long open time, so I can feel relaxed about glueing in the baffle. Before glueing, I drill pilot holes for self-tapping screws all around the baffle’s outer edge.
With the glue spread all over the baffle rebate surfaces, I drop the baffle into position and tighten all the screws. The baffle sits flush, no clamps are required and after the glue has set completely, I’m able to remove the screws. Cascamite needs about 24 hours to cure and the best way to be sure is to keep the excess glue in your mixing tub. Once that glue has become crystalline and brittle, you know it has set.
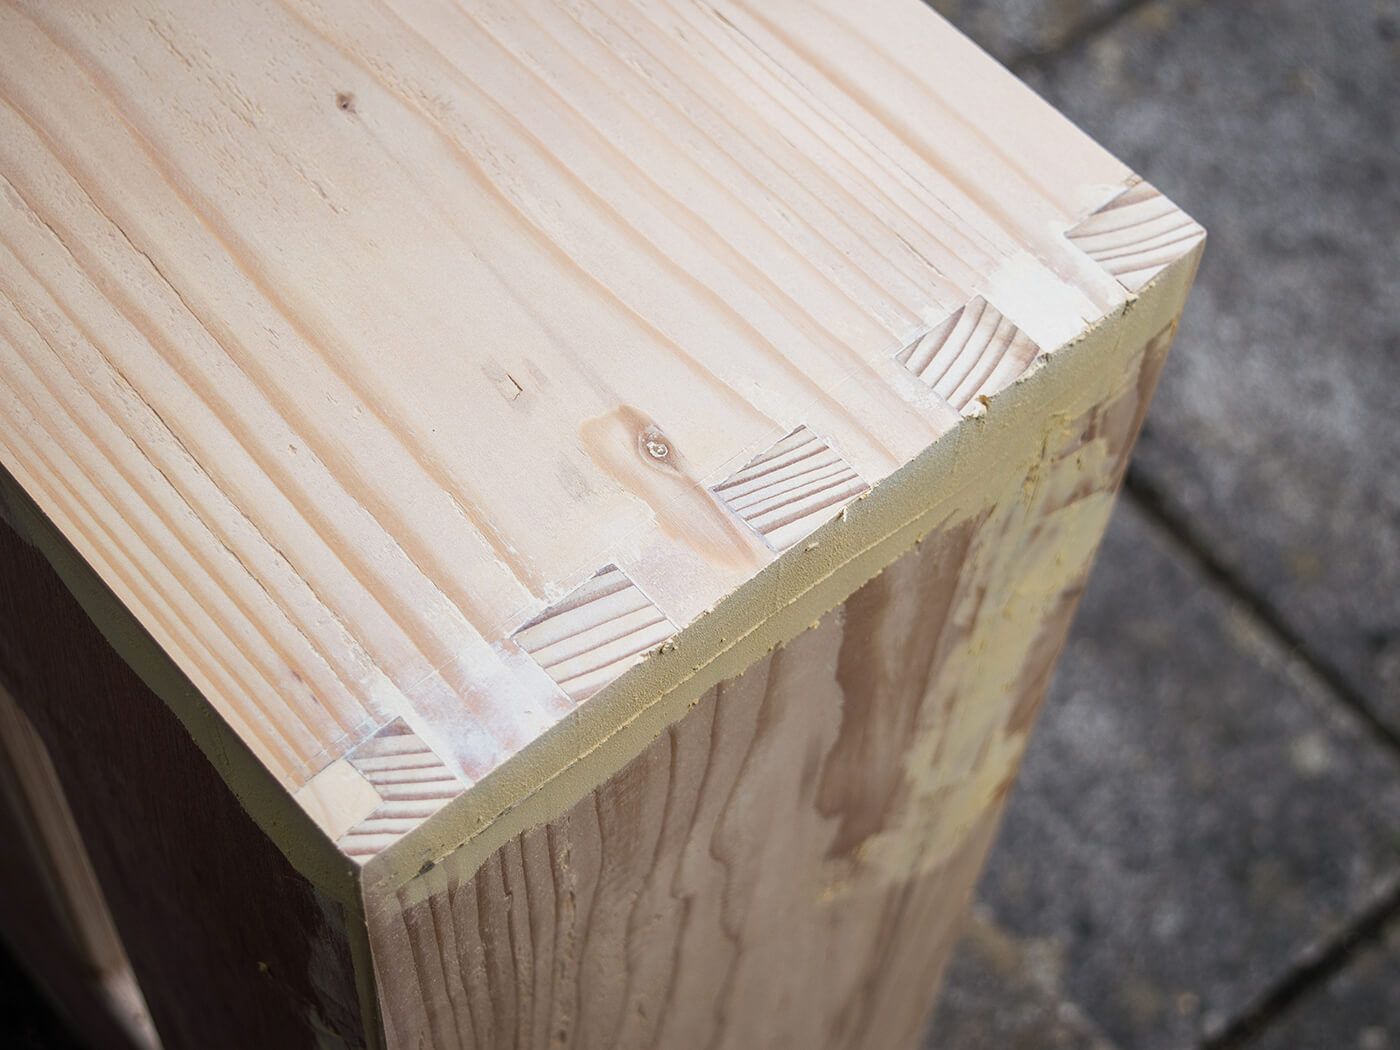
Now it’s time to rectify my oversight when routing the rebate channels. I went all the way to the ends of the panels, which left me with small rectangular gaps in each corner. These need to be filled, so I begin by cleaning out wood splinters and stray bits of glue.
Although I wiped the squeeze-out away from the front of the baffle immediately using a damp cloth, there is some squeeze-out inside the cabinet and in the corner gaps. Fortunately, Cascamite is very forgiving and it simply flakes off with a little persuasion from a chisel blade.
Four little pine rectangles are cut from leftover pieces from the cabinet construction. Each is custom fit to its gap and tapped into position with some Titebond Original. The fit is so tight, no clamps are required. After an hour or so, I’m able to file and sand the insert pieces flush. It’s almost as if it never happened…
Rolling over
With the exception of mid 1960s WEMs, I can’t think of any amp or speaker cabinets with square edges. The rounded edges are called ‘rollovers’ and that’s what I’m planning to do. Ideally, I’d be using a 3/4-inch radius roundover bit in my router, but 1/2-inch is the largest I can find with a 1/4-inch shaft.
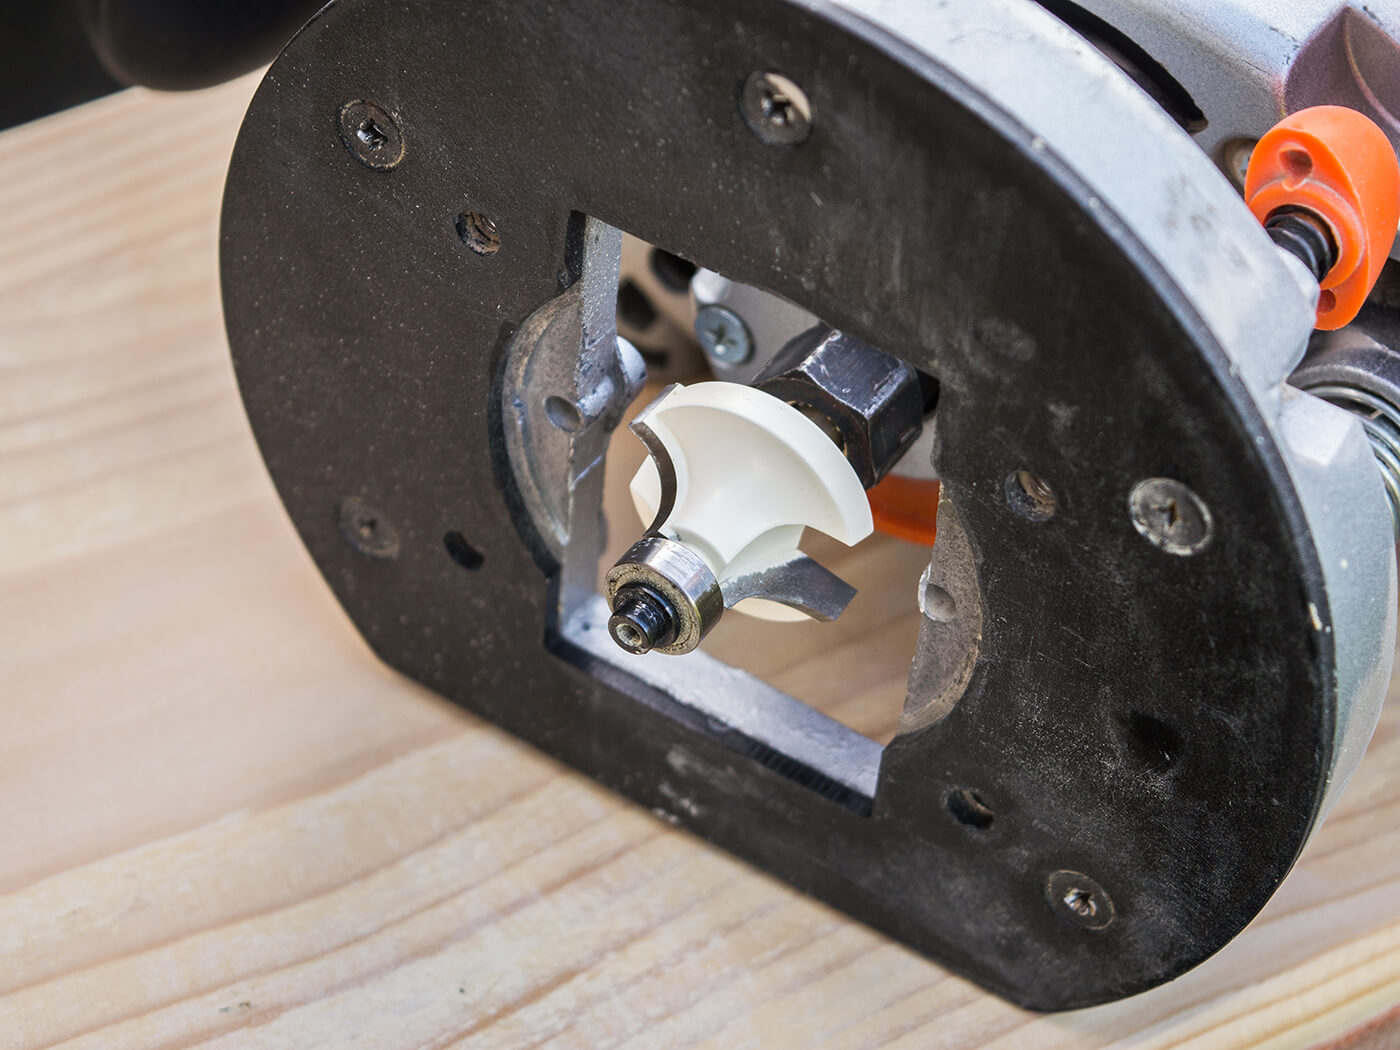
I get mine from Axminster Tools & Machinery and they come with a bearing guide at the end of the cutter. The bearing needs a flat edge to run against, so a bit of preparation work is required. After all, my box joints are less than perfect and those screw holes in the baffle won’t do at all.
Wood filler provides the solution and I use the type with the separate hardener that has to be mixed with the filler paste. If you’ve ever performed body repairs on a car, this type of filler will be familiar to you. Mix it, spread it on fairly thick and let it harden completely. All being well, you’ll be left with perfectly smooth and flat surfaces once you’ve sanded off the excess.
With my cabinet fully prepped, I fix my roundover bit in my router. Always ensure your router is disconnected from the mains when you’re fitting and adjusting cutting bits. Setting the plunge depth requires care and attention because if the plunge depth is too great, you’ll end up routing channels into your cabinet. Conversely, if it’s too shallow, the rollover will have a slightly square edge.
I use my set square to set the depth, making the cutting edge absolutely level with the router’s base. Once I’m happy, I lock it off and do some trial cuts on scrap pieces of timber. A full-size router table might make this job easier and safer, but I’m obliged to do this by hand.
Of course, the router has to sit perfectly flat on the panel surface to keep everything square. Router bases are not especially large, and routers are heavy and cumbersome devices, so it’s worth taking some time to practise. Once the cutting bit is spinning, the router almost feels like it self-levels, and I also discover that it’s better to move the router along briskly.
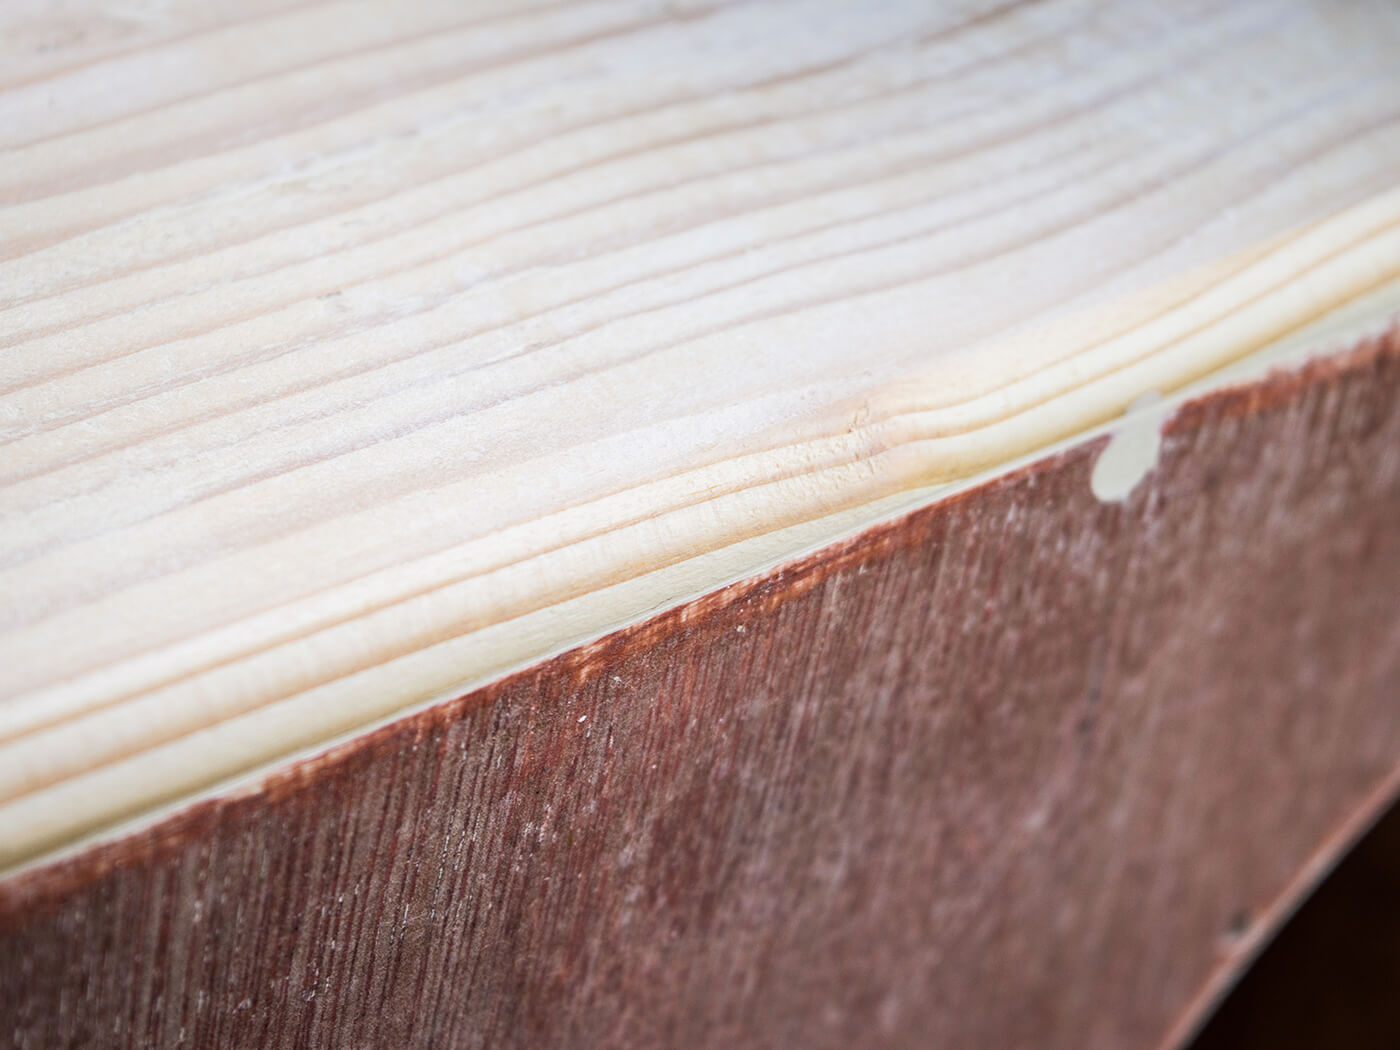
When you’re nervous about ruining all your hard work, you may be more inclined to approach this slowly. In practice, however, the router is more likely to wobble about if you do and I find that committing to the cut, and pushing the router along at a reasonable pace, produces better results. With all the edges done, the cab has a squarer look than tweed Fenders. Instead, it looks more like a vintage Marshall or Vox, and I’m pretty happy to go with that.
Material benefits
It has gradually dawned on me that by going with a porthole design, I may have bitten off more than I can chew. On reflection, a cab-building novice such as myself should have started out with a simpler wide- or narrow-panel design.
Armed with two yards of tweed from Allparts UK, I decide to take a trip to the Ceredigion workshop of expert cabinet builder and finisher Rory Coupland (rorycoupland@hotmail.co.uk) to tackle the tricky front panel. Even Rory finds the cab a bit of a handful and before long, he begins referring to it as ‘The Beast’.
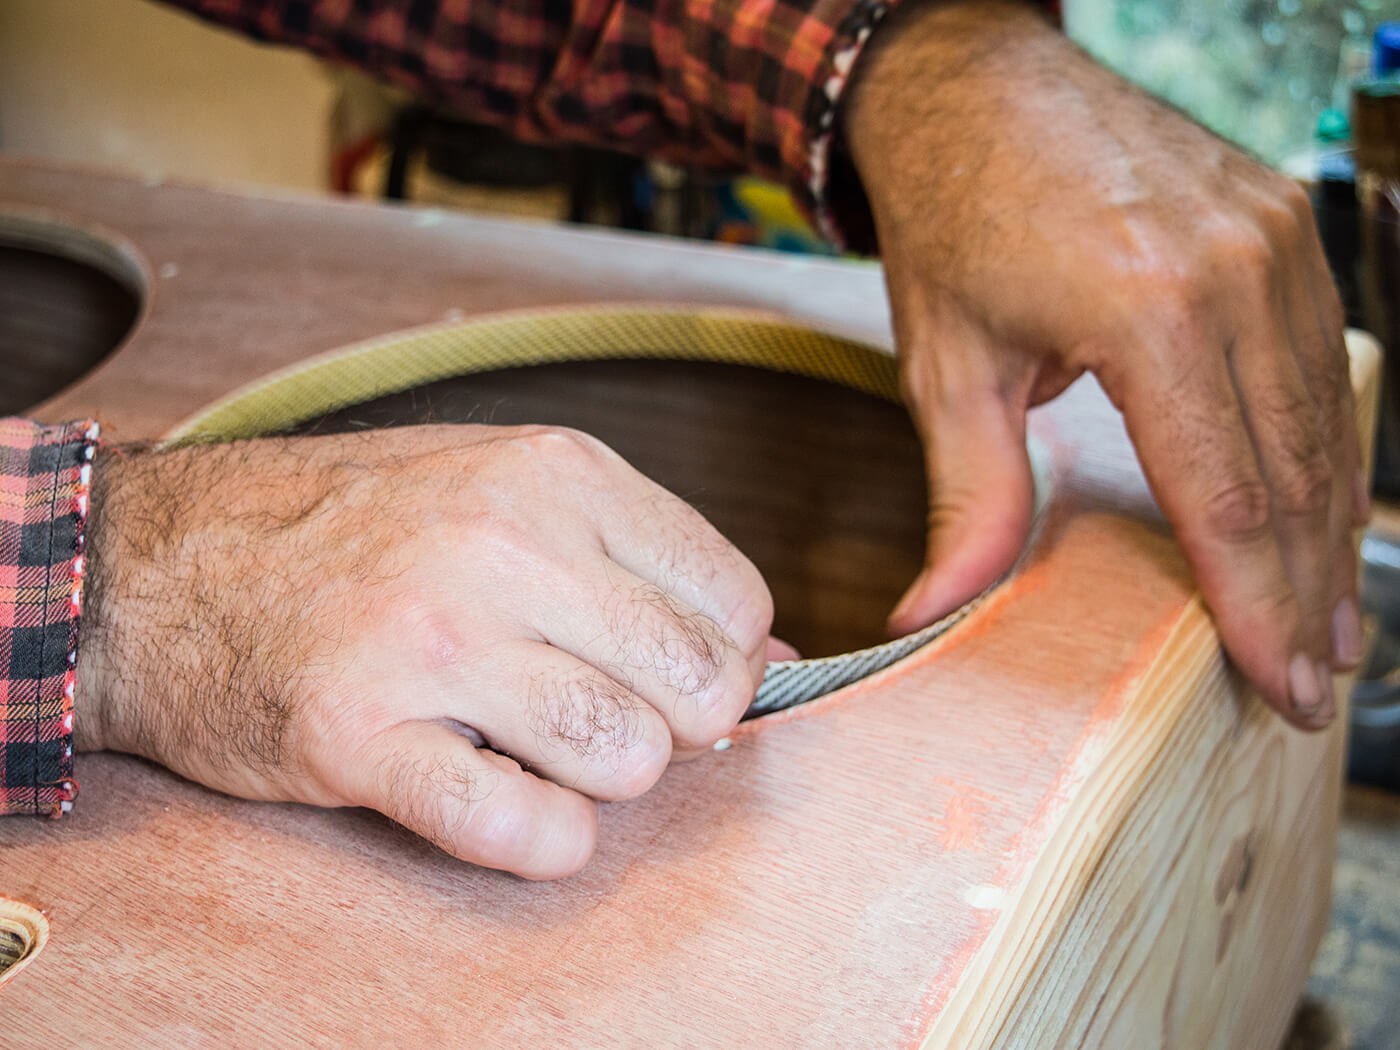
The first order of business is to cut long and thin strips of tweed to wrap around the rolled inner edges of the portholes and control-panel opening. Next, Rory cuts the tweed for the front panel and the intention is to use a single piece that wraps around all four edges. Rory uses a water-based contact adhesive that’s specially formulated for tweed and Tolex. It’s odour-free, too and you can buy it from Allparts UK.
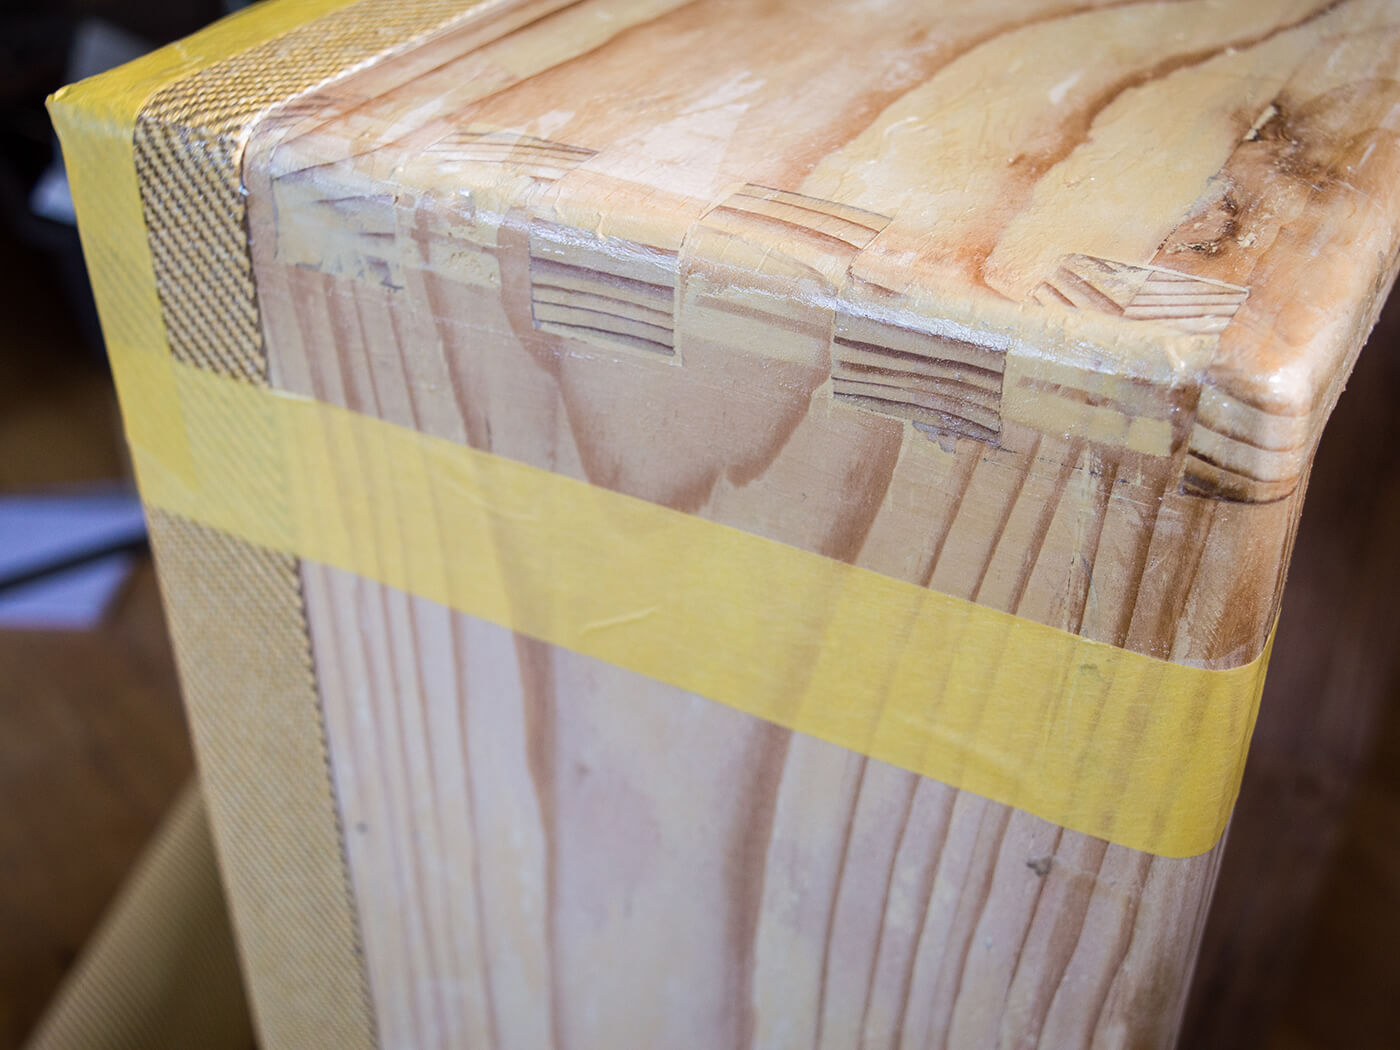
I’m especially impressed with the way Rory does the corners. The tweed is wrapped around the front edges and pressed together as it meets at the corner. This leaves a large folded section along the corner line, like a boat sail and Rory takes sharp scissors to cut the tweed as close as possible to the cabinet.
With the excess removed, the pieces are pressed down together and the resulting join is almost invisible. Rory then cuts around the edges of the tweed to achieve a straight overlap line all around the cabinet.
Back home, I’m tasked with completing the tweeding and with a deadline looming, I opt for a more conventional contact adhesive. I follow Rory’s instructions closely, spreading the glue as evenly as possible on both the cabinet and the tweed and leaving adequate time for the glue to go off before bringing the parts together.
All the tweed pieces are pre-cut to size using a utility knife with a fresh blade and I place masking tape on the cabinet and existing tweed to ensure that the glue only goes where it’s needed. I use a flat wooden block to press the tweed down and eliminate any bumps and bubbles – and although progress is slow, I finish the job in an afternoon.
Tweeding the cab turns out to be tremendous fun and it’s useful to have an early 50s Fender Deluxe on hand to help me orientate the lines properly. At the end of the day, I’m left with a sense of jubilation and a thumping headache. If you’re planning on doing something like this, my advice is to get some of Allparts’ water-based adhesive.
On the panel
Cutting the plywood back panels after the cab has been tweeded seems sensible, because I’m able to allow for the thickness of the tweed when I’m cutting them to size. The bottom panel is a simple rectangle, but the larger upper panel needs a cutout to provide ventilation for the amp. I decide on a large hole in the style of some Swart and Vintage 47 amps.
I make a circle-cutting jig just like the one used for the speaker cutouts, but this one is made for a Dremel mounted in a Stewart-MacDonald base and a two-inch radius. I use it to cut two holes a short distance apart, and then use a jigsaw to join them up. The resulting opening measures nine inches wide by four inches tall and I round over the edges with my router.
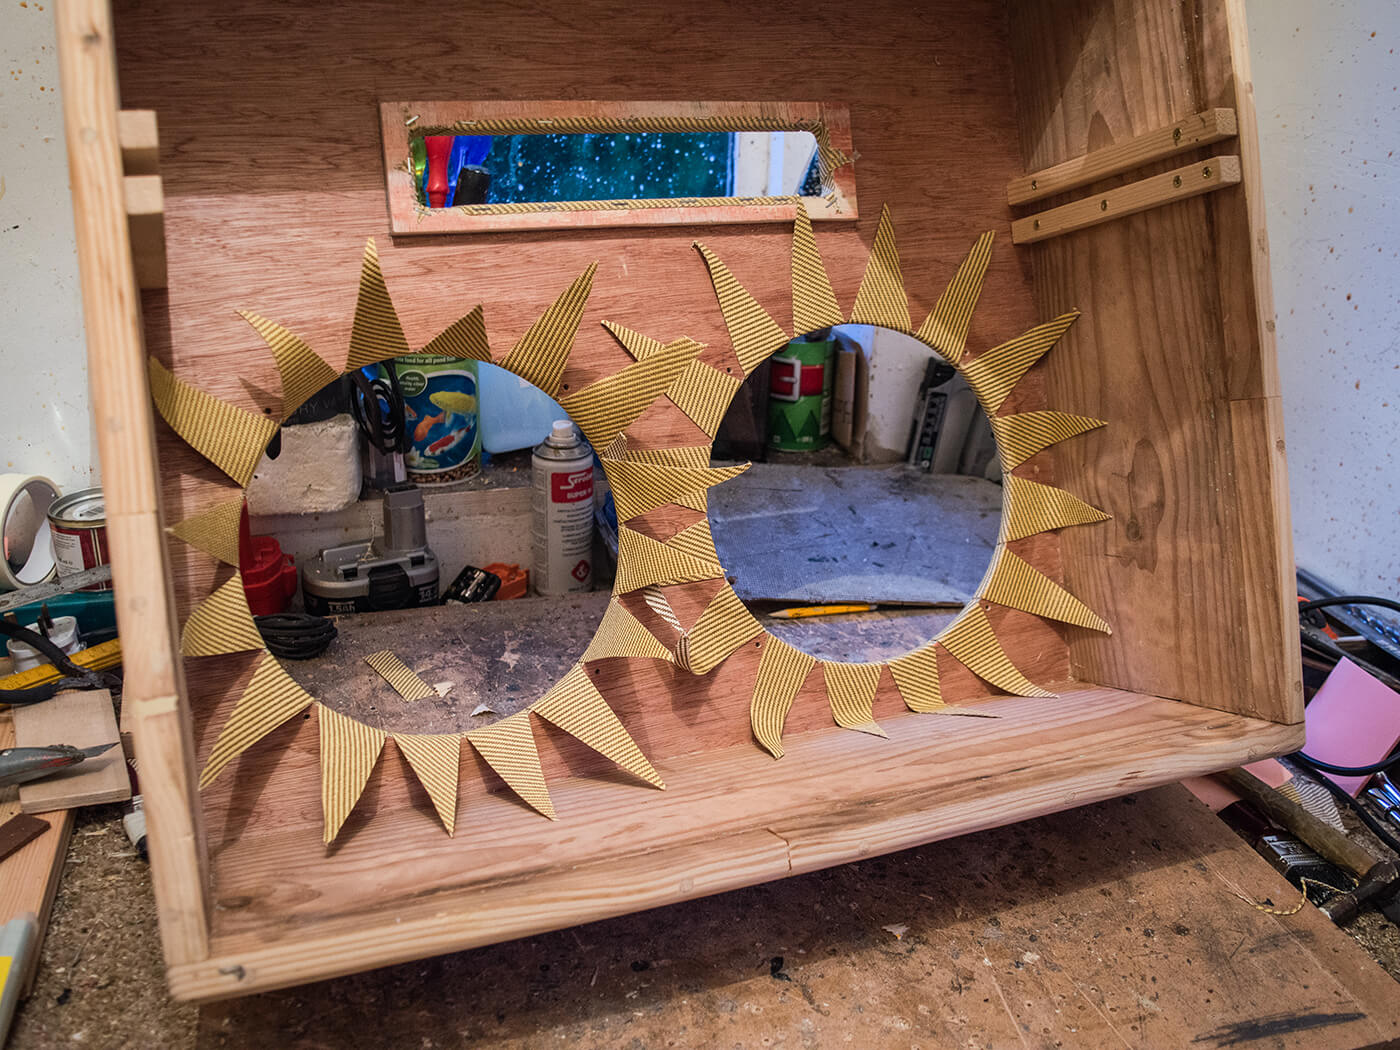
Now it’s my turn to heed Rory’s lesson and apply tweed around a cutout. I glue a tweed strip all around the inside edge of the cutout and trim the tweed flush with the back of the panel.
With the tweed applied to the front and sides, I flip the panel over, cut the tweed along the centre line, just up to the start of the curves and then make a series of cuts from the inside edges of the curves to the end of the centre-line cut. As the tweed is wrapped around the edges, it fans out into a star shape and I can finally close the lid on that stinky contact adhesive.
Finishing touches
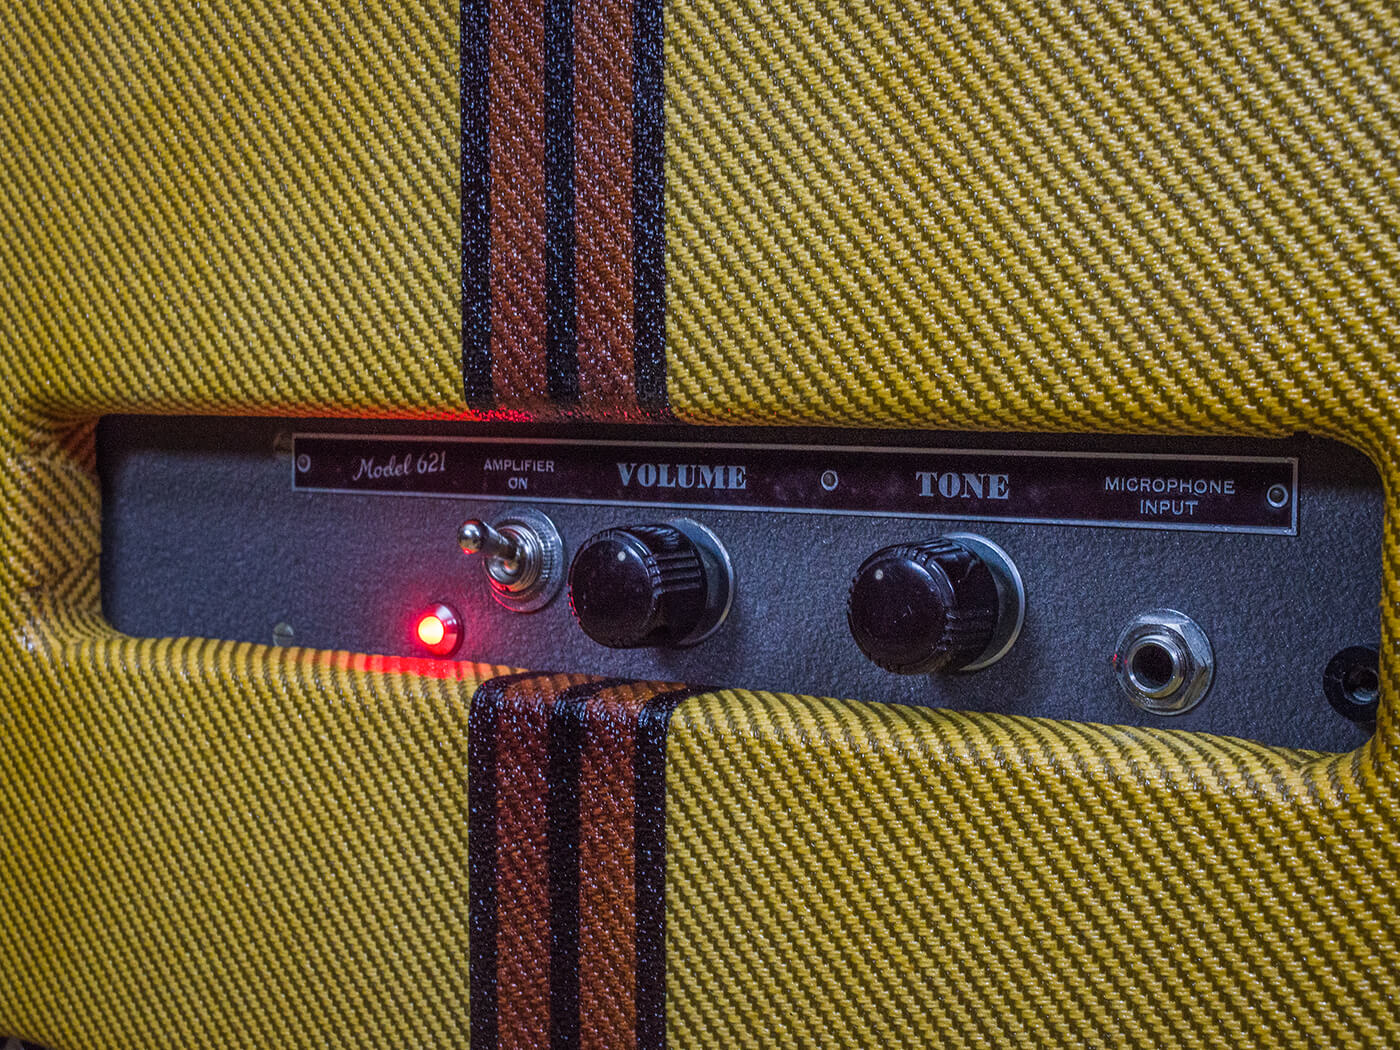
It has never been my intention to make a tweed Fender clone. Instead, I feel the Filmosound amp’s brown crackle finish is better suited to a pre-war Gibson vibe. The porthole idea came from the EH-185 cabinet design and I’m quite taken with the pinstriping that was also a feature of that era.
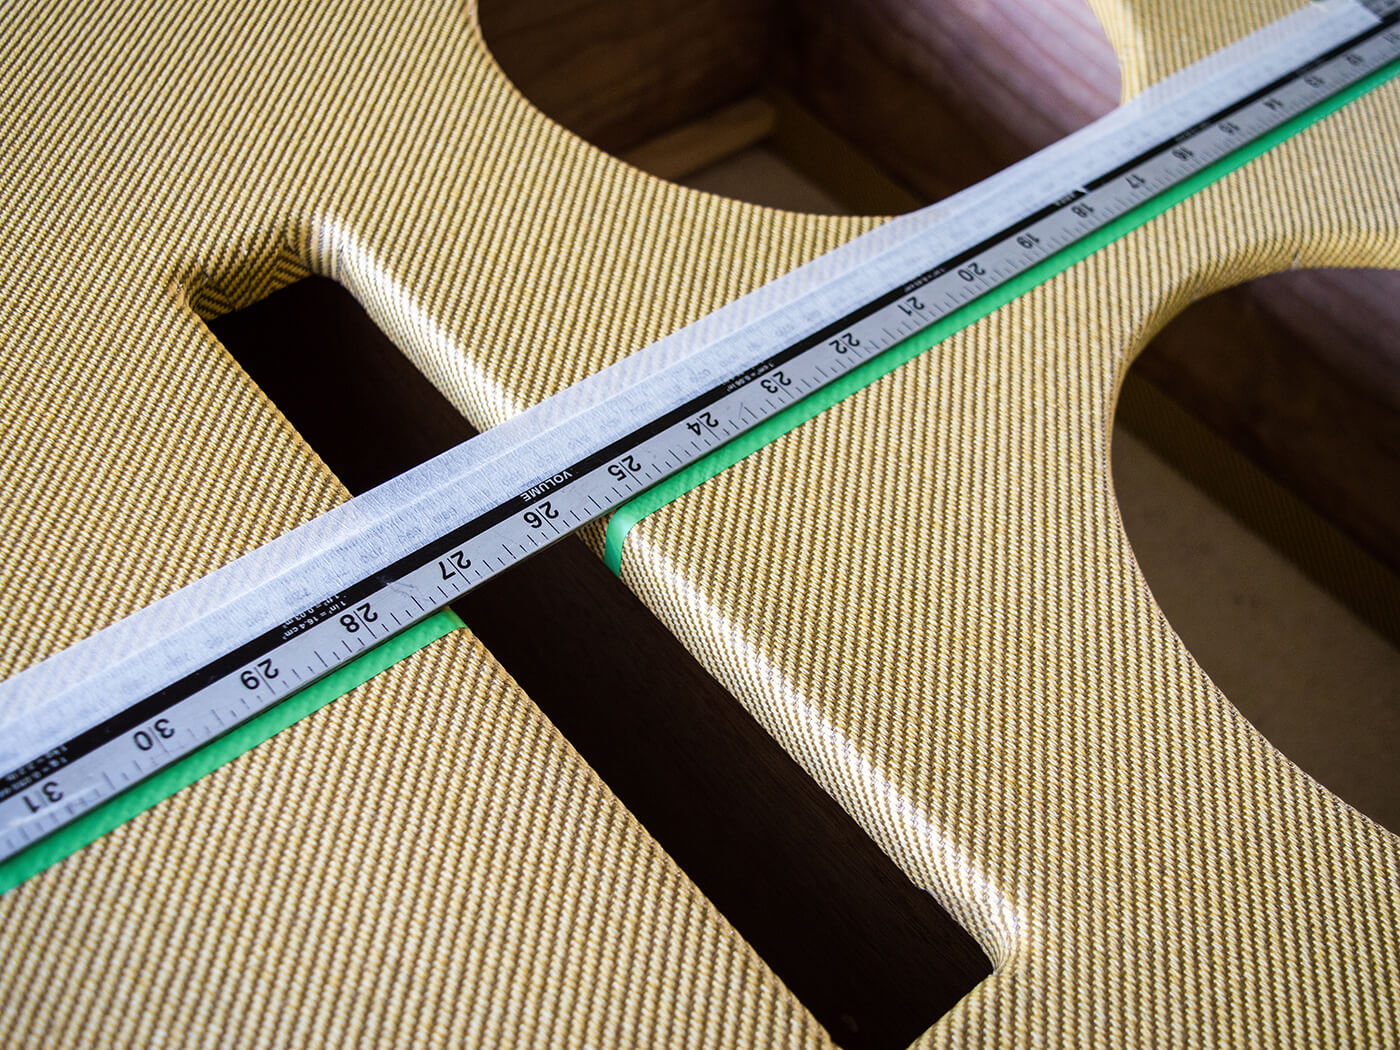
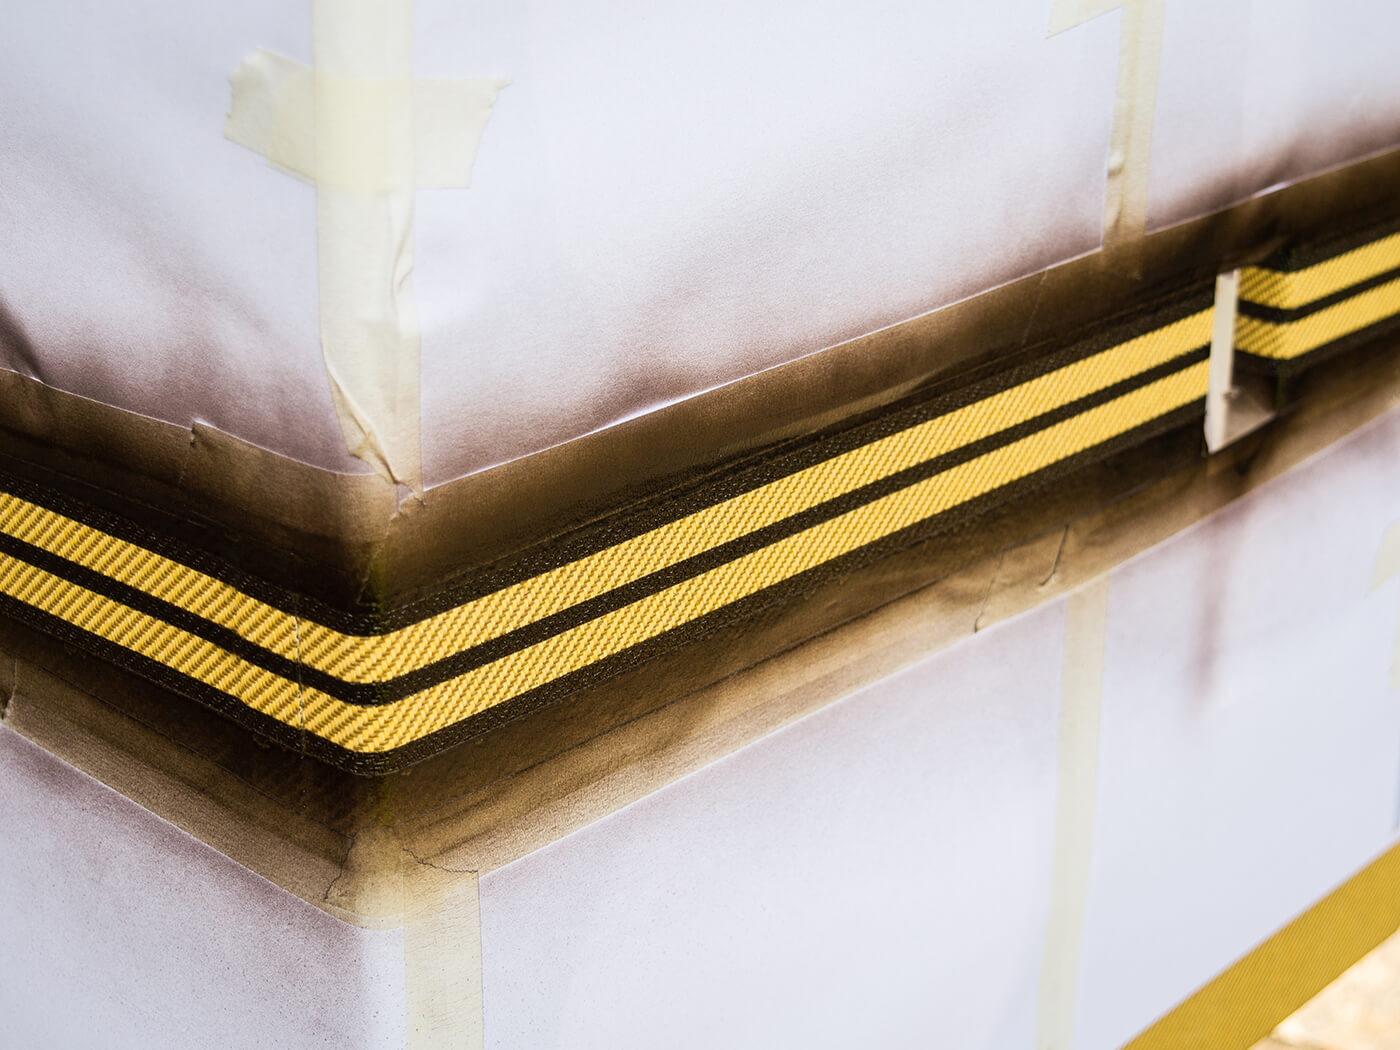
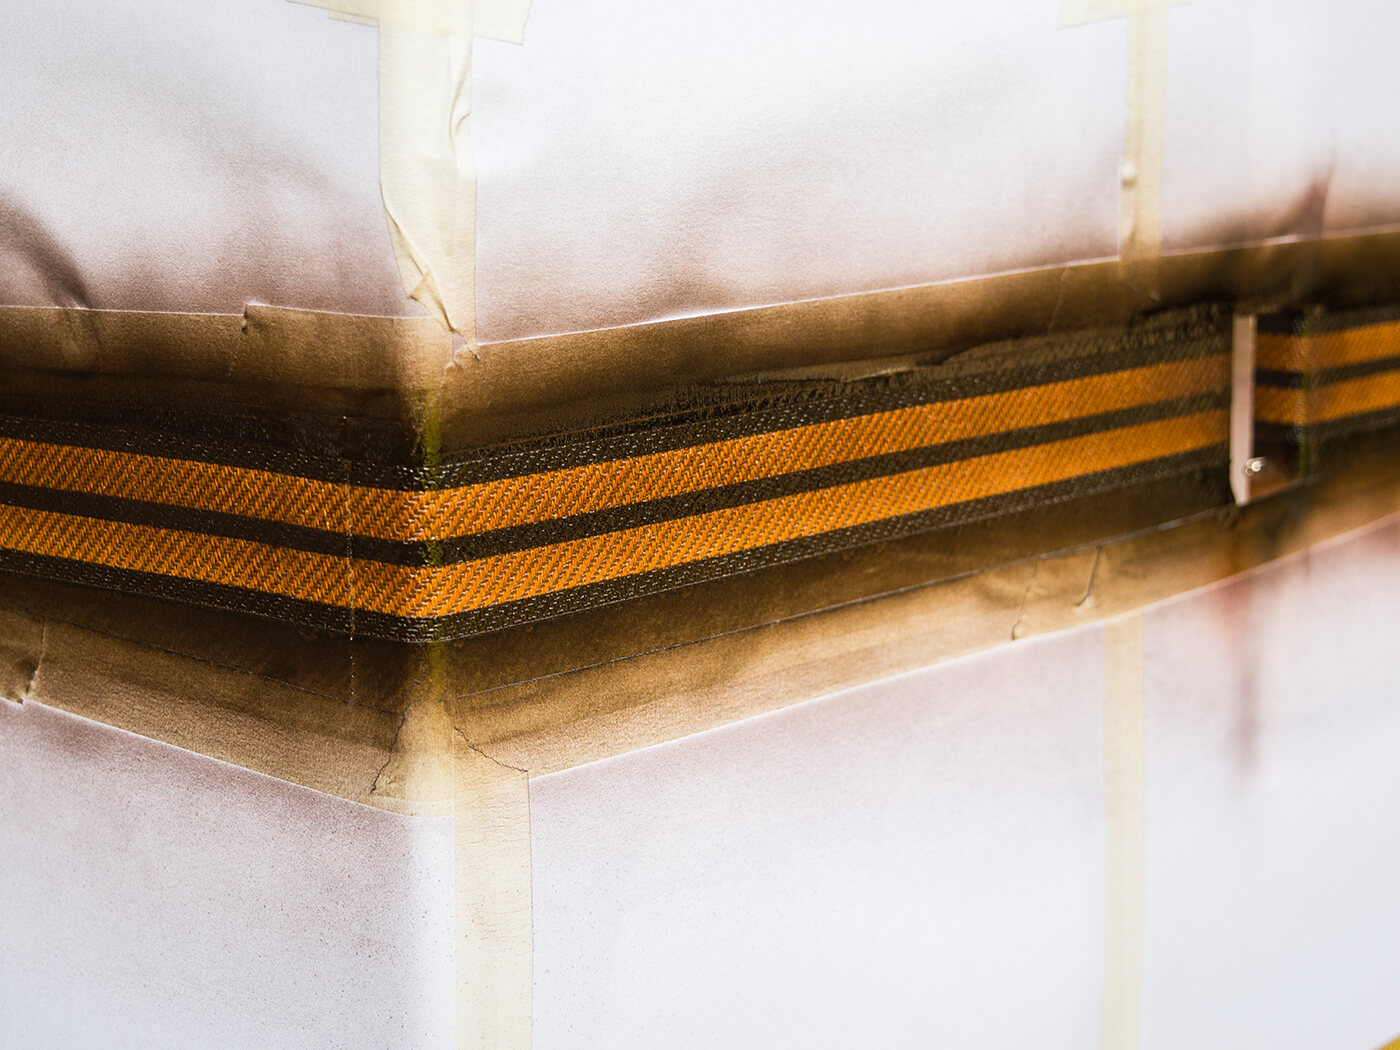
I decide to give it a try and after a generous coat of clear wax-free shellac has properly dried, I establish a centre line between the speaker holes and start running 6mm-wide plastic masking tape that you can buy at car-paint shops along the edge of a steel ruler for guidance.
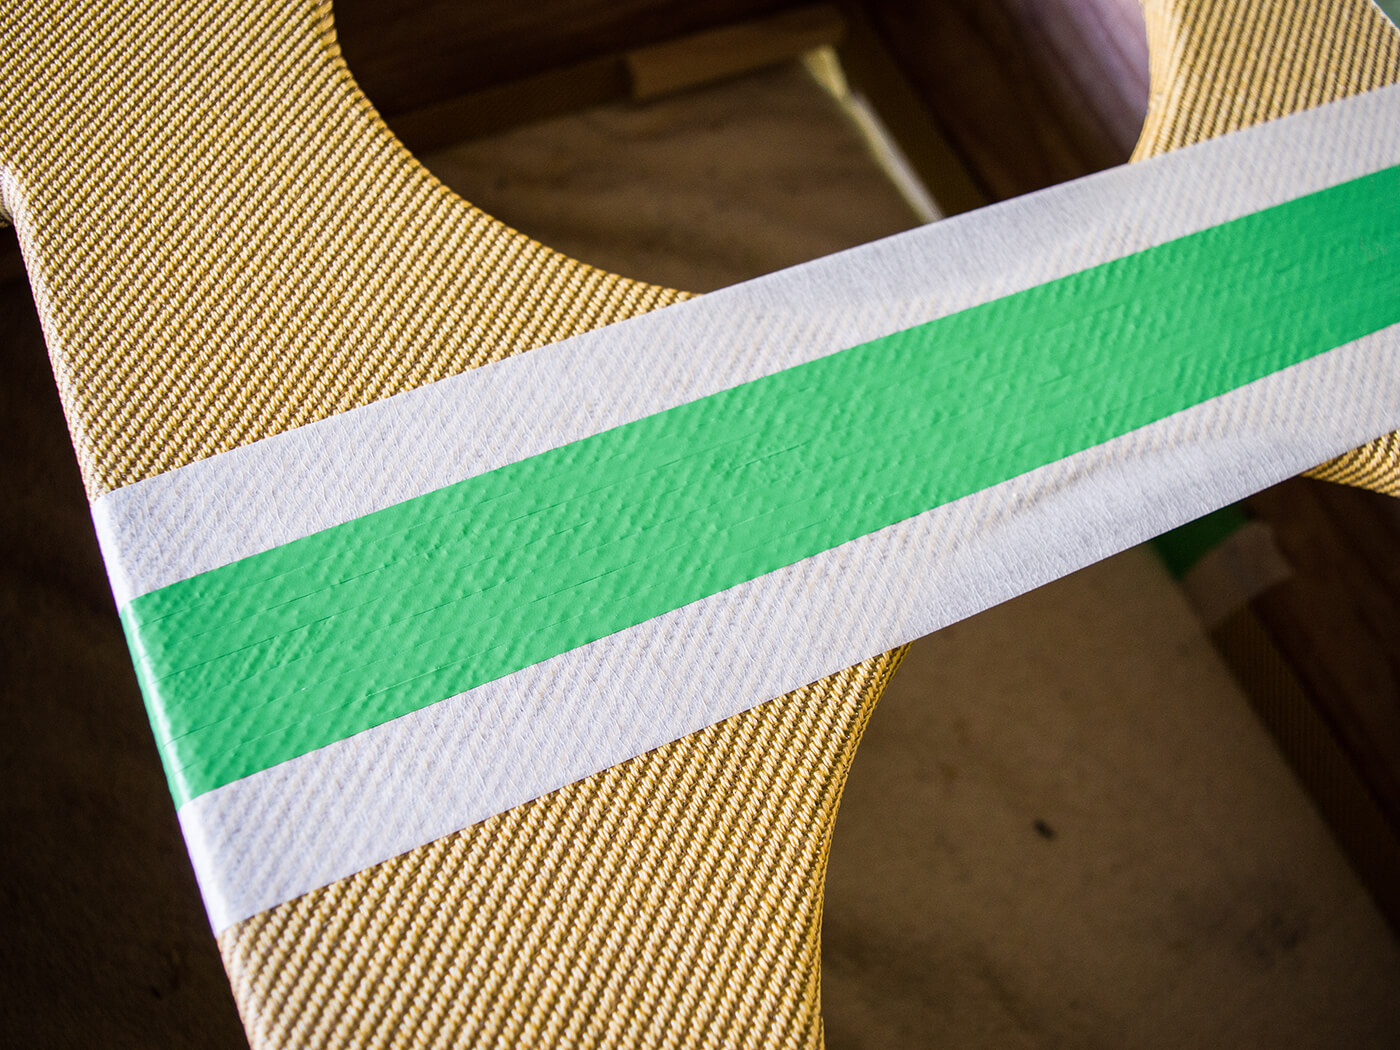
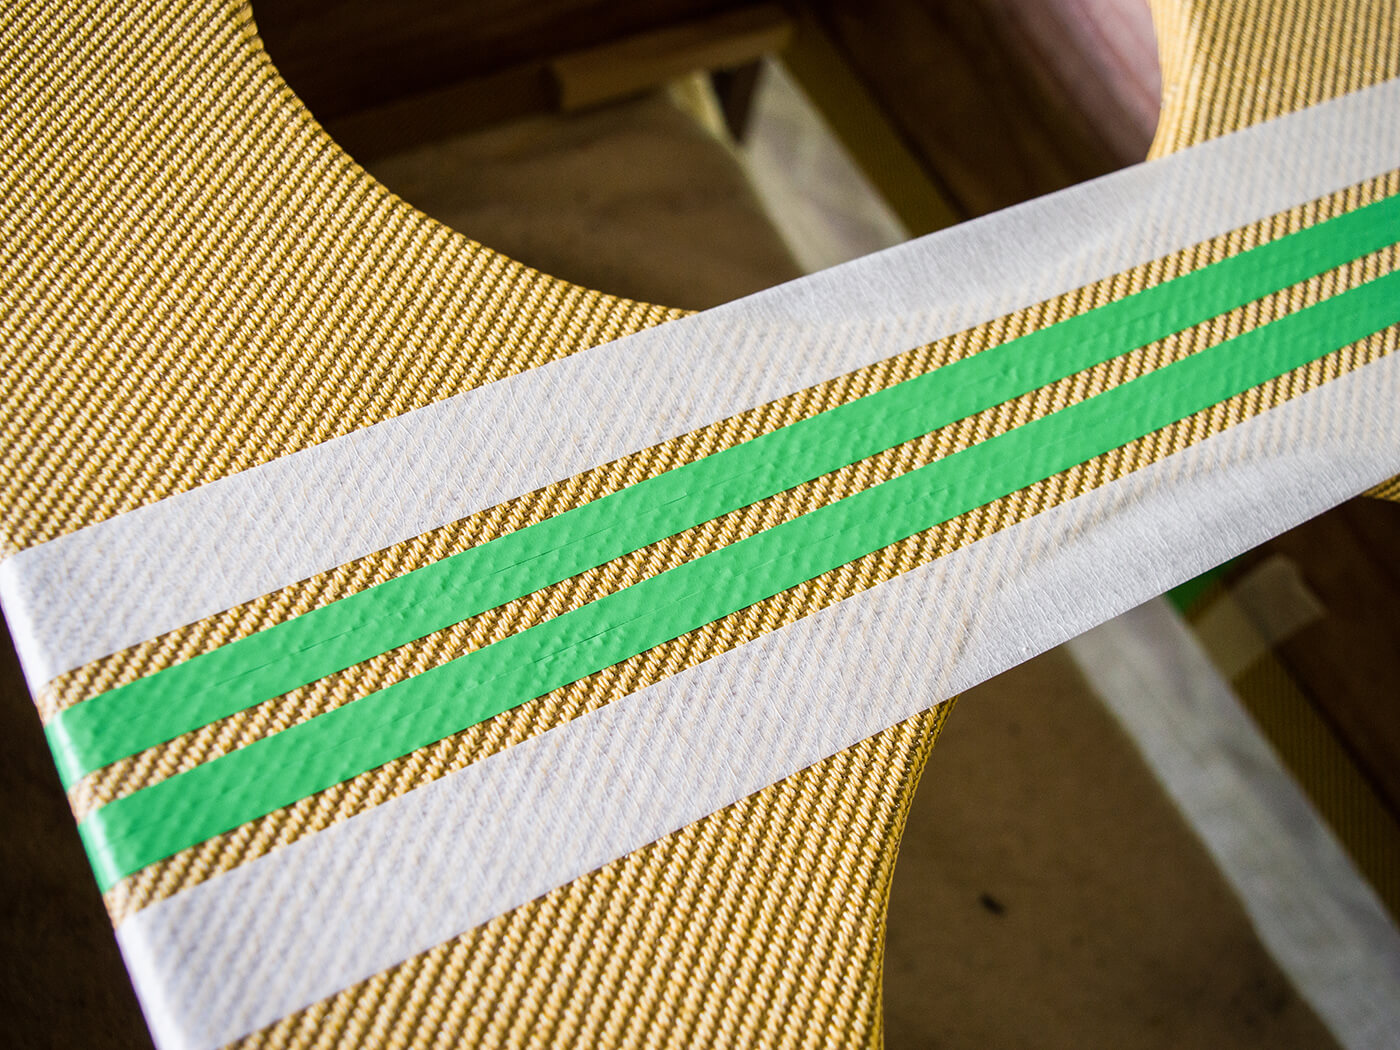
With the centre strip done, I apply three more strips on each side of it and then apply regular masking tape and printer paper to protect the cabinet inside and out. The centre strip of plastic tape and the two outer strips are then carefully peeled away to reveal three lines of bare tweed.
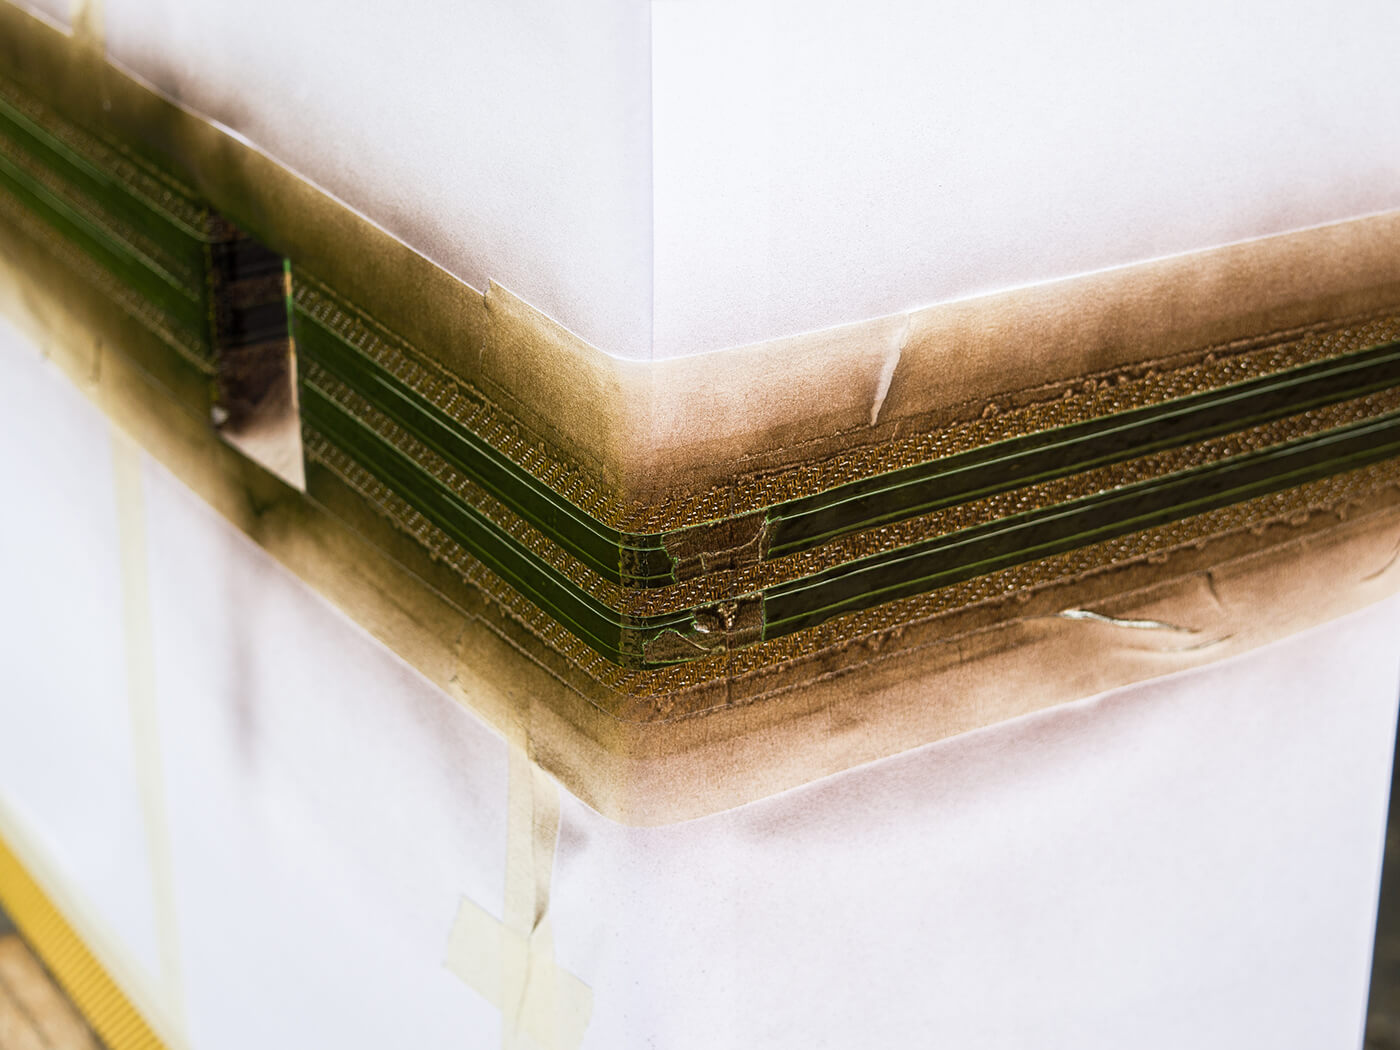
The cabinet is set on its side and I spray the exposed tweed with three coats of tobacco-brown lacquer. I tend to achieve cleaner lines by removing tape while the lacquer is still slightly soft. After 10 minutes, I remove the remaining plastic masking tape to reveal two more strips of bare tweed.
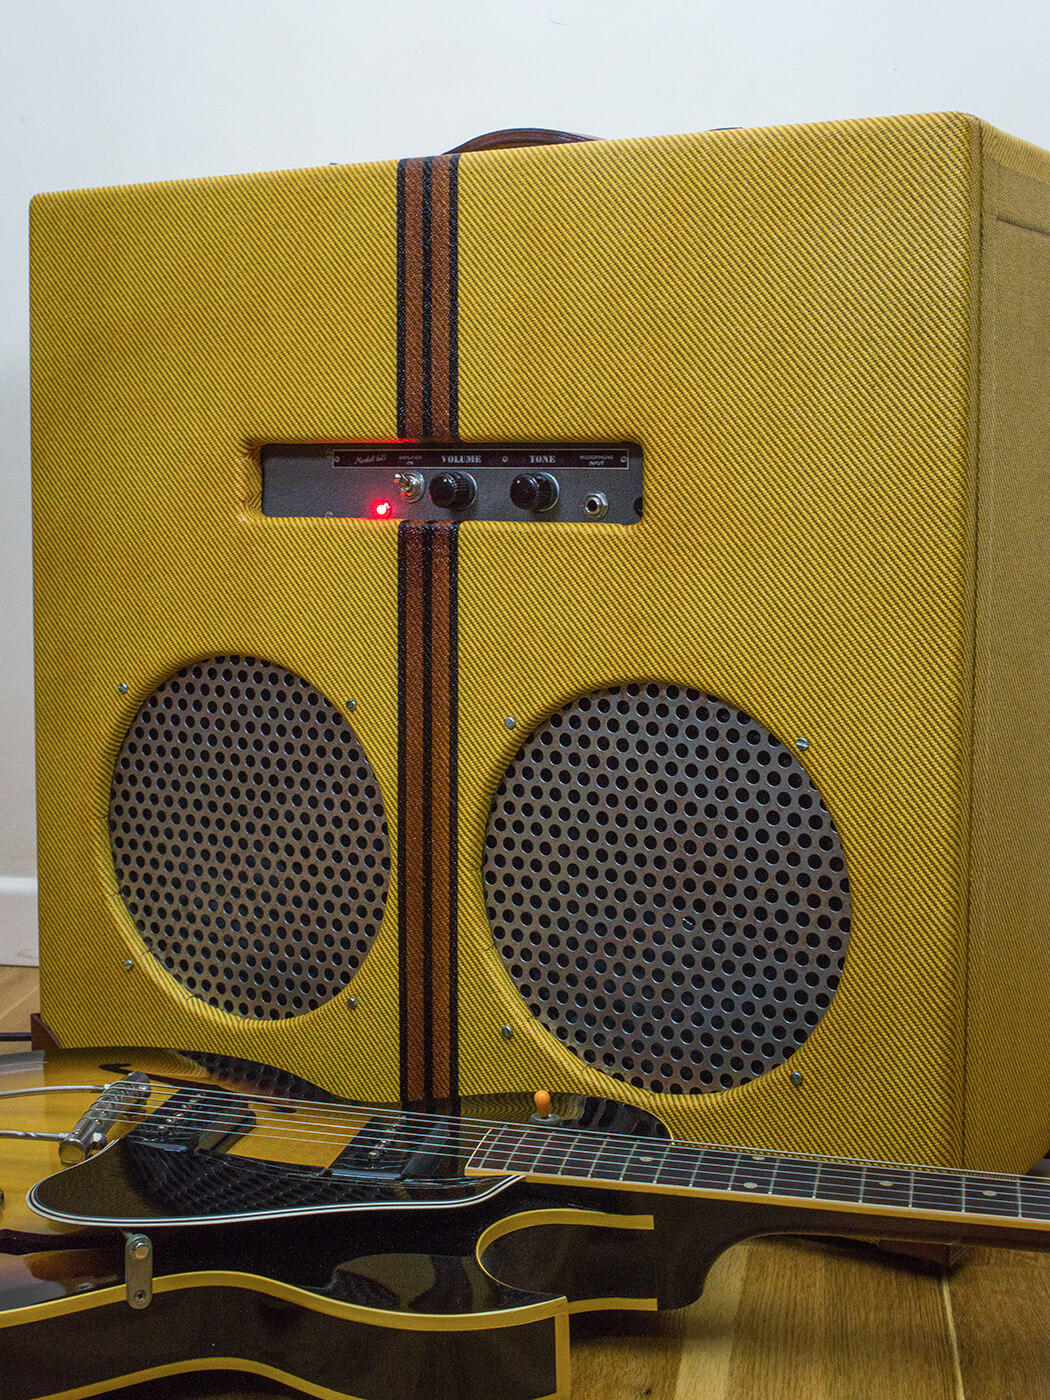
Now I spray medium-brown lacquer over the whole area to achieve a contrasting look with tobacco-brown stripes sandwiching two wider stripes of lighter reddish brown. With the remaining masking tape and paper shielding removed, I’m left with pinstriping running along the top, base and front of the cab.
Finally, I spray the cabinet and rear panels with a tin of tinted clear lacquer followed by a tin of clear gloss. The following day, I gently rub the cab down with a Scotch pad to knock the sheen back a tad, and the finishing process is complete.
The final corner
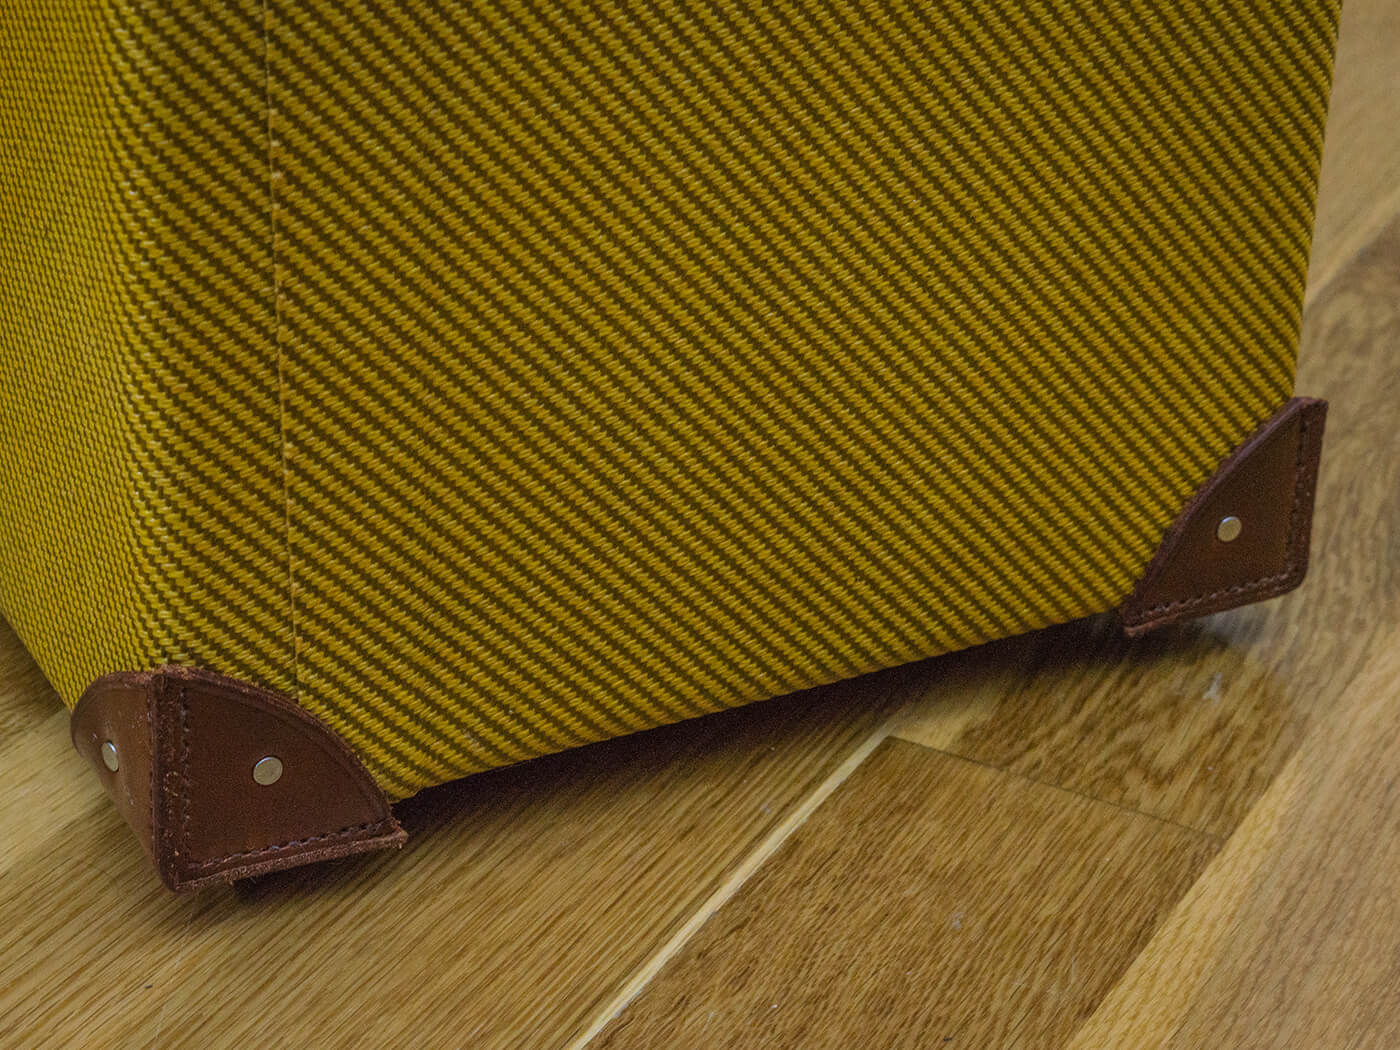
A while back I reviewed an Elektra The 185 amplifier and its tone and looks left a big impression on me. Among its features were leather corner protectors and a matching handle. These things aren’t available from regular amp-parts suppliers, so sometimes you have to think outside the box.
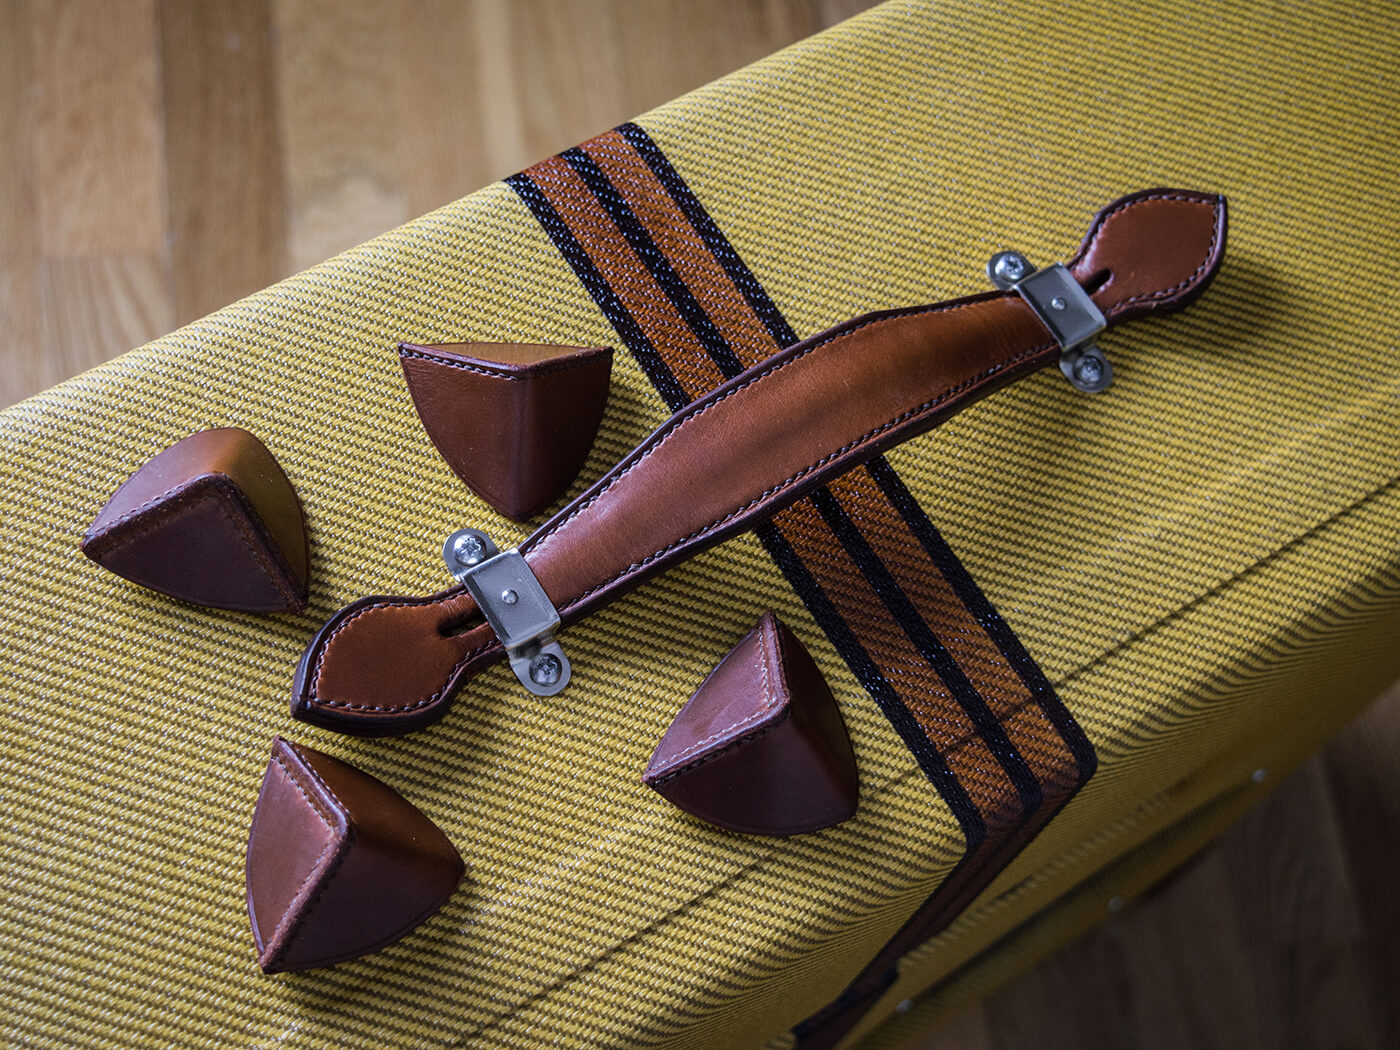
I contacted TCR Saddlery, which made me hand-stitched corner covers and a handle that is way superior to any of the commonly available leather handles. The bottom corners are fixed with serrated grab nails and the handle brackets are fixed with regular screws.
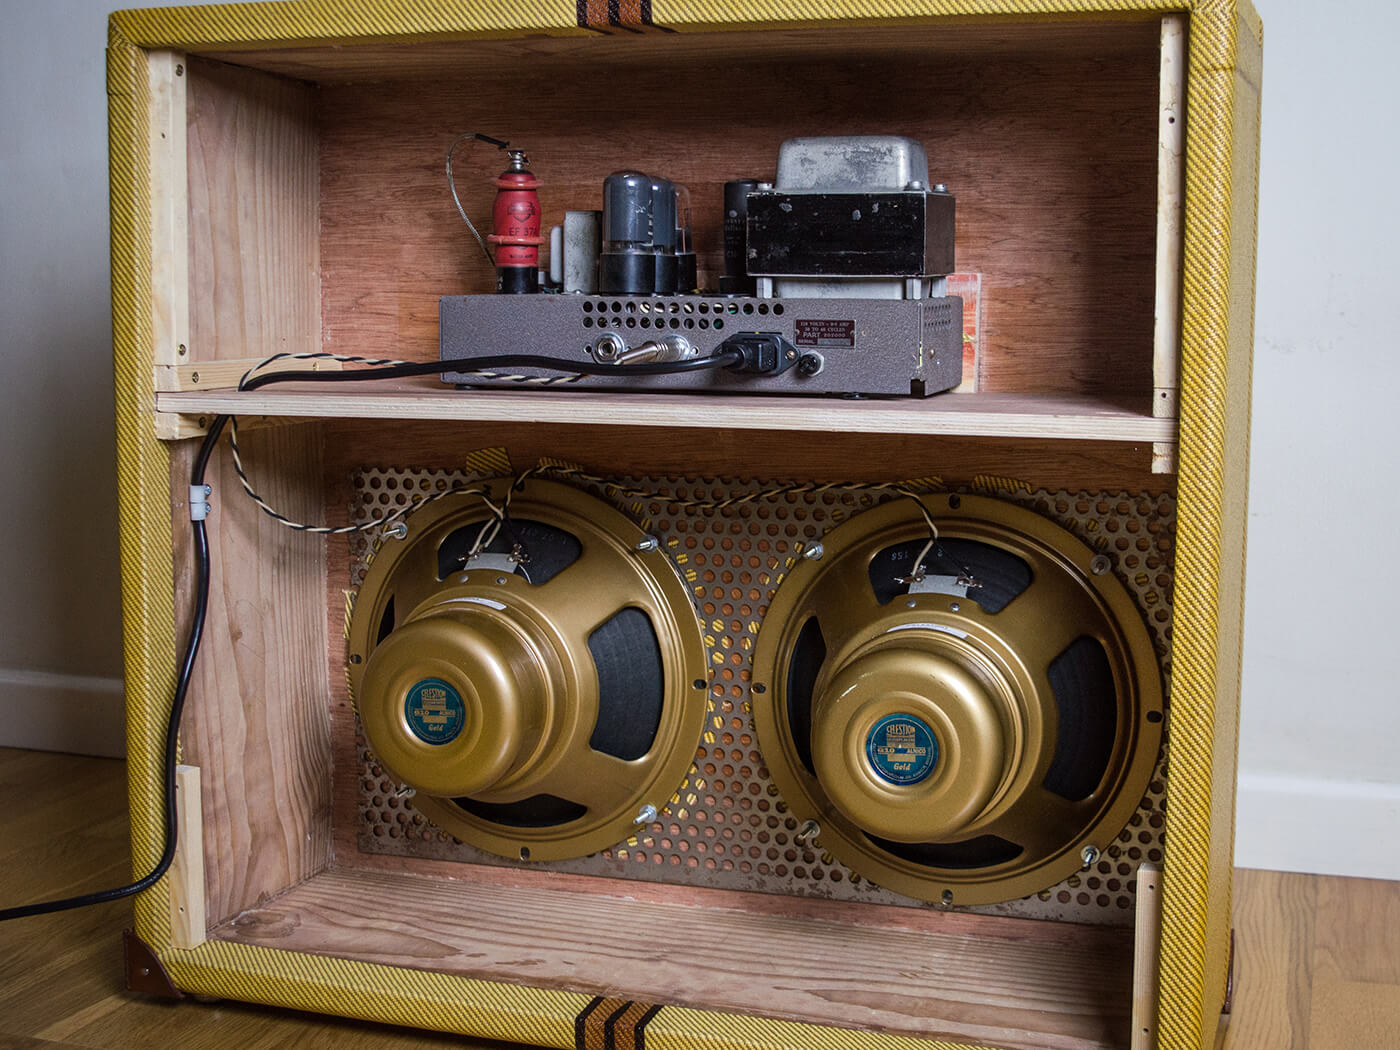
Rather than speaker cloth, I once again follow Gibson and use a perforated metal sheet. I was concerned that it might be hard to source, but it turns out that B&Q stocks exactly the right stuff. With some minor alterations, I’m able to place the metal grilles over the speaker screws and load up a pair of Celestion G10 Gold 10-inch speakers.
With a routed notch at each side of the amp shelf, I’m able to hook the speakers up to the amp and connect the mains cable, which is secured to the side of the cabinet with a plastic retaining hook. The back panels are fixed on and it’s time for testing.
Any concerns about an overly resonant cabinet are quickly dispelled. More by luck than judgement, the tone is full and balanced. The lows are deep without being boomy, the midrange sounds clear and there’s a naturally open quality without any boxiness.
I’ve learned a lot during this project and there are some things that I might have done differently. For instance, the cab is about 75mm taller than it needs to be and next time, I’ll make the batons for the back-panel screws a bit larger. Ditto the control-panel opening, because I failed to account for the thickness of the tweed. I should also have gone a bit lighter on the medium-brown pinstripes.
I’ll definitely be taking out the metal grille and cutting it into two smaller and more rounded pieces – if only to improve the looks. And I do need to find some nicer panel screws. I also have to make a decision about fitting my four remaining corner protectors to the top of the cab, but I’m leaving them off for the time being.

With the cost of the materials and the tools I bought especially for the job, this hasn’t been a money-saving project. In fact, a bare-wood 5E3-style cabinet for a Filmosound is currently available on a well-known auction site for less money. Then again, I’ve learned new skills, I have a totally unique cabinet and I thoroughly enjoyed the whole project. After all, that’s what all this DIY stuff should be about.
I’d like to thank Mike Phillips, Rory Coupland and Tamsin Raymond for their craftsmanship and kindness in helping with this project.
More DIY guides here.