Related Tags
DIY Workshop: How to build a speaker cabinet (Part One)
Following on from our Bell & Howell Filmosound projector amp conversion project, it’s time to make some decisions about speakers and figure out how to house it in a cabinet.
I’ve never made a cabinet before, let alone designed one, but now I’m doing both. Besides a working knowledge of the sonic characteristics of open and closed backs and a basic understanding of the arguments for resonant versus acoustically inert cabinets, I don’t know much about the subject. So instead, I’m going to go with gut instinct and hope for the best.
Firstly, I need to figure out the cabinet size and speaker combination that best suit the sound of the Filmosound amp. I decide the best way to do this is through experimentation and so I borrow a bunch of cabinets to audition.
The Tayden 15-inch alnico unit currently residing in my mate Simon’s tweed Fender Pro sounds huge and mellow at low to medium volume levels, but at higher levels, the low-end sounds a bit too dominant and I decide it’s a better match for the Pro circuit.
A Celestion Blue won’t cope with the Filmosound’s circa 20-watt power output, but I do like the way the Filmosound interfaces with a Celestion Ruby and Fane A60. I’m veering towards the latter until I try a pair of Celestion 10-inch speakers in a tweed Super cabinet – a Gold alnico and a Vintage 10.
A larger cabinet with two speakers produces a bigger sound, with tight and punchy lows, articulate mids and really pretty upper harmonics. I like the sound even more when I swap the Vintage 10 for a Celestion G10M Greenback. The complicating factor, however, is how I’m going to mount the Filmosound inside the cabinet.
Most of the companies offering rebuilt Filmosound amps, such as Old Amps and At Mars, offer them as a head rather than a combo. The amplifiers were designed to bolt into the underside of Bell & Howell’s projector chassis with the valves upright and the mains transformers and EF37 pentode in the V1 position are both fairly tall, so mounting the amp upright at the base of a head makes sense. The controls are all at the front, the valves don’t need retainers to prevent them from working loose and falling out – and there’s sufficient space above the chassis to keep things running cool.
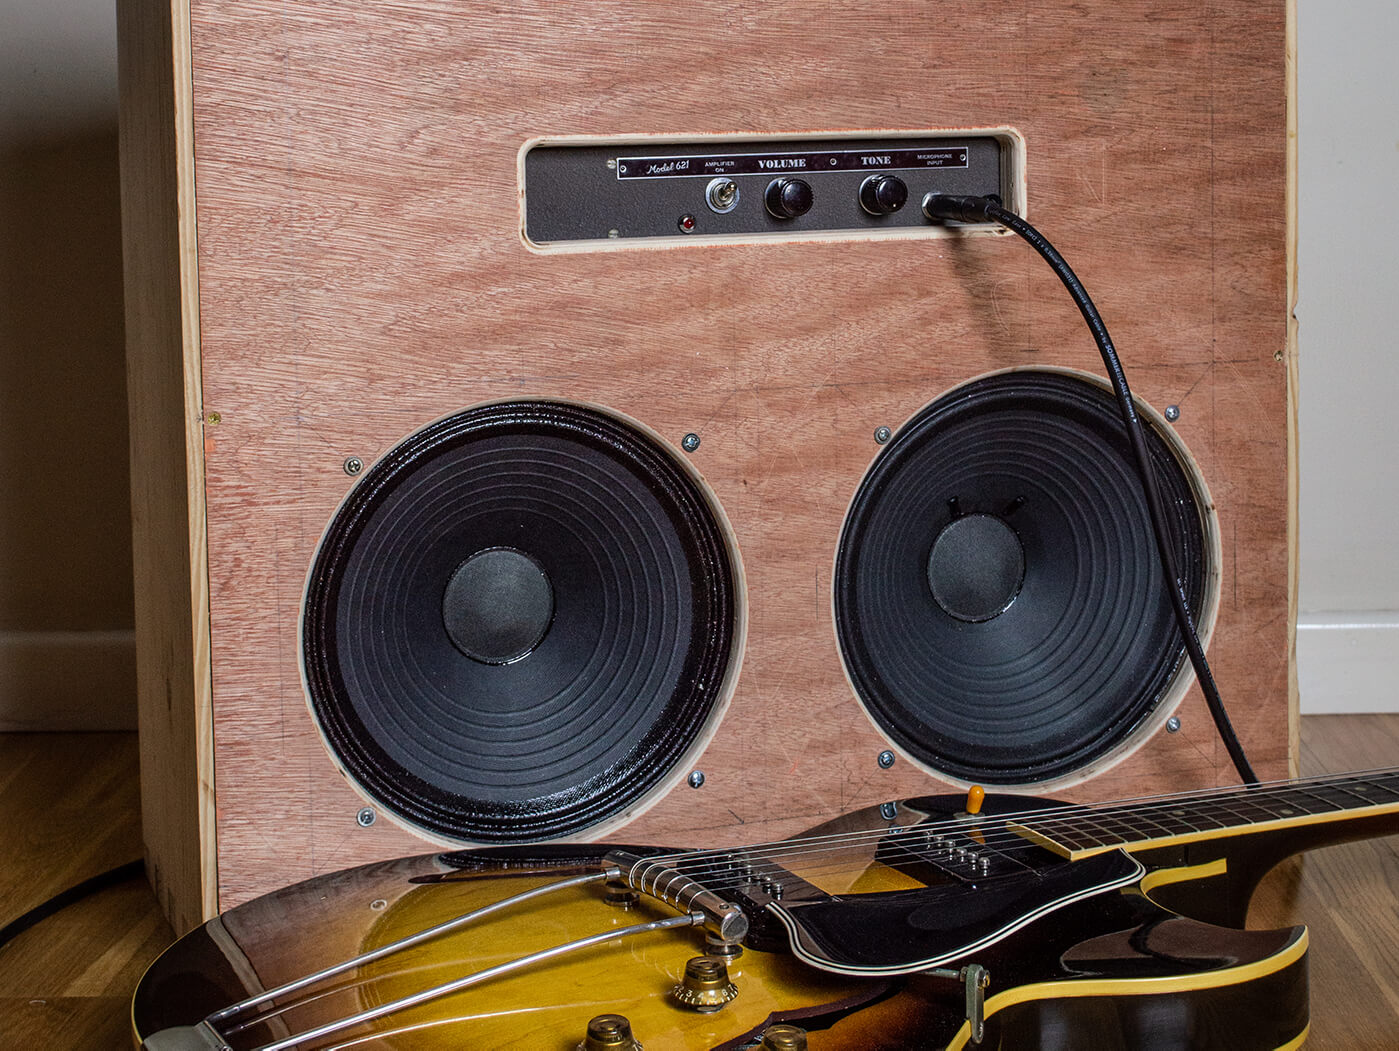
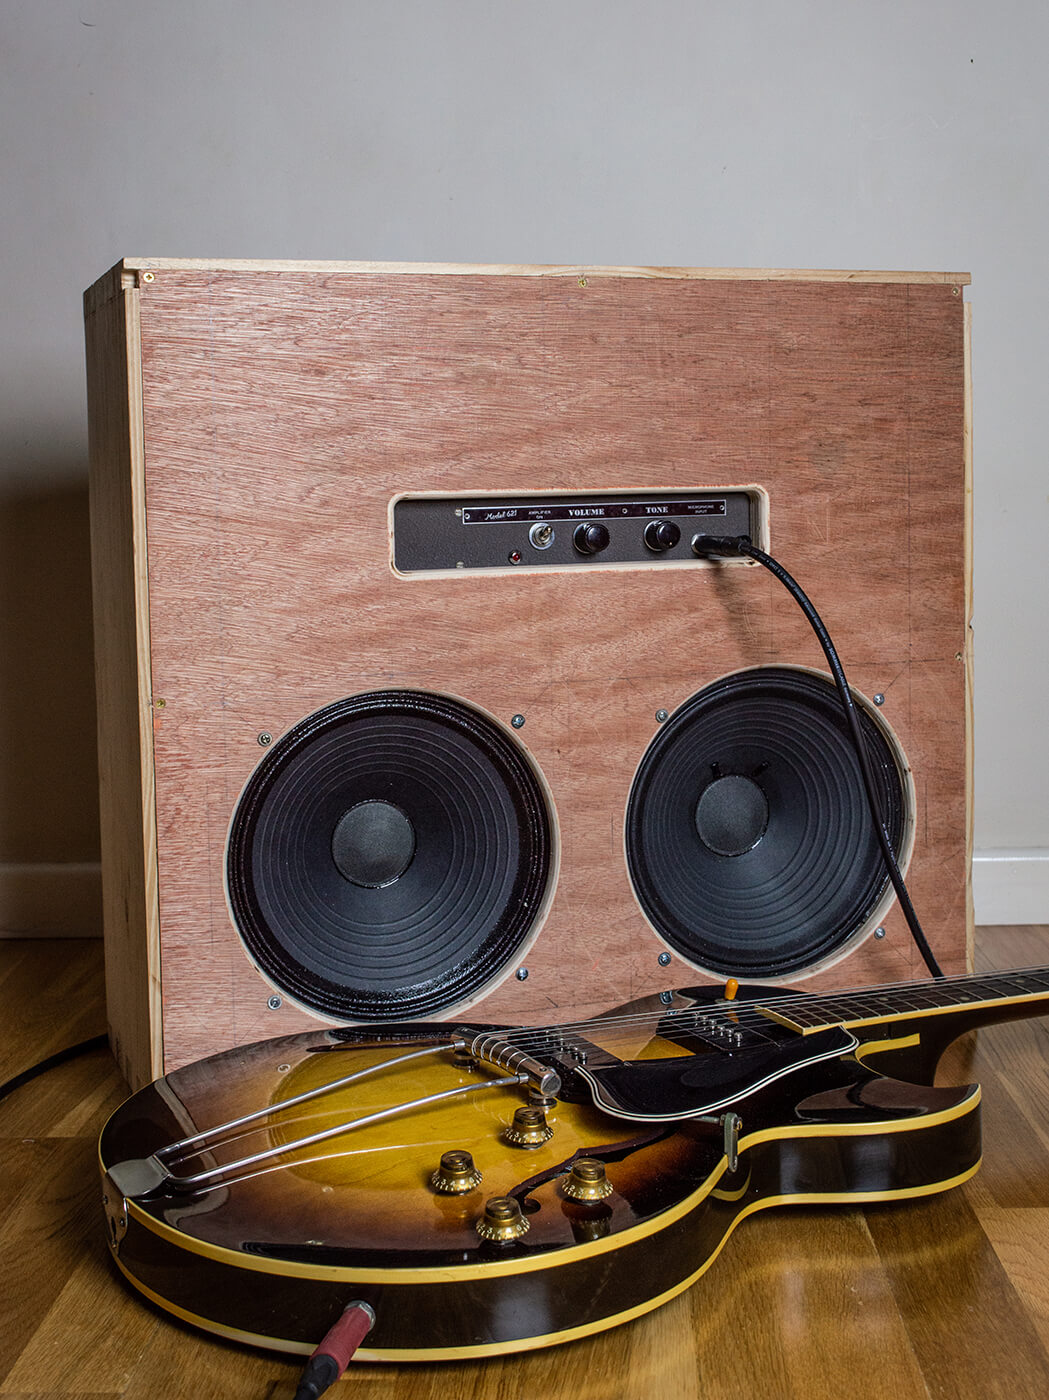
Taking some inspiration from Michiel Helsloot’s Elektra 185 amplifier, I decide to build a taller-than-standard combo cabinet. This will leave sufficient headroom above the side-by-side 10-inch speakers to mount the Filmosound on a sliding shelf – much like Vox did with vintage AC30 combos. The plan is to make cutouts in the front baffle for the speakers and the Filmosound’s front panel.
In order to decide on the dimensions, I lay two speakers out on a large piece of hardboard and position the amp above them. This gives me the baffle size required, and from that I can add on 0.75 inches all round for the cabinet timber. I end up with outside dimensions of 24.5 inches (622mm) wide and 22.5 inches (571mm) tall. The tweed Super’s outside dimensions are 22 x 18 inches.
Material benefits
These days, there’s a lot of interest in repurposed materials in guitar and amp manufacturing. I can’t claim that building amp cabinets from recycled wood benefits tone, but it can’t do any harm and it feels a lot better from an environmental perspective.
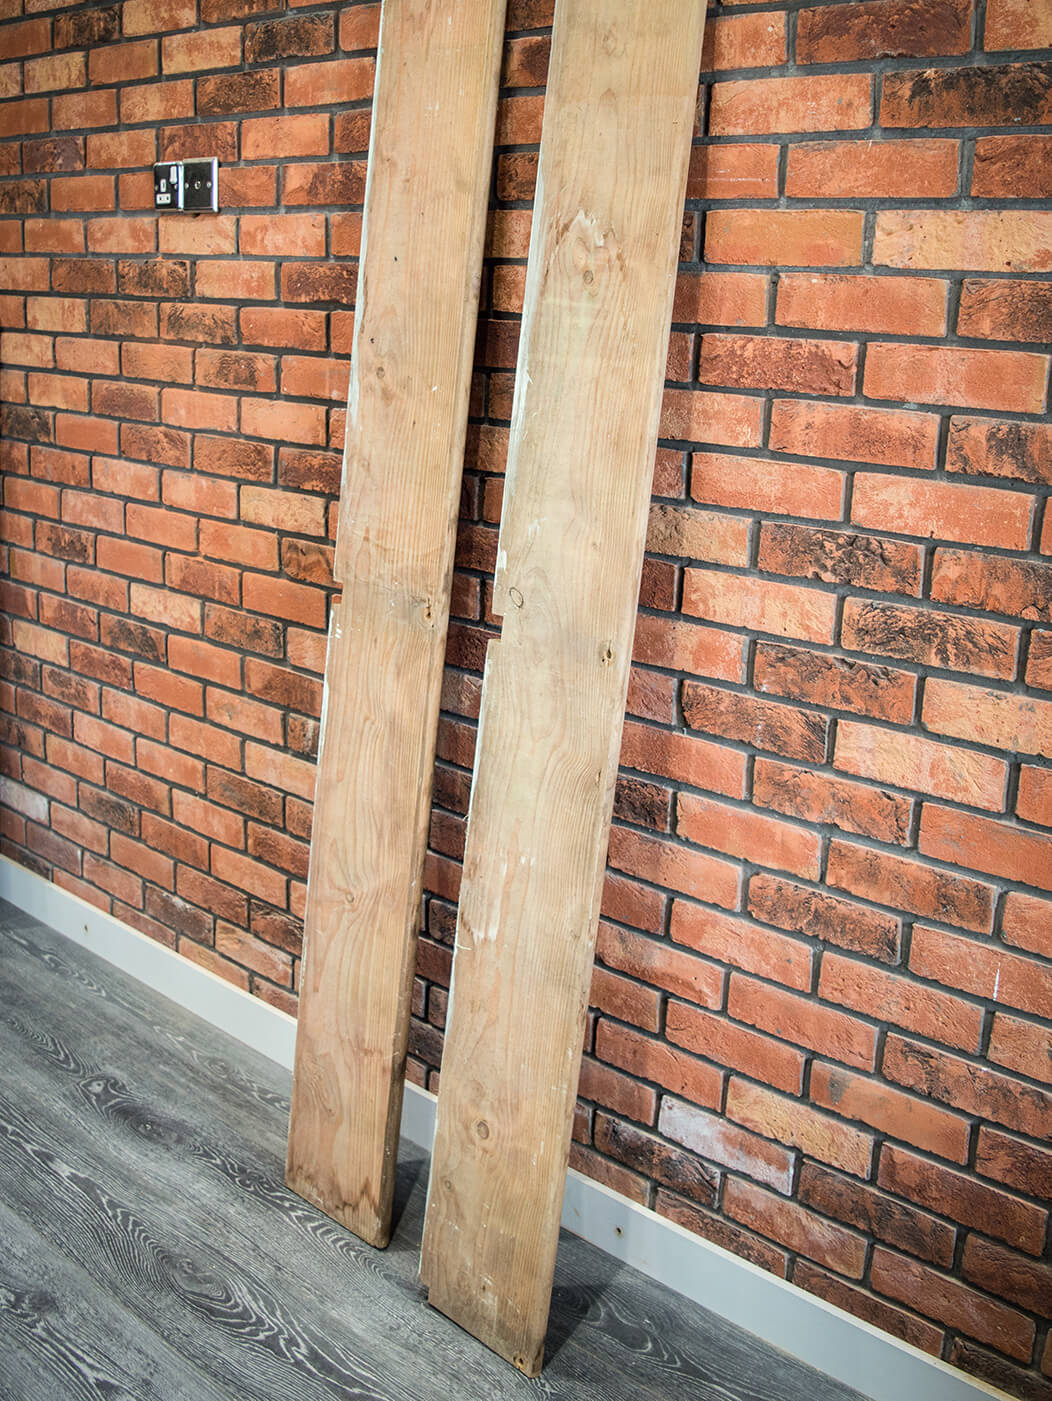
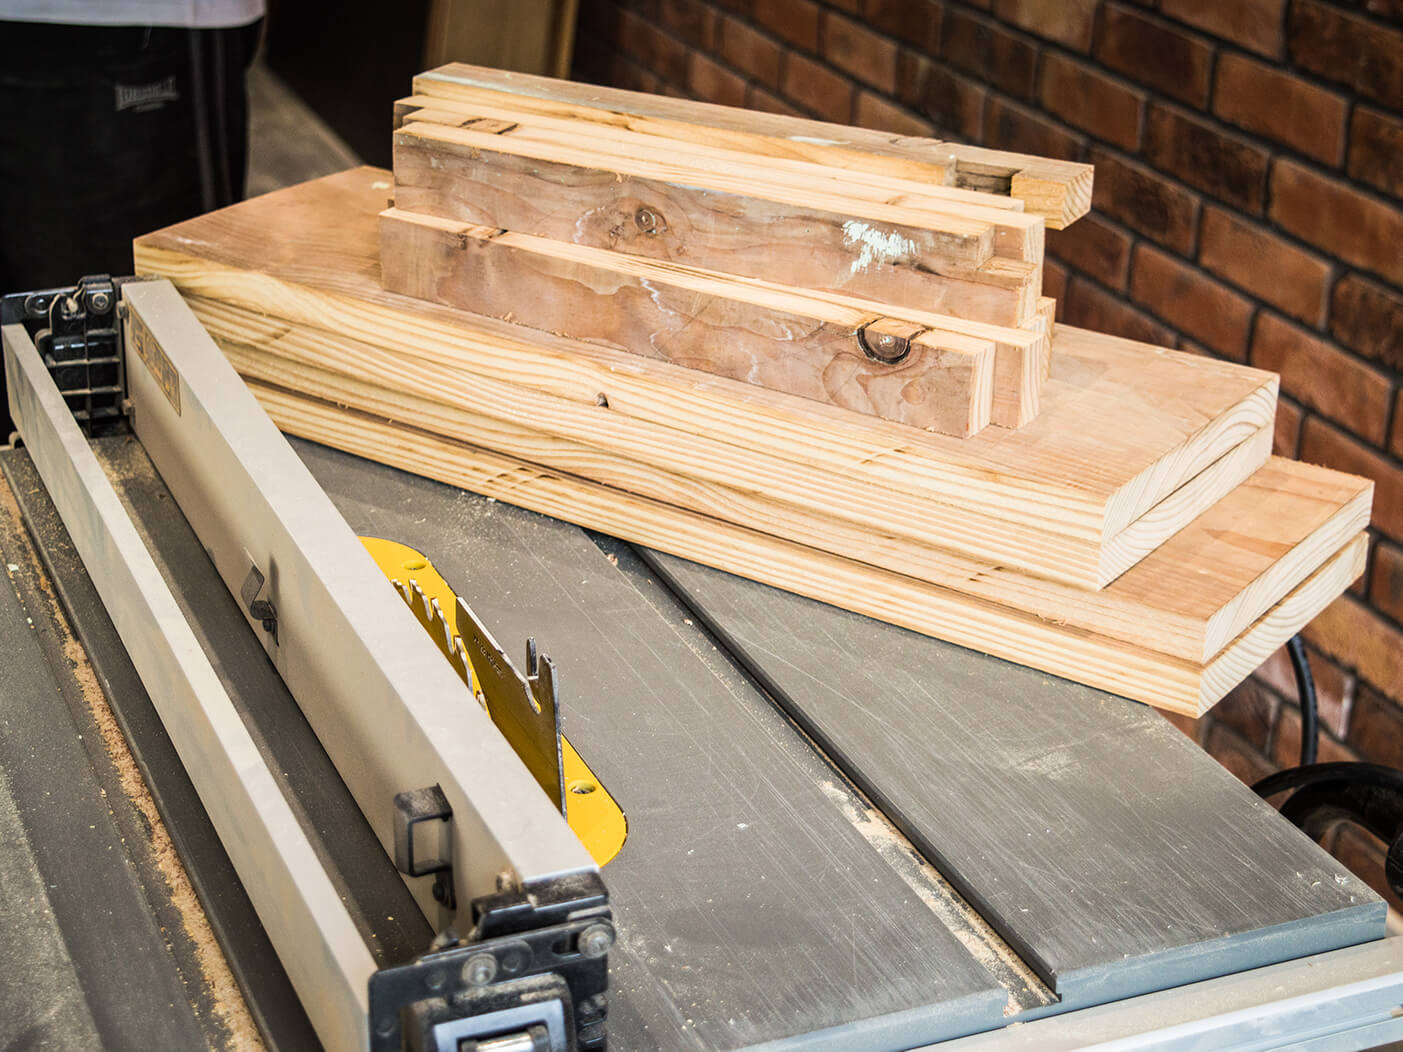
I head off to my local architectural salvage yard and purchase two old pine shelves that were removed from an old shoe shop in Cardiff. They have a dusty orange look, feel quite light and ring when I tap them.
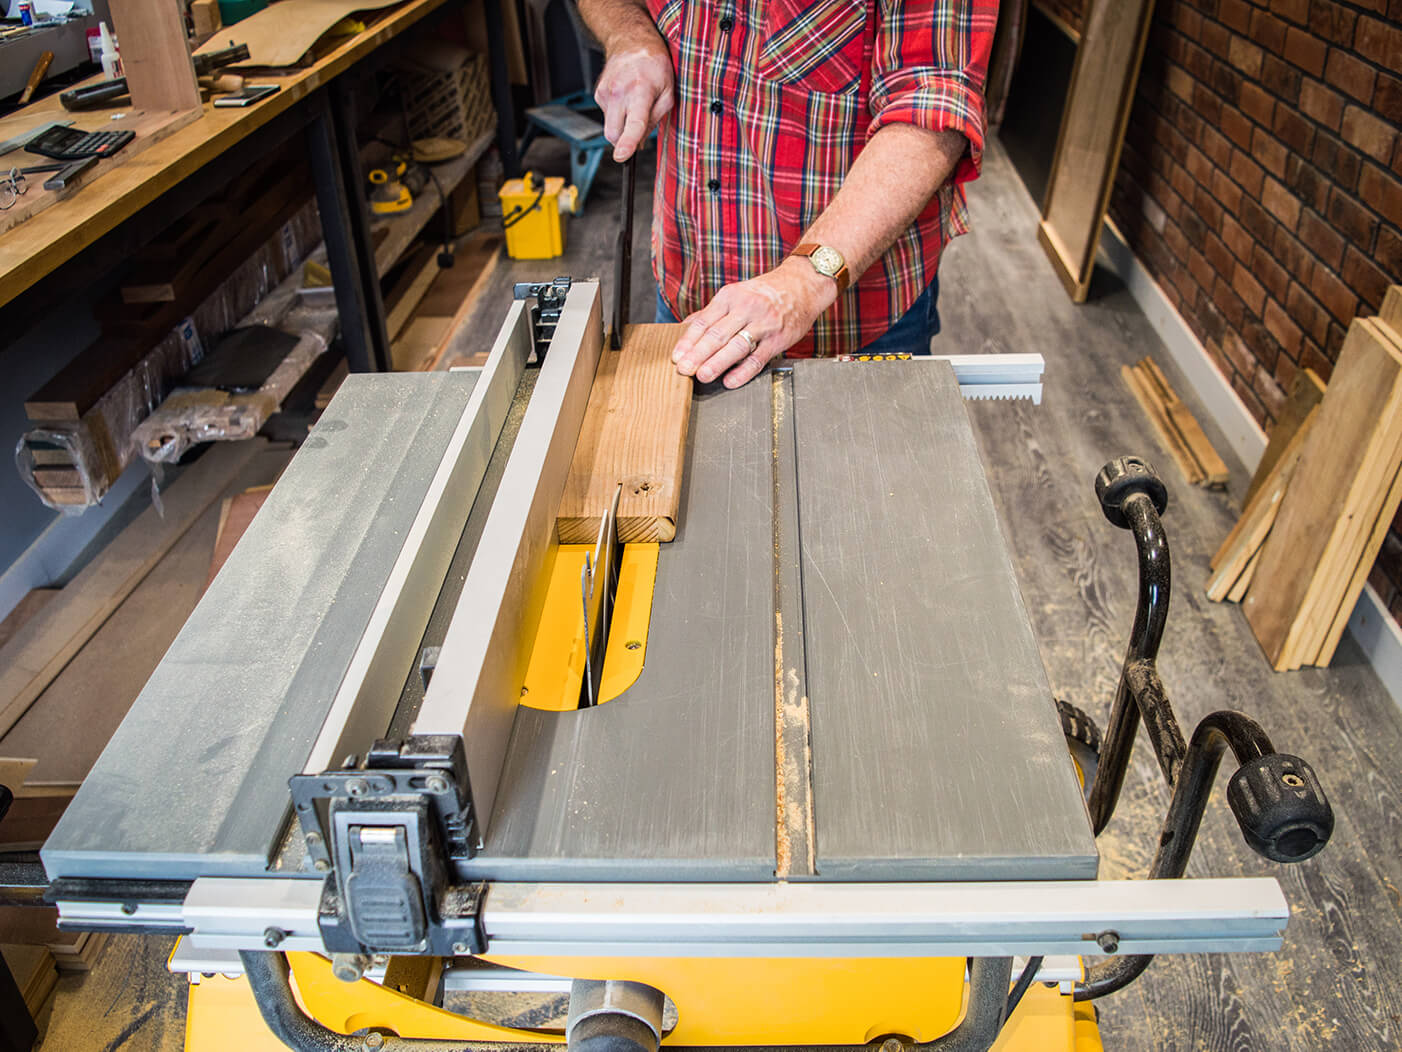
I don’t have a table saw, so my good friend Mike Phillips of classiccase.co.uk kindly helps me out. Before long, I have four sides cut to length and width and I still have all my fingers. The depth is a bit shallower than the nine inches I’m shooting for, so I graft offcuts onto the rear edges using Titebond Original glue.
For added strength, I drill through the glued-on pieces and into the main sections and then fill the holes with Titebond and tap in dowels. Once the glue has set, I trim the dowel ends flush and the results are pretty solid.
The other issue with the wood I sourced is that it’s about 1/8-inch too thick and not exactly flat across the flat sides. Rather than pay someone to run the planks through a thickness sander, I fix one side to a backing board in between two runners using double-sided tape.
My router is mounted on my small homemade ‘table’ and flipped upside down.
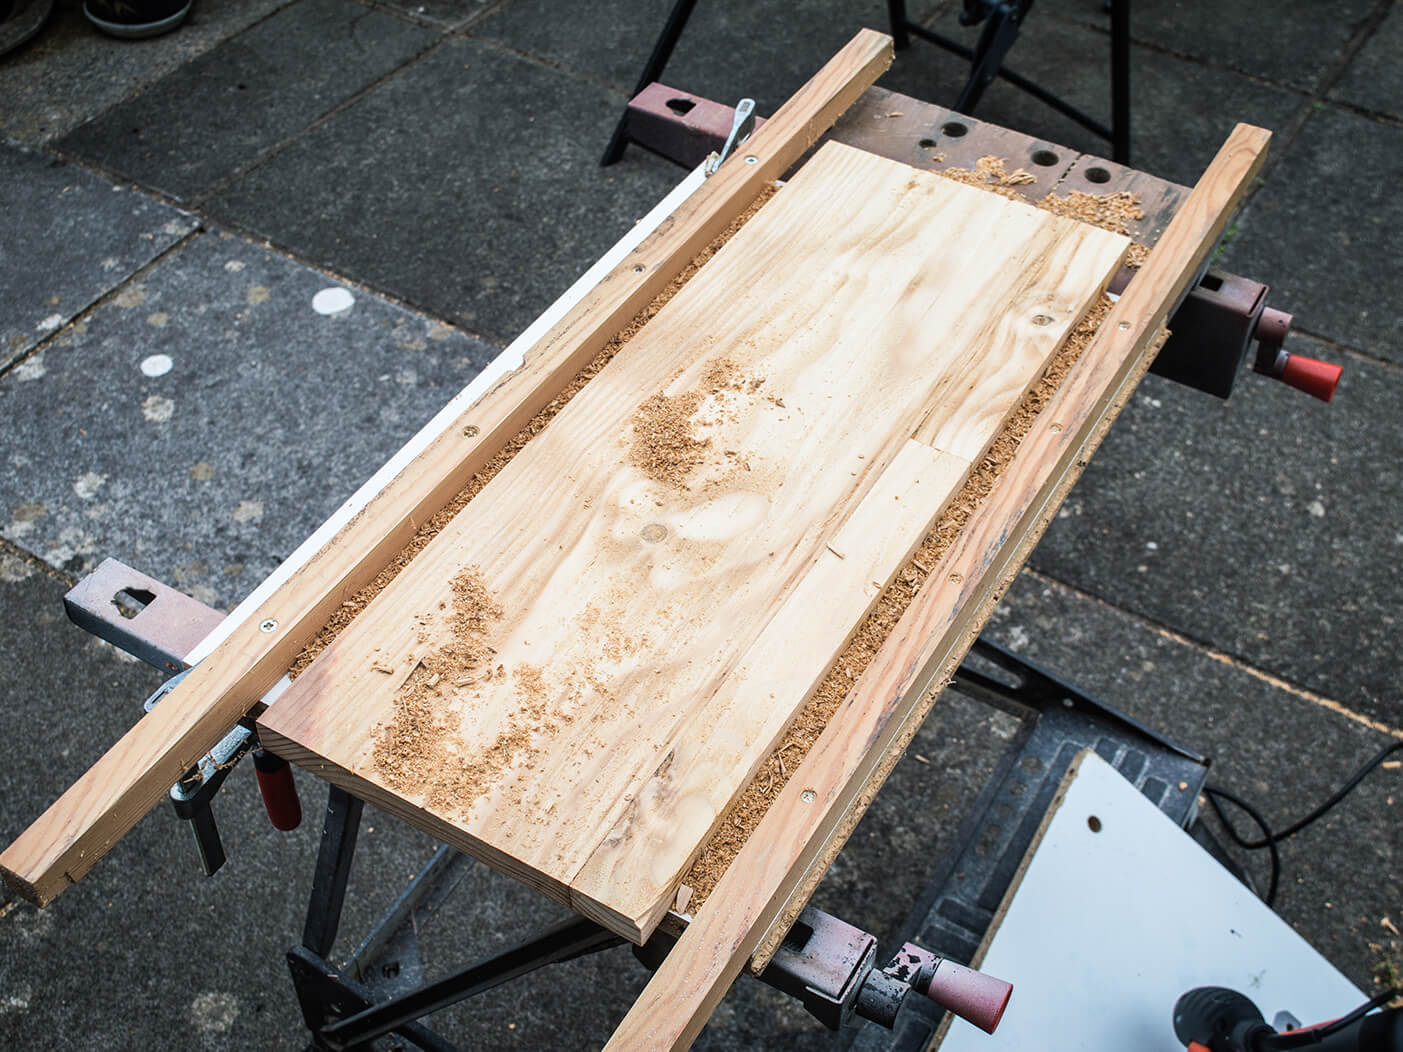
The ‘table’ slides on the runners and I make a few passes, lowering the cutting bit each time, until I have a flat surface and the board is the required 3/4-inch thickness. I do the same for the other three boards and it’s time to get the sides jointed up.
This one time, at band clamp
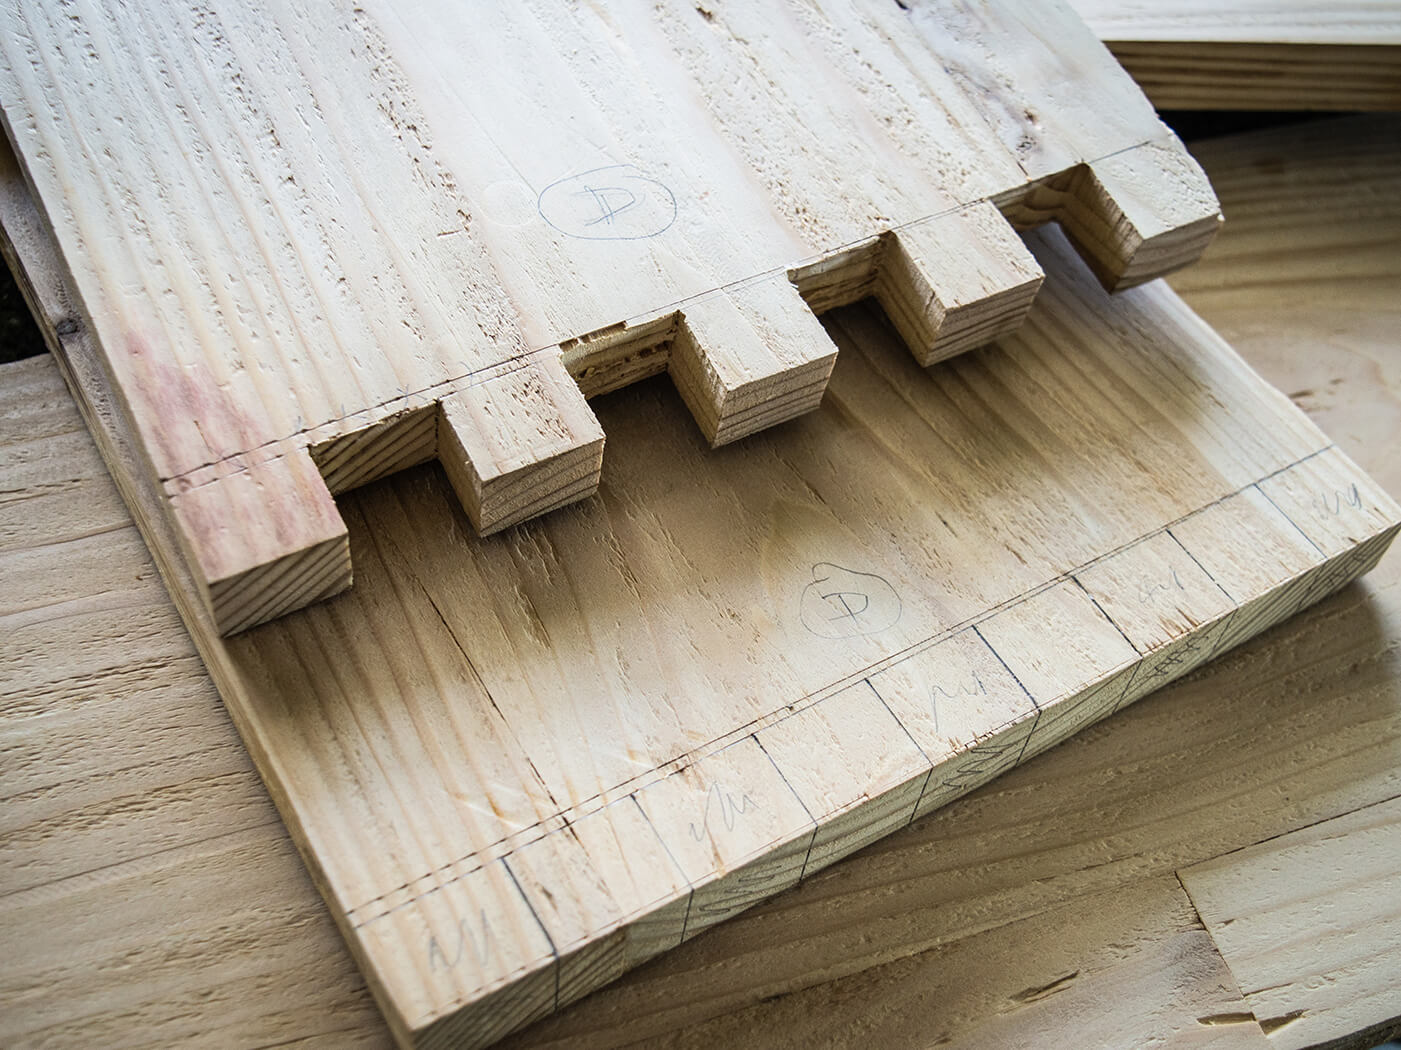
I decide on simple box joints to join the corners and set about carefully marking and measuring. Everything appears to be going well, until I realise that although the outside surfaces are perfectly flat, the inside surfaces are not.
In effect, I have to make all the box joints a custom fit for each and every piece of wood. It turns out to be way more work than I had anticipated, but I’ll chalk it up to experience – next time, I’ll level both sides of the boards. The box joints are marked one inch apart and I draw along the inside surfaces of each piece to establish the required depth.
A new Japanese razor saw is purchased for the occasion. It cuts on the pull stroke and it’s an absolute joy to use. With the depth cuts done, I use a jeweller’s saw to cut across the grain to create the boxes. I can’t claim this is the best bit of joinery I’ve ever done and there are some shameful gaps, but for the most part, the joints are pretty tight.
Before glueing everything together, I need to rout a rebate along the front inside edge of each piece. The idea is to create a ledge for the speaker baffle, so I can drop it into the frame and glue it in place to solidify the structure.
I set up my router table with a square cutting bit and a guide fence to cut the rebates in three stages. I’ve learned from cutting the box joints that this pine is dry and tends to chip out. This procedure goes quite smoothly, although I forget that I need to stop short at each end. With the sides glued together, I’ll have to fill four small gaps. Well, I did say it’s the first time I’ve done this!
At last, it’s time to glue the outer structure together and I decide to use Cascamite glue because it’s ultra strong, sets crystal hard and has a long open time. It also fills gaps very nicely and my shoddy box joints certainly need that. The only drawback is that Cascamite takes about 24 hours to fully cure.
Holding the box square as the glue goes off is critical. Sash clamps are one option, but they’re cumbersome and quite expensive. Having enjoyed myself so far, I’m pretty certain I’m going to be doing more cabinet builds in the future, so I decide to buy a couple of Stanley band clamps. They’re pretty heavy duty and when I do a dry run, I’m delighted to find that the cabinet pieces pull together dead square.
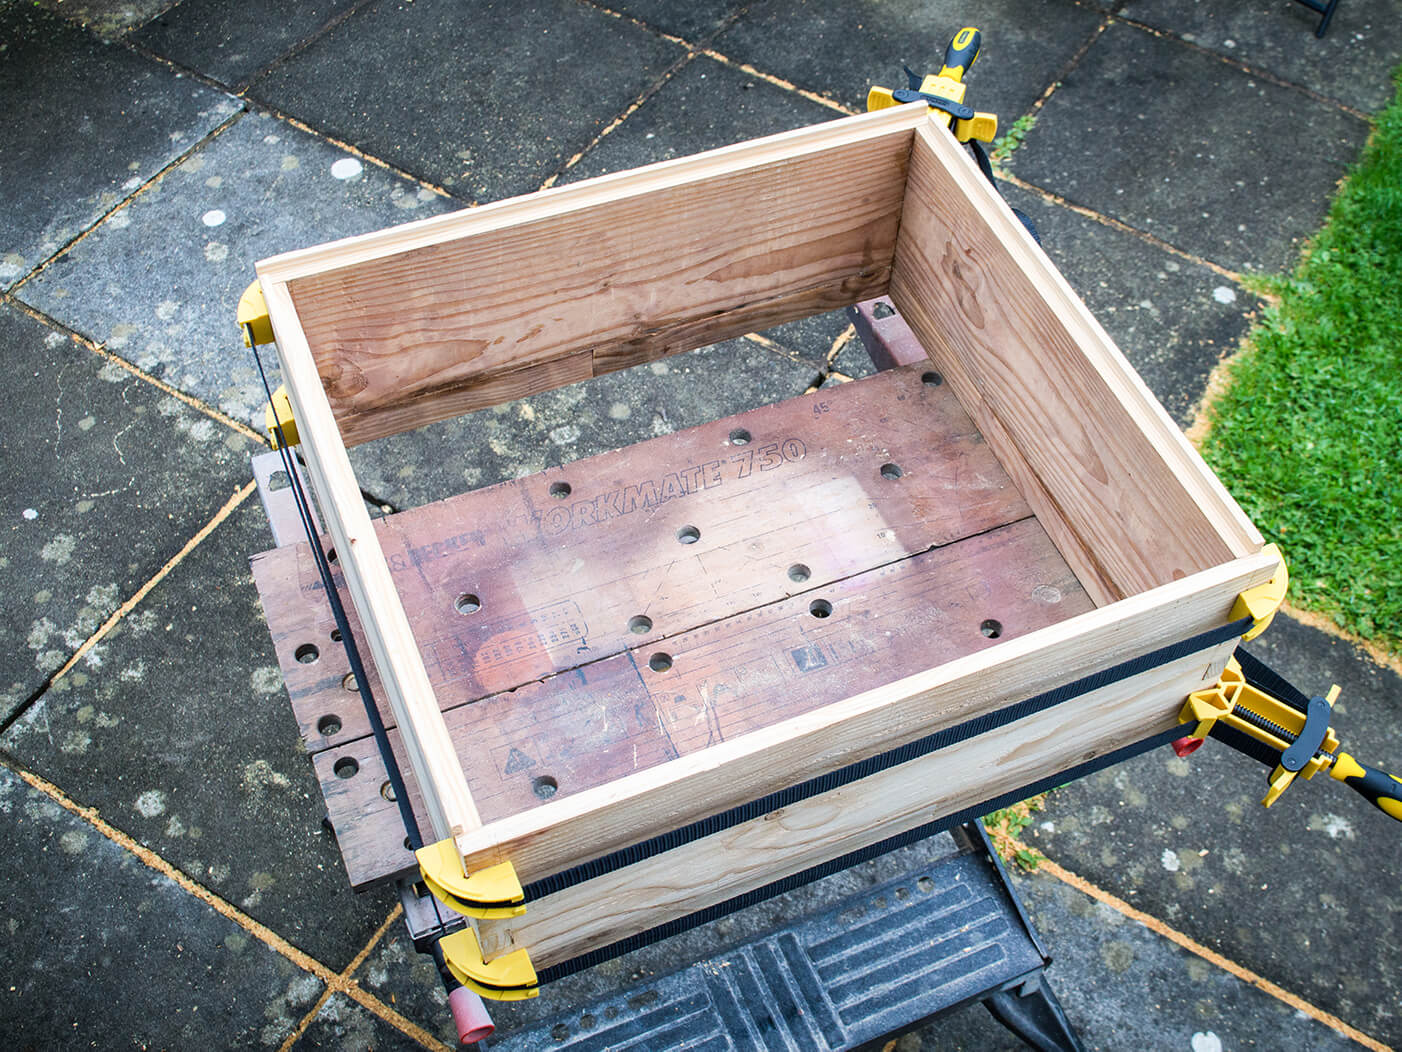
A quantity of Cascamite is mixed up, applied to every surface of the box joints and they’re soon assembled. Before doing this, I’m careful to give each of the corners a letter code, so there’s no confusion about which parts go together. I also prep the band clamps so the corners can slip over the joints with very little slack and be tightened quickly.
Once the clamps are tightened, I use a set square to verify that all the corners are at 90 degrees and everything looks good. After the required glueing period, I remove the clamps and breathe a big sigh of relief.
Getting baffled
My local B&Q provides a very accurate and clean timber-cutting service, so I purchase a piece of 12mm plywood sheet and have it cut to the size I need for the baffle. When I get it home, it actually drops straight into the routed recess channels.
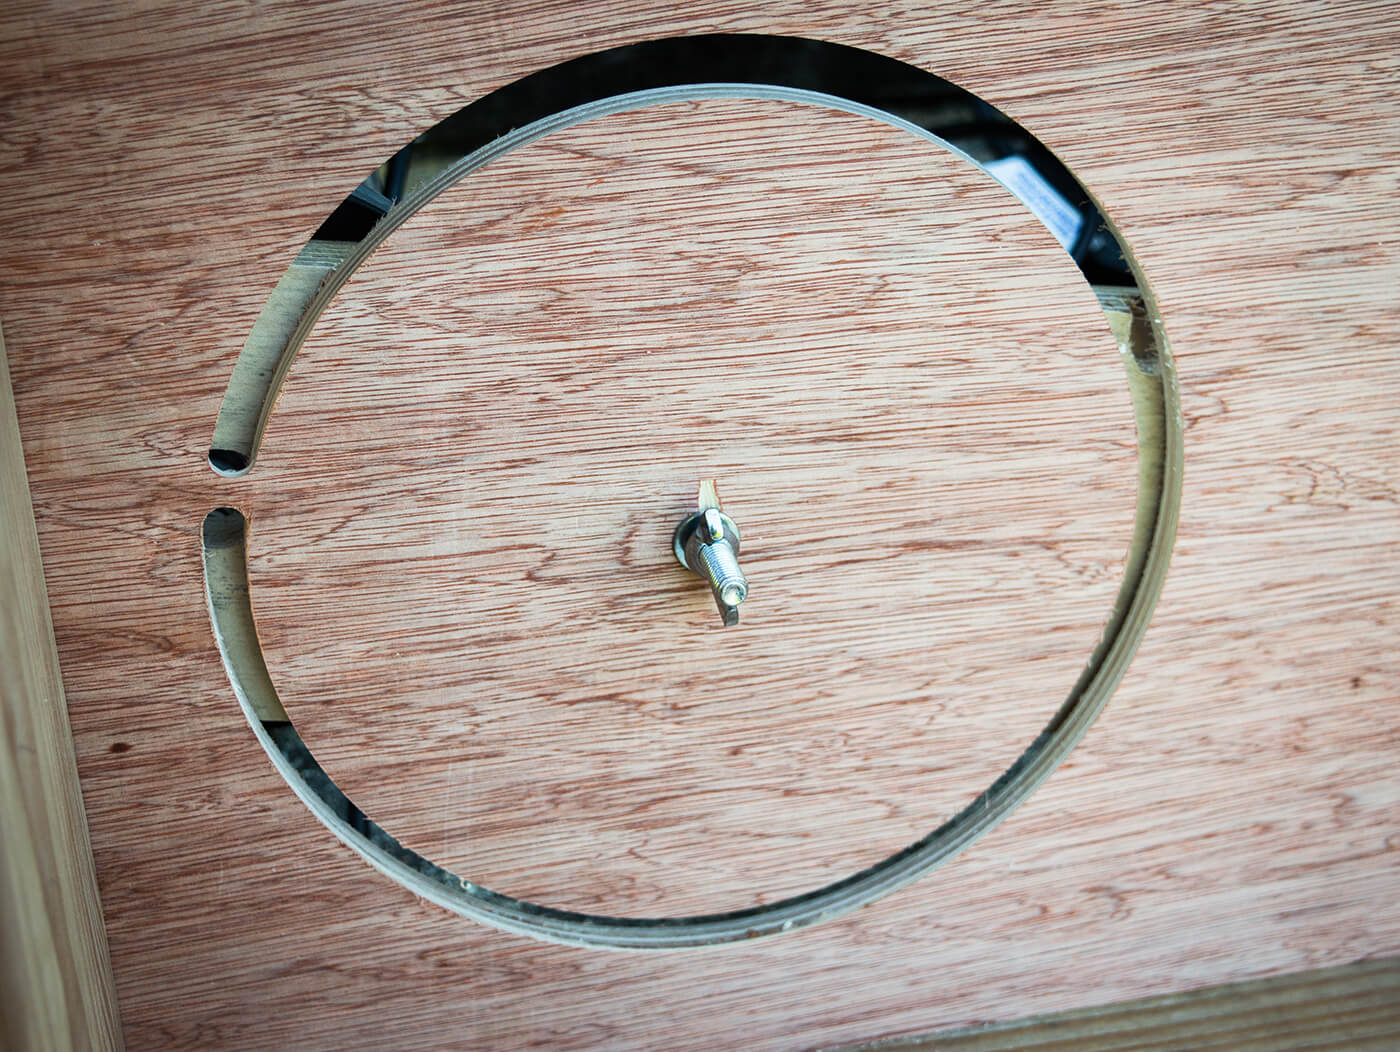
It’s time to mark the speaker positions onto the baffle and figure out how I’m going to cut the portholes. I decide to mount my router onto a length of plywood with a hole cut for the router bit and a second hole drilled 4.5 inches away from the outside edge of the bit.
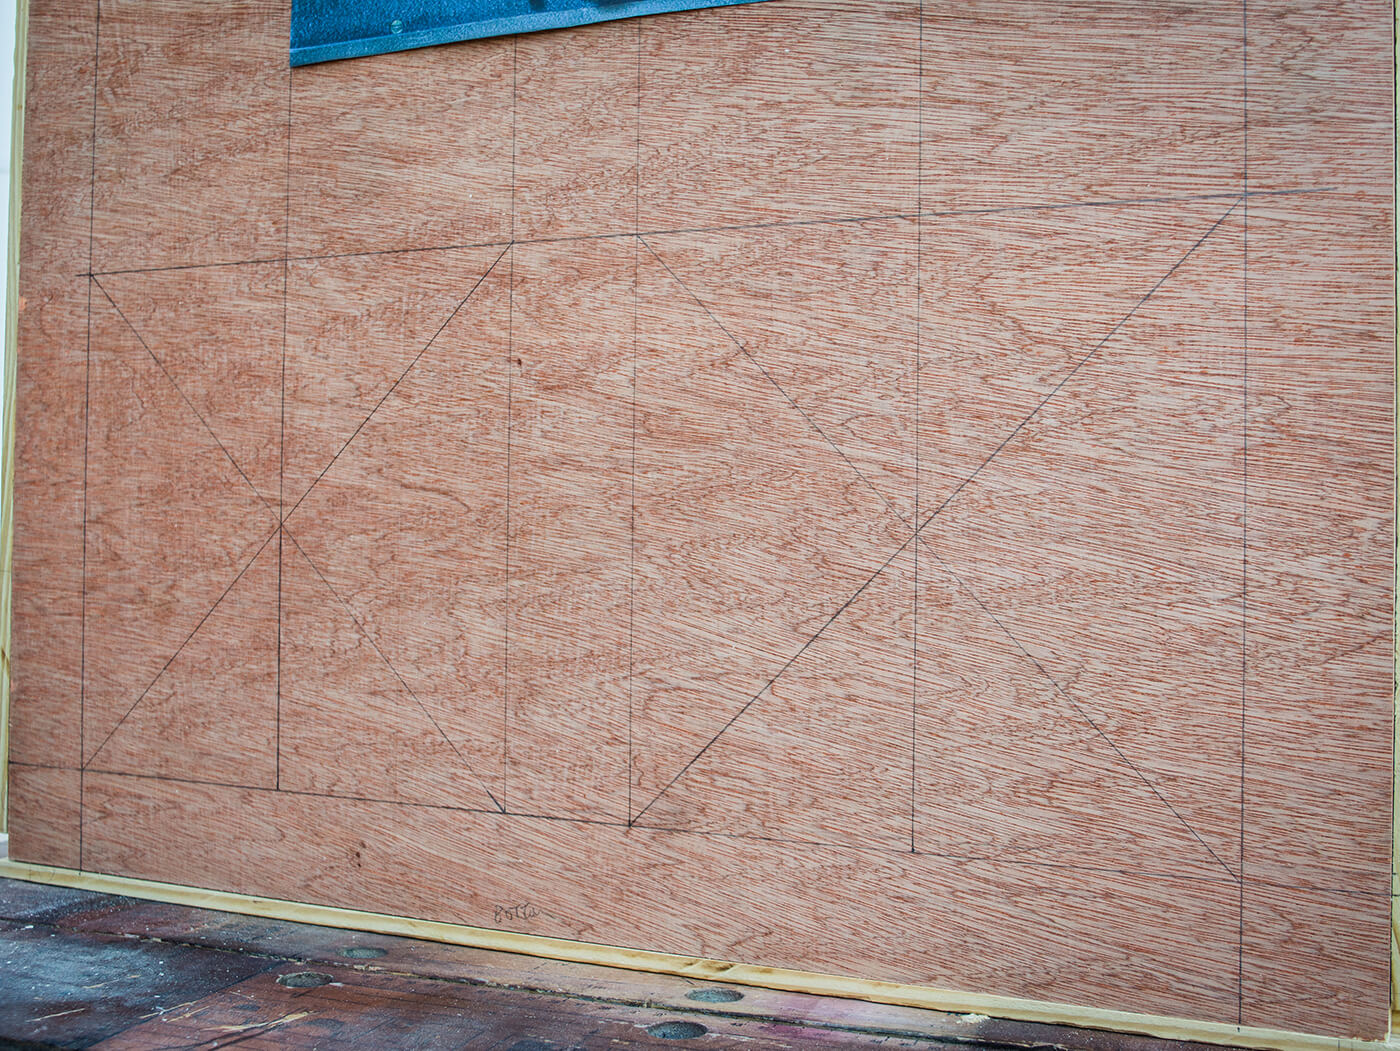
I push a bolt through the second hole and the plan is to drill holes in the centre of the speaker cutout, push the bolt through and secure it tight with a washer and a wing bolt.
This should allow the router to swivel around the centre point and cut a perfect circle. I test it out on a scrap piece of ply and it works perfectly. It’s best to cut through the ply in three or four passes, going a little deeper each time.
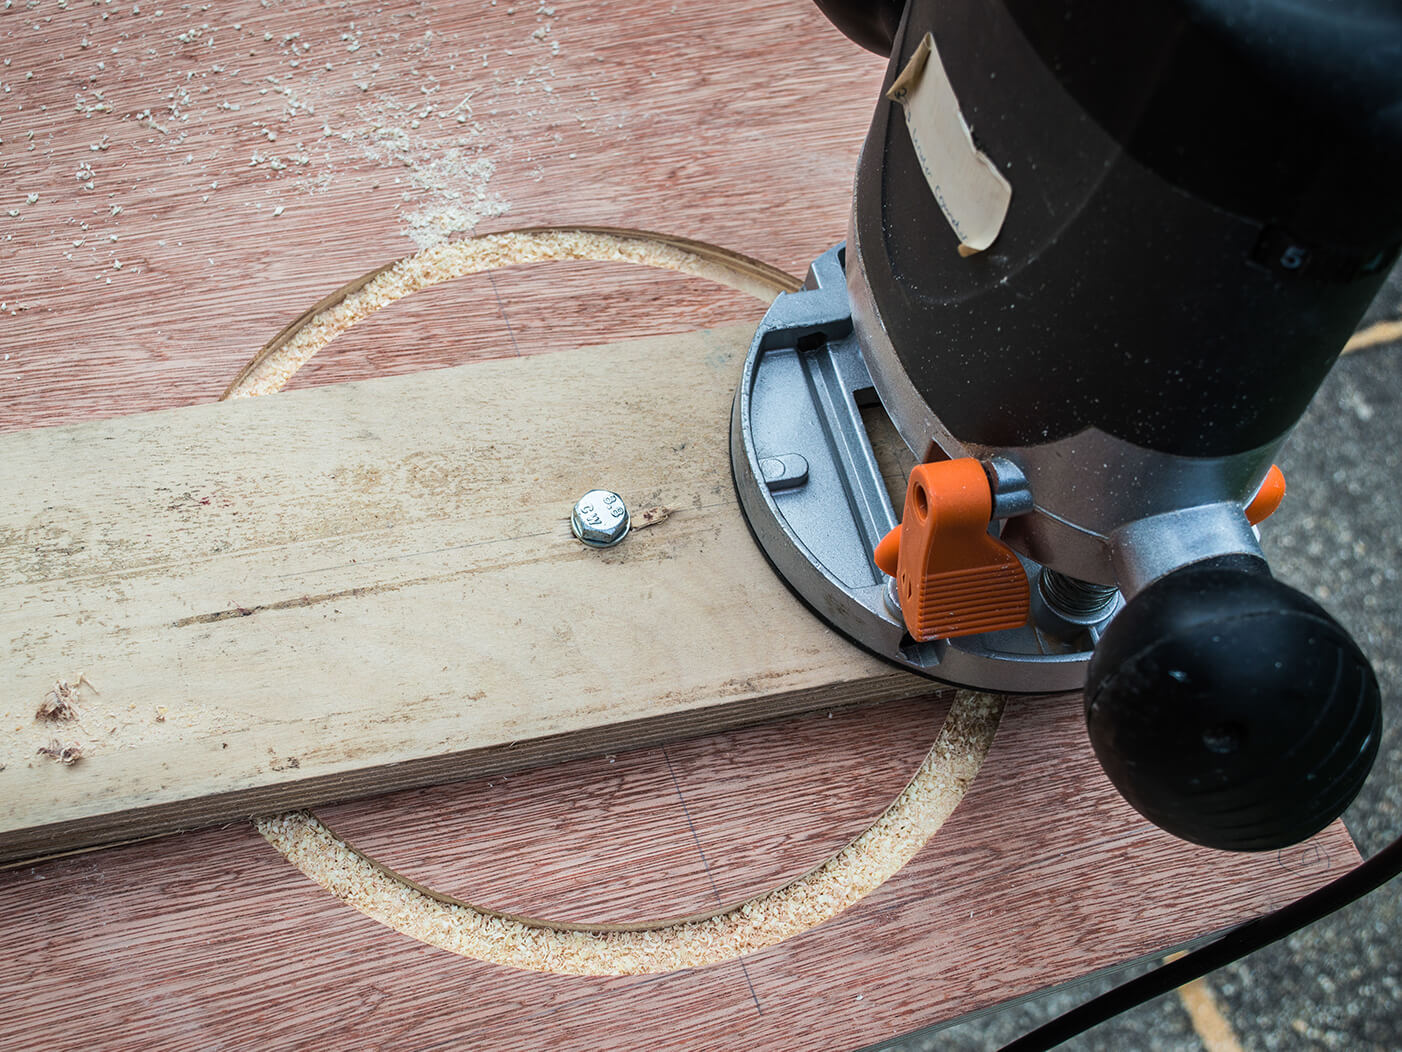
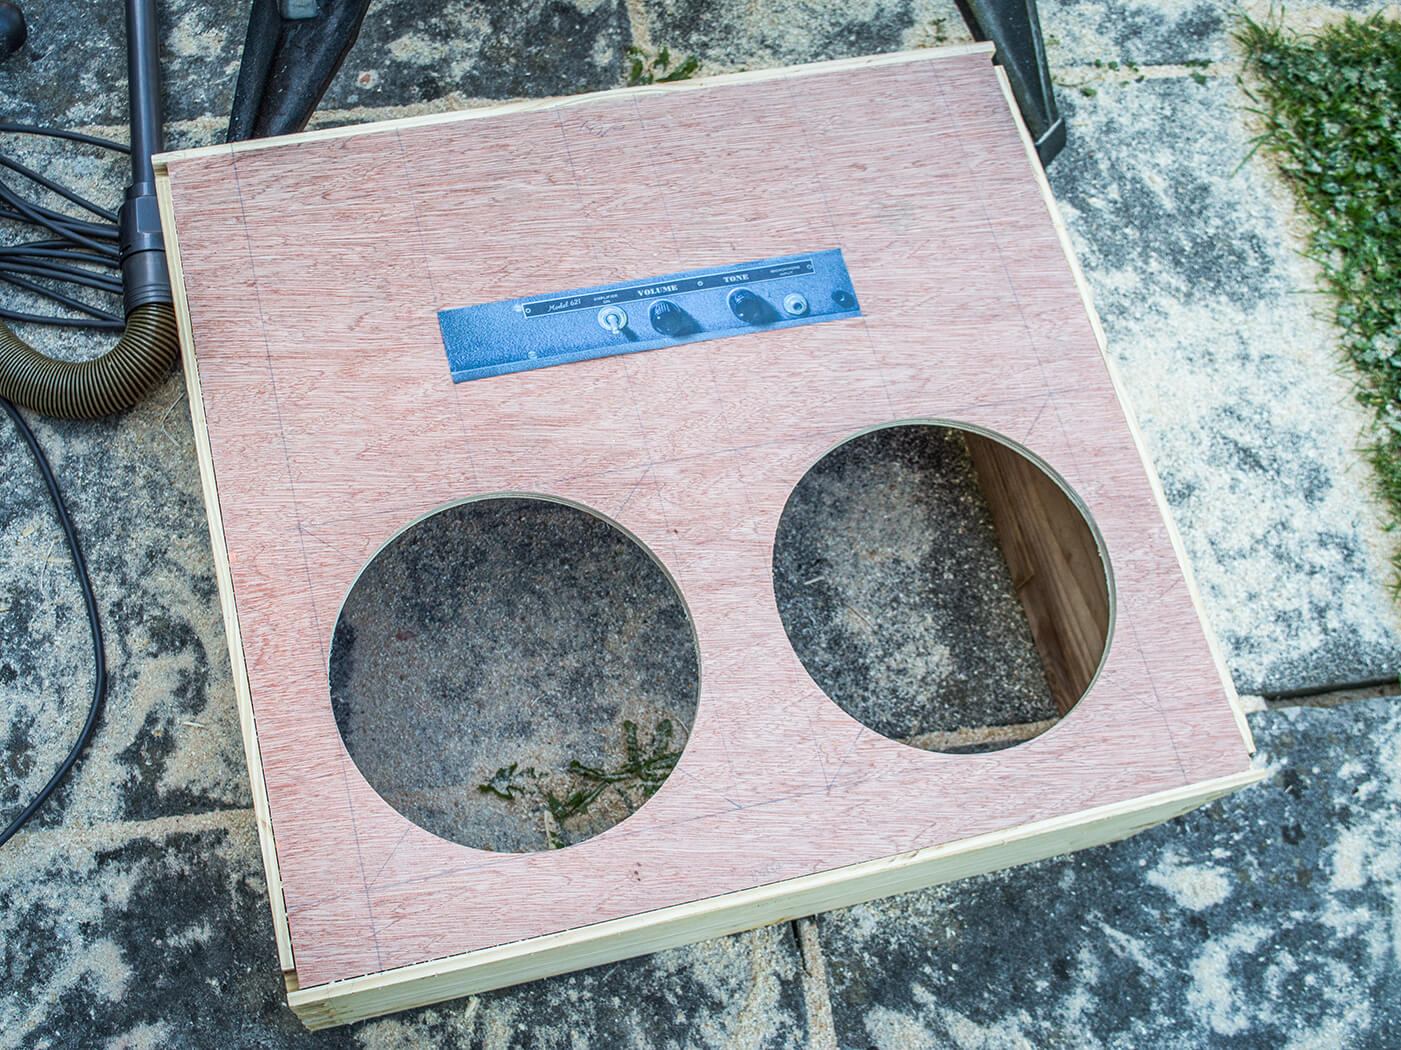
On the final pass, I stop routing just as the cutout piece starts to wobble. At that point I carefully snap off the cutout, leaving a small amount of ply protruding from the edge and clean it up with a rasp to leave perfectly smooth cut edges. With both speaker portholes cut, I mount the baffle back onto the cabinet and screw it down tight.
Amp mounting
As much as I like the look of retro-style amps such as Supros and Swarts, I prefer having the controls easily accessible – even when there are only two knobs. That means I have to cut a letterbox-shaped hole in the front panel and I need to make a template to do it.
I carefully measure the Filmosound’s front panel and settle on a hole size that’s very slightly smaller in height and width. The shape is marked out on a piece of MDF and I cut it out roughly using a jigsaw. A piece of scrap wood with straight sides is cut to create a guide for a flush-cutting bearing bit. The wood pieces are fixed to the MDF with double-sided tape and I clean up the edges of the hole using the router bit.

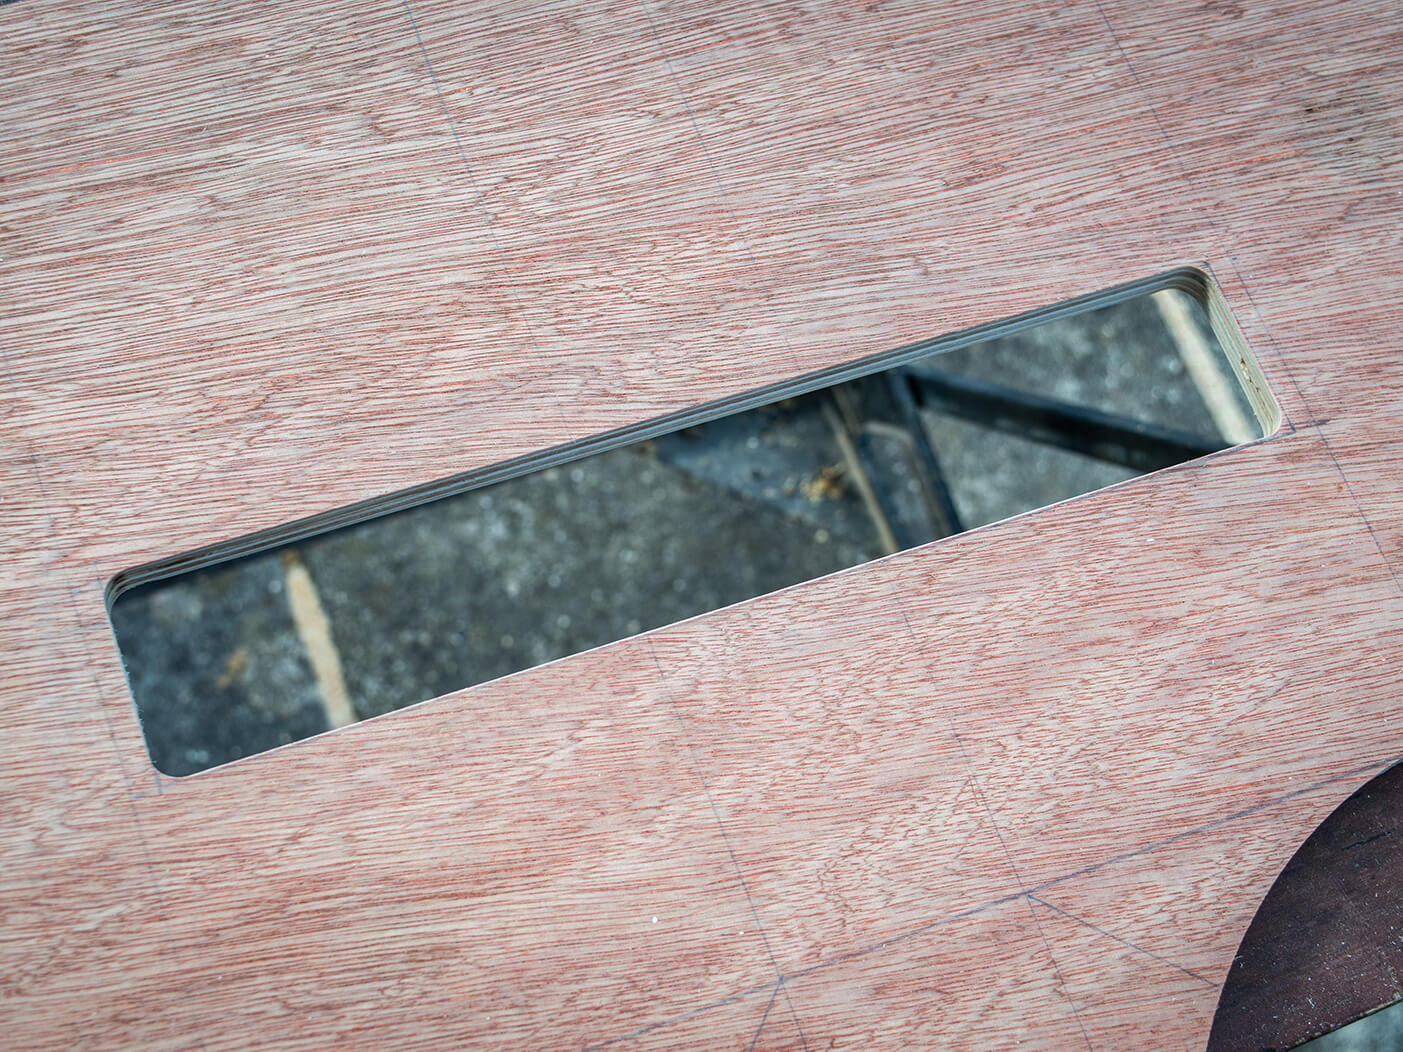
Once I’ve decided on the position of the amp, I use my routing template to draw the shape of the opening onto the baffle. Again, I rough cut the undersized hole using a jigsaw after first scoring around the cut lines using a utility knife. This ensures that any chips in the top layer of plywood will spread no further than the scored lines.
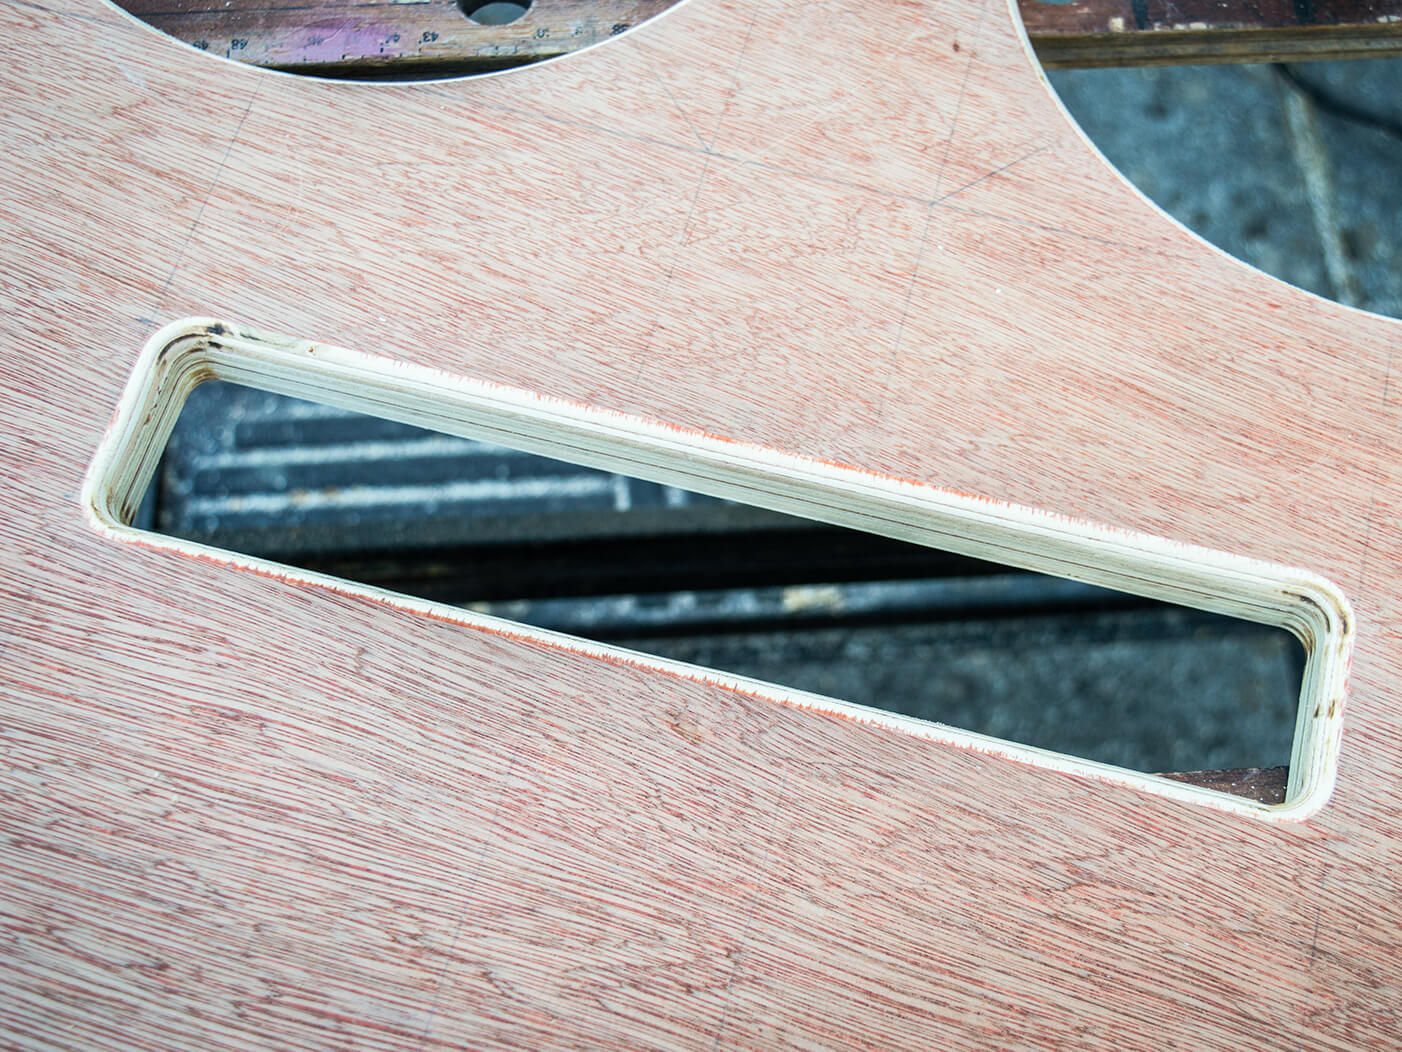
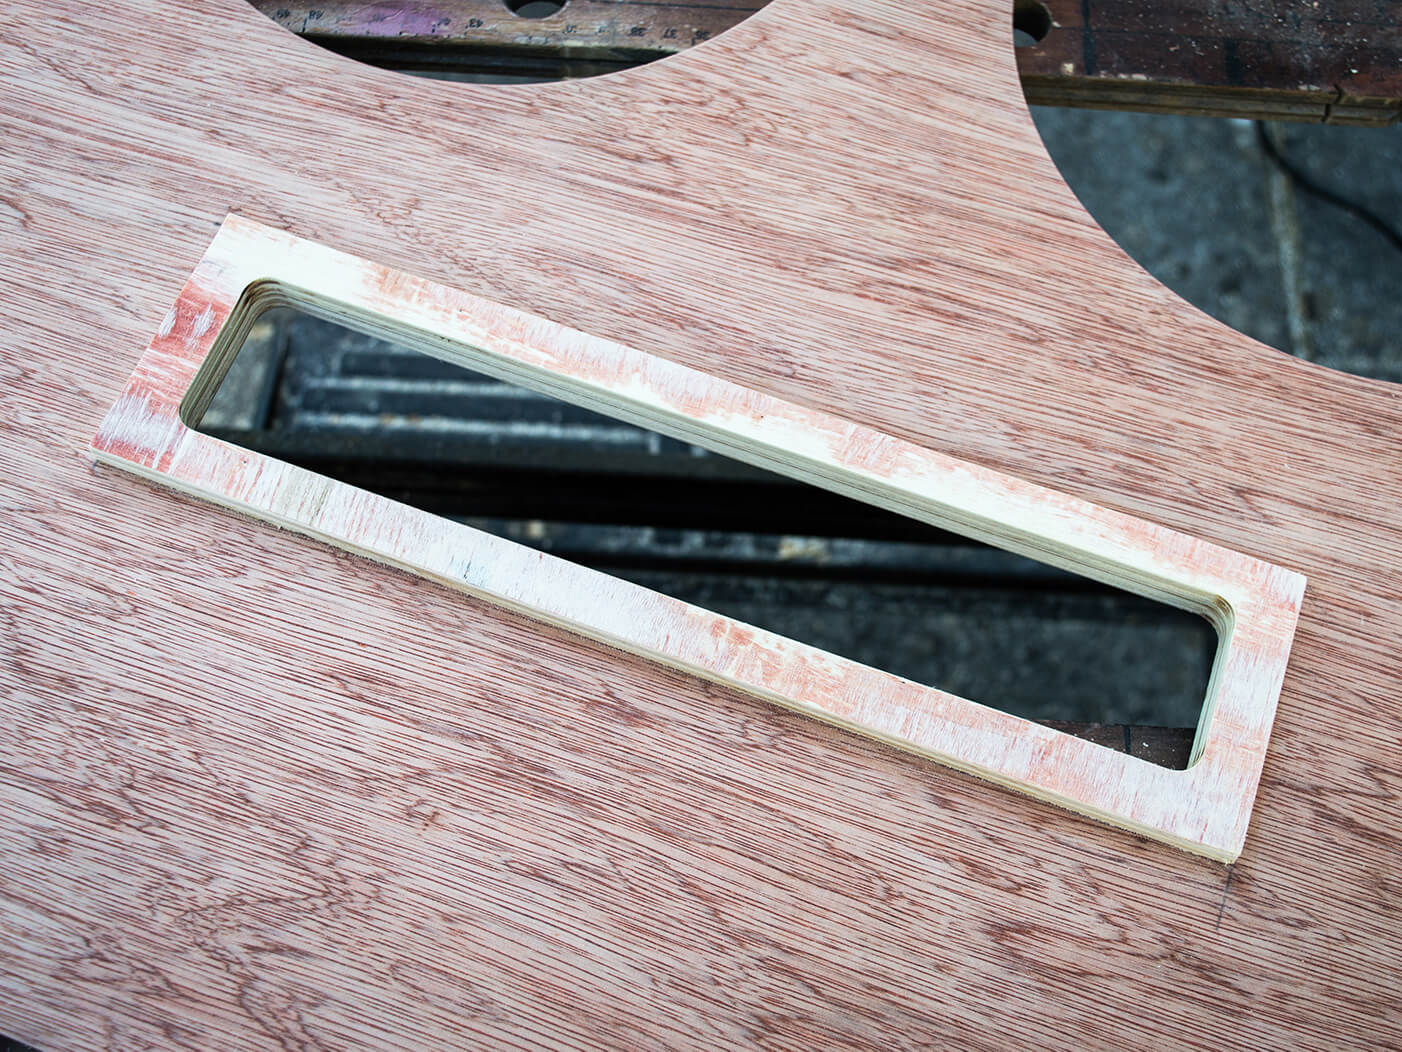
After taping the router template in position, I rout the control panel opening. In order to protect the controls, the amp must be set further back than the thickness of the baffle. My solution is to cut a rectangle of plywood, glue it onto the rear of the baffle and rout the opening using the first cutout to guide the router bit.
A rollover router bit applies the finishing touches by softening the edges of the speaker holes and control panel hole. I locate and drill the speaker bolt holes and screw the completed baffle onto the cabinet.
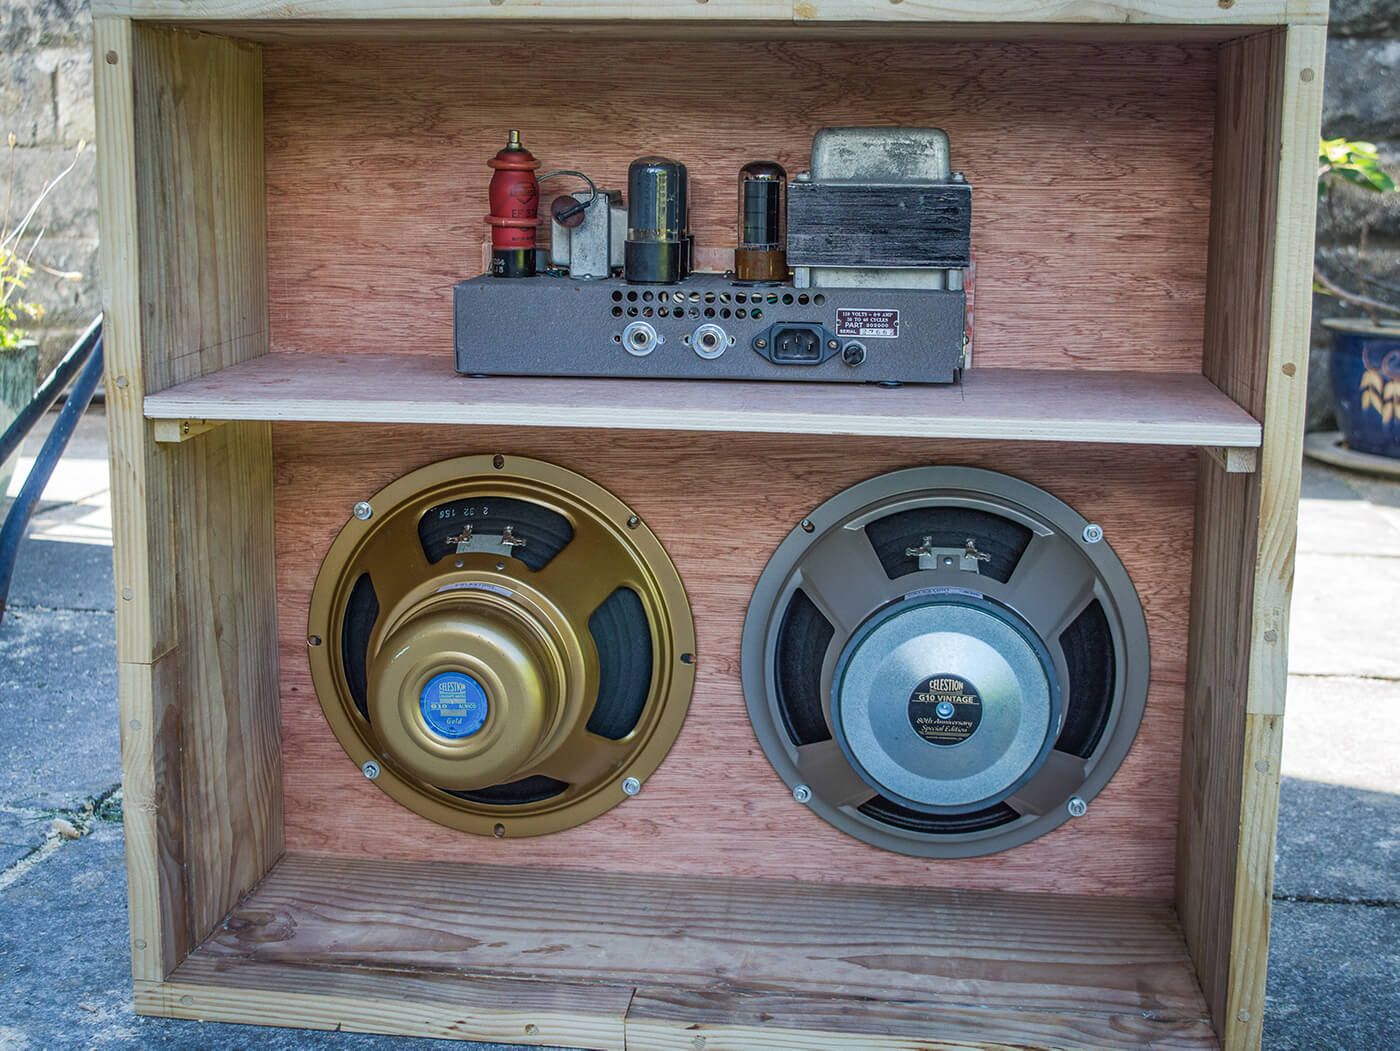
Next, I make a plywood shelf for the amp and after careful calculations, I decide where the shelf supports should be positioned. Batons are glued onto the inside panels and strengthened with screws for added insurance.
With the speakers loaded and the amp installed, it’s all looking good. Next time, I’ll be gluing the baffle into the frame, making the rear panels, rounding over the cabinet edges and applying the covering, speaker cloth and finishing touches.
More DIY guides here.