Related Tags
Tech Talk: How I learned to stop worrying and love fretwork
In the latest instalment of his column, Mike ruminates on how to address fretwork issues without going too far down the rabbit hole of perfectionism.
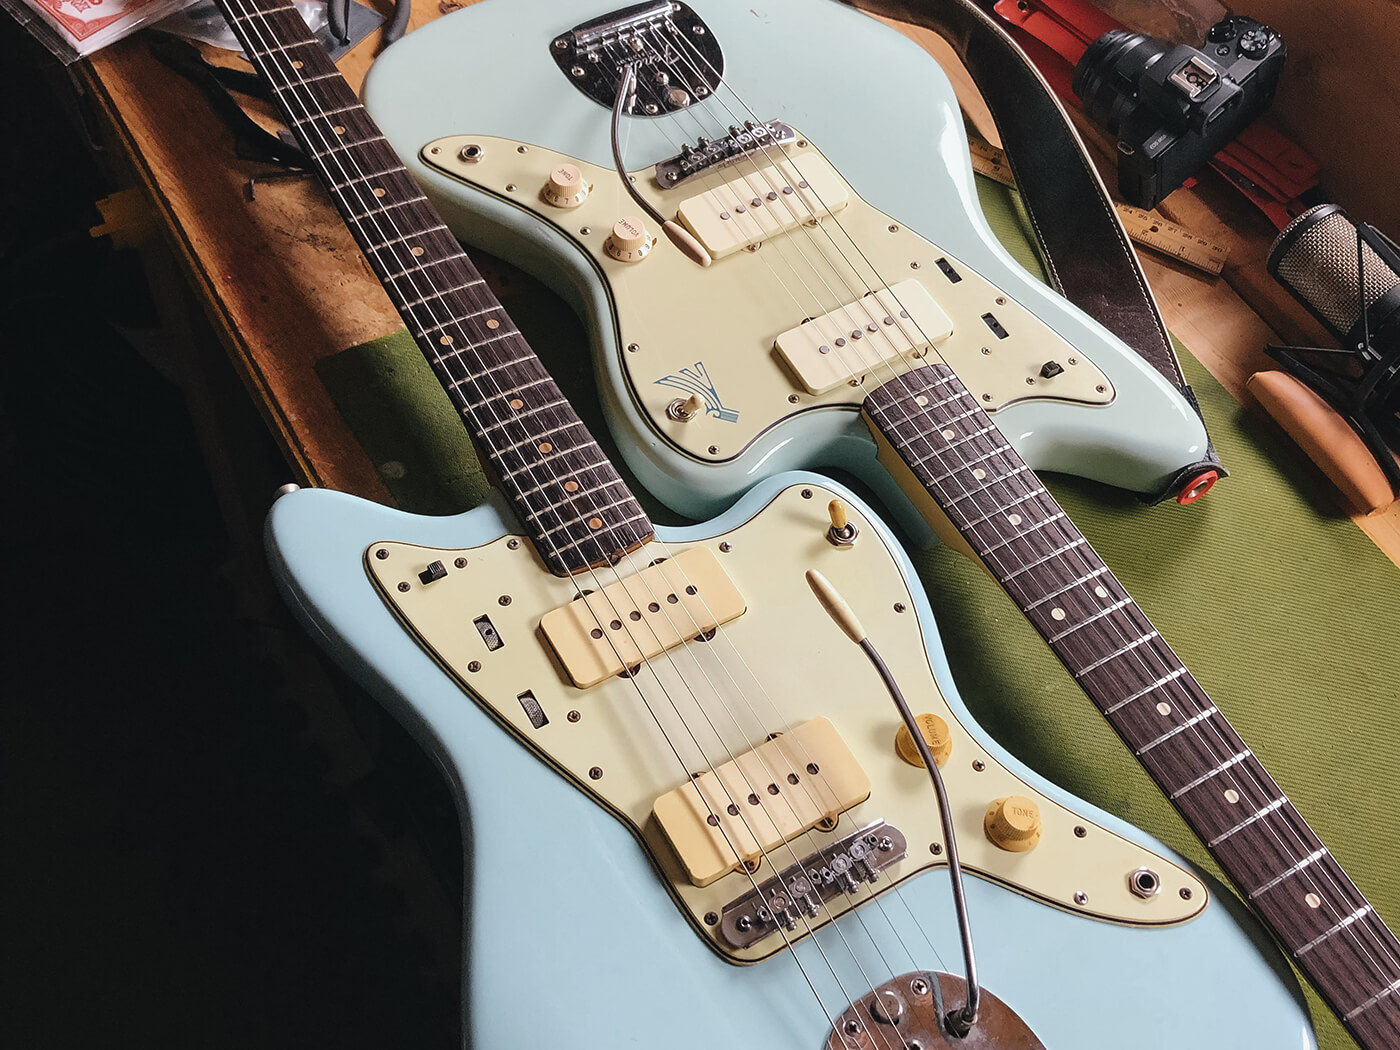
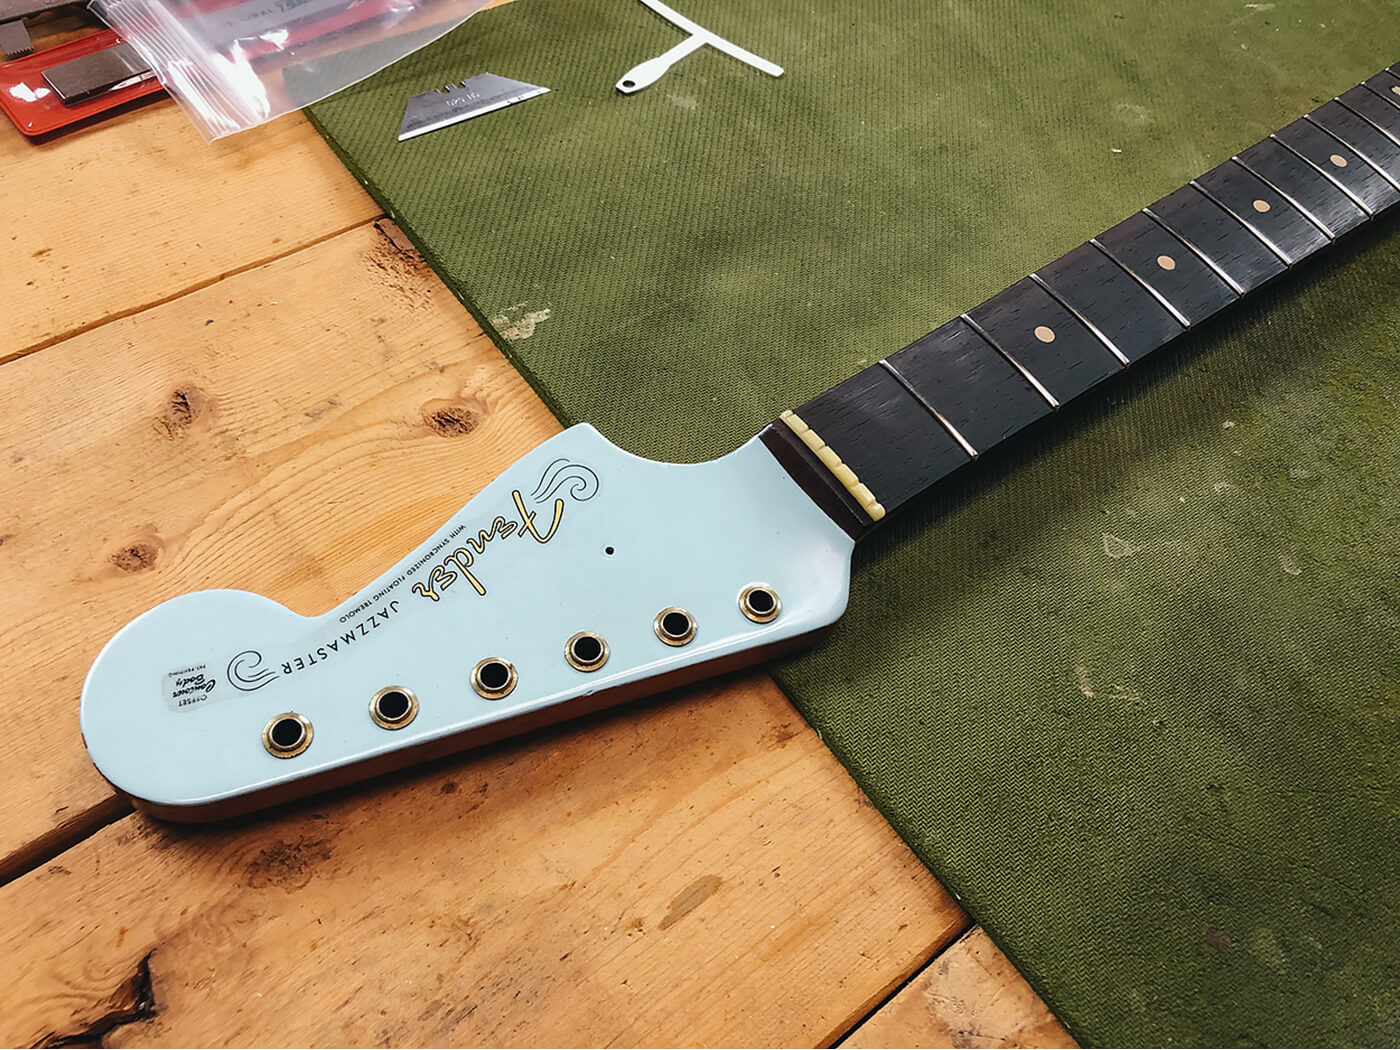
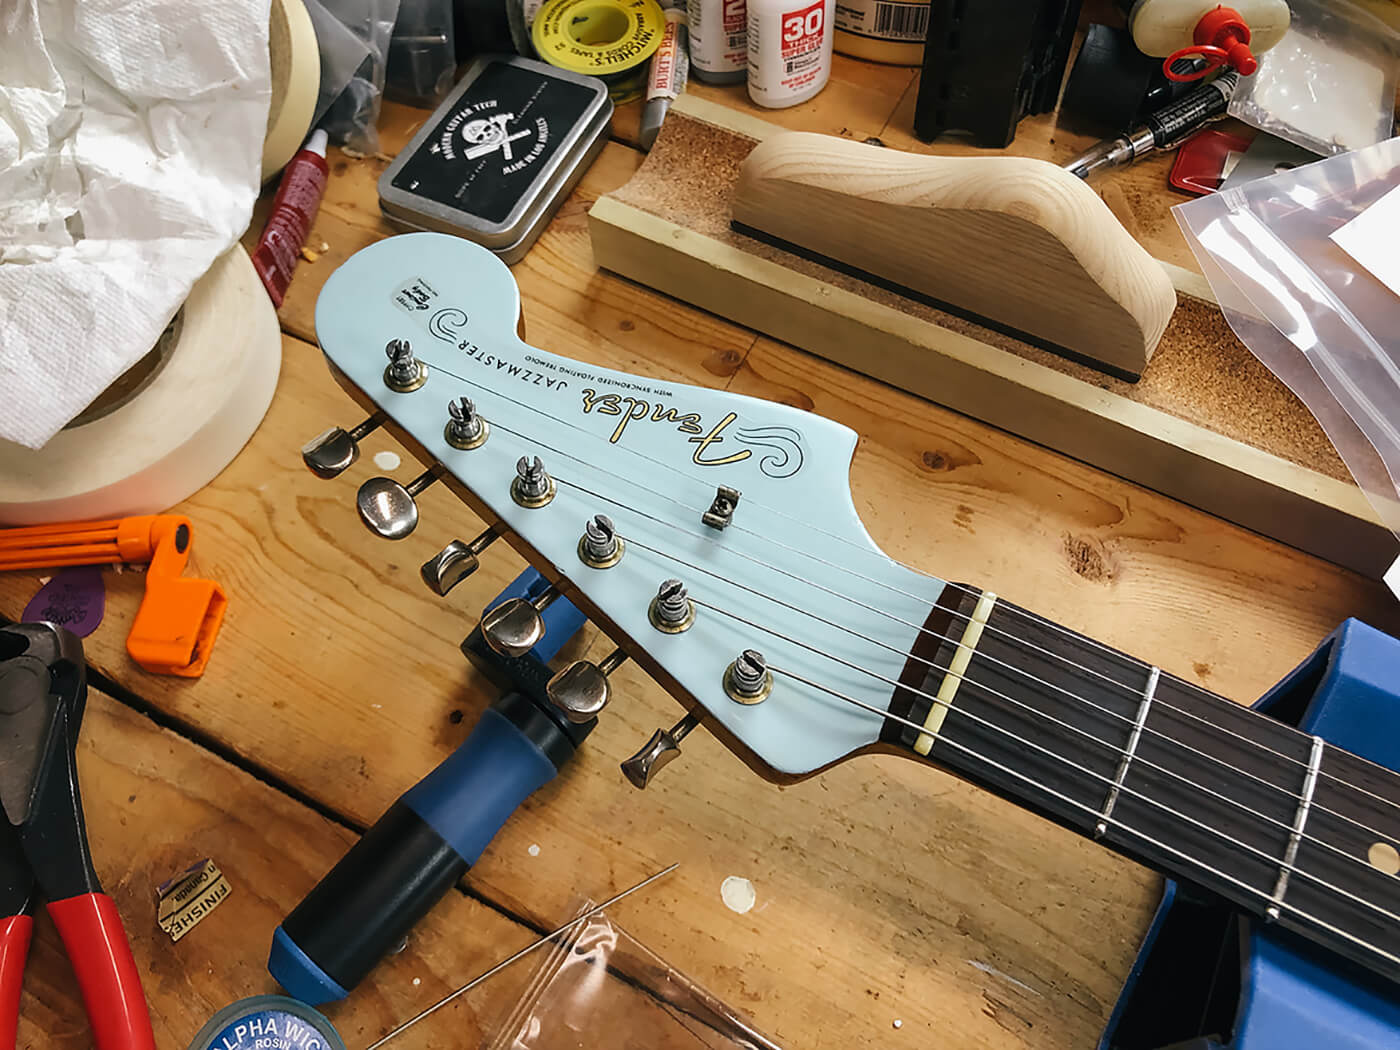
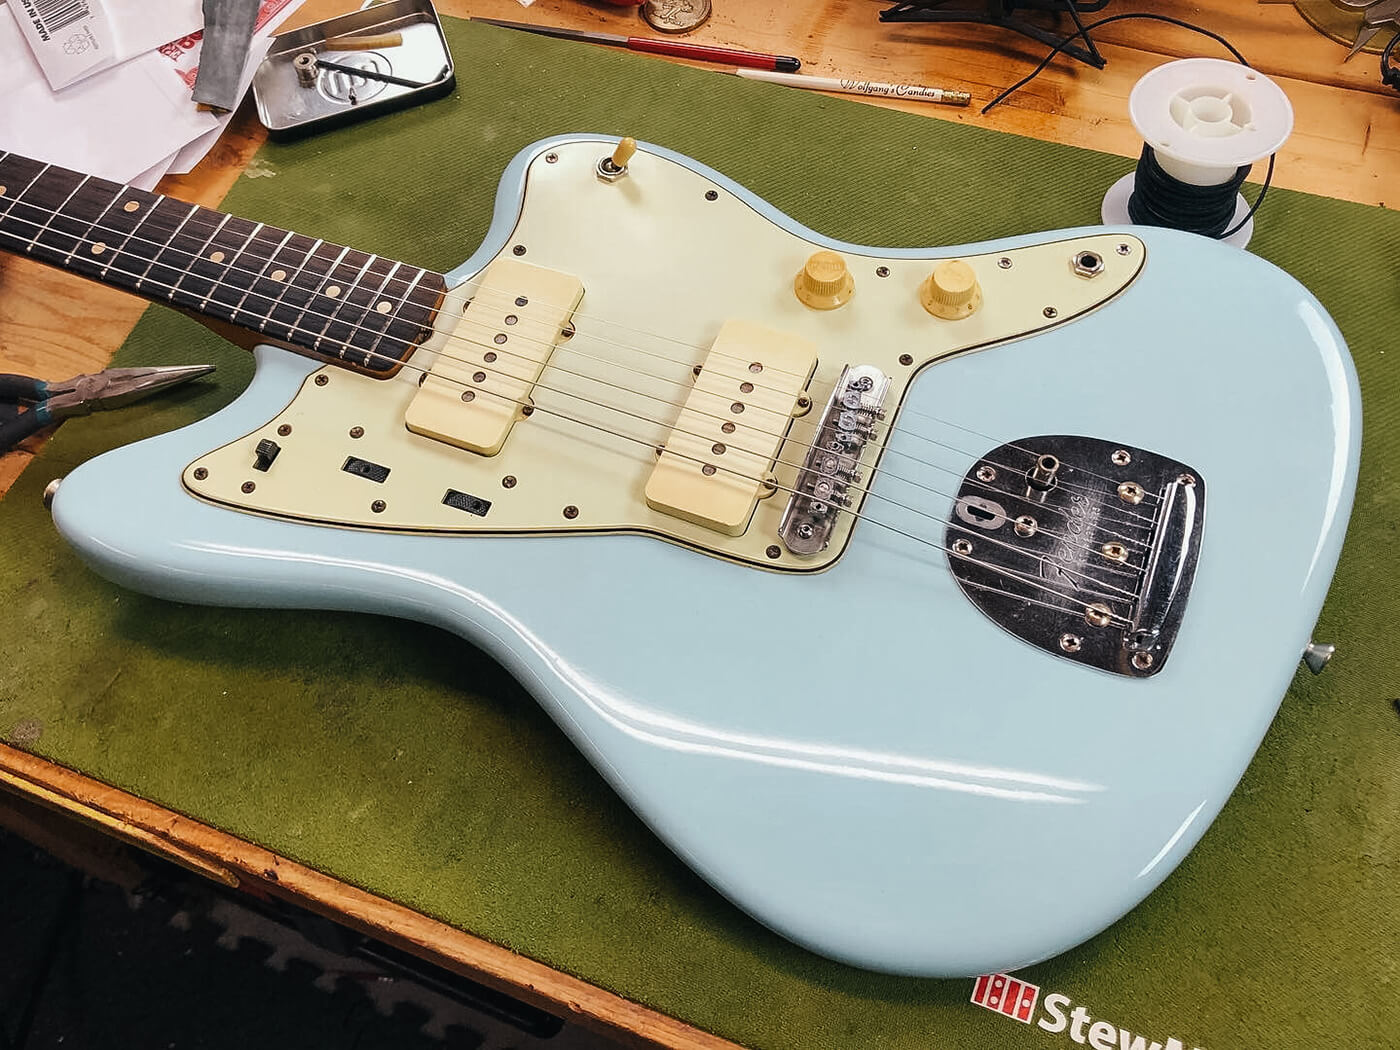
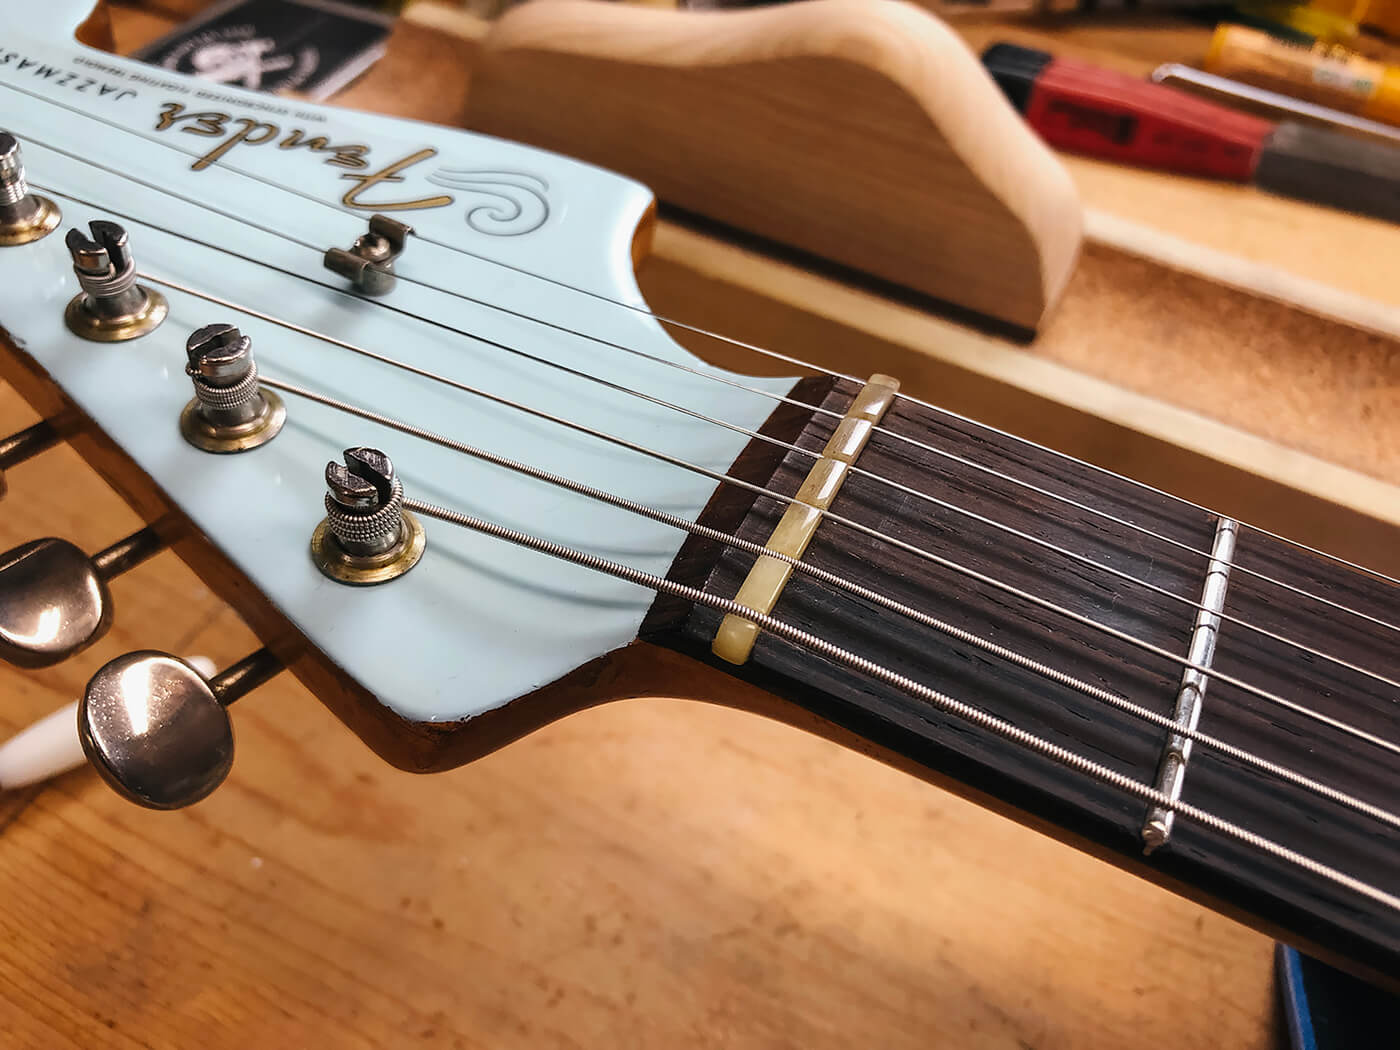
Two Jazzmasters, one very old (1961) and the other pretending to be (2007)
I’m not ashamed to admit that it’s been six whole years since my last serious fretwork. It’s not that I don’t enjoy it, it’s just that, well… I didn’t really want to do it after we moved to California all of those years ago.
For one, the cost of entry to a set of good fretting tools is about the price of a new American Fender guitar, and I just didn’t feel like spending the money. Secondly, working out of the home meant repairs often piled up in our living room, and fretting supplies meant more space taken up and more dust and debris floating around our apartment. Thirdly, I was worn out from years of hustling as a tech and God, I needed a break from it all. That’s self-care, baby!
Once I started taking on repair jobs again, frets were still nothing I wanted anything to do with. But, if that’s the case, what brought me back this year? To put it simply, pity.
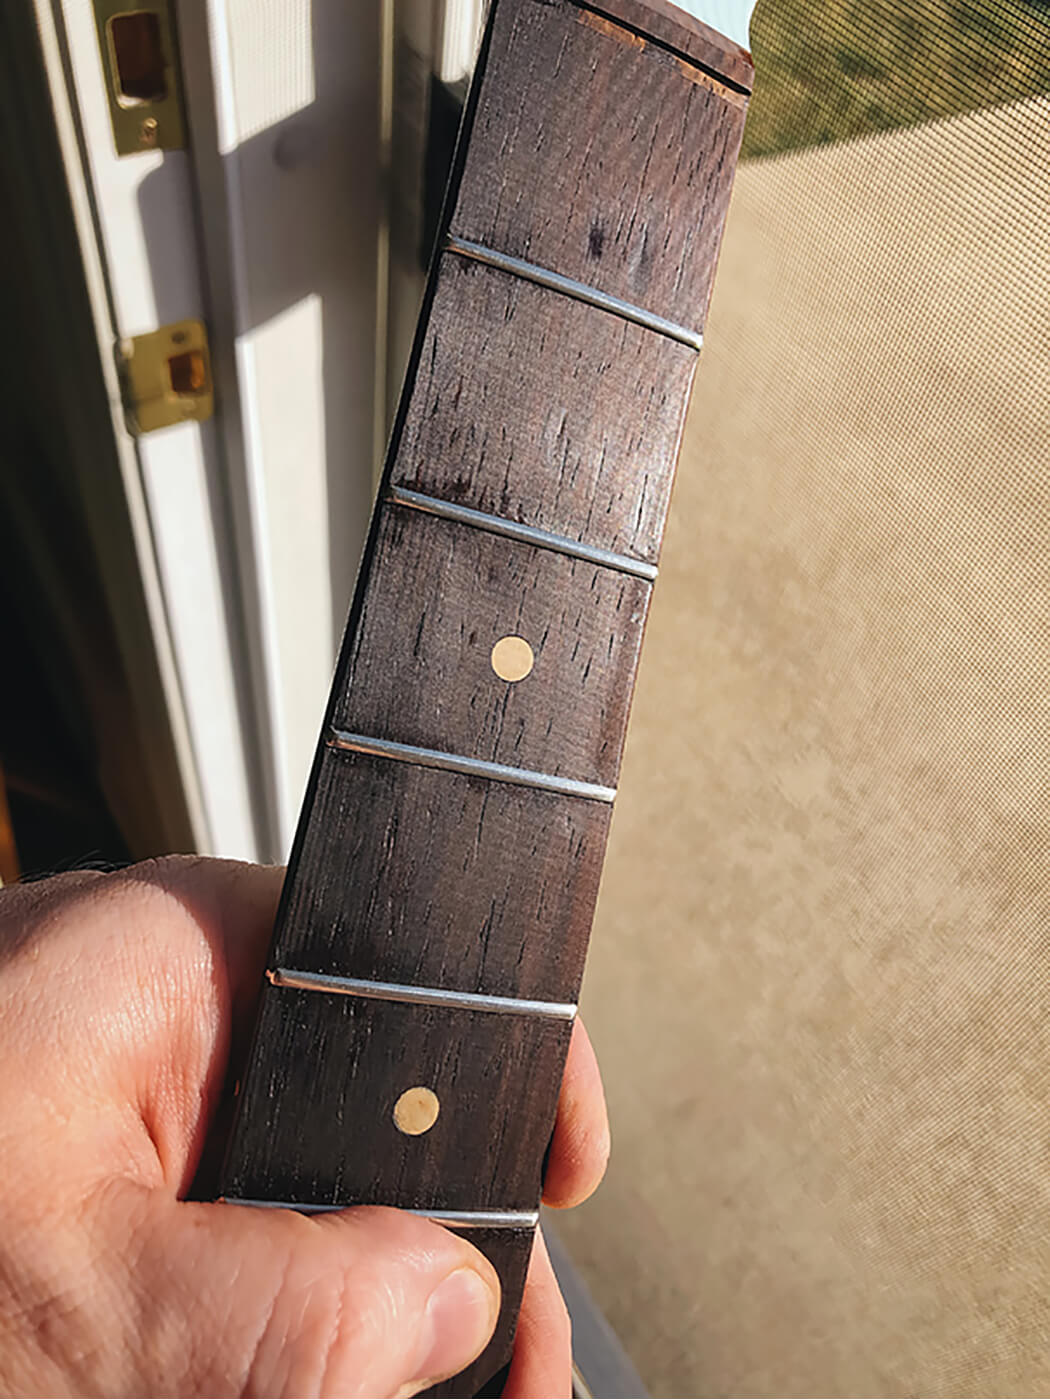
The patient was a 1961 Jazzmaster, beautifully refinished in something between Sonic and Daphne Blue. The rest of the guitar, however, left much to be desired – particularly the fretwork. I’ve seen some mangled ’boards in my day but this one really hurt.
Fretwear was the most noteworthy issue, where the pressure of play had left deep indentations from the root position all the way up to the 9th. But it wasn’t just wear that was distressing.
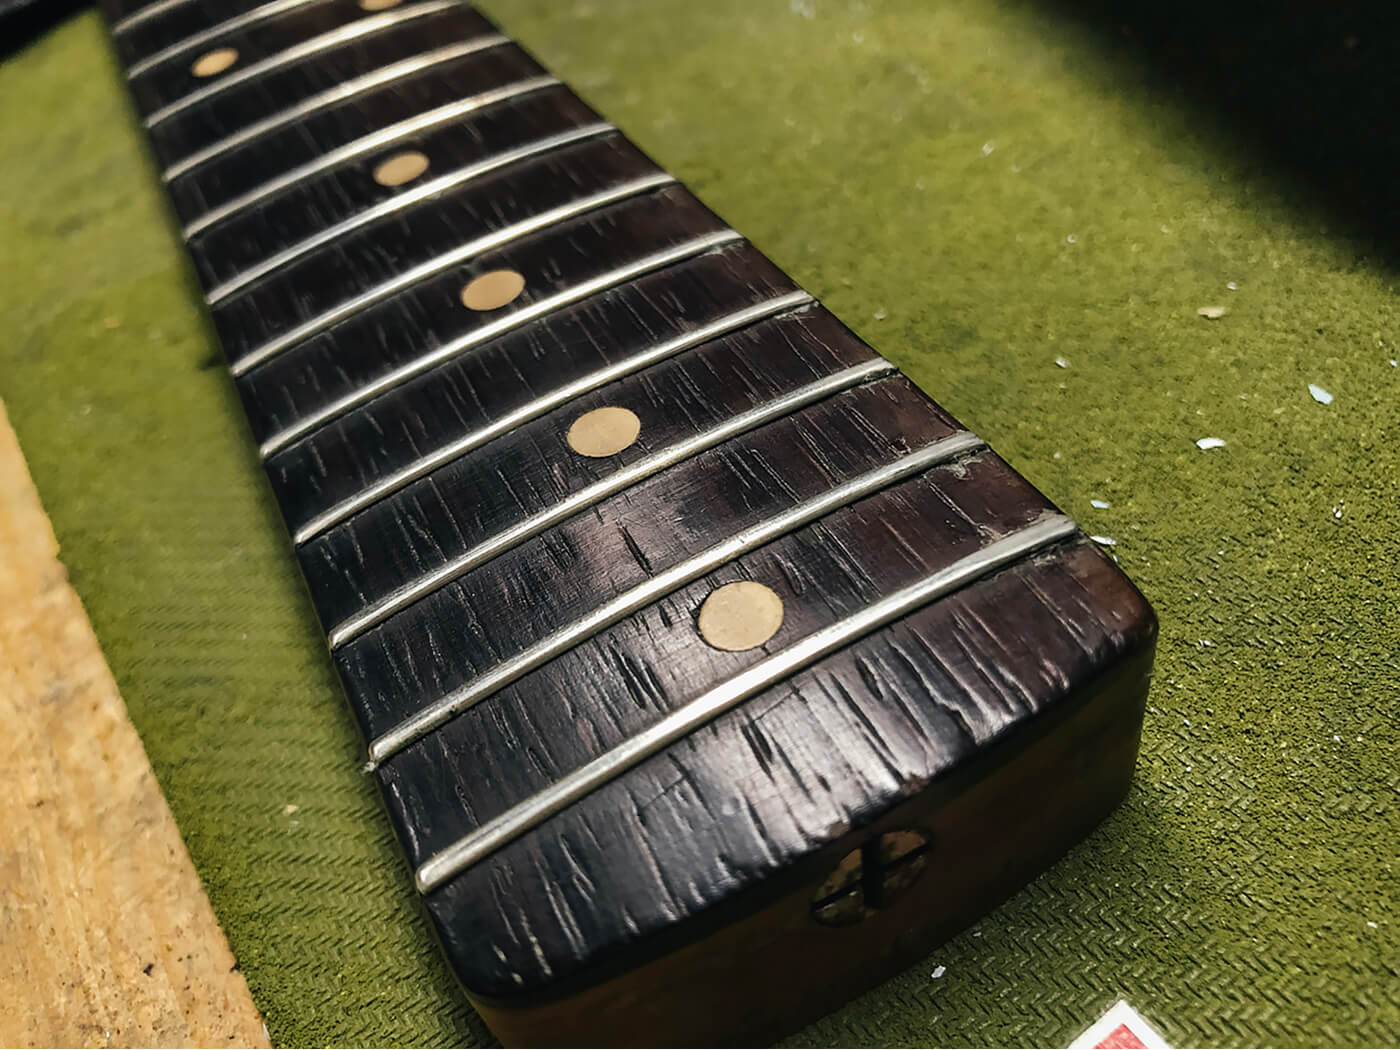
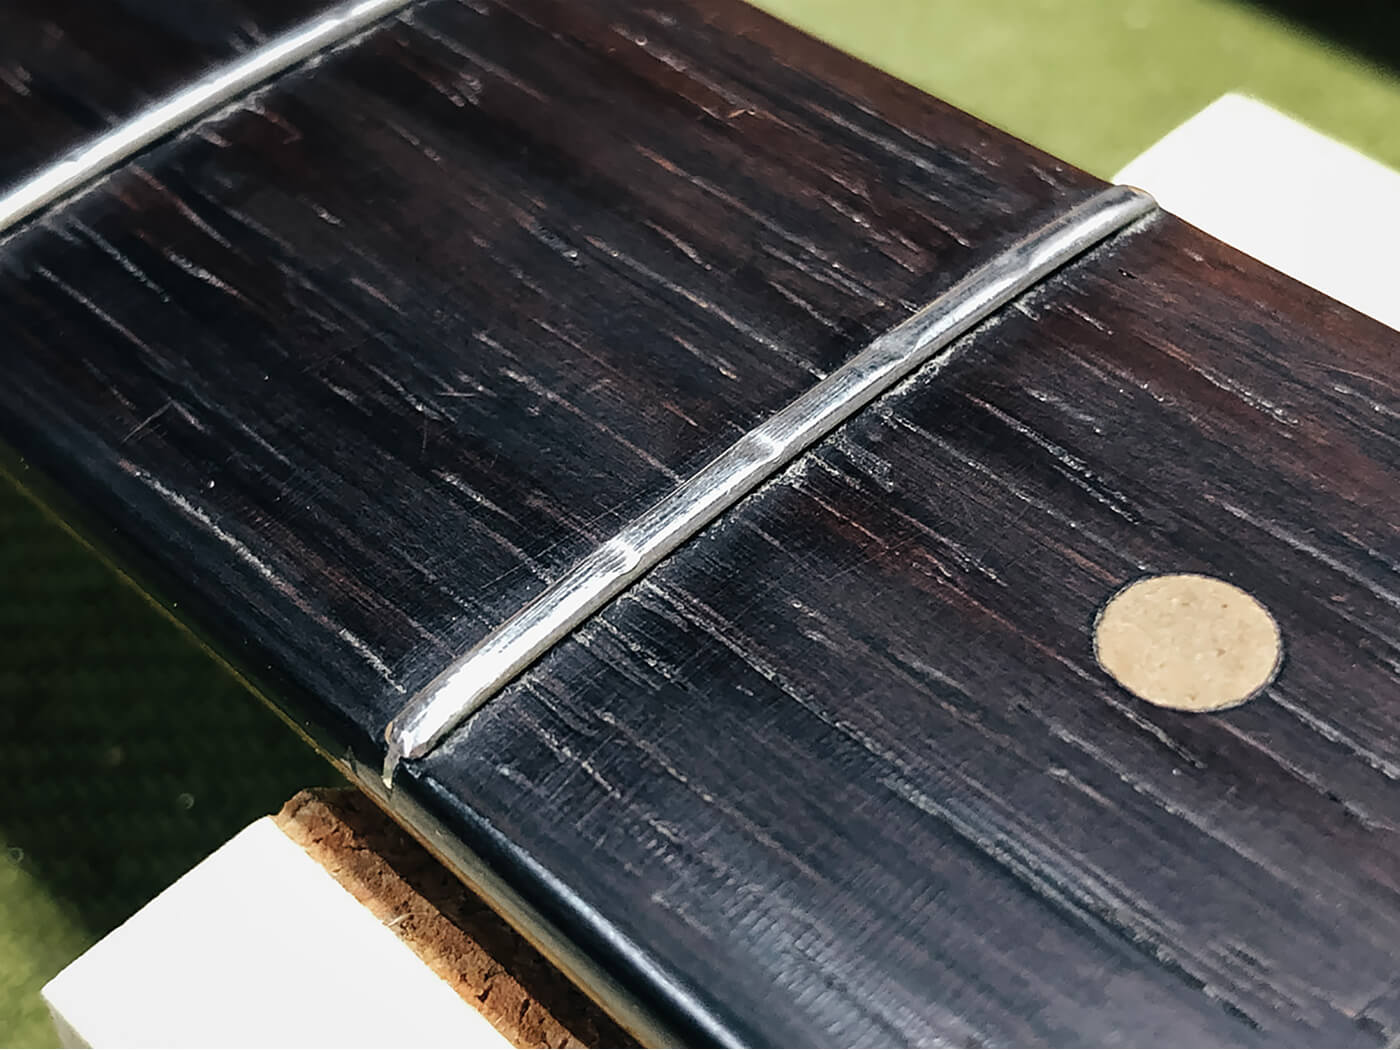
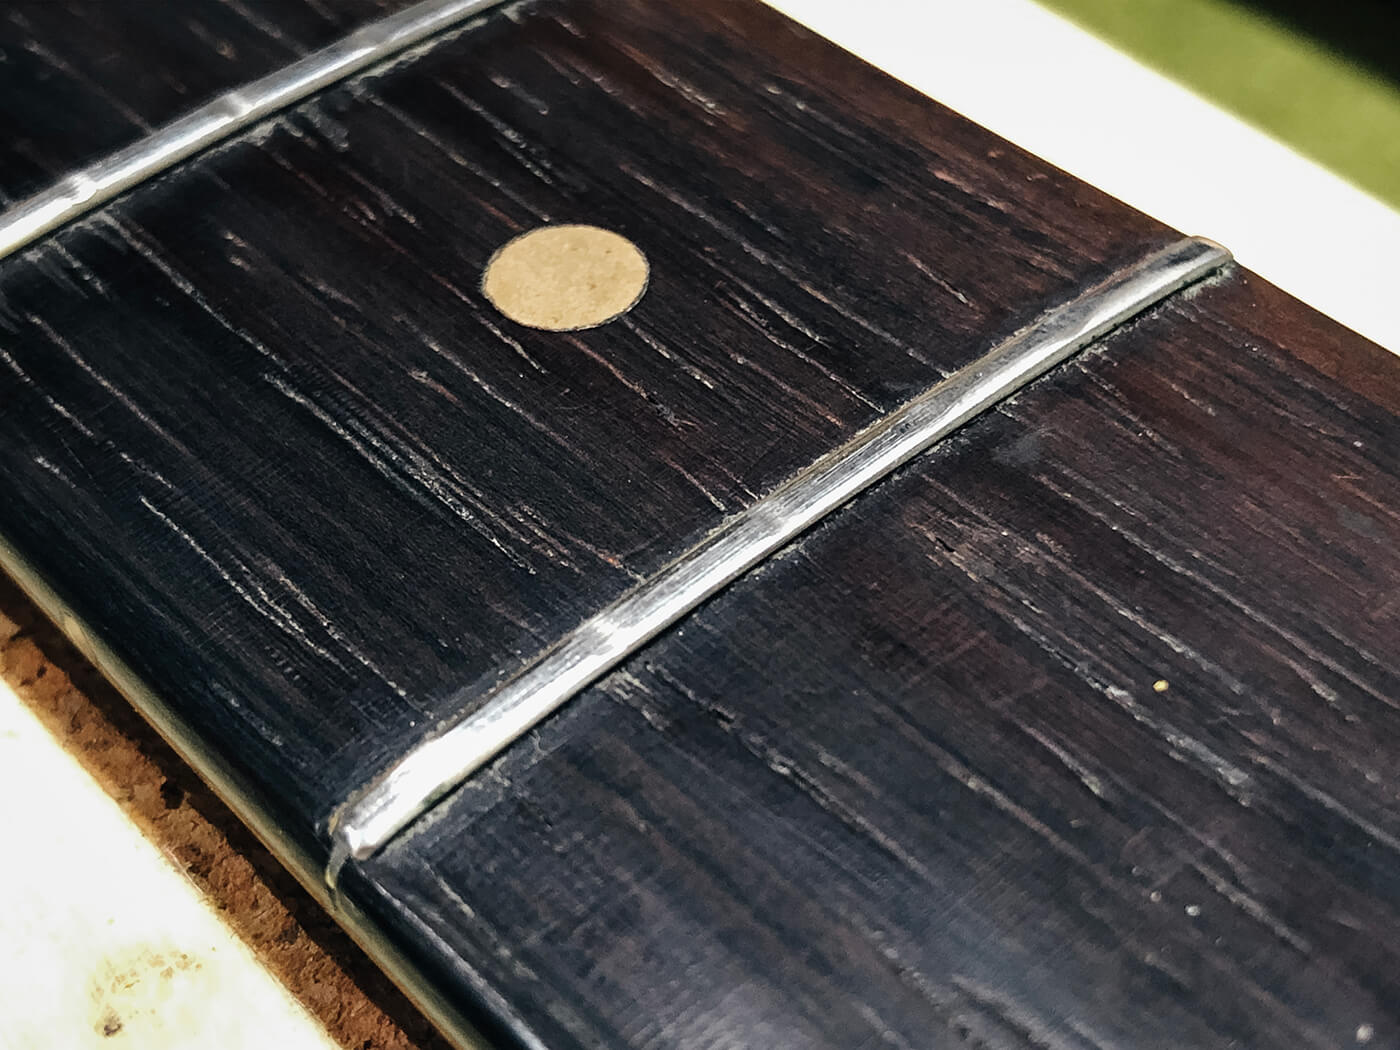
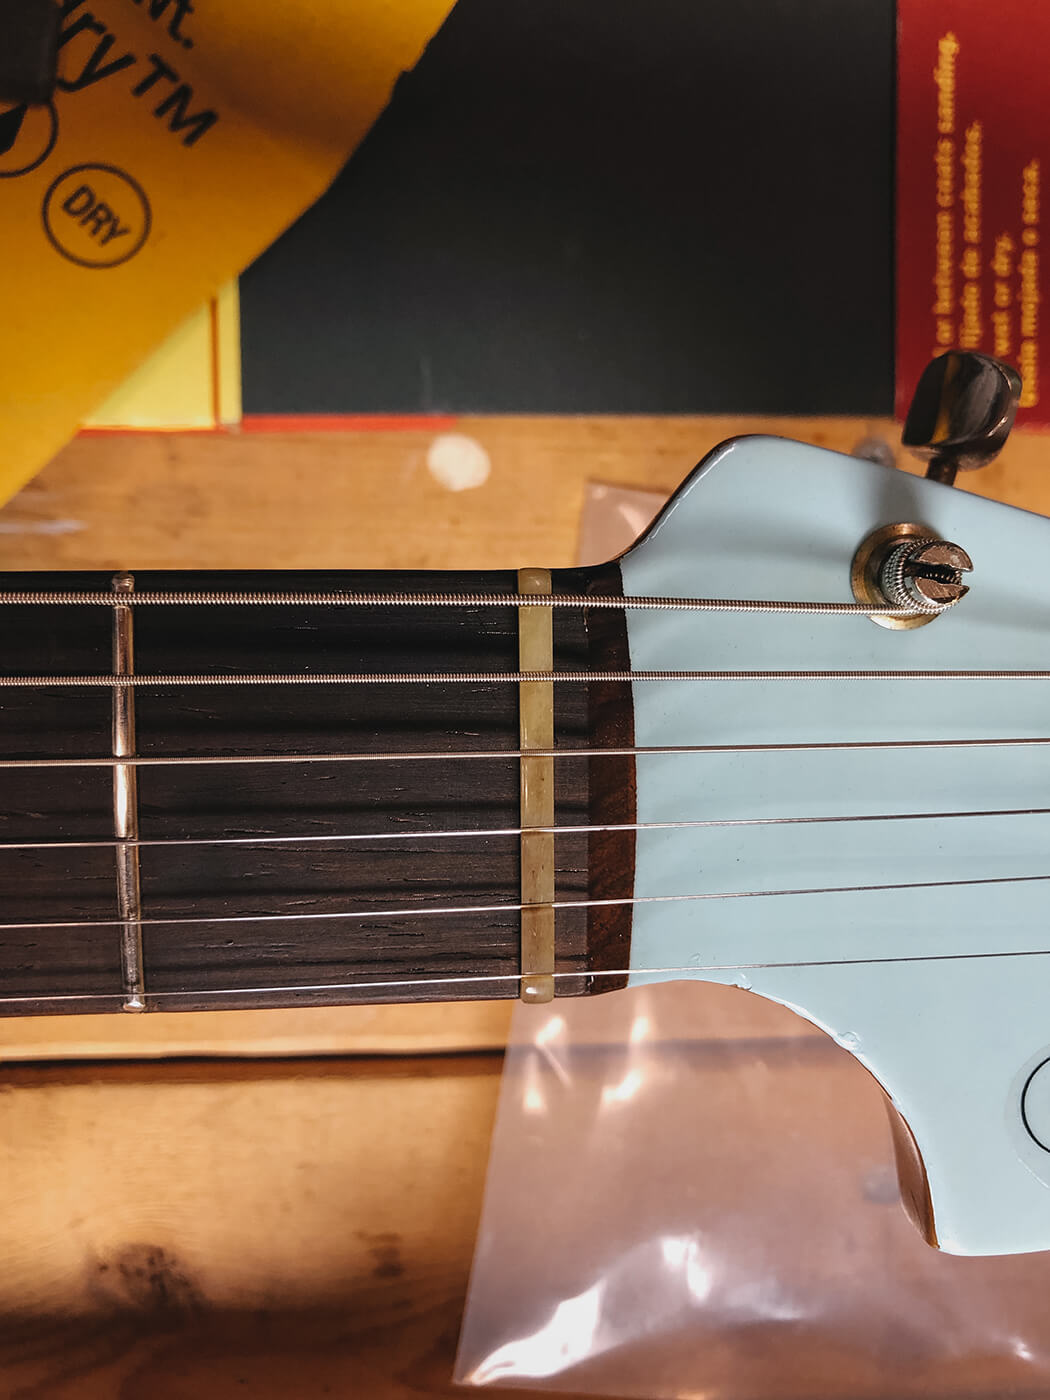
Among other issues, the fretboard had a sharp backward bow from frets one to three that couldn’t be dialled out via the truss-rod. To correct this, a luthier had levelled the frets themselves instead of the board, grinding down a drastic amount of the third and second frets so that those positions would actually play, which left them nearly flat.
Curiously, the fretboard had a compound radius but not in the way we normally expect: at the first fret, the vintage correct 7.25-inch radius; from 2-10, 9.5 inches; at 11 the fretboard lazily curved back to 7.25 inches. This was utter madness. Unfortunately, so much wood had already been removed that I didn’t think it wise to reshape back to the proper vintage radius, so when it came time to plane the board, I opted for 9.5 inches.
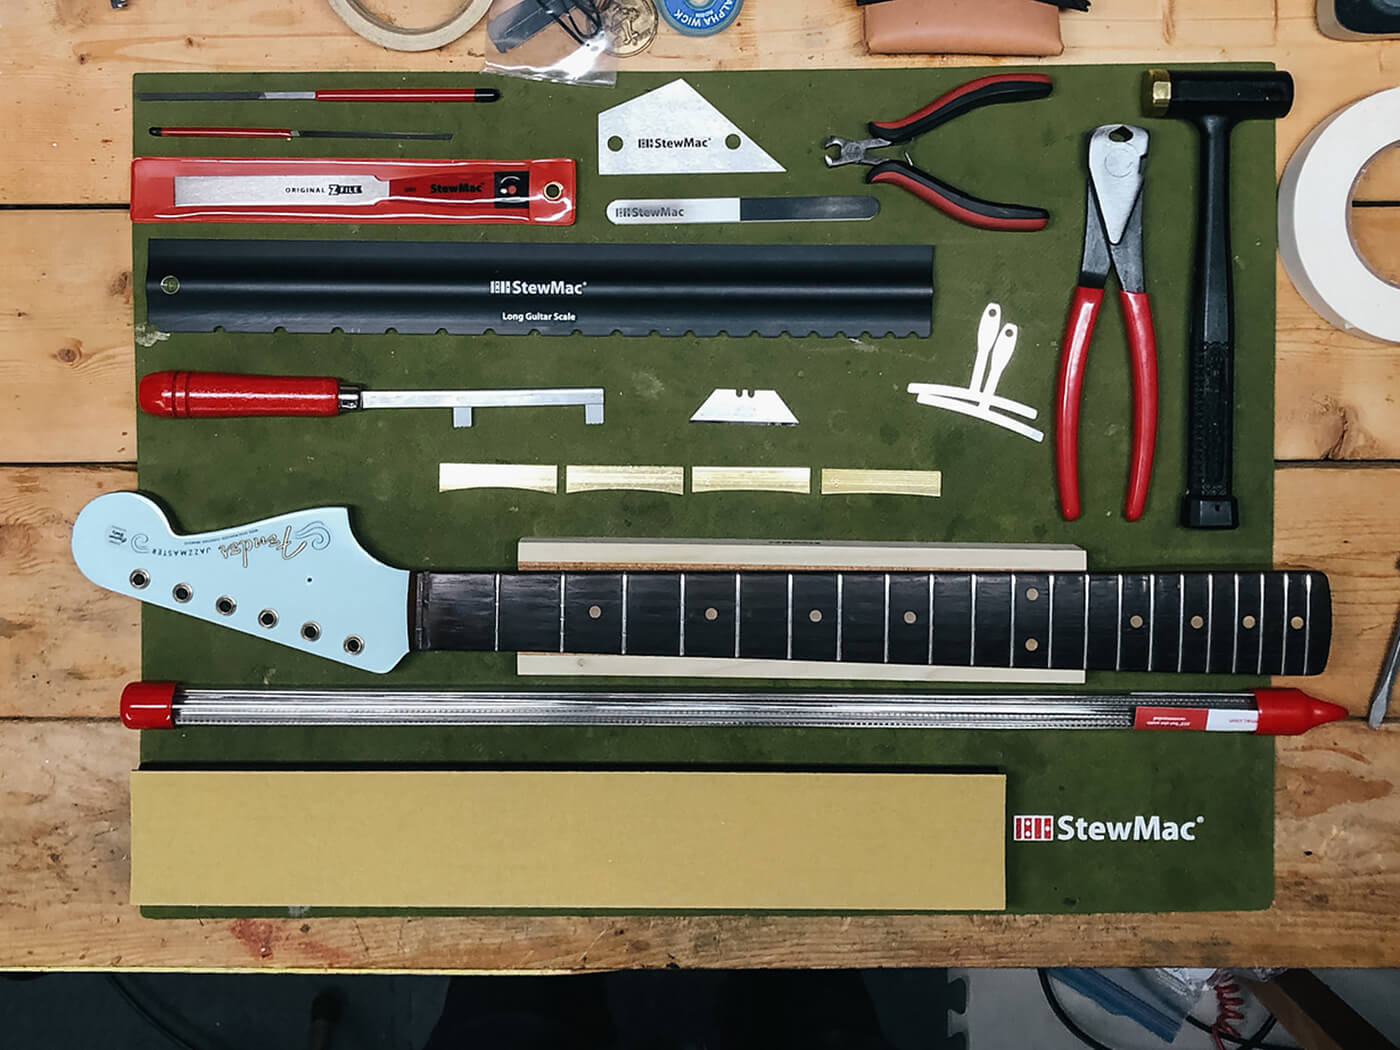
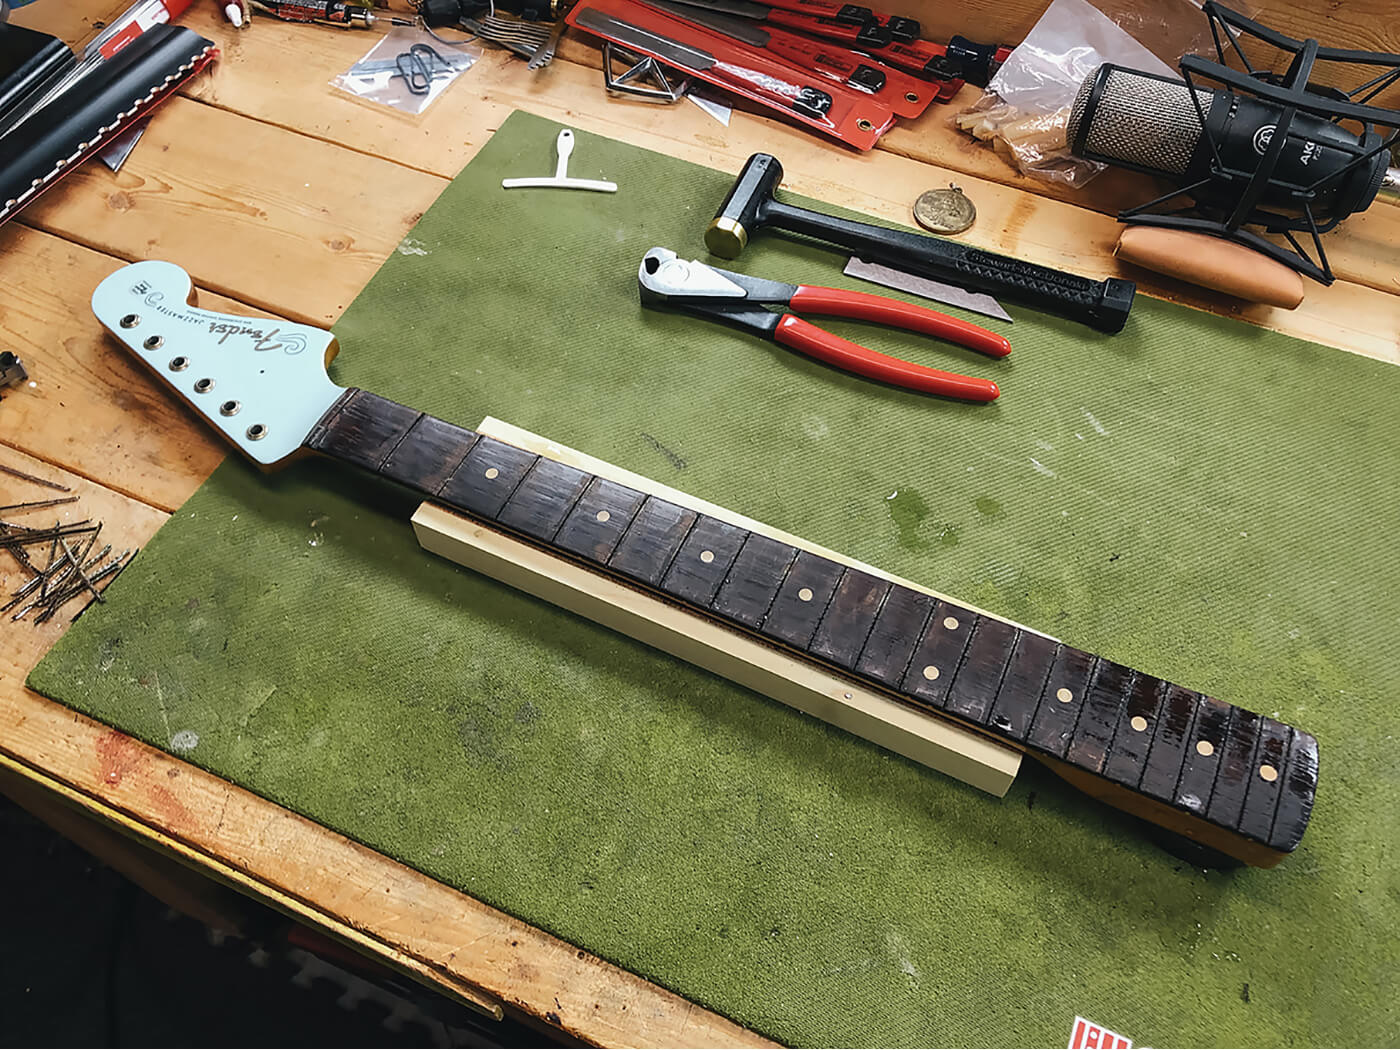
My heart went out to this ornery little offset, and like the Michael Corleone of guitar repair, I was pulled back into the world of refrets. I soon made a hefty order with StewMac and planned out my work. Here are some things that helped me as I jumped back into fretwork that I hope might help those of you approaching the job for first time:
1. Think it through
I’m glad that it took a while for my tools to arrive because that waiting period afforded me the time to think through every procedure I was about to perform. I’m a big fan of making notes for planning purposes, and having the chance to mull over each step of the process – the techniques, the measurements, the things to watch out for, problems that may arise – is crucial to the success of any good repair job.
2. Practice
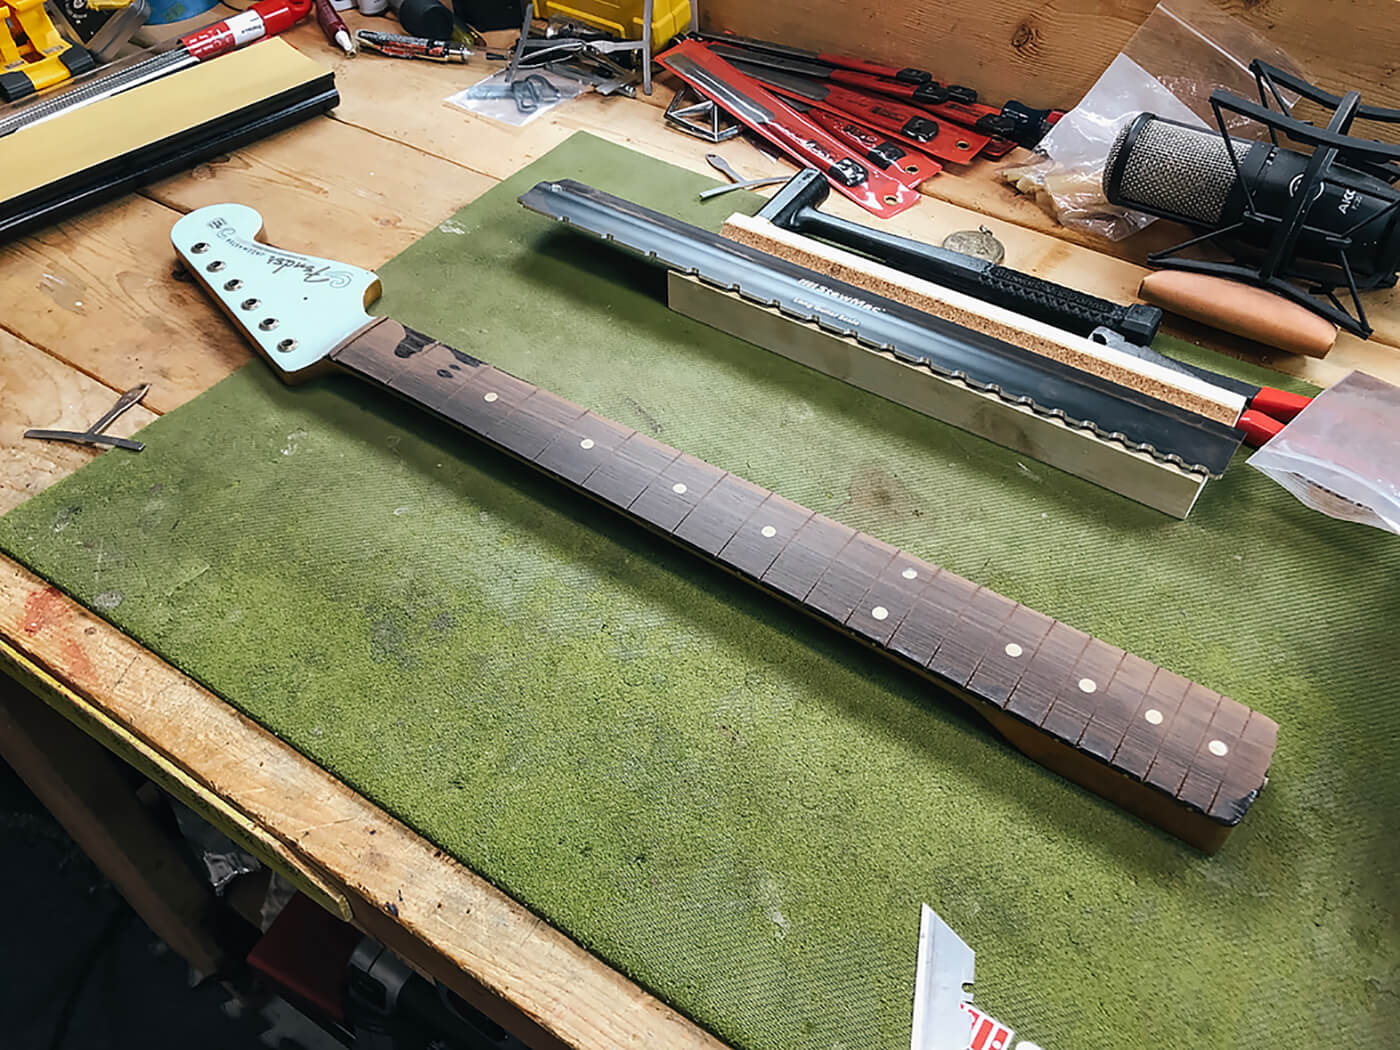
When my tools finally arrived, I took them each out of the box and spent time getting familiar with them, feeling the weight of them in my hands. Then I brought them into the workshop, took out a spare Duo-Sonic neck I have lying around, and tried them out. I felt the way my aluminium sanding beams pressed down on the neck with each pass, tapped my dead blow fretting hammer to the workbench to appreciate the balance, and discovered the joy of the Z-file and how easily it crowns the fretwire.
3. Work deliberately
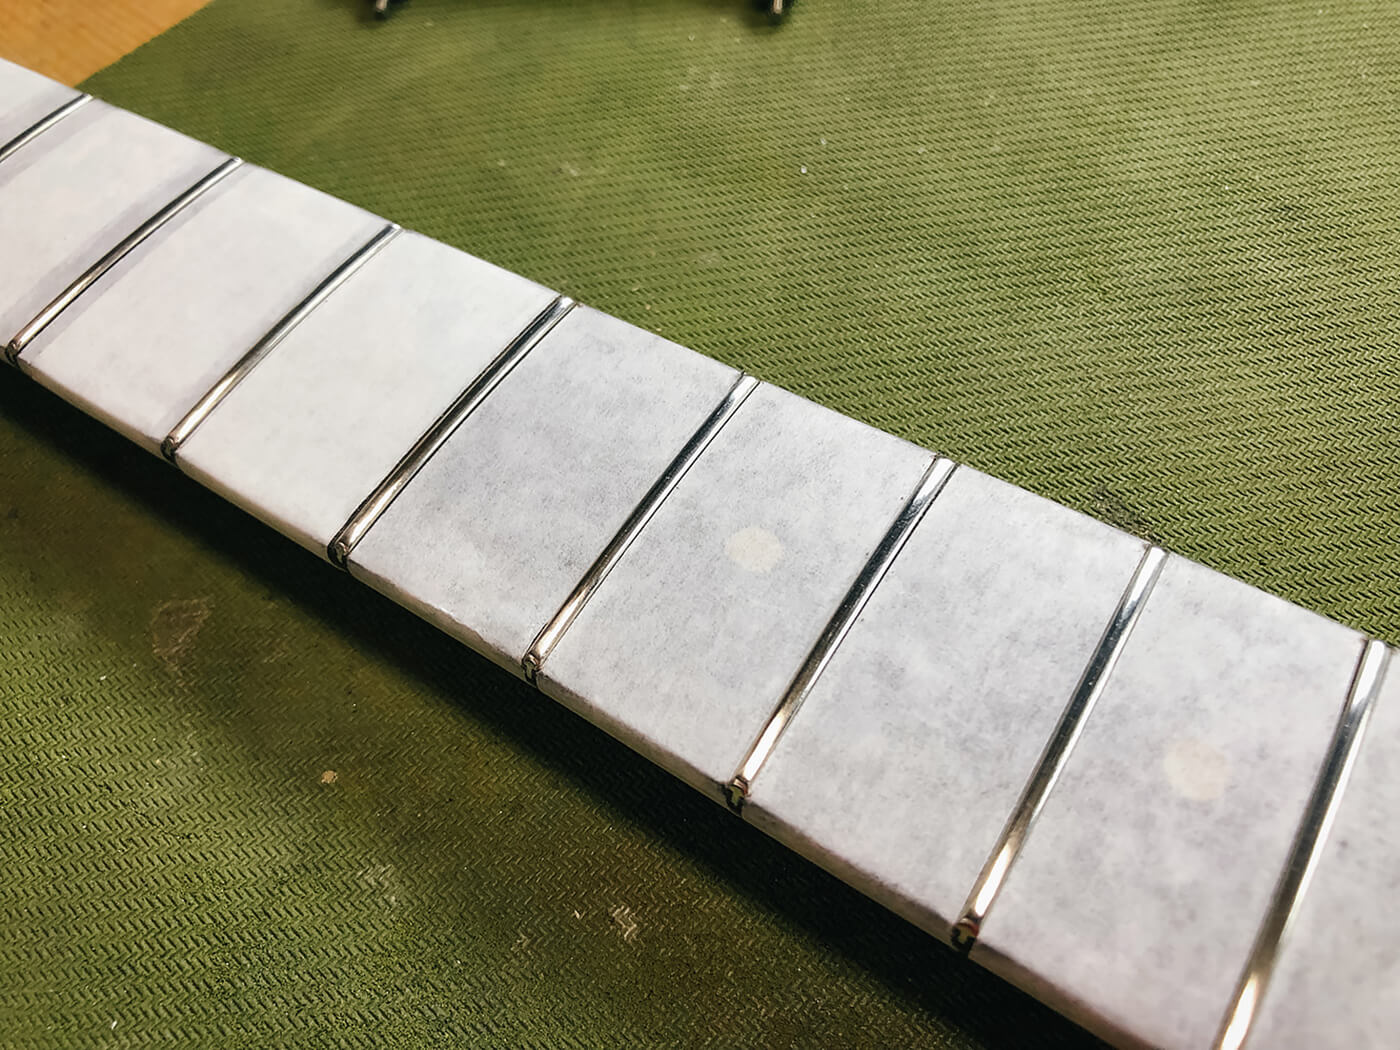
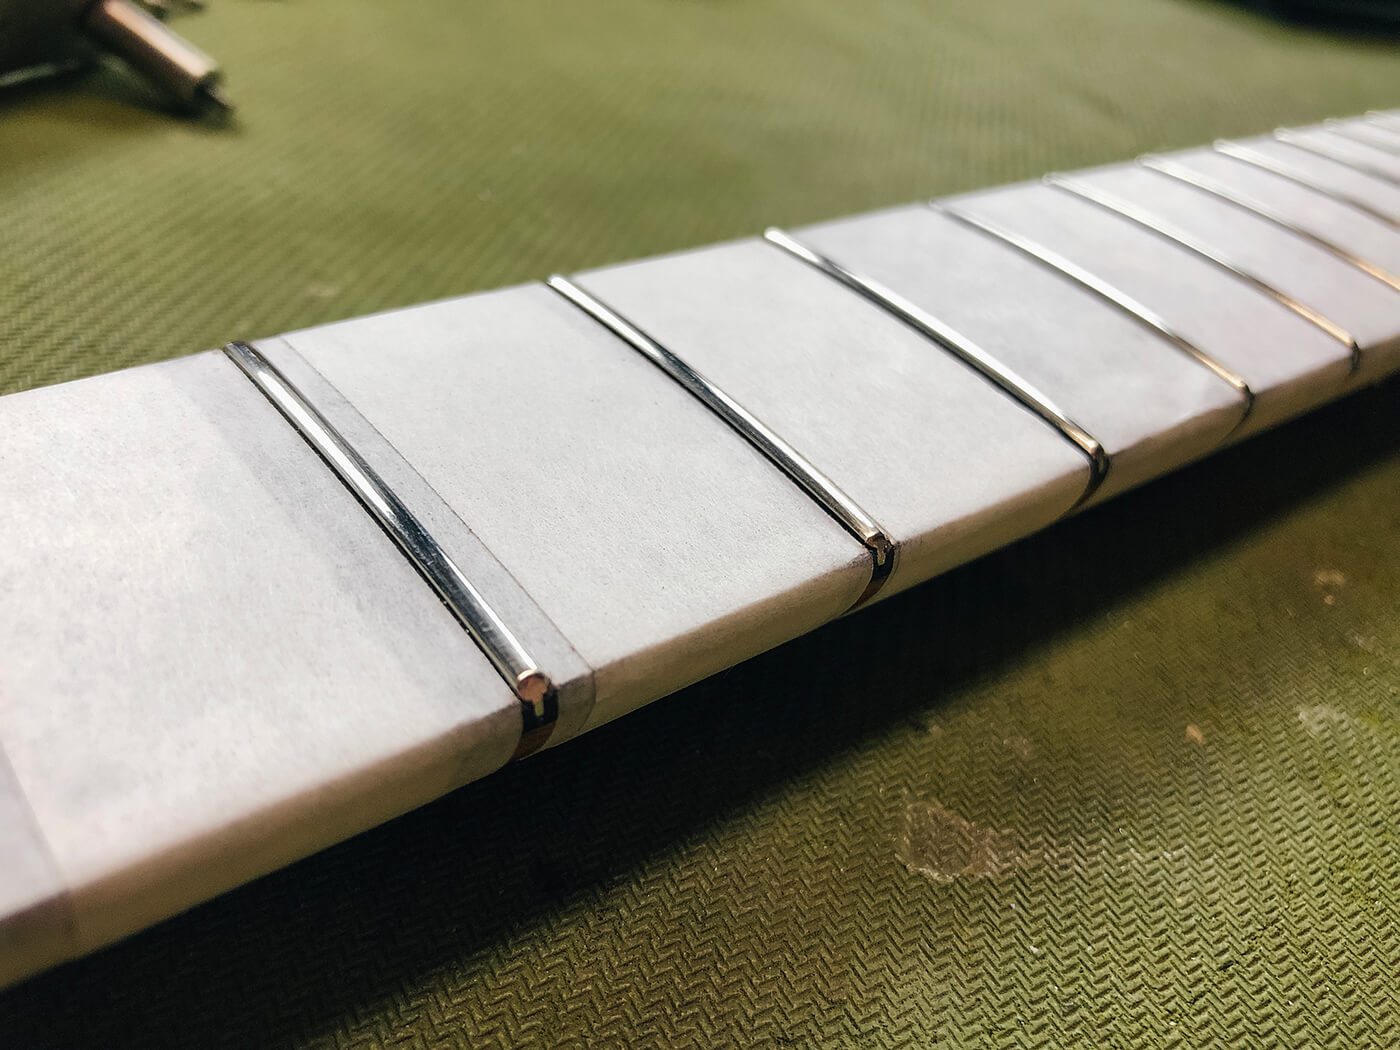
There’s no such thing as too level, let’s put it that way. When your aim is to make a guitar play cleanly and effortlessly, you can’t be too careful in levelling those frets. Be vigilant in finding areas that aren’t quite getting touched by whatever implement you’re using, be it a file or a full-width beam. Constantly check your work with Sharpie on the tops of the frets with a fret level gauge like the Rocker here, which tells you when a fret is too high. And do not be afraid to take a little longer than expected if it just isn’t right.
4. Let the tools do the work
When I really got down to it, I was shocked by how much easier the job was than I remembered. I joked to my wife, “Either I got better, or the tools did,” and honestly it has to be the tools.

I can remember a few jobs in the past where I completely wore myself out during the crowning phase thanks to lesser tools. This time, I relaxed my arm and let the file do the work for me, and you know what? This was maybe the best experience I’ve had with a crowning file.
It made quick work of each freshly levelled fret, and all without having to press down on the thing. I was able to complete all 21 frets in record time, and that’s the difference a quality tool can make. Shockingly, almost every aspect of the job went this way.
5. Take breaks
Even with the ease afforded by my tools, it’s still important to take breaks for the sake of mind and body. This is still tedious work, with lots of repetitive motions and tasks that start to run together if you try to do it all at once. And this goes double for first-timers.
Set little goals for yourself (radius the fretboard, or finish the fret ends) and take a little break when you complete them. Trust me, it helps.
6. Adapt
As with any repair job, there are always going to be problems that arise from simply doing the repair itself. It’s important to recognise and accept this fact so that you can then move on and address them head-on.
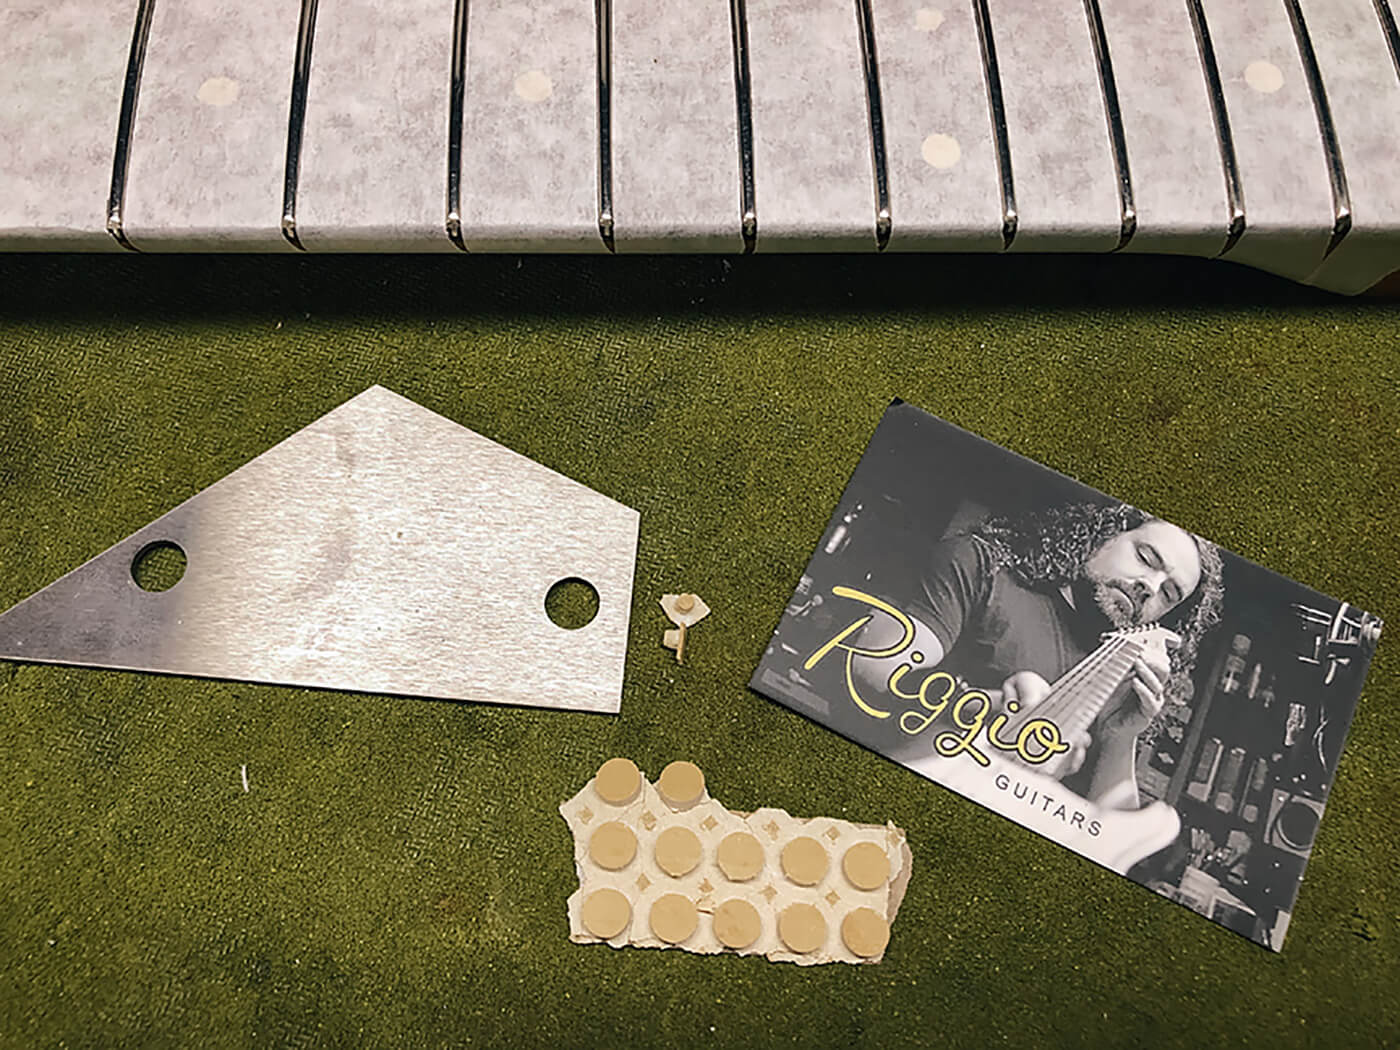
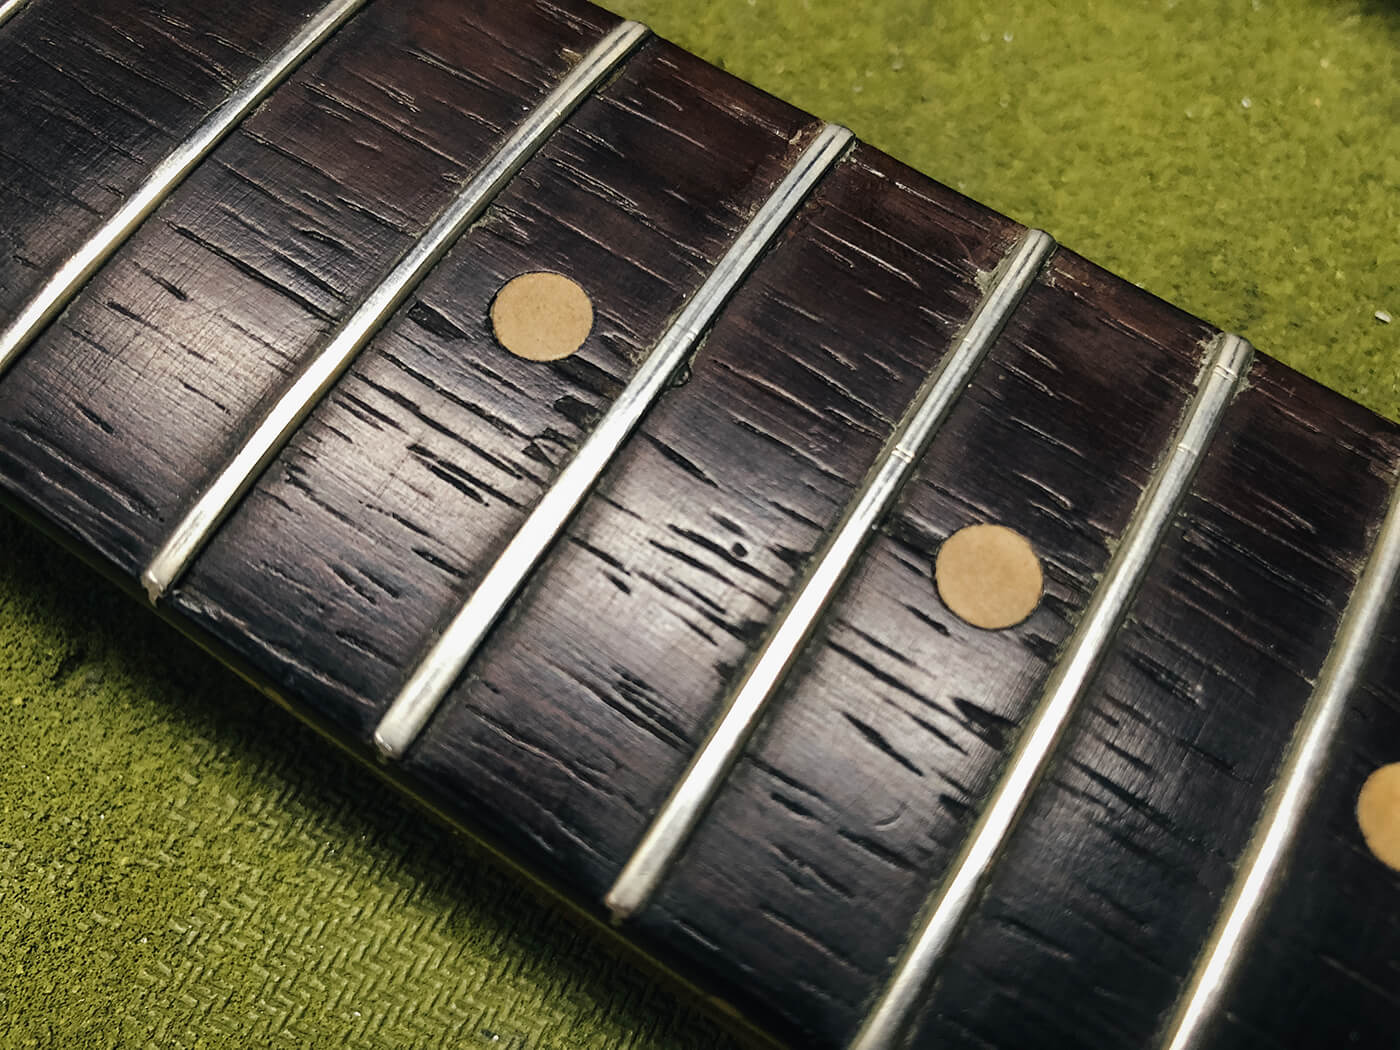
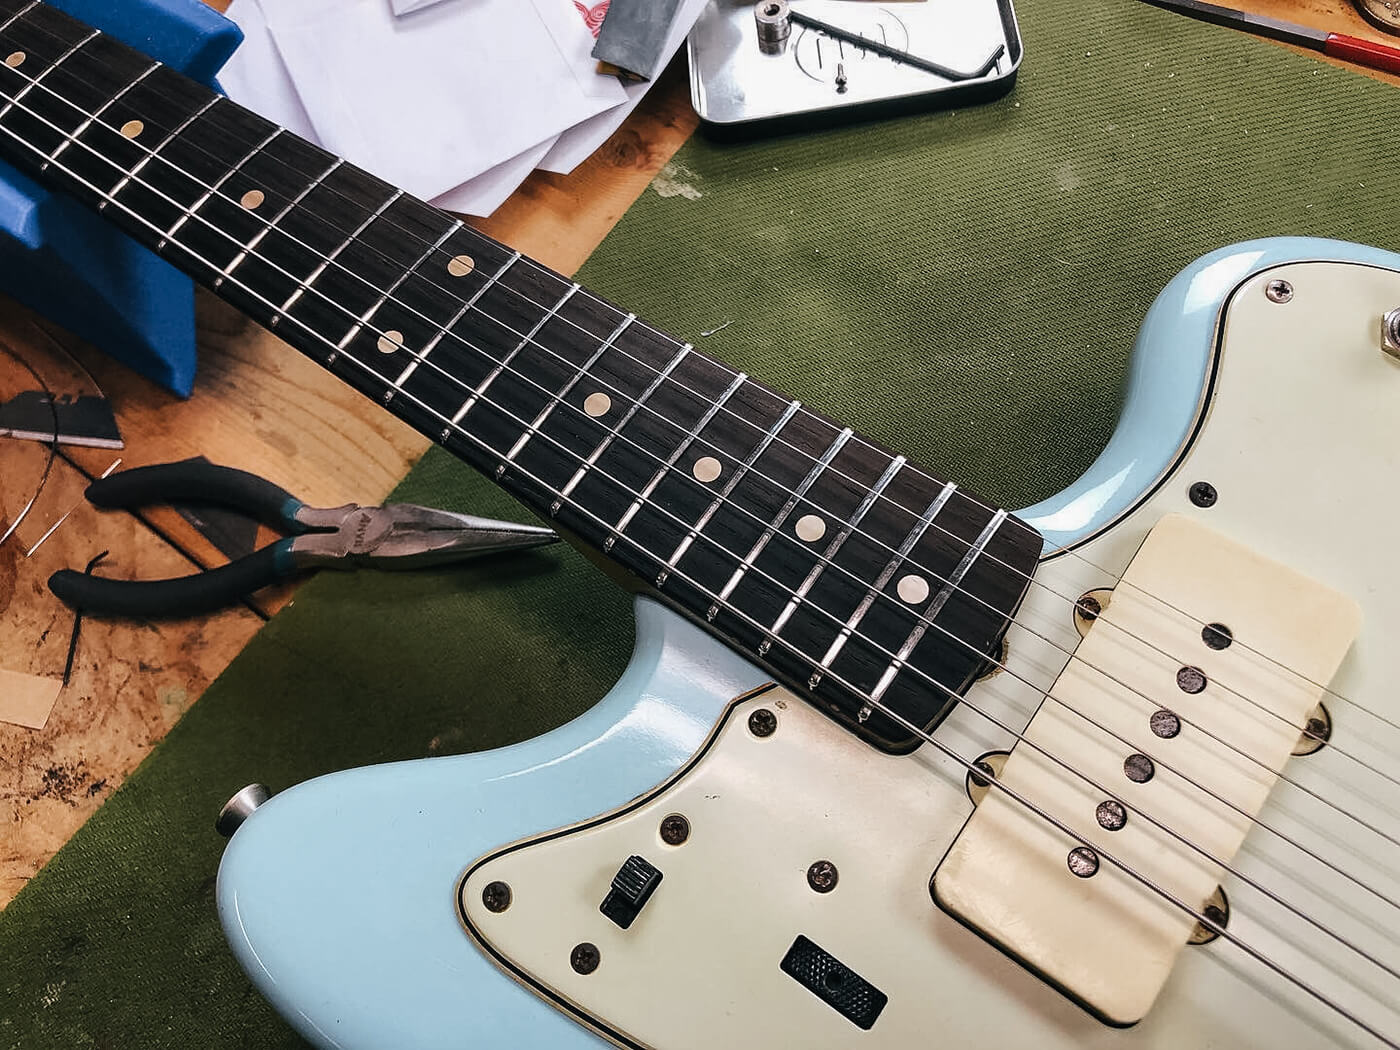
I had the faint impression that I might have to replace a few inlays on this fretboard, what with the amount of wood already taken off by the previous work. I just couldn’t know for certain until I crossed that proverbial bridge, and wouldn’t you know it, two inlays didn’t survive the levelling process.
Luckily, my friend and renowned refinish expert Joe Riggio set me up with a perfect set of his own ‘clay’ dot inlays. After gluing them in, the match was so good that I didn’t feel the need to stain them. From a few feet away, you can hardly tell which ones are the replacements.
7. Don’t let perfect be the enemy of good
It’s easy in a job like this to get a little lost in the details, to overdo a task, to exert too much of your energy while aiming for perfection. I have to admit that this definitely happened to me toward the end of the job.
I was diagnosed with obsessive-compulsive disorder and attention deficit hyperactivity disorder formally in 2004 after a lifetime dealing with hyper-focus issues and the inability to move on from something that felt unfinished. For the most part, understanding my conditions helped me manage and eventually harness them to work for me. Still, I have a rough day here and there.
Fretwork can be especially hard for me because I tend to hone in on the absolute tiniest details that almost every other person in the world would simply live with. I’m not talking about the usual stuff like a bad level or tool marks on the fretboard. I’m talking about how I don’t like the shape of the tip of that tang, and this fret end isn’t quite as perfectly rounded as the other 20 things that really don’t matter in the end – because absolutely no one will ever see them.
This is the reason I don’t like to work on my own guitars: I will always see every microscopic problem and it will quickly spiral out of control for me. This time, it was making the frets extra shiny. I had already levelled, crowned, and polished them and thinking back they all looked great. But were they perfect? My brain chemistry told me, no, they were not.
I could feel the urge to fixate rising up within me, but thankfully had the presence of mind to reach out to my friend Mike Baranik. Mike is one of my favourite builders in the world, and his work is stellar – perfect, even.
I sent a message to Mike asking for advice and he wrote back immediately, telling me he’d been through similar things with fret polishing and came to realise that a mirror-shine looks nice, but it isn’t the most important thing.
“It’s all about how they play,” he told me. He admitted that he often felt the same way, and that was all it took to end my spiral and bring me back to a healthier view of my work. I took a break, had a snack, and came back to the neck and felt really good about my work.
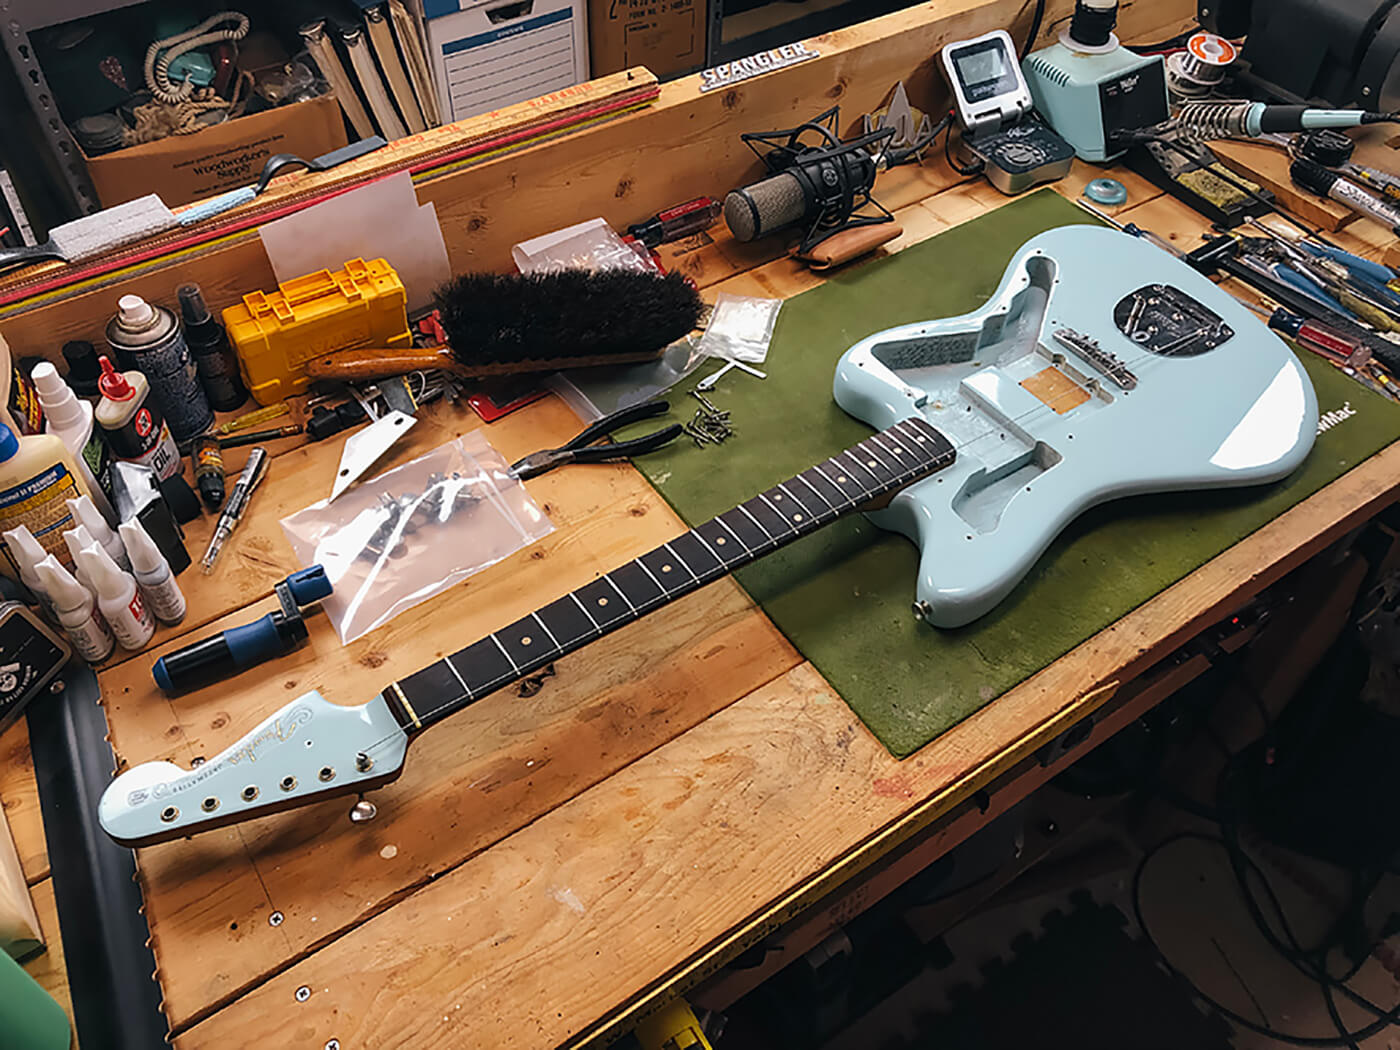
I’m sitting here now with the reassembled guitar in my lap, amazed at how beautifully it plays. I’m exceedingly proud of this one, I won’t lie. In a few days’ time, the owner is going to come collect it, and I know he’ll be just as happy as I am, if not even more. And really, that’s the most important thing.
Follow Mike on Instagram @puisheen.